Double Helix Stroller Frame Instruction Manual - Orbit Baby
Double Helix Stroller Frame Instruction Manual - Orbit Baby
Double Helix Stroller Frame Instruction Manual - Orbit Baby

You also want an ePaper? Increase the reach of your titles
YUMPU automatically turns print PDFs into web optimized ePapers that Google loves.
‘CLICK’‘CLICK’‘CLICK’‘CLICK’
‘CLICK’
®®Scan this code with yourmobile phone to access themost updated manual andsee other helpful videos.<strong>Double</strong> <strong>Helix</strong> <strong>Stroller</strong> <strong>Frame</strong>
2 – ENGLISH – <strong>Manual</strong> Text Booklet – <strong>Orbit</strong> <strong>Baby</strong> <strong>Double</strong> <strong>Helix</strong> <strong>Stroller</strong> <strong>Frame</strong>
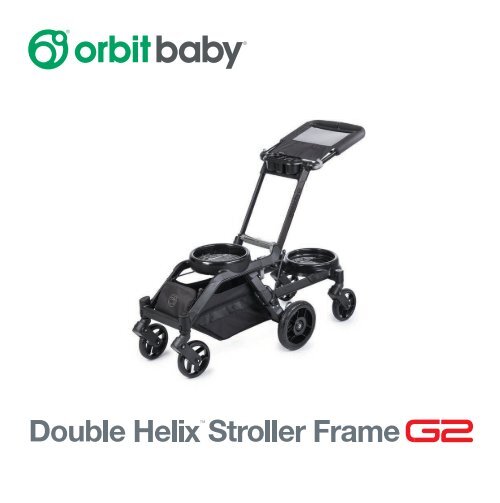
<strong>Manual</strong> Text Booklet – <strong>Orbit</strong> <strong>Baby</strong> <strong>Double</strong> <strong>Helix</strong> <strong>Stroller</strong> <strong>Frame</strong> – ENGLISH – 3Important: Read these instructions carefully before use and keep them for futurereference. Your children's safety may be affected if you do not follow these instructions.The <strong>Orbit</strong> <strong>Baby</strong> <strong>Double</strong> <strong>Helix</strong> <strong>Stroller</strong> <strong>Frame</strong> is made up of four parts, the <strong>Orbit</strong> <strong>Baby</strong> <strong>Stroller</strong><strong>Frame</strong> G2, the <strong>Helix</strong> SmartHub Attachment, a stroller basket and a ShadePad.ShadePad<strong>Stroller</strong> <strong>Frame</strong> G2stroller basket<strong>Helix</strong> SmartHub AttachmentUsing this <strong>Instruction</strong> <strong>Manual</strong>:Each step is described in both text in this booklet, and illustrations in the manual foldout. Numbers like in this booklet refer to the related sections in the manual foldout. Boxes like ⃞ in this booklet referto individual steps illustrated in sections of the manual foldout.Letters like A refer to the product parts identified on the labeled illustrations located both in thisbooklet and in the manual foldout.Some generic product names may differ by country. <strong>Stroller</strong> may be called pushchair. Bassinet may be calledcarry cot. Bassinet on a stroller frame may be called pram. Rocker may be called stand.In this manual, the word seats refers to all <strong>Orbit</strong> <strong>Baby</strong> products that can be docked into that particular SmartHub position.For example, seats, when referrring to the rear SmartHub, refers to the bassinet, stroller seat and infant car seat.All product specifications subject to change.
4 – ENGLISH – <strong>Manual</strong> Text Booklet – <strong>Orbit</strong> <strong>Baby</strong> <strong>Double</strong> <strong>Helix</strong> <strong>Stroller</strong> <strong>Frame</strong>ShadePad Athumbscrews Btwist griplock Ctwist grip Dfold lock EfrontSmartHub FG release capH swivel lockI handlebarJ handlebarleversK waterbottle trayL stroller baskethandleM plastic handlesN release leverO curb stepP rear SmartHubQ wheel releasebuttonR <strong>Helix</strong> SmartHubAttachment wheelsS rear legT stroller frame legconnectorsU tie rod boltV brake levers
<strong>Manual</strong> Text Booklet – <strong>Orbit</strong> <strong>Baby</strong> <strong>Double</strong> <strong>Helix</strong> <strong>Stroller</strong> <strong>Frame</strong> – ENGLISH – 5⚠ WARNING ⚠FAILURE TO FOLLOW THESE WARNINGS AND THE INSTRUCTIONS COULD RESULT INSERIOUS INJURY OR DEATH◦ Do not let others use the <strong>Double</strong> <strong>Helix</strong> <strong>Stroller</strong> <strong>Frame</strong> or other connected <strong>Orbit</strong> <strong>Baby</strong>products unless they understand how to properly use them.◦ Do not use the stroller if any parts are damaged, broken or missing. If the instructionmanual is missing or you need replacement parts or assistance, see the contactinformation included with this manual.PREVENT SERIOUS INJURY OR DEATH◦ NEVER leave your child unattended.◦ Always provide the supervision necessary for the continued safety of your child.◦ <strong>Stroller</strong> must be fully erected and locked in position prior to use.◦ Maximum child weight for the seat on the front SmartHub is 40 lbs (18 kg). Maximum childweight for the seat on the rear SmartHub is 40lbs (18 kg). Maximum child height for theseat on the rear SmartHub is 34 in (86 cm). Note that 34 in (86 cm) is a reduced height limitfor the stroller seat when using it on the rear SmartHub.◦ Never use the <strong>Orbit</strong> <strong>Baby</strong> Toddler Car Seat or Toddler Car Seat G2 on the rear SmartHub.Use the <strong>Orbit</strong> <strong>Baby</strong> Toddler Car Seat or Toddler Car Seat G2 only on the front SmartHub.FALL HAZARD: Avoid serious injury from falls or tipover.◦ Always make sure the <strong>Helix</strong> SmartHub Attachment is securely locked into the stroller frameleg connectors before placing your child into the stroller or starting to stroll. Pull backwardson the <strong>Helix</strong> SmartHub Attachment and check that the red stripes on both sides are NOTvisible.◦ Adult control required. Do not allow your child to stand on, sit on or play with the <strong>Helix</strong>SmartHub Attachment. It is not a toy.◦ Never let your child climb into or out of a seat unassisted.◦ Always make sure the stroller seat, infant car seat or bassinet on the <strong>Helix</strong> SmartHubAttachment is locked in the forward-facing position before strolling. Side-facing lockedpositions are for stationary use only.
6 – ENGLISH – <strong>Manual</strong> Text Booklet – <strong>Orbit</strong> <strong>Baby</strong> <strong>Double</strong> <strong>Helix</strong> <strong>Stroller</strong> <strong>Frame</strong>⚠ WARNING ⚠FALL HAZARD: Avoid serious injury from falls or tipover.◦ Always remove or adjust the topmost seat to avoid loss of control. Always rotate the seatto the side before lifting to remove it from the stroller. If not rotated, seats can overlap,interfering with removal and possibly cause a loss of control and the seat to be dropped.◦ DO NOT use stroller on stairs or escalators with children in it.◦ DO NOT lift or carry stroller by the water bottle tray or <strong>Helix</strong> SmartHub Attachment.PREVENT STROLLER TIPOVER AND CHILD'S SUDDEN CONTACT WITH STROLLER:◦ Use caution when maneuvering curbs and irregular surfaces. Use curb breaks wheneverpossible. If one is not available, move over the curb slowly with the stroller perpendicular tothe curb. To lift the stroller onto the curb, pull back on the handlebar and push forward withone foot on the <strong>Helix</strong> Attachment curb step to lift the stroller onto the curb. Do not allow thestroller to drop off the curb.PREVENT STROLLER TIPOVER:◦ Do not place parcels or accessory items in the stroller unless made by or specifically approvedby <strong>Orbit</strong> <strong>Baby</strong>. Added parcels or accessory items can make the the stroller become unstable.◦ Do not place more than 1 lb (0.5 kg) in the water bottle tray. Excessive weight may cause ahazardous unstable condition to exist.◦ Do not place more than 1.5 lb (0.7 kg) in the ShadePad. Excessive weight may cause ahazardous unstable condition to exist.AVOID BURN INJURY:◦ Never use the water bottle tray to hold hot liquids. These liquids may splash and spill ontoyou or your children and cause injury.AVOID LOSS OF CONTROL OF THE STROLLER:◦ Always use front wheel swivel locks when pushing the stroller on uneven terrain.◦ Use caution when pushing stroller on uneven terrain or hills.◦ Always lock the parking brake when the stroller is stopped.◦ NEVER leave the stroller unattended on a hill or incline even when the stroller brake is locked.
<strong>Manual</strong> Text Booklet – <strong>Orbit</strong> <strong>Baby</strong> <strong>Double</strong> <strong>Helix</strong> <strong>Stroller</strong> <strong>Frame</strong> – ENGLISH – 7AVOID PINCH INJURY:◦ Keep fingers clear of stroller when folding and unfolding the stroller.◦ Keep your children's hands and fingers clear of moving parts when adjusting the stroller orhandlebar.◦ Keep your children's arms, legs and feet clear when rotating seats and adjustng seatrecline.◦ Use caution when pushing stroller near traffic or in highly congested areas.Getting StartedRemove all the parts from the box. You should have received a stroller frame, <strong>Helix</strong> SmartHubAttachment, two (2) front wheels, two (2) rear wheels, two (2) <strong>Helix</strong> SmartHub Attachment wheels, astroller basket, and a ShadePad. These parts are illustrated in your manual foldout.⚠ WARNING ⚠PINCH HAZARD:◦ Avoid injury from pinching or finger entrapment. Keep children away when unfolding thestroller. Keep your hands clear of moving parts when folding and unfolding the stroller.◦ <strong>Stroller</strong> must be fully erected and locked in position prior to use. Listen for the audibleCLICK to confirm that it is fully deployed. Unfolding the stroller frame⃞ Your stroller frame comes folded in the box.⃞ Holding the twist grip D in your left hand, push out on the fold lock E with your right thumb.⃞ Rotate the handlebar upward with your right hand.⃞ Lock the handlebar in place. You will hear a CLICK.
8 – ENGLISH – <strong>Manual</strong> Text Booklet – <strong>Orbit</strong> <strong>Baby</strong> <strong>Double</strong> <strong>Helix</strong> <strong>Stroller</strong> <strong>Frame</strong> Assembling the stroller frame⃞ Insert the rear wheels into the rear legs. You will hear a CLICK when they are locked in place.⃞ Insert the front wheels into the front cross brace. Note that the front wheels have a long metal rodcoming out of the fork while the wheels for the <strong>Helix</strong> SmartHub Attachment have a short metal rod.You will hear a CLICK when they are locked in place. Attaching the stroller basket⃞ Insert the stroller basket handle L into the rail on the underside of the front SmartHub. You will heara CLICK when it locks in place.⃞ Expose the plastic handles M through the opening in the basket fabric and then fix the front of thestroller basket to the stroller frame by inserting the plastic handles one at a time into the openingson the front part of the stroller frame.⚠ WARNING ⚠PINCH HAZARD:◦ Avoid injury from pinching or finger entrapment. Keep children away when inserting the<strong>Helix</strong> SmartHub Attachment. Keep your hands clear of moving parts when inserting andremoving the <strong>Helix</strong> SmartHub Attachment.FALL HAZARD:◦ Always check that the <strong>Helix</strong> SmartHub Attachment is securely locked into the stroller frameleg connectors before placing your child into stroller or starting to stroll. Pull backwardson the <strong>Helix</strong> SmartHub Attachment and check that the red stripes on both sides are NOTvisible. Assembling and attaching the <strong>Helix</strong> SmartHub Attachment⃞ Insert the two <strong>Helix</strong> SmartHub Attachment wheels R. You will hear a CLICK when they are lockedin place.⃞ Grasp the <strong>Helix</strong> SmartHub Attachment with one hand while holding the stroller frame with your otherhand. Pull on the release lever N and guide both tube ends into the frame leg connectors T untilthey are fully inserted. You will hear a CLICK when the <strong>Helix</strong> SmartHub Attachment is locked in place.
<strong>Manual</strong> Text Booklet – <strong>Orbit</strong> <strong>Baby</strong> <strong>Double</strong> <strong>Helix</strong> <strong>Stroller</strong> <strong>Frame</strong> – ENGLISH – 9⚠ WARNING ⚠PINCH HAZARD:◦ Keep hands and fingers clear of moving parts when adjusting the handlebar.◦ Always maintain control of the handlebar after opening the handlebar levers to avoidcontact with the child in the rear seating positon. Unfolding the handlebar⃞ Unfold the handlebar by fully opening both handlebar levers J with your thumbs. Then rotate andpull the handlebar to your desired position.⃞ Note there are three different handlebar rotation positions (denoted with lines) and two telescopingpositions (position 1 or position 2).⃞ Lock the handlebar into position by closing both handlebar levers. Attaching the ShadePad⃞ Grasp the ShadePad A by its sides and slide it over the handlebar while pulling it wide open, untilthe ShadePad lines up with the end of the foam grip. Ensure that the clear window faces upwardand the flap with two snaps faces the handlebar.⃞ Attach the strips of hook and loop fastener on the underside of the ShadePad. Make sure that indoing so the upper two elastic bands remain covered.⃞ Snap both corners of the ShadePad to the water bottle tray K.Assembly of the <strong>Orbit</strong> <strong>Baby</strong> <strong>Double</strong> <strong>Helix</strong> <strong>Stroller</strong> is now complete.
10 – ENGLISH – <strong>Manual</strong> Text Booklet – <strong>Orbit</strong> <strong>Baby</strong> <strong>Double</strong> <strong>Helix</strong> <strong>Stroller</strong> <strong>Frame</strong>Using your <strong>Orbit</strong> <strong>Baby</strong> seats with the <strong>Double</strong> <strong>Helix</strong> <strong>Stroller</strong>⚠ WARNING ⚠FALL HAZARD: Avoid serious injury from falls or sliding out.◦ Restraint harness use is required for all use modes when harness is present on the product.Always secure your child to avoid serious injury from falling or sliding out. Always use boththe shoulder and lap portions of the harness.◦ Never let your child climb into or out of a seat unassisted.STRANGULATION HAZARD:◦ Children have STRANGLED in loose or partially buckled harness straps. Fully restrain thechild at all times.PINCH HAZARD:◦ When docking or adjusting your seats, keep hands and fingers, especially those of children,clear of moving parts and the SmartHubs.◦ Keep SmartHub areas clean. Keep all metal and plastic parts clear of objects, debris andliquids to allow proper and safe functionality.◦ Listen for audible CLICK which indicates that seats are locked into the SmartHubs.◦ Always check that the <strong>Orbit</strong> <strong>Baby</strong> seats are securely locked into the SmartHubs by tuggingupwards and turning.◦ Lock the stroller wheels and check stability of the stroller before placing your children in orremoving your children from seats.◦ Always make sure that the seat is locked in forward-facing position before strolling. Sidefacinglocked positions are for stationary use only. Do not rotate seats when the stroller is inmotion.◦ Lock the parking brakes and check stability when the stroller is stationary.
<strong>Manual</strong> Text Booklet – <strong>Orbit</strong> <strong>Baby</strong> <strong>Double</strong> <strong>Helix</strong> <strong>Stroller</strong> <strong>Frame</strong> – ENGLISH – 11 Loading your child into the rear SmartHub seat⃞ Rotate the infant car seat by pulling one or both levers and rotating the seat into the sidewaysloading position. Rotate the stroller seat or bassinet by pulling both levers and rotating the seat to asideways loading position.⃞ Place your child in the seat and secure according to the seat’s instruction manual. Rotate the seatforward-facing to begin strolling. Restrictions on the double stroller frame⃞ Never use both stroller seats in the fully reclined position as shown in the diagram; a child’s feetcould become pinched between the footrests. Avoid injury to the child in rear seat from kicking orcontact with footrest on stroller seat; only use footrest adjustment position 1 when stroller seat isrear-facing on the front SmartHub.⃞ The <strong>Orbit</strong> <strong>Baby</strong> bassinet, infant car seat, stroller seat or toddler car seat can be used on the frontSmartHub. The bassinet, infant car seat and toddler car seat will lock in four rotational positions.The stroller seat will lock in two rotational positions (front and rear-facing).The <strong>Orbit</strong> <strong>Baby</strong> bassinet, infant car seat or stroller seat can be used on the rear SmartHub. Theseats must face forward for strolling but may be positioned to the side for loading.⃞ Maximum child weight on either SmartHub (front or rear) is 40 lbs (18 kg). Maximum height for therear SmartHub is 34 in (86 cm). Note that 34 in (86 cm) is a reduced height limit for thestroller seat when used on the <strong>Helix</strong> SmartHub Attachment.Using Your <strong>Double</strong> <strong>Stroller</strong> Adjusting the handlebar⃞ To adjust the handlebar to your desired position, fully open both handlebar levers J with yourthumbs, rotate and/or telescope the handlebar, and then relock the handlebar levers closed.⃞ There are three different handlebar rotation positions (denoted with lines) and two telescopingpositions (position 1 or position 2).
<strong>Manual</strong> Text Booklet – <strong>Orbit</strong> <strong>Baby</strong> <strong>Double</strong> <strong>Helix</strong> <strong>Stroller</strong> <strong>Frame</strong> – ENGLISH – 13⃞ Push forward to get the remaining wheels up the curb.To go down a curb, slowly drive each set of wheels off the curb holding the handlebar to minimizeany movement of your children in the seats.⚠ WARNING ⚠◦ ALWAYS use the front wheel swivel locks when pushing the stroller on uneven terrain.◦ Use caution when pushing the stroller on uneven terrain or hills. Locking the front wheels⃞ For bumpy terrain, use the front wheel swivel locks H. To lock the front wheel forward-facing,press down on the front wheel swivel lock button. To unlock, push up on the same button.⚠ WARNING ⚠◦ ALWAYS lock the parking brake when the stroller is stopped.◦ NEVER leave the stroller unattended on a hill or incline even when parking brake is locked. Using the stroller brakes⃞ Lock the brakes by pressing firmly down on either brake lever V with your foot. Be sure that thebrake is engaged by gently rocking the stroller.⃞ Unlock the brakes by pulling up on either brake lever.⚠ WARNING ⚠◦ ALWAYS remove your child from the rear SmartHub seat before removing the <strong>Helix</strong>SmartHub Attachement from the stroller.◦ Always remove the <strong>Helix</strong> SmartHub Attachment before attaching the <strong>Orbit</strong> <strong>Baby</strong> Sidekick<strong>Stroller</strong> Board to the rear wheels. Child must hold on to stroller handlebar when riding orstanding on the Sidekick.
14 – ENGLISH – <strong>Manual</strong> Text Booklet – <strong>Orbit</strong> <strong>Baby</strong> <strong>Double</strong> <strong>Helix</strong> <strong>Stroller</strong> <strong>Frame</strong>⚠ WARNING ⚠PINCH HAZARD:◦ Keep child's hands clear of all moving parts when making adjustments or docking the seat. Converting your stroller into single mode⃞ Remove the <strong>Helix</strong> SmartHub Attachment by grasping the release lever N and pulling back.⃞ Set the handlebar in the single position by fully opening both handlebar levers J, pushing thehandlebar forward, and locking the handlebar levers closed.The <strong>Orbit</strong> <strong>Baby</strong> Sidekick <strong>Stroller</strong> Board can be used in this mode.Traveling and Storage⚠ WARNING ⚠PINCH HAZARD:◦ Keep children clear of the stroller when folding or unfolding it.◦ Keep your hands and fingers clear of moving parts as you fold the stroller◦ Do not allow children to touch or climb on the folded stroller. Folding the double stroller frame⃞ Remove children from both seats. Undock the seats from the SmartHubs and set aside wherechildren cannot access them.⃞ Remove contents from the stroller basket and ShadePad. To prepare the handlebar for folding,fully open both handlebar levers, push the handlebar to its shortest position, rotate the handlebardown towards you so it touches against the frame.⃞ Lock both handlebar levers closed.⃞ Remove the <strong>Helix</strong> SmartHub Attachment by grasping the release lever and pulling back.
<strong>Manual</strong> Text Booklet – <strong>Orbit</strong> <strong>Baby</strong> <strong>Double</strong> <strong>Helix</strong> <strong>Stroller</strong> <strong>Frame</strong> – ENGLISH – 15⃞ Release the twist grip lock C on the stroller frame.⃞ Grasp the twist grip D on the stroller frame.⃞ Rotate the twist grip D and lift to fold the stroller.⃞ The fold lock E will engage when the stroller is fully folded. You will hear a CLICK.⃞ To ensure the most compact folded dimensions, place the stroller frame so that the handlebar isfacing up and the <strong>Helix</strong> SmartHub Attachment lies on top of the folded frame.Traveling and Storing Moving the folded double stroller frame⃞ To tow the folded stroller in on its wheels, lock the front wheel swivel locks H and pull along by thetwist grip D. Packing the double stroller frame for travel or storage⃞ Remove both of the stroller front wheels by twisting the release cap G and pulling down on thewheel. Fold the stroller frame.⃞ Remove both of the <strong>Helix</strong> SmartHub Attachment wheels by pressing the release button Q andpulling down on the wheel. Nest the stroller and <strong>Helix</strong> SmartHub Attachment.CleaningAvoid excessive exposure to sun or heat, which may cause fading or warping. Keep the SmartHub,twist grip, stroller frame leg connectors, <strong>Helix</strong> SmartHub Attachment and handlebar mechanismsfree of abrasive grime and moisture. If wet, use a soft cloth to dry. Regularly check all rivets, screwsand safety devices for tightness and security. Inspect wheels and brakes and replace if necessary.All hard goods (plastic and metal) may be wiped clean with a damp cloth. Never use bleach ordetergents. Do not submerge or use running water on any metal or plastic parts of the stroller. TheShadePad and stroller basket can be spot cleaned with a clean, wet cloth and dried in place.
®www.orbitbaby.comORB300006 | Rev. 1.0 | 2012JUN©2012 <strong>Orbit</strong> <strong>Baby</strong>, Inc. All rights reserved.
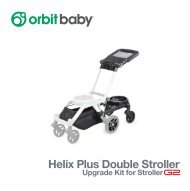
®®<strong>Helix</strong> <strong>Double</strong> <strong>Stroller</strong> <strong>Frame</strong><strong>Helix</strong> Plus <strong>Double</strong> <strong>Stroller</strong>Upgrade Kit for <strong>Stroller</strong>
2 - USA - ENGLISH - Warranty & Contact Information<strong>Orbit</strong> <strong>Baby</strong> Limited Customer Warranty - USA only:• What this Limited Warranty covers and for how long:<strong>Orbit</strong> <strong>Baby</strong>, Inc. (“<strong>Orbit</strong> <strong>Baby</strong>”) warrants that the product accompanied by this limited warranty is freefrom manufacturing defects in material or workmanship for a period of two (2) years from the date oforiginal purchase. This warranty only applies to the original purchaser of the product and only to productspurchased and used in the United States of America. The limited warranty period also applies to anyimplied warranties that may exist under applicable law. Some States do not allow limitations on how longan implied warranty lasts, so the above limitation may not apply to you.• What this Limited Warranty does not cover:This limited warranty does not apply to: (1) defects resulting from repair (except by <strong>Orbit</strong> <strong>Baby</strong> or itsauthorized service representatives) or alteration of the product, (2) defects resulting from use with covers,inserts, accessories, tightening devices, or other components not supplied by or expressly approvedin writing by <strong>Orbit</strong> <strong>Baby</strong>, (3) defects resulting from misuse, including any use not in accordance with theproduct instructions, abuse, accident, neglect, improper maintenance or handling, or normal wear andtear, (4) defects resulting from handling by airlines or airport staff, and (5) defects such as corrosion ormolding resulting from improper storage, such as storage outdoors, storage in damp environments, orstorage with moisture or salt on the product.• What <strong>Orbit</strong> <strong>Baby</strong> will do:If you believe the product is defective please return it to <strong>Orbit</strong> <strong>Baby</strong> in the manner described below withinthe limited warranty period. If <strong>Orbit</strong> <strong>Baby</strong> determines a defect is covered by this limited warranty, <strong>Orbit</strong><strong>Baby</strong> will, at its option, repair or replace the product or components of the product. This limited warrantyextends to repaired and replacement products and components only through the end of the originallimited warranty period.• Limitation of Remedies under Limited Warranty:Your remedies under this limited warranty are limited to repair or replacement of the product orcomponents of the product. In no event will <strong>Orbit</strong> <strong>Baby</strong> or any of its retailers, dealers, distributors orresellers be liable for incidental, indirect or consequential damages relating to the product (including anyrepaired or replacement product or component) or its use. Some States do not allow the exclusion orlimitation of incidental or consequential damages, so the above limitation and exclusion may not apply toyou.
Warranty & Contact Information - ENGLISH - USA - 3• How State law applies:This limited warranty gives you specific legal rights, and you may have other rights which vary from Stateto State.• What you must do to get service under this limited warranty:To make a claim under this limited warranty you must first contact <strong>Orbit</strong> <strong>Baby</strong>.Please write to: <strong>Orbit</strong> <strong>Baby</strong>, Inc.8445 Central Ave.Newark, CA 94560, U.S.A.or call: 1-877-ORB-BABY (1-877-672-2229)1-510-793-5007or email: support@orbitbaby.comYou must provide proof of purchase in the form of your original sales receipt in order to obtain serviceunder this limited warranty.If you would like to purchase spare parts, please visit www.shoporbitbaby.com.
®www.orbitbaby.comORB380006 | Rev. 1.0 | 2012JUN©2012 <strong>Orbit</strong> <strong>Baby</strong>, Inc. All rights reserved.