M119 Water Pump Removal Instructions - W124 Performance
M119 Water Pump Removal Instructions - W124 Performance
M119 Water Pump Removal Instructions - W124 Performance

Create successful ePaper yourself
Turn your PDF publications into a flip-book with our unique Google optimized e-Paper software.
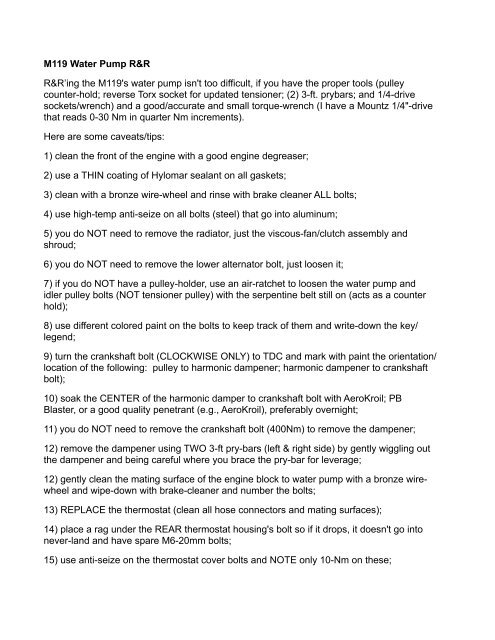
<strong>M119</strong> <strong>Water</strong> <strong>Pump</strong> R&RR&R’ing the <strong>M119</strong>'s water pump isn't too difficult, if you have the proper tools (pulleycounter-hold; reverse Torx socket for updated tensioner; (2) 3-ft. prybars; and 1/4-drivesockets/wrench) and a good/accurate and small torque-wrench (I have a Mountz 1/4"-drivethat reads 0-30 Nm in quarter Nm increments).Here are some caveats/tips:1) clean the front of the engine with a good engine degreaser;2) use a THIN coating of Hylomar sealant on all gaskets;3) clean with a bronze wire-wheel and rinse with brake cleaner ALL bolts;4) use high-temp anti-seize on all bolts (steel) that go into aluminum;5) you do NOT need to remove the radiator, just the viscous-fan/clutch assembly andshroud;6) you do NOT need to remove the lower alternator bolt, just loosen it;7) if you do NOT have a pulley-holder, use an air-ratchet to loosen the water pump andidler pulley bolts (NOT tensioner pulley) with the serpentine belt still on (acts as a counterhold);8) use different colored paint on the bolts to keep track of them and write-down the key/legend;9) turn the crankshaft bolt (CLOCKWISE ONLY) to TDC and mark with paint the orientation/location of the following: pulley to harmonic dampener; harmonic dampener to crankshaftbolt);10) soak the CENTER of the harmonic damper to crankshaft bolt with AeroKroil; PBBlaster, or a good quality penetrant (e.g., AeroKroil), preferably overnight;11) you do NOT need to remove the crankshaft bolt (400Nm) to remove the dampener;12) remove the dampener using TWO 3-ft pry-bars (left & right side) by gently wiggling outthe dampener and being careful where you brace the pry-bar for leverage;12) gently clean the mating surface of the engine block to water pump with a bronze wirewheeland wipe-down with brake-cleaner and number the bolts;13) REPLACE the thermostat (clean all hose connectors and mating surfaces);14) place a rag under the REAR thermostat housing's bolt so if it drops, it doesn't go intonever-land and have spare M6-20mm bolts;15) use anti-seize on the thermostat cover bolts and NOTE only 10-Nm on these;
16) use a heat gun on LOW or a hair-dryer to "soften" the water-pump's weep-hole pipeand then gently tug off the water pump and use the same heat source to "soften" the pipewhen re-installing;17) remove the pipe and tank (one bolt) to make disassembly easier;18) when replacing the idler-pully bracket, keep the bolts with enough slack since you haveto align/bolt-up back the air pump; alternator AND bracket back to the block;19) when replacing the thermostat elbow hose, smear a little Hylomar on the metal hosehousings to facilitate moving/bending the hose into place;20) REPLACE the hose between the thermostat TOP housing and INTAKE and the gasket(thin film of Hylomar);21) DO NOT OVER TIGHTEN esp. with anti-seize on bolts and into aluminum. Most boltsare 21 Nm, but with anti-seize on them, it's closer to 12-15 Nm. Do NOT use a 3/8-driveratchet to put any bolts ON, only 1/4-drive with about a 5-inch long handle so I don't overlytorque anything.BTW: I use a vacuum-based coolant installer that basically uses the compressed-air tocreate a vacuum in the cooling system, and then by flipping a valve, I suck in my 70%distilled water and 30% G05/Mercedes coolant with Redline <strong>Water</strong>-wetter.Hope this helps!:-) neil1988 E36T AMG1993 500E
![[Buying Guide] - W124 Performance](https://img.yumpu.com/51307820/1/190x245/buying-guide-w124-performance.jpg?quality=85)