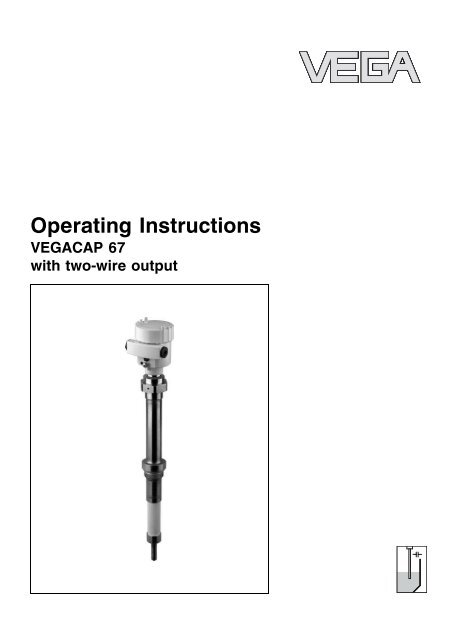
Operating Instructions - VEGACAP 67 with two-wire output - Insatech
Operating Instructions - VEGACAP 67 with two-wire output - Insatech
Operating Instructions - VEGACAP 67 with two-wire output - Insatech

You also want an ePaper? Increase the reach of your titles
YUMPU automatically turns print PDFs into web optimized ePapers that Google loves.
Contents8 Dismounting8.1 Dismounting steps ...................... 278.2 Disposal ............................. 279 Supplement9.1 Technical data. ........................ 289.2 Dimensions ........................... 329.3 Industrial property rights. ................. 3431317-EN-060223<strong>VEGACAP</strong> <strong>67</strong> - <strong>with</strong> <strong>two</strong>-<strong>wire</strong> <strong>output</strong> 3
For your safety2 For your safety2.1 Authorised personnelAll operations described in this operating instructions manualmust be carried out only by trained specialist personnelauthorised by the operator. For safety and warranty reasons,any internal work on the instruments must be carried out onlyby personnel authorised by the manufacturer..2.2 Appropriate use<strong>VEGACAP</strong> <strong>67</strong> is a sensor for level detection.Detailed information on the application range of <strong>VEGACAP</strong> <strong>67</strong>is available in chapter "Product description".2.3 Warning about misuseInappropriate or incorrect use of the instrument can give rise toapplication-specific hazards, e.g. vessel overfill or damage tosystem components through incorrect mounting or adjustment.2.4 General safety instructionsThe <strong>VEGACAP</strong> <strong>67</strong> is a high-tech instrument requiring the strictobservance of standard regulations and guidelines. The usermust take note of the safety instructions in this operatinginstructions manual, the country-specific installation standards(e.g. the VDE regulations in Germany) as well as all prevailingsafety regulations and accident prevention rules.2.5 CE conformity<strong>VEGACAP</strong> <strong>67</strong> is in CE conformity <strong>with</strong> EMC (89/336/EWG)and LVD (73/23/EWG).Conformity has been judged acc. to the following standards:lEMC:- Emission EN 61326: 2004 (class B)- Susceptibility EN 61326: 2004/Supplement Al LVD: EN 61010-1: 200131317-EN-060223<strong>VEGACAP</strong> <strong>67</strong> - <strong>with</strong> <strong>two</strong>-<strong>wire</strong> <strong>output</strong> 5
For your safety2.6 Safety information for Ex areasPlease note the Ex-specific safety information for installationand operation in Ex areas. These safety instructions are part ofthe operating instructions manual and come <strong>with</strong> the Exapprovedinstruments.2.7 Manufacturer declarationIn conformity <strong>with</strong> DIN EN 60079-14/2004, para. 5.2.3, pointc1, the capacitive probe <strong>VEGACAP</strong> <strong>67</strong> is suitable for use inzone 2.The operator must use the instrument correctly and follow thespecifications of the following documents:l this operating instructions manuall this manufacturer declaration (24645)l the applicable installation regulationsMax. increase of the surface temperature during operation:40 K (individual components in the instrument)With an ambient temperature of +70°C (+158°F) on thehousing and a process temperature of +70°C (+158°F), themax. ambient temperature during operation is +110°C(+230°F).Measures to maintain the explosion protection during operation:llllllOperate you instrument in the range of the specifiedelectrical limit values. Permissible supply voltage: see"Technical data"Mount and operate the instrument in such a way that noignition danger is expected by electrostatic charges. Theprocess fitting, the plastic-coated/covered probe part or thehousing are made of electrically non-conductive plastic(depending on the version).Make sure that the seal is mounted correctly betweenlower part of the housing and cover. Screw the cover ontightly.Make sure that there is no explosive atmosphere, if youwant to operate the instrument <strong>with</strong> open coverMake sure that the cable gland is tight and strain-relieved.The outer diameter of the connection cable must beadapted to the cable gland. Tighten the pressure screw ofthe cable gland carefully.Cover unused openings for cable glands tightly6 <strong>VEGACAP</strong> <strong>67</strong> - <strong>with</strong> <strong>two</strong>-<strong>wire</strong> <strong>output</strong>31317-EN-060223
For your safetyl Mount the instrument in such a position that the sensorcannot touch the vessel wall or vessel installations. Keepthe influences of product movements in the vessel in mind.l The surface temperature on the housing must not exceedthe ignition temperature of the concerned explosiveatmosphereThis instrument was judged by a person that fulfils therequirements acc. to DIN EN 60079-14.2.8 Environmental instructionsProtection of the environment is one of our most importantduties. That is why we have introduced an environmentmanagement system <strong>with</strong> the goal of continuously improvingcompany environmental protection. The environment managementsystem is certified acc. to DIN EN ISO 14001.Please help us fulfil this obligation by observing the environmentalinstructions in this manual:llChapter "Storage and transport"Chapter "Disposal"31317-EN-060223<strong>VEGACAP</strong> <strong>67</strong> - <strong>with</strong> <strong>two</strong>-<strong>wire</strong> <strong>output</strong> 7
Product description3 Product description3.1 ConfigurationScope of deliveryComponentsThe scope of delivery encompasses:ll<strong>VEGACAP</strong> <strong>67</strong> level sensordocumentation- this operating instructions manual- Ex-specific safety instructions (<strong>with</strong> Ex versions), ifnecessary further certificates.<strong>VEGACAP</strong> <strong>67</strong> consists of the following components:lllHousing coverHousing <strong>with</strong> electronicsProcess fitting <strong>with</strong> electrode8 <strong>VEGACAP</strong> <strong>67</strong> - <strong>with</strong> <strong>two</strong>-<strong>wire</strong> <strong>output</strong>31317-EN-060223
Product description1234Fig. 1: <strong>VEGACAP</strong> <strong>67</strong> - <strong>with</strong> plastic housing1 Housing cover2 Housing <strong>with</strong> electronics3 Process fitting4 Ceramic insulator3.2 Principle of operation31317-EN-060223Area of application<strong>VEGACAP</strong> <strong>67</strong> is a level sensor <strong>with</strong> capacitive probe for leveldetection under high process temperatures.<strong>VEGACAP</strong> <strong>67</strong> is very rugged and maintenance-free and canbe used in all areas of industrial process technology.Probes such as <strong>VEGACAP</strong> <strong>67</strong> are used in solids applications.The range of the process temperature is -50 … 300°C(-58 … 572°F). With remote housing -50 … 400°C(-58 … 752°F).<strong>VEGACAP</strong> <strong>67</strong> - <strong>with</strong> <strong>two</strong>-<strong>wire</strong> <strong>output</strong> 9
Product descriptionTypical applications are overfill and dry run protection.The capacitive measuring principle places no special requirementson installation. Hence, many different applications canbe equipped <strong>with</strong> <strong>VEGACAP</strong> <strong>67</strong>.Physical principleThe probe, the measured product and the vessel wall form anelectrical capacitor. The capacitance is influenced by threemain factors.123Fig. 2: Functional principle - Plate capacitor1 Distance between the electrode surfaces2 Size of the electrode surfaces3 Type of dielectric between the electrodesThe probe and the vessel wall are the capacitor plates. Themeasured product is the dielectric. Due to the higher dielectricconstant (DK value) of the product compared to air, thecapacitance increases as the probe is gradually covered.The capacitance change is converted by the oscillator into aswitching command.SupplyDepending on your requirements, <strong>VEGACAP</strong> <strong>67</strong> <strong>with</strong> <strong>two</strong>-<strong>wire</strong>electronics can be connected to different signal conditioninginstruments. Compatible signal conditioning instruments arelisted under "Technical data".The exact range of the voltage supply is specified in the"Technical data" in the "Supplement".3.3 AdjustmentThe probe can be adapted to the dielectric constant of theproduct directly on the electronics module.10 <strong>VEGACAP</strong> <strong>67</strong> - <strong>with</strong> <strong>two</strong>-<strong>wire</strong> <strong>output</strong>31317-EN-060223
Product descriptionA switching command can be triggered when the probe iscovered or laid bare.On the electronics module you will find the following indicatingand adjustment elements:lControl lamp for indication of the device status.3.4 Storage and transportPackagingStorage and transport temperatureYour instrument was protected by packaging during transport.Its capacity to handle normal loads during transport is assuredby a test acc. to DIN 55439.The packaging of standard instruments consists of environment-friendly,recyclable cardboard. For special versions, PEfoam or PE foil is also used. Dispose of the packaging materialvia specialised recycling companies.l Storage and transport temperature see "Supplement -Technical data - Ambient conditions"l Relative humidity 20 … 85 %31317-EN-060223<strong>VEGACAP</strong> <strong>67</strong> - <strong>with</strong> <strong>two</strong>-<strong>wire</strong> <strong>output</strong> 11
Mounting4.2 Mounting informationAgitators and fluidizationInflowing materialAgitators, equipment vibration, etc., can cause the level switchto be subjected to strong lateral forces. For this reason, do notuse an overly long probe for <strong>VEGACAP</strong> <strong>67</strong>, but check if youcan mount a short level switch on the side of the vessel inhorizontal position.If <strong>VEGACAP</strong> <strong>67</strong> is mounted in the filling stream, unwantedswitching signals may be generated. Mount <strong>VEGACAP</strong> <strong>67</strong> at alocation in the vessel where no disturbing influence from e.g.filling openings, agitators, etc. can occur.This applies particularly to instrument versions <strong>with</strong> a longerprobe.Fig. 4: Inflowing material31317-EN-060223SocketThe probe should protrude into the vessel to avoid buildup. Forthat reason, avoid using mounting bosses for flanges andscrewed fittings. This applies particularly to use <strong>with</strong> adhesiveproducts.<strong>VEGACAP</strong> <strong>67</strong> - <strong>with</strong> <strong>two</strong>-<strong>wire</strong> <strong>output</strong> 13
MountingMaterial coneIn silos <strong>with</strong> bulk solids, material cones can form which changethe switching point. Please keep this in mind when installingthe sensor in the vessel. We recommend selecting aninstallation location where the probe detects the average valueof the material cone.The measuring probe must be mounted in a way that takes thearrangement of the filling and emptying apertures into account.To compensate measurement errors caused by the materialcone in cylindrical vessels, the sensor must be mounted at adistance of d/6 from the vessel wall.d6d6ddFig. 5: Filling and emptying centered14 <strong>VEGACAP</strong> <strong>67</strong> - <strong>with</strong> <strong>two</strong>-<strong>wire</strong> <strong>output</strong>31317-EN-060223
d6dMounting123Fig. 6: Filling in the center, emptying laterally1 <strong>VEGACAP</strong> <strong>67</strong>2 Emptying opening3 Filling openingTensile loadMake sure that the max. permissible tensile load of thesuspension cable is not exceeded. The danger of thishappening exists particularly <strong>with</strong> very heavy solids and largemeas. lengths. The max. permissible load is stated under"Technical data" in the "Supplement".31317-EN-060223<strong>VEGACAP</strong> <strong>67</strong> - <strong>with</strong> <strong>two</strong>-<strong>wire</strong> <strong>output</strong> 15
Connecting to power supply5 Connecting to power supply5.1 Preparing the connectionNote safety instructionsTake note of safetyinstructions for ExapplicationsAlways observe the following safety instructions:lConnect only in the complete absence of line voltageIn hazardous areas you should take note of the appropriateregulations, conformity and type approval certificates of thesensors and power supply units.Select power supplySelect connection cableConnect the power supply acc. to the following diagrams. Takenote of the general installation regulations. As a rule, connect<strong>VEGACAP</strong> <strong>67</strong> to vessel ground (PA), or in case of plasticvessels, to the next ground potential. On the side of theinstrument housing there is a ground terminal between thecable entries. This connection serves to drain off electrostaticcharges. In Ex applications, the installation regulations forhazardous areas must be given priority.The data for power supply are stated in the "Technical data" inthe "Supplement".<strong>VEGACAP</strong> <strong>67</strong> is connected <strong>with</strong> standard cable <strong>with</strong> roundcross-section. An outer cable diameter of 5 … 9 mm(0.2 … 0.35 in) ensures the seal effect of the cable entry.If cable <strong>with</strong> a different diameter or <strong>wire</strong> cross section is used,exchange the seal or use an appropriate cable connection.In hazardous areas, only use approved cable connections for<strong>VEGACAP</strong> <strong>67</strong>.Select connectioncable for Ex applicationsTake note of the corresponding installation regulations for Exapplications.5.2 Connection stepsWith Ex instruments, the housing cover may only be opened ifthere is no explosive atmosphere present.Proceed as follows:1 Unscrew the housing cover2 Loosen compression nut of the cable entry16 <strong>VEGACAP</strong> <strong>67</strong> - <strong>with</strong> <strong>two</strong>-<strong>wire</strong> <strong>output</strong>31317-EN-060223
Connecting to power supply3 Remove approx. 10 cm (4 in) of the cable mantle, stripapprox. 1 cm (0.4 in) insulation from the ends of theindividual <strong>wire</strong>s4 Insert the cable into the sensor through the cable entry5 Lift the opening levers of the terminals <strong>with</strong> a screwdriver(see following illustration)6 Insert the <strong>wire</strong> ends into the open terminals according tothe wiring plan7 Press down the opening lever of the terminals, you willhear the terminal spring closing.8 Check the hold of the <strong>wire</strong>s in the terminals by lightlypulling on them9 Tighten the compression nut of the cable entry, the sealring must completely encircle the cable10 Screw the housing cover back onThe electrical connection is finished.Fig. 7: Connection steps 5 and 631317-EN-060223<strong>VEGACAP</strong> <strong>67</strong> - <strong>with</strong> <strong>two</strong>-<strong>wire</strong> <strong>output</strong> 17
Connecting to power supply5.3 Wiring plans, single chamber housingHousing overview44412 3Fig. 8: Material versions, single chamber housing1 Plastic (not <strong>with</strong> dust-Ex)2 Aluminium3 Stainless steel4 Filter element for pressure compensation or blind stopper <strong>with</strong> version IP 66/IP 68, 1 barElectronics and connectioncompartment4132Fig. 9: Electronics and connection compartment1 DIL switch for measuring range selection2 Ground terminal3 Terminals4 Control lampWiring planFor connection to a signal conditioning instrument. The sensoris powered by the connected signal conditioning instrument.Further information is available in the "Technical data" in the"Supplement", Ex-technical data are available in the suppliedsafety information manual.18 <strong>VEGACAP</strong> <strong>67</strong> - <strong>with</strong> <strong>two</strong>-<strong>wire</strong> <strong>output</strong>31317-EN-060223
Connecting to power supplyThe wiring example is applicable for all suitable signalconditioning instruments.Take note of the operating instructions manual of the signalconditioning instrument. Suitable signal conditioning instrumentsare listed in the "Technical data".1Fig. 10: Wiring plan1 Supply voltage5.4 Wiring plans, version IP 66/IP 68, 1 barWire assignment, connectioncable+-12Fig. 11: Wire assignment, connection cable1 br (+) and bl (-) for power supply or to the processing system2 Screen31317-EN-0602235.5 Start-up reactionAfter connecting to voltage supply or after a voltagerecurrence, the instrument passes a certain switch on routine.By lowering the current value when switching on, the instrumentcan <strong>output</strong> briefly a fault message.<strong>VEGACAP</strong> <strong>67</strong> - <strong>with</strong> <strong>two</strong>-<strong>wire</strong> <strong>output</strong> 19
Connecting to power supplyI/mA20,5101< 2,31,5 3 4,5 t/sFig. 12: Start-up reaction1 Measured value20 <strong>VEGACAP</strong> <strong>67</strong> - <strong>with</strong> <strong>two</strong>-<strong>wire</strong> <strong>output</strong>31317-EN-060223
Set up6 Set up6.1 GeneralThe numbers in brackets refer to the following illustrations.Function/ConfigurationOn the electronics module you will find the following indicatingand adjustment elements:llDIL switch for measuring range selectionControl lampNote:As a rule, always set the mode <strong>with</strong> the mode switch of thesignal conditioning instrument before starting setup <strong>VEGACAP</strong><strong>67</strong>. The switching <strong>output</strong> will change if you set the mode switchafterwards. This could possibly trigger connected downstreamdevices.6.2 Adjustment elements413231317-EN-060223Fig. 13: Oscillator - <strong>two</strong>-<strong>wire</strong> <strong>output</strong>1 DIL switch for measuring range selection2 Ground terminal3 Terminals4 Control lampA failure can be displayed when the housing is closed (onlyplastic housing), see "Function chart".<strong>VEGACAP</strong> <strong>67</strong> - <strong>with</strong> <strong>two</strong>-<strong>wire</strong> <strong>output</strong> 21
Set upNote:Screw the housing cover tightly to the point where theinspection glass is above the control lamp (LED).To adjust <strong>VEGACAP</strong> <strong>67</strong>, first of all remove the housing cover.Measuring range selectionswitch (1)Signal lamp (4)Switching point adjustmentWith the potentiometer on the signal conditioning instrumentand the meas. range selection switch (1) on <strong>VEGACAP</strong> <strong>67</strong> youcan change the switching point of the probe or adapt thesensitivity of the probe to the electrical properties of theproduct and the conditions in the vessel. This is necessary sothat the level switch can also reliably detect products e.g. <strong>with</strong>very low or very high dielectric value.Range 1: 0 … 20 pFRange 2: 0 … 85 pFRange 3: 0 … 450 pFControl lamp for indication of the device condition.l green = instrument functionsl red (flashing) = failureThe adjustment of the switching point is only possible ininstalled condition.The detailed adjustment of <strong>VEGACAP</strong> <strong>67</strong> is described in the"<strong>Operating</strong> instructions manual of the signal conditioninginstrument".22 <strong>VEGACAP</strong> <strong>67</strong> - <strong>with</strong> <strong>two</strong>-<strong>wire</strong> <strong>output</strong>31317-EN-060223
Maintenance and fault rectification7 Maintenance and fault rectification7.1 MaintenanceWhen used as directed in normal operation, <strong>VEGACAP</strong> <strong>67</strong> iscompletely maintenance-free.7.2 Fault rectificationCauses of malfunctionFault rectification24 hour service hotline<strong>VEGACAP</strong> <strong>67</strong> offers maximum reliability. Nevertheless faultscan occur during operation. These may be caused by thefollowing, e.g.:l Sensorl Processl Supplyl Signal processingThe first measure to be taken is to check the <strong>output</strong> signal. Inmany cases the causes can be determined and faults rectifiedthis way.Should the following measures not be successful, please callin urgent cases the VEGA service hotline under the phonenumber +49 1805 858550.The hotline is available to you 7 days a week round-the-clock.Since we offer this service world-wide, the support is onlyavailable in the English language. The service is free ofcharge, only the standard telephone costs will be charged.31317-EN-060223Checking the switching signal? <strong>VEGACAP</strong> <strong>67</strong> signals "covered" when the vibratingelement is not submerged (overfill protection)? <strong>VEGACAP</strong> <strong>67</strong> signals "uncovered" when the vibratingelement is submerged (dry run protection)l Supply voltage too lowà Check the power supplylElectronics defectiveà Push the mode switch (A/B) on the signal conditioninginstrument. If the signal conditioning instrument thenchanges the mode, the instrument may be mechanicallydamaged. Should the switching function in thecorrect mode still be faulty, return the instrument forrepair.à Check if there is buildup on the probe, and if so,remove it.<strong>VEGACAP</strong> <strong>67</strong> - <strong>with</strong> <strong>two</strong>-<strong>wire</strong> <strong>output</strong> 23
Maintenance and fault rectificationlUnfavourable installation locationà Mount the instrument at a location in the vessel whereno dead zones or mounds can form.à Check if the probe is covered by buildup on the socket.l Wrong mode selected on the signal conditioninginstrumentà Set the correct mode on the mode switch of the signalconditioning instrument (A: overfill protection; B: dry runprotection). Wiring should be carried out acc. to thequiescent current principle.? Signal lamp flashes redl Electronics module of <strong>VEGACAP</strong> <strong>67</strong> has detected afailureà Exchange instrument or return it for repair7.3 Exchange of the electronics moduleIn general, all oscillators of series CP60 can be interchanged.If you want to use an oscillator <strong>with</strong> a different signal <strong>output</strong>,you can download the corresponding operating instructionsmanual from our homepage under Downloads.Proceed as follows:1 Switch off power supply2 Unscrew the housing cover3 Lift the opening levers of the terminals <strong>with</strong> a screwdriver4 Pull the connection cables out of the terminals5 Loosen the <strong>two</strong> screws <strong>with</strong> a Phillips screwdriver (size 1)24 <strong>VEGACAP</strong> <strong>67</strong> - <strong>with</strong> <strong>two</strong>-<strong>wire</strong> <strong>output</strong>31317-EN-060223
Maintenance and fault rectification12Fig. 14: Loosen the screws1 Electronics module2 Screws (2 pcs.)6 Remove the old oscillator7 Compare the new oscillator <strong>with</strong> the old one. The type labelof the oscillator must correspond to that of the oldoscillator. This applies particularly to instruments used inhazardous areas.8 Compare the settings of the <strong>two</strong> oscillators. Set theadjustment elements of the new oscillator to the settings ofthe old oscillator.Information:Make sure that the housing is not rotated during the electronicsexchange. Otherwise the plug may be in a different positionlater.31317-EN-0602239 Insert the oscillator carefully. Make sure that the plug is inthe correct position.10 Screw in and tighten the <strong>two</strong> screws <strong>with</strong> a Phillipsscrewdriver.11 Insert the <strong>wire</strong> ends into the open terminals according tothe wiring plan12 Close the opening lever of the terminals, you will hear theterminal spring closing.13 Check the hold of the <strong>wire</strong>s in the terminals by lightlypulling on them14 Check the tightness of the cable entry. The seal ring mustcompletely encircle the cable.15 Screw the housing cover back onThe electronics exchange is finished.<strong>VEGACAP</strong> <strong>67</strong> - <strong>with</strong> <strong>two</strong>-<strong>wire</strong> <strong>output</strong> 25
Maintenance and fault rectification7.4 Instrument repairIf it is necessary to repair, please proceed as follows:You can download a return form (23 KB) in the Internet fromour home page www.vega.com under: "Downloads - Formsand Certificates - Repair form".By doing this you help us carry out the repair quickly and<strong>with</strong>out having to call back for needed information.llllPrint and fill out one form per instrumentClean the instrument and pack it damage-proofAttach the completed form and possibly also a safety datasheet to the instrumentPlease ask the responsible agency for the address of thereturn shipment!26 <strong>VEGACAP</strong> <strong>67</strong> - <strong>with</strong> <strong>two</strong>-<strong>wire</strong> <strong>output</strong>31317-EN-060223
Dismounting8 Dismounting8.1 Dismounting stepsWarning:Before dismounting, be aware of dangerous process conditionssuch as e.g. pressure in the vessel, high temperatures,corrosive or toxic products etc.Take note of the instructions in chapters "Mounting" and"Connecting to power supply" and carry out the listed steps inreverse order.With Ex instruments, the housing cover may only be opened ifthere is no explosive atmosphere present.8.2 Disposal<strong>VEGACAP</strong> <strong>67</strong> consists of materials which can recycled byspecialised recycling companies. We use recyclable materialsand have designed the electronic modules to be easilyseparable.WEEE directive 2002/96/EGThis instrument is not subject to the WEEE directive 2002/96/EG and the respective national laws (in Germany, e.g.ElektroG). Pass the instrument directly on to a specialisedrecycling company and do not use the municipal collectingpoints. These may be used only for privately used productsacc. to the WEEE directive.Correct disposal avoids negative effects to persons andenvironment and ensures recycling of useful raw materials.Materials: see "Technical data"If you cannot dispose of the instrument properly, pleasecontact us about disposal methods or return.31317-EN-060223<strong>VEGACAP</strong> <strong>67</strong> - <strong>with</strong> <strong>two</strong>-<strong>wire</strong> <strong>output</strong> 27
Supplement9 Supplement9.1 Technical dataGeneral dataMaterial 316L corresponds to 1.4404 or 1.4435Process fittingG1½A, 1½ NPTMaterials, wetted parts- Process fitting - Thread 316L- Process fitting - Flange 316L- Process seal Klingersil C-4400- insulation (partly insulated) Ceramic (KER 221 acc. to DIN 40685)- Probe - rod, ceramic partly insulated 316L(ø 15 mm/ø 0.6 in)- Probe - cable, ceramic partly insulated(ø 8 mm/ø 0.32 in) 1)316LMaterials, non-wetted parts- Housing Plastic PBT (Polyester), Alu die-casting powder-coated,316L- Seal ring between housing andhousing cover- Ground terminal 316LWeights- <strong>with</strong> plastic housing 3000 g (106 oz)- <strong>with</strong> Aluminium housing 3400 g (120 oz)- <strong>with</strong> stainless steel housing 3800 g (134 oz)- Gravity weight 1800 g (64 oz)- Rod weight ø 15 mm (ø 0.6 in) 1400 g/m (15 oz/ft)- Cable weight ø 8 mm (ø 0.32 in) 400 g/m (4.3 oz/ft)NBR (stainless steel housing), silicone (Alu/plastic housing)Sensor length- Rod (ø 15 mm/ø 0.6 in) 0.28 … 6 m (0.9 … 20 ft)- Cable (ø 8 mm/ø 0.32 in) 0.5 … 40 m (1.6 … 131 ft)Max. tensile load (cable)- Ceramic partly insulated ø 8 mm(ø 0.32 in)Max. torque (process fitting thread)10 KN (2248 lbs)80 Nm (58 lbf ft)1)Cable connected electrically conductive <strong>with</strong> the gravity weight.28 <strong>VEGACAP</strong> <strong>67</strong> - <strong>with</strong> <strong>two</strong>-<strong>wire</strong> <strong>output</strong>31317-EN-060223
SupplementOutput variableOutputTwo-<strong>wire</strong> <strong>output</strong>Suitable signal conditioning instruments VEGATOR 521, 527, 620, 621 and 622Output signal>4 …
SupplementElectromechanical data - version IP 66/IP <strong>67</strong> and IP 66/IP 68; 0.2 barCable entry/plug 2)- Single chamber housing l 1x cable entry M20x1.5 (cable-ø 5 … 9 mm),1x blind stopper M20x1.5or:l 1x closing cap ½ NPT, 1x blind plug ½ NPTor:Spring-loaded terminalsl1x plug (depending on the version), 1x blindplug M20x1.5for <strong>wire</strong> cross section up to 1.5 mm² (0.0023 in²)Electromechanical data - version IP 66/IP 68, 1 barCable entry- Single chamber housing l 1x IP 68 cable entry M20x1.5; 1x blindstopper M20x1.5or:l 1x closing cap ½ NPT, 1x blind plug ½ NPTConnection cable- Configuration four cores, one suspension cable, one breathercapillary, screen braiding, foil, mantle- <strong>wire</strong> cross section 0.5 mm²- <strong>wire</strong> resistance 1200 N (270 pounds force)- Standard length 5 m (16.4 ft)- max. length 1000 m (3280 ft)- Min. bending radius 25 mm (at +25°C/+77°F)- Diameter approx. 8 mm- Colour - standard PE Black- Colour - standard PUR Blue- Colour - Ex version BlueAdjustment elementsDIL switch for measuring range selection- range 1 0 … 20 pF- range 2 0 … 85 pF- range 3 0 … 450 pF2)Depending on the version M12x1, acc. to DIN 43650, Harting, Amphenol-Tuchel, 7/8" FF30 <strong>VEGACAP</strong> <strong>67</strong> - <strong>with</strong> <strong>two</strong>-<strong>wire</strong> <strong>output</strong>31317-EN-060223
SupplementSupply voltageSupply voltage10 … 36 VDC(via the signal conditioninginstrument)Electrical protective measuresProtection- Plastic housing IP 66/IP <strong>67</strong>- Alu and stainless steel standard IP 66/IP 68 (0.2 bar) 3)- Alu and stainless housing, optionallyavailableOvervoltage categoryProtection classIP 66/IP 68 (1 bar)IIIII31317-EN-0602233)Requirement to maintain the protection is the suitable cable.<strong>VEGACAP</strong> <strong>67</strong> - <strong>with</strong> <strong>two</strong>-<strong>wire</strong> <strong>output</strong> 31
Supplement9.2 DimensionsHousing versions in protection IP 66/IP<strong>67</strong> and IP 66/IP 68; 0.2 bar69mm (2 23/ 32")ø77mm (3 1/ 32")69mm (2 23/ 32")ø77mm (3 1/ 32")116mm (4 9/ 16")ø84mm (3 5/ 16")M20x1,5/½ NPT112mm (4 13/32")M20x1,5/½ NPT117mm (4 39/64")M20x1,5/½ NPT116mm (4 9/16")M20x1,51 2 3Fig. 16: Housing versions in protection IP 66/IP <strong>67</strong> and IP 66/IP 68; 0.2 bar1 Plastic housing2 Stainless steel housing3 Aluminium housingHousing in protection IP 66/IP 68, 1 bar~ 103mm(4 1/ 16")ø 77mm(3 1/ 32")~ 150mm (5 29/ 32")ø 84mm (3 5/ 16")117mm (4 39/64")116mm (4 9/16")M20x1,5M20x1,5M20x1,512Fig. 17: Housing versions in protection IP 66/IP 68, 1 bar1 Stainless steel housing2 Aluminium housing32 <strong>VEGACAP</strong> <strong>67</strong> - <strong>with</strong> <strong>two</strong>-<strong>wire</strong> <strong>output</strong>31317-EN-060223
SupplementSW46242mm(9 17/32")ø 38mm(1 1/ 2")L100mm(3 15/16")120mm(4 23/32")L123mm(29/32")G1 ½A/NPT1 ½ø 8mm(5/ 16")200mm(7 7/8")ø 40mm(1 37/ 64")ø 15mm(19/ 32")Fig. 18: <strong>VEGACAP</strong> <strong>67</strong> - Threaded version G1½ A and 1½ NPTL = Sensor length, see "Technical data"31317-EN-060223<strong>VEGACAP</strong> <strong>67</strong> - <strong>with</strong> <strong>two</strong>-<strong>wire</strong> <strong>output</strong> 33
Supplement9.3 Industrial property rightsVEGA product lines are global protected by industrial property rights.Further information see http://www.vega.com.Only in U.S.A.: Further information see patent label at the sensor housing.VEGA Produktfamilien sind weltweit geschützt durch gewerbliche Schutzrechte.Nähere Informationen unter http://www.vega.com.Les lignes de produits VEGA sont globalement protégées par des droits depropriété intellectuelle.Pour plus d'informations, on pourra se référer au site http://www.vega.com.VEGA lineas de productos están protegidas por los derechos en el campo de lapropiedad industrial.Para mayor información revise la pagina web http://www.vega.com.Линии продукции фирмы ВЕГА защищаются повсему миру правами наинтеллектуальную собственность.Дальнейшую информациюсмотрите на сайте http://www.vega.com. 德 (VEGA) 系 列 品 在 全 球 享 有 知 保 。 一 步 信 息 网 站 。34 <strong>VEGACAP</strong> <strong>67</strong> - <strong>with</strong> <strong>two</strong>-<strong>wire</strong> <strong>output</strong>31317-EN-060223
Supplement31317-EN-060223<strong>VEGACAP</strong> <strong>67</strong> - <strong>with</strong> <strong>two</strong>-<strong>wire</strong> <strong>output</strong> 35
VEGA Grieshaber KGAm Hohenstein 11377761 SchiltachGermanyPhone +49 7836 50-0Fax +49 7836 50-201E-mail: info@de.vega.comwww.vega.comISO 9001All statements concerning scope of delivery, application,practical use and operating conditions of the sensors andprocessing systems correspond to the information availableat the time of printing.© VEGA Grieshaber KG, Schiltach/Germany 2006Technical data subject to alterations31317-EN-060223