Sho~Bud (Pro I, II, III, and Super Pro) Owner's Manual - Carter Steel ...
Sho~Bud (Pro I, II, III, and Super Pro) Owner's Manual - Carter Steel ...
Sho~Bud (Pro I, II, III, and Super Pro) Owner's Manual - Carter Steel ...
- No tags were found...
You also want an ePaper? Increase the reach of your titles
YUMPU automatically turns print PDFs into web optimized ePapers that Google loves.
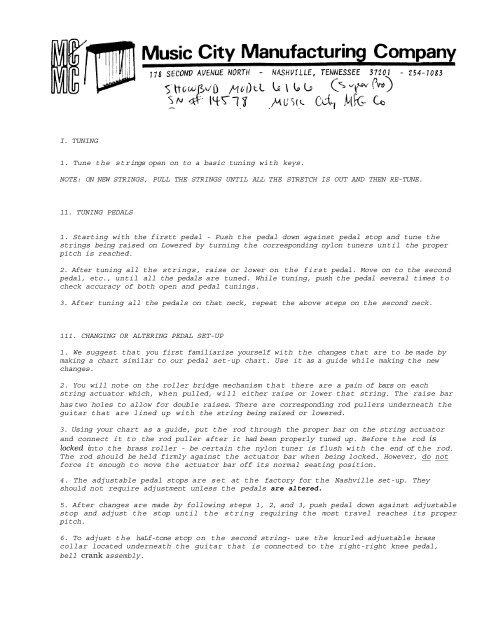
I. TUNING1. Tune the strings open on to a basic tuning with keys.NOTE: ON NEW STRINGS, PULL THE STRINGS UNTIL ALL THE STRETCH IS OUT AND THEN RE-TUNE.11. TUNING PEDALS1. Starting with the firstt pedal - Push the pedal down against pedal stop <strong>and</strong> tune thestrings being raised on Lowered by turning the corresponding nylon tuners until the properpitch is reached.2. After tuning all the strings, raise or lower on the first pedal. Move on to the secondpedal, etc., until all the pedals are tuned. While tuning, push the pedal several times tocheck accuracy of both open <strong>and</strong> pedal tunings.3. After tuning all the pedals on that neck, repeat the above steps on the second neck.111. CHANGING OR ALTERING PEDAL SET-UP1. We suggest that you first familiarize yourself with the changes that are to be made bymaking a chart similar to our pedal set-up chart. Use it as a guide while making the newchanges.2. You will note on the roller bridge mechanism that there are a pain of bars on eachstring actuator which, when pulled, will either raise or lower that string. The raise barhas two holes to allow for double raises. There are corresponding rod pullers underneath theguitar that are lined up with the string being raised or lowered.3. Using your chart as a guide, put the rod through the proper bar on the string actuator<strong>and</strong> connect it to the rod puller after it had been properly tuned up. Before the rod islocked into the brass roller - be certain the nylon tuner is flush with the end of the rod.The rod should be held firmly against the actuator bar when being locked. However, do notforce it enough to move the actuator bar off its normal seating position.4. The adjustable pedal stops are set at the factory for the Nashville set-up. Theyshould not require adjustment unless the pedals are altered.5. After changes are made by following steps 1, 2, <strong>and</strong> 3, push pedal down against adjustablestop <strong>and</strong> adjust the stop until the string requiring the most travel reaches its properpitch.6. To adjust the haLf-tone stop on the second string- use the knurled adjustable brasscollar located underneath the guitar that is connected to the right-right knee pedal,bell crank assembly.
THE ADJUSTABLE PEDAL STOP SHOULD BE ADJUSTED SO THAT THE STRING REQUIRING THE MOST TRAVEL ONEITHER OF THE TWO NECKS WILL REACH ITS PROPER PITCH.
ASSEMBLING YOUR GUITARNotice the way the guitar is now packed. It is placed upside down with the front facing the backof the case.1. Leave guitar in case.2. Remove legs <strong>and</strong> screw them into the leg holes. (The legs are the same size so there is nospecification as to front or back.)On the Maverick Guitar, insert legs into leg holes <strong>and</strong> tighten thumb screw. The legs withholes to in the holes on the front side of the guitar.3. Remove pedal bar assembly <strong>and</strong> attach to legs on the front side of guitar with footpedals to the inside. To attach, elide clamp over <strong>and</strong> put bar on legs. Return clamp <strong>and</strong>tighten wing nuts.On the Maverick Guitar, insert screws through holes in front legs <strong>and</strong> tighten wing nuts.4. Remove pedal rods <strong>and</strong> insert hook end into middle hole of bell crank mechanism. Open hook endshould be facing inside of guitar. Pull down on the ball joint at the other end of the pedalrod <strong>and</strong> insert into the ball joint screw on the foot pedal.5. Remove guitar from case.6. Disassembly is just the reverse of assembly.MAINTENANCE1. Lubricate all moving parts with a light weight oil such as 3-N-1.2. Keep instrument cleaned <strong>and</strong> polished with most of your regular household cleaners such asPledge, Windex, etc.. Note that you put the cleaner on a cloth <strong>and</strong> then clean theinstrument. This will prevent the cleaner from gumming up the moving parts.


