

Fitting Instructions Range Rover Classic Coil Spring Installation Kit
Fitting Instructions Range Rover Classic Coil Spring Installation Kit
Fitting Instructions Range Rover Classic Coil Spring Installation Kit

You also want an ePaper? Increase the reach of your titles
YUMPU automatically turns print PDFs into web optimized ePapers that Google loves.
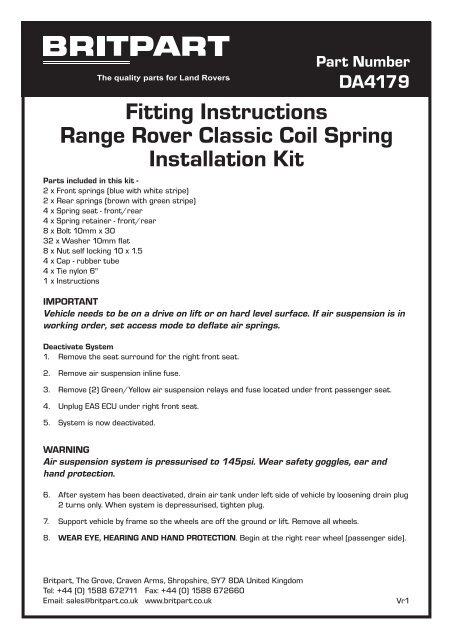
<strong>Fitting</strong> <strong>Instructions</strong><br />
<strong>Range</strong> <strong>Rover</strong> <strong>Classic</strong> <strong>Coil</strong> <strong>Spring</strong><br />
<strong>Installation</strong> <strong>Kit</strong><br />
Parts included in this kit -<br />
2 x Front springs (blue with white stripe)<br />
2 x Rear springs (brown with green stripe)<br />
4 x <strong>Spring</strong> seat - front/rear<br />
4 x <strong>Spring</strong> retainer - front/rear<br />
8 x Bolt 10mm x 30<br />
32 x Washer 10mm flat<br />
8 x Nut self locking 10 x 1.5<br />
4 x Cap - rubber tube<br />
4 x Tie nylon 6"<br />
1 x <strong>Instructions</strong><br />
IMPORTANT<br />
Vehicle needs to be on a drive on lift or on hard level surface. If air suspension is in<br />
working order, set access mode to deflate air springs.<br />
Deactivate System<br />
1. Remove the seat surround for the right front seat.<br />
2. Remove air suspension inline fuse.<br />
3. Remove (2) Green/Yellow air suspension relays and fuse located under front passenger seat.<br />
4. Unplug EAS ECU under right front seat.<br />
5. System is now deactivated.<br />
WARNING<br />
Air suspension system is pressurised to 145psi. Wear safety goggles, ear and<br />
hand protection.<br />
6. After system has been deactivated, drain air tank under left side of vehicle by loosening drain plug<br />
2 turns only. When system is depressurised, tighten plug.<br />
7. Support vehicle by frame so the wheels are off the ground or lift. Remove all wheels.<br />
8. WEAR EYE, HEARING AND HAND PROTECTION. Begin at the right rear wheel (passenger side).<br />
Britpart, The Grove, Craven Arms, Shropshire, SY7 8DA United Kingdom<br />
Tel: +44 (0) 1588 672711 Fax: +44 (0) 1588 672660<br />
Email: sales@britpart.co.uk www.britpart.co.uk<br />
Part Number<br />
DA4179<br />
Vr1
9. Remove clips at top and bottom of air spring, as you remove air spring, disconnect airline from<br />
top of air spring. Plug line with 1/4" rubber plug and tie line out of the way with 6" plastic tie.<br />
CAUTION - THERE MAY BE RESIDUAL AIR IN THE AIR SPRING.<br />
10. Remove the right rear shock. CAUTION - THE AXLE MAY DROP SLIGHTLY.<br />
11. Place spring seat on axle. Install rear spring marked P/S (or brown with green stripe) align holes<br />
in spring seat and axle. Place 2-10mm flat washers over each hole, use a small punch to align<br />
washers and holes. Place spring retainer through spring and install 10mm bolts with flat washers<br />
and nuts. DO NOT TIGHTEN YET. Note - you may have to disconnect the sway bar to gain enough<br />
clearance to install the spring.<br />
12. Turn spring so retainer is touching spring coil on both sides, then tighten bolts.<br />
13. Slowly raise axle, watch top of spring to make sure it seats in frame. Reinstall shock.<br />
14. Same procedure for left (driver) side.<br />
15. FRONT LEFT AIR SPRING, SEE WARNING ABOVE.<br />
16. Remove plastic cover; remove airline at top of air spring. Plug line with 1/4" rubber plug and tie<br />
line out of the way using 6" plastic tie.<br />
17. Remove clips at the top and bottom of air spring and remove air spring. Remove the heat shield<br />
on top of spring mount, be sure that plastic fastener is removed or spring will not seat properly.<br />
18. Remove 2-10mm nuts that hold brake line bracket to the wheel well and loosen bracket from<br />
wheel well.<br />
19. Support axle, remove shock and let axle down SLOWLY. Place spring seat on the axle. Install<br />
spring marked D/S (or blue with white stripe) on seat and align holes in seat and axle. Place 2-<br />
10mm washers on each hole and install spring retainer, install 2-10mm bolts with flat washers<br />
and nuts. DO NOT TIGHTEN YET. Note you may have to disconnect the sway bar to gain enough<br />
clearance to install the spring.<br />
20. Turn spring so that the retainer is touching spring coils on both sides. Tighten the bolts.<br />
21. Slowly raise axle, make sure that the spring seats in frame at top, and install shock.<br />
22. Place brake line bracket on studs and replace nuts. Reinstall plastic cover.<br />
23. FRONT RIGHT AIR SPRING, SEE WARNING ABOVE.<br />
24. See left front air spring removal and installation.<br />
25. After all air springs have been replaced reinstall cover to valve block.<br />
26. Check all bolts for tightness.<br />
27. Reinstall all wheels.<br />
28. Car will sit approximately 1.5" to 2.0" over standard height. Depending on springs installed.<br />
29. IT IS IMPORTANT THAT THE CAR IS ROAD TESTED FOR SUSPENSION NOISES!