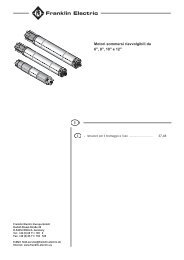
Submersible Motor Installation Check List - Franklin Electric Europa
Submersible Motor Installation Check List - Franklin Electric Europa
Submersible Motor Installation Check List - Franklin Electric Europa
- No tags were found...

You also want an ePaper? Increase the reach of your titles
YUMPU automatically turns print PDFs into web optimized ePapers that Google loves.
<strong>Franklin</strong> Application/<strong>Installation</strong> Data Europe No. 4/2009<strong>Submersible</strong> <strong>Motor</strong> <strong>Installation</strong> <strong>Check</strong> <strong>List</strong>In this edition we will focus on the right and necessary procedures to be executed prior to an installationof a submersible motor and pump into the application. As an attachment you can find this also “ready tobe printed “and to be used by your technicians as a checklist.1. <strong>Motor</strong> InspectionA. Verify that the model, kW or hp, voltage, number of phases and hertz on the motor nameplatematch the installation requirements.B. <strong>Check</strong> that the motor lead is not damaged.C. Measure insulation resistance using preferably a 500 volt DC megohmmeter, from each leadwire to the motor/ground. Resistance shall be more than 400 Megohms at 20°C without dropcable for a new motor.D. Keep a record of motor model number, kW or hp, voltage, date code and serial number, locatedabove and in the motor nameplate. (Sample: D/C 09H62 S/N08-00019A Type: 234 724 1621)2. Pump InspectionA. <strong>Check</strong> that the pump rating matches the motor.B. <strong>Check</strong> for pump damage and that shaft turns freely.3. <strong>Motor</strong>/Pump AssemblyA. Lubricate the rotor shaft splines with a food grade, water resistant grease or Vaseline. (see AID01/2007)B. Also lubricate the cylindrical rubber part of the cable connector before screwing into the motorwith similar lubricant. (see AID 02/2008)C. <strong>Check</strong> that pump and motor mounting faces are free from dirt, debris and uneven spotsD. Pumps and motors above 3 kW (4hp) should be assembled in the vertical position to preventstress on pump brackets and shafts. Assemble pump and motor together so their mountingfaces are in contact, and then tighten assembly bolts or nuts evenly (crosswise) followingmanufacturer specifications in terms of torque.E. If accessible, check that the pump shaft turns freely. (4” motors: check that motor sandslingertouches/seals the coupling )F. Assemble the pump lead guard over the motor leads. Do not cut or pinch lead wires duringassembly or installation.
4. Power Supply and Controls (Ensure electric power in the installation is switched off)A. Verify that the power supply voltage, Hertz, and kVA capacity match motor requirements.B. Verify control box kW (hp) and voltage matches motor (4” PSC, 3-Wire )C. <strong>Check</strong> that the electrical installation and controls meet all local safety regulations and match themotor requirements, including fuse or circuit breaker size and motor overload protection.Connect all metal plumbing and electrical enclosures to the power supply ground to preventshock hazard.Please observe local electrical safety legislation.<strong>Electric</strong>al installations must be done by skilled technicians.5. Lightning and Surge protectionA. Use properly rated surge (lightning) arrestors on all submersible pump installations. Smaller 4”motors can be factory equipped with “built in” surge arrestors. <strong>Check</strong> product leaflet. (see AID4/2005)B. Ground all above ground arrestors with copper wire directly to the motor frame, or to a metaldrop pipe or casing, which reaches below the well pumping level.6. <strong>Electric</strong>al Drop CableA. Use submersible cables sized in accordance with existing regulations and with the cable charts.<strong>Motor</strong> short lead must be buried in water. Drop cables must meet ampacity and temperaturerequirements. Ground motor per local codes. (see AID 2 and 3/2005)B. If required by regulations, include a ground wire to the motor and surge protection, connected tothe power supply ground. Also: always ground a pump set operated outside a drilled well.7. <strong>Motor</strong> coolingA . Ensure at all times that the installation provides adequate motor cooling ; min. cooling speedto be found in our product leaflets or in the motor nameplate. (see AID 2 – 2009)8. <strong>Motor</strong>/Pump <strong>Installation</strong>A. Splice motor leads to supply cable using electrical grade solder or compression connectors, andcarefully insulate each splice with watertight tape or adhesive-lined shrink tubingB. Support the cable to the delivery pipe every 3 meters (10 feet), with straps or tape, strongenough to prevent sagging. Allow cable to be a bit slack, when using a PP or plastic risertube/pipe, in order to avoid stress on cable. Use padding between cable and any metal straps.C. Verify pump is equipped with a spring loaded check valve. Otherwise an inline valve in thedelivery pipe is recommended, within max.8m (25 feet) above the pump, but below the drawdown level of the water supply (dynamic water level). (see AID 02/2004)D. Assemble all pipe joints as tightly as practical, to prevent unscrewing from motor torque. As athumb rule: torque should be 2mkg per kW (10 pound feed per hp) .E. Set the pump far enough below the lowest pumping level to assure the pump inlet will alwayshave at least the Net Positive Suction Head (NPSH), specified by the pump manufacturer.Pump set should be at least 3 meters (10 feet) from the bottom of the well to allow for sedimentbuild up.F. <strong>Check</strong> insulation resistance as motor/pump assembly is lowered into the well. Resistance maydrop gradually as more cable enters the water. A sudden drop indicates possible cable, splice ormotor lead damage.
9. After <strong>Installation</strong>A. <strong>Check</strong> all electrical and water line connections and parts before starting the pump.B. Switch on main electrical power switch. Start the pump and check the motor amps and pumpdelivery. If normal, continue to run the pump until delivery is clear. If three phase pump deliveryis low, it may be running backward. Rotation can be reversed (with power off) by interchangingany two motor lead connections to the power supply.C. <strong>Check</strong> three phase motors for current balance within 5% of average. Higher imbalance willcause higher motor temperatures and may cause overload trip, vibration and reduced life.D. Verify that starting, running and stopping cause no significant vibration or hydraulic shocks.E. After at least 15 minutes running time, verify that pump output, electrical input, pumping leveland other characteristics are stable and as specified.For best electrical protection: Set motor protection (Submonitor or overload relay) close to dutypoint operation amps.The <strong>Franklin</strong> AID has been published since January 2003. In case you have not received alleditions, please contact our Field Service Department at field-service@franklin-electric.de andwe will send you the required edition. Attached you will find a listing of all subjects published upuntil today.Seminars in 2010:Please check our website http://www.franklin-electric.de/de/training.aspand sign up for it.Upon request we offer specific seminars tailored to your needs.The <strong>Franklin</strong> <strong>Electric</strong> Service Team wishes “Merry Christmas” andgood success with <strong>Franklin</strong> products in 2010