In One Setup - Werth Messtechnik GmbH
In One Setup - Werth Messtechnik GmbH
In One Setup - Werth Messtechnik GmbH
- No tags were found...
Create successful ePaper yourself
Turn your PDF publications into a flip-book with our unique Google optimized e-Paper software.
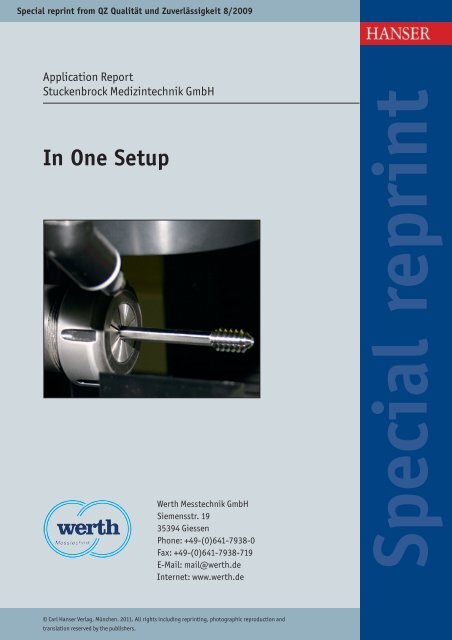
Coordinate MetrologyMEASURE AND TEST3Figure 2. The additional fourth axis of the multisensor coordinatemeasuring machine simplifies measurement.Figure 3. The measurement area was designed such that clampsand most fixtures can remain on the machine, which allows fasterchangeover of parts.tactile <strong>Werth</strong> Fiber Probe WFP also convincedus. As far as I know, there is no alternativeto its functionality.”The modular system at Stuckenbrockhas three sensors: the fiber probe, with aprobe sphere as small as 20 µm, a highresolutionoptical sensor with zoom optics,and a laser that is integrated in thezoom optics. All in all, the machine savestime and space, according to the manufacturer.Its use, and that of its software, is uncomplicatedand easy to learn, as JürgenKlemm confirms:“I completed a trainingclass at <strong>Werth</strong> <strong>Messtechnik</strong>, together withmy employee Salvatore Bennardo. Afterward,we were able to train our machineoperators sufficiently in the use of themeasuring machine. This was no problem,and neither is the daily use of theVideoCheck.” Klemm found the use oftwo screens to be very practical. <strong>One</strong> isused for the measuring program, and theother displays the video image with edgedetection. This eliminates switching backand forth in the software interface. SalvatoreBennardo is responsible for the measuringmachine on the day shift. He writesthe measurement programs and takes allthe measurements. The machine operatorsthemselves are responsible for measuringduring the other shifts. These areprimarily in-process measurements forvarious machines, but also final inspectionsand 100 percent inspections for particularlychallenging parts.The measurement area has been set upso that the clamps and most fixtures canremain on the machine, enabling morerapid changeout of parts (Figure 3).“Sometimes the time can get tight,”Klemm admits. “Measurements are almostalways rushed.After all, the machinetools need to be producing again withoutlong interruptions.”All measurement programs are availablevia a network connection to the machine.They can be called up by part number.The product portfolio is now up toabout 8000 to 9000 different articles,mostly with small production lot sizes,from under 100 up to 5000 parts.Measuring tools and workpiecesAn example: <strong>One</strong> of the products is a hipimplant, used for classical fractures of theneck of the femur. It consists of variouselements and therefore it can be placed onthe body without putting stress on thebone. The implant is screwed onto thethigh bone (femur) from outside.The load-bearing screw that is screwedinto the femur bone must meet nearlytwenty quality criteria. For the screwthread, the inner diameter, outer diameter,flank angle, radii, and pitch arechecked. The positions of the hex socket,external hex, and central C bores to eachother must exactly meet the requirements,so that the implant fits perfectly and canbe installed later. Without the multisensormeasuring machine, such measurementtasks would hardly be able to be implemented.It is also useful in many other ways.For one thing, the measurement recordsdocument the process sequence and the precision of the products, which canalso be useful in case of discrepancieswith customers. Tools are measured moreand more often as well. Jürgen Klemm explains:“We work with profile tools,among other things, that have surfaceLong TraditionThe roots of Stuckenbrock Medizintechnikin Tuttlingen go back to the year 1884,the year the predecessor firm Karl Vögelewas founded. It specialized in the fabricationand sales of surgical instruments.Production of scalpels is still an importantpillar of the company. Stuckenbrockhas become a shareholder corporation ofthe KLS Martin Group, which also includesKarl Leibinger Medizintechnik inMühlheim, the Martin brothers, and othercompanies. The various medical technologymanufacturers jointly use the nameKLS Martin in the marketplace.KLS Martin is a complete provider, sellingeverything that is needed in the surgeryroom. Its production spectrum has beendivided among the member corporations.Of the 180 employees at Stuckenbrock,about 40 work in a separate productionarea that specializes in prosthetics andimplants. <strong>In</strong>troduction and certification(DIN/EN/ISO 9001, EN 46001) and thatof Appendix II of the Directive 93/42 EWGin 1995 are intended to ensure the qualityof the productsQZ Volume 54 (2009) 8
4MEASURE AND TESTCoordinate Metrologycontours that are responsible for the precisionof the manufactured part. <strong>In</strong> orderto get good results right from the start,we have moved to inspecting the tolerancesthat we require, which was not possiblebefore we had the multisensor machine.”<strong>In</strong> the meantime, the VideoCheck machinehas been reconfigured and adaptedseveral times in order to meet all the requirements.“Completely capturing allfeatures of an implant in one setup is notan easy task, and requires some adaptationson the hardware side as well,” saysJürgen Klemm. “The <strong>Werth</strong> <strong>Messtechnik</strong>technicians were always by our side as fairpartners.” Translated by <strong>Werth</strong> <strong>Messtechnik</strong> <strong>GmbH</strong><strong>Werth</strong> <strong>Messtechnik</strong> <strong>GmbH</strong>Phone: +49-(0)641-7938-0mail@werth.dewww.werth.deWorld Leader in Coordinate Measuring Machines withOptics, Tomography, Multisensor SystemsOFFERING THE CMM THAT FITS THE APPLICATION!Prosthetic Joints,Screws and Nails,Implants ...Heart Valves,Plastic Parts forMetering Devices,Dental Drills ...Measuring RecordDental Implants,Syringes,Contact Lensesand ManyOthers3D CAD ComparisonPLEASE FIND THE COMPLETE PRODUCT LINE DESCRIPTION UNDERWWW.WERTH.DE<strong>In</strong>spector® TomoScope® VideoCheck® ScopeCheck®<strong>Werth</strong> <strong>Messtechnik</strong> <strong>GmbH</strong>Siemensstrasse 19 · D-35394 Giessen · Phone: +49(0)6 41/79 38-0 · Fax: +49(0)6 41/79 38-7 19mail@werth.de · www.werth.de© Carl Hanser Verlag, Munich QZ Volume 54 (2009) 8


