MANUAL Convection Ovens Instruction Manual Quarter ... - Cadco, Ltd
MANUAL Convection Ovens Instruction Manual Quarter ... - Cadco, Ltd
MANUAL Convection Ovens Instruction Manual Quarter ... - Cadco, Ltd

You also want an ePaper? Increase the reach of your titles
YUMPU automatically turns print PDFs into web optimized ePapers that Google loves.
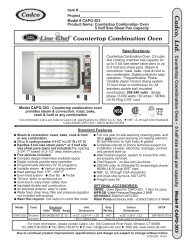
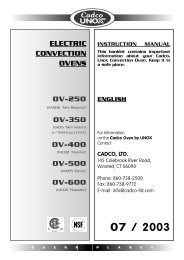
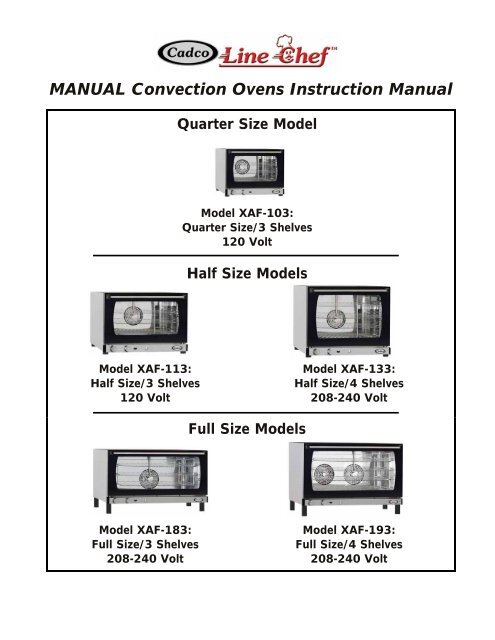
<strong>MANUAL</strong> <strong>Convection</strong> <strong>Ovens</strong> <strong>Instruction</strong> <strong>Manual</strong><strong>Quarter</strong> Size ModelModel XAF-103:<strong>Quarter</strong> Size/3 Shelves120 VoltHalf Size ModelsModel XAF-113:Half Size/3 Shelves120 VoltModel XAF-133:Half Size/4 Shelves208-240 VoltFull Size ModelsModel XAF-183:Full Size/3 Shelves208-240 VoltModel XAF-193:Full Size/4 Shelves208-240 Volt
INDEX:I. <strong>Instruction</strong>s For The Installer ............................................................................................................. 31. Data Plate ....................................................................................................................................... 32. Certification .................................................................................................................................... 33. Installation - Preliminary Operations .............................................................................................. 33.1 – Location of Installation ....................................................................................................... 33.2 – Feet Assembly ..................................................................................................................... 33.3 – Positioning .......................................................................................................................... 33.4 – Removing Protective Film ................................................................................................. 34. Installation ...................................................................................................................................... 44.1 - Electrical Connection .......................................................................................................... 44.2 - Water Connection (for XAF-113, XAF-133, XAF-183, XAF-193)……………………….4II. <strong>Instruction</strong>s For The User .................................................................................................................. 51. <strong>Instruction</strong> For The Operator .......................................................................................................... 52. Notes For Use ................................................................................................................................. 53. Control Panel .................................................................................................................................. 53.1 – Time Dial ............................................................................................................................ 53.2 – Temperature Dial ................................................................................................................ 53.3 – Humidity Button…………………………………………………………………………...64. Door & Fans .................................................................................................................................... 65. Cleaning Oven ................................................................................................................................ 66. Turning Off In Case Of Breakdown ............................................................................................... 6III. Cooking Principles ............................................................................................................................ 71. Cooking Modes ............................................................................................................................... 72. Cooking Variables .......................................................................................................................... 73. Use of Wire Grids & Sheet Pans .................................................................................................... 7IV. Maintenance ....................................................................................................................................... 71. Ordinary Maintenance .................................................................................................................... 72. Special Maintenance ....................................................................................................................... 72.1 – Replacement of Internal Lamp ........................................................................................... 82.2 – Reset The Safety Thermostat ............................................................................................. 8V. Optional Oven Accessories .................................................................................................................. 8VI. Remove & Reattach Oven Door ........................................................................................................ 9VI. Cooking Guide .................................................................................................................................. 10VII. Warranty .......................................................................................................................................... 152
I. INSTRUCTION FOR THE INSTALLERCongratulations! You have just purchased a new <strong>Cadco</strong> LineChef TM <strong>Manual</strong> <strong>Convection</strong> Oven. Let’s go oversome of the basics before you start using your new oven.1. DATA PLATE2. CERTIFICATION2.1 The “MET” mark on our data labels and on our user manual refers to the following listings:Certifications are listed under UNOX S.p.A., MET file #E112912, including XAF series oven modelsClass Number: 2831-03 DESCRIPTION: HEATERS-Cooking and Liquid - Stationary TypeClass Number: 2831-83 DESCRIPTION: HEATERS-Cooking and Liquid-Stationary Type-Certified to the requirements of UL 197 (for USA)and CSA C22.2 No. 9 (for Canada)2.2 The “NSF” mark refers to listing including XAF series oven models under UNOX SPA for NSF/ANSISTANDARD 4: Commercial Cooking, Rethermalization and Powered Hot Food Holding and TransportEquipment3. INSTALLATION - PRELIMINARY OPERATIONSAll electrical connections and installation operations must be done by qualified personnel, and complywith all existing codes.3.1 CHECK THE LOCATION OF INSTALLATIONVerify the overall measurements and the exact position of the electrical and water connections (whereapplicable) before installing the oven. Refer to the illustrations inthe separate “technical data” document for your model.3.2 FEET ASSEMBLYYou will find the feet packed inside your oven’s cooking cavity.The feet must be used when your oven is in operation. Never useyour oven without its feet properly installed. Assemble the feet asshown. (Full size models now come with tall feet that screw intoplace; all other models come with shorter feet that pop into place.)3.3 POSITIONINGPlace your oven so the back and sides can be easily reached. This will make the electrical connectionsand any servicing points easily accessible. Your oven is not designed for built-in applications or for sideby side positioning. <strong>Cadco</strong> suggests you leave a minimum distance of 4” between the back of the ovenand the wall to allow for the escape of moisture. The oven must be placed upon a support, a stand, or ontop of a counter made of non-combustible material. Never install the oven directly on the floor. If theoven is placed near walls, dividers, kitchen cabinets, decorated edges or drapes, they must be made ofnon combustible material.3.4 REMOVE THE PROTECTIVE FILMCarefully remove all the protective film from the external walls of your oven. Be sure to remove anyresidual glue left on the outside of the oven with an appropriate solvent.3
4. INSTALLATION4.1 ELECTRICAL CONNECTION• Connection to the electrical power source must be done according to all state and local codes. Beforeconnecting your oven, make sure that the voltage and the amps comply with those stated on the data plateof your oven. Avoid using patch cords and multiple jacks.• The appliance must be placed so that the connection plug to the outlet can be easily reached.When the appliance is in operation, the power supply voltage must not diverge from the value of thenominal voltage, written on the technical data plate, by more than + or – 10%.• <strong>Ovens</strong> are equipped with cordset and NEMA plug (single phase; 120V or 208-240V, depending on ovenmodel.) It is sufficient to insert the plug in the proper outlet (the outlet must be suitable for the plugassembled on the oven.)4.2 WATER CONNECTION (available on all current manual models EXCEPT XAF-103 per below)• CONNECTION TO THE WATER NET: Full Size manual oven models (XAF-183 & XAF-193)come with an electrovalve for direct water connection.♦ A mechanical filter must be placed between the water system and the water connection of the oven.♦ Before connecting the water pipe to the oven, please allow a suitable amount of water flow, in order toclean the duct from any residue.♦ The water used in the oven must have a nominal pressure value between 0.5 and 2 bars.♦ The water must have a hardness between 0.5° and 5°F (to avoid formation of lime deposits inside theelectric valve and inside the cavity).♦ <strong>Cadco</strong> suggests you use a decalcification filter in order to maintain fan balance.• AUXILIARY WATER PUMP (FOR CONNECTION TO AN EXTERNAL WATER TANK: ):Half Size manual ovens (XAF-113 & XAF-133) come with an Auxiliary Water Pump included, formanually pumping water from a bucket, water tank, or other container. WARNING: Before using thewater pump, always make sure that there is water in the tank. Damage to the pump can occur if it isoperated without water in the tank and it will void your warranty. If the pump makes “groaning” sounds,it is probably due to lack of water in the tank or the pump is simply running an air bubble through thesystem.To install:1) Part (1) is found in the plastic bag inside your oven cavity,along with the oven feet.)2) Connect the pipe (1) of the filter to the pump (3) by pushing itonto the nipple of the pump sticking out of the back of theoven, as shown.3) Insert the filter into a water tank (such as <strong>Cadco</strong> modelXC655) or other water container.4) Connect oven to power supply.5) Use only decalcified water.• Hot air and steam will exit the oven from the back exhaust port. During most cooking cycles, you willhave hot and humid exhaust coming out from this exhaust port (temperature and humidity of this exhaustdepend on the cooking parameters being used.) The steam that comes out of the exhaust port can also bevented outside if desired.4
II. INSTRUCTIONS FOR THE USERNever allow grease splatters or spills to collect on the inside walls, floor, orceiling of your oven. A simple cleaning with soap and water is usually enoughto keep your oven spotless and in “like new” condition for years. Your ovenshould never be cleaned with a water hose or anything more powerful than aspritz bottle. For tougher cleaning and built up grease, we suggest using FoamPlus® from Discovery Products Corporation (Tel. 877.822.8500.)1. INSTRUCTIONS FOR THE OPERATORYou will find important information about maintaining and operating your new oven in this manual.Please read the manual and become familiar with your new oven before you begin to operate it. Keep themanual in a safe place and make sure everyone reads it before operating the oven. Please use only <strong>Cadco</strong>authorized service centers and always require quality UNOX-OEM parts. Failure to comply with thesestandards can compromise safety and will void your warranty.2. NOTES FOR USE• Your <strong>Cadco</strong> oven was designed to cook food and must be used only for that specific purpose. Any otheruse may void your warranty. The oven allows you to work between 175ºF and 500ºF. It is suggested thatyou allow about 2-3” between trays for proper air circulation during the cooking process.Use your <strong>Cadco</strong> oven for:♦ Baking all types of bread and pastry, both fresh and frozen.♦ Cooking any meat, fish, or fowl.♦ Rethermalizing any cooled or frozen cooked foods.♦ Cooking (not steaming) any kinds of vegetables.• Please avoid salting your food products while they are inside the cooking cavity. Salt is very corrosiveand may, over time, damage the interior of your oven.3. CONTROL PANELTIME TEMPERATURE PILOT LIGHT HUMIDITY BUTTON3.1 TIME DIAL• To operate your oven, you must first turn the time dial clockwise to the time youchoose, from 0 to 60 minutes (if you’re facing the oven, it is the dial on the leftside of the control panel).• You may also turn the time dial counterclockwise and click the dial over tooperate the oven continuously, until you manually turn the knob back to “0”.• Whether you have chosen to set an actual time, or have set the time dial forcontinuous “on”, the internal light will turn on and the fan will begin spinning.3.2 TEMPERATURE DIAL• The cooking temperature inside the cooking chamber is set by the temperature knob (if you’re facing theoven, it is the dial on the right side of the control panel).• Turn the dial clockwise and set your desired temperature. At this time the green pilot light, located justto the right of the temperature dial will turn on. This indicates that the oven ispreheating.• Always preheat oven before placing food into it.• Please note: the green pilot light will fluctuate on and off throughout thecooking cycle. This indicates that the heating element is turning on and off tohelp keep the actual temperature within 5-10 degrees of the set temperature.5
3.3 HUMIDITY (On Models XAF-113, XAF-133, XAF-183, XAF-193)• These models have a manual humidity injection feature. Pressing the silver humiditybutton introduces a spritz of water to the cooking cavity, creating a moist cookingenvironment. The spritzing will continue until the button is released. The humidityindicator light will illuminate when the humidity feature is being used.• Warning! To keep from damaging the motors, the humidity injection button shouldonly be pressed for short [5-10 seconds] intermittent periods. These ovens are notdesigned for steaming foods.• When operating below 300°F, the oven may develop excess water in the cooking cavityif too much water is spritzed into the cavity..• WARNING: Before using the water pump, always make sure that there is water in the tank. Damage tothe pump can occur if it is operated without water in the tank and it will void your warranty. If the pumpmakes “groaning” sounds, it is probably due to lack of water in the tank or the pump is simply running anair bubble through the system.4. DOOR & FANS (FULL SIZE MODELS XAF-183 & XAF-193 ONLY!)• Fans stop automatically when oven door is opened.• <strong>Convection</strong> fans reverse direction approximately every 2 minutes for even baking.5. CLEANING THE OVEN• WARNING: Before starting any maintenance or cleaning operation, it is necessary to disconnectthe electrical power supply and wait for your oven to cool down.5.1 BEFORE USING THE OVEN♦ Clean the metal parts with hot soapy water and rinse thoroughly.♦ With the cooking cavity empty, heat the oven for about 30 minutes at a temperature of 350°F to “burnit in”.♦ Never wash the cooking chamber with acids, abrasives, or aggressive detergents.5.2 CLEANING THE COOKING CAVITY♦ Make sure to wipe up any and all spills as they occur.♦ At the end of the day (or as needed), clean the cavity using only proper products.♦ Never clean the stainless steel with acids, caustic detergents, abrasives or any products containingchlorine.5.3 CLEANING THE OUTSIDE OF YOUR OVEN♦ Wipe up spills, as they occur, with a damp cloth.♦ Never use a spray of water to clean the outside of your oven. This may damage the electricalcomponents and void your warranty.6. TURNING OFF IN CASE OF BREAKDOWNIf you encounter any kind of problem while your oven is in operation, or if you notice anything out of theordinary, follow these steps:♦ Unplug your oven immediately.♦ Consult <strong>Cadco</strong>, <strong>Ltd</strong>. at 877-603-7393 (Toll-Free)Failure to do so may result in a hazardous condition and void your warranty.6
III. COOKING PRINCIPLES1. COOKING MODES• CONVECTION COOKING♦ Food products bake in hot, moving air. This moving air removes the cool air barrier between the coolfood being cooked, and the heat of the oven chamber. It also helps your food products to cook evenlyand quickly. Foods cook faster with convection.• CONVECTION & HUMIDITY♦ Adding humidity while baking helps many products retain moisture. In some cases, such as with PateChoux, the product will gain in volume.♦ Moisture also makes the heat seem hotter (similar to a humid day) and products may cook a littlefaster.2. COOKING VARIABLES• TEMPERATURE♦ The exact setting of your oven temperature assures proper cooking of your food, both inside and outside:• Too low – your food cooks too slowly and will dry out.• Too High – your foods burns and cooks unevenly.♦ If you are new to convection cooking, <strong>Cadco</strong> suggests setting your LineChef TM <strong>Convection</strong> Oven to atemperature of about 30ºF - 50ºF lower than what you would have set it at in a conventional oven. Letthe food tell you what it needs; if it browns too fast, turn the oven temperature down.• TIME♦ The higher the temperature the quicker your foods will get done.♦ The quicker foods (especially protein products) cook, the more moisture they tend to lose.♦ Most bakery products can take high temperatures better than protein products.• HUMIDITY♦ The more humidity in the cooking cavity, the harder it will be for your food products to brown.• QUANTITY OF FOOD♦ One piece of chicken will take less time to cook than 2 or 3 pans of chicken. That’s “Mother Nature”pure and simple. <strong>Convection</strong> cooking is fantastic, but it’s NOT magic.♦ Overloading the oven can result in uneven cooking.♦ Avoid placing baked goods touching each other on the pan before baking.3. USE OF WIRE GRIDS AND SHEET PANS• It is recommended to use wire grids for meat items. This will elevate your food items and allow air tocirculate all around during the cooking process. Place your wire rack in a sheet pan to collect the juice.This reduces clean-up time also.• Use sheet pans for bakery items such as pastries, bread and rolls, and cookies.IV. MAINTENANCE1. ORDINARY MAINTENANCE• All maintenance operations must be done only by trained qualified personnel.• Before starting any maintenance operation, disconnect your oven from the electrical power supply andwait for it to cool down.• The parts that need ordinary maintenance can be reached by removing the front control panel and theback of the oven.2. SPECIAL MAINTENANCE• All maintenance operations must be done only by trained qualified personnel.• Before starting any maintenance operation, disconnect your oven from the electrical power supply andwait for it to cool down.7
2.1 REPLACEMENT OF INTERNAL LAMPTo replace the internal lamp:• Disconnect your oven from the power supply system and let it cool down.• Remove the side rails.• Unscrew the glass cover and replace the lamp with an identical bulb.• Screw the glass cover back on.• Reassemble the side rails.2.2 RESET THE SAFETY THERMOSTAT• This oven is equipped with a manually resettable safety thermostat designed to protect the oven againstoverheating. If there is an intervention, it completely deactivates the oven to avoid permanent damage.• To reset this device, remove the black cap positioned to the bottom of theback of the oven by unscrewing it counterclockwise, push the reset buttonunder the cap, and replace the black cap.• If the safety thermostat shuts your oven off, before turning your oven backon, be sure to check your entire circuit to verify that the total amps beingdrawn by all the appliances, lights, etc. on that circuit do not exceed theamps available on that circuit.V. OPTIONAL <strong>MANUAL</strong> CONVECTION OVENS ACCESSORIES• OV-HDS Heavy-Duty 2-Oven Stand with Wheels (half +/or quarter size size) Accommodates two half or quarter size <strong>Cadco</strong> <strong>Convection</strong> <strong>Ovens</strong>• OST-195 Oven Stand with Wheels (full size)(Note: Shorter oven feet must be used when placing oven on this stand.) Accommodates oven models: XAF-183, XAF-188, XAF-193 & XAF-195• OST-34 Oven Stand with Wheels (half size) Accommodates oven models: XAF-111, XAF-113, XAF-115, XAF-130, XAF-133,XAF-130 & XAF-135• Oven Baskets: Stainless steel oven baskets enhance even airflow around food for quicker, crisper results COB-F Oven Basket (Full Size) COB-H Oven Basket (Half Size) COB-Q Oven Basket (<strong>Quarter</strong> Size)• Pizza Heat Plates provide very fast baking times, up to 50% faster than traditional baking pans.It takes as little as 4-5 minutes to bake a fresh Pizza on the aluminum heat plate! The plates aremanufactured from alloys which provide superior heat storage and produce fast, evencooking of both top and bottom of the food product simultaneously. These plates alsohelp maintain better temperature stability under normal door opening/ closingconditions. Great for pizza, breads & other baked goods. CAP-F Pizza Heat Plate (Full Size) CAP-H Pizza Heat Plate (Half Size) CAP-Q Pizza Heat Plate (<strong>Quarter</strong> Size)• XC605 Air Deflector Plate Deflects the strong airflow in oven cavity; for baking delicate foods like puff pastry Attaches quickly to fan grid; no tools required.8
VI. Remove & Reattach Oven DoorOpen doorcompletelyas in Fig. 1Fig. 1Fig. 2Using ascrew driveror other object,swing doorsafety lockdown as shownin Figs 2 – 3 – 4Fig. 3Fig. 4Fig. 5With door completely downand door safety lock in itsdown position, move door ina closing directionuntil door safety lockstops the closing actionas in Fig. 5.~~~~~~~~Hold door as shown in Fig. 6.Fig. 6Slightly lift andswing doorout of unitas shown inFigs. 7 & 8Fig. 7Fig. 8Fig. 9For the door to beproperly installed,the notch on the bottomof the hinge finger (Fig. 9)must be seated inthe inner door hinge frame(Fig. 10)Reverse above procedure to attach door to oven - see Figs. 7 & 8Fig. 109
VII. COOKING GUIDEThe first and most important step will be: Have your new oven hooked up to the proper power and (ifapplicable) water source. If there is any doubt about the proper power or the connections, have the oveninstalled by a qualified electrician according to your local codes.Use this cooking guide to help determine which time and temperature works best for your specific fooditems. If your specific product isn’t addressed, you will probably find something similar.You’ll find many helpful hints in this cooking guide. Our aim is to help you use your <strong>Cadco</strong> LineChef TMDigital <strong>Convection</strong> Oven to its fullest, rather than teach you how to cook.The <strong>Cadco</strong> LineChef TM <strong>Manual</strong> <strong>Convection</strong> <strong>Ovens</strong> work on the principle of moving air. This air movementremoves the “Hot Spots” so we get very even browning, rapid preheats (10 minutes), and faster cooking.Here are some basic do’s and don’ts and guidelines for convection cooking: Use pans that have sides no taller than a common sheet pan. Preheat the oven to approximately 40º-50ºF above your baking temperature. After loading your product, remember to reset the oven to the desired baking temperature. If you notice uneven cooking, set the oven temperature down 25º-30ºF. Let the product tell you if itneeds more or less heat. Aluminum foil can get pulled into the fan and cause damage. Don’t overload the oven. Maintain a minimum 2”-3” between the product being cooked and the next shelf. Remove shelves ifnecessary. Your <strong>Cadco</strong> <strong>Convection</strong> Oven is a powerful tool, so don’t hesitate to utilize its full capacity. Keep your oven clean. Wipe up spills as they occur. Never allow grease to build up on the interior ofthe oven, or collect on the bottom of the cooking cavity. Frozen products draw more heat from the oven and may require a longer recovery time. When roasting meats we suggest using a cooking rack to elevate the product and facilitate evenroasting. Smaller cuts such as boneless chicken breasts, or seafood portions may be baked directly onthe pan if desired. Lower temperatures will reduce shrinkage and save money with all of your roasted meat products. Higher geographical elevations will often affect cooking time and temperature parameters.Have fun and experiment with your new <strong>Cadco</strong> <strong>Convection</strong> Oven. Your times and temperatures will varywith the different products you prepare. Refer to this <strong>Cadco</strong> Cooking Guide for direction or contact the<strong>Cadco</strong> Certified Executive Chef (877.603.7393) or the <strong>Cadco</strong>, <strong>Ltd</strong>. website (www.cadco-ltd.com), forspecific answers to your cooking needs. ***A FREE Video Demonstration DVD is available from <strong>Cadco</strong> tofamiliarize your employees with these ovens.We look forward to hearing from you,<strong>Cadco</strong>, <strong>Ltd</strong>.10
• CookiesBaking TemperatureOne of the most common items baked in your <strong>Cadco</strong> <strong>Convection</strong> Oven will be cookies. There aredozens of cookie manufacturers, and their products all have different baking characteristics. Most ofthe cookie recipes suggest a baking temperature of 325º - 350ºF. We have found that “Lower is better”.Over the years we have found that cookies bake best in a preheated oven at about 285º - 300ºF,assuming a 1.5 ounce cookie from refrigerated/frozen dough. By baking at a lower temperature, theytend to remain higher after cooling and produce a more eye appealing finished product. Bake for about12-18 minutes, depending on what you think is the perfect cookie.VariablesLower the temperature for larger cookies.Cookies bake from the outside in...so to make picture perfect cookies we have to consider twovariables before we begin baking, in any oven, or we may not be happy with our results. These twofactors come into play mostly when we make cookies from "scratch", (but they apply to all cookies):1. The temperature of the dough• Room temperature dough will spread out more than frozen or refrigerated dough.• The colder the dough, the less the cookie will spread / flatten out during baking.• Dough baked from frozen produces a thicker, better-looking cookie than ones that are baked fromrefrigerated, or room temperature, which will spread out and therefore, have less height.2. The fat content of the dough.• A higher ratio of fat to flour will make the cookie spread out more during baking.• CheesecakePeople generally love cheesecake and it’s not hard to make. Let’s start with a basic cheesecake batter: #3 cream cheese 1 ½ cups sugar 5 eggs lemon to taste 2 cups Half and Half (approx.)This will make enough batter for a 10” springform pan.There are so many fun options for making cheesecake, such as: Substitute chocolate milk for Half and Half in a triple chocolate cheesecake. Orange juice for an orange cheesecake. Baileys Irish Cream. Cookie dough. Turtle cheesecake. Lemon poppy seed. Pumpkin…peanut butter…pistachio…what else?For crust, spray the inside of the springform pan with vegetable oil and dust it with graham crackercrumbs. There are endless options for crusts such as shortbread, brownie, or Ladyfingers, or a simpledusting of graham crumbs. It’s your choice.Bake in a 200ºF oven for 4 hours, then cool, cut and serve.Have fun with some imaginative sauces also: Walnut, caramel and chocolate chip sauce. Lemon sauce. Pear sauce Pistachio sauce. Cinnamon Squared² Sauce (cinnamon stick and candies).11
• Muffins 15 minutes at 325ºF/ 20% humidity works well for most standard size muffins. For jumbo muffins set the oven temp at 300ºF/ 20% humidity and bake the muffins for 20 minutes oruntil a toothpick comes out clean. The more dense your batter is the longer your muffins will take to bake.• BiscuitsFor the test we used a basic baking powder biscuit about 3” in diameter. Bake at 350ºF for 10-12minutes.Some suggestions: A simple glaze can be made of powdered sugar and water. Glaze while your biscuits are still hot. Try peanut butter, lemon poppy seed, cinnamon raisin, cheese and bacon, sour dough, and of course,good old buttermilk biscuits. Drop biscuits take about the same amount of time to bake and they are wonderful. Call me and I’llshare a family favorite with you.• Bread Large loaves (1 lb -1 ½ lb) baked in 30 - 40 minutes at 325ºF. We found that you can bake dinner rolls using the same method as you do for biscuits.• PiesThe variables for bakery products are endless, and pies are no exception. These are some of the thingswhich will affect your cooking time: Amount of sugar in the crust. Size of your pie tin and the amount of filling used. Butter or oil in the crust. Amount of shortening to flour. Your choice of canned or fresh filling.For test pies we used 9” pie tins with homemade apple filling. Our crust was made using a basic 3-2-1 recipe: 3 parts flour 2 parts shortening 1 part (approx.) water With a little salt and a four finger pinch of sugar addedThe <strong>Cadco</strong> LineChef TM <strong>Convection</strong> Oven was preheated to 325ºF and the pies were baked for 45 minutesto an hour depending on the filling. The aroma coming out of the <strong>Cadco</strong> Training Center was fantastic!• PizzaThere are so many pizzas it’s hard to know where to start. The pizza we used for our tests were the11”, frozen, self rising type from the grocery store. They were all baked at 350ºF for 8 - 20 minutes on<strong>Cadco</strong> Pizza Heat Plates (see page 8), and our results were great on all of them. (The pizzamanufacturers suggested a temperature of 400ºF for 20-30 minutes).12
• “Oven Fried” ChickenLet’s say that you want to serve fried chicken in your food service operation but you don't want all ofthe problems associated with a chicken program. You don't want to deal with an expensive breadingprogram, the high insurance costs, constantly buying oil, employee training, the dangerouscleaning/filtering of French fryers, and the high cost of purchasing equipment. <strong>Cadco</strong> has the answer:how about "Oven Fried" chicken. We take cooked, frozen, browned chicken and season it with theseasoning(s) of your choice to produce the most delicious, unique chicken your customers have evertasted...and it's all done in your oven in about 30 minutes. Your chicken goes from the freezer, to theoven, to the display case (and your customers) in less time than it takes to fry from raw.We suggest Pierce Super Chicken; lay it out in a <strong>Cadco</strong> Oven Fry Basket (Model COB-F/Full Size),and season the pieces with any seasoning of your choice. Then you simply bake it in the <strong>Cadco</strong>LineChef TM <strong>Convection</strong> Oven at 325ºF for 20 minutes and it's ready to serve. You can have Cajun,Lemon Pepper, Italian, TexMex, Smoky, Jamaican, or…Whatever flavor you want, “Oven Fried”Chicken!• “Rotisserie Style” ChickenTired of paying the grocery store to make those delicious rotisserie chickens for you? Once you makeyour own “Rotisserie” chickens, in your <strong>Cadco</strong> <strong>Convection</strong> Oven, you’ll never buy another cookedchicken from the store again (and I’ll bet your customers won’t either). You’ll need a baking sheet pan and a cooking rack to keep your chicken elevated during the cookingprocess. The cooking rack allows air to circulate all around the chicken, similar to a rotisserie. Youcan also place your chicken directly on the oven rack and let it drip into a pan below. Caution! Never allow grease to drip onto the bottom of the oven!MethodSeason a #3 chicken and place it on the cooking rack. (For options, see below)Preheat your LineChef TM <strong>Convection</strong> Oven to 325ºF.Roast the chicken for about 45 minutes. If a crispier product is desired, raise the temperature to about 350ºF.Cook chicken to an internal temperature of 180ºF.Stuffing the chicken will increase cooking time and it is NOT suggested.OptionsSlip slices of lemon under the skin on the breast before roasting.Italian sausage under the skin of the breast before roasting.Sun dried tomatoes, fresh herbs, under the skin before roasting.Spray the chicken with olive oil, season, and dust with mashed potato flakes before roasting.Save the chicken fat after roasting and chill it. Mix the fat, and a little stock, with left over shreddedchicken, and season with salt and pepper, to make a spread on slices of French bread. Needless tosay…this is NOT heart-healthy fare, but it sure is good.Truss the chicken before roasting for more even cooking and eye appeal. Call for my quick method oftrussing a bird.• Burgers Lay your ¼ pound frozen burgers out onto a sheet pan and season to taste. Place them into 350ºF ovenfor about 10 to 12 minutes. Hamburger should be cooked to an internal temperature of 165ºF to be safe according to HACCPguidelines. Try cooking your burgers at 250ºF for 15 to 20 minutes and notice how juicy they are. Browning isnot as pronounced using the low temperature method, but the added flavor makes up for it.13
• Rare Roast Beef Rare beef is considered by most people to be 130ºF. The USDA states that full muscle beef when roasted to an internal temperature of 130ºF andmaintained at that temperature for 121 minutes is considered safe to eat. Overnight roasting requires a roast that is 7 pounds or larger. Seasonings will penetrate the roast about 1/4” deep. Cook elevated on a roasting rack so we have air circulation all around during the roasting process. Cook over a shallow sided pan to collect the pan juices for jus or gravy.Roast Tenderloin (quick roast and serve method) – Preheat your oven to 400ºF Load the tenderloin in the oven and reduce the roasting temperature to 350ºF Roast the tenderloin to an internal temperature of 120ºF and remove from the oven. The roast willcontinue to rise in temperature. In about 10 minutes (130ºF) the tenderloin will be ready to slice and serve• Jus Use your pan drippings to make jus. Many people say “I’m going to make some au jus”. This isincorrect and professionals will notice. Au jus means “with juice”. Prime Rib becomes “Prime Rib AuJus” when you add jus to the plated Prime Rib. Use beef/veal/chicken stock to dissolve all that wonderful tasting brown gooey material in the bottomof your roasting pan. Some add a little red wine, some add tomato, and some make their jus to theme:Cajun, Southwest, Oriental…..you get the idea.14
VIII. WARRANTY• <strong>Cadco</strong>, <strong>Ltd</strong>. warrants all products (in the United States and Canada) to be free from defects in materialand workmanship for a period of one year from date of purchase, unless otherwise noted below.***• Warranty does not apply in cases of misuse, abuse or damage from external service or repair attempts byunauthorized personnel.• Copy of original invoice is required for proof of purchase date for warranty coverage.• ALL WARRANTY / SERVICE ISSUES MUST BE AUTHORIZED FIRST! PLEASE CALL TOLL-FREE (877) 603-7393.• WARRANTY PERIODS:LineChef TM <strong>MANUAL</strong> CONVECTION OVENS:• 120 Volt Models (XAF-103, XAF-113): Two Year Limited Warranty (One year Carry-in service &parts, 2nd year parts only)***• 208-240 Volt Models (XAF-133, XAF-183, XAF-193): Two Year Limited Warranty (One year Onsiteservice & parts, 2nd year parts only)******ALL OVENS (INCLUDING LineChef TM <strong>MANUAL</strong> CONVECTION OVENS):• 90 day warranty on all light bulbs and gaskets. NOTE: These items are easily changeable on-site byuser and do not qualify for service center warranty assistance. Call <strong>Cadco</strong> directly for warrantyreplacement of these items.• 30 day warranty on glass.• ALL CONVECTION OVEN MOTORS ARE BACKED BY A ONE YEAR WARRANTY• WARRANTY PROCEDURES:The customer is responsible to ship or deliver Carry-in service items to a <strong>Cadco</strong> authorized servicecenter, or directly to <strong>Cadco</strong>**, along with a copy of the original invoice or sales receipt for proof ofpurchase date, and a description of the problem.**If returning a unit directly to <strong>Cadco</strong>, <strong>Ltd</strong>. for warranty repair, please call us first for a ReturnAuthorization Number. Return Authorization Number MUST be written on outside of carton totrack the unit and avoid service delays.*If shipping the unit to <strong>Cadco</strong> or to a service location, be sure to pack it securely and insure it for itsoriginal purchase price. <strong>Cadco</strong> is not responsible for damage or loss of unit in transit to us or a servicecenter.Please do not take your unit to the store where you purchased it for warranty repair. For the <strong>Cadco</strong>authorized US service agent nearest you, please contact:<strong>Cadco</strong>, <strong>Ltd</strong>., 145 Colebrook River Road, Winsted, CT 06098Tel. (860) 738-2500, Fax (860) 738-9772E-mail: info@cadco-ltd.com, Web site: www.cadco-ltd.com4/20/2012 RV1315