Lock-N-Load Bench Rest Powder Measure - Hornady
Lock-N-Load Bench Rest Powder Measure - Hornady
Lock-N-Load Bench Rest Powder Measure - Hornady
- No tags were found...

You also want an ePaper? Increase the reach of your titles
YUMPU automatically turns print PDFs into web optimized ePapers that Google loves.
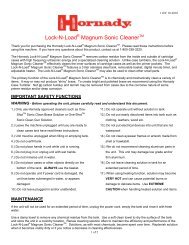
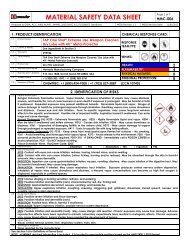
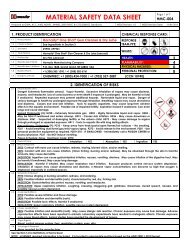
Your “<strong>Bench</strong> <strong>Rest</strong> Grade LNL <strong>Powder</strong> <strong>Measure</strong>” has been nickel plated forlong life and corrosion control, however it has also been treated with a rustpreventative, which must be removed before use.We recommend that you clean and degrease all moving parts with <strong>Hornady</strong> OneShotGun Cleaner and Dry Lube. (Black Label)To Disassemble:1. Set the rotor; with the Metering Device horizontal, press the Push Button andhold it down while removing the Metering Device.2. Remove the Handle, from the <strong>Powder</strong> <strong>Measure</strong>, by removing the two attachingscrews with a 1/8” hex wrench.3. Slide the Rotor out of the Housing by pressing gently on the handle side of theRotor.4.Be careful not to drop or otherwise damage the Rotor while it is out of the Body.5. Turn the Micrometer thimble in the full forward position “0” to extend therod and head from the Sleeve. (It should not be necessary to disassemble theMicrometer unit.) Spray all metal parts liberally with <strong>Hornady</strong> One Shot-GunCleaner and Dry Lube. Be sure all rust preventative is removed.6. Allow it to dry thoroughly before reassembling it.To Assemble:Reverse the procedure in steps 1-4.The Rotor and Housing are very closely fit and must be properlyaligned to reassemble.DO NOT FORCE IT, OR IRREPAIRABLE DAMAGE WILL OCCUR.
To Operate and Adjust:1. Attach the Mounting Bracket to your bench using (two) #14 BindingHead Sheet Metal Screws or other suitable hardware. The screws should beapproximately ½” back from the edge of the bench, and the smaller of the twolarge holes should be suspended off the bench.2. Place the <strong>Powder</strong> <strong>Measure</strong> in the hole of the Mounting Plate; and thread the<strong>Lock</strong> Nut onto the <strong>Powder</strong> <strong>Measure</strong> and lock in place with the 3/32’’ hex wrenchif desired.3. Select the appropriate Drop Tube (the small for .20 through .25 caliber,the large for 6.5mm and larger), and screw it into the bottom of the <strong>Powder</strong><strong>Measure</strong> until it is secure against the internal shoulder. (Finger tight is all that isrequired.)Precautions:1. To remove the metering device, always be sure to drop any charge first.Then, with the handle and the metering device horizontal, depress the buttonand remove the unit. If you allow the handle to drop, you will empty the hopper.2. Always be sure that your Micrometer Metering device is locked in placebefore operating.3. Always verify your charges with a scale before loading.4. Any moisture in the unit will cause powder to stick, and charge weights willvary drastically.
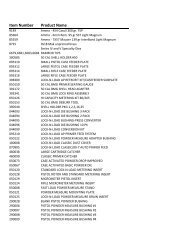
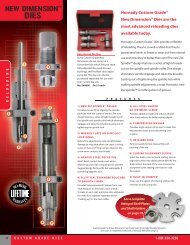
Parts BreakdownItem No.Production PartNumber Qty. Description1 170405 1 HOPPER CAP2 398520 1 HOPPER3 392740 1 BODY4 392719 2 SCREW BHSCS 10-32 X 3/85 392752 1 HANDLE ASSEMBLY6 392748 1 CLIP C 5/327 392749WASHER STEEL POWDER1 MEASURE8 392768 1 SPRING 8-32 X 3/8 BHCS9 398394 1 METERING PLUNGER10 398391 1 ROTOR11 398393 1 SLEEVE12 398396BUTTON BENCH REST1 POWDER MEASURE13 390411 1 O-RING 1/2 ID X 11/16 OD14 392766 1 O-RING 1 1/2 ID X 1 5/8 OD15 390702 1 SMALL DROP TUBE16 390701 1 LARGE DROP TUBE17 398395 1 THIMBLE18 392760 1 MOUNTING BRACKET19 044000 1 LOCK RING20 390656 1 3/32" HEX WRENCH21 392767 1 SCREW BHSCS 8-32 X 3/822 390653 1 1/8" HEX WRENCHP.O. Box 1848 • Grand Island, NE 68802-1848(308) 382-1390 • www.hornady.com05/07/07 780307A