

V300 Plus User's Guide - Sonocaddie
V300 Plus User's Guide - Sonocaddie
V300 Plus User's Guide - Sonocaddie

Create successful ePaper yourself
Turn your PDF publications into a flip-book with our unique Google optimized e-Paper software.
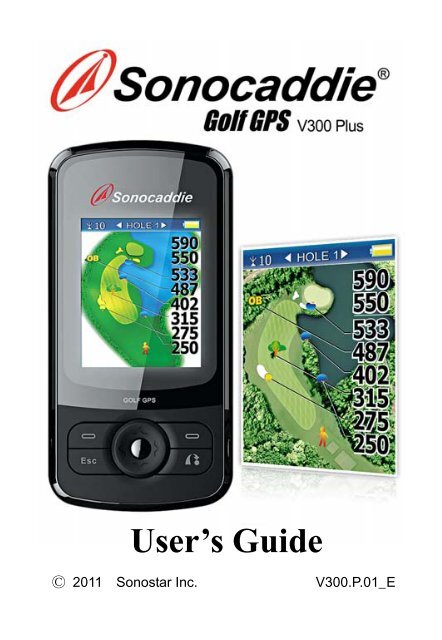
User’s <strong>Guide</strong>C 2011 Sonostar Inc.<strong>V300</strong>.P.01_E
WelcomeCongratulations on purchasing the <strong>Sonocaddie</strong><strong>V300</strong> <strong>Plus</strong>. It is the easiest and most advanced golfGPS device available today with its intuitive anduser-friendly design that includes many helpfulfunctions and multiple ways of navigating. ThisUser’s <strong>Guide</strong> provides you with simple tounderstand instructions for operating your new golfGPS. Please read the entire User’s <strong>Guide</strong> to fullyunderstand exactly how each feature operates. Tolearn more about <strong>Sonocaddie</strong>, please visitwww.sonocaddie.com.The <strong>Sonocaddie</strong> <strong>V300</strong> <strong>Plus</strong> serves as your ownpersonal golf caddie guiding you through each holeon the course to get the precise distance informationfor you to play your best. Using sophisticated GPSsatellite technology, the <strong>V300</strong> <strong>Plus</strong> determine thedistance from any point on the course to the greenand other strategic targets, even without a clear lineof sight like all golf laser range-finders require.Although most of the courses are preloaded into<strong>V300</strong> <strong>Plus</strong>, if you can not search the course youwant, all you have to do to get this valuableinformation at your fingertips is download aparticular golf course that you plan to play into the<strong>V300</strong> <strong>Plus</strong> from the <strong>Sonocaddie</strong> website using your1
‣ <strong>Sonocaddie</strong> should not be used while drivingany vehicle including golf carts. Always place<strong>Sonocaddie</strong> in a secure place to avoid anyimpact which could cause damage to it.‣ The USB cable provided is solely for the useof <strong>Sonocaddie</strong> devices (see the accessory list).Do not connect any other cable for datatransfer as this could damage the data port(I/O port) on the <strong>V300</strong> <strong>Plus</strong>.‣ A full battery charge may take up to fourhours, however, you should NOT chargedevice over 8 hours.‣ If you do not plan to use the device for a longperiod of time, please remove the battery toavoid the battery leaking and corroding thebattery case.Cautions:‣ The <strong>Sonocaddie</strong> may take at least 10-15minutes to receive satellite signals after youturn it on. This may take longer if the devicehas been off for more than four hours, or if itis more than 100 miles away from where youlast used the <strong>Sonocaddie</strong>.‣ The Global Positioning System (GPS) isoperated by the government of the UnitedStates, which is solely responsible for its3
accuracy and maintenance. The system issubject to changes which could affect theaccuracy and performance of all GPSequipment.‣ <strong>Sonocaddie</strong> has a built-in GPS antenna at thetop of the device. This antenna should faceupward to gain the best signals and should notbe covered with anything as this may affectthe quality of reception and accuracy of thedevice.‣ Trees and/or buildings may adversely affectcoverage/reception levels and accuracy.Optimal performance will occur by staying inwide open areas.4
Table of ContentsChapter 1 - Getting Started 7Chapter 2 – Introduction 92.1 <strong>Sonocaddie</strong> Features 102.2 Navigation 112.3 <strong>Sonocaddie</strong> <strong>V300</strong> <strong>Plus</strong> Main Screen 112.3.1 Menu Items (The applicable chaptersections are noted in parenthesis.) 122.3.2 Screen Display Items 13Chapter 3 - Before Starting a Game 143.1 Adjust the <strong>Sonocaddie</strong> <strong>V300</strong> <strong>Plus</strong> Settings 143.2 Install <strong>V300</strong> <strong>Plus</strong> Software and How toDownlaod Your Course Data 15Chapter 4 – Starting a Game 164.1 Start with Existing Courses 174.1.1 Course Auto Search 184.1.2 Search Courses from Course List 264.2 Select the First Hole 194.3 Understanding the Color Course Layout,Satellite Imagery and Basic View Data 194.4 Carrying the <strong>Sonocaddie</strong> <strong>V300</strong> <strong>Plus</strong> 23Chapter 5 – Using the <strong>Sonocaddie</strong> <strong>V300</strong> <strong>Plus</strong> duringa Round 235.1 View the Green Close-Up 245.2 Track Your Game Feature 255.2.1 Shot Track 265
5.2.2 Auto Track 265.3 Measure your Shot Distance 275.4 Use the Digital Scorecard 28Chapter 6 – Editing an Existing Course 316.1 Understanding the Edit Screen 316.2 Edit an Existing Target on a Hole 336.3 Add a New Target to a Hole 356.4 Delete a Target on a Hole 35Chapter 7 – Managing Course Information on the<strong>Sonocaddie</strong> <strong>V300</strong> <strong>Plus</strong> 367.1 Delete a Course 367.2 Rename a Course 377.3 Create a New Course 387.3.1 Name the New Course 387.3.2 Map the Targets on the New Course 39Chapter 8 – Review Stored Information after theRound 418.1 Use the <strong>Sonocaddie</strong> <strong>V300</strong> <strong>Plus</strong> to ReviewInformation 428.1.1 Review Prior Scorecards and Tracks 428.1.2 Delete Prior Scorecards and Tracks 438.2 Manage Course Information under theMyCourse Tab 43Appendices 44Frequently Asked Questions (FAQs) 45Regulatory Agency Compliance 506
Chapter 1 - Getting StartedBefore using the <strong>Sonocaddie</strong> <strong>V300</strong> <strong>Plus</strong> for the firsttime, charge the battery for at least 4 hours. Undernormal conditions, a full battery charge may take upto 4 hours if the device is turned off, and longer if itis turned on for use. To charge the <strong>V300</strong> <strong>Plus</strong>,remove the back cover and insert the suppliedrechargeable battery correctly as shown.Warning: We recommend that you never chargethe device over 8 hours.Locate thecharging/data port onthe right side of the<strong>V300</strong> <strong>Plus</strong>, pull out therubber cover, and carefully insert the mini-end ofthe supplied USB cable into the port. Connect theother end of the cable to the USB port on yourcomputer. (Fig. 1, 2)The screen indicates that thedevice is charging and also when it has reached afull charge. You can also charge the device with thesupplied AC Wall Charger Adapter or an optional12V Car Adapter (Fig. 3).The battery should last approximately 8~12 hoursunder normal operation. Please note that using7
longer “Backlight” durations in the Settings willdrain the battery quicker. You can confirm theremaining battery level with the <strong>V300</strong> <strong>Plus</strong>on-screen battery gauge.(Fig. 1, 2)Scale of power(Fig. 3)ConditionsFullEmptyRegister Your Membership & Unlock UnitImportant!Please register your membership once youreceived <strong>Sonocaddie</strong> <strong>V300</strong> <strong>Plus</strong>. The unit will belocked after turning on five times and remain itsstatus until your registration completed. Tounlock <strong>V300</strong> <strong>Plus</strong>, you must login <strong>V300</strong> <strong>Plus</strong>8
software with the unit connected.<strong>Sonocaddie</strong> <strong>V300</strong> <strong>Plus</strong> can be operated withoutregistration for the first five times under BasicView (icon mode) only. For any other colorcourse layout/ satellite imagery downloads,please register and upgrade your membership.Chapter 2 – IntroductionThe <strong>Sonocaddie</strong> <strong>V300</strong> <strong>Plus</strong> has many unique anduseful features to help you earn your best scoresever as shown below. The Course Layout is apatented color view of each hole that allows you tosee your exact position on every hole in real timeand the precise distances to critical targets. TheGreen View displays a full green image withdistances to the front, middle and back of the green.The Edit and Map functions let you quicklycustomize or create a golf hole right on the spot. TheMark function provides an easy way to quicklymeasure the distance of any shot. The Track Shotfunction gives you the ability to record your shotlocations from anywhere on the course for reviewlater. And the Scorecard feature provides a digitalscorecard for each course and the “Pro” Scorecardgives a full analysis of each round. The <strong>V300</strong> <strong>Plus</strong>has enough memory to store 100 different golf9
courses, record 100 scorecards, and track the golfshot locations for up to 100 rounds.2.1 <strong>Sonocaddie</strong> Features1 Power button2 Scorecard button3 Left soft key4 Right soft key5 ESC/ back to theprevious screen.6 Mark button7 5-way key:Left/Right/Up/Down/Select & Save8 Mini-USB Cable &Charging Port9 GPS Antenna10 Belt Clip Hook11 Battery Cover10
2.2 NavigationNavigating the <strong>Sonocaddie</strong> is simple. All functionsare available from the main screen using the frontpanel soft keys. In addition, the left and right sidebuttons provide a quick way to access frequentlyused features.• 5-Way Key – use the 5-Way key (#7) to move thescreen cursor and select menu items. Press theup/down or left/right arrows to scroll the cursoraround the screen and press the center key toexecute a highlighted selection.• Front Panel Soft Keys – use the right soft key (#4)or use the left soft key (#3) to select the actionshown directly above those keys. Use the Escapekey (#5) at any time to return to the previousscreen, or hold it down for three seconds to returnto the MAIN screen. Press the “Mark” button (#6)to measure your shot length.• Side Buttons – side buttons provide access topopular functions. Press the left “Scorecard”button (#2) to instantly bring up a digitalscorecard.2.3 <strong>Sonocaddie</strong> <strong>V300</strong> <strong>Plus</strong> Main ScreenTo turn on the <strong>Sonocaddie</strong> <strong>V300</strong> <strong>Plus</strong>, press the topleft-side Power button (#1) for at least 3 seconds.After a few seconds, the “MAIN” screen belowappears on the device. To turn off the <strong>Sonocaddie</strong>,11
press the Power button again for 3 seconds, or select“OFF” from the “MAIN” screen. When the“Shutdown Now?” screen appears, press “YES”with the right soft key.Satellite Signal MAIN Battery LevelGPS Status Record SettingsMy Course Auto Search Course ListOff Mark InfoTime Display Menu TextLeft Soft Key Action2.3.1 Menu Items (The applicable chapter sectionsare noted in parenthesis.)• GPS Status: Use this feature to get detailedinformation about satellite reception.• Record: Use this feature to view all the shotlocations by hole or scorecard records thatyou recorded during a game. (8.1)12Right Soft Key Action
• Settings: Use this feature to customize the<strong>Sonocaddie</strong> settings to your individualpreferences. (3.1)• My Course: Use this feature to select a courseto play from the list of courses youdownloaded. (3.3)• Auto Search: Use this feature to search theavailable courses in the specific distance.(4.1.1)• Course List: Use this feature to search thecourses by COUNTRY or HISTORY. (4.1.2)• Off: Use this feature to turn off the <strong>Sonocaddie</strong>.(2.3)• Mark: Use this feature to measure the distanceof any shot. (5.3)• Info: Use this feature to review the softwareversion number for the <strong>Sonocaddie</strong>.2.3.2 Screen Display Items• Satellite Signal: Displays the current numberof satellites the <strong>Sonocaddie</strong> is receiving.• Battery Level: Displays the amount of batterylife remaining.• Time Display: Displays the current time on theMain Screen only.Soft Keys: Displays the action that is available byselecting the right or left soft key.13
Chapter 3 - Before Starting a Game3.1 Adjust the <strong>Sonocaddie</strong> <strong>V300</strong> <strong>Plus</strong> SettingsThe <strong>Sonocaddie</strong> has ten settings to customize yourdevice. Follow these steps to change the settings;1) Select “SETTINGS” from the “MAIN” screen.2) Press the up/down buttons on the 5-way key toscroll down through each setting.3) Press the left/right buttons on the 5-way to scrollthrough the available options for that setting.4) To exit the screen without changing the settings,press the “ESCAPE” key on the front key pad.5) To save settings, press center key on the 5-waykey, or select “SAVE” with the right soft key.6) To return to the default factory settings, press“RESET” with the left soft key.14
1. LANGUAGE: English/ French/ Deutsch/Spanish / Japanese/ Traditional Chinese/Simplified Chinese2. TIME ZONE: Please choose your correct timezone3. DISTANCE UNIT: YARD / METER/ MILE/KILOMETER4. THEMES: BLUE / PURPLE/ GREEN/ORANGE5. BRIGHTNESS: OFF/1/2/3/4/56. BACKLIGHT TIME: ALWAYS/ 15sec/30sec/ 60sec7. AUTO TRACK: ON /OFF8. TRACK INTERVAL: 10sec / 20sec/ 30sec9. AUTO HOLE: ON/ OFF10. SCORECARD: NORMAL / PRO3.2 Install <strong>V300</strong> <strong>Plus</strong> Software and How toDownload Your Course Data.This software is used for downloading course data.Please install it from enclosed CD or from websiteat www.sonocaddie.com. Please refer the Quick<strong>Guide</strong> for a better understanding of how to installsoftware and download course(s). The latest versionof Quick <strong>Guide</strong> is also available on thewww.sonscaddie.com.15
Chapter 4 – Starting a GameBefore you leave for the course, make sure the<strong>Sonocaddie</strong> <strong>V300</strong> <strong>Plus</strong> is fully charged. When youarrive at the course, immediately turn the device onbecause acquiring satellites can take up to 15minutes. The <strong>Sonocaddie</strong> <strong>V300</strong> <strong>Plus</strong> performs bestunder clear skies so the better the satellite reception,the better the device performs as the chart belowshows.Satellite SignalSatellite signal Accuracy0~2None3~5Poor5~6Fair6~8Good8~10Very good>10 OptimalTip: Selecting “SATELLITE” from the “MAIN’screen displays a screen with detailed satellitereception information. Refer to the Appendix at theend of this guide for an explanation of this screen.16
4.1 Start with Existing Courses4.1.1 Course Auto SearchSelect “AUTO SEARCH” from the “Main” menuto enter the searching function. Select a range from5 miles to 50 miles, and all courses within the areawill be displayed. The nearest course will be on topof the list. (NOTE: If a course is not displayed, it isnot in your <strong>Sonocaddie</strong> <strong>V300</strong> <strong>Plus</strong> Unit. See Section3.3 to update your course list, or 7.3 to self map acourse, or contactmapping<strong>V300</strong><strong>Plus</strong>@sonocaddie.com to have us tomap this course for you.) Press “More” to select thecourse you want to play or arrange the order ofcourses by distance or by course name.You must select a COURSE and a HOLE first. Then,SCORECARD function and REFERENCE POINTfunction can be used.(Note: This function can only be activated whenthere is GPS reception.)17
4.1.2 Search Courses from Course ListSelect “COURSE LIST” from “Main” menu to enterthe searching function. There are two methods foryou to search your course from available coursespreloaded in the device:1. By Country: All the courses are listed by country.You can find your course by selecting “Country”,“State” and “City”. Press “SEARCH” button afterevery selection, then you will see all the availablecourses within the area.2. By History: Previous play will automatically addto COURSE LIST sorted by history. This functioncan memorize the last 30 courses.18
Important!For above two functions to search the course, if youwant to edit the selected course, by pressing“COPY”, the selected course will be copied intoMY COURSE for you to edit the reference points.4.2 Select the First HoleFirst you must select the starting hole manually. The“Auto-Hole” feature then automatically advancesthe device to the next hole when you finish a holeand enter the next tee box. Note that Auto-Hole canbe set to off from the Settings screen (see Chapter3.1).4.3 Understanding the Color Course Layout,Satellite Imagery and Basic View DataIn <strong>V300</strong> <strong>Plus</strong>, each course data only can store onekind of maps, color course layout or satelliteimagery along with basic view data. When youdownload the courses, the dialogue box will pop outasking which kind of maps you prefer to download:color course layout, satellite imagery or both ofthem. If you choose to download both maps, youwould get two courses listed on the device, and theone with satellite imagery will have "*" sign infront of the course name. The process to access two19
maps are the same, therefore, in following guide, wewill demonstrate with color course layout and showyou more <strong>V300</strong> <strong>Plus</strong> functions.After selecting the first hole, the “Color CourseLayout” screen below appears displaying distancesto targets on a full-color, graphical view of theactual hole. The distances constantly change as youmove and a “Walking Golfer” symbol also moves toshow your actual location on the hole. In addition, asecond “Basic View Data” screen is available withthe same distance information except it shows thetargets on the hole without the layout view. Toaccess the “Basic View Data” screen, select“MORE” with the right soft key and “INFO.” Thereare 15 different icons (or targets) available for thisscreen. Note that the green-side icons on the BasicView Data screen are visual markers only andprovide no distance reading. To return to the ColorCourse Layout screen, select “MORE and“LAYOUT” with the right soft key. Also selecting“GREEN” with the left soft key displays the fullgreen. (See Chapter 5.1)20
Important: If a Color Course Layout for a specificcourse is not yet available from <strong>Sonocaddie</strong>, thedevice displays the “Basic View Data” screen bydefault.<strong>Sonocaddie</strong> also providesgolfers the "full picture" oneach hole with satelliteimagery and precise distanceinformation from yourlocation. You can see theactual image with yardageinformation when you areplaying!21
Status explanationBunker Front/ BackWater Front/ Back(includes major waterhazards)*2 nd Green Front/ 2 ndGreen BackCreek (includes: river,ditch and stream)TrapTree (includes: shrubberyand forest)HillsSymbolLay-up areaOut of Bounds (OB)DeleteDogleg Left/ RightRock* Note: For some courses that have two greens onone hole these icons provide distance for the extragreen.22
4.4 Carrying the <strong>Sonocaddie</strong> <strong>V300</strong> <strong>Plus</strong>Conveniently attach the belt clip to your belt orclothing. Slide the hook on the back of the<strong>Sonocaddie</strong> <strong>V300</strong> <strong>Plus</strong> into the clip until you hear a“click” sound. To remove the <strong>Sonocaddie</strong>, press thebutton on top of the clip down and slide <strong>Sonocaddie</strong>upward out of the clip. You can also attach the clipto different things, such as a golf bag. The<strong>Sonocaddie</strong> <strong>V300</strong> <strong>Plus</strong> may also be mounted to agolf cart with optional golf cart mounts (visit<strong>Sonocaddie</strong> website for product information).Important: Please make sure the beltclip or mount is securely fastened andthe <strong>Sonocaddie</strong> isfirmly attached formaximum security.Chapter 5 – Using the <strong>Sonocaddie</strong> <strong>V300</strong> <strong>Plus</strong>during a RoundNow that you have set up your device, and selecteda course to play, you are ready to start using allthese features. When you are playing a hole and youneed the distance to the green or other targets simplypull out your <strong>Sonocaddie</strong> <strong>V300</strong> <strong>Plus</strong> to see all thedistances you need on its color screen.23
Tip: Hitting any key on the device turns on thescreen backlight feature on for easier viewing.5.1 View the Green Close-UpThe Green Close-up view displays a full puttinggreen and provides five distance readings for eachgreen. It shows the distance to the front, center andback of the green. In addition, the center readingautomatically changes to show an approximatedistance to a short and long pin location. To accessthis screen, select “GREEN” with the left soft key.To return, press “FULL” with the left soft key or the“Escape” key.Tip: To stop the auto-scrolling feature, press the upor down button on the 5-way key. Then press eitherkey again to scroll the ball manually to find yourideal spot.590580570560550Distance from back of the greenFar landing zoneCenter landing zoneNear landing zoneDistance from front of the greenGreen Close-Up24
5.2 Track Your Game FeatureThe <strong>Sonocaddie</strong> <strong>V300</strong> <strong>Plus</strong> has two features to trackyour game; “Shot Track” records your specific shotlocations and “Auto Track” automatically tracksyour route around the course. You can then go backat a later time and review your stored Tracks fromyour <strong>Sonocaddie</strong> <strong>V300</strong> <strong>Plus</strong> on the full-colorgraphical display of the hole as shown below. Thisway you can compare your performance from gameto game at your favorite course, analyze your playlike the pros, and learn your strengths andweaknesses so you can adjust your strategy forpracticing and playing a course.Important: Shot Track and Auto Track only work ifthe course has a “Color Layout” and you arelocated on a particular hole on that course with theWalking Golfer symbol visible on the screen.Shot Track Only Auto Track Only25Auto Track &Shot Track
5.2.1 Shot TrackShot Track remembers all the ball locations that youenter on each hole on the color course layout.Simply stand near the position of your shot andpress “SHOT TRACK” with the right soft button ofthe <strong>Sonocaddie</strong> <strong>V300</strong> <strong>Plus</strong>. Shot Track internallyrecords this exact ball location on the color courselayout screen for that hole so you can review at alater time. Each time you want to record a new shotlocation, press the “SHOT TRACK” button. Thedevice stores the shots for up to 100 rounds,however, it can only store one round per day.5.2.2 Auto TrackWhen set on, Auto Track automatically records youractual route around on the course on theHole-Layouts as you play. Auto Track can be veryuseful when used with Shot Track above. To turnAuto Track on, go to the “SETTINGS” screen,scroll down to “AUTO TRACK”, and choose “ON”with the left-right 5-way key. To set the intervalperiod for recording your position, scroll down to“TRACK INTERVAL”, choose the desired interval,and then press “SAVE” with the right soft key tosave these settings. Once you select a course to playand <strong>Sonocaddie</strong> begins to receive satellite signals,Auto Track immediately starts recording your route26
on the color course layout. The device stores up to100 rounds, however, it can only store one round perday.Important: Selecting different intervals for AutoTrack will affect the recording time for a round.TRACK INTERVAL Recording Period10 SECONDS 5 hours20 SECONDS 11 hours30 SECONDS 16 hours5.3 Measure your Shot DistanceThe “Mark” feature provides a simple way toquickly measure the length of any shot you make bymeasuring the distance between the start and endpositions of the shot. It is available anytime, exceptwhen you are on the Green Close-up screen. Thereare two ways to access this feature. The quickestway is to press “MARK” with the bottom button onthe front panel soft key of the <strong>Sonocaddie</strong> <strong>V300</strong><strong>Plus</strong>, or select “MARK” from the “MAIN” screen.Important: To use “Mark”, you must be on thecourse and the <strong>Sonocaddie</strong> must have satellitereception.To measure your shot, stand near where you hit yourball and press the “MARK” button and the Mark27
screen below appears. Press “START” with the rightsoft key and proceed to your ball. The distancedisplays “0” and changes as you move. You do nothave to travel in a straight line to the ball since thedevice always measures the distance from thestarting position to your current location in straightline. When you reach the ball, press “END” to lockthe number and see the actual distance of the shot.To measure another shot, press “START” again.Press the left soft key or the Escape key to return tothe previous screen.5.4 Use the Digital ScorecardThe <strong>Sonocaddie</strong> <strong>V300</strong> <strong>Plus</strong> provides a digitalscorecard to score your personal round and candisplay an analysis of your round. Two types ofscorecards are available. The “NORMAL”scorecard records your strokes only by hole andprovides a total for the front nine (out), back nine(in) and 18-hole round. The “PRO” scorecard28
ecords your strokes, putts, fairways hit, and sandsaves by hole. The Pro Scorecard also gives you afull analysis of your round. Both scorecardsautomatically display the “Par” (P) for whateverhole you are playing.The Normal scorecard is the default. Press the“SCORECARD” button on the left side of the<strong>Sonocaddie</strong> <strong>V300</strong> <strong>Plus</strong> and the Normal scorecardbelow appears. Scroll across to the “Strokes”column (S) with the left-right 5-way key and use theup/down key to enter your strokes. Press the“Escape” key to go back and <strong>Sonocaddie</strong>automatically saves your scores, even if you turn itoff.To make the Pro scorecard your default, go to the“MAIN” screen, select “SETTINGS”, scroll downthe list to “SCORECARD”, choose “PRO” with theleft-right 5-way key, and press “SAVE” with theright soft key.To record your score on the Pro Scorecard, press the“SCORECARD” button on the left side of the<strong>Sonocaddie</strong> <strong>V300</strong> <strong>Plus</strong> and the Pro scorecard belowappears. Scroll across each column one by one anduse the up/down key to enter your Score (S),number of Putts (Pt), and either Yes (Y) or No (N)29
for both the “Fairway Hit” (Fw) and “Sand Save”(Sd) column. To view an analysis of your round,press “ANALYSIS” with the right soft key.Important: For the <strong>Sonocaddie</strong> to accuratelycalculate Greens in Regulation (GIR), you mustenter the Strokes (S) and Putts (Pt) for every hole.Fairway and Sand Save percentages automaticallycalculate according to your scores and the Yes/Noresponse you entered on each hole.Normal ScorecardLegendHole (H)Par (P)Score (S)Putt (Pt)Fairway (Fw)Sand (S)Pro Scorecard30
Chapter 6 – Editing an Existing CourseWith the <strong>Sonocaddie</strong> <strong>V300</strong> <strong>Plus</strong>, you can also makeinstant changes to the given course information righton the spot. Courses are constantly changing andsometimes a target may have moved since the GPSsetting was recorded. Or maybe you have specifictargets you like to use when you play certain coursesor you notice that a distance reading is slightly off.With the <strong>Sonocaddie</strong> <strong>V300</strong> <strong>Plus</strong>, you can change thecourse information on the go to suit your ownpreferences so you will always be playing with themost accurate and up-to-date distances.6.1 Understanding the Edit ScreenThe information on each “Color Course Layout”screen or “Basic View Data” screen originates froman “EDIT” screen where specific GPS referencepoints (or targets) have been recorded for that hole.To view the Edit Screen, select “MORE” with theright soft key and “EDIT.” Each target shown on ahole was recorded on a blank Edit Screen. The EditScreen has eight available rows to locate GPStargets for distance readings; six for on/off fairwaytargets and two for the front and back green targets.Each row has three GPS locations to record a target(left side, fairway, and right side) and there can onlybe one target per row. There is one GPS target31
location for the front of the green and one for theback. Note that the green center is actuallycalculated by <strong>Sonocaddie</strong> based on the recordedfront and back points. Each green has two additionalgreen-side targets to display a visual marker. Thesedo not give a distance reading, nor do they appearon the color course layout screen since this viewalready provides a full-color, graphical view of thehole.Hole-Layout ScreenHole-Info ScreenEdit Screen with TargetsBlank Edit Screen32
6.2 Edit an Existing Target on a HoleThe Edit feature is available any time you areplaying a hole from the “Color Course Layout”screen or “Basic View Data” screen. If you need tocorrect a distance reading or want to change a giventarget on the hole while playing, simply follow theedit process below. Repeat the process anytime youneed to change or update a target.Important: To use the Edit feature, you must be onthe course and the <strong>Sonocaddie</strong> should have goodsatellite reception (six or more satellites).Step 1: Select “MORE” with the right soft key andthen select “EDIT” to view the Edit Screen.Step 2: Stand at the target on the course that youwant to correct or update. Using the 5-way key,scroll to and highlight the specific target icon on theEdit Screen that you are correcting or updating.Note the target distance reading may disappearwhen you are standing within 5 yards of the target.Step 3: Press “SELECT” with the right soft key toaccess the “Target Icon” screen. Scroll to the iconyou want to record for that hole (refer back toChapter 4.3 for icon definitions). If you arecorrecting a distance reading, select the same iconthat you selected previously on the Edit Screen. If33
you are changing the target, select a new icon whichis more appropriate.Step 4: Press “RECORD” with the right soft key toinsert the icon on the Edit Screen and update thisposition permanently in your <strong>Sonocaddie</strong> <strong>V300</strong> <strong>Plus</strong>.The distance immediately changes to a “0” reading.If it does not, stand still and press “Record” againfrom the same position.Important: Before pressing “Record”, be sure youstand still for five seconds at the target location sothe <strong>Sonocaddie</strong> can pin-point that position. Afteryou select record, the distance reading changes to“0” to indicate an accurate location.34
6.3 Add a New Target to a HoleTo add a new target, follow the editing steps above,except in Step 2 stand at the new target on the holeand scroll to one of the three available locations inan empty row. Then follow Steps 3 & 4 to select andrecord a new target on the hole.Tip: To make reading distances on Color CourseLayout or Basic View Data screens easier, be sureto record targets on the Edit Screen in the sameorder they appear on the hole. Also if you add anew target to a row that already has one, the oldtarget will disappear from the screen and the newone will appear instead.6.4 Delete a Target on a HoleIf you don’t want a specific target that has beenrecorded on a hole, deleting it is simple and youdon’t have to be on the course. From any hole on the<strong>Sonocaddie</strong> <strong>V300</strong> <strong>Plus</strong>, select “MORE” with theright soft key and “EDIT” to view the Edit Screen.Scroll to and select the Target Icon you want todelete. When the “Icon Screen” appears, select the“Delete” icon and press the right soft key. The targetdisappears from the hole.35
Chapter 7 – Managing Course Information onthe <strong>Sonocaddie</strong> <strong>V300</strong> <strong>Plus</strong>With the <strong>Sonocaddie</strong> <strong>V300</strong> <strong>Plus</strong>, you can easilyrename or delete any course, or map targets for anew course.7.1 Delete a CourseFrom the “MAIN” screen, select “MY COURSE” tosee the course list screen. Select a course and press“MORE” with the right soft key to see the pop-up36
list of options. Select either “DELETE” to delete theselected course or “DELETE ALL” to delete allcourses in the course list. After the “DeleteCourse?” confirmation screen appears, select “YES”with the right soft key to confirm, or “NO” with theleft soft key to go back. Selecting “YES”permanently deletes all the course information andtargets for that course.Important: Deleting a course does not delete anyScorecards or Tracks stored in the <strong>Sonocaddie</strong> forthe deleted course so you can still review these atany time (See Chapter 8).7.2 Rename a CourseFrom the “MAIN” screen, select “MY COURSE” tosee the course list screen. Select a course, press“MORE” with the right soft key and select“RENAME” from the pop-up list. Use the 5-way37
key with the screen keyboard to scroll back throughthe course name and edit it. After renaming thecourse, select “RECORD” with the right soft key tosave the changes.7.3 Create a New CourseCreating a new course map works just like the editprocess in Chapter 6.2, except the Edit Screen isblank when you start. By following the steps below,you can create your own custom layout for any holeon a new course. You can only view a new courseusing the “Basic View Data” screen and you must beon the course to map the targets.7.3.1 Name the New CourseTo create a new course, select “MY COURSE” fromthe “MAIN” screen and press “MORE” with theright soft key and select “NEW” from the pop-uplist to view the keyboard screen. Enter a new coursename using the 5-way key to scroll the keyboard38
and center key to enter a selection. The backspacekey () on the keyboard erases letters. When youare finished, press “RECORD” to save the name.After you save the new course name, the “SelectHole” screen immediately appears. The new coursename also automatically appears on your course list.7.3.2 Map the Targets on the New CourseMapping a new course with the <strong>Sonocaddie</strong> <strong>V300</strong><strong>Plus</strong> is easy. Simply repeat the following steps eachtime you want to add a target to a hole for a newcourse.Step 1: Press “SELECT” with the right soft key forthe hole you are mapping and then select “EDIT.”Step 2: Stand at the target you want to add on thehole. Use the 5-way key to scroll and highlight anempty location on the Edit Screen where you wantto record the new target. You can record one target39
per row on the eight on/off fairway rows, one frontgreen location and one back location, and twoseparate green-side icons.Step 3: Press “SELECT” with the right soft key toview the “Icon Screen” for targets. Scroll to the iconyou want to add for that hole and highlight it. (Referto Chapter 4.3 for Icon definitions)Step 4: Press “RECORD” with the right soft key toinsert the target icon on the Edit Screen andpermanently add this GPS target position to the hole.The icon now appears on the Hole-Info screen andthe distance to this location changes as you movearound the course.40
Step 5 - Green Targets: To set the front greenlocation, stand at the front of the green, select thefront green location on the Edit Screen, press“RECORD” and a “0” reading appears. Move to theback of the green, select the back green position,and press “RECORD” again. The deviceautomatically calculates the center location based onthe front and back locations. To add a green-sideicon (which does not provide distance information),scroll to either green-side location, press “SELECT”to view the Icon Screen, choose the icon you wantto display and press “RECORD” to insert it.Green Front Green Back Green-SideChapter 8 – Review Stored Information after theRoundIf you used the Scorecard or Track features duringyour round (see Chapter 5.2 & 5.4), you can review41
this information anytime from your <strong>Sonocaddie</strong><strong>V300</strong> <strong>Plus</strong> device.8.1 Use the <strong>Sonocaddie</strong> <strong>V300</strong> <strong>Plus</strong> to ReviewInformation8.1.1 Review Prior Scorecards and TracksThe <strong>Sonocaddie</strong> <strong>V300</strong> <strong>Plus</strong> stores scorecards/ tracksfor up to 100 rounds and saves them until you clearthe score or delete the scorecard from the device.The <strong>Sonocaddie</strong> stores scorecards by the coursename and date you played it.To view a stored scorecard/ track, go to the “MAIN”screen, select “RECORD” for a list of storedscorecards/ tracks. Scroll down to the informationyou want to view and press the right soft key. Youcan even edit your scores from this screen after around in exactly the same way you did during around. If you used the Pro Scorecard, you can alsoview a full analysis of your round by selecting“ANALYSIS” with the right soft key. Note belowhow the track views change depending on whatfeature you used. Press the Escape key at any timeto return to the previous screen.42
8.1.2 Delete Prior Scorecards and TracksYou may remove a saved Scorecard/ Track from the<strong>Sonocaddie</strong> anytime. From the “Main” screen select“RECORD”, scroll down the list to the one youwant to delete, and press “DELETE” with the rightsoft key. When the pop-up screen appears, select“DELETE” to delete the selected item or “DELETEALL” to delete the entire list. When the “Deleteboth track and scorecard?” confirmation screenappears, select “YES” with the right soft key toconfirm, or “NO” with the left soft key to go back.Important: Selecting “YES” deletes both thescorecard(s) and track(s) from the <strong>Sonocaddie</strong><strong>V300</strong> <strong>Plus</strong>.8.2 Manage Course Information under theMyCourse TabYou can also use the software to manage the courseinformation that is stored in your <strong>Sonocaddie</strong>. Todelete a course, check the box beside the desiredcourse listed under the MyCourse tab and press the“DELETE” button to the right of the tab.Important: Do not disconnect the cable between<strong>V300</strong> <strong>Plus</strong> device and computer when connecting.43
AppendicesA. Specifications• Size H 116mm×W 57.8mm×T 20.9mm (H4.6”×W 2.3”×T 0.8”)• Weight 119g ( 4.21 ounces)• Screen 2.2” high-resolution color LCD w/Backlight• Operating Maximum 60 º C / 158 º F; Minimum -5 ºTemperature C / 23 º F• Storage My Course: 100Courses Scorecard: 100Track: 100• Battery Rechargeableo 8 to 12 hours in normal operation (mayvary with backlight duration)o Charging Time: 8 hours in operationmode, 3-5 hours in off mode•Acquisition Approx 5~10 minutesRate ColdStart• Accuracy 3 Meters CEP (80%), 7 Meters CEP(90%) horizontal, SA off• GPS Built-in High Sensitivity GPS AntennaReceiver• Durability Waterproof, IPX3B. MembershipFor more detailed information, please refer towww.sonocaddie.com.44
C. System Requirement (Computer access notrequired when self-mapping or Pre-loaded Courses.)• XP/Vista/Windows 7• CD-ROM• 512 MB RAM (XP)• 1 GB RAM (Vista) or higher• 12 MB or more hard disk spaceD. AbbreviationsB = BackC = CentreF = Front/FairwayGIR = Green in RegulationGPS = Global Positioning SystemLat = LatitudeLon = LongitudeP = ParPt = PuttSd = Sand trapS = ScoreH = HoleFrequently Asked Questions (FAQs)You can also find answers to FAQs at the<strong>Sonocaddie</strong> website: www.sonocaddie.com.Q1. What do I do when my <strong>Sonocaddie</strong> is notdetecting a signal?Answer: The GPS unit must be used in open-skyareas and away from buildings (such as club house),45
deep forest, or cliff sides. Otherwise it won't receiveGPS signals and will show nothing on the display.After power-up, a number/bar will appear on theupper-left corner of the screen, which is the numberof satellites received. If showing "X", it means nosignal.In addition, it takes several minutes to receive stablesignal after power-up even under an open-sky. Ifthere is still no signal, please check your battery lifedisplayed on the screen. As a last resort, tryrestarting your <strong>Sonocaddie</strong>.If you are on the course, all distance numbers willautomatically show on the screen. However the limitof displayed yardage is 999 yards. Therefore anydistance beyond 999 yard will show 999 only. If theunit shows "─ ─" when the satellite is available, itmeans that the distance within 0~5 yards.Q2. How can I track my driving distance?Answer: Simply press a button to record thebeginning coordinates of your shot and the endcoordinates of your shot and <strong>Sonocaddie</strong> willaccurately calculate the shot distance. This is the‘straight-line’ distance between the starting and endpoints and does not take the shape of the fairway orthe shape of the shot into consideration. Pleaseconsult the user guide for more details.46
Q3. Can I connect my <strong>Sonocaddie</strong> to othercomputer devices?Answer: Apart from the computer systems approvedby <strong>Sonocaddie</strong>, we do not provide any assurances,and advise against attempting to connect it to anynon-approved devices.Q4. Why is the distance of the course markerdifferent from the distance measured by<strong>Sonocaddie</strong>?Answer:1. First, please make sure that the distance uniteither in <strong>Sonocaddie</strong> or the course is the same (i.e.“YARDS” vs. “METERS”). If they are different,please go to “Settings” in main menu and select“Yard” or “Meter” as the right unit.2. Some courses measure the distances by usinglaser equipment. If the Green and Tee box are not atthe same horizontal level, the yardage numberscould be different from those of <strong>Sonocaddie</strong>. MostGolf GPS devices measure the distance only inhorizontal level, which is more useful for golfersthan straight-line of laser unit.47
Regulatory Agency ComplianceFederal Communications Commission (FCC)This device complies with part 15 of the FCC Rules.Operation is subject to the following two conditions:(1) this device may not cause harmful interference,and (2) this device must accept any interferencereceived, including interference that may causeundesired operation.NOTICE The FCC warns that user modifications ofthis device without the express approval of SonostarInc. could void the user’s authority to operate thedevice.50


