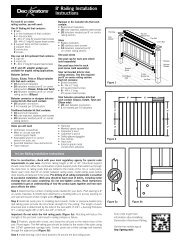
Keystone Decks Installation Instructions - Deckorators
Keystone Decks Installation Instructions - Deckorators
Keystone Decks Installation Instructions - Deckorators

You also want an ePaper? Increase the reach of your titles
YUMPU automatically turns print PDFs into web optimized ePapers that Google loves.
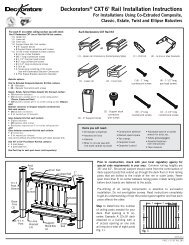
1. Begin by leaning the left house post (HPL) andright house post (HPR) upright against the structure.Face the two connectors away from thestructure and the notched side of the poststoward each other. Slide the house joist (HJ8)onto the house posts, ensuring the middle connectorfaces the deck. Lean assembled H-frameagainst the house or structure. Secure joist inplace by tapping with a rubber mallet. Checkhouse joist (HJ8) for level.HPLHJ8HPRRS8HPRCP2. Slide an 8' handrail section (RS8) onto a cornerpost (CP), making sure the middle connector onthe handrail and the corner post connectors onthe adjacent side of the post face toward the deck.This is best achieved by lining up the longer bottomconnectors prior to sliding the connectorstogether. Slide the opposite end of the rail section(RS8) onto the right house post (HPR). Secure toposts by tapping each side of rail section with arubber mallet. Repeat for opposite side rail.3. Slide front center entry rail section (RS8C) ontoeach corner post (CP) and secure by tapping witha rubber mallet. Note: The 8' rail sections areinterchangeable. A center entry rail section canbe placed in any 8' rail location which gives youmultiple stairway position options.CPRS8CCPSJ4SJ8SJ44. Connect the 8’ sub joist (SJ8) to the front rail section(RS8C) and house joist (HJ8). One at a time, install 4’ subjoists (SJ4) to the 8’ sub joist (SJ8) and rail sections (RS8)to complete the deck frame. Secure all joists in place bytapping with a rubber mallet.