Installation Instructions - EarthStone Ovens
Installation Instructions - EarthStone Ovens
Installation Instructions - EarthStone Ovens

Create successful ePaper yourself
Turn your PDF publications into a flip-book with our unique Google optimized e-Paper software.
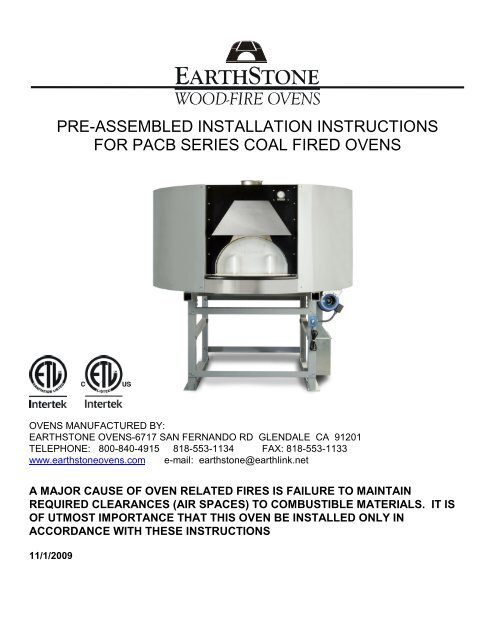
PRE-ASSEMBLED INSTALLATION INSTRUCTIONSFOR PACB SERIES COAL FIRED OVENSOVENS MANUFACTURED BY:EARTHSTONE OVENS-6717 SAN FERNANDO RD GLENDALE CA 91201TELEPHONE: 800-840-4915 818-553-1134 FAX: 818-553-1133www.earthstoneovens.com e-mail: earthstone@earthlink.netA MAJOR CAUSE OF OVEN RELATED FIRES IS FAILURE TO MAINTAINREQUIRED CLEARANCES (AIR SPACES) TO COMBUSTIBLE MATERIALS. IT ISOF UTMOST IMPORTANCE THAT THIS OVEN BE INSTALLED ONLY INACCORDANCE WITH THESE INSTRUCTIONS11/1/2009
EARTHSTONE OVENS, INC 6717 SAN FERNANDO RD, GLENDALE CA 91201earthstone@earthlink.net www.earthstoneovens.comCoal Fired Pre-Assembled installation instructions.Table of contentsPage<strong>Instructions</strong> for moving and lifting ovenParts list 1<strong>Installation</strong> procedures written portion 3Required clearances and air gaps 4-5Exhausting 6-9Cross air vent diagram 10Fuel Storage 10
INSTRUCTIONS FOR LIFTING AND MOVING OVENATTENTION: Only proper heavy liftingmachinery and handling equipment should beused for unloading, moving and installing theoven. This duty should be performed byprofessionals trained in this kind of work.Improper handling of the equipment couldresult in damaging the oven or personal injury.1- USING A FORKLIFT3- INSTALLING OVENSlowly lower oven into proper location. <strong>Ovens</strong>hould be set on a level floor. Shim asnecessary to assure that oven is level.Remove horizontal front angle when oven is inplace. Insert ramset red heads, min. of 3inches in length, through base plates. (See fig17-A pg. 7 in installation instructions)Determine if forklift capacity is sufficient to liftoven. (6000 lb for models 90 and 110, and8000 lb for models 130 and 160)Prior to lifting, make sure forks are long enoughto reach both horizontal steel tubes onunderside of oven (Without touching ovenshell). Approach oven from front entrance sideor rear side. Keep forklift straight. Carefullyplace forks through inside of tube steelsupports legs and position under horizontaltube steel members. Slowly lift and move ovenas needed. (See dia. A)2- USING A PALLET JACKDIA. ADetermine if pallet jack capacity is sufficient tolift oven. (4500 lb for models 90, 110, 130 and6000 lb for model 160)Prior to lifting, make sure pallet jack is longenough to reach both horizontal angles at lowerend of steel tube support legs. Place palletjack between tube steel support legs underhorizontal angles. (See dia. B) Carefully liftoven and move slowly.CAUTION: OVEN IS TOP HEAVY MOVEWITH CARE.DIA. B
EARTHSTONE OVENS PRE-ASSEMBLED INSTALLATION INSTRUCTIONS 1OVENADDITIONAL ITEMS• CAST ALUMINUM DOOR• DIAL TEMPERATURE GAUGE• COAL GRATE• COMBUSTION AIR INTAKE FAN• ASH DISPOSAL BINLIST OF SUPPLIED ITEMS
EARTHSTONE OVENS PRE-ASSEMBLED INSTALLATION INSTRUCTIONS 2PRE-ASSEMBLED INSTALLATION INSTRUCTION GUIDEREAD ALL INSTRUCTIONS CAREFULLY BEFORE INSTALLING AND USING THE APPLIANCE.If this oven is not properly installed, a fire may result. To reduce the risk of fire, follow the installationinstructions. Please read this entire manual before you install the oven. Failure to follow instructionsmay result in property damage, bodily injury, or even death.The installer should contact the local building or fire officials concerning any installation restrictions andthe need for inspection(s) of the oven and venting applications before beginning installation.Obtain the necessary permit to construct. In most areas this will include a permit to construct the ovenand a permit for the exhaust system. Sometimes an electrical permit is also necessary for connectingthe exhaust fan. All construction must comply with local building codes. There are some portions ofthese instructions which are more restrictive than the building codes. Whichever is most restrictive mustbe followed.The diagram below indicates the minimum floor space required.(ALL DIMENSIONS ARE TO OUTSIDE FACE OF STEEL ENCLOSURE)OUTSIDE DIMENSIONSMODEL 110-PACB 58” DIA - MODEL 130-PACB 70" DIA - MODEL 160-PACB 86" DIAIMPORTANT REMINDERAfter reading this installation guide it is important to determine which venting application method will beused.Most cities accept the U.L. listed chimney installation (direct venting) however a few cities will require theuse of a Type I grease hood over the oven opening. Check with your local building department todetermine which is acceptable.To maintain the ETL listing of the oven the venting application needs to be installed in accordance withthe guidelines specified in this installation instruction guide.SAVE THESE INSTRUCTIONS
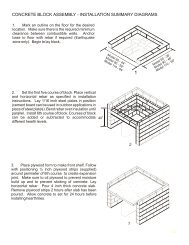
EARTHSTONE OVENS PRE-ASSEMBLED INSTALLATION INSTRUCTIONS 3A. INSTALLATION PROCEDURES1. Mark an outline on the floor of the location desired. This is to assure that you have adequatespace. Refer to Fig. 1, pg. 6.2. Check that there is adequate clearance at the ceiling for the hood. There must be a minimum of3 inches of clearance between the top of the hood and/or oven and the surface of the drywallabove. If direct venting is used then 83 inches will be sufficient (Refer to Fig. 2 & 3 pg. 4) Aheight of 105 inches is needed for a basic installation (Including hood).3. Check that there is a minimum clearance of 1 inch to any adjacent sidewall constructioncontaining combustibles. Any adjacent combustible sidewalls which projects beyond the frontof the oven opening must be a minimum of 48 inches, measured from the side of the ovenopening closest to the wall to the surface of the wall. (Refer to Fig. 4, pg. 4). If the distance isless than 48 inches a wall shield must be mounted on the wall. Refer to the U.L. listed wallshield installation instructions for the allowable clearance reduction.Any adjacent combustible floor which projects in front of the oven opening must be a minimumof 30 inches away from each side of the door opening and 36 inch from the front of the dooropening.WARNING: DO NOT PACK REQUIRED AIR SPACES WITH INSULATION OR OTHERMATERIALSA minimum of 3 inches must be maintained between any combustibles and the top of themetal covering over the oven enclosure. (Refer to Fig 2 & 3 pg. 4.)4. Once the oven is in the desired position, drill holes for the anchor bolts (Min 4 inches deep) usingthe base plates as a guide. Insert anchors to fasten oven base plates to concrete floor.Use ½” Dia. Anchors, 3 anchors each side. (Coat with Simpson’s Epoxy)Oven stand½ “ Dia. AnchorsCoat with Simpson’s epoxyBase plateEmbed 4”min.4” to 6”conc. Floorslab5. The outside surface of the oven enclosure may be faced with non-combustible facingmaterial if desired. This might include but not limited to: Brick, Ceramic tiles, Stainlesssteel, Marble or any other decorative metals. DO NOT FACE WITH COMBUSTIBLEMATERIALS OR USE COMBUSTIBLE ADHESIVES. ALLOW FOR ACCESS TO TOPAND BOTTOM OF THE OVEN FOR SERVICING AND REMOVAL OF ASH BIN. COALFAN SHOULD NOT BE BLOCKED BY ANY WALLS, FACADES OR OBJECTS. (SEEPG 5)NOTE: FOR HEALTH DEPARTMENT REQUIREMENTS ANY 1-INCH AIRGAP ADJACENT TO A COMBUSTIBLE WALL MUST BE SEALED WITH ANON COMBUSTIBLE STRIP. i.e. ALUMINUM, STAINLESS STEEL OF TILE.
EARTHSTONE OVENS PRE-ASSEMBLED INSTALLATION INSTRUCTIONS 4ALL CLEARANCES SPECIFIED ARETHE MINIMUM REQUIRED AIR SPACES3"MIN.COMBUSTIBLESFigure 1OUTSIDE DIAMETERMODEL 130-PACB - 70”MODEL 160-PACB - 86"COMBUSTIBLES 3"MIN.1" MIN.Figure 3U.M.C. & N.F.P.A.80”-83” 77”--80”1"MIN.COMBUSTIBLES1"MIN.Figure 2 - Direct VentingU.M.C. & N.F.P.A.FEEDOPENING1"MIN.3"MIN.HOODCOMBUSTIBLES48"MIN.Figure 448"MIN.105"Any adjacent combustible floor which projectsin front of the oven opening must be a minimumof 30 inches away from each side of the dooropening and 36 inches from the front of thedoor opening.Figure 2 - Exhaust HoodU.M.C. & N.F.P.A.WARNING: DO NOT PACK REQUIREDAIR SPACES WITH INSULATION OROTHER MATERIALS.
EARTHSTONE OVENS PRE-ASSEMBLED INSTALLATION INSTRUCTIONS 5
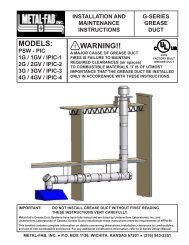
EARTHSTONE OVENS PRE-ASSEMBLED INSTALLATION INSTRUCTIONS 6B. VENTING APPLICATIONSDIRECT VENTINGU.L. LISTED GREASE DUCT/BUILDING HEATING APPLIANCE CHIMNEY INSTALLATIONIT IS NEVER APPROPRIATE TO USE “CLASS A” OR “B VENT” IN ANY PART OF THE EXHAUST SYSTEM.EXHAUST SYSTEMS SERVING SOLID-FUEL EQUIPMENT MAY NOT BE COMBINED WITH EXHAUSTSYSTEMS SERVING OTHER (NON-SOLID FUEL) COOKING EQUIPMENT1. A U.L. listed Grease Duct/Building Heating Appliance Chimney may be connected to the opening in theprimary hood of the oven. Refer to Fig. 18, pg. 7. For specific installation requirements refer to SelkirkMetalbestos Model PS and IPS Grease Duct <strong>Installation</strong> <strong>Instructions</strong> or Metal-Fab IPIC <strong>Installation</strong><strong>Instructions</strong>.2. A field-built duct, constructed and installed to the specifications of a grease duct, as detailed in NFPA 96or the International Mechanical Code, may also be used.Volume: 150-200 CFMModels: Metal-Fab IPIC or Value G (metal-fabcommercial.com)or Selkirk Metalbestos Model IPS (selkirkcorp.com)Important: Chases should be made of non-combustible materials.
EARTHSTONE OVENS PRE-ASSEMBLED INSTALLATION INSTRUCTIONS 7DIRECT VENTINGFOR ORDERING PARTS MENTIONED ON THIS PAGE CONTACT EARTHSTONE OR YOURSUPPLIER. Tel: 800-840-4915- 818-553-1134MODELS 90 & 110 USE 6 INCH INSIDE DIAMETER GREASE DUCTMODELS 130 & 160 USE 8 INCH INSIDE DIAMETER GREASE DUCT30” min.FIGURE 18GREASE DUCT HEATING APPLIANCE CHIMNEY ATTACHED TO PRIMARY HOODTHIS DIAGRAM GENERALLY DEPICTS THE INSTALLATION REQUIRED TO MAINTAIN THE U.L. LISTING OF THE OVENFOR THIS TYPE OF VENTING APPLICATION.FOR SPECIFIC INSTALLATION REQUIREMENTS REFER TO SELKIRK METALBESTOS MODEL IPS GREASE DUCTINSTALLATION 8. MODEL PS AND IPS GREASE DUCT COMPLIES WITH NFPA, SBCCI, ICBO AND BOCA WHENPROPERLY INSTALLED PER ITS INSTALLATION INSTRUCTIONS.CONTACT LOCAL AUTHORITY HAVING JURISDICTION REGARDING FIRE RATED DUCT SHAFT.NOTE: OTHER U.L. LISTED SYSTEMS MAY BE SUBSTITUTED FOR THE METALBESTOS SYSTEM DEPICTEDIN THIS DIAGRAM. TO MAINTAIN THE U.L. LISTING OF THE OVEN THE SYSTEM MUST BE A U.L. LISTEDGREASE DUCT WHICH IS ALSO A U.L. LISTED BUILDING HEATING APPLIANCE CHIMNEY INSTALLED INACCORDANCE WITH THE MANUFACTURER'S GREASE DUCT INSTALLATION INSTRUCTIONS.
EARTHSTONE OVENS PRE-ASSEMBLED INSTALLATION INSTRUCTIONS 8TYPE-I EXHAUST HOOD-Installed per NFPA 96TYPE-I EXHAUST HOOD-Installed per NFPA 96, standard for ventilation controland fire protection of commercial cooking operations. (For commercialapplications only)1. If required, a Type 1 hood must be placed above the cooking opening and set on the topof the oven. A height of 105 inches is needed for a basic installation (Including hood, seediagram below). The minimum exhaust hood dimensions are 40 in. wide, 37 in. deep and22 inches high for models 130 and 160. Refer to Fig. 19, PG. 9.Duct Velocity 1500-2500 FPM - Volume: 800-1000 CFM2. The grease filters must be positioned at the rear of the exhaust hood and must be of thesteel baffle type (Mesh type grease filters must not be used).3. The front of the exhaust hood is to set forward 10 inches from the front of the oven face.The face of the filter must be a minimum of 42 inches from the oven heath per theUniform Mechanical Codes. (UMC) or 48 inches per NFPA 96. When the exhaust hoodis fabricated, it is recommended that the bottom portion which is set on the oven(sheetmetal lid) be closed for ease of cleaning. Refer to Fig 19 pg. 9.4. The sides of the exhaust hood must extend a minimum of 6 inches to either side of theoven door opening.5. There must be a minimum of 3 inches of clearance between the hood and anycombustible surface.6. The exhaust duct is to be constructed as vertical as possible, free of offsets andhorizontal runs. If a horizontal run is needed then refer to the Grease Duct/BuildingHeating Appliance installation section.
EARTHSTONE OVENS PRE-ASSEMBLED INSTALLATION INSTRUCTIONS 9Type-I Exhaust Hood Installed per NFPA 9640.00022.000**IT IS NEVER APPROPRIATE TO USE “CLASS A” OR“B VENT” IN ANY PART OF THE EXHAUST SYSTEMEXHAUST SYSTEMS SERVING SOLID-FUELEQUIPMENT MAY NOT BE COMBINED WITHEXHAUST SYSTEMS SERVING OTHER(NON-SOLID FUEL) COOKING EQUIPMENTGrease filters must be placed at the rear of the hoodand must be of the steel baffle type (No mesh filters).Front of hood must be at least 10 inches fromthe front of the oven face.Face of the filter must be 42 inches from ovenhearth per UMC or 48 inches per NFPA 96Sides of the hood must extend a min. of 6 inches toeither side of the oven door opening.Coal Disposal BinFanOpen3 inch min. clearance between the hood and anycombustible material.37.000Grease filters10.000FanCoal DisposalBinFigure 19
EARTHSTONE OVENS PRE-ASSEMBLED INSTALLATION INSTRUCTIONS 10Cross Air Vent DiagramThe cross air vent will provide air circulation to cool the bottom half of the oven and thesurrounding enclosure. This will prevent the coal combustion air fans from overheating.A thermostatic gable mount fan with should be used. (i.e. Model Master Flow PS2). Use atleast a 20” x 20” louver on each side.COAL AND WOOD STORAGECoal and Wood storage shall not exceed a one-day supply where stored in the same roomas the oven. Refer to NFPA 96 for storage requirements.