mapping - Earth & Planetary Science, UC Berkeley - University of ...
mapping - Earth & Planetary Science, UC Berkeley - University of ...
mapping - Earth & Planetary Science, UC Berkeley - University of ...

You also want an ePaper? Increase the reach of your titles
YUMPU automatically turns print PDFs into web optimized ePapers that Google loves.
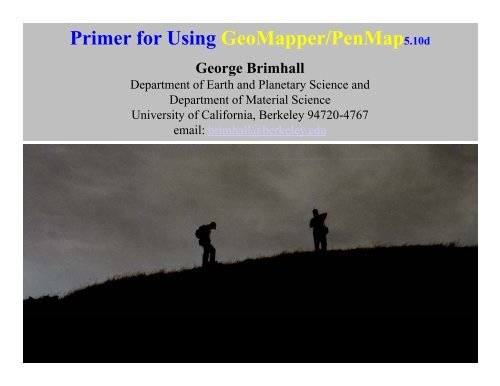
Primer for Using GeoMapper/PenMap5.10dGeorge BrimhallDepartment <strong>of</strong> <strong>Earth</strong> and <strong>Planetary</strong> <strong>Science</strong> andDepartment <strong>of</strong> Material <strong>Science</strong><strong>University</strong> <strong>of</strong> California, <strong>Berkeley</strong> 94720-4767email: brimhall@berkeley.eduBechtel 2008
ContentsWhat is digital <strong>mapping</strong>? 3Maintenance and care <strong>of</strong> the equipment 4Pen tablet slate PCs 5Display settings 7Flash PCMCIA card GPS units 8Calibrate pen stylus (important for left handed people) 8GPS accuracy variation 9Sky position <strong>of</strong> geostationary GPS satellites 10GPS Dilution <strong>of</strong> precision and diurnal variation 13GPS Setup 18Which COM port? 19Communication port assigned, settings, baud rate, NMEAReference ellipsoid id & projection type, UTM zone 21GPS ON 23GPS modes for <strong>mapping</strong> 24Setting up new Project areas and <strong>mapping</strong> Legends 29Customizing buttons 31
Outline Continued (2)Load Legend and automatic symbol rotation eg strikeand dip 37Loading Digital base maps 40Georeferencing base maps the same as the GPS settings 424 types <strong>of</strong> fbase maps 43Vector map set up 44Raster map set up 45DRG (digital raster graphics) set up 46Shape file set up 47Hiding selective map layers (Options Base button) 48Opening a map file 50Naming map files 50Mapping 50Start Mapping 52StartGeo tool bar 53Editing buttons 54Tool bars: Lithology, Structure, Formations 55
Outline Continued (3)Select base maps 57Hide unwanted map layers 58Lithology Tool bar and common structural buttons 59Opening a prepared base map 60Zooming to change map scale 61Panning to move the map frame 62Lithology tool bar 63Mapping outcrops as closed polygons 64Mapping a contact between formations 67Mapping a fault 67Infilling Formation colors 68Plotting a Strike and Dip symbol 74Recording a rock sample 78Plotting an oil seep 81Putting text on the map 82Linking Photographs to map locations 83
Outline Continued (4)Setting the AutoSave clock 85Saving map 86Review 89Mineralization tool bar 92Alteration tool lbar 93Entering text 98All sample types (rock, soil, water, oil seep, p,photo 99Returning to Start Geo 100Entering old data from hand-held GPS units 101Turning on auto Save 110Printing maps 111Exporting map files 115Permanent stations 122Editing <strong>mapping</strong> data 123Editing existing map Legend Formations & Lithologies 128Deleting unwanted Project Legends 138
Eliminating the “divide by zero” message 140Installing & removing device drivers for card GPS units 143Explanation <strong>of</strong> WAAS system 145SiRFstar III GPS chip set 149Changing symbol sizes 150Determining ii GPS accuracy sand Precision ii153Locating NGS permanent stations 154Changing glinewidths 159
What is Digital Mapping ?Conducting <strong>mapping</strong> with digital electronics andinformation i technology (IT) tools:(pen tablet portable PC’s, GPS, and digital base maps)GeoMapper is the data capture or <strong>mapping</strong> “front end”Visual User Interface to the PenMap 3-D GIS system
A good place to start is with the maintenance<strong>of</strong> the system: Charging <strong>of</strong> tablet PC and Li-ionbatteries- in a secure placeA <strong>mapping</strong> vest is an excellent field tool to protectthe system outdoors as the tablet can be convenientlycarried in an inside pocket <strong>of</strong> a vest thus providingboth convenience and protection for the pen tabletleaving both hands free while meeting ANSI visibilitystandards
PCMCIAFlash CardDGPSAn external GPS antenna on the shoulder <strong>of</strong>A vest keeps a more continuous GPS fixeven when the tablet is placed in theinside vest pocket for walking.Calibrate thepen (key forleft handedmappers)Start toControlPanel toTablet andPen SettingsThen clickRight or LeftHandedCalibrate penby touching in succession the 4markers
Slate Pen Tablet PC’sRunning Windows XP
Turn brightness to zero when outdoors- extendbattery life and use only solar powerTurn sounds <strong>of</strong>f to extend battery lifeTurn LCD brightness to Min to extendbattery life and Max when indoors
http://www.usglobalsat.com/item.asp?itemid=85US Globalsat BC-337 GPS receiver with compact flash20 channel rapid first fixAT-65 external antennaNMEA communication protocolThese connectors are verysmall so keep them clean in thefieldMMCX
GPS accuracy depends on:The number <strong>of</strong> satellites visible to the receiverStrength <strong>of</strong> satellite signals (S/N)Geometric position <strong>of</strong> satellite in the sky (constellation)Differential corrections- require an unobstructed view <strong>of</strong> thesouthern sky- suggestion: put your external GPSantenna on your shoulder and face north when takingGPS readings- this gives you the best chance <strong>of</strong> receivingthe Differential GPS signals from a geo-stationarysatellite in the southern skyThe Globalsat BC-337 uses only WAAS differentialcorrections which are available only in the USAAccuracy is about +/- 2.3 to 3 meters in plan vieweg a circle 4.6 to 6 meters in diameterWithout differential correction, the accuracy is about+/-5 meters in plan view, eg a circle 10 metersin diameterVertical uncertainty is always about 2.5 times the horizontal accuracy
DGPS satellites are always on the equator, so fromthe Northern hemisphere, they will be located in thesouthern part <strong>of</strong> the sky. In southern hemisphere, theywill be in the northern sky2Revolutions per day
Mathematical requirementsx, y, z, time are 4 unknownsNeed 4 independent equationsAt least 4 satellites are needed to get a 3 dimensional location <strong>of</strong>x, y and zThe more satellites the betterOur GPS units required at least 4 satellites with a signal to noise ratioabout 32
Th lit f GPS i d i th d ith th t ll ti fThe quality <strong>of</strong> GPS varies during the day with the constellation <strong>of</strong>Satellites available at any one time
Satellite Geometry given as:HDOP = Horizontal dilution <strong>of</strong> precission
Good GPS fix butNot differentiallycorrected
HDOP =1 is idealHave to position yourself so that theGPS receiver is in direct linewith a satellite sending down theDifferential corrections
Accuracyvariesduring theday
To find which COM port your card GPS unit is using,go to Start> Control Panel>System>Hardware>Device Manager>Ports (COM & LPT)>ThenRead what COM port is shown at the end <strong>of</strong>Compact Flash OX16CFF950 (Number?)For example, it may say:OX16CFF950 (COM4) meaning thatCommunication Port 4 is being used bythe GPS.
First (1) Setup GPSGPS device = NMEA coms configurableClick INIT to set com portSelect reference ellipsoidSelect Univ Trans MercatorClick Alter Parameters andenter zone and segmentfor your location- see map onfollowing pagesClick EXIT
Global UTM GridZone 10-SUTM EastingUTM NorthingMontana is T-12
Second (2) Turn GPS ON and wait for signals to arrive- be patientAnd make sure that you are outdoors with an unobstructed view <strong>of</strong> theSky in all directions.
3 useful GPS collection modes:Every time- useful in starting upGPSAveraged correctable- whilestoppedMinimum distance- as you walkand mapClick Status Box to see satellites
2 main modes <strong>of</strong> using the GPS:(1) Averaged fix for a static position (stop and count 15 seconds)(2) Minimum distance and out-putting locations as you walk;set to 10 meters, 50 meters etc, at least the distance <strong>of</strong> thelikely uncertainty <strong>of</strong> the GPS fix
Create a new Project LegendDecide on the name <strong>of</strong> your new Project.Create a new Directory (folder) with the same name as your newProject in the PenMap 5 Directory.Within the new Project Folder create two more directories:Rastermaps and Vectors MapsAll <strong>of</strong> the subsequent files for this Project Area should go insidethis Project Directory, for example: digital it base map filessuch as ortho-images, topographic map files, etc.Then start up GeoMapper and go to the Project Legend screenand click on Create New Project LegendFor each new Project, repeat this process
GeoMapper Project Manager lets the userdefine the local stratigraphic columnStart a new Project Legend
Plan the Legend on paper showing the stratigraphic column in terms <strong>of</strong>Formations and also Lithologies. That way you can map individualoutcrops by lithology, then later make a colored overlay showing theformations if you wish. Keep formation is time-stratigraphic orderDecide on the name <strong>of</strong> the Project Folder. Then click on GeoMapperand dinstead <strong>of</strong> going to a green button, go the lower right and click onCreate New Project Legend. To the right <strong>of</strong> Project LegendDescription, type in the new Project name. Beneath this to the right <strong>of</strong>Project Legend Name: GM-type a 4 letter abbreviation <strong>of</strong> the Projectname, eg GM-XXXX. The lowest entry should say Project Seed Name:GM-Geo. Geo If it doesn't type Geo. Then hit OKYou should see now on the bottom <strong>of</strong> the List <strong>of</strong> Project areas on theblue screen your new Project Area listed. Click on Edit New Legend.With the pen stylus, drag the lower right corner down and to the right tomaximize the screen. Use the right hand scroll bar to go down to thelowermost buttons for the Oldest formations. These will appear inGeoMapper on the left hand side <strong>of</strong> the button array so the buttons getyounger to the right.
What customization means is editing the buttons on the Formationstool bar to: (1) appear with age and formation abbreviations instead <strong>of</strong>numerical sequence 1, 2, 3 etc. and making the color <strong>of</strong> the formationon the map what you want(2) edit the Lithology tool bar to show the lithologies you desire eitherin areal infills <strong>of</strong> closed polygons for outcropsOr lithological symbols plotted along linesas in a open pit bench
GeoMapper Legend MakerTakes less than 1 hour using only point and click skillsA hard copy <strong>of</strong> the legend can be printedButtons are edited Change infill color Buttons are editedFormations replace numbers Lithologies are replacedUser-selected color infillpatternsSelectable pre-programmed lithologypatterns (Compton, 1985)
Example: A customized Formation tool bar for a statigraphic sectionis shown below running from oldest formations on the left to youngeston the right with unedited button still represented by numbersTertiary Tertiary Tertiary Tertiary TertiaryClaremont Orinda Moraga Siesta Bald PeakVllFormation Formation Formation Valley FormationFormationEach Formation button now shows the map color and the Formationsymbol abbreviation in correct stratigraphic order youngest to the rightBefore making a new stratigraphic section, plan it out carefully so youdo not omit formations and have to insert them later. It is much easierto place them in the correct order at the outset.
On the pull down menu, go View to Zoom to Custom to 800%
Now using the Paint tools on the left, make this button look the way youwant. Typically we use a time stratigraphic symbolism, eg Pp forPermian Phosphoria Formation. Customize all the colored button youwant and type in their formation name. Also click on the coloredrectangle to the immediate right <strong>of</strong> each Formation name and select thecolor you wish for display on the map.Now the right hand half <strong>of</strong> the Legend screen is for you to makeanalogous changes to the Buttons, lithologies, and select the pattern youwish to have shown for your outcropt. Do it step by step as before.When you are done, click the Pink Save Legend button and hit ExitLegend.Now when you start up GeoMapper, the new Project area we will showat the bottom <strong>of</strong> the list. Click on start <strong>mapping</strong>.
First, hit the green LOAD Legend button and select the GM- XXXXlegend you just made. Wait until the hard drive stops. Thismay take several minutes.To Make sure that the Symbols rotation option is ON, Click on the greatSETUP button shown below that is in the Upper row second from theupper right. iht
Then click ON the Prompt for orientation and click OK and close thisscreen. Hit a red SAVE button
Loading Digital Base MapsThe Project Manager creates a new directory each time youmake a new Project Legend in the C: PenMap 5 directory.To load digital base maps, you need to navigate to the Project directorywhere you wish to upload ddigital i lbase maps.For example, if you created a Project Legend for the Whitehall area,a new GeoMapper Project legend would appear.Navigate on the C: drive to the Penamp5 folder and find the directoryfor the project you want, eg Whitehall.I id hi f ld 2 di i lbldRInside this folder, create 2 new directories, one labeled Rastermapsand a second labeled Vectormaps
GeoMapper/PenMap can use four different types <strong>of</strong> base map filessimultaneously so that any <strong>of</strong> the 4 layers can be hidden or shownThe four types <strong>of</strong> graphics files are and the folder they go are are:VectorVectormaps folderRaster (bmp type)RastermapsDRG (digital raster graphics eg geo-tiff) RastermapsShapefilesVectormapsLoad you digital graphics files into the correct folder, either Vectormapsor raster maps for the Project directory <strong>of</strong> interest.Each Project directory will have its own subdirectories lebeledVectormaps and dRastermaps. This helps keep your files organized
For using tif files as base maps, the raw tiff file needs to have beengeoreferenced to the same UTM and reference ellipsoid thatyou are using in the field with the GPS.
Click on the blue Select Base buttonThis frame appears showing the 4 different map types; each <strong>of</strong> these hasa Browse button to local the files you want to load
Raster Map group is accessed by first pressing the Convert bitmaptypeFour different types <strong>of</strong> bit mapped image files can be used:Tif, PCX, BMP, and JPEG. You can if you wish, convertyour bitmapped file to a DRG list so that two different layerscan be used, one as a Raster map, and another as a DRG
DRG List Used is started by pressing Create/Edit DRG listThen Add new sheetsSelect the files you wantHit Open, then Save and Exit
Shapefile list used is done in the same way as with the other file types.
Now that you have loaded your digital base maps, you can hide themas you wish to display only 1 one more.Click the Blue Option Base button
To hide any <strong>of</strong> the 4 types <strong>of</strong> base maps, click on the Hide buttonsshown below- them hit the redraw button
When the DRG and Shapefiles are loaded, hit OK, then YES twice whenasked to update the current survey area. Disregard the messageDivision by Zero.To Save this collection <strong>of</strong> maps, go to File and Do a Save As to save thecombined map file as assembled. The next time you open GeoMapper,go to the green Open Map button and you can click on this file so thatyou need only load these base maps once.N t i fil A fil h ld b 8 h t l lNote on naming files: Any filename should be 8 characters or less longin front <strong>of</strong> the ".pts" eg 12345678.pts
Mapping -now that you have base maps ready to go
Go to the Project you want and click on agreen Start Mapping button
Each <strong>of</strong> the button icons in the StartGeo tool bar menu activatesspecific functions. No pull down menus are necessary
The buttons read like a book: start at the top left, move right & down.They are also colored coded like a traffic light:Green: Go Ahead, the most commonly used buttonsYellow: Caution, less commonly usedRed: Dire situations for Saving your work and Exiting.Color coding classifies the buttons into similar groups and also showswhich ones are most commonly used and which are usedonly under special circumstancesMost <strong>mapping</strong> is done with Green buttons: all others are specialfunctions:Blue: select base maps files (topography, ortho-image)Purple: rple:GPSEditing buttonsErasingEditing data
Button Tool barsTool bars are arrays <strong>of</strong> green buttons which can be touched bythe pen stylus to bring up groups <strong>of</strong> fbuttonsorganized that do most <strong>of</strong> the work <strong>of</strong> geological <strong>mapping</strong>:LithologyStructureFormationsMineralizationAlterationThese tool bars can be used in whatever sequence a mapper decides
GeoMapper StartGeo Tool BarColor-coded frequency <strong>of</strong> use hierarchy stop light (left to right)Go ahead: Open map, legend, map, sample, exportCaution: Set autosave, Undo, erase,Stop- pay attention: Save, Exit, Edit (red cross)Mapping continuumGo aheadCopyright <strong>UC</strong> Regents 2001Redraw the screen after making a change
Select base maps
Hide any maps you don’t need right awayTo hideDifferentBase maps
Button Tool bars bring up groups <strong>of</strong> buttons organized in a logical fashion butproviding flexibility in sequence- and have common features strike and dip, trendand plunge, solid contacts, dashed contacts, solid fault blue, dashed fault blueLithologyFormationsStructureMineralizationAlteration
Start at the upper left: click on Open Map- go to Project FolderBrowse until you find the fileYou want and then hit “OK”Once “Geology.pts” shows in thefilename window, click “OK”
To zoom in or out, click the Yellow Zoom buttonThe Zoom box appears showing possible scale factors forenlargement (X) or reduction factors. Click the factor you wishand touch the screen.Notice that the Pan function can also be accessed from theZoom box.The E and N corrdinates shown in the Zoom box are theThe E and N corrdinates shown in the Zoom box are theUTM (Universal Transverse Mercator) Eastingand Northing in meters.
Use the Pan buttonto drag the map towards the area you preferTouch the screen at the point you would like in the center <strong>of</strong> the map,drag it and release.
Once you are panned and zoomed into the area <strong>of</strong> interest where<strong>mapping</strong> can begin, we will show how to map an outcrop bydrawing a perimeter around the area <strong>of</strong> exposed rocks <strong>of</strong> onelithology.Click on the Lithology buttonThe Lithology toolbar opens up and draws the map shown beforeNotice that on Lithology Toolbar, other common features remain:Contacts, faults and strike and dip (both azimuthal and down dip)This saves time by not having to change tool bars very <strong>of</strong>ten
Notice the red box around thethe Lihtology tool bar is openLithology button. This shows thatNow select an Area fill type for the lithology you wantUsing the pen stylus touch the screen in a number <strong>of</strong> points demarkingthe perimeter <strong>of</strong> the outcrop but do not complete the pattern.To complete e the polygon, click c on the Gray Complete e button and hit OK
Always after hitting a Complete button, click on OK to completeentering the data into the GIS data base
A closed polygon is now filled in the selected lithology showing theoutcrop.Next map a contact. Click on the well-located (solid line) contactbutton and touch sevel points along the contact.Hit completewhen done
Select a second aerial lithology button and draw another polygonusing Complete to close the last gap <strong>of</strong> the polygon.Now let’s map a fault (in blue).Click on the well-located (solid blue) fault buttonClick on severla points along the idealized fault
Assume that the fault cuts <strong>of</strong>f the contact shown in black. As youcontinue to use the pen style to put in points along the fault,you can snap onto the SE end <strong>of</strong> the black contact lie to sharethat one node. Simply click on the SNAP button
Click on the end node <strong>of</strong> the black contact line, then hit Free Nodeto go back to inputting nodes using the stylus rather thansnapping on existing nodes. Hit complete when done, then OKLet’ add a Color infill to showthe Rock FormationsClick on the Formationstool bar button
Formations are colored infill areas. Select one <strong>of</strong> them, eg Formation 1and start to outline an area. When you want to snap ontoExisting nodes ona contact or nodearound and outcrop,click on SNAP node,then FREE node whenyou are not usingexisting nodes.Hit Complete, and OK
After clicking on the Strike and Dip symbol, touch the screen wherethe measurement e e is made. When the bearing box appearstouch the screen inside the Bearing angler box and a data entrybox will appear. Click “Clr” to clear the entry and use the keybox to enter the azimuth <strong>of</strong> the strike line using the right handrule. No decimal is necessary. Click OK. The RedrawThe infill the 2 remaining areaswith formations and hit Redraw.
An effective <strong>mapping</strong> sequence is Outcrops first, thencontacts, and last infilling the Formations.Outcrop lithology <strong>mapping</strong>preserves the prime dataColored formation showregional distribution
Plotting a Strike and dips involves a symbol in GeoMapperMost <strong>of</strong> the Green colored toolbars for Lithology, Structure, andFormations all have the Strike and Dip symbols as well as themost common kind s<strong>of</strong> contacts (solid and dashed lines) plusfaults so it is unnecessary to change tool bars to use a commonsymbol.Some <strong>of</strong> the symbols occur twice without and with a “D” notationwhich refers to down dip direction. Symbols without a “D”use an aziumth and dip or plunge.Use the Right Hand Rule is determining the azimuth <strong>of</strong> the strike line,ie, as you look along the strike line, if the bed dips towards
Your right, then read the north arrow <strong>of</strong> your compass. If the bed dipsto the left, read the south end <strong>of</strong> your compass or add 180 degrees tothe former reading.
Click on the Strike and Dip symbol (without the “D”)Zoom in so that the map scale is about 1:1000 or so.
Click on the Azimuth field and enterthe value.Click on the Dip field and enter apvalue
Recording a rock sample: Click on GeoToolsClick on the rock hammer symbol and touch the screen at thelocation where the rock sample is to be taken.Touch OK when this screen comes up
The next image that appears is the symbols plot boxTo resize the boxTo move the boxWhen you are content with the symbolclick on the check circle. Note, thecomputer will wait until you check thiscircle. Do not try to go on withoutcompleting this task
Enter more data on the rock sample including its lithology from thepull-down menu. Note: you must enter e a sample number otherwiseGeoMapper will not let you continue and the following messagewill appear.Click OK. The rock hammer symbol is plotted on the map to showthe location <strong>of</strong> the sample and the data is recorded in the GIS data base
The same plotting and recording procedure for the rock samplecan be used to plot the location o <strong>of</strong> an oil seep.Type-in the requestedattribute information.
To put text on the map use GeoTool toolbar and click on the GreenText tbuttonA symbol plot box will appear. Enter the text you want, eg. The dip, andclick on repeat text and click on the screen where you want the textsituated. Move the box to a place where it is on the dip side<strong>of</strong> the strike and dip symbol and click the check box to complete it.Enter data for dip
To put Photos links on the map, from the GeoTools toolbar, click onthe Magenta Photo button.Plot the location <strong>of</strong> the camera and use thebearing window to indicate the direction in whichthe photograph was taken.Click the Capture button to select and link theimage to the symbol plotted.The View button is clicked to see thephotograph.
To set the Autosave feature go to the StartGeo toolbar,then click c onIf you want AutoSave onclick on Timed and thenenter the time intervalbetween saves
To save you map file manually, click on the red Save button on anytoolbarTo exit GeoMapper click on the red EXIT button on any tool barAlways close one *.PTS file before opening anotherThis completes the Quick start guide to GeoMapper
Remember:Wait until the hard drive indicator stops before doing anything,otherwise a pen tablet can freeze up.Turn <strong>of</strong>f back lighting out doors to save battery lifeAdjust the appearance <strong>of</strong> your screen carefully- with just a fewclicksTurn <strong>of</strong>f bell sounds to save batteryRemember to check the check symbol or the computer will waituntil you doSave your work using red Save Button
Mapping on a Vector Topographic MapMap outcrops and add structural data first, faults,and contacts. Finally add formation in-fills by snappingonto to existing nodes.Outcrop lithology <strong>mapping</strong>preserves the prime dataColored formation showregional distribution which isadded later
With the exception <strong>of</strong> “Built” (as-built lines)- all features come up in“Free Node” (pen) input modeTo use the GPS to map feature, hit “Snap node” onceHit “Free” node to go back to normal, or hit any other button whichWill come up automatically in free pen mode.
Regarding using Structural symbols, they all come up in free or penmode unless you click the snap node button so that the GPS unit locatesthe symbol on you map.D=down dip direction, No “d” mean normal symbolsFor example, to place a strike and dip symbol on your map using the pen,just touch the strike and dip button then touch the screen where you wantto place the symbol then answer the questions.If you are outdoors and want to use the GPS, touch the strike and dipbutton, then hit the green Snap node button, and use the GPS. I suggestusing the "Average" mode and hit Restart and wait for 10 seconds. Whenyou hit accept, the symbol come up and answer the questions to fill indata. You will need to use an azimuthal (0 to 360 degree, clockwise)compass, not quadrant
Lithology toolbarLinesAreas
Mineralization toolbar
Alteration toolbar
Remember to “complete” so data goes into GIS data base
Trend and plungeContactFaultVeinStrike and Dip
Clear dataKey in azimuthusing right hand rule
Enter data for dipTouch the screen where you wantthe dip number shown
GeoToolsRock samples, soil samples, water samples, oil seeps,Infrared data, field Make photos < 1 MbAlways have a sample number orYou can’t continue
Return to Start Geo button array
Entering existing data from a hand-held GPS unit
To start, you will need to set the hand-held GPS so you can read the(x,y,z) UTM coordinates in Easting, Northing, and Elevation in the samereference ellipsoid eg WGS84 <strong>of</strong> whatever you used. Then point by pointenter that (x,y,z) point in GeoMapper as a point and then use theGeoMapper legend to snap the correct geological feature to that datapoint. You should also make a few setting in GeoMapper to do this.Click the SETUP button that looks like a Blue TV screenTo start, ,you will need to set the hand-held GPS so you can read the(x,y,z) UTM coordinates in Easting, Northing, and Elevation in the samereference ellipsoid eg WGS84 <strong>of</strong> whatever you used. Then point by pointenter that (x,y,z) point in GeoMapper as a point andthenusetheGeoMapper legend to snap the correct geological feature to that datapoint. You should also make a few setting in GeoMapper to do this.Click the SETUP button that looks like a Blue TV screen
When the screen shown below comes upUnder Annotate Nodes click on Position (x,y) which will show these( ,y)coordinates on the screen if you zoom in far enough.
Then for each thing you wish to transfer from the hand-held GPS toGeoMapper in the CCLNG map, you will need to make a pointon the screen for that (x,y) location. Click on the Gray button labeledPOINT and select DOT, then hit OK
Now you can enter the (x,y,z) data for that point by clicking on the Graybutton ENTER XYZA screen will appear in which you type in the (x,y,z) data then hit OK
The (X,Y) values from your <strong>mapping</strong> area should be about x=312919 and y = 7,375,139 This point would appear on your map asThen to locate the features in GeoMapper, go to GeoTools (green button)for camera picture locations, rock samples etcThen click on the purple camera icon, then hit the Green snap button andtouch the point you located with the enter data command
this should bring up the camera infill box. Enter the azimuth <strong>of</strong> thephoto, number etc and hit ok.The same mode <strong>of</strong> entering the data by hand should be followed for fieldnotes etc.For outcrops, for to the Lithology button and enter the data point, thenoutline it with a polygon, then hit complete to close the polygin.You may wish to turn <strong>of</strong>f the (X,Y) annotation by using the SETUP iconthen clicking <strong>of</strong>f the Annotate nodes (x,y)
For outcrops, for to the Lithology button and enter the data point, thenoutline it with a polygon, then hit complete to close the polygin.You may wish to turn <strong>of</strong>f the (X,Y) annotation by using the SETUP iconthen clicking <strong>of</strong>f the Annotate nodes ((x,y)
You can turn on Auto Save or just hit a red SAVE button regularly.To turn on Auto Save click on the Yellow clock button and clicksave on and set the time interval between saves. This can save somegrief.
Printing MapsYou can print out your completed map. For printing out a full scalecompleted map, eg on a 36 or 48 inch wide HP plotter. You would needhowever to load the same device driver for the printer onto your pentablet.To Print go to the GeoTools tool-bar and find 2 buttons
Use the GeoTools Toolbar to print map graphics.Use the Setup Printer buttonto select the printer connectedto your computer.NOTE: the printer’s drivershould be installed on thecomputer first.Click on the Print button toselect the scale and area <strong>of</strong>interest to print.
The SETup button is where you select the printer to be used (only whenthe device driver has been loaded), and the Print button to print the map.Select the Scaling 1: ???? eg 1:1000 scale, then click on the Set Plot Box
Use this icon to Panso that the desired areaEncloses the desiredregionChange Scale to get theBest tfit.When done, click onthis buttonto continue
The plot box will appear as shown below. To change the size <strong>of</strong> the areaclick on the check to return to the Plot Box menu and select a moreappropriate scale. In any case you always have to click onthe to proceed.You can also translate, the plot box by clicking on thebutton and dragging it with the pen stylus until the plot box surrounds tharea <strong>of</strong> your map that you want. Finally, click on the to proceed.You can enter Titles for the map,north arrow, scale, etc.
Export map filesGo to the START green button and hold it down to get My Computer.Double click Local Disc C: then open the PenMap5 folder. Open thefolder for the field project eg CCLNG. If there is not already a folderinside there entitled EXPORT, then create a new folder called EXPORT.This can be done by going to File, dragging down to New to Folder.(3) Click on the button on the main Start Geo array.
Use the GeoTools Toolbar to export map graphics and data.To export structuralstrike and dip data,click on the GIS Export button.Select the GIS Data option andclick OK.Use the DXF export buttonto port the map graphics toAutoCAD and/or ArcMap.Check-on Assemble polylinesand click OK.
This brings up the following array:The main export buttons are:suggest starting your export process with the button. This willexport a full data file for the entire map you map.Click on it and browse to find the EXPORT folder you made earlier sothat you know where the files are being stored.Name the file eg CCLNG.unv which stands for universal. Hit "FULL"to make a full export.
(4) The files that your GIS people can use come from the next set <strong>of</strong>buttons.The first button exports Shapefiles. Again Browse to the EXPORTdirectory and name the new export file.Set Directory as Export, hit Add All, and click Concise for moredata to be exported then hit OK.
5) The GIS button can to export data in csv (comma separated format.(6) One export you need to do for sure is the DXF. Browse to theEXPORT folder and name the new file.
Permanent StationsAre added in the field to special points such as claim posts,survey monuments (permanent identifiers -PIDs)Click on theButton and label the point. Turn this feature <strong>of</strong>f byclicking the next button to the right
Editing <strong>mapping</strong> dataIs done wit the following keysUndoErase- circle the bad dataErase only certain thingslines, symbols, GIS dataMove points toA Free or Snapnode
Edit pointsMove a point toa Free node or to asnap nodeEdit a symbolTextGIS dataElevationInsert a nodealong a line
Editing Formation and Lithology Buttons in an existing map LegendUsing the Legend you wish to modify, make sure that some <strong>mapping</strong> hasbeen done and saved as a *.pts file.Do a Save As to make a backup copy <strong>of</strong> you map by adding a 1 in thename to differentiate it from the original file name.Go to the Start Geo screen and find 3 yellow buttons saying “Legend”Click on the buttonAlong the bottom <strong>of</strong> the screen click on GM “your Legend Name”Project Legend Modification
Edit the buttons for Formation and Lithology as you wish, thenSave Legend and dExit
Browse to C:PenMap folder and locate a file labeled:“default.unv.unv unv unv” not in any other directory
Click OKClick on button
Click OKClick on Button 3
Click on “Retain existing object status”
Go to GeoTools tool barClick on
Click YesThe select the Legend you wish to update and click Save
Recording a rock sample: Click on GeoToolsClick on the rock hammer symbol and touch the screen at thelocation where the rock sample is to be taken.Touch OK when this screen comes up
Deleting Unwanted Project FilesYou will need to edit the geomap.ini file. To be safe, make a back upcopy <strong>of</strong> the file before you make changes, by doing a Save As toa new file name1) Navigate to the GeoMap folder found in the Penmap5 directory.2) Open the geomap.ini file (using MicroS<strong>of</strong>t Program notepad found onyour PC by going to Programs>Accessories>Notepad).3) Y dt d l t i h f th th ti fth fil f3) You need to delete a row in each <strong>of</strong> the three sections <strong>of</strong> the file foreach legend you wish to remove.
Example:[Project Legend]GMGeoLegend=GM-GeoGMGeoLegend=GM-test *Delete this entire row*[SectionEnd][Project Legend Description]GMGeoDescri=GeoMapper GeologyGMGeoDescri=Testing *Delete this entire row*[SectionEnd][Legend Count]GMGeoCount=0GMGeoCount=1 *Delete this entire row*4) Save the file.
Eliminating the “Division by Zero Message”Set the DRG pixel threshold to 256 pixels within the MapOptions/Settings i window. For example,Unless you save the Penmap.ini file updated in the Penmap5/Configfilesfolder into the GeoMap/GM-Ruby/Configs or the GeoMap/GM-Pion/configs directories, you might to reset this option every time to startGeoMapper, anew.
Example:[Project Legend]GMGeoLegend=GM-GeoGMGeoLegend=GM-test *Delete this entire row*[SectionEnd][Project Legend Description]GMGeoDescri=GeoMapper GeologyGMGeoDescri=Testing *Delete this entire row*[SectionEnd][Legend Count]GMGeoCount=0GMGeoCount=1 *Delete this entire row*4) Save the file.
Installing device drivers for card GPS units1) Uninstall Previously installed device drivers:a) )Select Start>>Control lPanel>>System>>Ports>>[Name P <strong>of</strong> Driver]b) Click the UnInstall Icon.2) Remove Previously installed applicationsa) Select Start>>Control Panel>>Add/Remove Programs>>GPSInformationb) Toggle-on on Remove program3) Remove old GPS Card4) Copy new GPS directory onto the C:\Temp directory <strong>of</strong> the tablet.5) Install the program files for new GPS applications:a) Double-Click on Setup.exe* If "Another device is running...." then b) restart computer andcontinue with step 5.* If "Card Not Inserted..." then b) repeat step 5a)
c) Toggle-on Modify and Un-Check the "98Me.." and "Win9XMe" boxesd) Click Next, then Finish6) Open the GPS program files and drivers directory:a) Select C:\Program Files\New GPS Name\GPSReceiver\Res\7) Insert the new GPS Card and immediately after double-click theInstallApp.exe file found in the Res directory.a) Click "Continue Anyway"b) Wait 10 seconds while the computer manages the other prompts p andwindows.
Explanation <strong>of</strong> WAAS GPS system:http://en.wikipedia.org/wiki/WAASGeostationary satellites used for WAAS in the USSee satellites # 48 and 51 in the map on the next page which arelocated above the earth’s equatorSatellites with PRN numbers greater than 32 are geostationary
http://www.nstb.tc.faa.gov/http://www.nstb.tc.faa.gov/opsdisplay.html
To find the elevation angle above the horizon <strong>of</strong> the WAAS satellites foryour locationhttp://www.lyngsat.com/tracker/galaxy15.htmlhtml
View Satellites:http://www.gjar-po.sk/import/capi_online/satellite.html/ i / lli h lSiRFstarIII:The SiRFstarIII chip is distinguished from earlier SiRF chips largely dueto its ability to acquire and maintain a signal lock in urban or denselycovered forest environments, and its faster Time to First Fix (TTFF), thetime it takes for a GPS receiver to lock onto the satellite signals anddetermine the initial position. The enhanced abilities <strong>of</strong> the SiRFstarIIIchips are made possible by several features:A 20 channel receiver, which can process the signals <strong>of</strong> all visible GPSand WAAS satellites simultaneously.Reviewers have praised the SiRFstarIII chipset for its superior sensitivityand tracking capabilities. [4]
Changing Symbol SizesTo change the symbol size retroactively within a library <strong>of</strong> PenMapsymbols is to reset the symbol. So for the strike and dip symbol you willneed to reset the symbol within the symbols library for the GeoMapperlegend(s). Specifically...Phase 11. Open the PTS file you want to edit.2. Export the Map File (export a UNV file).Phase 21. Open a PTS seed file, such as Geology.pts or Berk2005.pts (A PTSfile with the legend loaded but containing no data)2F 2. For relevant scale click likon the Strike Sik NDip button and plot a strikeand dip symbol.3. Create a strike an dip symbol that is twice as big by using theGraphic>>Line with Method>>free selections from the menu bar andpull-down the Default GIS Name selection.
4. Click on the Set Symbols button.5. Scroll-down and select the STKNDIP GISname symbol-box.6. From the menu select the Wipe option found within one <strong>of</strong> the menuitems in the symbol toolbox menu.7. Scroll-down to select the STKNDIP GISname symbol-box, again.8. Then select the Add symbol graphic from window option from themenu items.9. Click and Drag to select the new (twice as large) strike and dip symbolmade.10. Select File>>Save11. Toggle-on on to Replace existing file.12. File>>Exit or File>>Close the symbol toolbox window.13. Close the PTS file (don't need to save the PTS file).Phase 31. Copy the symbols file just updated/created named GM-Geo.slb intothe Configs folder <strong>of</strong> the pertinent legend folder found within theGeoMap directory. (if it is a map file <strong>of</strong> the <strong>Berkeley</strong> Hills project then
the corresponding legend folder is named GM-Berk.)2. Also copy the file into the Configfiles directory <strong>of</strong> Penmap.Phase 41. Start GeoMapper2. Click on the Load Legend to load the legend configuration i pertinent tothe Project. (if the file is a <strong>Berkeley</strong> Hills Project, project load GM-Berk)3. Click on the Compile Map button and select the Map file (unv file) <strong>of</strong>your map you exported earlier.4. The symbols for Stike and Dip should be recreated with the new size.
Determining GPS accuracy and precisionFirst locate a nearby Permanent Identifier (PID) that is maintainedby the US Geodetic Survey for which accurate location datais availableTo find these PIDS, the following utility works very wellhttp://www.metzgerwillard.us/Setup.aspx
Zoom in using the Google <strong>Earth</strong> controls on the rightClick on the PID <strong>of</strong> interesteg Stadium A
Click on the PID nameeg HT1891 so that theNGS data sheet appearsbelow.Be careful to observe whichellipsoid id is referencedeg NAD83 is NAD83CONUS
This map was made at PID HT1891using 80-10 second averaging timesfor the Globalsat BC-337 GPS with aSiRFstarIII chipset (WAAS)Systematic Error (relative toHT1892)= 2.332 metersRandom Error (relative to mean):Easting 1 = 0.73 mNorthing 1 =1.63 mSum random error:1 =SQRT(ADEQ ( 2 +ADN 2 )= 1.79m2 m3 Total Error = Systematic +/- Random Error1 Total Error = 2.33+/- 1.79m1 0.54 < Total Error < 4.12 m2 0
Set up over the chosen PIDUse Static Mean CorrectableGPS collection modeSelect a line to draw as the GPS fixes evolveCollect GPS data at 10 secaveraging timesTo process the data export the GPS data:File>Export>Other format>Export Survey PointsDAT formatNote on elevation:Elevation is stated elevation on NGS Data Sheet minusgeoid height; if
Finding USGS Topographic Mapshttp://www.gelib.com/usgs-topographic-maps.htm
Changing Line WidthsClick on the Display SetUp buttonMake sure the Show text if greater than is set to 2 pixels and theQuick redraw threshold is set to 1:2000
Determine the name <strong>of</strong> the layer for the line you wish to changeGo to Lithology and click on the button for the line <strong>of</strong> interestFor example, Notice the Name <strong>of</strong> the Layer: LL-L4L4Click Abort then click on the Layers Toolbox icon
Scroll down until you see a black dot on the left side <strong>of</strong> the layer <strong>of</strong>interest, eg. LL-L4 and click on the box: “Solid”Then increase the thickness and click OK
If you wish to save the changes line width, then save changesUse the same Layers as the Legend you are using.