Coordinator and Instructor Guide International Trauma Life Support ...
Coordinator and Instructor Guide International Trauma Life Support ...
Coordinator and Instructor Guide International Trauma Life Support ...

You also want an ePaper? Increase the reach of your titles
YUMPU automatically turns print PDFs into web optimized ePapers that Google loves.
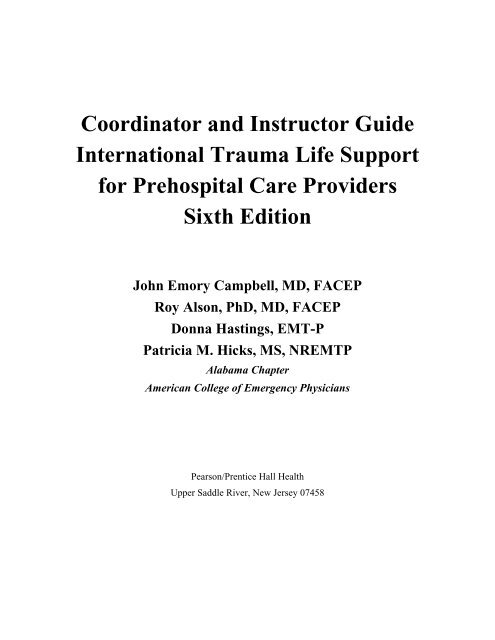
<strong>Coordinator</strong> <strong>and</strong> <strong>Instructor</strong> <strong>Guide</strong><strong>International</strong> <strong>Trauma</strong> <strong>Life</strong> <strong>Support</strong>for Prehospital Care ProvidersSixth EditionJohn Emory Campbell, MD, FACEPRoy Alson, PhD, MD, FACEPDonna Hastings, EMT-PPatricia M. Hicks, MS, NREMTPAlabama ChapterAmerican College of Emergency PhysiciansPearson/Prentice Hall HealthUpper Saddle River, New Jersey 07458
Publisher: Julie Levin Alex<strong>and</strong>erPublisher’s Assistant: Regina BrunoSenior Acquisitions Editor: Stephen SmithAssociate Editor: Monica MoosangExecutive Marketing Manager: Katrin BeacomMarketing Specialist: Michael SirinidesManaging Editor for Production: Patrick WalshProduction Liaison: Julie LiManufacturing Manager: Ilene SanfordManufacturing Buyer: Pat BrownNotice: The authors <strong>and</strong> the publisher of this volume have taken care that the information <strong>and</strong>technical recommendations contained herein are based on research <strong>and</strong> expert consultation, <strong>and</strong>are accurate <strong>and</strong> compatible with the st<strong>and</strong>ards generally accepted at the time of publication.Nevertheless, as new information becomes available, changes in clinical <strong>and</strong> technical practicesbecome necessary. The reader is advised to carefully consult manufacturers’ instructions <strong>and</strong> informationmaterial for all supplies <strong>and</strong> equipment before use, <strong>and</strong> to consult with a healthcareprofessional as necessary. This advice is especially important when using new supplies orequipment for clinical purposes. The authors <strong>and</strong> publisher disclaim all responsibility for anyliability, loss, injury, or damage incurred as a consequence, directly or indirectly, of the use <strong>and</strong>application of any of the contents of this volume.Copyright © 2008 by Pearson Education, Inc., Upper Saddle River, New Jersey, 07458.Pearson Prentice Hall. All rights reserved. Printed in the United States of America. This publicationis protected by Copyright <strong>and</strong> permission should be obtained from the publisher prior to anyprohibited reproduction, storage in a retrieval system, or transmission in any form or by anymeans, electronic, mechanical, photocopying, recording, or likewise. For information regardingpermission(s), write to: Rights <strong>and</strong> Permissions Department.Pearson Prentice Hall is a trademark of Pearson Education, Inc.Pearson ® is a registered trademark of Pearson plc.Prentice Hall ® is a registered trademark of Pearson Education, Inc.Pearson Education, Ltd., LondonPearson Education Australia Pty. Limited, SydneyPearson Education Singapore, Pte. Ltd.Pearson Education North Asia Ltd., Hong KongPearson Education Canada, Ltd., TorontoPearson Educacion de Mexico, S.A. de C.V.Pearson Education—Japan, TokyoPearson Education Malaysia, Pte. Ltd.Pearson Education, Upper Saddle River, NJISBN 0-13-159869-4ii
CONTENTSMission Statement of the ITLS OrganizationPrefacexiiixiv1 Overview of the Basic <strong>and</strong> Advanced ITLS Courses 1Course Synopsis 1Lectures 1Advanced ITLS 2Basic ITLS 2Skill StationsAdvanced ITLS 2Basic ITLS 3Skill Station Rotations 3Patient Assessment Scenario Practice <strong>and</strong> Testing 4Examples of Course Timetables 5Sample Course Timetables (Advanced Providers) 5Sample Course Timetable: Advanced Two-Day Course, Lectures Both Days 5Sample Course Timetable: Advanced Two-Day Course, Lectures First Day 6Sample Course Timetable: Advanced Two-<strong>and</strong>-a-Half-Day Course 8Sample Course Timetables (Basic Providers) 9Sample Course Timetable: Basic Two-Day Course, Lectures Both Days 9Sample Course Timetable: Basic Two-Day Course, Lectures First Day 10Sample Course Timetable: Basic Two-<strong>and</strong>-a-Half-Day Course 12Faculty Meetings 13Precourse 13Before Skill Station Rotations 14Before Assessment Scenario Practice <strong>and</strong> Testing 14Postcourse 14Faculty Critique 152 Administrative Considerations 16Frequently Asked Questions 16What Is the Mission of the ITLS Organization? 16iii
What Are the Goals <strong>and</strong> Objectives of the Basic <strong>and</strong> Advanced ITLS Courses? 16Who Can Teach the Course? 16Who Can Take the Course? 16How Many Students Can Be Taught in a Course? 17How Many <strong>Instructor</strong>s Are Required to Teach a Course? 17What Must Be Taught in an ITLS Course? 17What Constitutes Course Completion? 17What Are the Performance Criteria? 17What Are the Pass-Fail Criteria? 18What Is the Retest Policy? 18What Does Certification Mean? 19How Does an ITLS Provider or <strong>Instructor</strong> Maintain Certification? 19Where Do I Get the Pretest <strong>and</strong> Posttest? 19Precourse Planning 19Scheduling a Certified ITLS Course 19Selecting a Course <strong>Coordinator</strong> 20Selecting a Course Medical Director 20Selecting Faculty 20Selecting Models 21Selecting the Site 22Equipment 23Master Equipment List 23Meals 28Course Budget 29<strong>Instructor</strong> Ready Book 29Delegating Tasks 30Master Checklist 31Precourse 31Three Months Before the Course 31Two Months Before the Course 32One Month Before the Course 32Two Weeks Before the Course 33iv
One Day Before the Course 34First Day of the Course 34Second Day of the Course 35One Day After the Course 36One Week After the Course 36Door Signs for Skills <strong>and</strong> Testing Stations 383 Teaching Strategies: <strong>Guide</strong> for <strong>Instructor</strong>s 57Roles <strong>and</strong> Responsibilities 57Teaching Methodology 57Presentation of Lectures 58Important Lecture Presentation Tools 59Skill Stations 60Patient Assessment Scenario Practice <strong>and</strong> Testing 61How to Present the Scenario to the Student 61Teaching versus Testing Formats 624 Case Scenarios: Teaching <strong>and</strong> Evaluation Stations 64Scenario 1 65Scenario 2 70Scenario 3 75Scenario 4 79Scenario 5 83Scenario 6 88Scenario 7 93Scenario 8 98Scenario 9 102Scenario 10 107Scenario 11 111Scenario 12 115Scenario 13 119ITLS Scenario Generic Grade Sheet 123ITLS Basic <strong>and</strong> Advanced Patient Assessment Grade Sheet 125ITLS Scenario Development Sheet 126v
5 <strong>Instructor</strong> Training Course 132M<strong>and</strong>atory Topics for an ITLS <strong>Instructor</strong> Course 132Sample Agenda for One-Day <strong>Instructor</strong> Course 133<strong>Instructor</strong> C<strong>and</strong>idate Monitoring 1346 The Provider Course 135Scene Size-up 135Assessment <strong>and</strong> Initial Management of the <strong>Trauma</strong> Patient 136Initial Airway Management 137Thoracic <strong>Trauma</strong> 139Shock Evaluation <strong>and</strong> Management 140Head <strong>Trauma</strong> 142Spinal <strong>Trauma</strong> 143Abdominal <strong>Trauma</strong> 145Extremity <strong>Trauma</strong> 146Burns 147<strong>Trauma</strong> in Children 149<strong>Trauma</strong> in the Elderly 150<strong>Trauma</strong> in Pregnancy 151Patients Under the Influence of Alcohol or Drugs 152The <strong>Trauma</strong> Cardiopulmonary Arrest 153St<strong>and</strong>ard Precautions in the Prehospital Setting 154Skill Station 1: Basic <strong>and</strong> Advanced Airway Management 155Basic Airway Management 155Advanced Airway Management 161Skill Station 2: Spine Management Skills I 168Skill Station 3: Traction Splints 173Skill Station 4: Spine Management Skills II 176Skill Station 5: Chest Decompression/Fluid Resuscitation 183Skill Station 6: Patient Assessment <strong>and</strong> Management 1907 Other ITLS Courses 197Refresher Course for <strong>Instructor</strong>s 197Recertification Course for Providers 197vi
Affiliate Faculty Training Program 198Bridge Course for PHTLS <strong>Instructor</strong>s 1988 Policies <strong>and</strong> Procedures 200The ITLS Organization: <strong>International</strong> <strong>Trauma</strong> <strong>Life</strong> <strong>Support</strong>, Inc. 200<strong>International</strong> <strong>Trauma</strong> Conference 200ITLS Organizational Chart 202ITLS Chapter Structure 203Faculty <strong>and</strong> Providers 203Administrative Leaders of the Chapter Program 203Course Managers within the Chapter Program 203ITLS Chapter Responsibilities 203ITLS Responsibilities to the Chapters 204ITLS Certifications 204Basic ITLS Provider 205Advanced ITLS Provider 205Pediatric ITLS Provider 205ITLS Access Provider 206Basic ITLS <strong>Instructor</strong> 206Advanced ITLS <strong>Instructor</strong> 207Pediatric ITLS <strong>Instructor</strong> 208ITLS Access <strong>Instructor</strong> 209ITLS Appointments 211Chapter Advisory Committee Member 211Advisory Committee Chairperson 212<strong>International</strong> Faculty 214Chapter Medical Director 214Chapter <strong>Coordinator</strong> 216Affiliate Faculty 217Course Medical Director 219Course <strong>Coordinator</strong> 220Miscellaneous Policies 222Certification Cards 222vii
ITLS Reciprocity with PHTLS 222ITLS <strong>Instructor</strong> Reciprocity with Chapters 222ITLS Provider Reciprocity with Chapters 222Teaching Certified ITLS Courses in Areas That Do Not Have a Chapter 222Medical Director Involvement in ITLS Courses 222Bridge Course Policy 2239 Student <strong>Guide</strong> <strong>and</strong> Optional Skills 225Students’ <strong>Guide</strong> to ITLS 225Optional Skill Stations 226Optional Skill 1: Digital Intubation 226Optional Skill 2: Transillumination (Lighted Stylet) 228Optional Skill 3: Translaryngeal Jet Ventilation 229Optional Skill 4: Pharyngo-Tracheal Lumen Airway 231Optional Skill 5: Esophageal Tracheal Combitube ® 233Optional Skill 6: King LT-D Airway 235Optional Skill 7: Laryngeal Mask Airway 237Optional Skill 8: Adult Intraosseous Infusion 240Optional Skill 9: Rapid Sequence Intubation 242Forms 245Glasgow Coma Score 247Moulage 248viii
Mission Statement of the ITLS Organization<strong>International</strong> <strong>Trauma</strong> <strong>Life</strong> <strong>Support</strong>, Inc. is a global organization dedicated to preventing death<strong>and</strong> disability from trauma through education <strong>and</strong> emergency trauma care.ix
PrefaceThe Alabama Chapter of the American College of Emergency Physicians (ACEP) developed theBasic <strong>Trauma</strong> <strong>Life</strong> <strong>Support</strong> (BTLS) course in 1982. The decision to develop such a course wasbased on the need for good “h<strong>and</strong>s-on” continuing education courses for EMTs <strong>and</strong> other EMSpersonnel. BTLS has since changed its name to <strong>International</strong> <strong>Trauma</strong> <strong>Life</strong> <strong>Support</strong> (ITLS) <strong>and</strong>become accepted internationally as the st<strong>and</strong>ard training course for prehospital trauma care <strong>and</strong>now is not only taught as a continuing education course but also used in many EMT training programs.This instructor <strong>and</strong> coordinator guide is designed to help you conduct an organized ITLScourse. ITLS courses are monitored <strong>and</strong> certified by local ITLS chapters. Student texts <strong>and</strong> slidesare available to be used with this manual. The ITLS course is usually conducted over a two-dayperiod, but if time is available, this material can be better taught over a longer period, such asduring EMT training. Information about how to schedule a certified course in your area can beobtained by contacting the ITLS office:<strong>International</strong> <strong>Trauma</strong> <strong>Life</strong> <strong>Support</strong>, Inc.1 S. 280 Summit Avenue, Court B-2Oakbrook Terrace, IL 60181Phone U.S.: 1-888-495-ITLSPhone outside U.S.: +1-630-495-6442Fax: +1-630-495-6404E-mail: info@itrauma.orgInternet: http://www.itrauma.orgx
1Overview of the Basic <strong>and</strong> Advanced ITLS Courses<strong>Trauma</strong> is one of the leading causes of death <strong>and</strong> disability, not just in the United States, but alsoall over the world. 1 During the course of a year, almost 1 in every 4 U.S. citizens is injured <strong>and</strong> 1in 20 is disabled to some degree. Many of these patients require surgical intervention or otheradvanced capabilities available only in the hospital. For these patients, the difference betweenrecovery <strong>and</strong> death is often measured in minutes. Thus, the care provided by rescuers, both prehospital<strong>and</strong> hospital, is crucial.The primary purpose of the ITLS course is to provide students with the fundamental knowledge<strong>and</strong> experience necessary to get the trauma patient to the emergency department in the bestpossible condition. The ITLS course focuses on the skills necessary to recognize mechanisms ofinjury, perform an organized time-efficient assessment, prioritize <strong>and</strong> perform critical interventions,appropriately package, <strong>and</strong> transport the trauma patient. A major focus of the course is theidentification of conditions that require immediate transport (“load-<strong>and</strong>-go”) in order to save thepatient. The basic course is designed to teach EMT-Bs <strong>and</strong> first responders, <strong>and</strong> the advancedcourse is designed to teach paramedics, advanced EMTs, <strong>and</strong> other advanced EMS providers.<strong>Life</strong>saving techniques are taught or reviewed in practical exercises. Newly developed equipmentis provided, when possible, to allow the students to become familiar with state-of-the-art techniques<strong>and</strong> equipment.While the course is designed for the prehospital phase of EMS, it is also useful to medicalstudents, first-year emergency medicine residents, registered nurses, nurse practitioners, <strong>and</strong>physician assistants interested in trauma care. Not only will the lectures <strong>and</strong> most of the skills beuseful, but they will also provide a unique view of the world in which EMTs must function,which is very different from the “cozy confines” of the emergency department.COURSE SYNOPSISThe two-day format for ITLS courses is considered the most practical, even though it limits lecturetime <strong>and</strong> requires precise timing of practice stations. Most students <strong>and</strong> faculty simply donot have more than two days available to attend courses. Where there are no time constraints,you may take more time with both the lectures <strong>and</strong> skill stations <strong>and</strong> thus enhance learning thematerial. An excellent way to do this is to teach the course over two-<strong>and</strong>-a-half days, in the eveningstwice a week, or over a college semester. Sample schedules will be given.LECTURESCoordination of the lectures is of utmost importance. The lectures set the stage for the weekend,<strong>and</strong> equipment malfunction or speaker delays detract from the remainder of the course. The lectureassignments may be divided among the instructors or h<strong>and</strong>led by one instructor as desired.The course director <strong>and</strong> coordinator should take into consideration each person’s ability to lecture.It is important that the instructors are assigned <strong>and</strong> have the PowerPoint slide presentationat least two weeks before the course. It is advisable that each instructor be given the questions1
pertaining to his or her lecture that will appear on the written examination. It is also importantfor the course director to be available in the event that an instructor is late or does not show up.The coordinator or course director must get the lecturers started <strong>and</strong> finished on time. Chapterobjectives <strong>and</strong> key lecture points can be found in Chapter 6.Advanced ITLSThe first 22 chapters are considered “core” material <strong>and</strong> should be covered in all courses. Allchapters in the appendix are optional <strong>and</strong> should not be covered in a two-day or two-<strong>and</strong>-a-halfdaycourse (there is too much material to cover). If you are teaching ITLS as part of thecurriculum of an advanced EMT or paramedic course, it is reasonable to include the appendices.The students must be notified in advance if any optional material is to be covered.Basic ITLSChapters 1–4, Chapter 5: Basic Airway Management, Chapters 6, 8, 10–20, <strong>and</strong> 22 areconsidered core material <strong>and</strong> should be covered in all basic courses. (Chapter 5: AdvancedAirway Management <strong>and</strong> Chapters 7, 9, <strong>and</strong> 21 are for the advanced course.) The chapters in theappendices are optional <strong>and</strong> should not be covered in a two-day or two-<strong>and</strong>-a-half-day course(there is too much material to cover). If you are teaching ITLS as part of the curriculum of anEMT course, it is reasonable to include the basic-level information in the appendices. The studentsmust be notified in advance if any optional material is to be covered.SKILL STATIONSSkill stations are the heart of the ITLS course <strong>and</strong> are a key component to student success. Theskill stations should complement lectures <strong>and</strong> not repeat information already presented.Skill station objectives, equipment lists, <strong>and</strong> teaching outlines can be found in Chapter 6. Theskill stations are:1. Basic <strong>and</strong> Advanced Airway Management2. Short SMR Devices/Emergency Rescue <strong>and</strong> Rapid Extrication3. Traction Splints4. Helmet Management/Log-Roll/Long Backboard5. Chest Decompression/Fluid Resuscitation6. Patient Assessment <strong>and</strong> ManagementAdvanced ITLSSkill Stations 1–6 are core skills for the advanced course. There are two Patient Assessment <strong>and</strong>Management skill stations during the skill station rotations. During the first rotation, studentsobserve a detailed demonstration of patient assessment <strong>and</strong> review the ground rules of practice<strong>and</strong> testing. The students should underst<strong>and</strong> the specific steps of the assessment <strong>and</strong> the implicationsfor management after the first rotation. During the second rotation, students practice patient2
assessment using a scenario (see Chapter 6, Skill Station 6).You are not expected to teach all types of traction splints. Teach the traction splint in commonuse in your area. In the chest decompression station, it is recommended that you teach theanterior chest technique. Both external jugular vein cannulation <strong>and</strong> intraosseous infusion arecore skills, but some ITLS chapters do not teach external jugular vein cannulation if the studentsare already skilled in the procedure.All skills in the appendix are optional but may be taught if time permits. The students mustbe notified in advance if any optional material is to be covered.Basic ITLSSkill Stations 1–4 <strong>and</strong> 6 are core skills for the basic course. (Skill Station 5: Chest Decompression/FluidResuscitation is only taught in the advanced course.) There are two Patient Assessment<strong>and</strong> Management skill stations during the skill station rotations. During the first rotation,students observe a detailed demonstration of patient assessment <strong>and</strong> review the ground rules ofpractice <strong>and</strong> testing. The students should underst<strong>and</strong> the specific steps of the assessment <strong>and</strong> theimplications for management after the first rotation. During the second rotation, students practicepatient assessment using a scenario (see Chapter 6, Skill Station 6).You are not expected to teach all types of traction splints. Teach the traction splint in commonuse in your area.All of the optional skills in the appendix are considered advanced skills <strong>and</strong> should not betaught in the basic course.Skill Station RotationsThe students must be assigned to groups for skill station rotations. An easy way to do this is todivide them into the same number of groups as there are skill stations (see the following tentativeschedules), <strong>and</strong> assign a number for each group for the skill station rotations. It does not matter ifall of the groups do not have the same number of students.EXAMPLE: If there are 24 students <strong>and</strong> 7 skill stations, you would have four groups ofthree students <strong>and</strong> three groups of four students.EXAMPLE: If there are 20 students <strong>and</strong> 6 skill stations, you would have four groups ofthree students <strong>and</strong> two groups of four students.An easy way to do this is to point out “1, 2, 3, 4, 5, 6, 7 [to the number of skill stations]Group One. 1, 2, 3… Group Two,” <strong>and</strong> so on, while the students are still seated. Tell them to reportto the skill station that is the same as their group number. In other words, Group One goes toStation 1, Group Two to Station 2, <strong>and</strong> so on. Explain to the students that, when the timekeeperannounces “CHANGE STATIONS,” each group will rotate up one number. For example, GroupOne goes to Station 2, Group Two goes to Station 3, <strong>and</strong> so on. Also explain that when rotatingfrom the station with the highest number, that group goes to Station 1. See tentative schedulesthat follow.Some combined courses (basic <strong>and</strong> advanced providers) mingle the students <strong>and</strong> simply havethe basic providers go through all of the skill stations with the advanced providers (getting a3
eak during the advanced portion of the skill stations).Most course coordinators wait to assign groups until the students have arrived for class. Ifgroups are assigned before class begins, you may have to rearrange groups if some of the studentsdo not show up.PATIENT ASSESSMENT SCENARIO PRACTICE AND TESTINGThe patient assessment scenario stations are the heart of the course. They integrate the student’sprofessional experience, the lectures, <strong>and</strong> the skill stations. They are the stage for the h<strong>and</strong>s-onlearning of ITLS. You may choose from the patient assessment scenarios in Chapter 4, or youmay make up your own scenarios. If you make up your own scenarios, please send copies toITLS, Inc., as we may want to include them in the next <strong>Coordinator</strong> <strong>and</strong> <strong>Instructor</strong> <strong>Guide</strong>. AScenario Development Sheet is included at the end of this chapter to assist you in completingnew scenarios.Since the Glasgow Coma Scale (GCS) score is now used in patient assessment, you mustprovide a copy of the GCS for the students to use when they practice <strong>and</strong> test (they are not expectedto memorize it). A copy of the GCS is included in the Forms section in Chapter 9. Youmay photocopy it <strong>and</strong> provide copies to your students for use during patient assessment.The number of scenarios that you use will depend on the number of students who are takingthe course. You need at least one scenario station for each three students. You will never haveless than six scenarios, as you need that many for a group of three (three practices, three tests).You will almost always need an extra scenario station for retests, but this can be put together atthe end of the day if you are short of instructors. It is strongly recommended that you have twoinstructors for each patient assessment test station, one to interact with the students <strong>and</strong> one tofill out the grade sheet. If you mingle basic <strong>and</strong> advanced students, the instructor must indicatethe student’s level of training (basic or advanced) on the grade sheet <strong>and</strong> conduct the practice<strong>and</strong> test according to the appropriate level.When your students are ready to be assigned for rotation of their practice <strong>and</strong> testing scenarios,they need to be divided into groups of three.EXAMPLE: If there are 24 students, you would have eight groups of three students. Withthe students still seated, point out “1, 2, 3, Group One. 1, 2, 3, Group Two,” <strong>and</strong> so on. Tellthem to report to the patient assessment station that is the same as their group number. In otherwords, Group One goes to Station 1, Group Two to Station 2, <strong>and</strong> so on. Explain to thestudents that when the timekeeper announces “CHANGE STATIONS,” each group will rotateup one number. For example, Group One goes to Station 2, Group Two goes to Station 3,<strong>and</strong> so on. Also explain that when rotating from the highest station number, that group goesto Station 1.If your head count leaves you with two students in the last group, they can rotate as a groupof two. If your head count leaves you with one student in the last group, take that student <strong>and</strong>one student from another group <strong>and</strong> make two groups of two. A group of four students will notallow your stations to rotate smoothly. The groups of two students will rotate to the third practicestation. One of the students will practice twice. This allows the group of two to participate inthree practice stations, the same as the other groups. When they move to the fourth station, it will4
e a test like everyone else. However, after both students test, they will be finished.Each scenario station should have three rotations for practice at 20 minutes per rotation, <strong>and</strong>three rotations for testing at 10 minutes per rotation. These times may vary according to yourdiscretion.By using this system, your rotations will be smooth with very little coordinating, <strong>and</strong> nothingneeds to be written down. Students who do not show up for the course will not affect your rotations.Enough copies of grade sheets must be made so that each station will have enough for allthe teams that practice <strong>and</strong> test. A grade sheet is filled out for each team (specifically, the teamleader) that practices or tests in a station.It is strongly recommended that all groups rotate through the patient assessment testing stationsat the same time. However, if there is an insufficient number of faculty to conduct concurrentstations for each group, some course coordinators have allowed half of the groups to takethe written exam while the other half take the patient assessment test. If you must use this type ofrotation, it is very important that you keep the two groups of students separated so there is noexchange of test information (written or practical) between the two groups.EXAMPLES OF COURSE TIMETABLESThe classic ITLS course schedule has had lectures in the morning <strong>and</strong> skills in the afternoon fortwo days. It was originally done this way to follow the example of the ATLS <strong>and</strong> ACLS courses.The schedule was designed to give the students a break after four hours of lectures. The problemwith this is that you are teaching skills that will not be covered in a lecture until the second day.Several ITLS chapters have modified the schedule so that all of the lectures are taught the firstday, all of the skill stations are taught the second morning, <strong>and</strong> the second afternoon is spent intesting. Many of the students find this more acceptable in spite of facing eight hours of lectureson the first day. This schedule also allows you to have fewer instructors the first day. ITLS hastaken no st<strong>and</strong> on this issue, <strong>and</strong> you may choose whichever works best for you. Samples of bothschedules are provided. ITLS may also be offered in a case-based approach. Schedules are availablefrom the ITLS office.SAMPLE COURSE TIMETABLES (ADVANCED PROVIDERS)Sample Course Timetable: Advanced Two-Day Course, Lectures Both DaysFirst daySign-In <strong>and</strong> Collection of PretestsWelcome <strong>and</strong> IntroductionSt<strong>and</strong>ard PrecautionsScene Size-UpAssessment <strong>and</strong> Initial Management, <strong>and</strong> <strong>Trauma</strong> ArrestPatient Assessment Demonstration30 min5 min10 min30 min45 min15 min5
BreakInitial Airway ManagementShock Evaluation <strong>and</strong> ManagementLunch <strong>and</strong> Faculty MeetingThoracic <strong>and</strong> Abdominal <strong>Trauma</strong>Head <strong>and</strong> Spinal <strong>Trauma</strong>Extremity <strong>Trauma</strong>Skill Stations (30 minutes each)1. Basic <strong>and</strong> Advanced Airway2. Short SMR Devices/Emergency Rescue <strong>and</strong> Rapid Extrication3. Traction Splints4. Helmet Management/Log-Roll/Long Backboard5. Chest Decompression/Fluid Resuscitation6. Patient Assessment <strong>and</strong> Management7. Patient Assessment <strong>and</strong> ManagementFaculty MeetingSecond DayBurns<strong>Trauma</strong> in Pregnancy<strong>Trauma</strong> in ChildrenBreak<strong>Trauma</strong> in the ElderlyPatients Under the InfluencePatient Assessment ScenariosLunch <strong>and</strong> Faculty MeetingPatient Assessment ScenariosPractical <strong>and</strong> Written ExaminationFaculty MeetingResults to Students15 min30 min30 min60 min30 min30 min30 min210 min30 min45 min30 min45 min15 min25 min20 min60 min60 min90 min120 min30 minSample Course Timetable: Advanced Two-Day Course, Lectures First Day6
First DaySign-In <strong>and</strong> Collection of PretestsWelcome <strong>and</strong> IntroductionSt<strong>and</strong>ard PrecautionsScene Size-UpAssessment <strong>and</strong> Initial Management <strong>and</strong> <strong>Trauma</strong> ArrestPatient Assessment DemonstrationBreak<strong>Trauma</strong> in Pregnancy/Elderly <strong>Trauma</strong>Shock Evaluation <strong>and</strong> Management<strong>Trauma</strong> in ChildrenLunchThoracic <strong>Trauma</strong>Head <strong>Trauma</strong>Initial Airway ManagementAbdominal/Extremity <strong>Trauma</strong>BreakBurnsSpinal <strong>Trauma</strong>Patients Under the InfluencePatient Assessment DemonstrationFaculty MeetingSecond DayPatient Assessment Demo, Questions <strong>and</strong> AnswersSkill Stations (30 minutes each)1. Basic <strong>and</strong> Advanced Airway2. Short SMR Devices/Emergency Rescue <strong>and</strong> Rapid Extrication3. Traction Splint/Splinting4. Helmet Management/Log-Roll/Long Backboard5. Chest Decompression/Fluid Resuscitation6. Patient Assessment <strong>and</strong> Management7. Patient Assessment <strong>and</strong> Management30 min15 min10 min30 min45 min15 min15 min45 min30 min45 min60 min30 min30 min30 min45 min15 min45 min30 min20 min15 min30 min30 min210 min7
LunchWritten TestPractice <strong>and</strong> Testing Scenario StationsFaculty MeetingResults to Students60 min30 min120 min30 minSample Course Timetable: Advanced Two-<strong>and</strong>-a-Half-Day CourseFirst EveningFaculty MeetingSign-In <strong>and</strong> Collection of PretestsWelcome <strong>and</strong> IntroductionScene Size-UpAssessment <strong>and</strong> Initial Management <strong>and</strong> <strong>Trauma</strong> ArrestPatient Assessment DemonstrationBreakPatient Assessment Practice15 min30 min15 min30 min45 min15 min15 min90 minThe students should be divided into groups of six. There should be enough stations set up (4 fora class of 24 or 6 for a class of 36) for each group to watch one patient assessment demonstration<strong>and</strong> then divide into two groups of three to practice patient assessment.Second DaySign-In <strong>and</strong> CoffeeInitial Airway ManagementThoracic <strong>Trauma</strong>/Shock Evaluation <strong>and</strong> ManagementSpinal <strong>Trauma</strong>BreakHead <strong>Trauma</strong>Abdominal/Extremity <strong>Trauma</strong>BurnsLunch <strong>and</strong> Faculty MeetingSkill Stations (30 minutes each)30 min30 min60 min30 min15 min30 min45 min30 min60 min150 min8
1. Basic <strong>and</strong> Advanced Airway2. Short SMR Devices/Emergency Rescue <strong>and</strong> Rapid Extrication3. Traction Splint/Splinting4. Helmet Management/Log-Roll/Long Backboard5. Chest Decompression/Fluid ResuscitationFaculty MeetingThird DaySign-In <strong>and</strong> Coffee<strong>Trauma</strong> in Pregnancy/Elderly <strong>Trauma</strong><strong>Trauma</strong> in ChildrenPatients Under the InfluenceSt<strong>and</strong>ard PrecautionsBreak <strong>and</strong> Faculty MeetingPatient Assessment Practice <strong>and</strong> TestingLunchWritten TestContinue Patient Assessment Practice <strong>and</strong> TestingFaculty MeetingResults to the Students30 min30 min30 min30 min20 min15 min15 min90 min60 min30 min30 minSAMPLE COURSE TIMETABLES (BASIC PROVIDERS)Sample Course Timetable: Basic Two-Day Course, Lectures Both DaysFirst DaySign-In <strong>and</strong> Collection of PretestsWelcome <strong>and</strong> IntroductionSt<strong>and</strong>ard PrecautionsScene Size-UpAssessment <strong>and</strong> Initial ManagementPatient Assessment DemonstrationBreak30 min5 min10 min30 min45 min15 min15 min9
Initial Airway ManagementShock Evaluation <strong>and</strong> ManagementLunch <strong>and</strong> Faculty MeetingThoracic <strong>and</strong> Abdominal <strong>Trauma</strong>Head <strong>and</strong> Spinal <strong>Trauma</strong>Extremity <strong>Trauma</strong>Skill Stations (30 minutes each)1. Basic Airway2. Short SMR Devices/Emergency Rescue <strong>and</strong> Rapid Extrication3. Traction Splint/Splinting4. Helmet Management/Log-Roll/Long Backboard5. Patient Assessment <strong>and</strong> Management6. Patient Assessment <strong>and</strong> ManagementFaculty MeetingSecond DayBurns<strong>Trauma</strong> in Pregnancy<strong>Trauma</strong> in ChildrenBreak<strong>Trauma</strong> in the ElderlyPatients Under the InfluencePatient Assessment ScenariosLunch <strong>and</strong> Faculty MeetingPatient Assessment ScenariosPractical <strong>and</strong> Written ExaminationFaculty MeetingResults to Students30 min30 min60 min30 min30 min30 min180 min30 min45 min30 min45 min15 min25 min15 min60 min60 min90 min120 min30 minSample Course Timetable: Basic Two-Day Course, Lectures First DayFirst DaySign-In <strong>and</strong> Collection of Pretests30 min10
Welcome <strong>and</strong> IntroductionScene Size-UpSt<strong>and</strong>ard PrecautionsAssessment <strong>and</strong> Initial ManagementPatient Assessment DemonstrationBreak<strong>Trauma</strong> in Pregnancy/Elderly <strong>Trauma</strong>Shock Evaluation <strong>and</strong> Management<strong>Trauma</strong> in ChildrenLunchHead <strong>Trauma</strong>Initial Airway ManagementThoracic <strong>Trauma</strong>Abdominal/Extremity <strong>Trauma</strong>BreakBurnsSpinal <strong>Trauma</strong>Patients Under the InfluenceFaculty MeetingSecond DayPatient Assessment DemoQuestions <strong>and</strong> AnswersSkill Stations (30 minutes each)1. Basic Airway2. Short SMR Devices/Emergency Rescue <strong>and</strong> Rapid Extrication3. Traction Splint/Splinting4. Helmet Management/Log-Roll/Long Backboard5. Patient Assessment <strong>and</strong> Management6. Patient Assessment <strong>and</strong> ManagementLunchWritten TestPractice <strong>and</strong> Testing Scenario Stations15 min30 min10 min45 min15 min15 min45 min30 min45 min60 min30 min30 min30 min45 min15 min45 min30 min15 min30 min30 min180 min60 min30 min120 min11
Faculty MeetingResults to Students30 minSample Course Timetable: Basic Two-<strong>and</strong>-a-Half-Day CourseFirst EveningFaculty MeetingSign-In <strong>and</strong> Collection of PretestsWelcome <strong>and</strong> IntroductionScene Size-UpAssessment <strong>and</strong> Initial ManagementPatient Assessment DemonstrationBreakPatient Assessment Practice15 min30 min15 min30 min45 min15 min15 min90 minThe students should be divided into groups of six. There should be enough stations set up (4 fora class of 24 or 6 for a class of 36) for each group to watch one patient assessment demonstration<strong>and</strong> then divide into two groups of three to practice patient assessment.Second DaySign-In <strong>and</strong> CoffeeInitial Airway ManagementThoracic <strong>Trauma</strong>Shock Evaluation <strong>and</strong> ManagementSpinal Cord <strong>Trauma</strong>BreakHead <strong>Trauma</strong>Abdominal/Extremity <strong>Trauma</strong>BurnsLunch <strong>and</strong> Faculty MeetingSkill Stations (30 minutes each)1. Basic Airway2. Short SMR Devices/Emergency Rescue <strong>and</strong> Rapid Extrication3. Traction Splint/Splinting30 min30 min30 min30 min30 min15 min30 min45 min30 min60 min120 min12
4. Helmet Management/Log-Roll/Long BackboardFaculty MeetingThird DaySign-In <strong>and</strong> Coffee<strong>Trauma</strong> in Pregnancy/Elderly <strong>Trauma</strong><strong>Trauma</strong> in ChildrenPatients Under the InfluenceSt<strong>and</strong>ard PrecautionsBreak <strong>and</strong> Faculty MeetingPatient Assessment Practice <strong>and</strong> TestingLunchWritten TestContinue Patient Assessment Practice <strong>and</strong> TestingFaculty MeetingResults to the Students30 min30 min30 min30 min15 min15 min15 min90 min60 min30 min30 minFACULTY MEETINGSPrecourseThis meeting has traditionally taken place after dinner the night before the course but may just aswell be done early in the morning during course registration. This meeting serves several importantfunctions:1. Orient the faculty to each other <strong>and</strong> to the site.2. Orient the faculty to the particular student composition (EMT-Bs, first responders, EMTintermediates,paramedics, registered nurses, medical students, medical residents, etc.).3. Update the final changes in the agenda <strong>and</strong> remind faculty of the importance of adhering toscheduled lecture times.4. Update the latest ITLS innovations <strong>and</strong> directives from the affiliate faculty present.5. Review the goals <strong>and</strong> objectives of an ITLS course (see Chapter 2).6. Remind faculty that the discussion of students that takes place in the faculty meetings is to bekept in the meetings.7. Review both the <strong>Guide</strong> for <strong>Instructor</strong>s <strong>and</strong> the Student <strong>Guide</strong> to ensure consistency amonginstructors for the entire course.13
8. Review available equipment <strong>and</strong> its distribution.9. Review any skill station revisions, <strong>and</strong> local procedures or protocols that might directly impactthe station.10. Identify last-minute no-shows <strong>and</strong> forgotten lecture slide sets.11. Encourage faculty to have a meeting at lunch each day to discuss the afternoon’s practicalstations.Before Skill Station RotationsThis should be a brief meeting to review teaching techniques <strong>and</strong> objectives of the skill stations.Specifically stress that skill stations are not for lectures but for demonstration <strong>and</strong> h<strong>and</strong>s-ontraining. Emphasize that each session must begin <strong>and</strong> end on time.Before Assessment Scenario Practice <strong>and</strong> TestingThe most consistent student complaint in course critiques has been inconsistency among the facultymembers teaching <strong>and</strong> testing assessment scenarios. This meeting should review the followingsections in both the text <strong>and</strong> instructor’s guide:1. Ground rules for team practice <strong>and</strong> testing (Chapter 3 in textbook).2. Breakdown of performance criteria (see Chapter 2).3. How to fill out the grade sheet (specifically notes to be taken relative to student performance<strong>and</strong> critical identifying data).4. Pass/fail criteria (see Chapter 2).5. Retest policy (see Chapter 2).6. Emphasize need to orient models to the scenarios.7. Reminder that the purpose of the faculty is to help the student learn at least enough to pass.Every effort must be made to identify weaknesses <strong>and</strong> assist the student with correctingthem.PostcourseThis meeting is to determine each student’s final grade. When grading is completed, the facultyshould be encouraged to critique the course <strong>and</strong> offer constructive suggestions for future courses.Each student’s written test scores <strong>and</strong> patient assessment scores (both practice <strong>and</strong> test)should be collated with the student’s picture (optional) <strong>and</strong> considered by the faculty.If a student fails the patient assessment station, the faculty may consider the student’s practicegrade to see if perhaps a marginal increase in grade is warranted. The same is true if the studentis a possible instructor c<strong>and</strong>idate. The scenario practice grade cannot be used to lower apassing grade. In other words, faculty members should consider practice scores only if they areconsidering raising the student’s grade. Because patient assessment is a somewhat subjectivescore, there are always some changes (<strong>and</strong> a lot of lively discussions) at the faculty meeting. The14
grade sheets of students who fail, especially if they fail the retest, should include careful documentationof why they failed. Students should always be allowed to review the informationmissed on written tests <strong>and</strong> patient assessment grade sheets after the faculty meeting. Thus, bevery careful in your documentation.Faculty CritiqueThis is usually the last time that the faculty will be together until another ITLS course. Now isthe time to collect comments from the faculty about the course <strong>and</strong> teaching material. How canthey be improved? ITLS is always interested in ways to improve the text, slides, <strong>and</strong> instructor’sguide. All comments <strong>and</strong> suggestions are appreciated <strong>and</strong> carefully considered for changes infuture editions. The future development of ITLS is dependent on continued constructive criticismby students <strong>and</strong> faculty.Endnote1. Peden M, McGee K, Krug E (eds.). Injury: A leading cause of the global burden of disease, 2000. Geneva,Switzerl<strong>and</strong>: World Health Organization, 2002.15
2Administrative ConsiderationsFREQUENTLY ASKED QUESTIONSWhat Is the Mission of the ITLS Organization?ITLS is a global organization dedicated to preventing death <strong>and</strong> disability from trauma througheducation <strong>and</strong> emergency trauma care.What Are the Goals <strong>and</strong> Objectives of the Basic <strong>and</strong> Advanced ITLS Courses?1. Teach fundamental h<strong>and</strong>s-on trauma care.2. Teach a target audience of advanced EMTs, paramedics, <strong>and</strong> registered nurses for the advancedcourse <strong>and</strong> a target audience of EMT-Bs <strong>and</strong> first responders for the basic course.3. Maintain quality assurance so that the same fundamentals are consistently taught chapter tochapter <strong>and</strong> yet allow for regional differences.4. Keep the course current.5. Keep the course short enough to be taught in a weekend.6. Strive to make teaching <strong>and</strong> learning ITLS simple <strong>and</strong> practical.7. Keep the course conservative <strong>and</strong> noncontroversial so that the principles taught reflect thecurrent st<strong>and</strong>ard of care.Who Can Teach the Course?Certified ITLS courses must be taught by ITLS instructors. To become an ITLS instructor, onemust attend a certified ITLS course, score at least 86 percent on the written exam, <strong>and</strong> score “excellent”on patient assessment skills test (chapters may choose to use other criteria). After successfulcompletion of an instructor course, the instructor c<strong>and</strong>idate must be monitored or take aninstructor preceptorship (this varies from chapter to chapter). Basic ITLS instructors can onlyteach basic ITLS courses. Advanced ITLS instructors can teach basic or advanced ITLS courses.Physicians who are board certified in emergency medicine, or are ATLS providers, or who activelyparticipate <strong>and</strong> teach trauma care may take the instructor course or preceptorship withouttaking the full provider course.In unusual circumstances a physician or other EMS provider (EMT, nurse, nurse practitioner,or physician assistant) who has not taken the instructor course may help teach an ITLS course.However, this may be done only with the permission of the chapter ITLS medical director orITLS committee. These requirements are necessary to maintain the high quality of certifiedcourses.Who Can Take the Course?16
The advanced course material requires the ability to start intravenous fluids <strong>and</strong> to perform advancedairway management. Advanced airway management is defined as the use of a blind insertionairway device, or endotracheal tube. This limits the full course to advanced EMTs, paramedics,medical students, medical residents, registered nurses, nurse practitioners, <strong>and</strong> physician assistants.The basic course is for EMS personnel who cannot perform advanced procedures (basicEMTs, first responders, <strong>and</strong> licensed practical nurses).How Many Students Can Be Taught in a Course?The number of students that can be taught in a course is limited by the availability of faculty,equipment, <strong>and</strong> classroom space for lecture, skill stations, <strong>and</strong> patient assessment testing stations.Because so much of the teaching is almost one to one, large classes cannot be taught. Mostclasses range from 24 to 36 students; however, if enough instructors are available, as many as 50students may be taught.How Many <strong>Instructor</strong>s Are Required to Teach a Course?See Selecting Faculty in the Precourse Planning section of this chapter.What Must Be Taught in an ITLS Course?See Lectures <strong>and</strong> Skill Stations in Chapter 1.What Constitutes Course Completion?A student may become an ITLS provider by attending the lectures <strong>and</strong> skill stations <strong>and</strong> by passingthe written <strong>and</strong> practical examinations. ITLS providers will receive a card <strong>and</strong>/or certificatefrom the sponsoring chapter confirming that they have satisfactorily completed the course. Certificationis good for three years or whatever length is deemed appropriate by the chapter. Suchcertification does not guarantee future performance, nor is it a form of licensure of any kind. Studentswho fail either the written or the practical examination after retesting will be given documentationof attendance so they may receive continuing education credit.Recertification may be obtained by repeating the provider course or by taking an ITLS recertificationcourse.What Are the Performance Criteria?Performance criteria for the patient assessment test include the following:Inadequate Rating1. Disorganized assessment exams2. Prolonged on-scene times in the setting of load-<strong>and</strong>-go situations3. Critical actions missed (such as not stabilizing the neck)4. Fatal errors made (such as poor cervical spine management)5. Causes death of the patient17
Adequate Rating1. Reasonable organization of assessment exams2. Accurate identification of load-<strong>and</strong>-go situations3. Abbreviated on-scene times for load-<strong>and</strong>-go situations4. Performs all critical actions5. No fatal errors madeGood Rating1. Organized exams <strong>and</strong> solid overall performance2. Interacts well with patient <strong>and</strong> team members3. Performs all critical actions4. Abbreviated on-scene times for load-<strong>and</strong>-go situations5. Correctly performs or oversees performance of all critical interventionsExcellent Rating1. Excellent organization of assessment exams2. Excellent patient care3. Interacts well with patient <strong>and</strong> team members4. Directs the team well; displays leadership5. Performs all critical actions6. Abbreviated on-scene times for load-<strong>and</strong>-go situations7. Demonstrates clear underst<strong>and</strong>ing of prehospital trauma assessment <strong>and</strong> management8. Cooperative <strong>and</strong> supportive in the learning environment9. Conveys attitude of interest <strong>and</strong> desire to help teach trauma assessment <strong>and</strong> managementWhat Are the Pass-Fail Criteria?Students must attend the lectures <strong>and</strong> skill stations <strong>and</strong> obtain at least 74 percent on the writtenexam <strong>and</strong> at least “adequate” on the patient assessment test.What Is the Retest Policy?Students who fail only the patient assessment skills test will usually be retested on the same day(time permitting) or given the opportunity to retest within six weeks. It is strongly recommendedthat there be two evaluators for a patient assessment retest. If possible, the evaluator who initiallyrated the student as “inadequate” should not conduct the retest. Students may not retest inorder to raise a passing grade.18
Students who fail only the written test may not retake it immediately but will be given anopportunity to retest after having had time to review the material <strong>and</strong> study identified areas ofweakness. The retest will be scheduled within six weeks. Students who pass the retest will passthe course. Students who fail the retest may be provided an opportunity to retake the course at nocharge or for a reduced charge. Students may not retest in order to raise a passing grade.Students who fail both the written <strong>and</strong> patient assessment tests will be asked to repeat thecourse.What Does Certification Mean?Certification as an ITLS provider or instructor means that the individual has passed an ITLScourse taught by ITLS instructors under the sponsorship of the ITLS Organization. It does notcertify future performance, nor does it confer licensure of any kind.How Does an ITLS Provider or <strong>Instructor</strong> Maintain Certification?ITLS providers may maintain their certification by taking an ITLS provider or recertificationcourse every three years or whatever length is deemed appropriate by the chapter.ITLS instructors may maintain their instructor certification by teaching at least one ITLScourse (instructor or provider) per year for the years of certification <strong>and</strong> attending instructor updatesor refresher courses as deemed necessary by the chapter advisory committee. The chapteradvisory committee may develop additional criteria. (See Refresher Course for <strong>Instructor</strong>s inChapter 7.)Where Do I Get the Pretest <strong>and</strong> Posttest?Your ITLS chapter will provide the pretest <strong>and</strong> posttest when a certified course is scheduled.This practice ensures that your students will receive the most current version of the tests. Thisalso aids exam security.Scheduling a Certified ITLS CoursePRECOURSE PLANNINGCertified courses must be scheduled through the ITLS organization in your chapter. If you do notknow how to contact this organization in your area, you may obtain information by calling orwriting:Ginny Kennedy PalysExecutive Director<strong>International</strong> <strong>Trauma</strong> <strong>Life</strong> <strong>Support</strong>, Inc.1 S. 280 Summit Avenue, Court B-2Oakbrook Terrace, IL 60181 U.S.A.Phone inside U.S.: 1-888-495-ITLS19
Phone outside U.S.: +1-630-495-6442Fax: +1 630-495-6404Email: info@itrauma.orgInternet: http://www.itrauma.orgITLS support texts, instructor guides, <strong>and</strong> slides may be purchased at a discount through yourITLS chapter. They are also available from the ITLS Organization using the contact informationabove.Selecting a Course <strong>Coordinator</strong>The course coordinator is the key to a successful program. This position requires someone whois organized <strong>and</strong> motivated since there is a considerable amount of work involved over severalmonths. See Chapter 8 for the qualifications of a course coordinator.Teamwork <strong>and</strong> communication are the keys to a successful ITLS course. The course coordinatormust have a smooth working relationship <strong>and</strong> open communications with the course director<strong>and</strong> affiliate faculty, for it is teamwork that determines successful outcome. Together theymust select the site <strong>and</strong> faculty for the course. These selections are made on the basis of availability<strong>and</strong> the time frame in which they are working. Usually, three months are needed for thedevelopment of a course from beginning to end, with the last two weeks being the most intense.Selecting a Course Medical DirectorThe course medical director, or at least one of two co-directors, must be a physician ITLS instructor.A physician who is not already an instructor may co-direct a course with a physicianITLS instructor. It is best if the course medical director is also a local physician. A local physicianis better able to appropriately integrate the material into the local prehospital <strong>and</strong> emergencydepartment systems. An ITLS instructor physician is best prepared to present the material effectivelyin the manner in which it was designed. The medical director must take overall responsibilityfor the quality of the course.Responsibilities include being involved in the planning, scheduling, <strong>and</strong> actual teachingof the course. He or she must also see that the schedule allows adequate time for lectures <strong>and</strong>skill stations, including ensuring that lecturers stay within the given time frame. If any instructoris not present at the allotted time, the medical director should be able to fill in. The medical directormay delegate some or all of these responsibilities to the affiliate faculty. The course medicaldirector will chair the faculty meeting at the end of the course. If questions arise concerninggrading, the vote of the majority of the faculty will prevail. The medical director will vote onlyin the case of a tie.Selecting FacultyThe faculty for a certified ITLS course must consist of a course medical director, course coordinator,<strong>and</strong> enough instructors to teach the number of students registered. It is advisable to have amultidisciplinary faculty involved with the course to provide a balanced presentation of the traumateam concept. You must have at least one affiliate faculty at a course.20
The number of instructors needed depends on the number of students: The patient assessmenttesting is one-on-one <strong>and</strong> requires many instructors in order to keep the length of the coursewithin reason. The number of instructors used in the lectures varies. Most courses divide the lecturesamong the instructors, but one instructor can do all of them if necessary.Using the classic two-day sample schedule in Chapter 1 <strong>and</strong> the recommended minimumfaculty in Chapter 6, in addition to the course coordinator <strong>and</strong> course medical director, an advancedcourse would require nine faculty on the first day, <strong>and</strong> a basic course would require eightfaculty on the first day. Using the same criteria listed above, an advanced course with 21 studentswould require at least seven faculty on the second day, while an advanced class of 36 studentswould require at least 12 instructors on the second day for efficiency. A basic course with21 students would require at least seven faculty on the second day, <strong>and</strong> a basic class of 36 studentswould require at least 12 instructors on the second day for efficiency. Obviously, the morepatient assessment test stations you have, the more quickly the day will proceed, but it is stronglyrecommended that you have two instructors for each patient assessment test station, one to interactwith the students <strong>and</strong> one to fill out the grade sheet.One of the advantages of having all of the skill stations <strong>and</strong> testing done the second day isthat fewer instructors are needed the first day.When selecting instructors, remember that some people are good at lectures, others are goodat practical skills teaching, <strong>and</strong> a few are good at both. Try to make assignments that correspondto the instructors’ abilities. Local faculty should be used whenever possible. The greatest costinvolved in an ITLS course is the cost for out-of-town instructors. Many instructors serve withoutpay, but out-of-town instructors should at least have their expenses paid. Although it is preferredto have the same instructors for both days, it is not absolutely necessary, as some facultyhave only one day available.In unusual circumstances a physician or other EMS provider (EMT, registered nurse, nursepractitioner, or physician assistant) who has not taken the instructor course may help teach anITLS course. However, this may be done only with the permission of the chapter ITLS medicaldirector or committee. This requirement is necessary to maintain the high quality of certifiedcourses.<strong>Instructor</strong>s should all be consistent. There are two ways to promote consistency. One way isto cover all of the normal inconsistencies in the instructor meeting prior to the course. The otheris to monitor each lecture <strong>and</strong> skill station to catch inconsistencies.During the selection of instructors, you must ensure that at least four of your instructors arevery good at patient assessment demonstrations. One way to ensure this is to have those particularinstructors demonstrate the skills to the coordinator prior to the course.Selecting ModelsSince both acting ability <strong>and</strong> hard work are required of the models, you should use your bestjudgment when selecting them. They will be required to submit to being examined, h<strong>and</strong>led, extricated,splinted, <strong>and</strong> strapped for several hours. They should be paid for their efforts. Since theywill always have to have their chests examined, it is less embarrassing to have all male modelsexcept for those scenarios that call for a female. All models should be furnished old clothes orasked to wear clothes that they do not mind having ruined (it is a good idea to have clothes made21
up with Velcro fasteners so they can be pulled apart for exam <strong>and</strong> then easily stuck back together).Females should be warned to wear bathing suits or other suitable attire under theirclothes. Since the models will learn a lot about trauma care, it is recommended that EMTs orEMT students be used for this role. Students who are enrolled in the ITLS course should not beused for models except for minor skills such as traction splinting or helmet removal. The weight<strong>and</strong> age of a model should be a consideration. Models who are too heavy may cause injuries toyour students, <strong>and</strong> models who are too young may have too short an attention span to lastthrough a scenario.Selecting the SiteSelection of the appropriate site is the responsibility of the course coordinator <strong>and</strong> medical director.They should inspect the facility to determine the adequacy of the following:1. Large lecture room to accommodate both students <strong>and</strong> faculty. The st<strong>and</strong>ard ratio for a classroomis one person per 15 square feet. In other words, a 750-square-foot classroom wouldcomfortably fit 50 people.2. An adequate number of tables <strong>and</strong> chairs for students <strong>and</strong> faculty.3. Find out how many windows are in the classroom. If there are windows, they will need tohave shades so the screen can be seen.4. Are heating <strong>and</strong> air conditioning functional?5. Sufficient number of rooms or spaces to accommodate students, faculty, <strong>and</strong> equipment forskill stations. You will need at least one room or space for each skill station. Plan carefully;some stations require more space due to the amount of equipment. Some stations will requiretables, while others will require an open space. These rooms must be available prior to thestart of skill stations to allow equipment to be set up.Note: These rooms or spaces should be close enough to each other to allow timely rotations,but far enough from each other so that activity in one station does not distract studentsin another station. Careful selection of rooms can help prevent students from me<strong>and</strong>eringthrough the halls of the building <strong>and</strong> pausing to socialize.6. Sufficient number of rooms or spaces with open space to accommodate students, faculty, <strong>and</strong>equipment for patent assessment scenarios. You will need at least one room or space for eachgroup of three students. These rooms must be available prior to the start of skill stations to allowequipment to be set up.Note: These rooms or spaces should be close enough to each other to allow timely rotations,but far enough from each other so that activity in one station does not distract studentsin another station. Careful selection of rooms can help prevent students from me<strong>and</strong>eringthrough the halls of the building <strong>and</strong> pausing to socialize.7. A room or space that can be secured that is large enough to gather <strong>and</strong> store equipment whileit is not being used in skill stations.8. On-site or nearby meal functions to allow students <strong>and</strong> faculty to return to class on time afterlunch. If meals will not be on-site, directions to local restaurants should be available for thestudents <strong>and</strong> faculty.22
9. Privacy, which will prevent distractions to the students <strong>and</strong> shock to the casual passerby.ITLS courses have been adequately taught in motels, churches, junior colleges, hospitals,scout camps, <strong>and</strong> EMS training facilities.If you are teaching at another facility, you should inspect the site, if possible. Be sure thatstudents <strong>and</strong> faculty get a map of the location with their precourse materials. You will also needthe name of a responsible contact person for the facility.EquipmentEquipment should be assessed <strong>and</strong> inventoried two to three weeks prior to the course. When borrowingequipment, the equipment manager (see Delegating Tasks, later in this chapter) shoulduse a detailed checklist to see that all equipment is properly identified as to ownership <strong>and</strong> condition.Both before <strong>and</strong> after the course, it is advantageous to have staging areas, where equipmentis grouped by source. This area should have limited access <strong>and</strong> should be used to inventory<strong>and</strong> label equipment carefully. Any borrowed equipment should be returned cleaned <strong>and</strong> in goodrepair. This step is often a neglected item at the close of the course because of the fatigue <strong>and</strong> thenatural urge to “wrap it up <strong>and</strong> go home.” The equipment list is lengthy, <strong>and</strong> a great deal of timeis required for determining needs <strong>and</strong> inventory. Equipment needs will vary from course tocourse, depending on the number of students <strong>and</strong> the patient assessment situations chosen. Thereis an equipment list with each skill station. There is a master equipment list that follows, butthere is always some variation in equipment needs depending on the assessment scenarios chosen.Though not listed, a large coffeepot is an essential item.The following are common sources for equipment:1. Regional EMS offices2. Local EMT training departments3. Hospitals4. Prehospital provider servicesMaster Equipment ListThe amount of equipment needed for the second day of the course will depend on how many patientassessment scenario stations are being used. To determine your equipment needs, list thetotal of the equipment that is required for the patient assessment scenario stations you intend toinclude in the course. Check this list against the amount of equipment needed for the first day.You will usually need more backboards, oxygen masks, bag-valve devices, blood pressure (BP)cuffs, stethoscopes, <strong>and</strong> trauma boxes. Assess <strong>and</strong> inventory the complete equipment list two tothree weeks prior to the course.The following master equipment list is itemized by category. It covers equipment needed forthe core skill stations the first day but not the patient assessment scenarios (each has its ownequipment list) the second day. In addition, if you are teaching optional skills, you will need theequipment for those stations. The equipment lists for these stations can be found in the optionalskill station information in Chapter 9.23
Station Item QuantitySkill Station 1—Basic <strong>and</strong> Advanced Airway ManagementExam gloves (large nonsterile)1 boxGoggles/face shield 2Mannequin, trauma or ACLS (optional) 1Airway mannequin: Adult 4Airway mannequin: Pediatric 2Silicone lubricant spray (cans) 2Portable suction machine with charger 2Manual suction device (optional) 2Tonsil tip 2Suction tubes (14–18 Fr.) 2Tongue blades 10Oropharyngeal airways (set) 2Nasopharyngeal airways (set) 2Pocket mask (with supplemental oxygen nipple) 2Adult bag-valve device/reservoir 2Pediatric bag-valve device/reservoir 2Adult face mask (#4–5) 2Pediatric face masks (#1–3) 2Oxygen cylinder with regulator 2St<strong>and</strong> for oxygen cylinder 2Oxygen tubing 2Nasal cannula 2Non-rebreather mask 2Pulse oximeter 1 or 2Stethoscope 4Endotracheal tubes 7–92 ea.Endotracheal tube 3.5 Fr. 2Stylet (adult, pediatric)2 ea.Lighted stylet (optional) 110-cc syringe 224
Bottle of water 1Combitube ® (optional) 2Laryngoscope 2Spare batteries 4Curved blades #3–42 ea.Straight blades #2–3 <strong>and</strong> #12 ea.Spare bulbs1 ea.Waveform end-tidal CO 2 monitor 1Colorimetric CO 2 detector (optional) 1Esophageal detection device (optional) 2Skill Station 2— Short SMR Devices/Emergency Rescue <strong>and</strong> Rapid ExtricationLive model 2Rigid cervical collar (assorted sizes or adjustable)2 ea.Long backboard with straps 2Short backboard with straps (optional) 1Head or cervical immobilization device 2KED or similar vest-type extrication device 1Padding 1Tape 2Elastic wrap (ace) 1Chair 4Vehicle (optional) 1 or 2Skill Station 3—Traction SplintsLive model 2Padding 2Tape 1Thomas splint 1Sager or hare splint 1Tongue blades (for Spanish windless) 10Cravat 125
Skill Station 4—Helmet Management/Log-Roll/Long BackboardLive model 2Rigid cervical collar (assorted sizes or adjustable)2 ea.Long backboard with straps 1Reeve sleeve (optional) 1Miller body splint (optional) 1Vacuum backboard (optional) 1Head or cervical immobilization device 1Padding 1Tape4 rollsElastic wrap (ace) 1Motorcycle helmet (full face) 1Football helmet with face protector 1Shoulder pads1 setOpen face helmet 1Skill Station 5—Chest Decompression/Fluid ResuscitationCentral line (E-J) mannequin (optional) 1IO mannequin 1Decompression mannequin (anterior approach) 1Tension pneumothorax mannequin (optional) or1Artificial tension pneumothorax (materials below)Section of pork ribs at least 12″ by 12″ 1Small trailer wheel inner tube 1Valve core remover 1H<strong>and</strong>, foot, or electric air pump 18-fluid-ounce bottle of tire puncture sealer 2Roll of plastic wrap 1Roll of duct tape or foam latex tape 1One-way valveAsherman Chest Seal ® (optional) 126
Flutter valve #1 2Plastic 10-cc syringe 2Penrose drain 2Flutter valve #2 20Rubber condom (insert decompressing needle)10-cc syringe 614-, 18-, 20-ga over-the-needle catheter 20 ea.IV tubing (optional) 3Small container of water (optional) 1Paper towels2 rolls20-cc syringes 2Chicken legs (optional) 6–12Betadine solution (4-oz bottle) 1Intraosseous needles 6Skill Station 6—Patient Assessment (Two Stations)Exam gloves (large)2 boxes<strong>Trauma</strong> Box (jump kit—see below) 2Monitor-defibrillator (optional) 2Live model 2Adult bag-valve device/reservoir 2Rigid cervical collar (size to fit your model) 2Long backboard with straps 2Head immobilization device 2Padding 2Moulage kit or white tape <strong>and</strong> red felt-tip pen 1<strong>Trauma</strong> box or “jump kit” (materials below)Patient Assessment ScenarioYou will need two trauma boxes on the first day (twoteaching stations). On the second day, you will need onefor each patient assessment scenario station.Each trauma box should contain the following:Stethoscope 127
Blood pressure cuff 1Pocket mask 14-inch elastic wrap (ace) 46-inch elastic wrap (ace) 2Kerlix rolls 44 × 4 gauze pads (unsterile) 20Wide adhesive tape1 rollOne-inch adhesive tape3 rollsIV tubing2 setsOxygen mask or nasal prongs 1MiscellaneousClipboards 12Pencils 30Moulage kit (see Chapter 9) 1Spray bottles with glycerin-water mix 335-mm slide projector 1–2Spare bulb for projector 1–2Pointer 1Cloth towels 8Wide adhesive tape10 rollsBlankets 2Felt-tip pens (red <strong>and</strong> black)2 ea.MealsITLS is such an intensive learning course that convenient on-site lunches are desirable in orderto save time. The advantages of on-site meals include the following:1. They keep the students in contact with other students <strong>and</strong> faculty to foster the sharing of professionalexperience.2. They keep the students in close proximity to the course for easier coordination.3. They keep the amount of lost time to a minimum by eliminating waiting time <strong>and</strong> travel timefor students.The disadvantages of on-site meals are as follows:28
1. Increased course registration fees to cover the cost of meals2. Inability to satisfy everyone’s gourmet tastesOn-site meals need to be cost-effective <strong>and</strong> simple. Allowing the students to w<strong>and</strong>er to restaurants<strong>and</strong> st<strong>and</strong> in line to be served is a hindrance to course completion, but at times it is necessary.If you cannot provide on-site meals, you should provide specific directions or maps tonearby restaurants.Course BudgetOne of the earliest headaches for the course coordinator is to establish the course budget. Thisneeds to be one of the first considerations in planning a course because the course fee needs to beset early on. Several factors in a budget need to be considered:1. Site rental2. Mailingsa. Precourse advertisingb. Faculty invitation lettersc. Faculty precourse mailingsd. Student precourse mailingse. Student/faculty postcourse mailings3. Student <strong>and</strong> instructor guides4. Lunches for students, faculty, <strong>and</strong> models5. Coffee, beverages, <strong>and</strong>/or snacks during breaks for students, faculty, <strong>and</strong> models6. Faculty stipends (if offered)7. Faculty travel <strong>and</strong> lodging (if necessary to use out-of-town faculty)8. Chapter/international assessment fees9. Equipment10. Miscellaneousa. Postageb. Photocopyingc. Envelopes, paper, name tags, markers, <strong>and</strong> so on<strong>Instructor</strong> Ready BookThe following was developed by Leon Charpentier of Texas ITLS to help decrease the confusionin coordinating an ITLS course. The books are made in inexpensive three-ring binders. There isonly one book per lecture, per skill station, <strong>and</strong> per testing scenario. Originally, building thisbank of books takes a bit of work. You will need to do a lot of copying the first time you makethem, but it will save you a lot of copying in future courses. You must keep track of these books,29
collecting <strong>and</strong> storing them between each course. However, it really pays off as you get ready foreach course you coordinate.Lecture Book: The following items are placed permanently in each lecture book:1. A copy of the assigned lecture2. Chapter objectives <strong>and</strong> key lecture points from Chapter 6 of the instructor’s guide3. Print-out of PowerPoint slides or CD containing the PowerPoint slides for this lecture4. Test questions from the assigned lectureAt the beginning of the book, the following items are changed per course:1. The letter of what is expected from instructors2. Location <strong>and</strong> map3. Class scheduleSkill Station Book: The following items are placed permanently in each skill station book:1. A copy of the skills criteria from the student manual2. A copy of the skills criteria from the instructor’s guide3. A list of equipment required for that particular skill stationAt the beginning of the book, the following items are changed per course:1. The letter of what is expected from instructors2. Class scheduleTesting Scenario Book: The following are placed permanently in each testing scenario book:1. Four copies of the scenarioa. One for the instructorb. One for the moulage technicianc. One for the modeld. One to stay in the book if the others are lost2. Twelve scenario testing check-off sheets (some prefer different colored sheets for practice<strong>and</strong> testing)The books should be numbered 1 through 12 (or however many are chosen), correspondingto the scenario in the instructor’s guide.Delegating TasksStaff support is needed in the following areas:Correspondence: An efficient <strong>and</strong> organized secretary is invaluable in this area. Severalmailings <strong>and</strong> even more rosters are involved. The secretary will make mailing lists <strong>and</strong>30
participant <strong>and</strong> faculty rosters <strong>and</strong> send confirmation notices. There are also many schedules<strong>and</strong> rosters that must be sent to both faculty <strong>and</strong> students.Equipment manager: One person should be assigned the task of keeping up with equipment.This is especially true at the end of the course when everyone is tired <strong>and</strong> ready togo home. If one person does not take responsibility for getting equipment cleaned, repaired,packaged, <strong>and</strong> returned, there will be equipment missing.Timekeeper during the skill stations: There is a very tight schedule during the skill stations.There are only 30 minutes in which to practice a skill, prepare the room for thenext group, <strong>and</strong> mobilize the present group toward their next station. One person shouldbe delegated to notify each instructor five minutes before the end of the teaching period.This person, usually the coordinator, should then notify each instructor when the periodis over. Unless monitored closely, skill stations tend to run overtime, with resultantschedule disruption <strong>and</strong> confusion.Models: One person should be responsible for recruiting models for the skill stations (dayone or two) <strong>and</strong> patient assessment (day two). This same person should coordinate makeupof the models. Models should be brought in at least two hours ahead of time in orderto have their makeup applied (unless you are going to use felt-tip pen moulage). Failureto do this will always result in a delay of the afternoon session <strong>and</strong> will ensure a latefinish on the day.Makeup (moulage): At least two people should be assigned the task of applying makeup<strong>and</strong> moulage to the models. They should be reminded that simpler is better. Complexmoulage often falls off after the first session. The commercial rubber moulage is not asrealistic but is very durable. Using a felt-tip pen to simply draw <strong>and</strong> label the injury (ontoa piece of white tape that is stuck to the affected part) is also acceptable. The moulagecoordinator should be prepared to make the rounds during the course to maintain the victims’moulage.PrecourseMASTER CHECKLISTThree Months Before the Course1. Select the target group of students with the director.2. Decide if you are going to teach any optional material; if so, students <strong>and</strong> instructors must benotified early so they are prepared (see Frequently Asked Questions). As a general rule, youshould teach what is accepted technique in your area.3. Select the site <strong>and</strong> date. Submit a request for course approval through the chapter ITLS office.This ensures that there are no scheduling or other conflicts.4. Make initial faculty contact.5. Establish a tentative budget for your course.31
6. Once the course is approved, mail invitations/brochures to the target group of students.7. Appoint an equipment manager <strong>and</strong> together take an inventory of the on-site equipment. Determinethe needed equipment from the lists in the skill stations <strong>and</strong> patient assessment stations.Make initial contact for outside sources of equipment.8. Visit the site <strong>and</strong> confirm dates. Order the menu for the meals, <strong>and</strong> arrange for refreshmentsat the breaks.Two Months Before the Course1. Reserve the faculty <strong>and</strong> staff hotel/motel rooms in person to determine the adequacy of theaccommodations. An evening meeting place at the hotel for the visiting faculty is advantageous.If lodgings are some distance away from the course site, maps should be provided.2. Order the provider manuals.3. Send faculty acknowledgment letters with course dates <strong>and</strong> reply cards for confirmation. Toavoid misunderst<strong>and</strong>ing, the introductory letter should state whether the faculty members areperforming gratis, for reimbursement of expenses, or for a stated honorarium <strong>and</strong> reimbursementof some or all expenses.4. Decide if you wish to sell <strong>and</strong> distribute ITLS novelty items (T-shirts, pins, etc.). Either orderthe supplies through your chapter office or photocopy the order form for use by the students.One Month Before the Course1. Prepare the faculty roster <strong>and</strong> assignments.2. Send faculty precourse letter. The following items should be sent to each faculty member:a. Acknowledgement letterb. A copy of the appropriate part of Chapter 3, Teaching Strategies: <strong>Guide</strong> for <strong>Instructor</strong>ssection of the instructor’s guide (if your instructors do not have an instructor’s guide)c. CD or print-out of PowerPoint slides for scheduled lecturesd. Agenda for lectures <strong>and</strong> practical sessionse. Location <strong>and</strong> floor plan of the facility where the course will be taughtf. Faculty assignments for lecture, skill stations, <strong>and</strong> patient assessment stationsg. Registration forms for hotel/motel accommodations (if applicable)3. Confirm all hotel/motel reservations.4. Prepare the student roster as c<strong>and</strong>idates apply.5. Prepare <strong>and</strong> mail acknowledgments to registrants. Include a precourse study packet as follows:a. ITLS textbook (unless the students have already purchased them).b. Pretest, answer sheet, <strong>and</strong> key.c. Tentative course schedule with a list of any optional skills to be taught. Make it clear to32
the students that they do not have to be responsible for optional skills that are not to becovered in a particular course.d. Map of course location that includes area hotels.e. A copy of the Student’s <strong>Guide</strong> section of the instructor’s manual (see Appendix) or similarprepared h<strong>and</strong>out.6. Check the available equipment again with the equipment manager. Verify where the remainderof the equipment is to be obtained <strong>and</strong> who is transporting it.7. Recruit models with the moulage coordinator.Two Weeks Before the Course1. Prepare the final c<strong>and</strong>idate roster.2. Meet with the course director to check the following:a. Final scheduleb. Equipmentc. Facility3. Prepare c<strong>and</strong>idate packets:a. Welcome letterb. Group assignmentsc. Final agendad. Rotation schedulese. Faculty roster—with work addresses (do not include home telephone numbers)f. Student roster—with work addresses (do not include home telephone numbers)g. Name tags4. Make a final site visit:a. Confirm breaks <strong>and</strong> meals with caterers.b. Check rooming lists.c. Plan the layout of the rooms for skill stations <strong>and</strong> patient assessment stations.d. Make arrangements to open the doors at 6:30 A.M. in order to organize the equipmentstaging area <strong>and</strong> make the coffee.5. Send confirmation letter to models. Specify clothing to wear, eating accommodations, reimbursement,meeting place, <strong>and</strong> times.6. Photocopy the necessary pages from the instructor’s guide to include:a. Pages relevant to each instructor’s skill station.b. Pages relevant to each instructor’s patient assessment station.33
c. Posttest <strong>and</strong> answer sheet for each student (with extras). This will come from the ITLSchapter office.d. Patient assessment grade sheets (10 to l5 copies for each station).e. Equipment list for each skill station <strong>and</strong> patient assessment station with the numbers ofthe skill station <strong>and</strong> patient assessment station to be taped to the door for the equipmentmanager.f. The various forms (such as the course evaluation form).7. If you plan to photograph the students for identification, prepare 8.5 x 11-inch papers withthe student’s name printed in dark marker.One Day Before the Course1. Take all equipment to the staging area of the facility. Inventory <strong>and</strong> properly label it. Securethe area.2. Set up, inventory, <strong>and</strong> check all audiovisual equipment. You need a laptop <strong>and</strong> LCD projector<strong>and</strong> may need other items such as screen, 115-volt extension cord, slide advance remotecontrol with extension, <strong>and</strong> microphone for soft-voiced speakers if the size of the room requiresit. Arrange <strong>and</strong> check a VCR or DVD <strong>and</strong> TV if using video format for any presentations.3. At the precourse faculty meeting (usually the night prior to registration) give the faculty theirpackets. Include an agenda, station locations, selected scenarios, assignments, <strong>and</strong> final roster.Review the game plan for the weekend, including the following:a. Meals <strong>and</strong> meetings.b. Final agenda with changes noted.c. Student registrants, reviewing backgrounds (prehospital, nursing, industrial, military).d. Plan for management of equipment.e. Skill stations.f. Grading criteria <strong>and</strong> retest policy for patient assessment.g. Ground rules for student team member roles.h. Plan for setting up skill stations <strong>and</strong> distribution of equipment.First Day of the Course1. Arrive early with the equipment manager <strong>and</strong> moulage coordinator. Verify thermostat settings,posting of outside signs, room assignments, equipment distribution, <strong>and</strong> model preparation,<strong>and</strong> make coffee.2. Verify proper functioning of audiovisual equipment, <strong>and</strong> set up registration desk.3. Register participants, <strong>and</strong> collect their pretests.4. Take instant photographs, if possible, to assist in identifying students during the course <strong>and</strong>at the closing faculty meeting. (The cheapest way to photograph students is to take photos34
with a digital camera <strong>and</strong> print the photos on your printer.) If a video camera is available,you may record each student on a videotape <strong>and</strong> prepare a typed list of the students in the orderin which they appear. At the postcourse faculty meeting, the students should be discussedin the order that they appear on the tape. If you decide to use one of these methods, pleaseexplain to the students that the only purpose of the photos or videos is to help the facultyidentify the students.5. Line up the lecturers; introduce the first speaker, make sure the second one is ready, <strong>and</strong> soon. If a scheduled lecturer does not show up on time, you may substitute another lecture (it isa good idea to ask all lecturers to be present at the beginning of the course) or have one of theother faculty members give the scheduled lecture.6. During the morning lecture session, the other faculty members should set up their skill stations<strong>and</strong> inventory their equipment. It is best to do this the night before, but providingequipment security often prevents this.7. Check to be sure that the models arrive in time to be moulaged before the patient assessmentskill stations.8. Have a brief faculty meeting to review goals <strong>and</strong> procedures before beginning the skill stations.This may be done during lunch, but it is better for the faculty to have lunch with thestudents. Students are much more likely to ask questions of the faculty at this time.9. Assign someone to notify each instructor five minutes before the end of each skill stationteaching period. This person should then notify each instructor when the period is over. Youmust keep the stations on time. Any station that runs over its scheduled time will back up thewhole schedule.10. Enlist the support of the faculty to tear down the skill stations <strong>and</strong> distribute the equipment tothe patient assessment stations. Extra equipment should be stored in the equipment stagingarea. Maintaining equipment security may prevent you from distributing equipment until thesecond day.Second Day of the Course1. Arrive early with the equipment manager <strong>and</strong> moulage coordinator. Confirm the room assignments,verify the functioning of the audiovisual equipment, <strong>and</strong> make the coffee.2. Greet the students, correct any registration deficiencies from the first day, <strong>and</strong> have the continuingeducation forms filled out, signed, <strong>and</strong> collected.3. Line up the lecturers; introduce the first speaker, make sure the second one is ready, <strong>and</strong> soon.4. Direct the moulage coordinator to take charge of the models <strong>and</strong> their moulage.5. Have faculty members set up their patient assessment stations <strong>and</strong> inventory their equipment.6. Verify that the written-examination room is set up with answer sheets <strong>and</strong> pencils. A monitorshould be assigned to the room. Tests should be graded immediately by the monitor.7. Verify that the instructors close their stations for lunch <strong>and</strong> that food is brought to the models.A secluded classroom for the models is appropriate. Someone should be assigned to take35
efreshments to the models during the afternoon.8. Set up a collection area during testing. Collect the patient assessment evaluations <strong>and</strong> collatethem with the written tests <strong>and</strong> photographs.9. Arrange with a testing instructor, student, <strong>and</strong> course director for the retest of students whofail their first practical test.10. See that course evaluation forms are available for the students to fill out before they leave.11. Pass out continuing education forms if not already done.12. Direct the instructors <strong>and</strong> the equipment manager to break down the patient assessment stations.Bring all of the equipment to the staging area. The equipment manager should stay atthe staging area to verify that the equipment, which is leaving the area, is going with the appropriateperson. Borrowed equipment should be cleaned <strong>and</strong> repaired before returning.13. Arrange for the postcourse faculty meeting:a. Have available the collated student records for the faculty to review.b. Appoint a recorder to document the results of the written exam, practical practice, practicaltest, practical retest (if any), <strong>and</strong> final faculty decision, using the form provided.c. Collect comments from the faculty about the course <strong>and</strong> teaching material. How couldthey be improved?d. Distribute the faculty stipends (if any).e. Pay the models (unless other arrangements have been made).14. Verify with the equipment manager that the equipment has been distributed to the appropriatedeparting faculty.15. Prepare <strong>and</strong> distribute the following to those students who have waited in order to get theirgrades immediately:a. Participant scoresb. ITLS cardsc. Letter of attendance (for students who failed the course)One Day After the CourseTake a breather for a job well done.One Week After the Course1. Prepare <strong>and</strong> mail, if not distributed at the close of the course, the following:a. Participant scores.b. ITLS cards—It is your (<strong>and</strong> the chapter’s) responsibility to see that the students get theircards in a timely manner. The day of the course is preferred, but under no circumstancesshould it take longer than 90 days.c. Letters of attendance (for students who failed the course).36
d. Thank-you letter to faculty.2. Check all invoices <strong>and</strong> bills prior to payment. Make a course financial statement.3. Hold a staff critique.4. You should mail the following for postcourse audit to your chapter ITLS office (this mayvary from chapter to chapter; check with your chapter office):a. Any borrowed course materials (slides, equipment, <strong>and</strong> so on).b. An updated student roster. Keep a copy for your files.c. An updated faculty/staff roster. Keep a copy for your files.d. The completed chapter <strong>and</strong>/or international course registration forms with the appropriatechecks made out to the chapter or ITLS office as directed by your chapter. These formsare used to compile the statistics of ITLS providers, instructor c<strong>and</strong>idates, <strong>and</strong> instructorsinternationally. In some chapters, ITLS cards will not be sent until the student fees arepaid to the chapter <strong>and</strong> international offices. It is your (<strong>and</strong> the chapter’s) responsibilityto see that the students get their cards in a timely manner. The day of the course is preferred,but under no circumstances should it take longer than 90 days.5. Inventory, clean, repair, <strong>and</strong> return all equipment to the proper local facilities. Thank all individualswho provided support for the course.37
SKILL STATION 1BASIC AND ADVANCEDAIRWAY MANAGEMENT38
SKILL STATION 2SHORT SMR DEVICESEMERGENCY RESCUEAND RAPID EXTRICATION39
SKILL STATION 3TRACTION SPLINTS40
SKILL STATION 4HELMET MANAGEMENTLOG-ROLLLONG BACKBOARD41
SKILL STATION 5CHEST DECOMPRESSIONFLUID RESUSCITATION42
SKILL STATION 6PATIENT ASSESSMENTAND MANAGEMENT43
SKILL STATION 7PATIENT ASSESSMENTAND MANAGEMENT44
SKILL STATION 5PATIENT ASSESSMENTAND MANAGEMENT45
STATION 6PATIENT ASSESSMENTAND MANAGEMENT46
TESTING STATION147
TESTING STATION248
TESTING STATION349
TESTING STATION450
TESTING STATION551
TESTING STATION652
TESTING STATION753
TESTING STATION854
TESTING STATION955
TESTING STATION1056
3Teaching Strategies: <strong>Guide</strong> for <strong>Instructor</strong>sROLES AND RESPONSIBILITIESThe original Oath of Hippocrates required the medical practitioner to swear to teach the art ofmedicine to others. This concept is still very important. Medicine is not just a trade or craft; it isan art, <strong>and</strong> we as practitioners must give something back to the art to improve it constantly.Teaching is a wonderful way to accomplish this. Teaching is extremely important in that our influencemay pass from generation to generation, doing good or harm long after we are gone. Donatingour precious off-time to teach others how to save lives is in the highest traditions of medicine.ITLS instructors are responsible for knowing all of the ITLS material in order to present theirassigned topic in a simple <strong>and</strong> easily understood manner so that it ties in with the other parts ofthe ITLS method. It is just as important that, whenever possible, the instructors remain availableto the students for the purpose of answering questions <strong>and</strong> providing individual help. This includeseating <strong>and</strong> socializing with the students. Often, students will not ask the questions theyreally want to ask until they know the instructor <strong>and</strong> feel confident that the instructor will notridicule them. It is understood that there will be times that you can be present only long enoughto present your material, but, if at all possible, you should be present for the entire course.ITLS is a composite of accepted <strong>and</strong> new (optional) techniques for the care of trauma patients.If you do not agree with any of the material, you should make your thoughts known to thechapter ITLS chairperson or committee. ITLS is constantly being reviewed, <strong>and</strong> feedback is welcome.Changes will be made whenever they are judged to be an improvement over existing techniques.Feedback should be directed to the chapter affiliate faculty or chapter medical director,not to the students. If you teach material in conflict with the text, you will only confuse the students,so if you feel that you cannot teach the material as written, please do not agree to teach.The goal of all instructors of ITLS is to teach every student at least enough to pass the course<strong>and</strong> thus improve the quality of prehospital trauma care.TEACHING METHODOLOGYLearning is a relatively permanent change in behavior that comes about as a result of a plannedexperience. Teaching is a method of attaining this desired change. We are involved in teachingadults, most of whom are already practicing as EMTs or nurses. To gain their cooperation in thelearning process, we must:1. Convince them that there is a gap between the level at which they wish to perform <strong>and</strong> thelevel that they are actually performing.2. Help them to attain the desired level of performance.To accomplish this, the learner must accept the performance goals as personal goals <strong>and</strong> must57
also accept a share of the responsibility for attaining those goals. This is all just a way of sayingthat it is almost impossible to teach something to someone who does not feel the need to knowthe material. Good instructors must not only know the material <strong>and</strong> how to explain it, they mustalso be able to “sell” the “need to know” to the student. ITLS instructors should accept the philosophythat they are a team with the student <strong>and</strong> their goal is to help every student attain the desiredlevel of performance before the course is over. The practice of medicine is unique in thatpoor performance does not just lead to a poor product; it may result in the loss of life. We shouldconsider our students as family <strong>and</strong> be willing to go the extra mile to help them learn. The instructorwho takes pride in how many students fail has no business being in medicine or education.Effective teachers1. Are polite2. Are pleasant in their interactions3. Call students by name4. Give praise <strong>and</strong> positive feedback5. Involve students in decision making6. Do not ignore, belittle, or harass students7. Make reasonable dem<strong>and</strong>s on students8. Are businesslike <strong>and</strong> warm9. Are knowledgeable about their subject10. Use gestures <strong>and</strong> movement (are not “stiff”)11. Make few errorsIn general, lectures are effective ways to transfer information but alone are less effective forassuring long-term retention. H<strong>and</strong>s-on practice with a caring, interactive instructor is one of thebest ways to assure retention. Therefore, lectures must be succinct, to the point, <strong>and</strong> as free aspossible of incorrect information. If the lecture runs over its appointed time frame, there is probablyinformation presented that will not be remembered anyway.Learning proceeds most smoothly when material is somewhat new or challenging yet relativelyeasy for the students to relate to their existing knowledge.PRESENTATION OF LECTURES• Make a good opening. Use the opening to tell the students what you are going to discuss,why it is important to them, <strong>and</strong> what they should learn from the lecture.• Make a good presentation of the material.oAvoid reading (slides or notes) or reciting; it is boring, <strong>and</strong> students will retain only50 percent even with the best audiovisual aids58
ooooUse a variety of styles (questions, thought-provoking statements, etc.) when you lecture:• What are the ABCs of trauma?• If a negative pressure inside the thorax accomplishes inspiration, what willhappen if there is a gaping hole in the thorax?• If shock causes this catecholamine response, what symptoms should we lookfor in the shocky patient?• Why do we no longer hyperventilate the head-injury patient?• What injuries would you expect in this patient who was just struck from thepassenger’s side?Highlight the important points in your opening <strong>and</strong> closing remarks: “This is what weare going to discuss … this is what we are saying … this is what we just discussed.”Relate the (action) slides to your experiences <strong>and</strong> the experiences of the students:• This is the picture of the ankle of the man we picked up last week.• This is the sequence of slides of the fire-truck crash they had in Port Huronshortly before we visited there.• This chest X-ray shows an injury just like the one in the patient you broughtto the hospital last week.Do not try to cover too many points. Teach key concepts.• Make a good closing. Review the objectives that you outlined in your opening. Briefly bringeverything together in a way that relates to those objectives.• Eye contact:ooo• Movement:ooo• Voice:IMPORTANT LECTURE PRESENTATION TOOLSRead your audience—get feedback.Identify three to five students near the corners of the class <strong>and</strong> talk to them.Occasionally speak to people who are not paying attention.Don’t get stuck behind the podium or audiovisual equipment.Moving leisurely around the room keeps the students’ attention, especially when gettingclose to them.Avoid distracting the class with pacing, repetitive movements, or inappropriate wardrobe;they may spend more time looking at what you are doing or wearing than listeningto what you are saying.59
oooAvoid distractive, repetitive words (“uh,” “y’know,” “well,” “OK”).Vary your voice tone, volume, <strong>and</strong> speed.Communicate important points by emphasizing with voice quality.Help the students pass the course.SKILL STATIONSObjectiveAcquisition of the psychomotor skills necessary for the rapid assessment <strong>and</strong> treatment of themultiple traumatized patient.To PrepareThe skill stations are the heart of the course. Time should be used efficiently so that every studentcan become proficient in the procedures. The instructors must rehearse the station well, includingthe model, if appropriate. The instructor must learn what equipment is needed, <strong>and</strong> seethat it is available <strong>and</strong> set up correctly beforeh<strong>and</strong>. There are many optional skills included in themanual. The students should be notified well in advance of the course which skills will be taught(see the section in Chapter 2 titled “What Must Be Taught in a Certified ITLS Course”).First review the skill station from the student’s perspective by reading the individual skillstation in the student manual. Next review the skill station from the instructor’s perspective inChapter 6 of the instructor’s guide. Do this before the course so that on the day of the course youcan use your time setting up <strong>and</strong> practicing your station.Use the skill station as a complement to the lectures <strong>and</strong> not to repeat the information alreadypresented. Use the skill station as a preparatory step to the patient assessment stations by explainingwhat is to be expected of students in the application of the skills they are reviewing orlearning. It is imperative that the instructor knows the content of the patient assessment stations.Presenting a Skill Station• Do not lecture at the skill station.• Do present the objectives of the skill station.• Demonstrate the skill <strong>and</strong> talk through the skill, have the students talk through the skill, thenhave the students practice the skill to their <strong>and</strong> your satisfaction.• Encourage comments <strong>and</strong> questions about the procedure while students are busy practicingthe skill.• Remain flexible. Offer comments <strong>and</strong> feedback in a caring <strong>and</strong> constructive fashion. Do notembarrass the student who has difficulty with the skill being taught.• If there are two instructors at your station, predetermine <strong>and</strong> coordinate your expectations.• Allow as much time as possible for extra practice. Encourage the students to return at the end60
of the day if necessary. Give/offer extra help to those who may need it.Help the students pass the course.PATIENT ASSESSMENT SCENARIO PRACTICE AND TESTINGThe ability to assess <strong>and</strong> manage trauma patients rapidly is the goal of the ITLS course. Thistime of practice, teaching, <strong>and</strong> then testing is extremely important.1. Review teaching methodology.2. Familiarize yourself with what the members of the team are allowed to do during practice<strong>and</strong> testing. Review the section titled “How to Function as a Team” (Chapter 9).3. Review Chapters 2 <strong>and</strong> 3 in the ITLS textbook.4. During the practice-teaching portion, use the full time allowed. Allow the students to proceedwith as little interruptions or prompting as possible. When they have finished, quickly critiquetheir performance, show them how to do it correctly, <strong>and</strong> then allow them to practice astime permits. Take into account local law <strong>and</strong> protocol.5. During the testing portion you should not teach or prompt, <strong>and</strong> you should not discuss thescenario when the student finishes. Any questions are to be answered after the postcourse facultymeeting. As soon as one team finishes its test, you should immediately prepare for thenext team’s testing. It is a long afternoon; you must keep things moving.6. You need two instructors for each assessment station. One instructor cannot interact with theteam <strong>and</strong> grade at the same time. One instructor should present the patient scenario <strong>and</strong> interactwith the team. The other instructor should keep times <strong>and</strong> fill out the grade sheet. Whenthe practice or test is over, the two instructors should discuss the performance <strong>and</strong> assign agrade.7. Fill out the grade sheet:a. Write the team leader’s name <strong>and</strong> the scenario number at the top.b. Mark whether it is a practice or test.c. Record the pertinent times as indicated.d. Check off each step as the team performs the assessment. Make pertinent notes <strong>and</strong> commentsabout problems or techniques (good <strong>and</strong> bad). Do not record unkind or jesting remarks;the students are allowed to review their grade sheets.e. Review the critical actions; determine an overall grade, <strong>and</strong> document why the studentreceived that grade.f. Sign the grade sheet. It is important at the postcourse faculty meeting to know whograded each student (final grades may be raised on the basis of practice performance).HOW TO PRESENT THE SCENARIO TO THE STUDENT61
1. The scenario should be presented in the hall outside the room so that the scene does not distractthe students.2. Have the students introduce themselves <strong>and</strong> give their profession, level of training, <strong>and</strong> typeof work. Use the appropriate setting (prehospital, nursing, occupational health/industrial, military)based on the student’s background <strong>and</strong> work setting.3. Remind students that they have medical direction available on the radio.4. Remind students that this is an interactive scenario <strong>and</strong> that they must tell the instructor everythingthat they are doing, or you will assume that it was not done.5. Ask students if they have any questions.6. Dispatch the call as it would be dispatched in a real situation.TEACHING VERSUS TESTING FORMATSTeachingTestingInteract without obstructing education. Interact for vital signs <strong>and</strong> medical directiononly.Imprint the ITLS method, but don’t interruptso often that you obstruct the learningprocess.Reinforce the team concept.Allow a longer time for each station.Remind <strong>and</strong> guide students to:•Perform ongoing exam if patient worsens(<strong>and</strong> every five minutes during transport).•Address critical care aspects.•Splint all fractures, dress all wounds at theappropriate time.•Do a detailed exam.•Call medical direction.Patient Assessment ScenariosContinue the team concept during testing.Allow a shorter time for each station.Avoid reminding students about patient care.Test only!Do not teach!Do not prompt!You must remain objective <strong>and</strong> consistent forall testing scenarios.Grading is done by way of individual grade sheets. The generic grade sheets have every step ofthe assessment listed in an acceptable order followed by common critical actions <strong>and</strong> gradingcriteria. There is room for some variation in the order of the steps listed in the grade sheet. Donot become excessively rigid in this grading; no one (including you) will perform assessmentexactly as listed on the grade sheet. You must look at the overall performance of the team leader62
as well as how well the team members assist <strong>and</strong> then assign a grade, taking into account thelisted grading criteria <strong>and</strong> critical actions. It is important to write notes on the grade sheet to justifythe grade that you assign, especially if you fail the student. Remember that patient assessmentgrading is subjective. If you become excessively rigid, no one will do well. You must lookat the overall performance, not each individual action, when assigning a grade.63
4Case Scenarios: Teaching <strong>and</strong> Evaluation StationsYou may choose any of these patient assessment scenarios, or you may make up your own scenarios.If you make up your own scenarios, please send ITLS, Inc. copies, as we may want toinclude them in the next <strong>Coordinator</strong> <strong>and</strong> <strong>Instructor</strong> <strong>Guide</strong>. A Scenario Development Sheet isincluded at the end of this chapter to assist you in completing new scenarios.Since the Glasgow Coma Scale (GCS) score is now used in patient assessment, you mustprovide a copy of the GCS for the students to use when they practice <strong>and</strong> test (they are not expectedto memorize it). A copy of the GCS is included at the end of the <strong>Coordinator</strong> <strong>and</strong> <strong>Instructor</strong><strong>Guide</strong>. You may photocopy it <strong>and</strong> provide copies for your students to use during patient assessment.While preparing for the station, spend time with the model who will be acting as the patient.Make sure models underst<strong>and</strong> that they will be required to submit to being examined, h<strong>and</strong>led,extricated, splinted, <strong>and</strong> strapped for several hours. Direct them to the furnished old clothes orverify that they are wearing clothes that they do not mind having ruined. Verify that female modelsare wearing bathing suits or other suitable attire under their clothes. Consider the weight <strong>and</strong>age of the model for the scenario. Models that are too heavy may cause injuries to your students,<strong>and</strong> models that are too young may have too short an attention span to last through the scenario.If necessary, select a different scenario or ask the Course <strong>Coordinator</strong> to assign a different modelto the scenario.Review the setting, injuries, <strong>and</strong> patient instructions with the model. Discuss the level of“acting” you want them to display in their role as patient. Do they have any medical knowledge?If not, briefly explain the injuries so they better underst<strong>and</strong> the behavior they should exhibit. Explainthe history information, <strong>and</strong> give directions on how <strong>and</strong> when they are to provide the information.Agree on a signal that you will give them if you want a change in their behavior duringthe scenario (i.e., become unresponsive). Let them know that you may interject informationinto their performance if they forget anything or if there is an unexpected change in the scenariodevelopment.Learning should easily transfer to real-life actions. Before you begin, make sure that all ofthe equipment required for your scenario is available in the station. Four settings are provided foreach patient assessment scenario. Select the most appropriate setting for the team leader in yourstudent group. To facilitate learning, please ensure that the scenario is as realistic as possible.It is imperative that you review <strong>and</strong> memorize the information relevant to the scenario youwill be delivering. You need to respond quickly to student actions <strong>and</strong> requests for informationto maximize the learning experience <strong>and</strong> minimize assessment time.64
SettingSCENARIO 1EMS/Prehospital A young male was struck near the pit area at a car racetrack. He is found lyingsemiprone at the side of the track.Nursing/Medical A young male was struck near the pit area at a car racetrack. You are staffingthe medical tent at the race <strong>and</strong> arrive to find the patient lying semiprone at the side of the track.Occupational Health/Industrial A young male fell off a loading dock <strong>and</strong> was run over by atruck as it was backing into the dock. He is found lying semiprone by the dock.Military The patient is a young male soldier who was dared by fellow soldiers to sprint across abusy road before traffic approached. He is found lying semiprone at the side of the road.HistoryS—“I can’t breathe. My chest <strong>and</strong> leg hurt.”A—allergic to penicillinM—insulinP—diabetesL—does not rememberE—“He drove right over me!”Injuries1. Tension pneumothorax on left side2. Intra-abdominal bleeding3. Fracture of the left femur4. Scalp laceration5. HypoglycemiaPatient InstructionsYou should be confused <strong>and</strong> disoriented. You are having difficulty breathing. Complain of painwhen your abdomen is palpated or your left chest or upper left leg is examined.Moulage InstructionsApply contusions <strong>and</strong> abrasions on left chest <strong>and</strong> abdomen. Use trousers with a large tear in leftthigh area. The left thigh should have a large bruise, or write “fractured femur” on a piece ofwhite tape with a felt-tip pen <strong>and</strong> apply it to the left thigh. Apply some fake blood to an area ofthe scalp (fake blood mixed with KY jelly works well here—don’t use on light-colored hair; itwill stain). Simulate diaphoresis.65
<strong>Instructor</strong> InformationScene size-up—no danger, mechanism as described, no other patientsInitial assessmentGeneral impression—patient with potentially critical injuriesLOC—responds to verbal stimuli but is confusedAirway—clear <strong>and</strong> openBreathing—rapid with poor movement of airVentilation instructions—should order oxygen <strong>and</strong> ventilatory assistanceCirculationPulses—present at the wrist, rapidBleeding—blood in hair, no major bleedingSkin color, condition, <strong>and</strong> temperature—cyanotic, clammy, <strong>and</strong> coolDecision—rapid trauma survey due to mechanism <strong>and</strong> initial assessmentRapid trauma surveyHead—blood in hair, no active bleeding, no other wounds notedNeck—no DCAP-BTLSTrachea—possible slight deviation to the rightNeck veins—distendedChestLooking—contusions of left chest, no paradoxical movementFeeling—some crepitation <strong>and</strong> tendernessListening—decreased breath sounds on the left, heart sounds—present but difficult tohearPercussion—hyperresonant on the leftAbdomen—tender to palpation, slightly distendedPelvis—no DCAP-BTLSExtremitiesUpper legs—swelling, tenderness, deformity of left upper leg, normal PMSScan of lower legs <strong>and</strong> arms—no injuries notedExam of posterior—no DCAP-BTLSDecision—load <strong>and</strong> go, consider immediate decompression of tension pneumothorax, splintleft femur when in ambulance, two IV linesHistory (obtain from the patient)66
Vital signs—BP 80/50, pulse 150, respiration 36, temperature feels coolNeurologicalLOC—confused <strong>and</strong> abusive, won’t follow comm<strong>and</strong>sPupils—equal <strong>and</strong> reactiveSensory—normalMotor—normalGCS—(13) eyes—open spontaneously (4), verbal—confused (4), motor—localizes topain (5)Secondary survey (should be done after transport)History <strong>and</strong> vital signs (after decompression)—BP 100/60, pulse 110, respiration 30Neurological (after decompression)LOC—still confused <strong>and</strong> abusive, won’t follow comm<strong>and</strong>sPupils—unchangedSensory—normalMotor—normalGCS—unchangedFingerstick glucose—40 (if glucose is given, LOC improves to near normal)Head—blood in hair from scalp laceration, no Battle’s sign or raccoon eyes, face shows nosigns of trauma, no drainage from ears or noseAirway—open <strong>and</strong> clearBreathing—improved movement of air if tension pneumothorax has been decompressed;otherwise, worsening respirationNeck—no DCAP-BTLSTrachea—midline if tension pneumothorax decompressedNeck veins—flat if tension pneumothorax decompressedCirculation—BP still 100/60, skin pale, cool, clammyChestLooking—contusions of left chest, no paradoxical movementFeeling—no instability, some crepitation <strong>and</strong> tendernessListening—decreased breath sounds on the left, heart sounds—easier to hear nowPercussion—no longer hyperresonant on the left if decompressedAbdomen—more distended, more tenderPelvis—do not examine again67
ExtremitiesUpper—no injuries noted, good PMSLower—should have left leg in traction splint, good PMSOngoing examSubjective changes—if given glucose patient feels better nowNeurologicalLOC—improved, almost normal if glucose has been given, no change if glucose not givenPupils—equal <strong>and</strong> reactiveGCS—(15) eyes—4, verbal—5, motor—6Airway—open <strong>and</strong> clearBreathing—rate 30, much better movement of air if tension decompressedCirculationBlood pressure—110/70 if decompression <strong>and</strong> fluid bolusPulses—rate 110Skin color, condition, <strong>and</strong> temperature—pale, cool, diaphoreticNeck—no changeTrachea—midlineNeck veins—flatChest—unchanged, heart sounds—normalAbdomen—more distended, more tenderFocused assessment of injuriesScalp—no further bleedingPneumothorax—as aboveAbdomen—as aboveLeft femur fracture—good PMSHypoglycemia—should be resolvedCheck interventionsIs oxygen hooked up <strong>and</strong> turned on?Decompression needle still patent?Are IVs running? Rate?Traction splint on left leg? PMS still OK?68
Cardiac monitor applied?Pulse oximeter applied? 92 percent saturationDressing to scalp69
SettingsSCENARIO 2EMS/Prehospital The team is called to a laboratory where an explosion has taken place. Themale patient is just inside the door about 10 yards/9 meters from active burning. What is left ofhis shirt is smoldering.HistoryS—“I can’t feel anything from the neck down. My mouth <strong>and</strong> nose burn.”A—no allergiesM—no medicationsP—no history of serious illnessL—last meal six hours agoE—“I had just entered the lab when an explosion threw me across the room.”Nursing/Medical EMS was called to a laboratory where an explosion has taken place. The malepatient was just inside the door about 10 yards/9 meters from active burning. EMS is transporting<strong>and</strong> will arrive in 10 minutes.HistoryS—“I can’t feel anything from the neck down. My mouth <strong>and</strong> nose burn.”A—no allergiesM—no medicationsP—no history of serious illnessL—last meal six hours agoE— “I had just entered the lab when an explosion threw me across the room.”Occupational Health/Industrial The team is called to a laboratory where an explosion has takenplace. The male patient is just inside the door about 10 yards/9 meters from active burning.What is left of his shirt is smoldering.HistoryS—“I can’t feel anything from the neck down. My mouth <strong>and</strong> nose burn.”A—no allergiesM—no medicationsP—no history of serious illnessL—last meal six hours agoE—“I had just entered the lab when an explosion threw me across the room.”Military You are in a battle zone <strong>and</strong> are called to the scene of a helicopter that has been hit bya rocket. The helicopter crashed <strong>and</strong> is burning. The door gunner was thrown clear.70
HistoryS—“I can’t feel anything from the neck down. My mouth <strong>and</strong> nose burn.”A—no allergiesM—no medicationsP—no history of serious illnessL—last meal six hours agoE—“We were coming in to l<strong>and</strong> <strong>and</strong> everything exploded.”Injuries1. Second- <strong>and</strong> third-degree burns of face, anterior chest, <strong>and</strong> both arms2. Upper airway burns3. Open fracture of left forearm4. Cervical spine injury5. Spinal shockPatient InstructionsYou should be found crumpled in an awkward position, alert, complaining in a hoarse voice thatyou cannot move. Complain that your mouth <strong>and</strong> nose are burning. Partway through the assessment,start yelling, “Get me out of here, I can’t breathe!” Thereafter rapidly lose consciousness<strong>and</strong> respond only to painful stimuli.Moulage Instructions1. Apply burn moulage to face, chest, <strong>and</strong> arms.2. Apply commercial open fracture moulage to left forearm or just write “broken arm” on apiece of white tape with a felt-tip pen <strong>and</strong> apply it to the left forearm.3. A tiny bit of charcoal on the tongue will simulate intraoral burns.<strong>Instructor</strong> InformationScene size-up—except for the nursing scenario, the scene is unsafe, with fire <strong>and</strong> smoke present.The military scenario has the added danger of being fired upon. Mechanism is explosion <strong>and</strong>burns. There are no other live patients.Initial assessmentGeneral impression—potential for critical injuriesLOC—alertAirway—open, burns in mouth <strong>and</strong> nose71
Breathing—normal rate <strong>and</strong> qualityVentilation instructions—give oxygenCirculationPulses—present at the wrist, rate seems normalBleeding—no active bleedingSkin color, condition, <strong>and</strong> temperature—burns of face, chest, <strong>and</strong> arms; otherwise,normal color, warm, <strong>and</strong> dryDecision—rapid trauma survey due to mechanism <strong>and</strong> facial burnsRapid trauma surveyHead—scalp normal, burns of face with singed hairs in the nose <strong>and</strong> burns inside the mouthNeck—no DCAP-BLTS, blistering burns of the anterior neckTrachea—midlineNeck veins—flatChestLooking—burns present on anterior chest, no movement of ribs during breathingFeeling—no crepitation, no tenderness, no sensation, no instabilityListening—breath sounds bilateral <strong>and</strong> equal, heart sounds—normalAbdomen—soft, no tenderness, no sensationPelvis—stableExtremitiesUpper legs—no sign of trauma, no movement or sensationScan of lower legs <strong>and</strong> arms—open fracture of left forearm, good pulse, no sensation ormovementExam of posterior—no sign of trauma, no sensationDecision—load <strong>and</strong> go, watch for airway compromise, cool burns <strong>and</strong> cover with cleansheet, splint forearm, two IV linesHistory (obtain from the patient)Vital signs—BP 70/40, pulse 65, respiration 16–18, temperature warmSecondary survey (should be done after transport)History <strong>and</strong> vital signs—after fluid bolus: BP 76/50, pulse 65, respiration 16–18, temperaturewarmNeurologicalLOC—normal72
Pupils—equal <strong>and</strong> reactiveSensory—none below the neckMotor—none below the neck, diaphragmatic breathingHead—scalp normal, burns of mouth <strong>and</strong> inside nose, no drainage from nose or ears, no Battle’ssign or raccoon eyesAirway—swelling of the lips <strong>and</strong> mouth, stridor when breathing if not already intubated. Ifstudent attempts oral intubation, tell him/her that the patient is gagging too much to intubate.Student should explain to the patient why intubation is needed. May perform nasotrachealintubation or RSI.Breathing—if intubated, rate 24, assistance not requiredNeck—tender lower neck, can feel step-offTrachea—midlineNeck veins—flatCirculation—skin still warm <strong>and</strong> dry where not burned, no bleedingChestLooking—burns present on anterior chest, no movement of ribs during breathingFeeling—no crepitation, no tenderness, no sensation, no instabilityListening—breath sounds bilateral <strong>and</strong> equal, heart sounds—normalAbdomen—unchangedPelvis—no further examExtremitiesUpper—unchanged, good pulseLower—unchanged, good pulseDecision—intubate if not already done, fluid bolus, may use PASG, splint arm if not alreadydoneOngoing examSubjective changes—patient can’t speak due to being intubatedNeurologicalLOC—awake, follows comm<strong>and</strong>s, can’t speak due to endotracheal tube (ET)Pupils—equal <strong>and</strong> reactiveMotor <strong>and</strong> sensory—unchangedAirway—should be intubated; if not, severe stridorBreathing—diaphragmatic but normalCirculation73
Blood pressure—80/50Pulses—rate 65Skin color, condition, <strong>and</strong> temperature—warm <strong>and</strong> dry where not burnedNeck—unchangedTrachea—midlineNeck veins—flatChest—clear bilaterally, heart sounds—normalAbdomen—not distended, no sensationFocused assessment of injuriesBurns—unchangedFracture of left forearm—still has good pulseUpper airway burns—should be intubatedCervical spine injury—unchangedSpinal shock—unchangedCheck interventionsIs oxygen hooked up <strong>and</strong> turned on?ET tube in correct position?Are IVs running <strong>and</strong> at correct rate?Splint in good position, pulse OK?Dressing on open fracture blood-soaked?Cardiac monitor applied?Pulse oximeter applied? 92 percent saturation74
SettingSCENARIO 3EMS/Prehospital The patient is a young male who is found in an alley. A police officer statesthat the patient is a known criminal who has been attacked. There is no other history available.Nursing/Medical A young male is brought to the emergency department entrance <strong>and</strong> thrownout of a moving car. Your attending physician has gone to eat, <strong>and</strong> her beeper is not working.Occupational Health/Industrial There has been a strike by the local union. There have beensome violence <strong>and</strong> threats. Shots were heard, <strong>and</strong> the watchman found one of the employees lyingin the parking lot. He appears to have been beaten <strong>and</strong> shot.Military You are in a battlefield situation. You have been called to get an injured soldier who isin a foxhole following h<strong>and</strong>-to-h<strong>and</strong> combat.HistoryNot availableInjuries1. Closed head injury with dilated pupil on right2. Fracture of left femur3. Gunshot wound of left forearm <strong>and</strong> right leg4. Stab wound of lower backPatient InstructionsYou should respond only to pain. During the rapid trauma survey <strong>and</strong> the secondary survey, youshould withdraw to pain. During the ongoing exam, you should localize to pain.Moulage InstructionsIf you use the Med-E-Train mannequin, the injuries are already present except for the stabwound in the back. Use a red felt-tip pen to write “stab wound” on a piece of white tape. Placethe tape on the patient’s back. You may also use one of the “Crash Kelly”-series mannequinsfor this scenario. If you use a live model, you will have to moulage the injuries or use the felt-tippen <strong>and</strong> tape method.<strong>Instructor</strong> InformationScene size-up—the scene is safe in all of the scenarios except the military. The soldier will haveto be moved to a safe place for evaluation. There are no other patients.Initial assessmentGeneral impression—potential for critical injuries75
LOC—withdraws to painAirway—openBreathing—rate slow, depth normalVentilation instructions—assist ventilation with oxygenPulses—rapid, present at the neck but not at the wristBleeding—from right ear, left forearm, right lower legSkin color, condition, <strong>and</strong> temperature—pale, cool, clammyDecision—Rapid trauma survey due to mechanism <strong>and</strong> initial assessmentRapid trauma surveyHead—bleeding from right ear, Battle’s sign on right, <strong>and</strong> several contusions of face <strong>and</strong>scalpNeck—no obvious injuryTrachea—midlineNeck veins—flatChestLooking—no DCAP-BTLSFeeling—table, no crepitationListening—breath sounds present <strong>and</strong> equal, heart sounds—normalAbdomen—no obvious injuryPelvis—stableExtremitiesUpper legs—displaced femur fracture on left, pulses present both legsScan of lower legs <strong>and</strong> arms—bleeding gunshot wound of right lower leg <strong>and</strong> left forearm,pulses presentExam of posterior—stab wound of the back, still bleedingDecision—load <strong>and</strong> go (head injury, shock, abdominal injury), intubate, two IV lines, tractionsplint left femur, dressing to right leg <strong>and</strong> left arm <strong>and</strong> backHistory (unable to obtain)Vital signs—BP 70 systolic, pulse 140, respiration 8, temperature cool <strong>and</strong> clammyNeurologicalLOC—withdraws to painPupils—left 5 mm, right 8 mm, reaction to light: left normal, right sluggishSensory—no response76
Motor—withdraws to painGCS—(6) eyes: do not open—1, verbal: none—1, motor: withdraws to pain—4Secondary survey (should be done after transport)History <strong>and</strong> vital signs—after IV fluid bolus: BP 100/70, pulse 110, patient should be intubated<strong>and</strong> ventilated with 100% oxygen at a rate of about 12–15 breaths per minuteNeurological—unchanged from aboveHead—multiple contusions, no blood or fluids from nose, blood coming from left ear, Battle’ssign present on rightAirway—should be intubatedBreathing—should be assisting at rate of 12–15 breaths per minute (one breath every 5 seconds)Neck—unchangedTrachea—midlineNeck veins—flatCirculation—bleeding should be controlled, skin pale, cool, clammyChestLooking—no DCAP-BTLSFeeling—stable, no crepitationListening—breath sounds present <strong>and</strong> equal, heart sounds—normalAbdomen—unchangedPelvis—do not examine againExtremitiesUpper—should have dressing on wound, weak pulsesLower—should have splint on left leg <strong>and</strong> dressing on right leg, weak pulsesOngoing examSubjective changes—patient unconsciousNeurologicalLOC—localizes to painPupils—unchanged from aboveGCS—(7) improved from above, eyes: do not open—1, verbal: none—1, motor: localizesto pain—5Airway—should be intubatedBreathing—rate 8/min when not ventilated—should be ventilated at a rate of 12–1577
eaths/minCirculationBlood pressure—110/60 if IV fluids, 50 systolic if no fluidsPulses—rate 50–60Skin color, condition, <strong>and</strong> temperature—pale, cool, diaphoreticNeck—unchangedTrachea—midlineNeck veins—flatChest—unchanged, heart sounds—normalAbdomen—unchangedFocused assessment of injuriesClosed head injury—still has drainage from ear <strong>and</strong> dilated pupil, LOC is slightly improvedFractured femur—still has pulseGunshot wounds to forearm <strong>and</strong> leg—no further bleeding, still has pulseStab wound of lower back—do not log-roll just to check unless blood is running outfrom under the patientCheck interventionsIs oxygen hooked up <strong>and</strong> turned on?Is the ET tube still in the trachea?Are you ventilating at the correct rate?Are IVs running at correct rate?Is the leg still correctly splinted?Are the dressings on arm <strong>and</strong> leg blood-soaked?Is any blood coming from under the patient?Cardiac monitor applied? Sinus bradycardiaPulse oximeter applied? 98 percent saturation78
SCENARIO 4SettingEMS/Prehospital There has been a head-on collision of a sports car with a power pole. The unrestraineddriver is still in the vehicle.Nursing/Medical A young adult male is brought to your emergency department in the back seatof a two-door car. He was found unconscious sitting behind the wheel of his car after collidingwith a power pole. The steering wheel was broken, <strong>and</strong> the windshield was knocked out. Thepeople who brought the patient in do not know him. Your attending physician is with a criticalpatient <strong>and</strong> cannot help you at this time.Occupational Health/Industrial A truck loaded with crates backs into an employee, pinninghim chest high against a concrete wall. The truck has been moved, <strong>and</strong> a forklift has lifted thecrates to allow access to the patient.Military There has been a head-on collision between a Humvee <strong>and</strong> a Bradley. The unrestraineddriver is still in the Humvee.HistoryNot availableInjuries1. Sternal fracture2. Myocardial contusion3. Intra-abdominal bleeding4. ConcussionPatient InstructionsRespond only to pain (localize). Moan with pain when your chest or abdomen is palpated.Moulage InstructionsApply contusions to forehead <strong>and</strong> sternum (see moulage techniques). Simulate shock.<strong>Instructor</strong> InformationScene size-up—for prehospital setting: power lines are down on the car. The gas tank has ruptured<strong>and</strong> is leaking. If students try to get the patient out of the car without calling the powercompany, tell them that they have been electrocuted <strong>and</strong> must start over. If they elect to callthe power company, tell them that they have just arrived on the scene <strong>and</strong> have turned off thepower <strong>and</strong> removed the lines. When the team approaches the vehicle (prehospital <strong>and</strong> militarysetting), tell them that the back of the vehicle has just burst into flames. If the team doesnot extricate by the rapid emergency extrication method, tell them that they have all burnedup <strong>and</strong> must start over. Nursing <strong>and</strong> industrial settings have safe scenes. There are no other79
patients.Initial assessmentGeneral impression—potential for critical injuriesLOC—does not respond to voice but localizes to painAirway—open, gag reflex presentBreathing—normal rate <strong>and</strong> depthVentilation instructions—give oxygen, assist ventilation as neededCirculationPulses—present at the wrist, seems a little fastBleeding—no external bleeding notedSkin color, condition, <strong>and</strong> temperature—normalDecision—rapid trauma survey due to mechanism <strong>and</strong> examRapid trauma surveyHead—contusion of foreheadNeck—no response to palpation, no injuries notedTrachea—midlineNeck veins—flatChestLooking—contusion over sternum, otherwise normalFeeling—crepitance over sternum <strong>and</strong> anterior ribs, moans with pain when sternum <strong>and</strong>anterior ribs are palpatedListening—breath sounds present <strong>and</strong> equal, heart sounds—normal, but slightly irregularAbdomen—distended <strong>and</strong> painful moans when palpatedPelvis—stable <strong>and</strong> nontenderExtremitiesUpper legs—normalScan of lower legs <strong>and</strong> arms—normalExam of posterior—normalDecision—load <strong>and</strong> go, two IV lines, monitor heart, monitor for need to intubateHistory (unable to obtain)Vital signs—BP 80/60, pulse 130, respiration 20, temperature normalNeurological80
LOC—localizes to painPupils—5 mm, equal <strong>and</strong> reactiveSensory—localizes to painMotor—moves all extremities to painGCS—(8) eyes—open to pain (2), verbal—none (1), motor—localizes to pain (5)Secondary survey (should be done after transport)History <strong>and</strong> vital signs—no history, vital signs after fluid bolus 90/60, pulse 110, respiration20Neurological—unchanged from aboveHead—contusion of forehead, no fluid from nose or ears, no Battle’s sign or raccoon eyes,face stableAirway—open, gag reflex still presentBreathing—normal rate <strong>and</strong> depthNeck—no sign of traumaTrachea—midlineNeck veins—flatCirculation—BP as above, skin now pale, cool, clammyChest—no change, heart sounds—normal, but slightly irregularAbdomen—more distended, patient moans <strong>and</strong> localizes to palpationPelvis—no need to examine againExtremitiesUpper—normal, weak distal pulses, moves to painLower—normal, weak distal pulses, moves to painDecision—maintain IV fluids to keep BP in range of about 110 systolic, watch for loss ofgag reflex—isn’t a noncontrolled bleed BP maintenance of 100 systolicOngoing examSubjective changes—patient unconsciousNeurologicalLOC—unchangedPupils—equal <strong>and</strong> reactiveGCS—(8) eyes—2 , verbal—1, motor—5Gag reflex no longer presentAirway—open, no gag reflex, needs intubation81
Breathing—normal rate <strong>and</strong> depthCirculationBlood pressure—110/70Pulses—rate 110Skin color, condition, <strong>and</strong> temperature—pale, cold, clammyNeck—unchangedTrachea—midlineNeck veins—flatChest—unchanged, heart sounds—normal, but slightly irregularAbdomen—distended <strong>and</strong> tenderFocused assessment of injuriesSternal fracture unchangedIntra-abdominal bleeding continuesBlunt head trauma unchangedCheck interventionsIs oxygen hooked up <strong>and</strong> turned on?Is patient intubated <strong>and</strong> the tube in the trachea?Are IVs running at correct rate?Cardiac monitor <strong>and</strong> pulse oximeter applied? Multiple PVCs, 96 percent82
SettingSCENARIO 5EMS/Prehospital Police request assistance at the scene of a murder suicide. A male is confirmeddead from a gunshot to the head, while a female is lying supine <strong>and</strong> holding her arm.HistoryS—“I can’t get my breath. It hurts to breathe. I think my arm is broken.”A—allergic to tetanus toxoidM—noneP—hemophiliaL—three hours agoE—“I tried to stop him from attacking me <strong>and</strong> he broke my arm, then he shot me!”Nursing/Medical Police respond to the scene of a murder suicide. A male is confirmed deadfrom a gunshot to the head. Neighbors take a female to the nearby hospital before EMS arrives.HistoryS—“I can’t get my breath. It hurts to breathe. I think my arm is broken.”A—allergic to tetanus toxoidM—noneP—hemophiliaL—three hours agoE—“I tried to stop him from attacking me <strong>and</strong> he broke my arm, then he shot me!”Occupational Health/Industrial The husb<strong>and</strong> of one of your workers has come to the plant, hither with a bat, <strong>and</strong> shot her in the chest. He then shot himself in the head.HistoryS—“I can’t get my breath. It hurts to breathe. I think my arm is broken.”A—allergic to tetanus toxoidM—noneP—negative for serious illnessL—three hours agoE—“I tried to stop him from attacking me <strong>and</strong> he broke my arm, then he shot me!”Military You are on the front line <strong>and</strong> are called to rescue a soldier who has been injured by anexplosion.HistoryS—“I can’t get my breath. It hurts to breathe. I think my arm is broken.”83
A—allergic to tetanus toxoidM—noneP—negative for serious illnessL—three hours agoE—“A shell went off nearby <strong>and</strong> blew me up against this rock wall.”Injuries1. Sucking chest wound on the right side2. Fracture of left forearm3. Hemothorax on right side4. ShockPatient InstructionsYou are alert but have difficulty breathing <strong>and</strong> are in great pain. Cry out in pain when anyonetouches your left arm.Moulage InstructionsSucking chest wound <strong>and</strong> bruises on arm can be made as described in the chapter on moulagetechniques. As an alternative, you can simulate the injuries by placing white tape on the affectedareas <strong>and</strong> writing the injury (“sucking chest wound” <strong>and</strong> “broken arm”) with a felt-tip pen. Simulateshock.<strong>Instructor</strong> InformationScene size-up—EMS/prehospital: The police have secured the scene.Nursing/medical: Scene safeIndustrial: Scene safeMilitary: The patient is behind a rock wall at this time. There are no other patients.Initial assessmentGeneral impression—potential for critical injuriesLOC—alertAirway—openBreathing—rapid rate, poor air movementVentilation instructions—assist ventilation with oxygenCirculation84
Pulses—present at wrist, rapid rateBleeding—still bleeding from the chest woundSkin color, condition, <strong>and</strong> temperature—cyanotic, cold, clammyDecision—Rapid trauma survey due to mechanism <strong>and</strong> examRapid trauma surveyHead—no injury notedNeck—no sign of traumaTrachea—midlineNeck veins—flatChestLooking—sucking chest wound on right side, no paradoxical movement, no bruisingFeeling—there is crepitation on the right sideListening—sucking chest wound on the right, no breath sounds on the right, heartsounds—normal, but difficult to hear because of the sucking woundPercussion—dull on right sideAbdomen—soft, nontenderPelvis—stable <strong>and</strong> nontenderExtremitiesUpper legs—normalScan of lower legs <strong>and</strong> arms—swelling, tenderness, deformity of left forearmExam of posterior—normalDecision—load <strong>and</strong> go, seal sucking chest wound, two IV linesHistory (obtain from the patient)Vital signs—BP90/60, pulse 130, respiration 36, temperature normalSecondary survey (should be done after transport)History <strong>and</strong> vital signs—after fluid bolus, BP 100/60, pulse 120, respiration 36NeurologicalLOC—alertPupils—equal <strong>and</strong> reactiveSensory—normalMotor—normalHead—normal85
Airway—open, better movement of air if open wound is sealedBreathing—labored but improved if wound is sealedNeck—nontenderTrachea—midlineNeck veins—flatCirculation—BP <strong>and</strong> pulse as above, skin cyanotic, cool, clammyChest—no breath sounds on right, dull to percussion, heart sounds—normalAbdomen—soft <strong>and</strong> nontenderPelvis—no need to reexamineExtremitiesUpper—unchanged, weak pulses, normal sensory <strong>and</strong> motorLower—unchanged, weak pulses, normal sensory <strong>and</strong> motorOngoing examSubjective changes—patient complains of severe chest pain <strong>and</strong> dyspneaNeurologicalLOC—alertPupils—equal <strong>and</strong> reactiveSensory—normalMotor—normalAirway—openBreathing—still having dyspnea, rapid, shallow respirationCirculationBlood pressure—80/60 in spite of fluid bolusPulses—rate 140Skin color, condition, <strong>and</strong> temperature—pale, cool, clammyNeck—unchangedTrachea—midlineNeck veins—flatChest—unchanged, heart sounds—normalAbdomen—soft <strong>and</strong> nontenderFocused assessment of injuriesChest wound sealed, still dull on right86
Patient still short of breath, even with oxygenLeft arm should be splinted now, still has normal PMSCheck interventionsIs oxygen hooked up <strong>and</strong> turned on?Chest wound still sealed?Are IVs running at the correct rate?Chest dressing blood-soaked?Splint in good position? PMS OK?Cardiac monitor applied? Sinus tachycardiaPulse oximeter applied? 92 percent saturationDecision—notify medical direction that the patient has a right hemothorax <strong>and</strong> is in shock87
SettingsSCENARIO 6EMS/Prehospital The patient is an 18-year-old female unrestrained driver who was involved ina motor-vehicle collision. While traveling at approximately 60 miles per hour/90 kilometers perhour, she went off the road <strong>and</strong> hit a tree head-on. She is still in the car.HistoryS—“My hip hurts so bad! My chest <strong>and</strong> stomach hurt, too!”A—allergic to penicillinM—taking vitamins <strong>and</strong> DilantinP—history of epilepsy, seven months pregnantL—last meal two hours agoE—“I was driving down the road <strong>and</strong> woke up like this. Maybe I had another seizure.”Nursing/Medical The patient is an 18-year-old female unrestrained driver who was involved ina motor-vehicle collision. While traveling at approximately 60 miles per hour/90 kilometers perhour, she went off the road <strong>and</strong> hit a tree head-on. She was moved to another car by friends <strong>and</strong>transported to your location because they were afraid she might have the baby.HistoryS—“My hip hurts so bad! My chest <strong>and</strong> stomach hurt, too!”A—allergic to penicillinM—taking vitamins <strong>and</strong> DilantinP—history of epilepsy, seven months pregnantL—last meal two hours agoE—“I was driving down the road <strong>and</strong> woke up when my friends were moving me. Maybe Ihad another seizure.”Occupational Health/Industrial The patient is an 18-year-old female employee who was unrestrainedin her car. She was exiting the road into the parking lot at the factory at approximately60 miles per hour/90 kilometers per hour <strong>and</strong> hit a tree head-on. She is still in the car.HistoryS—“My hip hurts so bad! My chest <strong>and</strong> stomach hurt, too!”A—allergic to penicillinM—taking vitamins <strong>and</strong> DilantinP—history of epilepsy, seven months pregnantL—last meal five hours agoE—“I was driving down the road <strong>and</strong> woke up like this. Maybe I had another seizure.”88
Military An 18-year-old female is the civilian daughter of the general. She was walking to hercar after lunch at the officer’s club when a truck struck her.HistoryS—“My hip hurts so bad! My chest <strong>and</strong> stomach hurt, too!”A—allergic to penicillinM—taking vitamins <strong>and</strong> DilantinP—history of epilepsy, seven months pregnantL—last meal in the last hourE—“I was walking to my car <strong>and</strong> woke up like this. I don’t know what happened.”Injuries1. Posterior dislocation of left hip2. Fractured pelvis3. Shock4. Contusion of sternumPatient InstructionsYou should be alert <strong>and</strong> complain of pain in the chest, abdomen, <strong>and</strong> left hip. When examined,you should complain of pain when the sternum or anterior ribs are palpated, when the pelvis ispalpated, or when the left leg is moved in any way. Do not allow your left leg to be straightened.Scream at the top of your lungs at any attempt to straighten your left leg. Continually say, “I ampregnant—what about my baby?”Moulage InstructionsApply bruise to sternum. Use one pillow to simulate pregnancy (unless model is actually pregnant).Simulate diaphoresis.<strong>Instructor</strong> InformationScene size-up—the scene is safe in all settings. Mechanism depends on the setting chosen. Noother patients.Initial assessmentGeneral impression—potential for serious injuriesLOC—normalAirway—openBreathing—normal rate <strong>and</strong> qualityVentilation instructions—give supplemental oxygen89
CirculationPulses—rapid, present at the wristBleeding—no external bleedingSkin color, condition, <strong>and</strong> temperature—good color, warm <strong>and</strong> dryDecision—Rapid trauma survey due to mechanismRapid trauma surveyHead—no obvious injuryNeck—normal, nontenderTrachea—midlineNeck veins—flatChestLooking—contusion of sternumFeeling—tender sternum, no instabilityListening—breath sounds present <strong>and</strong> equal, heart sounds—normalAbdomen—very pregnant (uterus to the xyphoid), tenderPelvis—tender, unstableExtremitiesUpper legs—left leg flexed at the hip <strong>and</strong> knee, internally rotated, right leg normalScan of lower legs <strong>and</strong> arms—normalExam of posterior—normalDecision—load <strong>and</strong> go (fractured pelvis), two IV lines, splint dislocated hipHistory (obtain from the patient)Vital signs—BP 90/60, pulse 140, respiration 24, temperature normalSecondary survey (should be done after transport)History <strong>and</strong> vital signs—if given a bolus of IV fluids, BP is 100/70, pulse 110, respiration24NeurologicalLOC—alert <strong>and</strong> orientedPupils—equal <strong>and</strong> reactiveSensory—normalMotor—normalHead—normal, no fluid from ears or nose90
Airway—openBreathing—normal rate <strong>and</strong> qualityNeck—no tenderness or sign of traumaTrachea—midlineNeck veins—flatCirculation—no external bleeding, skin pale, cool, diaphoreticChestLooking—unchangedFeeling—sternal <strong>and</strong> anterior rib tendernessListening—breath sounds still present <strong>and</strong> equal, heart sounds—normalAbdomen—more tenderPelvis—do not examine againExtremitiesUpper—normalLower—unchanged from above, weak distal pulses, normal sensation, you cannotstraighten left hipOngoing examSubjective changes—patient complains of increasing abdominal painNeurologicalLOC—alertPupils—equal <strong>and</strong> reactiveSensory—normalMotor—normalAirway—openBreathing—normalCirculationBlood pressure—if no IV fluids: BP 60/40, if IV fluids: BP 100/60Pulses—rate if no IV fluids: 160, if IV fluids: 110Skin color, condition, <strong>and</strong> temperature—pale, cool, clammyNeck—no changeTrachea—midlineNeck veins—flat91
Chest—unchanged, heart sounds—normalAbdomen—very tenderFocused assessment of injuriesContusion of sternum—monitoring heartPosterior dislocation of hip—splintedFractured pelvis—stabilized on spine boardShock—fluid bolusesCheck interventionsIs oxygen hooked up <strong>and</strong> turned on?Hip splinted in flexed position?Are IVs running at correct rate?Patient on backboard tilted to the left?Cardiac monitor—sinus tachycardiaPulse oximeter—100 percent92
SettingSCENARIO 7EMS/Prehospital A 30-year-old male involved with road construction falls into a rock-crushingmachine. Co-workers stop the machine, pull him out, <strong>and</strong> lay him on the side of the road.HistoryS—patient unresponsiveA—noneM—noneP—diabeticL—last meal was four hours agoE—“The supervisor saw him fall in <strong>and</strong> yelled for someone to stop the machine, but he wasalready badly hurt!”Nursing/Medical A 30-year-old male involved with road construction falls into a rock-crushingmachine. Co-workers stop the machine, pull him out, <strong>and</strong> transport him in the box of a dumptruck to your facility.HistoryS—patient unresponsiveA—noneM—noneP—diabeticL—last meal was four hours agoE—“The supervisor saw him fall in <strong>and</strong> yelled for someone to stop the machine, but he wasalready badly hurt!”Occupational Health/Industrial A 30-year-old male involved with road construction falls intoa rock-crushing machine. Co-workers stop the machine, pull him out, <strong>and</strong> lay him on the side ofthe road.HistoryS—patient unresponsiveA—noneM—noneP—diabeticL—last meal was four hours agoE—“The supervisor saw him fall in <strong>and</strong> yelled for someone to stop the machine, but he wasalready badly hurt!”93
Military Soldiers were involved in mine-sweeping operations when a mine exploded, leavingone soldier badly injured <strong>and</strong> another with skin abrasions.HistoryNot available.Injuries1. Basilar skull fracture on the right side2. Both legs crushed <strong>and</strong> mangled3. Fractured pelvis4. Large laceration of abdomen with protruding visceraPatient InstructionsThe patient remains unresponsive.Moulage InstructionsYou may use a live model, but any mannequin, including a Resusci-Annie, can be used. Theprotruding viscera can best be simulated with commercial strap-on moulage, but it can be made(see makeup techniques). Bleeding from the legs can best be simulated with red paper or cloth onwhich “active bleeding” is written with a felt-tip pen. The closed fracture of the skull can best bemade by moulaging a Battle’s sign behind the right ear. Put some glycerin or artificial blood inthe right ear to represent spinal fluid or blood draining from the ear.<strong>Instructor</strong> InformationScene size-up—the scene is now safe in all settings except the military setting, in which youmust be concerned about stepping on another mine. There are no other patients.Initial assessmentGeneral impression—critical situationLOC—localizes to painAirway—openBreathing—normal depth of respiration, the rate seems slowVentilation instructions—should give 100 percent oxygen <strong>and</strong> assist ventilation at a rate of12–15 breaths per minuteCirculationPulses—present at the neck but not at the wrist, rate rapidBleeding—from both legs <strong>and</strong> abdominal woundSkin color, condition, <strong>and</strong> temperature—pale, cold, clammy94
Decision—rapid trauma survey due to mechanism <strong>and</strong> examRapid trauma surveyHead—bruising to right side of face, bloody fluid from right earNeck—no obvious traumaTrachea—midlineNeck veins—flatChestLooking—no obvious injuryFeeling—no TICListening—breath sounds present <strong>and</strong> equal bilaterally, heart sounds—normalAbdomen—protruding viscera, bleedingPelvis—very unstableExtremitiesUpper legs—both legs crushed <strong>and</strong> mangled from the upper thighs down to the feet,there is continued bleeding from both legsScan of lower legs <strong>and</strong> arms—arms no apparent injuries, legs as aboveExam of posterior—abrasions on lower backDecision—load <strong>and</strong> go, cover protruding viscera, pressure dressing to stop bleeding fromlegs, two IV lines, monitor for need to intubate, check fingerstick glucose (120)History (unobtainable)Vital signs—BP 50/0, pulse 160, respiration slow when not assisting, temperature normalNeurologicalLOC—localizes to painPupils—right dilated <strong>and</strong> nonreactive, left midposition <strong>and</strong> reactiveSensory—localizes to painMotor—moves arms well, little movement in legsGCS—(8) eyes—opens to pain (2), verbal—none (1), motor: localizes to pain (5)Secondary survey (should be done after transport)History <strong>and</strong> vital signs—after fluid bolus: BP 70/50, pulse 130, respiration still slow whennot assistingNeurologicalLOC—localizes to painPupils—right dilated <strong>and</strong> nonreactive, left midposition <strong>and</strong> reactive95
Sensory—localizes to painMotor—moves arms well, little movement in legsGCS—(8) eyes—open to pain (2), verbal—none (1), motor: localizes to pain (5)Head—Battle’s sign behind right ear, bloody fluid from right ear, face stable, no drainagefrom the noseAirway—open, no gag reflex, should be intubatedBreathing—slow <strong>and</strong> deep when not assistedNeck—unchangedTrachea—midlineNeck veins—flatCirculationBP—90/60 if fluids going, 50/0 if notPulse—130 if fluids going, 160 if notSkin color, condition, <strong>and</strong> temperature—pale, cool, clammyChest—unchanged, heart sounds still easily heardAbdomen—bleeding controlled with dressingsPelvis—do not examine againExtremitiesUpper—normalLower—continue to bleed unless tourniquets appliedDecision—tourniquets to legs, give fluids to get BP to 110 systolic, intubateOngoing examSubjective changes—patient unconsciousNeurologicalLOC—unchangedPupils—unchangedMotor <strong>and</strong> sensory—unchangedGCS—(8) eyes (2), verbal (1), motor (5)Airway—should be intubatedBreathing—should be assisted at 12–15 breaths per minuteCirculationBlood pressure—110/7096
Pulses—rate 130Skin color, condition, <strong>and</strong> temperature—pale, cool, clammyNeck—unchangedTrachea—midlineNeck veins—flatChest—unchanged, heart sounds still easily heardAbdomen—unchangedFocused assessment of injuriesBasilar skull fracture—still some drainage from the ear, still only localizes to pain, pupilsunchangedAbdomen—no further bleeding if properly dressedPelvis—no further examLegs—bleeding stopped by tourniquets, unable to splint due to extent of the injuriesCheck interventionsIs oxygen hooked up <strong>and</strong> turned on?ET tube in the trachea?Ventilation rate correct?Are IVs running at the correct rate?Dressings blood-soaked?Tourniquets still are controlling the bleeding?Cardiac monitor applied?Pulse oximeter applied? 98 percent saturation97
SettingsSCENARIO 8EMS/Prehospital Two teenagers were riding a four-wheeled all-terrain vehicle. The driver wasa 16-year-old female who drove a four-wheeler into a tree. The driver was killed instantly. Thepassenger, a 14-year-old male, was thrown into a ditch. Upon arrival, it is obvious that the driveris deceased. The 14-year-old is crying.Nursing/Medical Two teenagers were riding a four-wheeled all-terrain vehicle. The driver wasa 16-year-old female who drove the four-wheeler into a tree. The passenger, a 14-year-old male,was thrown into a ditch. A BLS ambulance has just arrived at your facility with both patientswithout prior notification. Upon arrival, it is obvious that the 16-year-old is deceased. The 14-year old is crying <strong>and</strong> is poorly strapped to a spine board.Occupational Health/Industrial Two teenagers were riding a four-wheeled all-terrain vehicle.The driver was a 16-year-old female who drove the four-wheeler into a tree. The driver waskilled instantly. The passenger, a 14-year-old male, was thrown into a ditch. Your clinic is closeto the collision, so you take a medical kit <strong>and</strong> go to the scene. Upon arrival, it is obvious that the16-year-old is deceased. The 14-year-old is crying.Military Two teenagers were riding a four-wheeled all-terrain vehicle on the military base. Thedriver was a 16-year-old female who drove the four-wheeler into a tree. The driver was killedinstantly. The passenger, a 14-year-old male, was thrown into a ditch. You are a medic on themilitary ambulance. Upon arrival, it is obvious that the driver is deceased. The 14-year-old iscrying.HistoryS—“My leg is killing me! Please help!”A—no allergiesM—no medicationsP—no significant past illnessesL—last meal two hours agoE—“I was on the back with my sister <strong>and</strong> we hit a tree. How is she doing? I want her herewith me!!!”Injuries1. Open fracture of the right lower leg2. Fracture of pelvis3. ShockPatient InstructionsYou should be alert <strong>and</strong> complain of pain in the right lower leg. When your pelvis is examined,98
you should cry out loudly with pain.Moulage InstructionsFull-face or half-face helmet should be in place in all settings. Open fracture is best done withcommercial strap-on moulage, but it can be made with wax or plumber’s putty <strong>and</strong> pieces ofbone. Simulate diaphoresis.<strong>Instructor</strong> InformationScene size-up—scene safe, other patient deceasedInitial assessmentGeneral impression—potential for critical injuriesLOC—alertAirway—open (helmet must be removed to evaluate)Breathing—rate <strong>and</strong> quality normalVentilation instructions—may give oxygenCirculationPulses—present at the wrist, rate seems increasedBleeding—slight bleeding from right lower legSkin color, condition, <strong>and</strong> temperature—warm <strong>and</strong> dry, color normalDecision—rapid trauma survey due to mechanismRapid trauma surveyHead—no sign of trauma (was wearing helmet)Neck—normalTrachea—midlineNeck veins—flatChestLooking—no DCAP-BTLSFeeling—no TICListening—breath sounds present <strong>and</strong> equal, normal heart soundsAbdomen—slight tenderness of lower abdomenPelvis—unstable <strong>and</strong> tenderExtremitiesUpper legs—normal99
Scan of lower legs <strong>and</strong> arms—open fracture of right lower leg, arms normalExam of posterior—normalDecision—load <strong>and</strong> go (unstable pelvis), two IV lines, splint legHistory (obtain from the patient)Vital signs—BP 90/70, pulse 160, respiration 32, temperature normalSecondary survey (should be done after transport)History <strong>and</strong> vital signs—BP 90/70, pulse 160, respiration 32NeurologicalLOC—alertPupils—equal <strong>and</strong> reactiveSensory—normalMotor—normalHead—normalAirway—openBreathing—normal rate <strong>and</strong> qualityNeck—nontenderTrachea—midlineNeck veins—flatCirculation—BP <strong>and</strong> pulse as above, skin: pale, cool, clammyChest—unchanged, normal heart soundsAbdomen—no changePelvis—do not examine againExtremitiesUpper—normal, good PMSLower—open fracture of right lower leg, distal pulses palpable, normal sensory, can wiggletoes, no bleeding if dressedDecision—record <strong>and</strong> continue to monitorOngoing examSubjective changes—abdominal pain is worseNeurologicalLOC—normalPupils—equal <strong>and</strong> reactive100
Sensory <strong>and</strong> motor—normalAirway—openBreathing—normal rate <strong>and</strong> qualityCirculationBlood pressure—80/50Pulses—rate 175Skin color, condition, <strong>and</strong> temperature—pale, cool, clammyNeck—nontenderTrachea—midlineNeck veins—flatChest—unchanged, normal heart soundsAbdomen—more tender in lower abdomenFocused assessment of injuriesLeg—splinted, still has good PMS, no bleeding nowPelvis—not recheckedAbdomen—still tenderCheck interventionsIs oxygen hooked up <strong>and</strong> turned on?Dressing blood-soaked?Are IVs running at correct rate to maintain BP of at least 90?Splint in good position?Decision—continue present treatment101
SettingSCENARIO 9EMS/Prehospital The patient is a young male who was riding his horse when he was knockedfrom the horse by a low tree branch. He subsequently fell down a steep cliff. His riding companioncalled for help.HistoryS—“I hurt all over.”A—allergic to penicillinM—insulinP—diabetesL—last meal was last night, approximately 18 hours agoE—“I was going home <strong>and</strong> my horse started galloping out of control; then, I hit a branch thatknocked me off, <strong>and</strong> I fell down the cliff.”Nursing/Medical The patient is a young male who was riding his horse when he was knockedfrom the horse by a low tree branch. He subsequently fell down a steep cliff. His riding companioncalled for help, <strong>and</strong> a nearby farmer put him in the back of his pickup truck <strong>and</strong> drove to yourfacility.HistoryS—“I hurt all over.”A—allergic to penicillinM—insulinP—diabetesL—last meal was last night, approximately 18 hours agoE—“I was going home <strong>and</strong> my horse started galloping out of control; then, I hit a branch thatknocked me off, <strong>and</strong> I fell down the cliff.”Occupational Health/Industrial One of your truck drivers runs head-on into the brick companysign without slowing down. He tried to get away from the vehicle but collapsed after onestep.HistoryS—“I hurt all over.”A—allergic to penicillinM—insulinP—diabetesL—last meal was last night. Did not eat breakfast this morning.102
E—“I swerved to miss an animal <strong>and</strong> ran into a sign.”Military The patient is a teen-age dependent of one of the officers on your base. He falls from athird-floor balcony onto concrete.HistoryS—“I hurt all over.”A—allergic to penicillinM—insulinP—diabetesL—last meal was last night. Did not eat breakfast.E—“I don’t remember.”Injuries1. Intraabdominal bleeding2. Fracture of left femur3. Scalp laceration4. Hypoglycemia (when asked, fingerstick glucose is 40)Patient InstructionsComplain of pain when your abdomen is palpated or your left upper leg is examined.Moulage InstructionsUse trousers with a large tear in left thigh area. The left thigh should have a large bruise. Applysome fake blood to an area of the scalp (fake blood mixed with KY jelly works well here). Don’tuse this on someone with light-colored hair, as it will stain the hair.<strong>Instructor</strong> InformationScene size-up—no danger, no other patientsInitial assessmentGeneral impression—potential for critical injuriesLOC—alert but confusedAirway—openBreathing—normal rate <strong>and</strong> qualityVentilation instructions—apply oxygen, assist if neededCirculation103
Pulses—present at neck <strong>and</strong> wrist, rate seems fastBleeding—some bleeding from the scalp woundSkin color, condition, <strong>and</strong> temperature—normalDecision—rapid trauma survey due to mechanismRapid trauma surveyHead—bleeding from scalp laceration, otherwise normalNeck—no swelling or discolorationTrachea—midlineNeck veins—flatChestLooking—normalFeeling—no TICListening—breath sounds present <strong>and</strong> equal, normal heart soundsAbdomen—diffusely tender to palpationPelvis—stable <strong>and</strong> nontenderExtremitiesUpper legs—swelling, tenderness, <strong>and</strong> deformity of left upper legScan of lower legs <strong>and</strong> arms—normalExam of posterior—normalDecision—load <strong>and</strong> go, two IV lines, traction splint left femur, blood glucose (40).Give IV glucose.History (obtain from the patient)Vital signs—BP 110/70, pulse 100, respiration 22, temperature normalNeurologicalLOC—awake but confusedPupils—equal <strong>and</strong> reactiveSensory—normalMotor—normalGCS—(14) eyes (4), verbal (3), motor (6)Secondary survey (should be done after transport)History <strong>and</strong> vital signs—as aboveNeurological104
LOC—alert <strong>and</strong> oriented if given glucose, awake but confused if notPupils—equal <strong>and</strong> reactiveSensory—normalMotor—normalHead—blood in hair from scalp laceration, no Battle’s sign or raccoon eyes, face normalAirway—openBreathing—normal rate <strong>and</strong> depthNeck—nontenderTrachea—midlineNeck veins—flatCirculation—BP <strong>and</strong> pulse as above, skin warm <strong>and</strong> dry, but paleChest—no change, normal heart soundsAbdomen—more tenderPelvis—do not examine againExtremitiesUpper—normalLower—left leg should be splinted, good PMSDecision—give IV glucose if not already doneOngoing examSubjective changes—abdominal pain is worseNeurologicalLOC—alert <strong>and</strong> oriented if given glucose, decrease LOC if no glucose givenPupils—equal <strong>and</strong> reactiveSensory <strong>and</strong> motor—unchangedAirway—openBreathing—normal rate <strong>and</strong> qualityCirculationBlood pressure—60/40Pulses—rate 150Skin color, condition, <strong>and</strong> temperature—pale, cool, clammyNeck—nontenderTrachea—midline105
Neck veins—flatChest—normal, heart sounds—normalAbdomen—distended <strong>and</strong> tenderFocused assessment of injuriesAbdomen—worseningScalp—no longer bleeding if dressedLeft leg—unchangedHypoglycemia—recheck glucose (136)Check interventionsIs oxygen hooked up <strong>and</strong> turned on?Blood glucose rechecked? (136)Are IVs running at correct rate to maintain systolic BP of 90–100?Dressing blood-soaked?Splint in good position?Cardiac monitor applied?Pulse oximeter applied? 98 percent saturationDecision—fluid bolus106
SettingSCENARIO 10EMS/Prehospital A male motorcyclist loses control on a curve <strong>and</strong> collides with a guardrail.Police call for medical assistance when they determine the man is injured <strong>and</strong> unable to move.HistoryS—“I can’t feel anything. I can’t move.”A—noneM—noneP—good healthL—six hours agoE—“I tried to lay the motorcycle down when I lost control, but the guardrail caught me.”Nursing/Medical A male motorcyclist loses control on a curve <strong>and</strong> collides with a guardrail.Police call for medical assistance when they determine the man is injured <strong>and</strong> unable to move,but EMS is significantly delayed, so they transport the patient to the hospital in the back of a policevan.HistoryS—“I can’t feel anything. I can’t move.”A—noneM—noneP—good healthL—six hours agoE—“I tried to lay the motorcycle down when I lost control, but the guardrail caught me.”Occupational Health/Industrial A male crane operator slips <strong>and</strong> falls (30 feet/10 meters) whileclimbing down the crane for lunch. A co-worker witnesses the fall <strong>and</strong> notifies you.HistoryS—“I can’t feel anything. I can’t move.”A—noneM—noneP—good healthL—six hours agoE—“I was climbing down the crane for lunch, like I do every day, but somehow I slipped.”Military A male recruit is repelling unsupervised from a platform when he looses his grip <strong>and</strong>falls 30 feet/10 meters. The drill sergeant finds the recruit <strong>and</strong> notifies you.History107
S—“I can’t feel anything. I can’t move.”A—noneM—noneP—good healthL—six hours agoE—“I was practicing climbing so I could pass the test.”Injuries1. Fractured lower neck with spinal cord injury2. Spinal shock3. Fractured right tibia (open)Patient InstructionsComplain of pain when your neck is examined. You can flex your arms at the elbows but haveweak grip with your h<strong>and</strong>s; otherwise, you are unable to move.Moulage InstructionsThe patient should wear a full-face motorcycle helmet. A partial-face helmet is an alternative.For OH/industry <strong>and</strong> military, have patient wear a hard hat or military helmet.<strong>Instructor</strong> InformationScene size-up—safe, no other patientsInitial assessmentGeneral impression—possible neck <strong>and</strong> spinal injuryLOC—alertAirway—openBreathing—normal rate, shallow, diaphragmatic onlyVentilation instructions—assist ventilation with oxygenCirculationPulses—present at wrist, rapid (still has catecholamines present)Bleeding—noneSkin color, condition, <strong>and</strong> temperature—normal color, sweaty, warmDecision—rapid trauma survey due to mechanism <strong>and</strong> examRapid trauma survey108
Head—face normal, helmet still in placeNeck—tenderness at base of neckTrachea—midlineNeck veins—flatChestLooking—no movement of ribs with breathing, otherwise normalFeeling—no TIC, no sensationListening—breath sounds present <strong>and</strong> equal, heart sounds—normalAbdomen—soft, no sensationPelvis—stableExtremitiesUpper legs—normalScan of lower legs <strong>and</strong> arms—right tibia protruding, can flex arms, weak grips bilaterally,pulses presentExam of posterior—normalDecision—spinal injury, load <strong>and</strong> goHistory (obtain from the patient)Vital signs—BP 70/50, pulse 70, respiration 18, temperature normalSecondary survey (should be done after transport)History <strong>and</strong> vital signs—after fluid challenge BP 80/60NeurologicalLOC—alert <strong>and</strong> orientedPupils—equal <strong>and</strong> reactiveSensory—no sensation from the neck downMotor—can flex arms, weak grips bilaterally, no movement below the shouldersHead—face normal, helmet still in placeAirway—openBreathing—rate 18, shallowNeck—still tender, some swellingTrachea—midlineNeck veins—flatCirculation—BP <strong>and</strong> pulse as above, skin warm <strong>and</strong> dry109
Chest—unchanged, heart sounds—unchangedAbdomen—unchangedPelvis—do not examine againExtremitiesUpper—unchangedLower—unchangedOngoing examSubjective changes—patient still has no feeling from the neck downNeurologicalLOC—normalPupils—equal <strong>and</strong> reactiveSensory <strong>and</strong> motor—unchangedAirway—openBreathing—unchangedCirculationBlood pressure—80/60 if fluids givenPulses—rate 70Skin color, condition, <strong>and</strong> temperature—warm, dry, <strong>and</strong> pinkNeck—unchangedTrachea—unchangedNeck veins—unchangedChest—unchanged, heart sounds—normalAbdomen—unchangedFocused assessment of injuriesNo change in neurological examCheck interventionsIs oxygen hooked up <strong>and</strong> turned on?Assisting respiration?Are IVs running at correct rate?Helmet left in place?Splint?110
SettingsSCENARIO 11EMS/Prehospital The patient is a 50-year-old male semitruck driver who collided with a trainat an uncontrolled crossing. He was ejected from the truck <strong>and</strong> is lying in the ditch.Medical/Nursing The patient is a 50-year-old male semitruck driver who collided with a trainat an uncontrolled crossing. He was ejected from the truck <strong>and</strong> transported by community firstresponders to your location.Occupational Health/Industrial The patient is a 50-year-old male semitruck driver who collidedwith a train at an uncontrolled crossing just outside the gate to your plant. He was ejectedfrom the truck <strong>and</strong> is lying in the ditch.Military The patient is a 50-year-old male supply clerk who was driving a 6 × 6 truck <strong>and</strong> collidedwith a train at an uncontrolled crossing. He was ejected from the 6 × 6 <strong>and</strong> is lying in theditch.HistoryNot availableInjuries1. Fractured left femur (closed)2. Fractured pelvis3. Fractured ribs on left side with flail section4. Shock5. Closed head injuryPatient InstructionsUnconscious with no response to stimulus.Moulage InstructionsCreate bruising over ribs. Create bruising <strong>and</strong> swelling over femur. Simulate cyanosis <strong>and</strong> diaphoresis.<strong>Instructor</strong> InformationScene size-up—the scene is safe in all settings. Mechanism depends on the setting chosen. Noother patients.Initial assessmentGeneral impression—potential for serious injuriesLOC—curses <strong>and</strong> localizes to pain111
Airway—openBreathing—normal quality, increased rateVentilation instructions—give supplemental oxygenCirculationPulses—rapid, present at the wristBleeding—no external bleedingSkin color, condition, <strong>and</strong> temperature—pale, clammy, <strong>and</strong> coolDecision—rapid trauma survey due to mechanismRapid trauma surveyHead—no obvious injuryNeck—normal, nontenderTrachea—midlineNeck veins—flatChestLooking—bruising over left chestFeeling—unstable section of anterior ribs on left sideListening—breath sounds present <strong>and</strong> equal, heart sounds—normalAbdomen–—normalPelvis—unstableExtremitiesUpper legs—left leg swollen <strong>and</strong> bruised midfemur, right leg normalScan of lower legs <strong>and</strong> arms—normalExam of posterior—normalDecision—load <strong>and</strong> go (fractured pelvis), two IV lines, splint fractured femurHistory—unable to obtain because of patient’s level of consciousnessVital signs—BP 80/60, pulse 140, respiration 24, temperature normalGCS—eyes: open to pain (2), verbal: curses to pain (3), motor: localizes to pain (5)Secondary survey (should be done after transport)History <strong>and</strong> vital signs—if given a bolus of IV fluids BP is 90/70, pulse 120, respiration 24NeurologicalLOC—curses to painPupils—equal <strong>and</strong> reactive112
Sensory—localizes to painMotor—moves all extremitiesGCS—unchangedBlood glucose—138Head—normal, no fluid from ears or noseAirway—openBreathing—normal rate <strong>and</strong> qualityNeck—no tenderness or sign of traumaTrachea—midlineNeck veins—flatCirculation—no external bleeding, skin pale, cool, diaphoreticChestLooking—unchangedFeeling—anterior rib instabilityListening—breath sounds still present <strong>and</strong> equal, heart sounds—normalAbdomen—no changePelvis—do not examine againExtremitiesUpper—normalLower—unchanged from above, weak distal pulsesOngoing examNeurologicalLOC—curses to painPupils—equal <strong>and</strong> reactiveSensory—localizes to painMotor—moves all extremitiesGCS—unchangedAirway—openBreathing—normalCirculationBlood pressure—if no IV fluids: BP 60/40, if IV fluids: BP 90/70Pulses—rate if no IV fluids: 160, if IV fluids: 110113
Skin color, condition, <strong>and</strong> temperature—pale, cool, clammyNeck—no changeTrachea—midlineNeck veins—flatChest—unchanged, heart sounds—normalAbdomen—very tenderFocused assessment of injuriesRib fractures—check flail <strong>and</strong> monitor heartFractured femur—traction splintFractured pelvis—stabilized on spine boardShock—fluid bolusesCheck interventionsIs oxygen hooked up <strong>and</strong> turned on?Are IVs running at correct rate to maintain BP of 110–120 systolic?Controlled flail segment?Cardiac monitor—sinus tachycardiaPulse oximeter—100 percent114
SettingSCENARIO 12EMS/Prehospital A young male at a building site was struck by a collapsing wall <strong>and</strong> debris.The man is under some rubble; however, you have full, easy access to him. Scene appears safe.Nursing/Medical A young male at a building demolition site was struck by a collapsing wall<strong>and</strong> debris. His co-workers put him in the back of their pickup <strong>and</strong> brought him to your emergencydepartment. The attending physician is with a cardiac arrest <strong>and</strong> cannot immediately assistyou.Occupational Health/Industrial A young male at a building demolition site was struck by acollapsing wall <strong>and</strong> debris. The man is under some rubble; however, you have full, easy access tohim. Scene appears safe.Military The patient is a young soldier who was on a “clearing mission” when a booby trap wastripped, causing a structural cave-in.HistoryS—Pain in chest <strong>and</strong> right lower leg, “tingling all over,” difficulty breathing, <strong>and</strong> ringing inhis earsA—no allergiesM—no medicationsP—no significant past illnessesL—last meal three hours agoE—“All I saw was a something falling on me!”Injuries1. Open fracture of the right lower leg2. Cervical spine injury3. Flail chest on the right side4. Fracture of pelvis5. ShockPatient InstructionsYou should be alert <strong>and</strong> complain of pain in the chest <strong>and</strong> right lower leg. You should describe“tingling all over,” <strong>and</strong> complain of difficulty breathing, ringing in your ears, <strong>and</strong> difficulty hearing.When your pelvis is examined, you should cry out loudly with pain.Moulage InstructionsOpen fracture is best done with commercial strap-on moulage, but it can be made with wax or115
plumber’s putty <strong>and</strong> pieces of bone (see makeup techniques in the appendix). The strap-on moulageis not as realistic, but it holds up much better during a long day of use. Flail chest is bestmade by applying a piece of white tape to the chest <strong>and</strong>, using a felt-tip pen, writing “flail chest”on it. Dirt around mouth, nose, <strong>and</strong> eyes.<strong>Instructor</strong> InformationScene size-up—no danger, mechanism of injury is as described, no other patientsInitial assessmentGeneral impression—initially does not appear critically injuredLOC—alert <strong>and</strong> responds appropriatelyAirway—open <strong>and</strong> clearBreathing—rate increased, quality laboredVentilation instructions—should order 100 percent oxygenCirculationPulses—present <strong>and</strong> strong at the wrist, rate seems increasedBleeding—no external bleeding noted other than some blood on right lower leg (not activelybleeding)Skin color, condition, <strong>and</strong> temperature—warm <strong>and</strong> dry but slightly cyanoticDecision—do rapid trauma survey due to mechanismRapid trauma surveyHead—minor bruising <strong>and</strong> small abrasions on face <strong>and</strong> neckNeck—no discoloration or swelling, tender to palpationTrachea—midlineNeck veins—flatChestLooking—paradoxical motion of right chestFeeling—instability <strong>and</strong> crepitation in right chestListening—breath sounds decreased on right, heart sounds—normalPercussion—equalAbdomen—soft, slightly tender in lower quadrantsPelvis—unstable, painful to palpationExtremitiesUpper legs—no apparent injuryScan of lower legs <strong>and</strong> arms—open fracture of right lower leg, no active bleeding, nor-116
mal PMSExam of posterior—normal except that the neck is tenderDecision—load <strong>and</strong> go due to flail chest <strong>and</strong> respiratory difficulty, notify medical direction,two IV lines, stabilize flail segment, 100 percent oxygenHistory (obtain from the patient)Vital signs—BP 120/90, pulse 110, respiration 30 <strong>and</strong> labored, temperature feels normalSecondary survey (should be done after transport)History <strong>and</strong> vital signs—unchanged from aboveNeurologicalLOC—responds to verbal stimuli but now is pale <strong>and</strong> lethargicPupils—equal <strong>and</strong> reactiveSensory—abnormal “tingling” sensation below the neckMotor—normalGCS—(14), eyes (4), verbal (4), motor (6)Head—scalp normal, negative Battle’s sign <strong>and</strong> raccoon eyes, no fluid from ears or nose,face stableAirway—open <strong>and</strong> clearBreathing—still labored, with rate of 30/minNeck—tender to palpationTrachea—midlineNeck veins—flatCirculation—skin now pale, cool, <strong>and</strong> diaphoretic, repeat BP is 80/50ChestLooking—flail should be stabilizedFeeling—no changeListening—still has decreased breath sounds on right side, heart sounds—normalPercussion—still equalAbdomen—slight tenderness in lower quadrants, not distendedPelvis—already examined; do not examine againExtremitiesUpper—minor scrapes <strong>and</strong> abrasionsLower—should have splint <strong>and</strong> dressing on fracture of right lower leg, PMS is unchanged117
Decision—check that the patient is getting 100 percent oxygen, give fluid bolus, check fingerstickglucose—120Ongoing examSubjective changes—patient feels better nowNeurologicalLOC—more alert after fluid bolusPupils—equal <strong>and</strong> reactiveGCS—(15), eyes—4, verbal—5, motor—6Airway—clear <strong>and</strong> openBreathing—still painful with rate of 30/min but moving air better with stabilization of theflailCirculationBlood pressure—90/50Pulses—rate 130Skin color, condition, <strong>and</strong> temperature—still pale, cool, diaphoreticNeck—unchangedTrachea—still midlineNeck veins—still flatChest—unchanged, heart sounds—normalAbdomen—unchangedFocused assessment of injuriesNeck stabilized?Flail chest stabilized?Open fracture dressed <strong>and</strong> splinted? No bleedingShock being managed with cautious fluid resuscitation?Check interventionsIs oxygen hooked up <strong>and</strong> turned on?Is flail chest still stabilized?Are IVs running at a rate to maintain BP of 90–100 systolic?Is fracture well-splinted <strong>and</strong> wound dressed?Cardiac monitor applied?Pulse oximeter applied? 92 percent saturation118
SettingsSCENARIO 13EMS/Prehospital A park employee was mowing grass on the side of a road when his tractorwas struck on the left rear side by a truck traveling at high speed. The operator of the tractor wasthrown from his tractor approximately 18 meters/16 yards.Nursing/Medical A park employee was mowing grass on the side of a road when his tractorwas struck on the left rear side by a truck traveling at high speed. The operator of the tractor wasthrown from his tractor approximately 18 meters/16 yards. Local first responders brought him toyour emergency department. Your attending physician is with a cardiac arrest <strong>and</strong> cannot immediatelyrespond.Occupational Health/Industrial A company grounds employee was mowing grass on the sideof a road when his tractor was struck on the left rear side by a truck traveling at high speed. Theoperator of the tractor was thrown from his tractor approximately 18 meters/16 yards.Military A PFC was mowing grass on the side of the protected area of the installation when histractor was struck on the left rear side by a truck traveling at high speed. The operator of thetractor was thrown from his tractor approximately 18 meters/16 yards.HistoryS—“My chest <strong>and</strong> hips are killing me!”A—noneM—“I take blood pressure pills <strong>and</strong> allergy pills” (for military scenario—no medications)P—high blood pressure (for military scenario—no significant past history)L—last meal three hours agoE—“I don’t know where that truck came from that hit me!”Injuries1. Fracture of C-7, but the spinal cord has not been injured yet2. Flail chest on the left3. Ruptured spleen4. Multiple fractures of the pelvisPatient InstructionsYou are awake <strong>and</strong> alert. Complain of pain in the left chest <strong>and</strong> hip. Do not complain of abdominalor neck pain. When the neck <strong>and</strong> abdomen are checked, complain of tenderness. When pelvisis checked, complain of severe pain. Complain of difficulty breathing when your chest is examined.Moulage Instructions119
Place white tape on left side of chest. Label “flail chest” with a felt-tip pen.<strong>Instructor</strong> InformationScene size-up—the scene is safeInitial assessmentGeneral impression—potential for critical injuriesLOC—alert <strong>and</strong> orientedAirway—open <strong>and</strong> clearBreathing—rapid, shallow, labored respirationVentilation instructions—supplemental oxygen, assist ventilation as needed. Intubate if respirationworsens.CirculationPulses—rapid, present at the wristBleeding—no external bleeding notedSkin color, condition, <strong>and</strong> temperature—cyanotic, pale, diaphoreticDecision—rapid trauma survey based on mechanism <strong>and</strong> initial assessmentRapid trauma surveyHead—no injuries notedNeck—tender to palpationTrachea—midlineNeck veins—flatChestLooking—paradoxical movement on the left sideFeeling—unstable segment on the leftListening—breath sounds decreased on the left, good heart soundsPercussion—equal bilaterallyAbdomen—slightly tender to palpationPelvis—unstable <strong>and</strong> tenderExtremitiesUpper legs—no sign of injuryScan of lower legs <strong>and</strong> arms—no sign of injuryExam of posterior—no injury notedDecision—load <strong>and</strong> go, stabilize flail segment, two IV lines, monitor for shock120
History (obtain from the patient)Vital signs—BP 90/60, pulse 130, respiration 36, temperature normalSecondary survey (should be done after transport)History <strong>and</strong> vital signs—after fluid bolus: BP 100/60, pulse 120, respiration 30 <strong>and</strong> lesspainful if flail segment stabilizedNeurologicalLOC—alertPupils—equal <strong>and</strong> reactiveSensory—normalMotor—normalHead—scalp normal, no drainage from ears or nose, negative Battle’s sign <strong>and</strong> raccoon eyes,face stableAirway—openBreathing—rate <strong>and</strong> quality improved if flail has been stabilizedNeck—some swelling now, more tenderTrachea—midlineNeck veins—flatCirculationBP as abovePulse as aboveSkin color, condition, <strong>and</strong> temperature—pale, cool, clammyChestLooking—should have flail segment stabilizedFeeling—should not palpate againListening—decreased breath sounds on left, heart sounds unchangedPercussion—still equalAbdomen—distended <strong>and</strong> painful nowPelvis—should not be examined againExtremitiesUpper—no DCAP-BTLS, good PMSLower—no DCAP-BTLS, good PMSDecision—continue present therapy, monitor for need to intubateOngoing exam121
Subjective changes—patient complains of worsening abdominal pain <strong>and</strong> severe pain withbreathingNeurologicalLOC—normalPupils—equal <strong>and</strong> reactiveSensory <strong>and</strong> motor—normalAirway—openBreathing—painful but adequateCirculationBlood pressure—90/60Pulses—rate 130Skin color, condition, <strong>and</strong> temperature—pale, cool, clammyNeck—swelling <strong>and</strong> painful (do not palpate any more)Trachea—midlineNeck veins—flatChest—unchanged, heart sounds—normalAbdomen—more distended <strong>and</strong> tenderFocused assessment of injuriesNeck—swollen <strong>and</strong> tender but no paralysis or weaknessFlail segment—stabilized, patient splinting on left but no hemothoraxAbdomen—becoming more tender <strong>and</strong> distendedCheck interventionsIs oxygen hooked up <strong>and</strong> turned on?Assisted ventilation as needed?Are IVs running at rate to maintain BP of 90–100?Flail segment well-stabilized? Cardiac monitor applied?Pulse oximeter applied? 92 percent saturation122
ITLS SCENARIO GRADE SHEETStudent Name: Date: Scenario #:TimeStarted:TimePrimary completed:TimeTransported:[ ] Basic[ ] Advanced[ ] Practice [ ] Test [ ] RTTimeSecondary completed :ACTION COMMENTSPATIENT ASSESSMENT - PRIMARY SURVEYScene Size-upSt<strong>and</strong>ard precautionsScene HazardsNumber of PatientsNeed for More Help or EquipmentMechanism of InjuryGeneral ImpressionAge, Sex, WeightGeneral AppearanceBody PositionPosition in EnvironmentPatient ActivityObvious Injury or BleedingLOC A.V.P.U.Airway Snoring, Gurgling, Stridor, SilenceBreathing Present? Rate, Depth, EffortRadial/Carotid PulsesPresent? Rate, Rhythm, QualitySkin Color, Temp, Moisture, Capillary RefillUncontrollable external hemorrhage?Head <strong>and</strong> NeckMajor facial injuriesBruising, swelling, penetrationsSubcutaneous emphysema?Neck vein distention?Tracheal deviation?Chest Look: Asymmetry, Contusion,Penetrations, Paradoxical Motion, Chest RiseFeel: Tenderness, Instability, CrepitationBreath SoundsPresent? Equal?If decreased breath sounds, percussionHeart TonesAbdomenLook: bruising, penetration/eviscerationGently palpate: tenderness, rigidity, distentionPelvis Deformity, penetrating wounds, TICLower ExtremitiesUpper: swelling, deformity, TICLower: scan wounds, swelling, deformityMotor, sensory before transfer to backboardBaseline Vital Signs HR, RR, BPHistory SAMPLEIF ALTERED MENTAL STATUSPupils Size? Reactive? Equal?Glasgow Coma ScaleOrientation, emotional stateSigns of cerebral herniationMedical identification devicesBlood glucoseCritical transport decisionACTION COMMENTSACTION COMMENTSPATIENT ASSESSMENT - SECONDARY SURVEYRepeat Initial AssessmentRepeat vital signsConsider Cardiac monitor, Sp0 2 , EtCO 2LOCAVPUIf conscious, orientation <strong>and</strong> emotional stateIf altered mental status, GCSIf altered mental status, blood glucoseIf altered mental status, Sp0 2If altered mental status, consider naloxonePupils size, equality, response to lightMotor move fingers <strong>and</strong> toes?Sensation feel fingers <strong>and</strong> toes?If unconscious, respond to pinch?HeadDCAP-BTLSRaccoon eyesBattle’s signsDrainage from ears or noseMouthReassess airwayNeckDCAP-BTLSNeck vein distention?Tracheal deviation?ChestDCAP-BTLS, paradoxical movementInstability <strong>and</strong> crepitationBreath sounds present? equal? quality?If decreased breath sounds, percussionUpper ExtremitiesScan wounds, swelling, deformityMotor, sensory before transfer to backboardPosterior Penetrations, deformity, edemaIF CRITICAL, TRANSFER TO AMBULANCEGRADE KEY:[ ] Completed, skill performed in sequence[ D ] Delayed, performed out of sequence[ X ] Skill not performed, too late or incorrectlyJuly 2007Heart soundsRecheck wound seals, injuriesAbdomenSigns of blunt or penetrating traumaPalpate all quadrants for tenderness, rigidityPelvis <strong>and</strong> ExtremitiesDCAP-BTLSPMS distal to injuries on extremitiesIF CRITICAL, TRANSPORT IMMEDIATELY
ONGOING ASSESSMENTACTION COMMENTSSubjective Ask patient if changes in how feelsReassess mental status LOC, pupilsIf altered mental status Recheck GCSReassess airwayReassess breathing <strong>and</strong> circulationRecheck vital signsSkin color, condition, temperatureCheck for neck vein distentionCheck for tracheal deviationRecheck chestBreath sounds quality? equal?Reassess heart soundsReassess abdomen - if possible injuryDevelopment of tenderness, distention, rigidityCheck all identified injuriesFor example:Lacerations for bleedingPMS distal to injuries on extremitiesFlail segmentsPneumothoraxOpen chest woundsCheck all interventionsFor example:ET tube for patency <strong>and</strong> positionOxygen for flow rateIVs for patency <strong>and</strong> fluid rateSeals on sucking chest woundsPatency of decompression needleSplints <strong>and</strong> dressingsImpaled objects for stabilizationIf pregnant, body positionCardiac monitor, Sp0 2 , EtCO 2CRITICAL ACTIONSCompletes Scene Size-up <strong>and</strong> uses universal precautionsPerforms initial assessment <strong>and</strong> interacts with patientPerforms organized Rapid <strong>Trauma</strong> Survey or Focused ExamEnsures spinal motion restrictionEnsures appropriate oxygenation <strong>and</strong> ventilationRecognizes <strong>and</strong> treats all life-threatening injuriesUses appropriate equipment <strong>and</strong> techniquesRecognizes critical trauma, time <strong>and</strong> transport prioritiesPerforms Secondary Survey (when time permits)IMPORTANT ACTIONSPerforms Ongoing Exam (when time permits)Utilizes time efficientlyIf critical, notifies medical direction earlyGives appropriate report to medical directionDemonstrates acceptable skill techniquesDisplays leadership <strong>and</strong> teamworkADDITIONAL ACTIONSFinish b<strong>and</strong>aging <strong>and</strong> splinting after Secondary Survey (when time permits)Vital signs every 5 minutes for critical patents, every 15 minutes for stableRepeats Ongoing Exam each time patient moved or intervention performedRepeats Ongoing Exam if patient condition worsensAppropriately interacts with patient, family <strong>and</strong> byst<strong>and</strong>ersGRADE KEY:[ ] Completed, skill performed in sequence[ D ] Delayed, performed out of sequence[ X ] Skill not performed, too late or incorrectly July 2007INSTRUCTOR COMMENTSOVERALL GRADE[ ] Excellent [ ] Good [ ] Adequate [ ] InadequateFurther Comments:Lead <strong>Instructor</strong> Name (print):Signature:<strong>Instructor</strong> Name (print):Signature:<strong>Instructor</strong> Name (print):Signature:
Name:ITLS BASIC AND ADVANCEDPATIENT ASSESSMENT GRADE SHEETStudent Level:Date: Practice Test Retest (circle one) Scenario #:Start time: Transport Time: Total Time:Critical ActionsNotes___ Completes scene size-up <strong>and</strong> uses universal precautions___ Performs initial assessment <strong>and</strong> interacts with patient___ Performs organized rapid trauma survey/focused exam___ Ensures spinal motion restriction___ Ensures appropriate oxygenation <strong>and</strong> ventilation___ Recognizes <strong>and</strong> treats all life-threatening injuries___ Uses appropriate equipment <strong>and</strong> techniques___ Recognizes critical trauma, time <strong>and</strong> transport priorities___ Performs secondary survey (when time permits)Important Actions___ Performs ongoing exam (when time permits)___ Utilizes time efficiently___ Gives appropriate report to medical direction___ Demonstrates acceptable skill techniques___ Displays leadership <strong>and</strong> teamworkSpecific Scenario Requirements_____________________NotesNotes125
Overall RatingCommentsEvaluator’s NameEvaluator’s NameSignatureSignatureITLS SCENARIO DEVELOPMENT SHEETSettingEMS/PrehospitalSCENARIO #Nursing/MedicalOccupational Health/IndustrialMilitaryInjuriesMoulage InstructionsPatient InstructionsResponsiveness <strong>and</strong> InteractionSymptoms <strong>and</strong> ComplaintsHistorySpecial directions, if any:ITLS Primary SurveyScene Size-Up126
St<strong>and</strong>ard PrecautionsScene HazardsNumber of PatientsNeed for More Help or EquipmentMechanism of InjuryGeneral ImpressionAge, Sex, WeightGeneral AppearanceBody PositionPosition in EnvironmentPatient ActivityObvious Injury or BleedingLOCAirwaySnoring, Gurgling, Stridor, SilenceBreathingPresent? Rate, Depth, EffortRadial/Carotid PulsesPresent? Rate, Rhythm QualitySkin Color, Temperature, Moisture, CapillaryRefillUncontrollable external hemorrhage?Head <strong>and</strong> NeckMajor Facial InjuriesBruising, Swelling, PenetrationsSubcutaneous Emphysema?Neck Vein Distention?Tracheal Deviation?ChestLook: Asymmetry, Contusion, Penetrations,Paradoxical Motion, Chest Rise,Diaphragmatic BreathingFeel: Tenderness, Instability, CrepitationBreath SoundsPresent? Equal?Percussion ResultsHeart TonesAbdomenExpose <strong>and</strong> Look: Bruising, Penetration/EviscerationGently Palpate: Tenderness, Rigidity,DistentionPelvisDeformity or Penetrating Wounds127
Tenderness, Instability, CrepitationLower ExtremitiesUpper Legs: Swelling, Deformity, Instability,TendernessUpper Legs: Motor, SensoryLower Legs: Scan Wounds, Deformity,MovementUpper ExtremitiesScan Wounds, Deformity, MovementPosteriorPenetrations, Deformity, Presacral EdemaPupilsSize? Reactive? Equal?Glasgow InformationEyes, Voice, MotorOrientation, Emotional StateHistorySAMPLEExtraneousFrom Patient or from Byst<strong>and</strong>er?Vital Signs <strong>and</strong> MonitorsPulseRespirationBlood PressureTemperaturePulse OximetryCardiac MonitorGlucoseEtCO 2Critical Decisions:Other Expected Decisions:Critical Interventions/Actions:Other Expected Interventions/Actions:ITLS Secondary SurveyLOCAirwaySnoring, Gurgling, Stridor, SilenceBreathingPresent? Rate, Depth, EffortBreath SoundsCarotid/Radial PulsesPresent? Rate, Rhythm, QualitySkin Color, Temperature, Moisture,128
Capillary RefillUncontrolled External Hemorrhage?HeadPupils, Battle’s Sign, Raccoon Eyes,Drainage, DCAP-BTLSNeckDCAP-BTLSNeck Vein Distention?Tracheal Deviation?ChestAsymmetry, Paradoxical Motion,DCAP-BTLS, Chest Rise, DiaphragmaticBreathingBreath SoundsPresent? Equal?Percussion ResultsHeart TonesAbdomenDCAP-BTLS, Rigidity, DistentionPelvisDCAP-BTLSLower ExtremitiesDCAP-BTLS, TIC, PMSUpper ExtremitiesDCAP-BTLS, TIC, PMSPosteriorDCAP-BTLSHistorySAMPLEExtraneousFrom Patient or from Byst<strong>and</strong>er?Glasgow InformationEyes, Voice, MotorOrientation, Emotional StateVital Signs <strong>and</strong> MonitorsPulseRespirationBlood PressureTemperaturePulse OximetryCardiac MonitorGlucoseEtCO 2129
Critical Decisions:Other Expected Decisions:Critical Interventions/Actions:Other Expected Interventions/Actions:ITLS Ongoing ExamSubjective ChangesMental StatusLOCPupilsSensoryMotorGlasgow InformationEyes, Voice, MotorOrientation, Emotional StateAirwayPatencyBreathingPresent? Rate, Depth, EffortBreath SoundsHeart TonesCirculationPulses Present? Rate, Rhythm, QualitySkin Color, Temperature, Moisture,Capillary RefillNeckSwelling, DiscolorationNeck Vein Distention?Tracheal Deviation?ChestAsymmetry, Paradoxical Motion,DCAP-BTLS, Chest Rise, DiaphragmaticBreathingAbdomenDevelopment of Tenderness, Distention,RigidityEach Identified InjuryChange in Status, PMSInterventionsPatency, Position, Flow Rate, SecurityVital Signs <strong>and</strong> MonitorsPulseRespirationBlood PressureTemperature130
Pulse OximetryCardiac MonitorGlucoseEtCO 2Critical Decisions:Other Expected Decisions:Critical Interventions/Actions:Other Expected Interventions/Actions:131
5<strong>Instructor</strong> Training CourseThe instructor course must be taught by affiliate faculty. This is generally a one-day course <strong>and</strong>may be taught the day before a scheduled provider course so that the instructor c<strong>and</strong>idates canteach in the course <strong>and</strong> be monitored at that time. Slides are available from the ITLS office forthis course.MANDATORY TOPICS FOR AN ITLS INSTRUCTOR COURSEIntroductionStructure of ITLS program internationally <strong>and</strong> within the chapterChapter policy <strong>and</strong> proceduresEffective Teaching TechniquesHow to teachThe bad lectureThe good lectureFaculty MeetingsPrecourseBefore skill stationsBefore patient assessment teaching <strong>and</strong> testingPostcourseMoulage TechniquesPatient Assessment Stations<strong>Instructor</strong> objectivesSetupTechniques <strong>and</strong> troubleshootingGrading criteria <strong>and</strong> grading sheetsStudents must teach the skill stationsMini-LecturesSummaryThe instructor c<strong>and</strong>idates should receive continuing education credit for the number of hours of132
the course. <strong>Instructor</strong> c<strong>and</strong>idates who attend a one-day instructor course will be monitored at futureprovider courses. If the instructor c<strong>and</strong>idates attend an instructor course in conjunction witha provider course (three-day instructor course), they will be monitored during that course <strong>and</strong>receive certification at that time.SAMPLE AGENDA FOR ONE-DAY INSTRUCTOR COURSERegistrationIntroduction to ITLS:A. Structure of the ITLS program internationallyB. Structure of the local ITLS chapterC. Chapter policies <strong>and</strong> proceduresD. Obtaining authorization for a courseE. Administrative guidelines1. Books2. Slides3. Precourse paperwork4. Course fees5. Postcourse paperworkITLS formatA. Faculty meetings1. Precourse2. Before skill stations3. Before patient assessment scenario teaching <strong>and</strong> testing4. PostcourseB. LecturesC. Skill stationsD. Patient assessment scenario teaching <strong>and</strong> testingEffective Teaching TechniquesA. How to teachB. The bad lectureC. The good lectureBreakMini-lectures with review <strong>and</strong> feedback30 min30 min30 min30 min15 min90 min133
LunchMoulage techniquesSkill stationsA. ObjectivesB. Setting upC. Techniques <strong>and</strong> troubleshootingD. Grading criteria <strong>and</strong> grading sheetsE. Students demonstrate teaching of skill stationsWrap-upFaculty meeting60 min60 min180 min (including 15-min break)15 min30 minINSTRUCTOR CANDIDATE MONITORINGAt the first provider course after an instructor course, the instructor c<strong>and</strong>idate should be pairedwith an experienced instructor during skill station teaching <strong>and</strong> patient assessment scenarioteaching <strong>and</strong> testing. The chapter affiliate faculty member monitoring the course must have a listof the instructor c<strong>and</strong>idates <strong>and</strong> observe them periodically during the course. At the conclusionof the postcourse faculty meeting, the chapter affiliate faculty member should meet separatelywith the instructors who were assigned instructor c<strong>and</strong>idates to determine if the c<strong>and</strong>idatesshould be certified or should be required to gain more experience. Feedback should be providedto the instructor c<strong>and</strong>idates.134
6The Provider CourseSCENE SIZE-UPITLS instructors are responsible for knowing all the ITLS material in order to present their assignedtopic in a simple <strong>and</strong> easily understood manner that ties in with the other parts of theITLS method. The lectures are designed to present both basic <strong>and</strong> advanced information gearedto the prehospital care of the trauma patient. Please keep this in mind as you give your lecture,<strong>and</strong> refrain from adding unnecessary advanced material more applicable to the hospital environment.This may be modified if you are teaching hospital personnel. Feel free to add material thatis practical <strong>and</strong> pertinent, but remember to keep the lecture within the time allotted. The studentsshould have read <strong>and</strong> studied the chapters. When you lecture you should present, reinforce, <strong>and</strong>explain only the key concepts. The slide set no longer has separate slides for the basic ITLScourse. If you are teaching EMT-Bs or first responders, please explain that they are not responsiblefor the advanced procedures mentioned on the slides; however, the inclusion of these proceduresallows the students to be familiar with situations where calling for an advanced unit, ifavailable, would be beneficial.Chapter ObjectivesUpon completion of this lecture, the student should be able to:1. Explain the relationship of time to patient survival, <strong>and</strong> explain how this affects his or heractions at the scene.2. Discuss the steps of the scene size-up.3. List two basic mechanisms of motion injury.4. Discuss mechanisms <strong>and</strong> settings for blunt versus penetrating trauma.5. Identify the three collisions associated with a motor vehicle crash (MVC), <strong>and</strong> relate potentialpatient injuries to deformity of the vehicle, interior structures, <strong>and</strong> body structures.6. Name five common forms of MVCs.7. Describe the potential injuries associated with proper <strong>and</strong> improper use of seat restraints,head rests, <strong>and</strong> air bags in a head-on collision.8. Differentiate lateral-impact collision from head-on collision based on the three collisions associatedwith an MVC.9. Describe potential injuries from rear-end collisions.10. Explain why the mortality rate is higher for victims ejected from vehicles in MVCs.11. Describe the three assessment criteria for falls, <strong>and</strong> relate them to anticipated injuries.12. Identify the two most-common forms of penetrating injuries, <strong>and</strong> discuss associated mecha-135
nisms <strong>and</strong> extent of injury.13. Relate three factors involved in blast injuries to patient assessment.Key Lecture Points1. Explain the relationship of time to patient survival <strong>and</strong> how this affects our actions at thescene.2. Explain the steps of the scene size-up <strong>and</strong> the importance of each step.3. Explain the importance of being aware of mechanisms of injury.4. Briefly review the concept of transfer of energy.5. Stress the concept of the “three collisions.”6. Briefly review the highlights of specific situations.a. Large vehicle accidents1. Frontal deceleration—effect on driver <strong>and</strong> passengers2. Lateral impact3. Rear impact4. Rollover5. Effect of restraints—lap belts, cross-chest-lap belts, <strong>and</strong> air bags6. Tractor accidentsb. Small vehicle accidents1. Motorcycles2. All-terrain vehicles3. Personal watercraft4. Snowmobilesc. Pedestrian injuriesd. Fallse. Penetrating injuries1. Knives2. Gunshot woundsf. Blast injuriesASSESSMENT AND INITIAL MANAGEMENTOF THE TRAUMA PATIENTITLS instructors are responsible for knowing all the ITLS material in order to present their as-136
signed topic in a simple <strong>and</strong> easily understood manner that ties in with the other parts of theITLS method. The lectures are designed to present both basic <strong>and</strong> advanced information gearedto the prehospital care of the trauma patient. Please keep this in mind as you give your lecture,<strong>and</strong> refrain from adding unnecessary advanced material more applicable to the hospital environment.This may be modified if you are teaching hospital EMS personnel. Feel free to add materialthat is practical <strong>and</strong> pertinent, but remember to keep the lecture within the time allotted. Thestudents should have read <strong>and</strong> studied the chapters. When you lecture you should present, reinforce,<strong>and</strong> explain only the key concepts. The slide set no longer has separate slides for the basicITLS course. If you are teaching EMT-Bs or first responders, please explain that they are not responsiblefor the advanced procedures mentioned on the slides; however, the inclusion of theseprocedures allows the students to be familiar with situations where calling for an advanced unit,if available, would be beneficial.Note: Chapter 21 is not core lecture material for the basic ITLS course. Prior to giving the Assessment<strong>and</strong> Initial Management, the faculty should review Chapter 21 (see Table 21-1).Chapter ObjectivesUpon completion of this chapter, the student should be able to:1. Outline the steps in trauma assessment <strong>and</strong> management.2. Describe the ITLS primary survey.3. Describe the initial assessment, <strong>and</strong> explain how it relates to the ITLS rapid trauma survey<strong>and</strong> the focused exam.4. Describe when the initial assessment can be interrupted.5. Describe when critical interventions should be made <strong>and</strong> where to make them.6. Identify which patients have critical conditions <strong>and</strong> how they should be managed.7. Describe the ITLS secondary survey.8. Describe the ITLS ongoing exam.Key Lecture Points1. The concept of simultaneous assessment (team leader) <strong>and</strong> delegated intervention (teammembers) in life-threatening emergencies needs to be stressed.2. Point out that the Initial Assessment is interrupted only for airway obstruction, if the scenebecomes too dangerous, or the need to perform CPR.3. The step-by-step assessment scheme must be taught.4. Emphasize the need to get the critically injured patient out of the field <strong>and</strong> to an appropriatehospital as quickly as possible. The ten-minute rule must be reinforced.5. Stress that the Ongoing Exam should be repeated any time the patient’s condition worsens.INITIAL AIRWAY MANAGEMENT137
ITLS instructors are responsible for knowing all the ITLS material in order to present their assignedtopic in a simple <strong>and</strong> easily understood manner that ties in with the other parts of theITLS method. The lectures are designed to present both basic <strong>and</strong> advanced information gearedto the prehospital care of the trauma patient. Please keep this in mind as you give your lecture,<strong>and</strong> refrain from adding unnecessary advanced material more applicable to the hospital environment.This may be modified if you are teaching hospital EMS personnel. Feel free to add materialthat is practical <strong>and</strong> pertinent, but remember to keep the lecture within the time allotted. Thestudents should have read <strong>and</strong> studied the chapters. When you lecture you should present, reinforce,<strong>and</strong> explain only the key concepts. The slide set no longer has separate slides for the basicITLS course. If you are teaching EMT-Bs or first responders, please explain that they are not responsiblefor the advanced procedures mentioned on the slides; however, the inclusion of theseprocedures allows the students to be familiar with situations where calling for an advanced unit,if available, would be beneficial.Chapter ObjectivesUpon completion of this lecture, the student should be able to:1. Describe the anatomy <strong>and</strong> physiology of the respiratory system.2. Explain the importance of observation as it relates to airway control.3. Describe methods to deliver supplemental oxygen to the trauma patient.4. Briefly describe the indications, contraindications, advantages, <strong>and</strong> disadvantages of the followingairway adjuncts:a. Nasopharyngeal airwaysb. Oropharyngeal airwaysc. Bag-valve masksd. Oxygen-powered, flow-restricted ventilation devicese. Blind insertion airway devicesf. Endotracheal intubation5. Describe the predictors of difficult mask ventilation <strong>and</strong> endotracheal intubation.6. Describe the Sellick maneuver.7. Describe the essential components of an airway kit.Key Lecture Points1. Review anatomy.2. The differences in airway management of the trauma patient as opposed to the medical patientneed to be clearly emphasized. Particular emphasis needs to be placed on stabilizing thecervical spine <strong>and</strong> maintaining stability of the cervical spine during airway maneuvers.3. Stress that any movement, especially hyperextension of the cervical spine during airway maneuvers,may do great damage.138
4. Continuously monitor the airway to be sure it remains patent. Stress that suction must beimmediately available.5. High-flow oxygen (as close to 100 percent as possible) must be provided to trauma patients.Discuss oxygen settings.6. Remind students that the oropharyngeal airway is for use only in the unconscious patientwith no gag reflex.7. Review airway management in the conscious versus unconscious patient.8. Stress that EMTs tend to inadvertently hyperventilate patients. The starting ventilatory rateshould be about eight breaths per minute. Use of pulse oximetry <strong>and</strong> capnography is recommended.9. Discuss the “BOOTS” mnemonic as a predictor of the patient who will be difficult to ventilatewith a bag-valve mask.10. Review management of the prone patient <strong>and</strong> the patient with profuse upper airway bleeding.THORACIC TRAUMAITLS instructors are responsible for knowing all the ITLS material in order to present their assignedtopic in a simple <strong>and</strong> easily understood manner that ties in with the other parts of theITLS method. The lectures are designed to present both basic <strong>and</strong> advanced information gearedto the prehospital care of the trauma patient. Please keep this in mind as you give your lecture,<strong>and</strong> refrain from adding unnecessary advanced material more applicable to the hospital environment.This may be modified if you are teaching hospital EMS personnel. Feel free to add materialthat is practical <strong>and</strong> pertinent, but remember to keep the lecture within the time allotted. Thestudents should have read <strong>and</strong> studied the chapters. When you lecture you should present, reinforce,<strong>and</strong> explain only the key concepts. The slide set no longer has separate slides for the basicITLS course. If you are teaching EMT-Bs or first responders, please explain that they are not responsiblefor the advanced procedures mentioned on the slides; however, the inclusion of theseprocedures allows the students to be familiar with situations where calling for an advanced unit,if available, would be beneficial.Chapter ObjectivesUpon completion of this lecture, the student should be able to:1. Identify the major symptoms of thoracic trauma.2. Describe the signs of thoracic trauma.3. State the immediate life-threatening thoracic injuries.4. Explain the pathophysiology <strong>and</strong> management of an open pneumothorax.5. Describe the clinical signs of a tension pneumothorax in conjunction with appropriate management.6. List three indications to perform emergency chest decompression.139
7. Explain the hypovolemic <strong>and</strong> respiratory compromise pathophysiology <strong>and</strong> management inmassive hemothorax.8. Define flail chest in relation to associated physical findings <strong>and</strong> management.9. Identify the triad of physical findings in the diagnosis of cardiac tamponade.10. Explain the cardiac involvement <strong>and</strong> management associated with blunt injury to the chest.11. Summarize other injuries <strong>and</strong> their appropriate management.Key Lecture Points1. Briefly review the anatomy of the chest, particularly the great vessels.2. Emphasize load-<strong>and</strong>-go conditions <strong>and</strong> discuss why these conditions are so critical:a. Massive hemothorax with shock: Explain that when massive hemothorax has occurred, asevidenced by dullness to percussion <strong>and</strong> diminished breath sounds in the base of the affectedlung, massive hemorrhage has occurred into the chest with major blood vessel disruption<strong>and</strong> massive blood loss. If these patients are not rapidly taken to surgery, theyusually die.b. Tension pneumothorax: Explain how the increased pressure in the chest reduces blood returnto the heart, causing reduction in cardiac output, <strong>and</strong> thus producing shock. Stressthe signs <strong>and</strong> symptoms of the tension pneumothorax (review the primary survey) <strong>and</strong>how critical it is not to leave out steps in the primary survey, which would prevent theidentification of this problem.c. Penetrating chest trauma with shock: Explain that the penetrating chest injury with resultingevidence of shock is a load-<strong>and</strong>-go situation because of the many serious <strong>and</strong> potentiallylethal conditions that may result.3. Discuss the mechanics of airflow during inspiration <strong>and</strong> expiration. Discuss how the presenceof an open wound into the pleural space decreases air movement through the tracheobronchialtree.4. Discuss the pathophysiology of the flail chest <strong>and</strong> the management of this problem: Assistedventilation <strong>and</strong> prevention of movement of the flail segment if it is decreasing air movementthrough the tracheobronchial tree. Stress that h<strong>and</strong> stabilization is usually adequate until thepatient is moved into the ambulance. Point out that nasotracheal intubation (patient usuallyhas a gag reflex) is the most effective method to stabilize the flail <strong>and</strong> oxygenate the patient.5. A review of the mechanism of injury in chest trauma is appropriate. Stress the importance ofanticipating serious chest trauma or the potential for life-threatening injury even before deteriorationhas occurred. This is particularly important in those patients with evidence of majorchest trauma.SHOCK EVALUATION AND MANAGEMENTITLS instructors are responsible for knowing all the ITLS material in order to present their assignedtopic in a simple <strong>and</strong> easily understood manner that ties in with the other parts of the140
ITLS method. The lectures are designed to present both basic <strong>and</strong> advanced information gearedto the prehospital care of the trauma patient. Please keep this in mind as you give your lecture,<strong>and</strong> refrain from adding unnecessary advanced material more applicable to the hospital environment.This may be modified if you are teaching hospital EMS personnel. Feel free to add materialthat is practical <strong>and</strong> pertinent, but remember to keep the lecture within the time allotted. Thestudents should have already read <strong>and</strong> studied the chapters. When you lecture you should present,reinforce, <strong>and</strong> explain only the key concepts. The slide set no longer has separate slides forthe basic ITLS course. If you are teaching EMT-Bs or first responders, please explain that theyare not responsible for the advanced procedures mentioned on the slides; however, the inclusionof these procedures allows the students to be familiar with situations where calling for an advancedunit, if available, would be beneficial.Chapter ObjectivesUpon completion of this lecture, the student should be able to:1. List the four components of the vascular system necessary for normal tissue perfusion.2. Describe symptoms <strong>and</strong> signs of shock in the order that they develop, from the very least tothe very worst.3. Describe the three common clinical shock syndromes.4. Explain the pathophysiology of hemorrhagic shock <strong>and</strong> compare it to the pathophysiology ofneurogenic shock.5. Describe the management of the following:a. Hemorrhage that can be controlledb. Hemorrhage that cannot be controlledc. Nonhemorrhagic shock syndromes6. Discuss the use of hemostatic agents for uncontrolled extremity hemorrhage.7. Discuss the current indications for the use of IV fluids in the treatment of hemorrhagic shock.Key Lecture Points1. Discuss the modern concept of “shock”: threat to normal cell function caused by diminishedtissue perfusion <strong>and</strong>/or hypoxia.2. Discuss the pathophysiology of hemorrhagic shock, including the classic signs <strong>and</strong> symptoms<strong>and</strong> their cause.3. Discuss the three shock syndromes:a. Low volume (absolute hypovolemia)b. High space (relative hypovolemia)c. Mechanical (obstructive)4. Discuss the management of shock:141
a. Posttraumatic hemorrhage1. Exsanguinating external hemorrhage that can be controlled2. Exsanguinating external hemorrhage that cannot be controlled3. Exsanguinating internal hemorrhageb. Nonhemorrhagic shock1. Mechanical shock2. High-space shock5. Discuss the use of tourniquets <strong>and</strong> hemostatic agents in the situation of exsanguinating hemorrhage.6. Stress that shock is, in general, recognized too late <strong>and</strong> treated insufficiently. Point out thatdelaying transport of a patient in shock is a critical mistake.HEAD TRAUMAITLS instructors are responsible for knowing all the ITLS material in order to present their assignedtopic in a simple <strong>and</strong> easily understood manner that ties in with the other parts of theITLS method. The lectures are designed to present both basic <strong>and</strong> advanced information gearedto the prehospital care of the trauma patient. Please keep this in mind as you give your lecture,<strong>and</strong> refrain from adding unnecessary advanced material more applicable to the hospital environment.This may be modified if you are teaching hospital EMS personnel. Feel free to add materialthat is practical <strong>and</strong> pertinent, but remember to keep the lecture within the time allotted. Thestudents should have read <strong>and</strong> studied the chapters. When you lecture you should present, reinforce,<strong>and</strong> explain only the key concepts. The slide set no longer has separate slides for the basicITLS course. If you are teaching EMT-Bs or first responders, please explain that they are not responsiblefor the advanced procedures mentioned on the slides; however, the inclusion of theseprocedures allows the students to be familiar with situations where calling for an advanced unit,if available, would be beneficial.Chapter ObjectivesUpon completion of this lecture, the student should be able to:1. Describe the anatomy of the head <strong>and</strong> brain.2. Describe the pathophysiology of traumatic brain injury.3. Explain the difference between primary <strong>and</strong> secondary brain injury.4. Describe the mechanisms for the development of secondary brain injury.5. Describe the assessment of the patient with a head injury.6. Describe the prehospital management of the patient with a head injury.7. Recognize <strong>and</strong> describe the management of the cerebral herniation syndrome.8. Identify potential problems in the management of the patient with a head injury.142
Key Lecture Points1. Cover the anatomy.2. Cover the physiology of the brain, <strong>and</strong> explain why hyperventilation is no longer recommendedexcept in cases of herniation syndrome.3. Emphasize the control of the airway in the patient with an altered level of consciousness.Stress that suction must be available at all times.4. Stress that a patient with a serious head injury (Glasgow Coma Score of 8 or less) will nottolerate hypoxia or hypotension. In this situation do not allow the blood pressure to get below100–110 systolic.5. Mention that prehospital providers tend to inadvertently hyperventilate head-injured patients.Stress that, if possible, capnography should be used to prevent inadvertent hyperventilation.6. Mention the aspects of the Glasgow Coma Score <strong>and</strong> that each part should be recorded, notjust the total score. This score should always be recorded if there is altered mental status.7. Stress indications for hyperventilation.SPINAL TRAUMAITLS instructors are responsible for knowing all the ITLS material in order to present their assignedtopic in a simple <strong>and</strong> easily understood manner that ties in with the other parts of theITLS method. The lectures are designed to present both basic <strong>and</strong> advanced information gearedto the prehospital care of the trauma patient. Please keep this in mind as you give your lecture,<strong>and</strong> refrain from adding unnecessary advanced material more applicable to the hospital environment.This may be modified if you are teaching hospital EMS personnel. Feel free to add materialthat is practical <strong>and</strong> pertinent, but remember to keep the lecture within the time allotted. Thestudents should have read <strong>and</strong> studied the chapters. When you lecture you should present, reinforce,<strong>and</strong> explain only the key concepts. The slide set no longer has separate slides for the basicITLS course. If you are teaching EMT-Bs or first responders, please explain that they are not responsiblefor the advanced procedures mentioned on the slides; however, the inclusion of theseprocedures allows the students to be familiar with situations where calling for an advanced unit,if available, would be beneficial.Chapter ObjectivesUpon completion of this lecture, the student should be able to:1. Explain the normal anatomy <strong>and</strong> physiology of the spinal column <strong>and</strong> spinal cord.2. Define spinal motion restriction (SMR), <strong>and</strong> explain why this term is preferred to the termspinal immobilization.3. Describe mechanisms of injury that indicate SMR may be required.4. Describe the process of SMR from extrication through transportation, including airway maintenance.143
5. Explain the difference between Emergency Rescue <strong>and</strong> Rapid Extrication.6. Describe history <strong>and</strong> assessment criteria that identify patients who do not need spinal immobilization.7. Give examples of special situations for which SMR techniques may need to be altered.8. Using the clinical evaluation, differentiate neurogenic shock from hemorrhagic shock.Key Lecture Points1. Cover the anatomy of the spine briefly.2. Reinforce that any trauma patient who has an altered level of consciousness must be presumedto have a cervical spine injury until proven otherwise. Appropriate precautions mustbe taken.3. Stress that not only must the cervical spine be protected, but also the entire spine, includingthe lumbar <strong>and</strong> dorsal spine.4. Briefly discuss the signs, symptoms, <strong>and</strong> treatment of neurogenic shock.5. Stress documentation of the brief neurological exam (movement <strong>and</strong> sensation of h<strong>and</strong>s <strong>and</strong>feet) before <strong>and</strong> after extrication or movement of the patient with a suspected spinal injury.6. Stress that full SMR includes cervical collar, head immobilizer, <strong>and</strong> appropriate strappingapplied to the patient on a long spine board.7. Stress that cervical collars alone offer little to no protection of the cervical spine. ITLS teachesthat SMR is manually maintained by a team member until the patient is secured to the longspine board.8. Emphasize that SMR on a long spineboard MANDATES airway protection by the rescuerdue to the patient being prevented from protecting himself.9. Discuss the indications for rapid extrication (without using short boards or KED-type devices).Primary survey of the patient identifies a condition that requires immediate interventionthat cannot be done in the entrapped area, such as:a. Airway obstruction that cannot be relieved by jaw thrust or finger sweepb. Cardiac or respiratory arrestc. Chest or airway injuries requiring ventilation or assisted ventilationd. Deep shock or bleeding that cannot be controlled10. Note that there are other situations that are so desperate that you may not have time to useany technique <strong>and</strong> emergency rescue is warranted to pull the patient to safety. The need foremergency rescue is identified during the scene survey with circumstances that may immediatelyendanger the patient <strong>and</strong> the rescuers.a. Fire or immediate danger of fireb. Danger of explosionc. Rapidly rising water144
d. Structure in danger of collapsee. Continuing toxic exposure11. Mention that short backboard type SMR devices may be difficult to apply <strong>and</strong> ineffective inpregnant <strong>and</strong> very obese patients.12. Briefly clarify management of unusual circumstances, such as:a. Closed space rescueb. Water rescuec. Prone <strong>and</strong> st<strong>and</strong>ing patientsd. Pediatricse. Geriatricsf. Helmet removal (stress that studies have found that rescue scissors will not efficientlyremove face masks)g. Obese patientsh. Neck or face woundsABDOMINAL TRAUMAITLS instructors are responsible for knowing all the ITLS material in order to present their assignedtopic in a simple <strong>and</strong> easily understood manner that ties in with the other parts of theITLS method. The lectures are designed to present both basic <strong>and</strong> advanced information gearedto the prehospital care of the trauma patient. Please keep this in mind as you give your lecture,<strong>and</strong> refrain from adding unnecessary advanced material more applicable to the hospital environment.This may be modified if you are teaching hospital EMS personnel. Feel free to add materialthat is practical <strong>and</strong> pertinent, but remember to keep the lecture within the time allotted. Thestudents should have read <strong>and</strong> studied the chapters. When you lecture you should present, reinforce,<strong>and</strong> explain only the key concepts. The slide set no longer has separate slides for the basicITLS course. If you are teaching EMT-Bs or first responders, please explain that they are not responsiblefor the advanced procedures mentioned on the slides; however, the inclusion of theseprocedures allows the students to be familiar with situations where calling for an advanced unit,if available, would be beneficial.Chapter ObjectivesUpon completion of this lecture, the student should be able to:1. Identify the basic anatomy of the abdomen, <strong>and</strong> explain how abdominal <strong>and</strong> chest injuriesmay be related.2. Differentiate between blunt <strong>and</strong> penetrating injuries, <strong>and</strong> identify complications associatedwith each.3. Describe the treatment required for the patient with protruding viscera.145
4. Relate how injuries apparent on the exterior of the abdomen can damage underlying structures.5. Describe possible intraperitoneal injuries based on findings of history, physical examination,<strong>and</strong> mechanism of injury.6. Discuss advanced life support interventions for patients with abdominal injuries.Key Lecture Points1. Cover the anatomy of the abdomen.2. Stress the importance of the abdomen as regards morbidity <strong>and</strong> mortality associated with majortrauma.3. Mention that a distended abdomen is a very late sign of hemorrhage within the abdomen.4. Mention that abdominal trauma with shock is a grim finding <strong>and</strong> must be rapidly managed.5. Discuss pelvic fractures <strong>and</strong> their potential for massive bleeding.EXTREMITY TRAUMAITLS instructors are responsible for knowing all the ITLS material in order to present their assignedtopic in a simple <strong>and</strong> easily understood manner that ties in with the other parts of theITLS method. The lectures are designed to present both basic <strong>and</strong> advanced information gearedto the prehospital care of the trauma patient. Please keep this in mind as you give your lecture,<strong>and</strong> refrain from adding unnecessary advanced material more applicable to the hospital environment.This may be modified if you are teaching hospital EMS personnel. Feel free to add materialthat is practical <strong>and</strong> pertinent, but remember to keep the lecture within the time allotted. Thestudents should have read <strong>and</strong> studied the chapters. When you lecture you should present, reinforce,<strong>and</strong> explain only the key concepts. The slide set no longer has separate slides for the basicITLS course. If you are teaching EMT-Bs or first responders, please explain that they are not responsiblefor the advanced procedures mentioned on the slides; however, the inclusion of theseprocedures allows the students to be familiar with situations where calling for an advanced unit,if available, would be beneficial.Chapter ObjectivesUpon completion of this lecture, the student should be able to:1. Prioritize extremity trauma in the assessment <strong>and</strong> management of life-threatening injuries.2. Discuss the major complications <strong>and</strong> treatment of the following extremity injuries:a. Fracturesb. Dislocationsc. Amputationsd. Open wounds146
e. Neurovascular injuriesf. Sprains <strong>and</strong> strainsg. Impaled objectsh. Compartment syndrome3. Estimate blood loss from pelvic <strong>and</strong> extremity fractures.4. Discuss major mechanisms of injury, associated trauma, potential complications, <strong>and</strong> managementof injury to the following areas:a. Pelvisb. Femurc. Hipd. Kneee. Tibia/fibulaf. Clavicle <strong>and</strong> shoulderg. Forearm <strong>and</strong> wristh. H<strong>and</strong> or footKey Lecture Points1. Stress that the extremities MUST be examined for exsanguinating blood loss during the ITLSprimary survey.2. The treatment of extremity trauma should be deemphasized in the patient with a load-<strong>and</strong>-gocondition. In this scenario, traction splints should not be applied on scene; rather, a longspine board should be employed initially. Other splints can be applied during transport ifthere is time.3. Estimated blood loss in major extremity fractures should be covered.4. The splints available for various purposes should be mentioned.5. Stress that the rescuer must note neurovascular status of the extremities before <strong>and</strong> aftersplinting procedures.6. Mention that when there is bleeding that cannot be controlled by pressure, use of a tourniquet<strong>and</strong>/or hemostatic agents is warranted.BURNSITLS instructors are responsible for knowing all the ITLS material in order to present their assignedtopic in a simple <strong>and</strong> easily understood manner that ties in with the other parts of theITLS method. The lectures are designed to present both basic <strong>and</strong> advanced information gearedto the prehospital care of the trauma patient. Please keep this in mind as you give your lecture,<strong>and</strong> refrain from adding unnecessary advanced material more applicable to the hospital environ-147
ment. This may be modified if you are teaching hospital EMS personnel. Feel free to add materialthat is practical <strong>and</strong> pertinent, but remember to keep the lecture within the time allotted. Thestudents should have read <strong>and</strong> studied the chapters. When you lecture you should present, reinforce,<strong>and</strong> explain only the key concepts. The slide set no longer has separate slides for the basicITLS course. If you are teaching EMT-Bs or first responders, please explain that they are not responsiblefor the advanced procedures mentioned on the slides; however, the inclusion of theseprocedures allows the students to be familiar with situations where calling for an advanced unit,if available, would be beneficial.Chapter ObjectivesUpon completion of this lecture, the student should be able to:1. Identify the basic anatomy of the skin, including:a. Epidermal <strong>and</strong> dermal layersb. Structures found within the skin2. List the basic functions of the skin.3. Describe types of burns as a function of burn depth.4. Estimate depth of burn based on skin appearance.5. Estimate extent of burns using the rule of nines.6. Identify complications <strong>and</strong> describe the management of:a. Thermal burnsb. Chemical burnsc. Electrical burns7. List situations <strong>and</strong> physical signs that:a. Indicate inhalation injuryb. Suggest carbon monoxide poisoning8. Discuss how carbon monoxide causes hypoxia.9. Describe the treatment of carbon monoxide poisoning.10. Identify which patients may require transport to a burn center.Key Lecture Points1. Review the types <strong>and</strong> classifications of burns.2. Discuss the management of different types of burns. Note should be made that while theburns should be cooled briefly to control ongoing heat injury, burns should not be subjectedto prolonged cold exposure due to the risk of hypothermia.3. Discuss the complications of major burns, such as airway compromise <strong>and</strong> later fluid loss.4. Discuss the need to consider the mechanism of injury, especially with regard to the potential148
for carbon monoxide or other toxic gas inhalation. A note should be made as to whether thisinjury occurred in an enclosed space.5. Stress the need for maintaining body temperature.6. Discuss the treatment of carbon monoxide poisoning. Unless otherwise indicated, 100 percentoxygen should be used in the major burn patient until he can be further evaluated.7. Discuss the findings that suggest inhalation injury <strong>and</strong> stress that the rescuer must always bealert to this injury.8. Stress that the rescuer should record the time that the burn occurred.9. Review chemical burns <strong>and</strong> how their treatment differs from thermal burns.10. Review electrical burns <strong>and</strong> lightning burns, <strong>and</strong> discuss their treatment.11. Stress the danger of becoming a victim when dealing with electrical burns.12. Mention that the rescuers should be alert to the signs of child abuse when dealing withburned children.TRAUMA IN CHILDRENITLS instructors are responsible for knowing all the ITLS material in order to present their assignedtopic in a simple <strong>and</strong> easily understood manner that ties in with the other parts of theITLS method. The lectures are designed to present both basic <strong>and</strong> advanced information gearedto the prehospital care of the trauma patient. Please keep this in mind as you give your lecture,<strong>and</strong> refrain from adding unnecessary advanced material more applicable to the hospital environment.This may be modified if you are teaching hospital EMS personnel. Feel free to add materialthat is practical <strong>and</strong> pertinent, but remember to keep the lecture within the time allotted. Thestudents should have read <strong>and</strong> studied the chapters. When you lecture you should present, reinforce,<strong>and</strong> explain only the key concepts. The slide set no longer has separate slides for the basicITLS course. If you are teaching EMT-Bs or first responders, please explain that they are not responsiblefor the advanced procedures mentioned on the slides; however, the inclusion of theseprocedures allows the students to be familiar with situations where calling for an advanced unit,if available, would be beneficial.Chapter ObjectivesUpon completion of this lecture, the student should be able to:1. Describe effective techniques for gaining the confidence of children <strong>and</strong> their parents.2. Predict pediatric injuries based on common mechanisms of injury.3. Describe the ITLS primary <strong>and</strong> secondary surveys in the pediatric patient.4. Demonstrate underst<strong>and</strong>ing of the need for immediate transport in potentially life-threateningcircumstances, regardless of lack of immediate parental consent.5. Differentiate equipment needs of pediatric patients from those of adults.6. Describe the various ways to perform SMR on a child, <strong>and</strong> how these ways differs from149
those used on an adult.7. Discuss the need for involvement of EMS personnel in prevention programs for parents <strong>and</strong>children.Key Lecture Points1. Discuss the differences <strong>and</strong> similarities between the adult <strong>and</strong> pediatric patient as regardstrauma management.2. Cover the various baseline vital signs expected for the different age groups.3. Note that the ITLS primary survey sequence is the same for pediatric as for adult patients.4. Note that children will appear to be stable with fewer warning signs of deterioration, whichcan be followed by sudden disastrous decompensation.5. Mention that gastric distension in small children may cause hypotension.6. Mention that transport of small children in their car seats with appropriate additional stabilizationmay be acceptable under certain conditions.TRAUMA IN THE ELDERLYITLS instructors are responsible for knowing all the ITLS material in order to present their assignedtopic in a simple <strong>and</strong> easily understood manner that ties in with the other parts of theITLS method. The lectures are designed to present both basic <strong>and</strong> advanced information gearedto the prehospital care of the trauma patient. Please keep this in mind as you give your lecture,<strong>and</strong> refrain from adding unnecessary advanced material more applicable to the hospital environment.This may be modified if you are teaching hospital EMS personnel. Feel free to add materialthat is practical <strong>and</strong> pertinent, but remember to keep the lecture within the time allotted. Thestudents should have read <strong>and</strong> studied the chapters. When you lecture you should present, reinforce,<strong>and</strong> explain only the key concepts. The slide set no longer has separate slides for the basicITLS course. If you are teaching EMT-Bs or first responders, please explain that they are not responsiblefor the advanced procedures mentioned on the slides; however, the inclusion of theseprocedures allows the students to be familiar with situations where calling for an advanced unit,if available, would be beneficial.Chapter ObjectivesUpon completion of this lecture, the student should be able to:1. Describe the changes that occur with aging, <strong>and</strong> explain how these changes can affect yourassessment of the geriatric trauma patient.2. Describe the assessment of the geriatric trauma patient.3. Describe the treatment of the geriatric trauma patient.150
Key Lecture Points1. Review pathophysiology of aging by systems.2. Stress that when doing field triage, the geriatric patients have more injuries <strong>and</strong> worse outcomesthan younger patients who are subjected to the same mechanisms.3. Review patient assessment, <strong>and</strong> relate how aging affects assessment <strong>and</strong> interventions.4. Discuss potential problems with spinal motion restriction in elderly patients.TRAUMA IN PREGNANCYITLS instructors are responsible for knowing all the ITLS material in order to present their assignedtopic in a simple <strong>and</strong> easily understood manner that ties in with the other parts of theITLS method. The lectures are designed to present both basic <strong>and</strong> advanced information gearedto the prehospital care of the trauma patient. Please keep this in mind as you give your lecture,<strong>and</strong> refrain from adding unnecessary advanced material more applicable to the hospital environment.This may be modified if you are teaching hospital EMS personnel. Feel free to add materialthat is practical <strong>and</strong> pertinent, but remember to keep the lecture within the time allotted. Thestudents should have read <strong>and</strong> studied the chapters. When you lecture you should present, reinforce,<strong>and</strong> explain only the key concepts. The slide set no longer has separate slides for the basicITLS course. If you are teaching EMT-Bs or first responders, please explain that they are not responsiblefor the advanced procedures mentioned on the slides; however, the inclusion of theseprocedures allows the students to be familiar with situations where calling for an advanced unit,if available, would be beneficial.Chapter ObjectivesUpon completion of this lecture, the student should be able to:1. Underst<strong>and</strong> the dual goals in managing the pregnant trauma patient.2. Describe the physiological changes associated with pregnancy.3. Underst<strong>and</strong> the pregnant trauma patient’s response to hypovolemia.4. Describe the types of injuries most commonly associated with the pregnant trauma patient.5. Describe the initial assessment <strong>and</strong> management of the pregnant trauma patient.6. Discuss trauma prevention in pregnancy.Key Lecture Points1. Cover the general information included in the lecture slides, including the information associatedwith the various trimesters.2. Note should be made that the status of the fetus generally depends on the well-being of themother. Therefore, if the mother has adequate blood volume, blood pressure, <strong>and</strong> circulation,then the fetus will do well. Use the quote, “Death of the fetus in the trauma situation is mostoften associated with the death of the mother.”151
3. Mention that the treatment of shock is the same for pregnant patients as for other patients.4. Emphasize that the physiologic changes of pregnancy may cause delay in the diagnosis of theshock state in the mother.5. Stress that uterine obstruction of venous blood flow may cause hypotension in the supine patient(“supine hypotension syndrome”) <strong>and</strong> thus must be prevented by rolling the patient orbackboard to the left.6. Note that there is an increased rate of fetal demise two or three days following major traumato the mother.7. Mention that short backboard-type devices may be ineffective as an SMR device in the pregnantpatient because of the difficulty with adequately securing the straps. This concern alsoapplies to the very obese patient.PATIENTS UNDER THE INFLUENCE OF ALCOHOL OR DRUGSITLS instructors are responsible for knowing all the ITLS material in order to present their assignedtopic in a simple <strong>and</strong> easily understood manner that ties in with the other parts of theITLS method. The lectures are designed to present both basic <strong>and</strong> advanced information gearedto the prehospital care of the trauma patient. Please keep this in mind as you give your lecture,<strong>and</strong> refrain from adding unnecessary advanced material more applicable to the hospital environment.This may be modified if you are teaching hospital EMS personnel. Feel free to add materialthat is practical <strong>and</strong> pertinent, but remember to keep the lecture within the time allotted. Thestudents should have read <strong>and</strong> studied the chapters. When you lecture you should present, reinforce,<strong>and</strong> explain only the key concepts. The slide set no longer has separate slides for the basicITLS course. If you are teaching EMT-Bs or first responders, please explain that they are not responsiblefor the advanced procedures mentioned on the slides; however, the inclusion of theseprocedures allows the students to be familiar with situations where calling for an advanced unit,if available, would be beneficial.Chapter ObjectivesUpon completion of this lecture, the student should be able to:1. List signs <strong>and</strong> symptoms of patients under the influence of alcohol <strong>and</strong>/or drugs.2. Describe the five strategies you would use to best ensure cooperation during assessment <strong>and</strong>management of a patient under the influence of alcohol <strong>and</strong>/or drugs.3. Describe situations in which you would restrain patients, <strong>and</strong> tell how to h<strong>and</strong>le an uncooperativepatient.4. List the special considerations for assessment <strong>and</strong> management of patients in whom substanceabuse is suspected.Key Lecture Points1. Review commonly abused drugs <strong>and</strong> their common signs <strong>and</strong> symptoms.152
2. Review clues of drug use by the patient.3. Review the pertinent history you should obtain when managing a patient who may be underthe influence of drugs.4. Explain how to interact with a patient who is under the influence of drugs.5. Explain how to manage the patient who is injured, under the influence, <strong>and</strong> uncooperative.Be familiar with <strong>and</strong> discuss your local laws regarding restraining a patient.THE TRAUMA CARDIOPULMONARY ARRESTITLS instructors are responsible for knowing all the ITLS material in order to present their assignedtopic in a simple <strong>and</strong> easily understood manner that ties in with the other parts of theITLS method. The lectures are designed to present both basic <strong>and</strong> advanced information gearedto the prehospital care of the trauma patient. Please keep this in mind as you give your lecture,<strong>and</strong> refrain from adding unnecessary advanced material more applicable to the hospital environment.This may be modified if you are teaching hospital EMS personnel. Feel free to add materialthat is practical <strong>and</strong> pertinent, but remember to keep the lecture within the time allotted. Thestudents should have read <strong>and</strong> studied the chapters. When you lecture you should present, reinforce,<strong>and</strong> explain only the key concepts. The slide set no longer has separate slides for the basicITLS course. If you are teaching EMT-Bs or first responders, please explain that they are not responsiblefor the advanced procedures mentioned on the slides; however, the inclusion of theseprocedures allows the students to be familiar with situations where calling for an advanced unit,if available, would be beneficial.Chapter ObjectivesUpon completion of this lecture, the student should be able to:1. Identify patients in traumatic cardiac arrest for whom you should consider withholdingresuscitation attempts.2. Identify treatable causes of traumatic cardiopulmonary arrest.3. Describe the proper evaluation <strong>and</strong> management of the patient in traumatic cardiopulmonaryarrest.Key Lecture Points1. Briefly review the causes of cardiopulmonary arrest in the trauma situation.2. Review the position statement (National Association of EMS Physicians <strong>and</strong> the AmericanCollege of Surgeons Committee on <strong>Trauma</strong>) on withholding or terminating resuscitation ofprehospital cardiopulmonary arrest. Discuss any local protocols that impact this decision.3. Review the general management of the trauma arrest.4. Compare <strong>and</strong> contrast the management of the trauma arrest to general advanced cardiac resuscitationguidelines.153
5. Remind the students always to think of hemorrhagic shock, tension pneumothorax, <strong>and</strong> pericardialtamponade when evaluating the trauma arrest patient.6. Stress rapid transport of the trauma arrest patient.STANDARD PRECAUTIONS IN THE PREHOSPITAL SETTINGITLS instructors are responsible for knowing all the ITLS material in order to present their assignedtopic in a simple <strong>and</strong> easily understood manner that ties in with the other parts of theITLS method. The lectures are designed to present both basic <strong>and</strong> advanced information gearedto the prehospital care of the trauma patient. Please keep this in mind as you give your lecture,<strong>and</strong> refrain from adding unnecessary advanced material more applicable to the hospital environment.This may be modified if you are teaching hospital EMS personnel. Feel free to add materialthat is practical <strong>and</strong> pertinent, but remember to keep the lecture within the time allotted. Thestudents should have read <strong>and</strong> studied the chapters. When you lecture you should present, reinforce,<strong>and</strong> explain only the key concepts. The slide set no longer has separate slides for the basicITLS course. If you are teaching EMT-Bs or first responders, please explain that they are not responsiblefor the advanced procedures mentioned on the slides; however, the inclusion of theseprocedures allows the students to be familiar with situations where calling for an advanced unit,if available, would be beneficial.Chapter ObjectivesUpon completion of this lecture, the student should be able to:1. Discuss the three most common bloodborne viral illnesses to which EMS providers are likelyto be exposed to in the provision of patient care.2. Discuss the signs <strong>and</strong> symptoms of tuberculosis, <strong>and</strong> describe protective measures to take toreduce possible exposure to TB.3. Describe precautions EMS providers can take to prevent exposure to blood <strong>and</strong> other potentiallyinfectious materials (cerebrospinal fluid [CSF], synovial fluid, amniotic fluid, pericardialfluid, pleural fluid, or any fluid with gross visible blood).4. Identify appropriate use of personal protective equipment.5. Describe procedures for EMS providers to follow if they are accidentally exposed.Key Lecture Points1. Explain that trauma care involves exposure to blood <strong>and</strong> body fluids, <strong>and</strong> to the diseases thatare spread by these means.2. Explain the difference between active <strong>and</strong> passive immunity.3. Describe the diseases caused by hepatitis B, hepatitis C, <strong>and</strong> HIV.4. Discuss tuberculosis <strong>and</strong> why it is making a comeback.5. Explain precautions to prevent contracting these diseases.154
6. Describe personal protection, <strong>and</strong> h<strong>and</strong>ling <strong>and</strong> cleaning of items exposed to blood or otherpotentially infectious materials (OPIM).7. Describe reporting of exposure to blood or OPIM.SKILL STATION 1: BASIC AND ADVANCED AIRWAY MANAGEMENTBefore beginning, review “Teaching Skill Stations” (Chapter 3). Minimum instructors needed: 2.ObjectivesAt the conclusion of this station, the student should be able to:1. Perform the various manual methods of opening the airway.2. Suction the airway.3. Insert a nasopharyngeal <strong>and</strong> oropharyngeal airway.4. Ventilate using the pocket mask.5. Ventilate using the bag-valve device.6. Correctly use a pulse oximeter.7. Describe the preparations necessary to perform endotracheal intubation.8. Perform adult <strong>and</strong> infant orotracheal laryngoscopic intubation.9. Perform nasotracheal intubation.10. Use capnography to confirm correct tube placement.11. Anchor the endotracheal tube.BASIC AIRWAY MANAGEMENTSkill 1A: Basic Airway ManagementImportant Points1. Show the students how to set up <strong>and</strong> connect the reducing valve on an oxygen cylinder (reviewthe procedure beforeh<strong>and</strong>).2. Demonstrate how much easier it is to give adequate ventilation using mouth-to-mask ventilationrather than bag-valve-mask ventilation.3. Stress that using the reservoir bag with the bag-valve device will double the oxygen concentrationto the patient.4. Stress how to interpret the pulse oximeter reading <strong>and</strong> also those conditions that make pulseoximeter reading unreliable.5. If you have time, you may demonstrate new or different equipment.155
Equipment ListItemQuantityCPR mannequin 1 or 2Portable suction machine with charger 1 or 2Manual suction device (optional) 1 or 2Suction tubing 1 or 2Tonsil suction tips (Yaunker) 1 or 2Tongue blades 10Silicone lubricant spray (cans) 1Nasopharyngeal airways (various sizes)1 setOropharyngeal airways (various sizes)1 setPocket masks (with supplemental oxygen nipple) 2Oxygen cylinders 2Pulse oximeters 1 or 2Oxygen connecting tubing 3Reducing valves for cylinders 3St<strong>and</strong>s for cylinders 3Adult bag-valve device with adult face mask 2Pediatric bag-valve device 1Children’s face masks (various sizes)1 setReservoir bags for bag-valve devices 3Adult intubation mannequin 1Pediatric intubation mannequin 1Assorted endotracheal tubes 3 or 4Jar of water 1Tables 2ProceduresManual techniques to open the airwayA. Modified jaw thrust1. Place your h<strong>and</strong>s on either side of the neck at the base of the skull.156
2. While maintaining in-line stabilization of the neck, push up on the angles of the m<strong>and</strong>iblewith your thumbs.B. Jaw thrust1. Stabilize the head <strong>and</strong> neck with your knees, or have your partner stabilize the neck ina neutral position.2. Using the index <strong>and</strong> middle fingers of each h<strong>and</strong>, grasp the angles of the jaw just belowthe ear.3. Lift gently.C. Chin lift1. Stabilize the head <strong>and</strong> neck with your knees, or have your partner stabilize the neck ina neutral position.2. Place the fingers on one h<strong>and</strong> under the chin.3. With the thumb of the same h<strong>and</strong>, grasp the chin below the lower lip.4. Lift gently.D. Jaw lift (used for inserting oral airway or BIAD)1. Stabilize the head <strong>and</strong> neck with your knees, or have your partner stabilize the neck ina neutral position.2. Place the fingers of one h<strong>and</strong> under the chin.3. Insert the thumb of the same h<strong>and</strong> inside the mouth. Grasp the lower incisors.4. Lift gently.Suctioning the airway1. Attach the suction tubing to the portable suction machine.2. Turn the device on <strong>and</strong> test it.3. Insert the suction tube through the nose or mouth without activating the suction.4. Activate the suction <strong>and</strong> withdraw the suction tube using circular movements.5. Repeat the procedure as necessary.Insertion of pharyngeal airwaysA. Nasopharyngeal airway1. Choose the appropriate size. It should be the largest that will fit easily through the externalnares.2. Lubricate the tube.3. Insert it straight back through the right nostril with the beveled edge of the airwaytoward the septum.157
4. To insert it in the left nostril, turn the airway upside down so that the bevel is towardthe septum, then insert straight back through the nostril until you reach the posteriorpharynx. At this point, turn the airway 180 degrees <strong>and</strong> insert it down the pharynx untilit lies behind the tongue.B. Oropharyngeal airway1. Choose the appropriate size. Demonstrate how to measure from the lips to the earlobe or angle of the jaw.2. Open the airwaya. Scissor maneuverb. Jaw liftc. Tongue blade3. Insert the airway gently without pushing the tongue back into the pharynx.a. Insert the airway upside-down <strong>and</strong> rotate into place. This method should not beused in children.b. Insert the airway under direct vision using the tongue blade.Use of pocket mask with supplemental oxygen1. Have your partner stabilize the neck in a neutral position (or apply a good stabilizationdevice).2. Connect the oxygen tubing to the oxygen cylinder <strong>and</strong> the mask.3. Open the oxygen cylinder, <strong>and</strong> set the flow rate at 12 liters/min.4. Open the airway.5. Insert the oral airway properly.6. Place the mask on the face, <strong>and</strong> establish a good seal.7. Ventilate mouth-to-mask with 800 to 1000 cc each breath.Use of the bag-valve mask1. Stabilize the neck with a suitable device.2. Connect the oxygen tubing to the bag-valve system <strong>and</strong> oxygen cylinder.3. Attach the oxygen reservoir to the bag-valve mask.4. Open the oxygen cylinder, <strong>and</strong> set the flow rate at 12 liters/mm.5. Select the proper size mask, <strong>and</strong> attach it to the bag-valve device.6. Open the airway.7. Insert the oral airway properly.8. Place the mask on the face, <strong>and</strong> have your partner establish <strong>and</strong> maintain a good seal.158
9. Using both h<strong>and</strong>s, ventilate with about 800 cc of volume with each breath.10. If you are forced to ventilate without a partner, use one h<strong>and</strong> to maintain a face seal <strong>and</strong>the other to squeeze the bag. This decreases the volume of ventilation, because less volumeis produced by only one h<strong>and</strong> squeezing the bag.Use of the bag-valve mask to ventilate infants (optional)1. Stabilize the neck with a suitable device.2. Connect the oxygen tubing to the bag-valve system <strong>and</strong> oxygen cylinder.3. Attach the oxygen reservoir to the bag-valve mask.4. Open the oxygen cylinder, <strong>and</strong> set the flow rate at 12 liters/mm.5. Select the proper size mask, <strong>and</strong> attach it to the bag-valve device.6. Open the airway.7. Insert the oral airway properly.8. Place the mask on the face, <strong>and</strong> establish <strong>and</strong> maintain a good seal. You may have to turnthe mask upside down to get a good seal.9. Ventilate with enough volume to make the chest rise. Use about 20 centimeters of waterpressure. To experience this amount of pressure, place a 20 cm (#8) endotracheal tubevertically in water except for the bag connection, <strong>and</strong> compress the resuscitation bag sothat air bubbles come out the tower end of the endotracheal tube. This will be 20 cm ofwater pressure. Pressures higher than this will always cause some air to be forced into thestomach.Use of the pulse oximeterA pulse oximeter is a noninvasive photoelectric device that measures the arterial oxygensaturation <strong>and</strong> pulse rate in the peripheral circulation. It consists of a portable monitor <strong>and</strong> asensing probe that clips onto the patient’s finger, toe, or earlobe. The device displays thepulse rate <strong>and</strong> the arterial oxygen saturation in a percentage value (%SaO 2 ). This is a veryuseful device that should be used on all patients with any type of respiratory compromise.The pulse oximeter is useful to assess the patient’s respiratory status, the effectiveness ofoxygen therapy, <strong>and</strong> the effectiveness of BVM or FROPVD ventilation. Remember that thedevice measures %SaO 2 , not the arterial partial pressure of oxygen (PaO 2 ).The hemoglobin molecule is so efficient at carrying oxygen that it is 90 percent saturated(90%SaO 2 ) when the partial pressure of oxygen is only 60 mm Hg (100 is normal). If you areused to thinking about PaO 2 (where 90–100 mm Hg is normal), then you may be fooled intothinking that a SaO 2 reading (pulse oximeter) of 90 percent is normal when it is actuallycritically low. As a general rule, any pulse oximeter reading below 92 percent is cause forconcern <strong>and</strong> requires some sort of intervention (open airway, suction, oxygen, assisted ventilation,intubation, decompression of tension pneumothorax, etc.). A pulse oximeter readingbelow 90 percent is critical <strong>and</strong> requires immediate intervention to maintain adequate tissueoxygenation. Try to maintain a pulse oximeter reading above 95 percent. However, do not159
withhold oxygen from a patient with a pulse oximeter reading above 95 percent who alsoshows signs <strong>and</strong> symptoms of hypoxia or difficulty breathing.The following are conditions that make the pulse oximeter reading unreliable:• Poor peripheral perfusion (shock, vasoconstriction, hypotension). Do not attach the sensingprobe onto an injured extremity. Try not to use the sensing probe on the same arm that youare using to monitor the blood pressure. Be aware that the pulse oximeter reading will godown while the blood pressure cuff is inflated.• Severe anemia.• Carbon monoxide poisoning. This will give falsely high readings since the sensing probecannot distinguish between oxyhemoglobin <strong>and</strong> carboxyhemoglobin.• Hypothermia.• Excessive patient movement.• High ambient light (bright sunlight, high-intensity light on area of the sensing probe).• Nail polish or a dirty fingernail, if you are using a finger probe. Use acetone to clean the nailbefore attaching the probe.ProcedureTurn on the device.1. Clean the area (earlobe, fingernail, <strong>and</strong> toenail) that you are to monitor.2. Attach the sensing clip to the area.3. Note the reading on the device.Skill 1B: Assisting with Advanced Airway ManagementNote: This skill is taught only to students taking the basic ITLS course. It consists of:1. Preparation for endotracheal intubation (see Skill 1C)2. Procedure for assisting with orotracheal <strong>and</strong> nasotracheal intubation (see below)3. Confirmation of tube placement (see Skill 1E)4. Anchoring the tube (see Skill 1F)EquipmentThe same as for Skill 1D.Procedure1. Following ventilation <strong>and</strong> initial preparations, the student should hold the patient’s head<strong>and</strong>/or perform the Sellick maneuver. The student should count slowly aloud to 30 as theALS provider performs the intubation.160
2. When the tube is inserted, the student (or the ALS provider) should check the tube for placementby the confirmation protocol (Skill 1E).3. When the tube placement is confirmed, the student should anchor the tube (Skill 1F).ADVANCED AIRWAY MANAGEMENTThese skills are taught only to students taking the advanced ITLS course.Skill 1C: Preparation for Endotracheal IntubationWhatever the method of intubation used, both patients <strong>and</strong> rescuers should be prepared for theprocedure. The following are considered basic to all intubation procedures:• Gloves: Rubber examining (not necessarily sterile) gloves should be worn for all intubationprocedures.• Eye protection: Goggles or face shield should be worn to protect from blood or fluids thatmight be coughed up.• Oxygenation: All patients should be ventilated, or should breathe high-flow oxygen (12L/min) for several minutes prior to the attempt.• Airway equipment: All equipment should have been checked <strong>and</strong> should be kept at h<strong>and</strong> inan organized kit. For laryngoscopic intubation, the endotracheal tube should be held in a“field hockey stick” or open “J” shape by a malleable stylet that is first lubricated <strong>and</strong> inserteduntil the distal end is just proximal to the side-hole of the endotracheal tube. The cuffof the endotracheal tube should be checked by inflating it with 10 cc of air. The air shouldthen be completely removed <strong>and</strong> the syringe filled with air left attached to the pilot tube. Thecuff <strong>and</strong> distal end of the tube are then lubricated.• Suction: Must be immediately at h<strong>and</strong>.• Assistant: An assistant (may be an EMT-B or first responder) should be available to helpwith the procedure. The Sellick maneuver should be applied during ventilation <strong>and</strong> the subsequentintubation attempt. The assistant may also aid in holding the head <strong>and</strong> neck immobile<strong>and</strong> informing you when 30 seconds have elapsed.Optional Preparation• Lidocaine: Topical lidocaine, sprayed into the posterior pharynx before intubation attempts,can decrease the adverse cardiovascular <strong>and</strong> intracranial pressure effects of the intubationprocedure.Skill 1D: Laryngoscopic Orotracheal IntubationImportant Points1. Check batteries <strong>and</strong> all laryngoscope lights.161
2. Since this is a trauma course, cervical collars should be applied to the intubation mannequinsso the students can learn to intubate without extending the neck. Have one student stabilizethe neck from below while another intubates.3. Require the students to follow the procedure as outlined in the text. The suction machine canbe simulated, but the tubing <strong>and</strong> suction tip should be placed next to the patient each time intubationis practiced.Equipment ListItemQuantityAdult intubation mannequins 2Infant intubation mannequins 2Adult cuffed ET tubes7 mm 28 mm 29 mm 2Pediatric ET tubes (not cuffed)3.5 mm 24.0 mm 24.5 mm 2Wire guides for adult ET tubes 2Wire guides for pediatric tubes 2Laryngoscope h<strong>and</strong>les 4Spare batteries for laryngoscopes 8Spare bulbs for laryngoscopes 4Adult laryngoscope bladesCurved 2Straight 2Pediatric laryngoscope bladesStraight 2Can of silicone lubricant spray 110-cc syringes 2Lighted stylet (optional) 2Oral airways (size to fit adult mannequin) 2Oral airways (size to fit infant mannequin) 2162
Tonsil auctions tip (Yaunker) <strong>and</strong> suction tubing 4 eachBag-valve devices 4Nonsterile rubber gloves1 boxFace shields or goggles 4CO 2 detector (optional) 1Esophageal detection device (optional) 1Procedure: Adult Endotracheal IntubationIn this method, the upper airway <strong>and</strong> the glottic opening are visualized <strong>and</strong> the tube is slippedgently through the cords. Its advantages include the ability to see obstructions <strong>and</strong> to visualizethe accurate placement of the tube. It has the disadvantage of requiring a relatively relaxed (unconscious)patient without anatomic distortion <strong>and</strong> with minimal bleeding or secretions.1. Stabilize the neck in a neutral position from below (done by your partner).2. While the patient is being ventilated, prepare your equipment:a. Be sure suction apparatus is available <strong>and</strong> functioning.b. Select the correct size ET tube, insert a wire guide, attach a 10-cc syringe, <strong>and</strong> test thecuff.c. Connect the laryngoscope blade <strong>and</strong> h<strong>and</strong>le. Test the light.Following ventilation <strong>and</strong> initial preparations, the following steps should be carried out:1. An assistant holds the head, performs the Sellick maneuver, <strong>and</strong> counts slowly aloud to 30 (ifthe intubator requests).2. Holding the laryngoscope in the left h<strong>and</strong>, the intubator pulls down on the chin <strong>and</strong> slides theblade into the right side of the patient’s mouth, pushing the tongue to the left <strong>and</strong> “inching”the blade down along the tongue in an attempt to see the epiglottis. A key maneuver must beperformed here: The blade must pull forward on the tongue to lift up the epiglottis <strong>and</strong> bringit into view.3. The laryngoscope blade is used to lift the tongue <strong>and</strong> epiglottis up <strong>and</strong> forward in a straightline. “Levering” the blade is a common error with novices <strong>and</strong> can result in broken teeth <strong>and</strong>other trauma. The laryngoscope is essentially a “hook” to lift the tongue <strong>and</strong> epiglottis up <strong>and</strong>out of the way so that the glottic opening can be identified.4. The tube is advanced along the right side of the oropharynx once the epiglottis is seen. Whenthe glottic opening (or even just the arytenoid cartilages) is identified, the tube is slippedthrough to a depth of about 5 cm beyond the cords.5. While the tube is still held firmly, the cuff is inflated with 4 to 6 cc of air <strong>and</strong> ventilation begun.6. Insert an oral airway.163
7. The tube is then checked for placement by the immediate confirmation protocol <strong>and</strong> securedin place. If possible, placement should be reconfirmed using capnography.8. Begin ventilation using adequate oxygen concentration <strong>and</strong> tidal volume.Procedure: Infant Endotracheal IntubationFollow the same procedure as for adults, except that there is no cuff to inflate.Skill 1E: Immediate Confirmation of Tube PlacementOne of the greatest challenges of intubation is ensuring the correct intratracheal placement ofendotracheal tubes. An unrecognized esophageal intubation is a lethal complication of this lifesavingprocedure. Every effort must be made to avoid this catastrophe, <strong>and</strong> a strict protocol mustbe followed to reduce the risk.Although the most reliable method of ensuring proper placement is actually visualizing thetube passing through the glottic opening, even this is not 100 percent sure. The gold st<strong>and</strong>ard forconfirming <strong>and</strong> monitoring endotracheal tube placement is waveform capnography (see below).If you do not have capnography available, the following protocol can be used but is not reliable.When you use this protocol, you should recognize the unreliable nature of auscultation as thesole method of confirming intratracheal placement. Correct intratracheal placement should besuspected from the following initial signs:1. An anteriorward displacement of the laryngeal prominence as the tube is passed distally.2. Coughing, bucking, or straining on the part of the patient.Note: Phonation (any noise made with the vocal cords) is ABSOLUTE EVIDENCE THAT THETUBE IS IN THE ESOPHAGUS AND SHOULD BE REMOVED IMMEDIATELY.3. Breath condensation on the tube with each exhalation—this is not 100 percent reliable, but itis very suggestive of intratracheal placement.4. Normal compliance with bag ventilation—the bag does not suddenly “collapse,” but ratherthere is some resilience to it <strong>and</strong> resistance to lung inflation.5. No air leak around the cuff after inflation—persistent leak indicates esophageal intubationuntil proven otherwise.The following procedure should then be immediately carried out to prove correct placement:1. Auscultate three sites:a. The epigastrium (perhaps the most important site) should be silent, with no sounds heard.b. Right <strong>and</strong> left midaxillary lines.2. Inspect: Observe full movement of the chest with ventilation. Watch for any change in thepatient’s color or in the pulse oximeter reading. Also observe the EKG monitor for changes.When you perform the secondary survey, or when there is a question of correct tube placementafter the above confirmation protocol, you should:164
1. Auscultate six sites:a. The epigastrium. It should be silent, with no sounds heard.b. Right <strong>and</strong> left apex.c. Right <strong>and</strong> left midaxillary lines.d. The sternal notch. “Tracheal” sounds should be readily heard here.2. Inspect the chest for full movement of the chest with ventilation.3. Gently palpate the tube cuff in the sternal notch, while compressing the pilot balloon betweenthe fingers <strong>and</strong> thumb; a pressure wave should be felt in the sternal notch.4. Use adjuncts such as a CO 2 detector (capnographic or colormetric), esophageal detection device,or lighted stylet. (Note: Since a misplaced endotracheal tube is a fatal error, there is atrend now for the immediate use of capnography to confirm tube placement in every endotrachealintubation.)Confirming <strong>and</strong> Monitoring ET Tube Placement with Capnography1. Prepare all equipment for intubation. Turn on monitor, <strong>and</strong> attach capnography filter line orwires to the monitor. (This will vary depending on the br<strong>and</strong> of capnograph.)2. Place endotracheal tube, <strong>and</strong> inflate the cuff. In cases of arrest, compressions should not beinterrupted to perform this procedure.3. Attach the capnography airway adapter on the endotracheal tube, <strong>and</strong> then attach the BVMto the airway adapter.4. Ventilate the patient, <strong>and</strong> observe the waveform. The presence of a "square" pattern confirmstracheal placement (see Figure 5-12 in the textbook). Print out the waveform, if possible(for documentation). If the waveform is nonexistent, or appears in gross <strong>and</strong> irregularwaveform patterns, the tube is possibly in the esophagus or hypopharynx.5. Listen for breath sounds midaxillary on each side to rule out right mainstem intubation.6. Secure the tube <strong>and</strong> continually monitor the waveforms during transport.7. On arrival at the receiving facility, print out another waveform (if available) to prove correctplacement at the time of patient transfer.8. On your run report, document the visualization of the vocal cords, attach the waveformprintout(s) or document the presence, <strong>and</strong> document equal breath sounds.Troubleshooting while monitoring:• Loss of waveform completely. Apnea, or tube is dislodged or obstructed.• Waveforms <strong>and</strong> values getting smaller. Hyperventilation (check the depth <strong>and</strong> rate of ventilation)or hypoperfusion (shock, or loss of pulses).Skill 1F: Anchoring the Tube165
This can be a frustrating exercise. Not only does it require some fine movements of the h<strong>and</strong>swhen we appear to be all thumbs, but it is also difficult to perform this task when ventilation,movement, or extrication is being carried out. There is one thing to keep in mind: There is nosubstitute for the human anchor. That is, one person should be held responsible for ensuring thatthe tube is held fast <strong>and</strong> that it does not migrate in or out of the airway. To lose a tube can be acatastrophe, especially if the patient is inaccessible or the intubation was a difficult one to beginwith.Fixing the endotracheal tube in place is important for several reasons. First, movement of thetube in the trachea will produce more mucosal damage <strong>and</strong> may increase the risk of postintubationcomplications. In addition, movement of the tube will stimulate the patient to cough, strain,or both, leading to cardiovascular <strong>and</strong> intracranial pressure changes that could be detrimental.Most of all, there is a greater risk of dislodging a tube <strong>and</strong> losing control of the airway if the tubeis not anchored solidly in place.The endotracheal tube can be secured in place by either tape or a commercially availableholder. While taping a tube in place is convenient <strong>and</strong> relatively easily done, it is not always effective,since there is often a problem with the tape sticking to skin that is often wet with rain,blood, airway secretions, or vomitus. If tape is to be used, several principles should be followed:• An oropharyngeal airway should also be in place to prevent the patient from biting down onthe tube.• The patient’s face should be dried off <strong>and</strong> tincture of benzoin applied to better ensure properadhesion of the tape.• The tape should be carried right around the patient’s neck in anchoring the tube. The neckmust not be moved.• The tube should be anchored at the labial angle, not in the midline.Because of the difficulty of fixing the tube in place with tape, we recommend the use of acommercial endotracheal tube holder that uses a small rubber strap to fix the tube in a plasticholder that acts as a bite block. A second rubber strap passes around the patient’s neck. Whilethis is not an ideal solution, it is easier to use <strong>and</strong> more quickly applied. If tube holders with Velcroare used, care must be taken not to get the small hooks embedded in the fingers or in thepatient’s lips.Since flexion or extension of the patient’s head can move the tube in or out of the airway bytwo or three cm, it is a good practice to restrict head <strong>and</strong> neck movement of any patient who hasan endotracheal tube in place. If the patient is immobilized because of the risk of cervical spineinjury, then you need not worry about this. However, in those who do not have a collar in place,it is best to tape the head to the backboard or stretcher in order to restrict movement. Failing this,the airway manager is required to ensure that the head <strong>and</strong> neck are kept in a neutral position.Skill 1G: Nasotracheal IntubationIndicationsAs with all advanced procedures, this technique must be accepted local protocol <strong>and</strong> you must166
have permission from medical direction before performing it. Indications for performing nasotrachealintubation in the field setting are as follows:• A patient who needs endotracheal intubation but who has a possible cervical spine injury• A patient who needs endotracheal intubation but who has clenched jaws• A patient who needs endotracheal intubation (respiratory distress secondary to large flailchest, open chest wound, blunt trauma to the neck, etc.) but who has a gag reflex• A patient who needs endotracheal intubation but who is trapped <strong>and</strong> you are unable to getinto a position to use a laryngoscopeContraindicationsContraindications to this procedure are as follows:Absolute Contraindications• <strong>Trauma</strong> to the face or nose with possible basilar skull fracture (blood or fluid draining fromthe nose, facial fractures, <strong>and</strong>/or raccoon eyes). There is danger of inserting the tube into thecranial vault in this instance.• Patients taking anticoagulant medication.• Children under the age of ten years.Relative ContraindicationIt is almost impossible to perform nasotracheal intubation on the patient who is not breathing.You need the sound of the patient’s breathing to guide the tube.Complications• <strong>Trauma</strong> to the nose or airway resulting in hemorrhage <strong>and</strong> possible aspiration• Esophageal intubation, leading to hypoxia <strong>and</strong> death• Induction of vomiting, leading to aspiration, hypoxia, <strong>and</strong> death• Right mainstem bronchus intubation• Inability to intubate, leading to hypoxia <strong>and</strong> death• <strong>Trauma</strong> to the vocal cordsEquipmentUse the same equipment listed for routine adult endotracheal intubation, except modify the adultintubation mannequin by removing one “lung” <strong>and</strong> attaching a bag-valve device to simulatebreath sounds.Preparation for IntubationThe greatest disadvantage of the nasotracheal route of endotracheal intubation is its relative difficulty,depending as it does on the appreciation of the intensity of the breath sounds of sponta-167
neously breathing patients. It is a blind procedure <strong>and</strong>, as such, requires extra effort to demonstrateproper intratracheal placement.Guidance of the tube through the glottic opening is a question of the intubator perceiving theintensity of the sound of the patient exhaling. The tube can, with some difficulty, be guided towardthe point of maximum intensity <strong>and</strong> slipped through the cords. Breath sounds can be betterheard <strong>and</strong> felt with the ear placed against the proximal opening of the tube or, even better, use ofan adjunct such as the Burden nasoscope (see Figure 5-4 in the textbook).The success of this method will also depend on an anterior curve to the tube that will preventits passing into the esophagus. This may better be achieved by preparing two tubes prior to carryingout the intubation attempt. The distal end of the 33-cm tube is inserted into its proximalopening, thus molding it into a formed circle. Preparing two tubes permits the immediate use of asecond, more-rigid tube should the first plastic tube become warm with body temperature, thuslosing its anterior curve. Displacing the tongue <strong>and</strong> jaw forward may also be helpful in achievingplacement, since this maneuver lifts the epiglottis anteriorly out of the way of the advancingtube.Procedure1. Perform routine preparation procedures as described in endotracheal intubation.2. Following lubrication of its cuff <strong>and</strong> distal end, a 7.0- or 7.5-mm endotracheal tube with thebevel against the floor or septum of the nasal cavity is slipped distally through the largest nares.3. When the tube tip reaches the posterior pharyngeal wall, great care must be taken on “roundingthe bend” <strong>and</strong> then directing the tube toward the glottic opening.4. By watching the neck at the laryngeal prominence, you can judge the approximate placementof the tube. Tenting of the skin on either side of the prominence indicates catching up of thetube in the pyriform fossa, a problem solved by slight withdrawal <strong>and</strong> rotation of the tube tothe midline. Bulging <strong>and</strong> anterior displacement of the laryngeal prominence usually indicatesthat the tube has entered the glottic opening <strong>and</strong> has been correctly placed. At this point thepatient, especially if not deeply comatose, will cough, strain, or both. This may be alarmingto the novice intubator, who might interpret this as laryngospasm or misplacement of thetube. The temptation may be to pull the tube <strong>and</strong> ventilate, since the patient may not breatheimmediately. Holding the h<strong>and</strong> or ear over the opening of the tube to detect air flow may reassurethe intubator that the tube is correctly placed, <strong>and</strong> the cuff may be inflated <strong>and</strong> ventilationbegun.5. Confirm placement by the confirmation protocol.SKILL STATION 2: SPINE MANAGEMENT SKILLS IShort SMR Devices/Emergency Rescue <strong>and</strong> Rapid ExtricationSkill 2A: Spine Management—Short SMR DevicesBefore beginning, review “Teaching Skill Stations” (see Chapter 3). Minimum instructors168
needed: 1.ObjectivesAt the conclusion of this station, the student should be able to:1. Explain when to use spinal motion restriction (SMR).2. Perform SMR with a short device.3. Perform rapid extrication <strong>and</strong> emergency rescue.Important Points1. The time allowed (30 minutes) to teach this station is very short. You must get started immediately.2. Most physicians are not taught this skill. It is best to have an experienced EMT teach this station.3. Do not lecture; demonstrate. Show the students where to put their h<strong>and</strong>s <strong>and</strong> have them performthe techniques.4. Weather permitting, this station should be taught outside using a vehicle rather than a chair.Equipment ListItemQuantityLive model 1Rigid cervical collar 1Short backboard with straps 1Long backboard with straps 1KED or similar vest-type extrication device 1Head immobilization device 1Kerlix roll or towels to pad neck 2Wide adhesive tape2 rollsElastic wraps (ace) 6″ 2Chair or vehicle 1ProceduresWho should receive spinal motion restriction (SMR)?• Any trauma patient with obvious neurological deficit such as paralysis, weakness, or paresthesia(numbness or tingling)169
• Any trauma patient who complains of pain in the neck or back• Any trauma patient who is unconscious• Any trauma patient who may have injury to the spine but in whom evaluation is difficult dueto altered mental status (e.g., drugs, alcohol)• Any unconscious patient who may have been subjected to trauma• Any patient who has a positive mechanism of injury (see Spinal <strong>Trauma</strong> chapter in textbook)• When in doubt, use SMRWhen to Use SMRPatients requiring SMR must be addressed before they are moved at all. In the case of a motorvehiclecollision, the patient must receive SMR before being removed from the wreckage. Moremovement is involved in extrication than at any other time, so SMR must be accomplished beforebeginning extrication.Technique of SMR Using the Short SMR DevicesThis device is for use with a patient who is not critical <strong>and</strong> who is in a position (such as a vehicle)that does not allow use of the long backboard. There are several different devices of thistype; some devices have different strapping mechanisms from the one explained here. You mustbecome familiar with equipment you will employ before using it in actual patient situations.Remember that the routine priorities of assessment <strong>and</strong> management are done before theSMR devices go on.1. One rescuer must, if possible, station himself or herself behind the patient, place his orher h<strong>and</strong>s on either side of the patient ’ s head, <strong>and</strong> manually maintain the neck in a neutralposition. This step is part of the ABCs of assessment. It is done at the same time that youbegin assessment of the airway.2. When you have the patient stable enough to begin SMR, you must apply a rigid cervicalcollar. If you have enough people, this can be done while someone else is doing theABCs of assessment <strong>and</strong> management. If you have limited help, apply the collar after finishingthe rapid trauma survey but before transferring the patient to the long backboard.3. Position the device behind the patient. The first rescuer continues to manually maintainthe neck in a neutral position while the short device is being maneuvered into place. Thepatient may have to be moved forward to get the device in place; great care must be takenso that moves are coordinated to support the neck <strong>and</strong> back.4. Secure the patient to the device with the straps that are supplied. Place the short strap underthe armpits <strong>and</strong> across the upper chest as an anchor. Bring each long strap over a leg,down between both legs, back around the outside of the same leg, <strong>and</strong> then across thechest, <strong>and</strong> then attach each to the opposite upper strap that was brought across the shoulders.5. Tighten the straps until the patient is held securely.170
6. Secure the patient ’ s head to the device by wide tape or elastic wraps around the forehead.Apply padding under the neck <strong>and</strong> head as needed to maintain a neutral position.7. Transfer the patient to a long backboard. Turn the patient so that his or her back is to theopening through which he or she is to be removed. Someone must support the legs so thatthe upper legs remain at a 90-degree angle to the torso. Position the long backboardthrough the opening until it is under the patient. Lower the patient back onto the longbackboard, <strong>and</strong> slide the patient <strong>and</strong> the short device up into position on the long backboard.Loosen the straps on the device, allow the patient’s legs to extend out flat, <strong>and</strong>then retighten the straps. Now secure the patient to the long board with straps, <strong>and</strong> securethe head with a padded head device. When the patient is secured in this way, it is possibleto turn the whole unit on its side if the patient has to vomit. The patient should remain secure.Important Points to Remember1. When you are placing the straps around the legs on a male, do not catch the genitals in thestraps.2. Do not use the short board as a “h<strong>and</strong>le” to move the patient. Move both patient <strong>and</strong> deviceas a unit.3. When you are applying the horizontal strap (long backboard) around a female, place the upperstrap above her breasts, not across them.4. When you are applying the lower horizontal strap on a pregnant patient, see that it is lowenough so as not to injure the fetus.5. You may need to modify how you attach the straps, depending on injuries.6. Secure the patient well enough so that no motion of the spine will occur if the board is turnedon its side. Do not tighten the straps so tight that they interfere with breathing.Skill 2B: Emergency Rescue <strong>and</strong> Rapid ExtricationBefore beginning, review “Teaching Skill Stations” (see Chapter 3). Minimum instructorsneeded: 1.ObjectivesAt the conclusion of this station, the student should be able to:1. Explain the indications for emergency rescue <strong>and</strong> rapid extrication.2. Demonstrate the techniques of emergency rescue <strong>and</strong> rapid extrication.Important Points1. The time allowed for this station is very short, so you must begin immediately.2. Most physicians are not taught this skill. It is best to assign an experienced EMT to teach thisstation.171
Equipment ListItemQuantityLive model 1Long backboard with straps 1Rigid cervical collar 1Head immobilization device 1Wide adhesive tape 2 rollsChair or vehicle 1Situations Requiring Emergency Rescue or Rapid ExtricationThere are two kinds of situations in which you should perform abbreviated extrication. The firstof these is an emergency rescue in any situation in which your scene size-up identifies a conditionthat immediately endangers you <strong>and</strong> your patient. Immediately means you may not evenhave the seconds required to perform an organized rapid extrication <strong>and</strong> are reduced to simplygrabbing <strong>and</strong> pulling the patient to safety with no regard for spinal precautions. Examples ofsuch situations include:1. Fire or immediate danger of fire2. Danger of explosion3. Rapidly rising water4. Structure in danger of collapseWhen performing an emergency rescue, try to drag the patient along the long axis of thebody. Above all, get your patient <strong>and</strong> yourself to safety. Whenever you use this procedure itshould be noted in the written report, <strong>and</strong> you should be prepared to explain your actions at a reviewby your medical direction physician.The second kind of situation is a rapid extrication in which the initial exam of the patientidentifies any condition that requires an immediate intervention that cannot be done in the vehicleor other structure. Generally these situations allow you to take the seconds required to do anorganized rapid extrication. Examples include:1. Airway obstruction that is not relieved by jaw thrust or finger sweep2. Cardiac or respiratory arrest3. Chest or airway injuries requiring ventilation or assisted ventilation4. Bleeding that cannot be controlledRapid extrication is to be used only in a situation where the patient’s life is in immediate danger.Whenever you use this procedure it should be noted in the written report, <strong>and</strong> you should be preparedto explain your actions at a review by your medical direction physician.Procedures172
1. One rescuer must, if possible, station himself or herself behind the patient, place his or herh<strong>and</strong>s on either side of the patient’s head, <strong>and</strong> manually maintain the neck in a neutral position.This step is part of the ABCs of assessment. It is done at the same time that you beginassessment of the airway.2. Do a rapid trauma survey; then, apply a cervical collar. You should have the collar with youwhen you begin.3. If your rapid trauma survey of the patient reveals an immediate life-threatening situation, goto the rapid extrication technique. This requires at least four, <strong>and</strong> preferably five or six, rescuersto perform well.4. Immediately slide the long backboard onto the seat <strong>and</strong>, if possible, at least slightly under thepatient’s buttocks.5. A second rescuer st<strong>and</strong>s close beside the open door of the vehicle <strong>and</strong> takes over maintainingthe cervical spine.6. The first rescuer or another rescuer is positioned on the other side of the front seat ready torotate the patient’s legs around.7. Another rescuer is positioned at the open door beside the patient. By holding the upper torso,he or she works together with the rescuer, holding the legs to turn the patient carefully.8. The patient is turned so that his or her back is toward the backboard. The legs are lifted <strong>and</strong>the back is lowered to the backboard. The neck <strong>and</strong> back are not allowed to bend during thismaneuver.9. Using teamwork, the patient is carefully slid to the full length of the backboard while the legsare carefully straightened.10. The patient is then moved immediately away from the vehicle (to the ambulance if available),<strong>and</strong> resuscitation is begun. The patient is secured to the long backboard as soon as possible.SKILL STATION 3: TRACTION SPLINTSBefore beginning, review “Teaching Skill Stations” (see Chapter 3). Minimum instructorsneeded: 1.ObjectivesAt the conclusion of this station, the student should be able to:1. Explain when to use a traction splint.2. Describe the possible complications of using a traction splint.3. Demonstrate how to apply the most common traction splints:a. Thomas splintb. Hare splint173
c. Sager splintImportant Points1. The time allowed (30 minutes) is very short. Begin immediately so that each student has timeto practice.2. Most nurses <strong>and</strong> doctors are not trained in use of traction splints. It is best to assign an experiencedEMT to teach this station.3. Stress when to use traction splints. Make sure the students know that load-<strong>and</strong>-go patients donot have traction splints applied before transport unless the ambulance has not arrived.4. You do not have to teach every one of the various traction splints. Teach what is commonlyused in your area. There is usually time to practice with at least two types.5. Do not lecture; demonstrate. Show the students where to put their h<strong>and</strong>s, <strong>and</strong> have them practicethe techniques.Equipment ListItemQuantityThomas splint 1At least one of the following splints:Sager or HareLive models (may use students) 2Cravats for padding 10Tongue blades (for Spanish windlass) 10Adhesive tape (1 inch)1 rollProceduresTraction splints are designed to immobilize fractures of the upper legs. They are useful forfractures of the femur. They are not useful for fractures of the hip, knee, ankle, or foot. Applyingfirm traction to a fractured or dislocated knee may tear the blood vessels behind the knee. If thereappears to be a pelvic fracture, you cannot use a traction splint, because it may cause furtherdamage to the pelvis. Fractures below the midthigh that are not angulated or severely shortenedmay just as well be immobilized by a variety of other splints, such as air splints or the antishockgarment. Traction splints work by applying a padded device to the back of the pelvis (ischium)or to the groin. A hitching device is then applied to the ankle <strong>and</strong> countertraction is applied untilthe limb is straight <strong>and</strong> well-immobilized. The splints must be applied to the pelvis <strong>and</strong> groinvery carefully to prevent excessive pressure on the genitalia. Care must also be used when attachingthe hitching device to the foot <strong>and</strong> ankle so as not to interfere with circulation. To preventany unnecessary movement, traction splints should not be applied until the patient is on along backboard. If the splint extends beyond the end of the backboard, you must be very carefulwhen moving the patient <strong>and</strong> when closing the ambulance door. You must check the circulation174
in the injured leg, so remove the shoe before attaching the hitching device. In every case, at leasttwo rescuers are needed. One must hold steady, gentle traction on the foot <strong>and</strong> leg while theother applies the splint. When dealing with load-<strong>and</strong>-go situations, the splint should not be applieduntil the patient is in the ambulance <strong>and</strong> transport has begun (unless the ambulance has notarrived).A. Thomas Splint (Half-Ring Splint)1. The first rescuer supports the leg <strong>and</strong> maintains gentle traction, while the second rescuer cutsaway the clothing <strong>and</strong> removes the shoe <strong>and</strong> sock to check pulse <strong>and</strong> sensation at the foot.2. Apply padding to the foot <strong>and</strong> ankle.3. Apply the traction hitch around the foot <strong>and</strong> ankle.4. Position the splint under the injured leg. The ring goes down, <strong>and</strong> the short side goes to theinside of the leg. Slide the ring snugly up under the hip, where it will be pressed against theischial tuberosity.5. Position two support straps above the knee <strong>and</strong> two below the knee.6. Attach the top ring strap.7. Maintain gentle traction by h<strong>and</strong>.8. Attach the traction hitch to the end of the splint.9. Increase traction by Spanish windlass action using a stick or tongue depressors.10. Release manual traction, <strong>and</strong> reassess circulation <strong>and</strong> sensation.11. <strong>Support</strong> the end of the splint so that there is no pressure on the heel.B. Hare Splint1. Position the patient on the backboard or stretcher.2. The first rescuer supports the leg <strong>and</strong> maintains gentle traction, while the second rescuer cutsaway the clothing <strong>and</strong> removes the shoe <strong>and</strong> sock to check pulse <strong>and</strong> sensation at the foot.3. Apply the padded traction hitch to the ankle <strong>and</strong> foot.4. Position the splint under the injured leg. The ring goes down, <strong>and</strong> the short side goes to theinside of the leg. Slide the ring up snugly under the hip against the ischial tuberosity.5. Position two support straps above the knee <strong>and</strong> two below the knee.6. Attach the heel rest.7. Attach the top strap.8. Maintain gentle manual traction.9. Attach the traction hitch to the windlass by way of the S-hook.10. Turn the ratchet until the correct tension is applied.11. Release manual traction, <strong>and</strong> recheck circulation <strong>and</strong> sensation.175
12. Attach support straps around the leg with Velcro straps.13. To release traction, pull the ratchet knob outward <strong>and</strong>, then, slowly turn to loosen.C. Sager SplintThis splint is different in several ways. It works by providing countertraction against the pubicramus <strong>and</strong> the ischial tuberosity medial to the shaft of the femur; thus, it does not go under theleg. The hip does not have to be slightly flexed as with the Hare <strong>and</strong> Thomas. The Sager islighter <strong>and</strong> more compact than other traction splints. You can also splint both legs with onesplint if needed. The new Sager splints are significantly improved over older models <strong>and</strong> mayrepresent the state-of-the-art in traction splints.1. Position the patient on a long backboard or stretcher.2. The first rescuer supports the leg <strong>and</strong> maintains gentle traction, while the second rescuer cutsaway the clothing <strong>and</strong> removes the shoe <strong>and</strong> sock to check the pulse <strong>and</strong> sensation at the foot.3. Using the uninjured leg as a guide, pull the splint out to the correct length.4. Position the splint to the inside of the injured leg with the padded bar fitted snugly againstthe pelvis in the groin. The splint can be used on the outside of the leg, using the strap tomaintain traction against the pubis. Be very careful not to catch the genitals under the bar (orstrap).5. While maintaining gentle manual traction, attach the padded hitch to the foot <strong>and</strong> ankle.6. Extend the splint until the correct tension is obtained.7. Release manual traction, <strong>and</strong> recheck circulation <strong>and</strong> sensation.8. Apply elastic straps above <strong>and</strong> below the knee.SKILL STATION 4: SPINE MANAGEMENT SKILLS IIHelmet Management/Log-Roll/Long BackboardBefore beginning, review “Teaching Skill Stations” (see Chapter 3). Minimum instructorsneeded: 1.ObjectivesAt the conclusion of this station, the student should be able to:1. Demonstrate log-rolling a patient onto a long backboard.2. Demonstrate securing a patient to a long backboard.3. Demonstrate spinal motion restriction (SMR) for a patient from a st<strong>and</strong>ing position.4. Demonstrate SMR when a neutral position cannot safely be obtained.5. Explain which patients should have helmets removed in the field <strong>and</strong> which patients shouldhave helmets stabilized in place.176
6. Demonstrate how to remove a helmet properly.7. Demonstrate proper SMR of a patient who is wearing shoulder pads <strong>and</strong> a helmet.Important Points1. The time allowed (30 minutes) is very short. You must begin immediately.2. If groups are large enough (6–8), it is best to divide the students into two teams: one to practicelog-rolling <strong>and</strong> helmet management <strong>and</strong> one to practice securing the patient to the longbackboard. You will need a second instructor if you do this.3. You should review the differences in immobilizing <strong>and</strong> transporting a pregnant patient.4. Review the use of padding under the shoulders or torso to maintain a neutral spinal positionin children <strong>and</strong> some elderly patients. It would be useful to have a child or a child mannequinfor the students to use in practice.5. Be sure that students underst<strong>and</strong> that there is some regional variation in who gives the orderto roll (rescuer at the head or rescuer at the shoulder). You may use the local preference.6. The introduction of the vacuum backboard made several of these techniques much easier.You may want to demonstrate this device in this station.Equipment ListItemQuantityLive model (may use student) 1Rigid cervical collar 2Reeve’s sleeve (optional) 1Miller body splint (optional) 1Vacuum backboard (optional) 1Long backboard with straps (or strap system) 2Towels for padding head <strong>and</strong> neck 4Cushion-type head immobilizers (optional) 1Blanket roll 1Wide adhesive tape4 rollsMotorcycle helmet (full face) 1Football helmet with face protector 1Shoulder pads1 setOpen-face helmet 1Live model 1 or 2177
Helmet ManagementImportant Points1. Patients wearing both shoulder pads <strong>and</strong> a helmet:a. Patients who are wearing both shoulder pads <strong>and</strong> a helmet will usually have their cervicalspines maintained in a more neutral position by leaving the helmet in place <strong>and</strong> padding<strong>and</strong> taping the helmet to the backboard to act as a head immobilizer. Football helmetsusually fit very snug <strong>and</strong> make an excellent head immobilizer. They usually raise thehead just enough to match the elevation of the shoulders by the shoulder pads. If the faceprotector must be removed to manage the airway, it can be easily done with a screwdriver,pruning shears, or one of the commercial face mask removers. The team equipmentmanager usually has the proper tools to immediately remove face protectors.b. If a patient wearing a helmet <strong>and</strong> shoulder pads has already had the helmet removedwhen you arrive, or if the helmet must be removed for some reason, you will usually haveto place padding under the head to keep the neck in a neutral position.2. Patients wearing a helmet but no shoulder pads:a. Patients with helmets but no shoulder pads will usually have their necks in a flexed positionunless the helmet is removed or padding is placed under the shoulders. It is better toremove the helmet.b. Motorcycle helmets are usually looser than sports helmets <strong>and</strong> thus may allow the head tomove around inside the helmet. Such helmets do not make good head immobilizers whenpadded <strong>and</strong> taped to the backboard.c. Because patients come in all shapes <strong>and</strong> sizes, there may be instances where the patient’sneck may be in a more neutral position with the helmet in place. Use judgment in suchcases.d. Patients who have full-face motorcycle helmets must have the helmet removed in order toassess <strong>and</strong> manage the airway.Procedure1. Divide the students into teams of two to practice helmet removal. Each student should practiceat least twice (once as rescuer number 1 <strong>and</strong> once as rescuer number 2).2. Review the important points in deciding whether to remove a helmet.3. Have the students practice padding <strong>and</strong> taping the helmet of the football player. Also havethem practice placing padding under the head of the football player who has already had thehelmet removed.4. Demonstrate how to remove the face protector of a football helmet.5. Have the students practice removing the motorcycle helmet.178
Procedure for Removing a Helmet from a Patient with a Possible Cervical Spine Injury1. The first rescuer positions himself or herself above or behind the patient, places his or herh<strong>and</strong>s on each side of the helmet, <strong>and</strong> manually maintains the head <strong>and</strong> neck by holding thehelmet <strong>and</strong> the patient’s neck.2. The second rescuer positions himself or herself to the side of the patient <strong>and</strong> removes thechin strap. Chin straps can usually be removed easily without cutting them.3. The second rescuer then assumes the stabilization by placing one h<strong>and</strong> under the neck at theocciput <strong>and</strong> the other h<strong>and</strong> on the anterior neck, with the thumb pressing on one angle of them<strong>and</strong>ible <strong>and</strong> the index <strong>and</strong> middle fingers pressing on the other angle of the m<strong>and</strong>ible.4. The first rescuer now removes the helmet by pulling out laterally on each side to clear theears <strong>and</strong> then up to remove. Football helmets may need to have the air released <strong>and</strong> ear padsremoved. Full-face helmets will have to be tilted back to clear the nose (tilt the helmet, notthe head). If the patient is wearing glasses, the first rescuer should remove them through thevisual opening before removing the full-face helmet. The second rescuer manually maintainsthe head <strong>and</strong> neck during this procedure.5. After removal of the helmet, the first rescuer takes over SMR by grasping the head on eitherside with his fingers holding the angle of the jaw <strong>and</strong> the occiput.6. The second rescuer now applies a suitable cervical collar.Alternate Procedure for Removing a HelmetThis procedure has the advantage of one rescuer maintaining immobilization of the neckthroughout the whole procedure. This procedure does not work well with full-face helmets.1. The first rescuer positions himself or herself above or behind the patient <strong>and</strong> places his or herh<strong>and</strong>s on each side of the neck at the base of the skull. He or she manually maintains theneck in a neutral position. If necessary, he or she may use his thumbs to perform a modifiedjaw thrust while doing this.2. The second rescuer positions himself or herself over or to the side of the patient <strong>and</strong> removesthe chin strap.3. The second EMT now removes the helmet by pulling out laterally on each side to clear theears <strong>and</strong> then up to remove. The first rescuer maintains SMR during the procedure.4. The second rescuer now applies a suitable cervical collar.Removing a Helmet from a Person Wearing Shoulder Pads1. Follow usual procedure for removing the helmet.2. Place towels under head <strong>and</strong> neck to maintain neutral position.3. Apply a head device.Log-Rolling the Supine Patient179
1. Rescuer 1 maintains SMR. A rigid cervical collar is applied. Even with the collar in place,rescuer 1 maintains the head <strong>and</strong> neck in a neutral position until the log-rolling maneuver iscompleted.2. The patient is placed with legs extended in the normal manner <strong>and</strong> arms (palms inward) extendedby his sides. The patient will be rolled upon one arm with that arm acting as a splintas well as a spacer for the body.3. The long backboard is positioned next to the patient. If one arm is injured, place the backboardon the injured side so that the patient will roll on the uninjured arm.4. Rescuers 2 <strong>and</strong> 3 kneel at the patient’s side opposite the board.5. Rescuer 2 is positioned at the mid-chest area, <strong>and</strong> rescuer 3 is by the upper legs.6. Rescuer 2, using his or her knees, holds the patient’s near arm in place. He or she then reachesacross the patient <strong>and</strong> grasps the shoulder <strong>and</strong> hips, holding the patient’s far arm in place.Usually, it is possible to grasp the patient’s clothing to help with the roll.7. Rescuer 3, with one h<strong>and</strong>, reaches across the patient <strong>and</strong> grasps the hip. With the other h<strong>and</strong>,the feet are held together at the lower legs.8. Rescuer 2, when everyone is ready, gives the order to roll the patient.9. Rescuer 1 carefully keeps the head <strong>and</strong> neck in a neutral position (anterior-posterior as wellas laterally) during the roll.10. Rescuers 2 <strong>and</strong> 3 roll the patient up on his side toward them. The patient’s arms are keptlocked to his or her side to maintain a splinting effect. The head, shoulders, <strong>and</strong> pelvis arekept in line during the roll.11. When the patient is upon his side, rescuer 2 (or rescuer 4, if available) quickly examines theback for injuries.12. The long backboard is now positioned next to the patient <strong>and</strong> held at a 30–45 degree angle byrescuer 4. It there are only three rescuers, the board is pulled into place by rescuer 2 or 3. Theboard is left flat in this case.13. When everybody is ready, rescuer 1 gives the order to roll the patient onto the backboard.This is accomplished keeping head, shoulders, <strong>and</strong> pelvis in line.Log-Rolling the Prone (Face-Down) PatientThe status of the airway is critical for decisions concerning the order of the log-rolling procedure.There are three clinical situations that dictate how you should proceed.1. The patient who is not breathing or who is in severe respiratory difficulty must be log-rolledimmediately in order to manage the airway. Unless the backboard is already positioned, youmust log-roll the patient, manage the airway, <strong>and</strong> then transfer the patient to the backboard(in a second log-rolling step) when ready to transport.2. The patient with profuse bleeding of the mouth or nose must not be turned to the supine position.Profuse upper airway bleeding in a supine patient is a guarantee of aspiration. This patientwill have to be carefully positioned <strong>and</strong> transported prone or on his or her side, allowing180
gravity to help keep the airway clear.3. The patient with an adequate airway <strong>and</strong> respiration should be log-rolled directly onto abackboard.The procedure to log-roll the prone patient who has an adequate airway is as follows:1. Rescuer 1 maintains SMR. When placing the h<strong>and</strong>s on the head <strong>and</strong> neck, the rescuer’sthumbs always point toward the patient’s face. This prevents having the rescuer’s armscrossed when the patient is rolled. A rigid cervical collar is applied.2. The rapid trauma survey is done (including the back), <strong>and</strong> the patient is placed with legs extendedin the normal manner <strong>and</strong> arms (palms inward) extended by his or her side. The patientwill be rolled up on one arm, with that arm acting as a splint as well as a spacer for thebody.3. The long backboard is positioned next to the body. The backboard is placed on the side ofrescuer 1’s lower h<strong>and</strong> (if rescuer 1’s lower h<strong>and</strong> is on the patient’s right side, the backboardis placed on the patient’s right side). If the arm next to the backboard is injured, carefullyraise the arm above the patient’s head so he does not roll on the injured arm.4. Rescuers 2 <strong>and</strong> 3 kneel at the patient’s side opposite the board.5. Rescuer 2 is positioned at the midchest area, <strong>and</strong> rescuer 3 is by the upper legs.6. Rescuer 2 grasps the shoulder <strong>and</strong> the hip. Usually, it is possible to grasp the patient’s clothingto help with the roll.7. Rescuer 3 grasps the hip (holding the near arm in place) <strong>and</strong> the lower legs (holding themtogether).8. Rescuer 2, when everyone is ready, gives the order to roll the patient.9. Rescuer 1 carefully keeps the head <strong>and</strong> neck in a neutral position (anteroposterior as well aslaterally) during the roll.10. Rescuers 2 <strong>and</strong> 3 roll the patient up on his or her side away from them. The patient’s armsare kept locked to his or her side to maintain a splinting effect. The head, shoulders, <strong>and</strong> pelvisare kept in line during the roll.11. The backboard is now positioned next to the patient <strong>and</strong> held at a 30–45-degree angle by rescuer4. If there are only three rescuers, the board is pulled into placed by rescuer 2 or 3. Theboard is left flat in this case.12. When everyone is ready, rescuer 1 gives the order to roll the patient onto the backboard. Thisis accomplished keeping the head, shoulders, <strong>and</strong> pelvis in line.Securing the Patient to the Long BackboardThere are several different methods of securing the patient using straps. Three of the best commercialdevices for SMR are the Reeves sleeve, the Miller body splint, <strong>and</strong> the vacuum backboard.The Reeves sleeve is a heavy-duty sleeve into which a st<strong>and</strong>ard backboard will slide. At-181
tached to this sleeve are the following:a. A head deviceb. Heavy vinyl-coated nylon panels that go over the chest <strong>and</strong> abdomen <strong>and</strong> are securedwith heavy nylon straps <strong>and</strong> quick-release connectorsc. Two full-length leg panels to secure the lower extremitiesd. Straps to hold the arms in placee. Six carrying h<strong>and</strong>lesf. Metal rings (2500-lb strength) for lifting the patient by ropeWhen the patient is in this device, SMR is maintained when lifted horizontally, vertically, oreven carried on his or her side (like a suitcase). This device is excellent for the confused, combativepatient who must be restrained for his own safety.The Miller body splint is a combination backboard, head device, <strong>and</strong> SMR device. Like theReeves sleeve, it does an excellent job of full-body SMR with a minimum of time <strong>and</strong> effort.The vacuum backboard, essentially a full-body vacuum splint, actually molds around the patient<strong>and</strong> can be used to stabilize the head, neck, torso, <strong>and</strong> extremities in any position. It appearsto be an extremely useful piece of equipment.Many other innovative immobilization devices are now available. Be sure to be familiar withthe ones that are in common use in your area.The procedure for securing the patient to the long backboard using straps is as follows:1. The head <strong>and</strong> neck are held in a neutral position (a rigid collar should already be inplace), while padding is placed behind the head to maintain this position. A blanket rollor commercial head device is applied <strong>and</strong> strapped into position using elastic wraps orwide tape. Do not use chin straps unless they can be applied to the chin portion of thecervical collar itself. Chin straps that hold the patient’s mouth closed guarantee aspirationif the patient vomits.2. Two straps are laced through the top two lateral holes of the backboard. Apply them sothat they connect together across the chest below the armpits <strong>and</strong> act as an anchor.3. Bring the other ends of the straps over the shoulders <strong>and</strong> across the chest.4. Lace the straps through the lateral holes at the level of the pelvis.5. Bring the straps back across the lower pelvis <strong>and</strong> upper legs, then lace through the lateralholes <strong>and</strong> connect below the knees. The straps must be applied snugly so that the bodydoes not move if the board has to be turned to allow the patient to vomit.If you are not using commercial strapping that accompanies the long board, use 12-foot straps.Nine-foot straps will work, but they are usually too short to go below the knees. If you use two9-foot straps, most adults will require another strap below the knees.Applying <strong>and</strong> Securing a Long Backboard to a St<strong>and</strong>ing Patient182
Method I1. One rescuer st<strong>and</strong>s behind the patient <strong>and</strong> manually maintains the head <strong>and</strong> neck in a neutralposition. A rigid cervical collar is applied. The rescuer continues to maintain SMR.2. A long backboard is placed on the ground behind the patient.3. Other rescuers stabilize the shoulders <strong>and</strong> trunk <strong>and</strong> allow the patient to carefully sit down onthe backboard.4. The patient is carefully lowered back onto the backboard, maintaining stabilization of thehead, neck, <strong>and</strong> trunk.5. The patient is centered on the backboard <strong>and</strong> secured.Method II1. Rescuer 1 st<strong>and</strong>s in front of the patient <strong>and</strong> manually maintains the head <strong>and</strong> neck in a neutralposition. A suitable cervical collar is applied. Rescuer 1 continues to maintain SMR.2. Rescuer 2 places a long backboard against the patient’s back.3. Rescuer 3 secures the patient to the board using straps. These must include an anchor straphigh on the chest as well as ones that cross over the shoulders, pelvis, <strong>and</strong> legs to preventmovement when the board is tilted down.4. Padding is placed behind the head to maintain a neutral position, <strong>and</strong> a blanket roll or commercialhead device is applied <strong>and</strong> secured using elastic wraps or wide tape.5. The board is carefully tilted back onto a stretcher.Immobilizing the Head <strong>and</strong> Neck when a Neutral Position Cannot SafelyBe AttainedIf the head or neck is held in an angulated position <strong>and</strong> the patient complains of pain on any attemptto realign it, you should initiate SMR in the position found. The same is true of the unconsciouspatient whose neck is held to one side <strong>and</strong> does not easily straighten with gentle traction.You cannot use a cervical collar or commercial head device in this situation. You must use padsor a blanket roll <strong>and</strong> careful taping to secure the head <strong>and</strong> neck in the position found.SKILL STATION 5: CHEST DECOMPRESSION/FLUIDRESUSCITATIONBefore beginning, review “Teaching Skill Stations” (see Chapter 3). Minimum number of instructorsneeded: 2.ObjectivesAt the conclusion of this station, the student should be able to:1. Recite the indications for emergency decompression of a tension pneumothorax.183
2. Recite the complications of needle decompression of a tension pneumothorax.3. Perform needle decompression of a tension pneumothorax.4. Perform cannulation of the external jugular vein.5. Recite the indications for use of intraosseous infusion.6. Perform intraosseous infusion.Advanced Skill 5A: Chest DecompressionProcedure to Make a One-Way Valve for DecompressionThere are several ways to make a one-way valve to attach to the decompressing catheter. Theinstructor may demonstrate one or all of them.1. The best valve now available is the Asherman Chest Seal ® , which is available commercially<strong>and</strong> can be used to seal open chest wounds or as a one-way valve for the needle when youdecompress a tension pneumothorax (see Figures 6-10 <strong>and</strong> 6-11 in the textbook).2. A satisfactory valve can be made by removing the plunger from a plastic 10-cc syringe, cuttingthe barrel off at about the 5-cc mark, then pulling a penrose drain over the barrel. Thedevice will directly attach to the plastic decompressing catheter <strong>and</strong> is an excellent one-wayflutter valve to allow air to escape (see Figures 6-9, 6-12, <strong>and</strong> 6-13 in the textbook).3. A water-seal drainage system may be made using a large bore catheter <strong>and</strong> IV tubing. Cut offthe IV tubing where it attaches to the IV bottle. Insert this end into a container of water, <strong>and</strong>place it below the level of the chest. Insert the catheter into the chest <strong>and</strong> then remove theneedle. Attach the IV tubing to the catheter. This is a sophisticated system, although not apractical one, because the container of water is likely to be turned over in a moving ambulance.Making the Artificial Tension PneumothoraxCommercial decompressable tension pneumothorax models have been available, but they do notwork well with the anterior approach. Revised models should be available soon.Material Needed to Make an Artificial Tension Pneumothorax• Section of pork ribs at least 12″ by 12″• Small trailer wheel inner tube• Valve core remover• H<strong>and</strong>, foot, or electric air pump• Two 8-fluid-oz. bottles of tire puncture sealer. The best are Pre-Seal by Lubri Tech (availableat most motorcycle dealers) <strong>and</strong> Stop-Leak by Sears (available at any Sears store)• Roll of plastic wrap• Roll of duct tape or foam latex tape184
Procedure to Make the Artificial Tension Pneumothorax1. Assemble the material.2. Remove the valve core from the inner tube.3. Inject the contents of two bottles of tire sealer into the inner tube, <strong>and</strong> replace the valve core.4. Attach the air pump, <strong>and</strong> pump a small amount of air into the tube.5. Rotate the tube so that the puncture sealer can coat the entire inner surface.6. Fold the inner tube over on itself, <strong>and</strong> tape it together with duct tape.7. Pump up the tube until there is a few pounds of pressure inside. Use just enough to simulate atension pneumothorax. Excessive pressure will cause the tube to leak when the students begindecompression.8. Wrap the ribs in plastic wrap.9. Attach pork ribs over the central area of the tube. Tape well with duct tape or foam latex tapeto simulate skin.10. Use large bore over-the-needle catheter to decompress the “tension pneumothorax.”11. Attach a one-way valve. You can make one from a 10-cc syringe <strong>and</strong> a penrose drain, or usean Asherman Chest Seal ® .12. Occasionally pump more air into the tube to replace the air that has been “decompressed.”Equipment ListItemQuantityArtificial tension pneumothorax 1#14 over-the-needle catheters (Jelco) 20IV tubing (optional) 1Small container for water (optional) 1Rubber condoms (optional) 10Paper towels (rolls) 110-cc syringes 2Penrose drains 2Asherman Chest Seal ® (optional) 1Indications As with all advanced procedures, this technique must be accepted local protocol,<strong>and</strong> you must have permission from medical direction (voice or protocol) before performing. Theconservative management of tension pneumothorax is 100 percent oxygen, assisted ventilation,<strong>and</strong> rapid transport. The indication for performing emergency field decompression is the presenceof a tension pneumothorax <strong>and</strong> more than one of the following:185
• Respiratory distress <strong>and</strong> cyanosis• Loss of the radial pulse (late shock)• Decreasing level of consciousness (not from head injury)Complications• Laceration of intercostal vessel with resultant hemorrhage: The intercostal artery <strong>and</strong> veinrun around the inferior margin of each rib. Poor placement of the needle can lacerate one ofthese vessels.• Creation of a pneumothorax may occur if not already present. If your assessment was notcorrect, you may give the patient a pneumothorax when you insert the needle into the chest.• Laceration of the lung is possible. Poor technique or inappropriate insertion (no pneumothoraxpresent) can cause laceration of the lung with subsequent bleeding <strong>and</strong> more air leak.• Risk of infection is a consideration. Adequate skin prep with an antiseptic will usually preventinfection.Procedure1. Assess the patient to be sure the condition is due to a tension pneumothorax.a. Poor ventilation in spite of an open airwayb. Neck vein distension (may not be present if there is associated severe hemorrhage, i.e.,hypovolemic shock)c. Tracheal deviation away from the side of the injury (almost never present)d. Absent or decreased breath sounds on the affected sidee. Tympany (hyperresonance) to percussion on the affected sidef. Shock2. Give the patient high-flow oxygen, <strong>and</strong> assist ventilation.3. Determine that indications for emergency decompression are present; then, obtain medicaldirection (protocol or voice) to perform the procedure.4. Identify the second or third intercostal space on the anterior chest at the midclavicular line onthe same side as the pneumothorax. This may be done by feeling the “angle of Louis,” thebump located on the sternum about a quarter of the way from the suprasternal notch. The anteriorsite is preferred, because the patient lying supine has a better chance of having accumulatedair in the pleural space entered when decompressing at the midclavicular area as opposedto the midaxillary area. Monitoring of the site is also easier if performed in the anteriorsite, because the catheter is not as likely to be unintentionally dislodged when the patient ismoved. However, if there is significant anterior chest trauma, the alternate site may be used,the midaxillary line, the fourth or fifth intercostal space directly above the fifth or sixth rib(the nipple is over the fifth rib).5. Quickly prepare the area with an antiseptic.186
6. Use a large bore over-the-needle catheter at least 2 inches (5 cm) long to do the decompression.Remove the plastic cap from the catheter (to allow the air to exit the needle as it passesinto the pleural space) <strong>and</strong> insert the needle into the skin over the superior border of the thirdrib, midclavicular line. Direct the needle into the intercostal space at a 90-degree angle to thethird rib. The direction of the bevel is irrelevant to successful results. As the needle enters thepleural space, there will be a “pop.” If a tension pneumothorax is present, there will be a hissof air as the pneumothorax is decompressed. Advance the catheter into the chest, remove theneedle, <strong>and</strong> tape the catheter hub to the chest wall.7. Cover the hub with an Asherman Chest Seal ® , or attach a one-way valve.8. Leave the catheter in place until it is replaced by a chest tube at the hospital.Advanced Skill 5B: Cannulation of the External Jugular VeinEquipment ListItemQuantityLive model 1Marking pencils (red <strong>and</strong> blue) 1 eachImportant Points1. Stress the importance of learning to use large bore needles. In the same period of time, a 14-gauge cannula will infuse twice as much fluid as a 16-gauge cannula, <strong>and</strong> three times asmuch as an 18-gauge cannula. A 20-gauge cannula infuses so little fluid that it is useful onlyfor pediatric patients or for keep-open lines.2. Since you are only simulating starting the IV line, you do not actually have to use a needle todemonstrate the technique. Your model will be more comfortable if you use something blunt.IndicationThe pediatric or adult patient who needs IV access <strong>and</strong> in whom no suitable peripheral vein isfound.Surface AnatomyThe external jugular vein runs in a line from the angle of the jaw to the junction of the medial<strong>and</strong> middle third of the clavicle. This vein is usually easily visible through the skin <strong>and</strong> can bemade more prominent by pressing on it just above the clavicle. It runs into the subclavian vein.Procedure1. The patient must be in the supine position, preferably head down, to distend the vein <strong>and</strong> preventair embolism.2. If there is no danger of cervical spine injury, you should turn the patient’s head to the oppositeside. If there is a danger of a C-spine injury, one rescuer must stabilize the head in a neu-187
tral position (it must not be turned) while the IV is started by a second rescuer.3. Quickly prepare the skin with an antiseptic, <strong>and</strong> then align the cannula with the vein. Theneedle will be pointing at the clavicle at about the junction of the middle <strong>and</strong> medial thirds.4. With one finger, press on the vein just above the clavicle. This should make the vein moreprominent.5. Insert the needle into the vein at about the midportion <strong>and</strong> cannulate in the usual way.6. If it was not already done, draw a 30-cc sample of blood <strong>and</strong> store it in the appropriate tubes7. Tape down the line securely. If there is danger of a cervical spine injury, a cervical collar canbe applied over the IV site.Advanced Skill 5C: Intraosseous InfusionEquipment ListItemQuantityArtificial infant leg for IO insertion 2Betadine solution4 fluid ounces 10 ccsyringes1 per student*16–18-gauge intraosseous needles 1 per student*Nonsterile rubber gloves1 boxPaper towels1 roll*One per student means number of students in the skill station at each teaching session (not theentire class).Important Points1. Stress that intraosseous infusion is rarely used as a first line procedure for intravenous access.When it is used in an EMS system, protocols should be employed directing criteria forit to be used.2. Children six years of age <strong>and</strong> younger are the target population for successful implementationof intraosseous infusion.3. If you are not going to use one of the commercial pediatric intraosseous legs, the anatomicalsites of insertion should be demonstrated using one of the students as a model before practicingon animal bones.4. Stress that an intraosseous line is never placed in a fractured extremity.5. As with all advanced procedures, this technique must be accepted local protocol, <strong>and</strong> permissionfrom medical direction (protocol or verbal) must be obtained before performing.6. If infiltration occurs (rare), do not reuse the same bone. Another site must be selected, as fluidwill leak out of the original hole made in the bone.188
7. Potential complications:a. Subperiosteal infusion due to improper placementb. Osteomyelitisc. Sepsisd. Fat embolisme. Marrow damagef. Tibial fracture if needle is too largeStudies have proven all of these complications to be rare; however, good aseptic technique isimportant, just as with intravenous therapy.DiscussionThe technique of bone marrow infusion of fluid <strong>and</strong> drugs is not new. Intraosseous infusion (IO)was first described in 1922 <strong>and</strong> was used commonly in the 1930s <strong>and</strong> 1940s as an alternative tointravenous infusion of crystalloids, drugs, <strong>and</strong> blood. The technique was “rediscovered” in the1980s, <strong>and</strong> studies have confirmed it to be a fast, safe, <strong>and</strong> effective route to infuse medications,fluids, <strong>and</strong> blood. Intraosseous infusion can be used for giving medications in both adults <strong>and</strong>children, but because the flow rate is not as rapid as peripheral venous infusions, it cannot beused for rapid volume replacement in adults. The F.A.S.T.1 TM sternal intraosseous system wasdeveloped several years ago <strong>and</strong> has been used successfully by many services. Recently, otheradult systems developed to place an IO needle in the tibia or humerus have become available.All of these commercial systems may provide adequate flow rates for adult volume resuscitation.Intraosseous infusion has the advantage of being quick <strong>and</strong> simple to perform, while providing astable (anchored in bone) access that is not easily dislodged during transport.Indications• A pediatric or adult patient who is in cardiac arrest <strong>and</strong> in whom you cannot quickly obtainperipheral venous access• Hypovolemic pediatric patients who have a prolonged transport <strong>and</strong> in whom you are unableto quickly obtain peripheral venous accessProcedure1. Determine the need for this procedure, <strong>and</strong> obtain permission from medical direction (protocolor verbal).2. Have all needed equipment ready prior to bone penetration.3. Identify the site on the proximal tibia, one fingerbreath below the tibial tuberosity either midlineor slightly medial to the midline.4. Prep the skin with antiseptic.5. Obtain the proper needle. Several commercial IO needles are available. The needle must189
have a stylet to prevent becoming plugged with bone. While 13-, 18-, <strong>and</strong> 20-gauge spinalneedles will work, they are difficult <strong>and</strong> uncomfortable to grip during the insertion process.Long spinal needles tend to bend easily, so if you use spinal needles, try to obtain the shortones. The 13-gauge needle can break a bone in a small child so use a smaller needle withsmaller patients. The preferred needle is a 14- to 18-gauge intraosseous needle, but bonemarrow needles can also be used.6. Using aseptic technique, insert the needle into the bone marrow cavity. Place s<strong>and</strong>bags orrolled towels under the knee. Insert the needle (with stylet in place) perpendicular to the skindirected away from the epiphyseal plate <strong>and</strong> advance to the periosteum. Penetrate the bonewith a slow boring or twisting motion until you feel a sudden “give” (decrease in resistance)as the needle enters the marrow cavity. This can be confirmed by removing the stylet <strong>and</strong> aspiratingblood <strong>and</strong> bone marrow.7. Confirm proper placement.a. The needle should st<strong>and</strong> without support.b. You should be able to aspirate bone marrow.c. IV fluids should infuse freely.For the purposes of this skill station <strong>and</strong> identification of proper needle placement, havestudents draw up a small amount of betadine solution <strong>and</strong> infuse it into the bones to visualizevascular accessibility.8. Attach st<strong>and</strong>ard IV tubing, <strong>and</strong> infuse fluid <strong>and</strong>/or medications. Tape the tubing to the skin,<strong>and</strong> secure the bone marrow needle as if to secure an impaled object (4 × 4’s taped aroundinsertion site).SKILL STATION 6: PATIENT ASSESSMENT AND MANAGEMENTBefore beginning, review “Teaching Skill Stations” (see Chapter 3). Minimum instructorsneeded: 1.ObjectiveAt the conclusion of this station, the student should be able to demonstrate the proper sequenceof assessment <strong>and</strong> management of a trauma patient.Important Points1. The time allowed (30 minutes) is very short. You must begin immediately.2. Each group of students will rotate through patient assessment <strong>and</strong> management twice. Thosegoing through the station the first time should watch you do a demonstration of the ITLSprimary survey, detailed exam, <strong>and</strong> ongoing exam. You should also review the ground rulesthat will be in effect for the patient assessment scenarios the second day. If time permits,have the students practice patient assessment. Those who rotated through the other patientassessment station first should spend the whole period practicing patient assessment. Thus,half of the groups will watch you demonstrate assessment <strong>and</strong> go over ground rules <strong>and</strong> the190
other half will spend the period practicing assessment.3. Every student should be given a grade sheet for study purposes.4. Students not actually participating in the assessment should follow along with the gradesheet.5. At the end of the scenario, point out that, while this case was a little tricky, it is an exampleof an actual case in which the patient died because the history of the stab wound was not obtained.Equipment List (You Will Have Two Stations, So Double the Amounts Below)ItemQuantityLive model 1Moulage kit or red felt-tip pen 1Rigid cervical collar 1Monitor-defibrillator (optional) 1<strong>Trauma</strong> box 1BP cuff 1Stethoscope 1Kerlix rolls 14″ elastic wraps 44 × 4 gauze pads (unsterile) 20Wide tape (rolls) 1IV tubing 2Oxygen mask or nasal prongs 1Long backboard with straps 1Cushion-type head immobilizer 1Asherman Chest Seal ® , defibrillation pads,or plastic wrap 1Grade sheets1 per studentProcedureWhen you are demonstrating assessment, choose two students to assist you perform initial assessment,rapid trauma survey, secondary survey, <strong>and</strong> ongoing exam. Use the trauma scenario.Explain <strong>and</strong> demonstrate exactly how you want them to do the exams.When you are having the students practice patient assessment, select three students to be therescue team. Have them evaluate the patient who is described in the trauma scenario. Any extra191
students should follow using the grade sheet. If possible, try to go through the scenario twice sothat all the students can participate. If two instructors are present, one instructor should interactwith the student during the scenario while the other instructor follows along with the grade sheet(just as you will do in the practice <strong>and</strong> testing scenarios). The student team leader should be giventhe completed grade sheet to use for study.<strong>Trauma</strong> ScenarioA young male was driving through an intersection. His automobile hit another vehicle. He wasnot wearing restraints, <strong>and</strong> the vehicle did not have an air bag.Injuries1. Fracture of C-7, but no spinal cord injury yet2. Stab wound to anterior chest, with development of pericardial tamponadePatient InstructionsYou are initially awake <strong>and</strong> alert. If asked, you complain of pain in the left chest <strong>and</strong> upper back.If your neck is not stabilized or if your neck is allowed to move, immediately become paralyzed.HistoryS—pain in left chest <strong>and</strong> upper backA—no allergiesM—takes no medicationsP—no significant illnessL—last meal eaten two hours ago (hot dogs <strong>and</strong> lima beans)E—“I was stabbed by my girlfriend’s husb<strong>and</strong>. I was trying to get to the hospital when theaccident occurred.”Moulage InstructionsMake contusions over sternum <strong>and</strong> forehead. Make a small puncture wound on the anterior leftchest.Patient Evaluation: lnstructor’s Information (Memorize)Scene Size-UpNo dangers, obvious mechanism of injury is a deceleration automobile accident (windshieldcracked, steering wheel bent). The other mechanism is a stab wound of the chest (this mustbe obtained by history). The driver was the only occupant of his vehicle; the other vehiclehad no injured occupants.192
Initial assessmentGeneral impression—patient appears in no distressLOC—patient is alert <strong>and</strong> responds appropriatelyAirway—clearBreathing—rate: normal, quality: normalVentilation instructions—none, may order oxygenCirculationPulse—present <strong>and</strong> strong at the wrist; rate appears normalBleeding—none obviousSkin color <strong>and</strong> condition—warm <strong>and</strong> dry <strong>and</strong> pinkDecision—rapid trauma survey due to mechanismRapid trauma surveyHead <strong>and</strong> face—bruising on forehead, otherwise normalNeck—tender at base of neck, no other signs of trauma.Trachea—midlineNeck veins—flatChestLooking—contusion from steering wheel, small puncture wound to left chestFeeling—tender over sternum, no instability, no crepitationListening—breath sounds present <strong>and</strong> equal, heart sounds normalHeart sounds—normalAbdomen—no DCAP-BTLSPelvis—no DCAP-BTLS, no instability or crepitationLegs—no DCAP-BTLS, no instability or crepitationBack—no signs of traumaDecision—load <strong>and</strong> go due to puncture wound of chestHistory (obtained by team leader)—must be given by the patientS—pain in left chest <strong>and</strong> upper backA—no allergiesM—takes no medicationsP—no significant illnessL—eaten two hours ago (hot dogs <strong>and</strong> lima beans)193
E—“I was stabbed by my girlfriend’s husb<strong>and</strong>. I was trying to get to the hospital whenthe accident occurred.”Vital signs (may be obtained by team member)BP—110/70Pulse—90 (slightly irregular)Respiration—20/mmDecision—Seal puncture wound of chest, give oxygen, start two large bore IVs, but run atKVO rateSecondary surveyHistory <strong>and</strong> vital signs—unchanged from aboveNeurologicalLOC—alert <strong>and</strong> orientedPupils—equal <strong>and</strong> reactiveSensory—abnormal “tingling” sensation below the neckMotor—normalHead—scalp normal, contusion <strong>and</strong> tenderness of the forehead, no lacerations or deformity,face—no DCAP-BTLS, no instability or crepitation, no Battle’s sign or raccoon eyes, noblood or fluid from ears or noseAirway—open <strong>and</strong> clearBreathing—unchanged from aboveNeck—tender to palpationTrachea—midlineNeck veins—slightly distendedCirculation—skin still warm <strong>and</strong> dry, BP unchangedChest—unchanged from aboveHeart sounds—normalAbdomen—no tenderness, not distendedPelvis—do not examine againExtremitiesUpper—no injuries noted, good pulses <strong>and</strong> motor function, sensation—some “tingling”feelingLower—no injuries noted, good pulses <strong>and</strong> motor function, sensation—some “tingling”feelingDecision—continue present treatment194
Ongoing examNeurologicalLOC—patient confused <strong>and</strong> agitatedPupils—slightly dilated, but react equallySensory—unchangedMotor—unchangedGCS—(14) eyes (4), verbal (4), motor (6)Airway—clearBreathing—rate: 26/minute, quality: normalCirculationPulses—not present at the wrist, present but weak at neck; rate appears rapidBlood pressure—70/50Pulse—160/minSkin color <strong>and</strong> condition—cool, clammy, <strong>and</strong> paleNeck—no swelling or discolorationTrachea—midlineNeck veins—distendedChestLooking—contusion from steering wheel, small puncture wound to left chestFeeling—no instability, no crepitationListening—breaths sounds present <strong>and</strong> equal, heart sounds decreased from previous examsAbdomen—soft, not distended, no response to palpationAssessment of injuries—no bleeding from the stab wound, no change in bruise on sternumInterventionsTransport immediately if not already en routeCheck to see that 100 percent oxygen is being givenBegin two IVs if not already done—cautious fluid challenge during transportReport to medical directionCardiac monitor—sinus tachycardiaPulse oximeter—98 percent saturationRepeat vital signs after IV fluids:195
BP—90/60Pulse—130Respiration—24Now responds to verbal stimuli196
7Other ITLS CoursesREFRESHER COURSE FOR INSTRUCTORS<strong>Trauma</strong> care changes over time; therefore, the ITLS courses must change to reflect new st<strong>and</strong>ardsof care. <strong>Instructor</strong>s who are very active teachers may only require a new textbook <strong>and</strong> anopen-book written test to demonstrate that they underst<strong>and</strong> the changes in the ITLS courses.Most will be better served if they attend a half-day or one-day refresher course designed to tellthem about changes in the book <strong>and</strong> demonstrate changes in techniques. The following is a tentativeagenda for a half-day refresher course. <strong>Instructor</strong>s should read the new edition of the textbefore the course (unless the course precedes release of a new edition of the text).Example of a Refresher Course AgendaRegistration <strong>and</strong> coffeeReview of the structure of ITLS <strong>and</strong> the ITLS chapter structureReview of chapter policy <strong>and</strong> proceduresReview of new didactic materialBreakDemonstration of new skills30 min15 min15 min60 min15 min60–120 minRECERTIFICATION COURSE FOR PROVIDERS<strong>Trauma</strong> care is changing rapidly, <strong>and</strong> all professionals experience some degree of skills decay. Itis reasonable that every few years ITLS providers should recertify their trauma assessment <strong>and</strong>management skills. The following is a tentative agenda for a one-day refresher course. Studentsshould reread the book (or read the new edition), take a pretest, <strong>and</strong> then study the areas of weaknessas identified on the pretest. Students should be prepared to take a written test during the recertificationcourse. They should spend the morning reviewing skills <strong>and</strong> the afternoon reviewingpatient assessment.Example of a Recertification Course for Providers AgendaRegistration <strong>and</strong> collection of pretestsWritten testSkill stationsLunch30 min60 min30 min each60 min197
Review of patient assessmentPatient assessment scenario practice <strong>and</strong> testingFaculty meeting15 min120 min30 minAFFILIATE FACULTY TRAINING PROGRAM<strong>Instructor</strong>s who are chosen to be affiliate faculty members should have a brief training session toprepare them for this role. This could be scheduled on the evening before a course in which theyare to teach.Example of an Affiliate Faculty Training Program AgendaRegistrationWelcome <strong>and</strong> course overviewITLS: A global perspectiveChapter ITLS: A local perspectiveOverview of chapter policies <strong>and</strong> proceduresRoles <strong>and</strong> responsibilities of the chapter affiliate facultyCommon perils <strong>and</strong> pitfalls encountered in a “typical” ITLS classReview of the ITLS grading systemQuestions <strong>and</strong> answersSummary30 min5 min15 min15 min15 min15 min30 min5 min10 minBRIDGE COURSE FOR PHTLS INSTRUCTORSA PHTLS instructor may become an ITLS instructor following successful completion of a chapter-approvedbridging course, which emphasizes ITLS patient assessment, administrative structure,<strong>and</strong> philosophy of ITLS. After completion, the local chapter’s policies for provisional instructorswill apply <strong>and</strong> must include monitoring. See “The Bridge Course Policy” in Chapter 8.Example of a Bridge Course for PHTLS <strong>Instructor</strong>s AgendaRegistration <strong>and</strong> collection of pretestsWritten testAdministrative structure• ITLS structure <strong>and</strong> philosophy• Chapter structure <strong>and</strong> philosophy• Chapter policy <strong>and</strong> procedures30 min60 min45 min198
• Roles of a chapter ITLS instructor• Chapter precourse <strong>and</strong> postcourse materialBreakSkill stations• Preskill setup• Skill lesson presentation• Assistant instructors<strong>Instructor</strong> c<strong>and</strong>idate demonstrations• Basic <strong>and</strong> Advanced Airway• Short SMR Devices/Emergency Rescue <strong>and</strong> Rapid Extrication• Traction Splints• Chest Decompression/Fluid Resuscitation• Helmet Management/Log-Roll/Long BackboardLunchCourse objectives, lesson plans, <strong>and</strong> curriculum• Advanced ITLS course lesson plan• Basic ITLS course lesson plan• Combined ITLS course lesson plan• Teaching stations• Testing stationsITLS patient assessmentPatient assessment demonstration<strong>Instructor</strong> c<strong>and</strong>idate demonstrations: patient assessment teaching <strong>and</strong> testingFaculty meeting15 min30 min90 min60 min30 min30 min15 min90 min199
8Policies <strong>and</strong> ProceduresPolicy <strong>and</strong> procedure manuals for each chapter are available through that chapter’s ITLS office.THE ITLS ORGANIZATION:INTERNATIONAL TRAUMA LIFE SUPPORT, INC.ITLS, Inc. is a nonprofit corporation for the purpose of providing education to both basic <strong>and</strong>advanced EMS providers in the management of the acutely traumatized patient. 1 The organizationis supported by financial assessments upon every ITLS provider <strong>and</strong> instructor trained. Thisassessment was set in place as a voluntary contribution by the chapter organizations at the January1985 organizational meeting in Atlanta. 2 Other financial support for the organization is providedby royalties from the text <strong>and</strong> by the sale of texts <strong>and</strong> accessory materials through the internationaloffice.As stated in the articles of incorporation, the purpose of the organization is to provide traumatraining for EMS personnel. However, the proper disposition of the program, including theanalysis of methods of education of the adult learner, assessment of the state of the art in traumacare, performance of research in trauma care <strong>and</strong> patient assessment, efficient management of theorganization, provision of venues for organizational meetings, <strong>and</strong> support of the organization’scommittees, are clearly issues within the purview of ITLS.ITLS is a continually developing organization. As long as the program is provided as a methodof behavior modification relative to patient assessment <strong>and</strong> management for the EMS provider,ITLS will continue to exist.ITLS, as a nonprofit corporation, has officers <strong>and</strong> an executive committee. Chapter delegatesat the annual meeting of the corporation elect the board of directors annually. The board membershave rotating terms of three years, requiring m<strong>and</strong>atory appraisal by the general body of theorganization. Hence, from the most basic provider within the educational framework to the highesttier of organizational management, ITLS is sensitive <strong>and</strong> responsive to its membership.The executive director position is occupied by Ginny Kennedy Palys. The board of directorsof ITLS appoints this position, <strong>and</strong> the term is limited only according to regular performance appraisalby the board.<strong>International</strong> <strong>Trauma</strong> ConferenceEach year the <strong>International</strong> <strong>Trauma</strong> Conference is held in a different location throughout theworld to facilitate educational sessions <strong>and</strong> the annual meeting. Opportunity is provided toreview the instructional materials, review the results of the program teaching internationally,hear committee reports, <strong>and</strong> gain general consensus regarding specific items taught within theprogram, such as how best to perform the patient primary survey in the trauma situation.Representatives from each chapter attend, as well as invited members, such as representatives200
from ACEP, ENA, <strong>and</strong> other interested organizations. The ITLS <strong>International</strong> <strong>Trauma</strong>Conference meets annually <strong>and</strong> has done so since January 1985.201
ITLS Organizational ChartITLS Board of Directors↓<strong>International</strong> Meeting Delegates↓Chapter Advisory Committee↓Chapter Medical Director↓Chapter <strong>Coordinator</strong>↓Chapter Affiliate Faculty↓Course Medical DirectorCourse <strong>Coordinator</strong>s<strong>Instructor</strong>s↓Providers202
ITLS CHAPTER STRUCTUREThe educational <strong>and</strong> business mechanisms of the management of ITLS within a given chapter arebased on two broad groups: the faculty <strong>and</strong> providers, <strong>and</strong> the administrative leaders <strong>and</strong> coursemanagers. These groups are defined by the following levels.Faculty <strong>and</strong> ProvidersAffiliate Faculty (also serves as a course manager)Basic ITLS <strong>Instructor</strong>Advanced ITLS <strong>Instructor</strong>Pediatric ITLS <strong>Instructor</strong>ITLS Access <strong>Instructor</strong>Basic ITLS ProviderAdvanced ITLS ProviderPediatric ITLS ProviderITLS Access ProviderAdministrative Leaders of the Chapter ProgramAdvisory Committee MemberAdvisory Committee Chair<strong>International</strong> Meeting DelegateChapter Medical DirectorChapter <strong>Coordinator</strong><strong>International</strong> FacultyCourse Managers within the Chapter ProgramCourse Medical DirectorCourse <strong>Coordinator</strong>Affiliate FacultyITLS CHAPTER RESPONSIBILITIESThe following is a list of some of the ongoing responsibilities of designated ITLS chapters. Thislist is not all-inclusive <strong>and</strong> may include other chapter-specific responsibilities.• Coordinate local ITLS courses.• Collect data, including the number of providers <strong>and</strong> various faculty members.203
• Disseminate information from the ITLS Office to the constituents of the chapter.• Provide information to the ITLS office on ITLS advisory committee activities <strong>and</strong> new conceptsdeveloped within the chapter.• Provide quality assurance for ITLS courses that are conducted within the chapter.• Provide local financial management for ITLS chapter programs.• Provide positive public relations for ITLS advisory committee activities conducted within thechapter.• Appoint delegates to represent the chapter at the ITLS <strong>International</strong> Congress.• Send rosters <strong>and</strong> fees at least quarterly to ITLS.ITLS RESPONSIBILITIES TO THE CHAPTERSThe following is a list of ongoing activities <strong>and</strong> services that ITLS provides its chapters. This listis not intended to be all-inclusive.• Disseminate current information to chapters regarding changes in protocols, changes in ITLSteaching materials, <strong>and</strong> updates on revisions to ITLS policies <strong>and</strong> procedures.• Provide resources to new chapters <strong>and</strong> organizational materials to assist them in developingITLS programs.• Provide a clearinghouse for ITLS committee recommendations to the chapters.• Provide quality assurance at an international level by enforcing the guidelines <strong>and</strong> st<strong>and</strong>ardsrecommended by the ITLS board of directors <strong>and</strong> committees.• Conduct the annual meeting <strong>and</strong> trauma conference for constituents from all chapters to berepresented.• Prepare financial reports.• Publish an ITLS newsletter <strong>and</strong> maintain a Web site designed to disseminate information tothe chapters.• Distribute ITLS instructional materials <strong>and</strong> novelties.• Distribute all ITLS certification cards <strong>and</strong> certificates, <strong>and</strong> maintain course roster information.ITLS CERTIFICATIONS204
Basic ITLS ProviderPrerequisites The c<strong>and</strong>idate must be an entry-level EMS provider such as a first responder, basicemergency medical technician, or other allied health professional who holds suitable qualificationsfor entry.Requirements for Certification The c<strong>and</strong>idate must attend all the lectures <strong>and</strong> skill stations,<strong>and</strong> obtain a written test score of at least 74 percent <strong>and</strong> at least “adequate” on the patient assessmenttest. The local chapter may require a higher score.Length of Certification Three years or whatever length is deemed appropriate by the chapter.Recertification The provider must attend an approved basic ITLS recertification course prior tothe expiration date on the card or complete a certified ITLS provider course. The local chaptermay decide which is appropriate.Advanced ITLS ProviderPrerequisites The c<strong>and</strong>idate must be an advanced level practitioner such as a certified/licensedEMT–Intermediate, paramedic, registered nurse, physician assistant, physician, or other alliedhealth professional. (The definition of an advanced level practitioner is one who can performadvanced airway procedures, perform IV cannulation, <strong>and</strong> administer IV fluids. Advanced airwaymanagement is defined as the use of a blind insertion airway device, or endotracheal tube.)Requirements for Certification The c<strong>and</strong>idate must attend all the lectures <strong>and</strong> skill stations,<strong>and</strong> obtain a written test score of at least 74 percent <strong>and</strong> at least “adequate” on the patient assessmenttest. The local chapter may require a higher score.Length of Certification Three years or whatever length is deemed appropriate by the chapter.Recertification The provider must attend an approved advanced ITLS recertification courseprior to the expiration date on the card or complete a certified ITLS provider course. The localchapter may decide which is appropriate.Pediatric ITLS ProviderPrerequisites It is strongly suggested that the c<strong>and</strong>idate be a certified basic or advanced ITLSor PHTLS provider.Requirements for Certification The c<strong>and</strong>idate must attend all the lectures <strong>and</strong> skill stations,<strong>and</strong> obtain a written test score of at least 74 percent <strong>and</strong> at least “adequate” on the patient assessmenttest. The local chapter may require a higher score.Length of Certification Three years or whatever length is deemed appropriate by the chapter.Recertification The provider must attend an approved pediatric ITLS recertification course205
prior to the expiration date on the card or complete a certified pediatric ITLS provider course.The local chapter may decide which is appropriate.ITLS Access ProviderPrerequisites The c<strong>and</strong>idate must be in EMS in at least a first responder role.Requirements for Course Completion The c<strong>and</strong>idate must attend the lectures <strong>and</strong> skill stations.The local chapter may increase these requirements.Length of Recognition Three years or whatever length is deemed appropriate by the chapter.Rerecognition The provider must attend an approved ITLS access provider update course.Basic ITLS <strong>Instructor</strong>Prerequisites Achieve at least 86 percent on the written test, “excellent” on the patient assessmenttest, <strong>and</strong> be recommended as a potential instructor by an affiliate faculty during an ITLSprovider course. The chapter ITLS committee may modify these prerequisites.Physicians who are board certified in emergency medicine, or are ATLS providers, or whoactively participate <strong>and</strong> teach trauma care may take the instructor course or preceptorship withouttaking the full provider course.In unusual circumstances a physician or other EMS provider (EMT, nurse, nurse practitioner,or physician assistant) who has not taken the instructor course may help teach an ITLS course.However, this may be done only with the permission of the chapter ITLS medical director orcommittee. These requirements are necessary to maintain the high quality of certified courses.Requirements for Certification The c<strong>and</strong>idate must successfully complete an ITLS instructorcourse or preceptorship <strong>and</strong> monitoring (in lecture, skills stations, <strong>and</strong> patient assessment in aprovider course) by an affiliate faculty.Length of Certification Three years or whatever length is deemed appropriate by the chapter.Recertification Basic ITLS instructors may maintain their instructor certification by teaching atleast one ITLS course (instructor or provider) per year for the years of certification <strong>and</strong> attendinginstructor updates or refresher courses as deemed necessary by the chapter advisory committee.The chapter advisory committee may develop additional criteria.Removal Procedure The chapter shall establish a mechanism, through the chapter advisorycommittee, to revoke the certification of an ITLS basic instructor should the need arise. In addition,the chapter shall establish a method to provide the instructor with due process in the eventthat the instructor certification is revoked.EXAMPLE: If written allegations are made regarding inappropriate conduct by or an inadequateknowledge base of an instructor, the chapter advisory committee may initiate an inves-206
tigation. The instructor’s certification status may also be suspended pending the outcome ofthe investigation. The chairperson of the chapter advisory committee shall appoint a threememberspecial committee to conduct the investigation. The investigation shall be completedwithin 60 days. Upon completion, the instructor will be informed, in writing, of the basis ofthe allegations <strong>and</strong> given an opportunity to refute the allegations, in writing, within 30 days.The special committee will then make recommendations to the chapter advisory committeefor action including, but not limited to, one or more of the following:a. Temporary suspension of instructor certification for a specified period of timeb. Permanent suspension of instructor certificationc. Remedial trainingd. Supervision by an affiliate faculty for a specified period of timeAdvanced ITLS <strong>Instructor</strong>Prerequisites Achieve at least 86 percent on the written test, “excellent” on patient assessment,<strong>and</strong> be recommended as a potential instructor by an affiliate faculty during an ITLS providercourse. The chapter advisory committee may modify these prerequisites.Physicians who are board certified in emergency medicine, or are ATLS providers, or whoactively participate <strong>and</strong> teach trauma care may take the instructor course or preceptorship withouttaking the full provider course.In unusual circumstances a physician or other EMS provider (EMT, nurse, nurse practitioner,or physician assistant) who has not taken the instructor course may help teach an ITLS course.However, this may be done only with the permission of the chapter ITLS medical director orcommittee. These requirements are necessary to maintain the high quality of certified courses.Requirements for Certification The c<strong>and</strong>idate must successfully complete an ITLS instructorcourse or preceptorship <strong>and</strong> monitoring (in lecture, skills stations, <strong>and</strong> patient assessment in aprovider course) by an affiliate faculty.Length of Certification Three years or whatever length is deemed appropriate by the chapter.Recertification Advanced ITLS instructors may maintain their instructor certification by teachingat least one ITLS course (instructor or provider) per year for the years of certification <strong>and</strong>attending instructor updates or refresher courses as deemed necessary by the chapter advisorycommittee. The chapter advisory committee may develop additional criteria.Removal Procedure The chapter shall establish a mechanism, through the chapter advisorycommittee, to revoke the certification of an advanced ITLS instructor should the need arise. Inaddition, the chapter shall establish a method to provide the instructor with due process in theevent that the instructor certification is revoked.EXAMPLE: If written allegations are made regarding inappropriate conduct by or an inadequateknowledge base of an instructor, the chapter advisory committee may initiate an inves-207
tigation. The instructor’s certification status may also be suspended pending the outcome ofthe investigation. The chairperson of the chapter advisory committee shall appoint a threememberspecial committee to conduct the investigation. The investigation shall be completedwithin 60 days. Upon completion, the instructor will be informed, in writing, of the basis ofthe allegations <strong>and</strong> given an opportunity to refute the allegations, in writing, within 30 days.The special committee will then make recommendations to the chapter advisory committeefor action including, but not limited to, one or more of the following:a. Temporary suspension of instructor certification for a specified period of timeb. Permanent suspension of instructor certificationc. Remedial trainingd. Supervision by an affiliate faculty for a specified period of timePediatric ITLS <strong>Instructor</strong>[Note: Basic instructors cannot teach advanced skills or assessment in the Pediatric ITLSCourse.]Prerequisitesa. ITLS instructors who pass the pediatric ITLS course may become pediatric ITLS instructors<strong>and</strong> will only have to be monitored to be certified.b. Pediatric ITLS students who achieve at least 86 percent on the written test, “excellent” onpediatric patient assessment, <strong>and</strong> are recommended as a potential instructor by an affiliate facultyduring a pediatric ITLS provider course. The chapter advisory committee may modifythese prerequisites.Requirements for Certification The c<strong>and</strong>idate must successfully complete an ITLS instructorcourse or preceptorship <strong>and</strong> monitoring (in lecture, skills stations, <strong>and</strong> patient assessment in aprovider course) by an affiliate faculty. Previous basic or advanced ITLS instructors are not requiredto take an instructor course or preceptorship <strong>and</strong> only require monitoring.Length of Certification Three years or whatever length is deemed appropriate by the chapter.Recertification Pediatric ITLS instructors may maintain their instructor certification by teachingat least one pediatric ITLS course per year for the years of certification <strong>and</strong> attending instructorupdates or refresher courses as deemed necessary by the chapter advisory committee. Thechapter advisory committee may develop additional criteria.Removal Procedure The chapter shall establish a mechanism, through the chapter advisorycommittee, to revoke the certification of a pediatric ITLS instructor should the need arise. In addition,the chapter shall establish a method to provide the instructor with due process in the eventthat the instructor certification is revoked.EXAMPLE: If written allegations are made regarding inappropriate conduct by or an inadequateknowledge base of an instructor, the chapter advisory committee may initiate an inves-208
tigation. The instructor’s certification status may also be suspended pending the outcome ofthe investigation. The chairperson of the chapter advisory committee shall appoint a threememberspecial committee to conduct the investigation. The investigation shall be completedwithin 60 days. Upon completion, the instructor will be informed, in writing, of the basis ofthe allegations <strong>and</strong> given an opportunity to refute the allegations, in writing, within 30 days.The special committee will then make recommendations to the chapter advisory committeefor action including, but not limited to, one or more of the following:a. Temporary suspension of instructor certification for a specified period of timeb. Permanent suspension of instructor certificationc. Remedial trainingd. Supervision by an affiliate faculty for a specified period of timeITLS Access <strong>Instructor</strong>Prerequisites Recognized <strong>and</strong> certified training <strong>and</strong> experience as an adult educator. Recognized<strong>and</strong> certified training <strong>and</strong> experience as a vehicle rescue provider or instructor.Requirements for Certification The c<strong>and</strong>idate must be recommended as a potential instructorby an affiliate faculty during an ITLS access course. Becoming an ITLS access instructor is similarto an apprenticeship program. There is no formal course, as the content is completely separatefrom the usual ITLS core material. The chapter advisory committee may modify these requirements.Length of Certification Three years or whatever length is deemed appropriate by the chapter.Recertification The instructor must teach at least one ITLS access provider course per year forthe years of certification. <strong>Instructor</strong> updates <strong>and</strong> refresher courses may be required as deemednecessary by the advisory committee.Removal Procedure The chapter shall establish a mechanism, through the chapter advisorycommittee, to revoke the certification of an ITLS Access instructor should the need arise. In addition,the chapter shall establish a method to provide the instructor with due process in the eventthat the instructor certification is revoked.EXAMPLE: If written allegations are made regarding inappropriate conduct by or an inadequateknowledge base of an instructor, the chapter advisory committee may initiate an investigation.The instructor’s certification status may also be suspended pending the outcome ofthe investigation. The chairperson of the chapter advisory committee shall appoint a threememberspecial committee to conduct the investigation. The investigation shall be completedwithin 60 days. Upon completion, the instructor will be informed, in writing, of the basis ofthe allegations <strong>and</strong> given an opportunity to refute the allegations, in writing, within 30 days.The special committee will then make recommendations to the chapter advisory committeefor action including, but not limited to, one or more of the following:209
a. Temporary suspension of instructor certification for a specified period of timeb. Permanent suspension of instructor certificationc. Remedial trainingd. Supervision by an affiliate faculty for a specified period of time210
Chapter Advisory Committee MemberITLS APPOINTMENTSDuties <strong>and</strong> Responsibilities Advise the chapter medical director <strong>and</strong> chapter coordinator onmatters concerning the Chapter ITLS Program on issues such as:• Development of chapter policy <strong>and</strong> procedures• Promulgation of ITLS throughout the chapter area• Development of long-range <strong>and</strong> strategic plans• Dissemination of information at the local level• Disciplinary issuesOther Duties• Provide input into the process of becoming a chapter.• Provide mechanism through which personnel throughout the area have a voice in ITLSrelatedmatters.• Appoint chapter medical director <strong>and</strong> chapter coordinator.• In conjunction with the chapter medical director <strong>and</strong> chapter coordinator, appoint affiliatefaculty.• Oversee the due process of revocation for ITLS instructors, affiliate faculty, course coordinators,<strong>and</strong> course medical directors.• Other duties as assigned by the chapter.Appointed by The organization holding the charter (for example, in many chapters in the UnitedStates, this would be the state’s American College of Emergency Physicians [ACEP] chapter).Length of Appointment Three years or whatever length is deemed appropriate by the chapter.Prerequisites Set by the organization holding the charter.EXAMPLE: Affiliate faculty with extensive knowledge <strong>and</strong> experience in ITLS <strong>and</strong> themanagement of educational programs.Appointment Process The advisory committee is first established by the organization holdingthe charter. They may accomplish this by requesting the appointee’s commitment to the evolutionof ITLS in the chapter area. A broad base of providers representing all geographical areasshould be selected for the committee. Representatives should be basic <strong>and</strong> advanced EMS providers<strong>and</strong> other allied health professionals. The chapter developers should invite representationfrom area emergency medical organizations.Vacancy Procedure Set by the organization holding the charter.211
EXAMPLE: A curriculum vitae (resume), recommendations by two current affiliate faculty,<strong>and</strong> a letter stating intent should be sent to the chapter advisory committee. The advisorycommittee shall select the most suited for the position from the pool of applicants.Reappointment Procedure Set by the organization holding the charter.EXAMPLE: The performance of the advisory committee members will be subject to reviewto determine the advisability of reappointment. The review will be completed by the entity ororganization that appointed the member with recommendation by the chapter medical director.The review will be held on a schedule consistent with the length of term of the committee.It is suggested that one-third of members be reviewed annually.Removal Procedure The chapter shall establish a mechanism, through the entity or organizationthat appointed the chapter advisory committee, to remove the designation of a chapter advisorycommittee member should the need arise. In addition, the chapter shall establish a methodto provide the chapter advisory committee member with due process in the event that the designationis revoked.EXAMPLE: If written allegations are made regarding inappropriate conduct by or an inadequateknowledge base of the chapter advisory committee member, the entity or organizationthat appointed the chapter advisory committee may initiate an investigation. The chapter advisorycommittee member designation may also be suspended pending the outcome of theinvestigation. The entity or organization that appointed the chapter advisory committeemember shall appoint a three-member special committee to conduct the investigation. Theinvestigation shall be completed within 60 days. Upon completion, the chapter advisorycommittee member will be informed, in writing, of the basis of the allegations <strong>and</strong> given anopportunity to refute the allegations, in writing, within 30 days.The special committee will then make recommendations for action including, but not limitedto, one or more of the following:a. Temporary suspension of the chapter advisory committee member designation for aspecified period of timeb. Permanent suspension of chapter advisory committee member designationc. Remedial trainingd. Supervision by the chapter advisory committee <strong>and</strong>/or chapter coordinatorAdvisory Committee ChairpersonDuties <strong>and</strong> Responsibilities• Lead <strong>and</strong> supervise the ITLS committee.• Serve as the liaison between the ITLS advisory committee <strong>and</strong> the charter holder.• Advise the organization holding the charter board of directors on issues relative to the operationof the ITLS program <strong>and</strong> the progress of the committee.• Oversee the operation of the ITLS advisory committee.212
• Appoint ad hoc subcommittees as needed to address specific ITLS issues.• Provide leadership for the ITLS advisory committee for strategic <strong>and</strong> long-range planning.• Appoint a special committee to execute due process in the event of revocation.• Other duties as assigned by the chapter.Appointed by The organization holding the charter.Length of Appointment One year or whatever length is deemed appropriate by the chapter.Prerequisites• Must be a member of the advisory committee.• The nominee should have extensive experience in managing continuing education courses<strong>and</strong> demonstrate an in-depth knowledge of ITLS.• Experience as a committee chairperson is preferred.Appointment Procedure Set by the organization holding the charter.EXAMPLE: The ITLS advisory committee chairperson will be appointed by the ITLS charterholder from the body of the ITLS advisory committee.Reappointment Procedure Set by the organization holding the charter.EXAMPLE: The performance of the committee chairperson should be reviewed on an annualbasis by the medical director, peer review, <strong>and</strong>/or the charter holder’s board of directors todetermine the advocacy of reappointment. Should the chairperson not demonstrate satisfactoryperformance or not wish to continue, the charter holder’s board of directors shall ask forhis or her resignation <strong>and</strong> initiate a search for qualified c<strong>and</strong>idates.Removal Procedure The chapter shall establish a mechanism, through the entity or organizationthat appointed the chapter advisory committee chairperson, to remove the designation of achapter advisory committee chairperson should the need arise. In addition, the chapter shall establisha method to provide the chapter advisory committee chairperson with due process in theevent that the designation is revoked.EXAMPLE: If written allegations are made regarding inappropriate conduct by or an inadequateknowledge base of the chapter advisory committee chairperson, the entity or organizationthat appointed the chapter advisory committee may initiate an investigation. The chapteradvisory committee chairperson designation may also be suspended pending the outcome ofthe investigation. The entity or organization that appointed the chapter advisory committeechairperson shall appoint a three-member special committee to conduct the investigation.The investigation shall be completed within 60 days. Upon completion, the chapter advisorycommittee chairperson will be informed, in writing, of the basis of the allegations <strong>and</strong> givenan opportunity to refute the allegations, in writing, within 30 days.The special committee will then make recommendations for action including, but not limitedto, one or more of the following:213
a. Temporary suspension of the chapter advisory committee chairperson designation fora specified period of timeb. Permanent suspension of chapter advisory committee chairperson designationc. Remedial trainingd. Supervision by the chapter advisory committee <strong>and</strong>/or chapter coordinator<strong>International</strong> FacultyITLS holds an annual meeting <strong>and</strong> conference for trauma education <strong>and</strong> for conducting business<strong>and</strong> elections for the ITLS board of directors. The number of votes a chapter is awarded for thebusiness session of the international conference is determined by the number of ITLS certificationsissued during the past two calendar years. In order for these certifications to be valid, payment<strong>and</strong> rosters must be submitted prior to March 31 of the next year. It is the prerogative of thechapter ITLS advisory committee to appoint <strong>International</strong> faculty to represent accurately the interestsof the chapter.Duties <strong>and</strong> Responsibilities• Represent the ITLS chapter as an international meeting delegate.• Communicate the perspective of the chapter with regard to major issues.• Disseminate information to all members of the advisory committee as required.• Participate in the assessment of the ITLS program.• Participate in the formative process of continuing course revision.• Participate in the development of ITLS, Inc.Prerequisites• Should be affiliate faculty• Should have a strong working knowledge of ITLS <strong>and</strong> related issues• Orientation by the chapter medical director <strong>and</strong>/or the advisory committee to the positionAppointed by ITLS advisory committee <strong>and</strong>/or the chapter medical director.Length of Appointment Duration of the annual international meeting or whatever length isdeemed appropriate by the chapter.Chapter Medical DirectorDuties <strong>and</strong> Responsibilities• Ultimately responsible for the management of the ITLS program within the chapter, in botheducational <strong>and</strong> business-related matters.214
• Provide consistent leadership for the program.• Stimulate the evolution <strong>and</strong> consistency of ITLS programs throughout the chapter area.• Ensure the availability of training <strong>and</strong> the quality of the programs offered.• Ensure the medical appropriateness of the course content.• Ensure that the program is taught in a manner consistent with the EMS laws of the chapter.• Ensure the medical quality of ITLS courses throughout the chapter.• Advise the chapter ITLS advisory committee on the appointments of affiliate faculty.• Represent ITLS as an international meeting delegate, if possible.• Regularly review the courses held under the auspices of the appointed course directors withinthe chapter.• Relieve a course director of this title if he or she fails to present courses that are consistentwith ITLS st<strong>and</strong>ards, or where management of the course impedes student education or thereputation of the chapter ITLS program.• Relieve a course coordinator of this title if he or she fails to present courses that are consistentwith ITLS st<strong>and</strong>ards, or where management of the course impedes student education orthe reputation of the chapter ITLS program.• In association with the chapter coordinator, facilitate the daily operation of the ITLS program.• Oversee the appeal of due process activities.• Other duties as assigned by the chapter.Prerequisites• Must be a physician licensed to practice medicine within the chapter area plus other criteriadeveloped by the chapterEXAMPLES:• Should be a physician involved in emergency medicine with a background of involvementin prehospital care• Should be an ITLS <strong>Instructor</strong>Appointed by ITLS advisory committee <strong>and</strong>/or the sponsoring organization holding the charter.Length of Appointment Two years or whatever length is deemed appropriate by the chapter.The performance of the director should be reviewed on an annual basis to determine the advocacyof reappointment.Removal Procedure The chapter shall establish a mechanism, through the entity or organizationthat appointed the chapter medical director, to remove the designation of a chapter medicaldirector should the need arise. In addition, the chapter shall establish a method to provide thechapter medical director with due process in the event that the designation is revoked.215
EXAMPLE: If written allegations are made regarding inappropriate conduct by or an inadequateknowledge base of the chapter medical director, the chapter advisory committee mayinitiate an investigation. The chapter medical director’s designation may also be suspendedpending the outcome of the investigation. The entity or organization that appointed the chaptermedical director shall appoint a three-member special committee to conduct the investigation.The investigation shall be completed within 60 days. Upon completion, the chaptermedical director will be informed, in writing, of the basis of the allegations <strong>and</strong> given an opportunityto refute the allegations, in writing, within 30 days.The special committee will then make recommendations for action including, but not limitedto, one or more of the following:a. Temporary suspension of the chapter medical director designation for a specified periodof timeb. Permanent suspension of chapter medical director designationc. Remedial trainingd. Supervision by the chapter advisory committee <strong>and</strong>/or chapter coordinatorChapter <strong>Coordinator</strong>Duties <strong>and</strong> Responsibilities• In association with chapter medical director, facilitate the daily operation of the ITLS program.• Provide consistent leadership for the program.• Stimulate the evolution <strong>and</strong> consistency of ITLS programs throughout the chapter area.• Ensure the availability of training <strong>and</strong> the quality of the programs offered.• Provide financial management <strong>and</strong> oversight of the ITLS chapter, including organization ofchapter finances.• Ensure the quality <strong>and</strong> consistency of ITLS, focusing primarily on the administrative aspects.• Advise the chapter advisory committee regarding the appointment of affiliate faculty.• Represent ITLS as an international meeting delegate.• Organize chapter records.• Provide administrative support for the ITLS chapter.• Execute the plans <strong>and</strong> enforce the policies of the ITLS Policy <strong>and</strong> Procedure Manual.• Coordinate due process activities of the chapter advisory committee.• Other duties as assigned by the chapter.Prerequisites• Must possess <strong>and</strong> maintain affiliate faculty status or be the administrative designate of the216
ITLS chapter• Should be an individual who has experience in managing continuing education courses <strong>and</strong>has demonstrated an in-depth knowledge of prehospital <strong>and</strong> hospital trauma care• Other criteria as determined by the chapterAppointed by ITLS advisory committee <strong>and</strong>/or the sponsoring organization holding the charter.EXAMPLE: The chapter coordinator is elected by the ITLS advisory committee <strong>and</strong> serves atwo-year term or whatever is deemed appropriate by the chapter. The performance of the coordinatorshould be reviewed on an annual basis to determine the advocacy of reappointment.Should the coordinator not demonstrate satisfactory performance or not wish to continue, theITLS advisory committee shall initiate a search for a qualified c<strong>and</strong>idate.Length of Appointment Two years or whatever length is deemed appropriate by the chapter.Removal Procedure The chapter shall establish a mechanism, through the entity or organizationthat appointed the chapter coordinator, to remove the designation of a chapter coordinatorshould the need arise. In addition, the chapter shall establish a method to provide chapter coordinatorwith due process in the event that the designation is revoked.EXAMPLE: If written allegations are made regarding inappropriate conduct by or an inadequateknowledge base of chapter coordinator, the chapter advisory committee may initiate aninvestigation. The chapter coordinator designation may also be suspended pending the outcomeof the investigation. The entity or organization that appointed the chapter coordinatorshall appoint a three-member special committee to conduct the investigation. The investigationshall be completed within 60 days. Upon completion, the chapter coordinator will be informed,in writing, of the basis of the allegations <strong>and</strong> given an opportunity to refute the allegations,in writing, within 30 days.The special committee will then make recommendations for action including, but not limitedto, one or more of the following:a. Temporary suspension of the chapter coordinator designation for a specified period oftimeb. Permanent suspension of chapter coordinator designationc. Remedial trainingd. Supervision by the chapter medical director <strong>and</strong>/or chapter advisory committeeAffiliate FacultyDuties <strong>and</strong> Responsibilities• Monitor the quality of ITLS courses in the chapter.• Serve as a resource person for course medical directors <strong>and</strong> course coordinators.• Monitor new ITLS instructors.217
• Participate as faculty for instructor courses <strong>and</strong> updates.• Participate as faculty for provider courses.• Participate in the ITLS advisory committee structure.EXAMPLES:• Serve as primary liaison between ITLS instructors <strong>and</strong> the ITLS advisory committee.• Disseminate information to providers <strong>and</strong> instructors.• Promote ITLS.• Provide valuable input affecting decisions made at the chapter level.• Other duties as assigned by the chapter.Prerequisites• Must keep ITLS instructor certification current• Should complete a chapter ITLS advisory committee approved affiliate faculty training program• Must possess considerable knowledge with respect to the ITLS chapter structure <strong>and</strong> operations• Must be willing to maintain active involvement with the development of ITLS educationalmaterial• Must possess a willingness to promote actively the growth <strong>and</strong> development of the ITLSprogram• Other criteria as assigned by the chapterAppointed by ITLS advisory committee <strong>and</strong>/or chapter medical director. Affiliate facultyshould be equally distributed throughout the chapter.EXAMPLE OF APPOINTMENT PROCEDURE: A curriculum vitae (resume), recommendationsby two current affiliate faculty, <strong>and</strong> a letter stating intent should be sent to the chapteradvisory committee. The advisory committee shall vote on the appropriateness of the appointment.EXAMPLE OF REAPPOINTMENT PROCEDURE: Reappointment of affiliate facultyshould be determined by their yearly activities, which should include participation in at leasttwo ITLS courses per year <strong>and</strong>/or on the needs <strong>and</strong> dem<strong>and</strong>s of the chapter. Reappointment isnot considered an automatic right or due.Length of Appointment Twelve months or whatever length is deemed appropriate by the chapter.Removal The chapter shall establish a mechanism, through the chapter advisory committee, torevoke the affiliate faculty designation of an ITLS (basic, advanced, or pediatric) instructorshould the need arise. In addition, the chapter shall establish a method to provide the affiliate facultymember with due process in the event that the designation is revoked.218
EXAMPLE: If written allegations are made regarding inappropriate conduct by or an inadequateknowledge base of the affiliate faculty member, the chapter advisory committee mayinitiate an investigation. The affiliate faculty member’s designation may also be suspendedpending the outcome of the investigation. The chairperson of the chapter advisory committeeshall appoint a three-member special committee to conduct the investigation. The investigationshall be completed within 60 days. Upon completion, the affiliate faculty member willbe informed, in writing, of the basis of the allegations <strong>and</strong> given an opportunity to refute theallegations, in writing, within 30 days.The special committee will then make recommendations to the chapter advisory committeefor action including, but not limited to, one or more of the following:a. Temporary suspension of the affiliate faculty designation for a specified period oftimeb. Permanent suspension of affiliate faculty designationc. Remedial trainingd. Supervision by the chapter medical director <strong>and</strong>/or chapter coordinatorCourse Medical DirectorDuties <strong>and</strong> Responsibilities• Provide clinical oversight during the course.• Act as a resource to the affiliate faculty members present.• Promote professional relationship with EMS providers during the course.• In the absence of an instructor, be prepared to present information.• Chair faculty meetings.• Must be in attendance at advanced courses (length of time required to be present at thecourse is determined by the chapter). The chapter may choose to make the course medical director’son-site presence a requirement for all provider courses. When present the coursemedical director may lecture <strong>and</strong> is encouraged to participate in all course sessions, includingpractical skills <strong>and</strong> patient assessment stations. When not present during the course, themedical director should be available by phone for consult with affiliate faculty members.(See Medical Director Involvement in ITLS Courses policy near the end of this chapter.)Prerequisites• The course medical director must be a licensed physician within the chapter boundaries.• Should be familiar with EMS systems <strong>and</strong> prehospital care <strong>and</strong> have experience <strong>and</strong> trainingrelated to trauma patients.• Should be an ITLS instructor or should serve as co-director for one course with a physicianITLS instructor.• If not an ITLS instructor, must be familiar with the ITLS curriculum, particularly the patient219
assessment component.Approved by Chapter medical director.Length of Appointment The time frame of the scheduled ITLS course.Removal The chapter shall establish a mechanism, through the chapter advisory committee, toremove the designation of a course medical director should the need arise. In addition, the chaptershall establish a method to provide the course medical director with due process in the eventthat the designation is revoked.EXAMPLE: If written allegations are made regarding inappropriate conduct by or an inadequateknowledge base of the course medical director, the chapter advisory committee may initiatean investigation. The course medical director’s designation may also be suspendedpending the outcome of the investigation. The chairperson of the chapter advisory committeeshall appoint a three-member special committee to conduct the investigation. The investigationshall be completed within 60 days. Upon completion, the course medical director will beinformed, in writing, of the basis of the allegations <strong>and</strong> given an opportunity to refute the allegations,in writing, within 30 days.The special committee will then make recommendations to the chapter advisory committeefor action including, but not limited to, one or more of the following:a. Temporary suspension of the course medical director designation for a specified periodof timeb. Permanent suspension of course medical director designationc. Remedial trainingd. Supervision by the chapter medical director <strong>and</strong>/or chapter coordinatorCourse <strong>Coordinator</strong>Duties <strong>and</strong> Responsibilities• Must be present throughout the course <strong>and</strong> will serve as the primary resource for information<strong>and</strong> questions of an administrative nature.• Coordinate all aspects of the ITLS course:• Proper precourse preparation• Ordering of textbooks• Ordering <strong>and</strong> distribution of ITLS educational resources to students <strong>and</strong> lecturers• Arranging for equipment• On-site coordination, including meals <strong>and</strong> breaks• Registration of students• Appropriate placement of equipment in working order220
• Flow of skills stations• Patient assessment practice <strong>and</strong> testing stations• Grading of written exams• Submission of the appropriate paperwork <strong>and</strong> fees to the chapter office within requiredtime frame• Must work closely with the course medical director, affiliate faculty, <strong>and</strong> ITLS chapter office.• Other duties as assigned by the chapter.Prerequisites• ITLS certification preferred, but not required.• Experienced EMS educator <strong>and</strong> program organizer with thorough knowledge of the ITLSprogram. A demonstrated history of coordinating <strong>and</strong> conducting multiple session programs(e.g. ACLS, PALS, etc.) is helpful.• Able to coordinate all requirements precourse, during the course, <strong>and</strong> postcourse follow-up.• These prerequisites may be modified by the chapter.Appointed by Chapter coordinatorRemoval The chapter shall establish a mechanism, through the chapter advisory committee, toremove the designation of a course coordinator should the need arise. In addition, the chaptershall establish a method to provide the course coordinator with due process in the event that thedesignation is revoked.EXAMPLE: If written allegations are made regarding inappropriate conduct by or an inadequateknowledge base of the course coordinator, the chapter advisory committee may initiatean investigation. The course coordinator’s designation may also be suspended pending theoutcome of the investigation. The chairperson of the chapter advisory committee shall appointa three-member special committee to conduct the investigation. The investigation shallbe completed within 60 days. Upon completion, the course coordinator will be informed, inwriting, of the basis of the allegations <strong>and</strong> given an opportunity to refute the allegations, inwriting, within 30 days.The special committee will then make recommendations to the chapter advisory committeefor action including, but not limited to, one or more of the following:a. Temporary suspension of the course coordinator designation for a specified period oftimeb. Permanent suspension of course coordinator designationc. Remedial trainingd. Supervision by the chapter medical director <strong>and</strong>/or chapter coordinator221
MISCELLANEOUS POLICIESCertification CardsStudents who pass a certified ITLS course should receive their cards at the end of the course. Atno time should they have to wait longer than 90 days after a course to get their cards.ITLS Reciprocity with PHTLSA PHTLS instructor may become an ITLS instructor following successful completion of a chapter-approvedbridging course that emphasizes ITLS patient assessment, the administrative structure,<strong>and</strong> philosophy of ITLS. After completion, the local chapter’s policies for provisional instructorswill apply <strong>and</strong> must include monitoring.A PHTLS provider may become an ITLS provider by taking <strong>and</strong> passing an ITLS providercourse.ITLS <strong>Instructor</strong> Reciprocity with ChaptersITLS instructor certification will be accepted from any other ITLS chapter. An instructor cominginto a different ITLS chapter must apply to the ITLS chapter coordinator for reciprocity. Thisapplication will include the instructor’s past activities regarding ITLS teaching <strong>and</strong> a letter confirminggood st<strong>and</strong>ing from his or her former chapter medical director.Once approved by the ITLS chapter coordinator, the instructor must be monitored whileteaching by a chapter affiliate faculty. Upon completion of monitoring, the affiliate faculty willsend his or her recommendation to the ITLS chapter coordinator. The chapter coordinator mayissue a certification card or, in the case of an unfavorable recommendation, present the results tothe chapter advisory committee.ITLS Provider Reciprocity with ChaptersITLS providers from other ITLS chapters will be accepted to the date of expiration of their certificationcard. The provider must attend an ITLS course within the chapter to recertify. The chaptermay modify this requirement.Teaching Certified ITLS Courses in Areas that Do Not Have a ChapterCertified ITLS courses to be taught in areas that do not have an ITLS chapter must be clearedthrough the Global Development Committee. This can be accomplished by calling ITLS at 1-888-495-ITLS (outside U.S.: +1-630-495-6442).Medical Director Involvement in ITLS Courses222
To be certified, an ITLS course must be taught by registered ITLS instructors under the sponsorshipof the ITLS Organization. The course does not certify future performance, nor does it conferlicense of any kind on successful completion.ITLS strongly recommends on-site involvement of physician instructors in ITLS courses tointegrate material into the local emergency medical service systems, as well as to provide medicaloversight. The local chapter may establish a policy to meet their specific needs.Each course must have a medical director who is available for consultation during the course.The course medical director acknowledges accountability by being familiar with all course content<strong>and</strong> ensuring that the course is taught per guidelines of the chapter’s policy <strong>and</strong> procedures<strong>and</strong> the ITLS Organization.When the course medical director is not on site, each course must have a designated affiliatefaculty who is on site <strong>and</strong> accepts responsibility for overall quality assurance.The participation of both the course medical director <strong>and</strong> affiliate faculty provide the necessaryquality assurance, overall responsibility, <strong>and</strong> adherence to ITLS st<strong>and</strong>ards.Bridge Course PolicyIn an effort to facilitate the process by which certified trauma instructors may become ITLS instructors,ITLS has developed a bridge course. The following policy outlines the course requirements.ITLS chapters may modify the policy as needed for their specific needs.This course is open to any currently certified PHTLS or ATLS instructor who wishes to becomean ITLS instructor. An ITLS faculty member must conduct the course.Rationale This course has been developed to facilitate the process by which certified traumainstructors may become certified as ITLS instructors. The course assumes that the c<strong>and</strong>idate isfamiliar with basic instructional methodology <strong>and</strong> the skills of ITLS. Successful completion certifiesthe c<strong>and</strong>idate as an ITLS instructor c<strong>and</strong>idate.Necessary Prerequisites The prerequisite for registering in the bridge course is current PHTLSor ATLS (or similar trauma training program) instructor certification.Certified by Following completion of the bridge course, the c<strong>and</strong>idate is classified as an instructorc<strong>and</strong>idate. To become certified as an ITLS instructor, the c<strong>and</strong>idate must be recommendedfor certification by a faculty member who monitors the c<strong>and</strong>idate teaching during anITLS provider course. Monitoring must be within 12 months of the bridge course <strong>and</strong> includeteaching a lecture <strong>and</strong> a skill station. An extension may be granted for the 12 months if consideredappropriate by the chapter medical director.Certified for Three years or whatever length is deemed appropriate by the chapter.Recertification To be recertified as an ITLS instructor, the individual must teach <strong>and</strong> be monitoredin at least one ITLS course (basic or provider) per year for the three years of certification.<strong>Instructor</strong> updates may be required as deemed necessary by the chapter.223
Recommended Course Length One day.Required Text ITLS instructor manual <strong>and</strong> ITLS provider manual.Endnotes1 BTLS <strong>International</strong>, Inc., Articles of Incorporation, 1987.2 Minutes, BTLS <strong>International</strong>, January 1985.224
9Student <strong>Guide</strong> <strong>and</strong> Optional SkillsITLS Mission StatementSTUDENTS’ GUIDE TO ITLSITLS is a global organization dedicated to preventing death <strong>and</strong> disability from trauma througheducation about emergency trauma care <strong>and</strong> trauma prevention.What to Wear at the CourseITLS is a practical course that stresses h<strong>and</strong>s-on teaching. You should wear comfortable clothesthat you do not mind getting dirty. Blue jeans <strong>and</strong> sweatshirts are perfect.How to Prepare for the CourseYou absolutely must read <strong>and</strong> study the ITLS book before the course. There is not enough time intwo days to learn the written material, the skills, <strong>and</strong> imprint the ITLS patient assessment method.The philosophy of a two-day h<strong>and</strong>s-on course is to be familiar with the material beforeh<strong>and</strong>,to review the concepts briefly, <strong>and</strong> then to spend most of the time practicing the practicalapplications of those concepts. The best method of preparation is to:1. Read the book through once (including skill stations that are to be taught in your course—you should be notified if you are to be responsible for any of the optional skills). Unless notifiedin writing, you are not required to read, nor will you be tested on material in, the appendix.2. Take the pretest.3. Reread the book, paying particular attention to those subjects identified as weaknesses by thepretest.4. Memorize the initial exam, rapid trauma survey, detailed exam, <strong>and</strong> ongoing exam.5. If possible, practice patient assessment using the team approach as outlined in Chapter 3.GradesIf you are taking a certified course, you will have to take a written exam <strong>and</strong> a practical test. Thepractical test is patient assessment. You will not be required to test on each of the skills taught inthe skill stations. However, you will be required to use those skills correctly in the managementof your simulated patients. The written test is composed of 33 questions <strong>and</strong> requires a grade ofat least 74 percent to pass. Patient assessment is a practical exam, <strong>and</strong> you are graded on youroverall management of the problem. Some students with superior performance may be asked tobecome instructor c<strong>and</strong>idates.225
ScheduleYou will be sent a schedule for the course. ITLS is a very intensive learning course, <strong>and</strong> timemust be used efficiently. You must be familiar with your skill station schedule so that you havetime to practice each skill during the brief time available.How to Function as a Team1. Decide who will be the team leader, Rescuer 2, <strong>and</strong> Rescuer 3. Change each time you practiceso that each member gets to be team leader once.2. Before entering the room, be sure each of you underst<strong>and</strong>s your duties.Team Leader You are responsible for the overall performance of the team. You must directother team members to do certain actions if they do not do them on their own. You must performthe scene size-up, see that the spine is stabilized, <strong>and</strong> perform the patient assessment. You are theonly member who should directly interact with the instructor. The other team members report toyou, <strong>and</strong> you are responsible for their actions. You should help carry some of the equipment tothe patient.Rescuer 2 While the team leader is sizing up the scene, you should get the cervical collar, traumabox, <strong>and</strong> oxygen equipment <strong>and</strong> carry it to the patient. Do not approach the patient until theteam leader states that it is safe to do so. When you approach the patient, you will place theequipment within easy reach <strong>and</strong> immediately stabilize the patient’s cervical spine (unless theteam leader elects to do this). You must maintain stabilization of the neck with either your h<strong>and</strong>sor your knees until the patient is transferred to a backboard <strong>and</strong> the head immobilizer is applied.You are also in charge of maintaining the airway <strong>and</strong> appropriate ventilation. The team leadershould give you ventilation instructions as soon as the airway has been examined. If the teamleader forgets to give you instructions, you may ask, “Are there any ventilation instructions?”Rescuer 3 While the team leader is surveying the scene, you should get the backboard <strong>and</strong> headimmobilizer <strong>and</strong> be ready to place them next to the patient. You should assist with helmet removal,stop bleeding, dress wounds, <strong>and</strong> proceed with other tasks as delegated. You should helptransfer the patient to the backboard <strong>and</strong> secure the straps. Team members do not have to st<strong>and</strong>around waiting to be told to do something, but they must not take over the evaluation of the patient.The team leader may elect to stabilize the neck but is still responsible for assessing the patient<strong>and</strong> assuring that all procedures are performed. This is accomplished more easily if Rescuer2 is allowed to maintain stabilization.Review Ground Rules for Teaching <strong>and</strong> Testing <strong>and</strong> Patient Assessment Pearls in Chapter 3of the ITLS textbook.OPTIONAL SKILL STATIONSOPTIONAL SKILL 1: DIGITAL INTUBATIONMinimum instructors needed: 1226
Objectives At the conclusion of this skill station, the student should be able to:1. Recite the indications for digital intubation.2. Perform digital intubation.The original method of endotracheal intubation, widely known in the eighteenth century, wasthe tactile or digital technique. The intubator merely felt the epiglottis with the fingers <strong>and</strong>slipped the endotracheal tube distally through the glottic opening. Recently the technique hasbeen refined <strong>and</strong> demonstrated to be of use in the prehospital setting for a wide variety of patients.Indications Tactile orotracheal intubation is particularly useful for deeply comatose or cardiacarrest patients who:• Are difficult to position properly• Are somewhat inaccessible to the full view of the rescuer• May be at risk of cervical spine injury• Have facial injuries that distort anatomy• Have copious oropharyngeal bleeding or secretions that impair visualization of the airwayPersonnel may prefer to perform tactile intubation when they are more confident in their abilitywith this technique, or when a laryngoscope fails or is not immediately available. We havefound the technique most valuable in those patients in difficult positions (e.g., extrications) <strong>and</strong>in those who have copious secretions despite adequate attempts at suctioning.Equipment This method of intubation requires the following:• Endotracheal tube, 7.0, 7.5, or 8.0 mm internal diameter• Malleable stylet (Note: some prefer to perform the procedure without a stylet)• Water soluble lubricant (use silicone spray for mannequin)• 12-cc syringe• A dental prod, mouth gag, or something similar for placing between the teeth• Rubber examining gloves• Adult intubation mannequinProcedure1. Perform routine preparation procedures as described for endotracheal intubation.2. The tube is prepared by inserting the lubricated stylet <strong>and</strong> bending the tube into an “open J”configuration. The stylet should not protrude beyond the tip of the tube, but it should come toat least the side hole.3. A water-soluble lubricant is used liberally on the tip <strong>and</strong> cuff of the tube.227
4. The intubator kneels at the patient’s left shoulder facing the patient, <strong>and</strong> places a dental prodor mouth gag between the patient’s molars.5. The intubator then “walks” the index <strong>and</strong> middle fingers of his left h<strong>and</strong> down the midline ofthe tongue, all the while pulling forward on the tongue <strong>and</strong> jaw. This is an important maneuver<strong>and</strong> serves to lift the epiglottis up within reach of the probing fingers.6. The middle finger palpates the epiglottis. It feels much like the tragus of the ear.7. The epiglottis is pressed forward <strong>and</strong> the tube is slipped into the mouth at the left labial angleanterior to the palpating fingers. The index finger is used to keep the tube tip against the sideof the middle finger (that is still palpating the epiglottis). This guides the tip to the epiglottis.The side hole of the tube can also be used as a l<strong>and</strong>mark to ensure that the intubator is alwaysaware of the position of the tip of the endotracheal tube. This is a crucial principle of thistechnique.8. <strong>Guide</strong> the tube tip to lie against the epiglottis using the middle <strong>and</strong> index fingers. The righth<strong>and</strong> then advances the tube distally through the cords as the index <strong>and</strong> middle fingers of theleft palpating h<strong>and</strong> press forward to prevent the tube from slipping posteriorly into the esophagus.Note: At this point the tube/stylet combination may encounter resistance, especiallyif the distal curve of the tube is sharp. This usually means that the tube tip is pressing on theanterior wall of the thyroid cartilage. Pulling back slightly on the stylet will allow the tube toconform to the anatomy, <strong>and</strong> the tube should slip into the trachea.9. Confirm placement by the confirmation protocol taught in Chapter 5 (advanced text).OPTIONAL SKILL 2: TRANSILLUMINATION (LIGHTED STYLET)Minimum instructors needed: 1Objective Upon completion of this station, the student should be able to perform endotrachealintubation by the transillumination method.The transillumination or lighted stylet method of endotracheal intubation is based on the factthat a bright light inserted inside the upper airway can be seen through the soft tissues of theneck when inside the larynx or trachea. This permits the intubator to guide the tube tip throughthe glottic opening without directly visualizing the cords. It has been called the indirect visualmethod, <strong>and</strong> it has been shown in several studies to be reliable, quick, <strong>and</strong> atraumatic. It is particularlyattractive in trauma patients since it appears to move the head <strong>and</strong> neck less than conventionalorotracheal methods.Equipment• Stylet—the lighted stylet is a malleable wire connecting a proximal battery housing to adistal light bulb <strong>and</strong> covered with a tough plastic coating that prevents the light from beingseparated from the wire. The wire stylet part is 25 cm in length. An on/off switch islocated at the proximal end of the battery housing.• Endotracheal tubes—all tubes should be 7.5 to 8.5 mm internal diameter <strong>and</strong> should becut to 25 cm to accommodate the stylet.228
• Other equipment is the same as listed for orotracheal intubation.Important Points The success of this method of intubation will depend on several factors:1. The level of ambient light2. Pulling forward on the patient’s tongue, or tongue <strong>and</strong> jaw3. The bend of the tube-styletThe light should be cut down to about 10 percent of normal, or the neck should be shieldedfrom direct sun or bright daylight. While the transilluminated light can be perceived in thin patientseven in daylight, success will be more likely in darker surroundings.Pulling forward on the tongue (or tongue <strong>and</strong> jaw) lifts the epiglottis up out of the way. Thisis essential to this method.The stylet/tube combination should be bent just proximal to the cuff. A bend that is too farproximal will cause the tube to strike against the posterior pharyngeal wall <strong>and</strong> prevent the tubeadvancing anteriorly through the glottic opening. The lubricated stylet is slipped into the tube<strong>and</strong> held firmly against the battery housings while the tube-stylet is bent. Bend more sharply ifthe patient is not in the sniffing position.Procedure1. Perform routine preparation procedures as described in Chapter 5 of the textbook.2. The intubator st<strong>and</strong>s or kneels on either side facing the patient’s head. Gloves are worn forthe procedure. The light is turned on.3. The patient’s tongue (or, more easily, the tongue <strong>and</strong> jaw) is grasped by the intubator <strong>and</strong>drawn gently forward while the liberally lubricated tube-stylet combination is slipped downthe tongue.4. Using a “soup ladle” motion, the epiglottis is “hooked up” by the tube-stylet <strong>and</strong> the transilluminatedlight can be seen in the midline. Correct placement at or beyond the cords is indicatedby the appearance of a circumscribed, easily perceived light at the level of the laryngealprominence. A dull glow, diffuse <strong>and</strong> difficult to see, indicates esophageal placement.5. When the light is seen, the stylet is held firmly in place <strong>and</strong> the fingers of the other h<strong>and</strong> supportthe tube lying along the tongue as they advance the tube off the stylet more distally intothe larynx.6. Confirm placement of the tube with the confirmation protocol as described in Chapter 5 ofthe textbook.OPTIONAL SKILL 3: TRANSLARYNGEAL JET VENTILATIONMinimum instructors needed: 1Objective Upon completion of this station, the student should be able to perform translaryngealjet ventilation.229
Important Points When access below the level of the cords is sought, translaryngeal jet ventilation(TLJV) provides a quick, reliable, <strong>and</strong> relatively safe method of adequate oxygenation <strong>and</strong>ventilation, especially in the trauma patient. Many misconceptions <strong>and</strong> erroneous impressionspersist about this technique, <strong>and</strong> the medical literature is confusing on the subject. Clinical experience<strong>and</strong> studies done using appropriate equipment in both animals <strong>and</strong> patients wouldclearly indicate the following:1. Patients can be both oxygenated <strong>and</strong> ventilated with this technique that delivers 100 percentoxygen in volumes exceeding one liter per second.2. Ventilation can proceed indefinitely, provided the correct size cannula is used with theproper driving pressure.3. Cannulae of 14 gauge or larger, with side holes, must be used.4. Driving pressures of at least 50 psi must be used to deliver sufficient volumes to ensure adequateventilation.Patients cannot be ventilated using small-bore cannulae with continuous flow oxygen attached:The forgoing principles must be adhered to if this technique is to be used safely <strong>and</strong> effectively.Equipment The tools needed for TLJV should be prepared well in advance <strong>and</strong> stored in asmall bag or kit:• #14 or #13 gauge cannula, with side holes—these sizes are the minimum necessary foradequate ventilation. Side holes are especially important, since they prevent the cannulafrom remaining against the tracheal wall <strong>and</strong> subjecting it to sudden pressures that couldrupture it.• Manual jet ventilator device—these are commercially available <strong>and</strong> are merely valvesthat allow high-pressure oxygen to flow through them when a button is pushed. Theyshould have high-pressure tubing attached solidly with special fasteners <strong>and</strong> tape.• Wrench—a small wrench should be attached to the jet ventilator tubing so that no timewill be lost looking for a way to tap into the oxygen tank, or turn it on.• Cricoid stick mannequin.Procedure Identification of the cricothyroid membrane is essential to this technique, althoughplacement between the tracheal rings would probably not result in major complications.1. While continuing attempts at ventilation <strong>and</strong> oxygenation, the cricothyroid membrane ispunctured by the cannula firmly attached to a 5-cc syringe filled with 1 or 2 cc of saline. Severalmilliliters of 2 percent lidocaine can be used instead of saline, to produce local anesthesiaof the mucosa in the area of the distal port of the cannula.2. The cannula is directed downward, with continual aspiration to promptly demonstrate entryinto the larynx, identified when bubbles of air are readily aspirated. At this point, if lidocaineis contained in the syringe, it can be injected to provide some anesthesia <strong>and</strong> prevent thecoughing that sometimes occurs in those patients who are somewhat responsive.230
3. On entry into the larynx, the cannula is slid off the needle trochar <strong>and</strong> is held in place whilethe TLJV is connected to the proximal port of the cannula.4. The patient is immediately ventilated using one-second bursts of oxygen from the 50-psi manualsource. The rate used is at least 20/minute (i.e., an inspiratory/expiratory ratio of 1:2).5. If a tie is available, the cannula is fixed in place. Tape can also be used, but it must be fastenedfirmly to the cannula <strong>and</strong> then around the patient’s neck. Firm pressure at the site of insertioncan reduce the small amount of subcutaneous emphysema that usually occurs withthis technique.OPTIONAL SKILL 4: PHARYNGO-TRACHEAL LUMEN AIRWAYMinimum instructors needed: 1Objectives Upon completion of this skill station, the student should be able to:1. Explain the five essential points about use of this airway.2. Correctly insert the pharyngo-tracheal lumen airway (PtL ® ).Important Points The pharyngo-tracheal lumen airway is a blind insertions airway device (BI-AD) developed for EMS providers who are not trained to perform endotracheal intubation. ThePtL ® consists of a smaller-diameter long tube inside of a short, large-diameter tube. The longertube goes either into the trachea or the esophagus, while the shorter tube opens into the lowerpharynx. Each tube has a cuff; the longer tube’s cuff seals the esophagus or trachea, <strong>and</strong> theshorter tube’s cuff seals the oropharynx so that there is no air leak when you ventilate the patient.You insert the PtL ® blindly into the pharynx; then, you must carefully determine whetherthe longer tube is in the esophagus or the trachea. If the long tube is in the trachea, you ventilatethrough it. If the tube is in the esophagus, you ventilate through the larger tube in the pharynx.The PtL ® has advantages over the EGTA in that you don’t require extra h<strong>and</strong>s to keep a seal witha face mask; also, the cuff in the pharynx prevents blood <strong>and</strong> mucus from entering the airwayfrom above.You must remember five essential points about the PtL ® :1. Use only in patients who are unresponsive <strong>and</strong> without protective reflexes.2. Do not use in any patient with an injury to the esophagus (e.g., caustic ingestions) or inchildren who are under the age of 15 <strong>and</strong> are of average height <strong>and</strong> weight.3. Pay careful attention to proper placement. Unrecognized intratracheal placement of thelong lube is a lethal complication that produces complete airway obstruction. Such an occurrenceis not always easy to detect, <strong>and</strong> the results are catastrophic. Like other BIADs,one of the great disadvantages of this airway is the fact that determining correct placementby auscultation <strong>and</strong> observation of chest movement may be unreliable in the prehospitalsetting. Confirmation by use of end-tidal CO 2 detectors is recommended.4. You must insert gently <strong>and</strong> without force.5. If the patient regains consciousness, you must remove the PtL ® as it will cause retching231
<strong>and</strong> vomiting.Equipment ListItemQuantityAdult intubation mannequins 2PtL ® airways 2Cans of silicone lubricant spray 235-cc syringes 2Tonsil suctions tip (Yaunker) <strong>and</strong> suction tubing 2Bag-valve devices 2Nonsterile rubber gloves1 boxFace shields or goggles 2Procedure The airway is relatively easily inserted <strong>and</strong> must never be forced. In the supine patient,the following procedure is used:1. Ventilate with mouth-to-mask or bag-valve-mask, <strong>and</strong> suction the pharynx prior to insertionof the airway.2. Prepare the airway by checking to be sure that both cuffs are fully deflated, that the long #3tube has a bend in the middle, <strong>and</strong> that the white cap is securely in place over the deflationport located under the #1 inflation valve.3. After liberal lubrication, slide the airway into the oropharynx while the tongue <strong>and</strong> jaw arepulled forward.4. Holding the PtL ® in your free h<strong>and</strong> so that it curves in the same direction as the natural curvatureof the pharynx, advance the airway behind the tongue until the teeth strap contacts thelips <strong>and</strong> teeth. On very small patients you may have to withdraw the airway so that the teethstrap is up to an inch from the teeth. Conversely, on very large patients you may have to insertthe teeth strap into the mouth, past the teeth.5. Immediately inflate both cuffs. Make sure that the white cap is in place over the deflationport located under the inflation valve. Deliver a sustained ventilation into the inflation valve.You can detect failure of the cuffs to inflate properly by failure of the external pilot balloonto inflate or by hearing or feeling air escape for the patient’s mouth <strong>and</strong> nose. This usuallymeans that one of the cuffs is torn <strong>and</strong> the airway must be removed <strong>and</strong> replaced. When youdetermine that the cuffs are inflating, continue inflation until you get a good seal.6. Immediately determine whether the long #3 tube is in the esophagus or the trachea. First ventilatethrough the short #2 tube. If you see the chest rise, hear breath sounds, feel good compliance,<strong>and</strong> hear no breath sounds over the epigastrium, the long #3 tube is in the esophagus,<strong>and</strong> you should continue ventilating through the #2 tube.7. If you do not see the chest rise, hear breath sounds, <strong>and</strong> feel good compliance when the #2232
tube is ventilated, the #3 tube is probably in the trachea. In this case, remove the stylet fromthe #3 tube <strong>and</strong> ventilate through the #3 tube. If you see the chest rise, hear breath sounds,feel good compliance, <strong>and</strong> hear no breath sounds over the epigastrium, the #3 tube is in thetrachea, <strong>and</strong> you should continue ventilating through the #3 tube.8. When you are sure that the patient is being adequately ventilated, carry the neck strap overthe patient’s head <strong>and</strong> tighten it in place. Continually monitor the appearance of the pilot balloonduring ventilation. Loss of pressure in the balloon signals a loss of pressure in the cuffs.If you suspect a cuff is leaking, increase pressure by blowing into the #1 inflation valve orreplace the airway.If the patient becomes conscious, you must remove the PtL ® . Remove the white cap from the deflationport to simultaneously deflate both cuffs. Extubation is likely to cause vomiting; be preparedto suction the pharynx <strong>and</strong> turn the backboard.OPTIONAL SKILL 5: ESOPHAGEAL TRACHEAL COMBITUBE ®Minimum instructors needed: 1Objectives Upon completion of this skill station, the student should be able to:1. Explain the five essential points about use of this airway.2. Correctly insert the Combitube ® .Equipment ListItemQuantityAdult intubation mannequins 2Combitube ® airways 2Cans of silicone lubricant spray 235-cc syringes 2Tonsil suctions tip (Yaunker) <strong>and</strong> suction tubing 2Bag-valve devices 2Nonsterile rubber gloves1 boxFace shields or goggles 2Introduced in the early 1970s, blind-insertion airway devices (BIADs) were designed for useby EMS personnel who were not trained to intubate the trachea. All of these devices are designedto be inserted into the pharynx without the need for a laryngoscope to visualize where thetube is going. All of these devices have a tube with an inflatable cuff that is designed to seal theesophagus, thus preventing vomiting <strong>and</strong> aspiration of stomach contents as well as preventinggastric distention during bag-valve-mask or dem<strong>and</strong>-valve-mask ventilation. It was also thoughtthat by sealing the esophagus more air would enter the lungs <strong>and</strong> ventilation would be improved.These devices have their own dangers <strong>and</strong> require careful evaluation to be sure that they are in233
the correct position. None of the BIADs are equal to the endotracheal tube, which has becomethe invasive airway of choice for advanced EMS providers.The Combitube ® is like the PtL ® airway in that it has a double lumen. However, in the Combitube® , the two lumens are separated by a partition rather than one being inside of the other.One tube is sealed at the distal end <strong>and</strong> there are perforations in the area of the tube that wouldbe in the pharynx. When the long tube is in the esophagus, the patient is ventilated through thisshort tube. The long tube is open at the distal end, <strong>and</strong> it has a cuff that is blown up to seal theesophagus or the trachea, depending on which it has entered. When inserted, if the long tubegoes into the esophagus, the cuff is inflated, <strong>and</strong> the patient is ventilated through the short tube.If the long tube goes into the trachea, the cuff is inflated <strong>and</strong> the patient is ventilated through thelong tube. Like the PtL ® airway, this device has a pharyngeal balloon that seals the pharynx <strong>and</strong>prevents blood <strong>and</strong> mucus from entering the airway from above. The Combitube ® is somewhatquicker <strong>and</strong> easier to insert than the PtL ® airway but, as with the other BIADs, you must be surethat you are ventilating the lungs <strong>and</strong> not the stomach.Essential PointsYou must remember five essential points about the Combitube ® :1. Use only in patients who are unresponsive <strong>and</strong> without protective reflexes.2. Do not use in any patient with an injury to the esophagus (e.g., caustic ingestions) or inchildren who are under the age of 15 <strong>and</strong> of average height <strong>and</strong> weight.3. Pay careful attention to proper placement. Unrecognized intratracheal placement of thelong tube is a lethal complication that produces complete airway obstruction. Such an occurrenceis not always easy to detect, <strong>and</strong> the results are catastrophic. Like other BIADs,one of the great disadvantages of this airway is the fact that determining correct placementby auscultation <strong>and</strong> observation of chest movement may be unreliable in the prehospitalsetting. Confirmation by use of end-tidal CO 2 detectors is recommended.4. You must insert gently <strong>and</strong> without force.5. If the patient regains consciousness, you must remove the Combitube ® as it will causeretching <strong>and</strong> vomiting.Procedure1. Insert the tube blindly, watching for the two black rings on the Combitube ® that are used formeasuring the depth of insertion. These rings should be positioned between the teeth <strong>and</strong> thelips.2. Use the large syringe to inflate the pharyngeal cuff with 100 cc of air. When inflated, theCombitube ® will seat itself in the posterior pharynx behind the hard palate.3. Use the small syringe to fill the distal cuff with 10–15 cc of air.4. The long tube will usually go into the esophagus. Ventilate through the esophageal connector.It is the external tube that is the longer of the two <strong>and</strong> is marked #1. As with the PtL ®airway, you must see the chest rise, hear breath sounds, feel good compliance, <strong>and</strong> hear no234
eath sounds over the epigastrium in order to be sure that the long tube is in the esophagus.5. If you do not see the chest rise, hear breath sounds, feel good compliance, <strong>and</strong> you hearbreath sounds over the epigastrium, the tube has been placed in the trachea. In this case,change the ventilator to the shorter tracheal connector, which is marked #2. Again you mustcheck to see the chest rise, hear breath sounds, feel good compliance, <strong>and</strong> hear no breathsounds over the epigastrium in order to be sure that you are ventilating the lungs.Like other BIADs, if the patient becomes conscious, you must remove the Combitube ® .Extubation is likely to cause vomiting; be prepared to suction the pharynx <strong>and</strong> turn thebackboard.OPTIONAL SKILL 6: KING LT-D AIRWAYMinimum instructors needed: 1Objectives Upon completion of this skill station, the student should be able to:1. Explain the six essential points about use of this airway.2. Correctly insert the King LT-D airway.Introduced in the early 1970s, blind insertion airway devices (BIADs) were designed for use byEMS personnel who were not trained to intubate the trachea. All of these devices were designedto be inserted into the pharynx without the need for a laryngoscope to visualize where the tube isgoing. All of these devices have a tube with an inflatable cuff that is designed to seal theesophagus, thus helping to prevent vomiting <strong>and</strong> aspiration of stomach contents, as well aspreventing gastric distention during bag-valve mask or dem<strong>and</strong>-valve mask ventilation. It wasalso thought that by sealing the esophagus, more air would enter the lungs <strong>and</strong> ventilation wouldbe improved. These devices have their own dangers <strong>and</strong> require careful evaluation to be sure thatthey are in the correct position. None of the BIADs are equal to the endotracheal tube, which hasbecome the invasive airway of choice for advanced EMS providers.The King LT-D airway differs from the Combitube ® <strong>and</strong> the PtL ® airways in that it has asingle lumen. Once the tube is inserted into the esophagus, both the esophageal <strong>and</strong> pharyngealcuffs are inflated, <strong>and</strong> the patient is ventilated through the single tube. With the airway in place,you may insert a bougie or a fiberoptic bronchoscope through the ventilating tube <strong>and</strong> swap theairway for an endotracheal tube. There is also an LTS-D airway that has a port through whichyou can insert a gastric tube to decompress the stomach. It is inserted exactly the same as theLT-D airway. The King LT-D airway is quicker <strong>and</strong> easier to insert than either the PtL ®airway or the Combitube ® but, as with the other BIADs, you must be sure that you areventilating the lungs <strong>and</strong> not the stomach.Essential PointsYou must remember six essential points about the King LT-D airway:1. Use the King LT-D airway only in patients who are unresponsive <strong>and</strong> without protectivereflexes.235
2. Do not use it in any patient with injury to the esophagus (e.g., caustic ingestions) or inchildren who are below the age of 15 <strong>and</strong> of average height <strong>and</strong> weight.3. Do not use in patients who are less than four feet tall.4. Pay careful attention to proper placement. Unrecognized intratracheal placement of thetube is a lethal complication that produces complete airway obstruction. Such an occurrenceis not always easy to detect, <strong>and</strong> the results are catastrophic. Capnography is recommendedfor confirmation of tube placement.5. You must insert gently <strong>and</strong> without force.6. If the patient regains consciousness, you must remove the airway, as it will cause retching<strong>and</strong> vomiting.Equipment ListItemQuantityAdult intubation mannequins 2King LT-D airway 2Cans of silicone lubricant spray2(replaces water-soluble lubricant)35-cc syringes 2Tonsil suctions tip (Yaunker) <strong>and</strong> suction tubing 2Bag-valve devices 2Nonsterile rubber gloves1 boxFace shields or goggles 2Tube holder with bite block 2Procedure1. Select the correct size King LT-D airway:• Size 3 (yellow connector color) is for adults 4–5 feet in height.• Size 4 (red connector color) is for adults 5–6 feet in height.• Size 5 (purple connector color) is for adults greater than 6 feet in height.2. Test cuff inflation system for air leak.3. Apply water-soluble lubricant to the distal tip.4. Hold the airway at the connector with your dominant h<strong>and</strong>. With your non-dominant h<strong>and</strong>,hold the mouth open <strong>and</strong> apply a chin lift. Using a lateral approach, introduce the tip into themouth.236
5. Advance the tip behind the base of the tongue while rotating the tube back to the midline sothat the blue orientation line faces the chin of the patient.6. Without exerting excessive force, advance tube until base of connector is aligned with teethor gums.7. Hold the KLT 900 Cuff Pressure Gauge in non-dominant h<strong>and</strong>, <strong>and</strong> inflate the cuffs of theKing LT-D with air to a pressure of 60 cm H 2 O. If a cuff pressure gauge is not available<strong>and</strong> a syringe is being used to inflate the King LT-D, inflate cuffs with the minimum volumenecessary to seal the airway at the peak ventilatory pressure employed (just seal volume).Typical inflation volumes are as follows:• Size 3 (yellow) = 45–60 ml• Size 4 (red) = 60–80 ml• Size 5 (purple) = 70–90 ml8. Attach the resuscitator bag to the airway. While bagging the patient, gently withdraw thetube until ventilation becomes easy <strong>and</strong> free-flowing. Adjust cuff inflation if necessary toobtain a seal of the airway at the peak ventilatory pressure employed. You must see the chestrise, hear breath sounds, feel good compliance, <strong>and</strong> hear no breath sounds over theepigastrium to be sure that the King LT-D airway is correctly placed. However, thismethod is unreliable, <strong>and</strong> thus capnography is recommended for confirming <strong>and</strong> monitoringthe position of the tube.Like the other BIADs, if the patient becomes conscious, you must remove the airway. Extubationis likely to cause vomiting, so be prepared to suction the pharynx <strong>and</strong> turn the backboard.OPTIONAL SKILL 7: LARYNGEAL MASK AIRWAYMinimum instructors needed: 1Objectives Upon completion of this skill station the student, should be able to1. Explain the five essential points about use of the airway.2. Correctly insert the Laryngeal Mask Airway (LMA).Important Points The laryngeal mask airway (LMA) was developed for use as an alternative tothe face mask for achieving <strong>and</strong> maintaining control of the airway during routine anesthetic proceduresin the operating room. Since it does not protect the airway against vomiting <strong>and</strong> aspiration,it was meant to be used in patients who had been fasting <strong>and</strong> thus had an empty stomach. Itwas later found to be useful in the emergency situation when intubation is not possible <strong>and</strong> youcan’t ventilate with a BVM. It may prevent having to do a surgical procedure to open the airway.The LMA is another blind-insertion airway device (BIAD), but it differs from the others in that itwas never designed to seal the esophagus <strong>and</strong> was not originally meant for emergency use. It isnot equal to the endotracheal tube <strong>and</strong> should only be used when efforts to intubate the tracheahave been unsuccessful <strong>and</strong> ventilation is compromised.You must remember these essential points about the LMA:237
1. Use only for patients who are unresponsive <strong>and</strong> without protective reflexes. If the patientstill has a gag reflex, the LMA may cause laryngospasm or vomiting.2. Do not use for any patient with an injury to the esophagus (e.g., caustic ingestions) or inchildren who are less than 30 kg.3. Lubricate only the posterior surface of the LMA to avoid blockage of the aperture or aspirationof the lubricant.4. Patients should be adequately monitored (constant visual monitoring, cardiac monitor,<strong>and</strong>, if possible, pulse oximeter) at all times during LMA use.5. To avoid trauma to the airway, force should never be used during LMA insertion.6. Never overinflate the cuff after insertion. Overinflation may cause malposition, loss ofseal, or trauma. Cuff pressure should be checked periodically.7. If airway problems persist or ventilation is inadequate, the LMA should be removed <strong>and</strong>reinserted or an airway established by other means.8. The LMA does not prevent aspiration if the patient vomits. The presence of a nasogastrictube does not rule out the possibility of regurgitation <strong>and</strong> may even make regurgitationmore likely because the tube makes the esophageal sphincter incompetent.9. If the patient regains consciousness, you must remove the LMA, as it will cause retching<strong>and</strong> vomiting.Equipment ListItemProcedureQuantityAdult intubation mannequins 2LMAs 2Cans of silicone lubricant spray2(replaces water-soluble lubricant)35-cc syringes 2Tonsil suctions tip (Yaunker) <strong>and</strong> suction tubing 2Bag-valve devices 2Nonsterile rubber gloves1 boxFace shields or goggles 2Tube holder with bite block 21. Ventilate with mouth-to-mask or bag-valve mask, <strong>and</strong> suction the pharynx prior to insertionof the airway.238
2. Remove the valve tab, <strong>and</strong> check the integrity of the LMA cuff by inflating with the maximumvolume of air (see Table 9–1, below).3. The cuff of the LMA should be tightly deflated using the enclosed syringe so that it forms aflat oval disk with the rim facing away from the aperture. This can be accomplished by pressingthe mask with its hollow side down on a sterile flat surface. Use the fingers to guide thecuff into an oval. Shape <strong>and</strong> attempt to eliminate any wrinkles on the distal edge of the cuff.A completely flat <strong>and</strong> smooth leading edge facilitates insertion, avoids contact with the epiglottis,<strong>and</strong> is important to assure success when positioning the device.4. Lubricate the posterior surface of the LMA with a water-soluble lubricant just before insertion.5. Preoxygenate the patient.6. If there is no danger of spinal injury, position the patient with the neck flexed <strong>and</strong> the headextended. If the mechanism of injury suggests the potential for spinal injury, the head <strong>and</strong>neck must be maintained in a neutral position.7. Hold the LMA like a pen, with the index finger placed at the junction of the cuff <strong>and</strong> thetube. Under direct vision, press the tip of the cuff upward against the hard palate <strong>and</strong> flattenthe cuff against it. The black line on the airway tube should be oriented anteriorly toward theupper lip.8. Use the index finger to guide the LMA, pressing upward <strong>and</strong> backward toward the ears inone smooth movement. Advance the LMA into the hypopharynx until a definite resistance isfelt.9. Before removing the index finger, gently press down on the tube with the other h<strong>and</strong> to preventthe LMA from being pulled out of place.10. Without holding the tube, inflate the cuff with just enough air to obtain a seal. The maximumvolumes are shown in Table 9–1.11. Connect the LMA to the BVM <strong>and</strong> employ manual ventilation of less than 20 cm H 2 O (thisprecludes use of a FROPVD unless you use one that allows you to set the pressure). As withthe BIADs, you must see the chest rise, hear breath sounds, feel good compliance, <strong>and</strong> hearno breath sounds over the epigastrium in order to be sure that the LMA is correctly placed.12. Insert a bite block (not an oropharyngeal airway) <strong>and</strong> secure the LMA with tape. Rememberthat the LMA does not protect the airway from aspiration. If the patient becomes conscious,the LMA must be removed. Extubation is likely to cause vomiting; be prepared to suction thepharynx <strong>and</strong> turn the backboard.239
TABLE 9–1LMA Size Patient Size Maximum Cuff Volumes (air only)3 Children >30 kg <strong>and</strong> small adults 20 mL2 Normal <strong>and</strong> large adults 30 mL1 Large adults 40 mLNote: Never overinflate the cuff. Avoid prolonged intracuff pressures greater than 60 cm H 2 0.OPTIONAL SKILL 8: ADULT INTRAOSSEOUS INFUSIONMinimum instructors needed: 1Objectives Upon completion of this skill station, the student should be able to1. Explain the indications for the use of adult intraosseous infusion.2. Perform an adult intraosseous infusion. (Other adult IO devices may be used instead of theF.A.S.T. 1 ® that is demonstrated here.)St<strong>and</strong>ard vascular access in the adult patient involves the peripheral venous system. Underconditions common in trauma, the peripheral veins often collapse. Intraosseous infusion (IO) forthe pediatric patient has been taught within the BTLS course <strong>and</strong> has been common practice forseveral years. In the past, adult IO was used in some cases to give medications, but the flow ratewas too slow for it to be used for fluid resuscitation of adult trauma patients. Recently, severaldevices have been developed to allow rapid fluid replacement <strong>and</strong> administration of medicationsto adults.One of these devices (F.A.S.T. 1 ® ) makes use of the sternum for the site because:1. The sternal body is large, relatively flat, <strong>and</strong> can be readily located.2. The sternum retains a high proportion of red marrow.3. The F.A.S.T. 1 ® device has a thinner, more uniform cortical bone covering overlying arelatively uniform marrow space.4. It is less likely to be fractured than the extremities, particularly at the level of the manubrium.5. It is usually exposed, or easy to expose, in a trauma patient.6. The recommended infusion site on the midline of the manubrium, 15 mm below the sternalnotch, is easy to locate <strong>and</strong> l<strong>and</strong>mark.7. There is not an appreciable time lag between central venous infusion <strong>and</strong> IO infusion ofmost substances. For adult trauma patients who need fluid resuscitation or medications<strong>and</strong> you are unable to quickly obtain a peripheral IV line, this device may be the vascularaccess of choice. It is fast (60–90 seconds), simple (failure rate
Indications• The adult patient who is in cardiac arrest <strong>and</strong> in whom you cannot quickly obtain peripheralvenous access• Hypovolemic adult patients who have a prolonged transport <strong>and</strong> in whom you are unableto quickly (two sticks or 90 seconds) obtain peripheral venous accessContraindications• Do not use this device if the sternum is fractured.• Recent sternotomy (may have compromised the integrity of the manubrium or its vascularization).• Severe osteoporosis or bone softening conditions.Important Points on Adult Intraosseous Infusion1. As with all advanced procedures, this technique must be accepted local protocol, <strong>and</strong> youmust obtain medical direction (protocol or verbal) before performing.2. If infiltration occurs (rare), you must abort the procedure. This is the only bone in which thisdevice is used.3. Potential complications include:a. Subperiostial infusion due to improper placementb. Osteomyelitisc. Sepsisd. Fat embolisme. Marrow damageStudies have shown these complications to be rare; however, good aseptic technique is important,just as with intravenous therapy.Equipment List1. Several configurations are available for F.A.S.T.1 ® training, depending on available resources.Basic commercial packages are the F.A.S.T.1 ® SIM IO System, F.A.S.T.1 ® TrainingSystem, <strong>and</strong> F.A.S.T.1 ® Training Kit. Realism can be added with the F.A.S.T.1 ® Trainer,F.A.S.T. 1 ® Adult Sternal IO Simulator, or the Adult Sternal Intraosseous Infusion mannequin.2. Non-sterile glovesProcedure1. Place the Target Patch at the site. The single recommended site of insertion is the adult manubrium,on the midline <strong>and</strong> 1.5 cm (5/8”) below the sternal notch. The site is prepped with241
aseptic technique, <strong>and</strong> the index finger is used to align the Target Patch with the patient’ssternal notch.2. With the Patch securely attached to the patient’s skin, the Introducer is placed in the targetzone, perpendicular to the skin. A firm push on the Introducer releases the Infusion Tube intothe correct site <strong>and</strong> to the right penetration depth. The Introducer is pulled straight back, exposingthe Infusion Tube <strong>and</strong> a two-part support sleeve, which falls away.3. Correct placement is verified by observation of marrow entering the Infusion Tube. The InfusionTube is joined to tubing on the patch, which is connected to a purged source of fluid.Fluid can now flow to the patient.4. The Protector Dome is pressed down firmly over the Target Patch to engage the Velcro ® fastening.The site is clearly visible through the Dome, the Infusion Tube <strong>and</strong> connection tubingmove easily without any strain on the skin, <strong>and</strong> the site requires no further stabilization whilethe patient is transported.OPTIONAL SKILL 9: RAPID SEQUENCE INTUBATIONMinimum instructors needed: 1Objectives Upon completion of this skill station, the student should be able to:1. Discuss the situations where Rapid Sequence Intubation (RSI) can be of benefit to the patient.2. Discuss the situations were RSI can be detrimental to the patient.3. Correctly perform RSI.The importance in appropriately managing the airway of the trauma patient cannot beoveremphasized. Loss of airway remains the leading cause of early preventable trauma deaths,<strong>and</strong> hypoxia has been shown to worsen outcomes for trauma patients, especially those withclosed head injury. The indications for active airway management <strong>and</strong> the options managing theairway are well covered in Chapter 4 of the textbook, <strong>and</strong> the skills for managing the airway aredetailed in Chapter 5 of the textbook. All responders should be familiar with the materials inthese two chapters <strong>and</strong> be able to apply this care.When EMS first obtained ability to perform endotracheal intubation, it was essentiallyperformed on "dead" patients: unresponsive <strong>and</strong> apneic. Not all patients fit this situation, <strong>and</strong>airway management of the agitated, combative, or patient with airway trauma had to wait untilthey deteriorated <strong>and</strong> became unresponsive.It is important to remember that all airways managed in the field meet the American Societyof Anesthesiology's definition of a “Difficult Airway.” Thus, the responder must have many"tools" in the tool box, available to manage the airway of the trauma patient. Popular in EMScircles, one tool in the tool box for airway management (one that addresses the problem above)is Rapid Sequence Intubation (actually rapid sequence induction). The term rapid sequenceintubation is a misnomer, as this procedure is certainly not rapid. Because of this, it canadversely affect patient outcome by prolonging scene time. Unless there is a critical need, this242
procedure should be performed during transport. In the urban setting, where there are shorttransport times, there are almost no indications for this procedure.A variant of the practice of rapid sequence induction used by anesthesiologists whenconfronted with a nonfasting patient, the technique allows the intubator to achieve conditionsthat improve the likelihood of intubating the patient, while minimizing the risks of aspiration, byrapidly administering a sedative <strong>and</strong> paralytic to improve intubating conditions. Numerousstudies have shown that EMS personnel can be effectively taught to use this technique <strong>and</strong> applyit in the field setting. Other studies have shown that there is a real danger of the patient havingprolonged hypoxia during this procedure, so constant recording of pulse oximetry reading shouldbe done, <strong>and</strong> there should be a strict quality improvement program that monitors intubation time,oxygenation of the patient, <strong>and</strong> scene time.The actual technique of RSI is quite simple. The difficult part for EMS personnel is torecognize the patient who should not undergo RSI. The worst thing you can do in airwaymanagement is take a spontaneously breathing patient <strong>and</strong> place them into a “Can’t Intubate <strong>and</strong>Can’t Ventilate” situation. All personnel who utilize RSI should be familiar with <strong>and</strong> able to useone of the many blind insertion airway devices (BIAD), <strong>and</strong> also should be able to perform acricothyrotomy if unable to ventilate or intubate the patient. Lastly (but most important of all),all EMS personnel should be able to manage an airway using a BVM. Remember BLS comesbefore ALS. Lastly, many EMS providers erroneously see use of RSI <strong>and</strong> even intubation as ameasure of “prestige.” It is simply one of many tools available to us to manage an airway. Thereal trick is to choose the right one for your patient <strong>and</strong> correctly apply it.At the time of publication, several studies have called into question the utility of this skill inthe field setting. The decision to implement the use of RSI by an EMS system should becarefully reviewed, especially with respect to issues of skill retention, transport times, <strong>and</strong> theavailability of alternative airway methods. Any system using RSI must have in place a strongeducational <strong>and</strong> quality improvement program.Equipment ListItemQuantityAdult intubation mannequins 2Adult cuffed ET tubes7 or 7.5 mm 28 mm 2Wire guides for adult ET tubes 2Laryngoscope h<strong>and</strong>les 4Spare batteries for laryngoscopes 8Spare bulbs for laryngoscopes 4Adult laryngoscope bladesCurved 2243
Straight 2Can of silicone lubricant spray 110-cc syringes 2Oral airways (size to fit adult mannequin) 2Tonsil auctions tip (Yaunker) <strong>and</strong> suction tubing 2 eachBag-valve devices 2Nonsterile rubber gloves1 boxFace shields or goggles 210-cc syringes (empty) labeled for the drugs to10be used in RSICO 2 detector (optional) 1Esophageal detection device (optional) 1TechniqueThe ideal approach uses the 6 Ps: Preparation, Preoxygenation, Premedicate, Paralyze, Pass thetube, confirm Position.1. Preparation. First, you should evaluate the difficulty you may experience when you try tointubate. Do this by using the Mallampati score (see Chapter 4). If the patient appears to beparticularly difficult to intubate, you would be better served using a BIAD or BVM ratherthan struggling with a paralyzed, apneic, hypoxic patient. If you decide to perform RSI, youshould have a plan for an escape airway should intubation be unsuccessful. All necessaryequipment, including suction, should be readily available <strong>and</strong> checked.Proper positioning is an important part of preparation. While the EMS environment oftenprecludes placing the patient at a good height, on a stretcher, in the sniffing position, anysteps we can take to better position ourselves so that we have the best view are helpful.Given that many of our patients are in spinal-motion restriction, one "positioning step" wecan take, just prior to intubation, is to remove or loosen the cervical collar <strong>and</strong> apply in-linestabilization. This will allow you to move the jaw forward <strong>and</strong> improve visualization of thecords.244
2. Preoxygenation. Since the patient will be rendered apneic, hypoxia will rapidly follow. Toextend the time for intubation, nitrogen in the lungs is "washed out" by having the patientbreathe 100 percent oxygen for 2–3 minutes. Washout of the nitrogen allows the patient totolerate up to 5 minutes of apnea (only 2–3 minutes in children) during intubation withoutbecoming hypoxic. In patients with airway compromise or other problems, ventilations canbe assisted, though care should be made not to ventilate with too much force, thus reducingthe risk of insufflating air into the stomach <strong>and</strong> thus regurgitation of stomach contentsleading to aspiration. Application of cricoid pressure (Sellick's maneuver) will help reducethis, as well as reduce risk of aspiration as the lower esophageal sphincter relaxes afteradministration of paralytic. All patients should be placed on a cardiac monitor, a pulseoximeter, <strong>and</strong> a capnometer at this time, if not previously done.3. Premedicate. Both the act of intubation <strong>and</strong> some paralytics can raise intracranial pressure.Though advocated in the past, use of IV lidocaine prior to intubation has been found to be ofno benefit in the field setting. Pediatric patients given succinylcholine may developbradycardia. Most experts feel that pediatric patients <strong>and</strong> those adults receiving a repeat doseof succinylcholine should receive 0.1mg/kg of atropine. Remember also in the pediatricpatient that the use of a length-based system, such as the Broselow Tape or similar, c<strong>and</strong>ecrease dosing errors. Depolarizing paralytic agents like succinylcholine can causefasiculations, which can cause a rise in both intracranial pressure <strong>and</strong> intraocular pressure aswell as be uncomfortable for the patient. A non-depolarizing blocking agent such asvecuronium at 0.01mg/kg can be given at 3 minutes prior to administering the paralyticagent. Because it adds time to the process in what is often a time-critical situation, many fieldproviders omit this step.The last premedication is the sedative. This ensures that the patient is not awake whileparalyzed. Benzodiazepines such as versed at 0.1mg/kg can be used, though etomidate(0.3mg/kg) is one of the more commonly used sedative agents <strong>and</strong> has advantages in that ithas minimal effects on hemodynamics. Some trauma surgeons do not support use ofetomidate due to reported adrenal suppression, with even a single dose.4. Paralyze. Two types of paralytics are available. A depolarizing agent, such assuccinylcholine, is the preferred agent due to rapid onset of action <strong>and</strong> rapid degradation. Ata dose of 1 to 1.5 mg/kg (2 mg/kg in children), intubating conditions are achieved within 90seconds of administration <strong>and</strong> are cleared within 5 minutes. Contraindications to use ofdepolarizing agents are listed in Table A-2.Nondepolarizing agents have a longer onset <strong>and</strong> paralysis lasts longer. The fastest actingagent is rocuronium (0.5mg/kg adult; 0.75mg/kg in children). Vecuronium 0.1 mg/kg can beused to maintain paralysis after intubation is successful.5. Pass the Tube. Once intubating conditions are achieved, pass the tube. Aids in the processinclude the use of a stylet, the gum elastic bougie, <strong>and</strong> external laryngeal manipulation.6. Confirm Position. Use techniques described in Chapter 5 of the ITLS textbook. Use ofcapnography is m<strong>and</strong>atory so that inadvertent tube dislodgement can be detected.FORMS245
The following forms are available from ITLS <strong>and</strong> can be obtained as a packet by calling 1-888-495-ITLS (outside the U.S.: +1-630-495-6442).Course <strong>Coordinator</strong> WorksheetCourse BudgetCourse Request FormPostcourse ChecklistModel Selection FormCourse Roster (m<strong>and</strong>atory for reporting)Course Roster Tally Sheet (m<strong>and</strong>atory for reporting)Sample Letter to Course <strong>Instructor</strong>sSample Letter to Course RegistrantsAffiliate Faculty Course EvaluationProvider Course Application Form<strong>Instructor</strong> Course Application Form<strong>Instructor</strong> Reciprocity Form<strong>Instructor</strong> Recertification FormCourse Lecture EvaluationPractical Skills EvaluationPractical Station EvaluationPractical Testing Evaluation246
GLASGOW COMA SCOREEye Opening Verbal Response Motor ResponsePoints Points PointsSpontaneous 4 Oriented 5 Obeys comm<strong>and</strong>s 6To voice 3 Confused 4 Localizes pain 5To pain 2 Inappropriate words 3 Withdraws 4None 1 Incomprehensible sounds 2 Abnormal flexion 3*Silent 1 Abnormal extension 2**No movement 1*Decorticate posturing to pain**Decerebrate posturing to painNOTES247
MOULAGEThe purpose of makeup or moulage is to help the student’s assessment by making the patient situationmore realistic. The students will get the feel of an emergency situation more easily if thepatient has injuries that appear genuine. Beautiful but delicate makeup is often destroyed beforethe first group is through their practice; thus, you must use judgment in applying makeup. Manyinjuries or signs of injury (distended neck veins, deviated trachea, sucking chest wound, flailchest) can be shown better (<strong>and</strong> longer) by simply writing on a piece of white tape <strong>and</strong> sticking itto the skin in the appropriate place. If the student examines the patient <strong>and</strong> sees “distended neckveins” <strong>and</strong> “trachea deviated to the right” written on the tape, the effect is better than having toask the instructor or having to guess what smudged or “fallen off” moulage once represented.Makeup is probably best used to simulate cyanosis or shock, bruising, lacerations, burns, or abrasions.Having an experienced makeup artist prepare the models is preferable, but with a littleknowledge <strong>and</strong> practice, the average person can do a surprisingly good job.Selection of ModelsTreatment of the multiple trauma patient requires exposure of the injured areas, including thechest, so less embarrassment is involved if most of the models are male (the pregnant patient, ofcourse, is best portrayed by a female). Warn all models (especially female) to wear bathing suitsor other suitable attire under their clothes.If the “patients” have some knowledge of the symptoms pertaining to their “injuries,” it willadd to the realism. EMTs <strong>and</strong> nurses often make the best “patients,” <strong>and</strong> it is a learning experiencefor them. The faculty in each station should discuss with the model exactly how to portrayhis injuries. If you choose to do moulage, allow a minimum of two hours for model preparation.Makeup KitA wound simulation kit is commercially available. It contains artificial blood, other makeup materials,<strong>and</strong> various plastic or rubber simulated injuries to be attached to the skin. You can assembleyour own makeup kit at considerable savings. The following lists include many of theitems necessary. Almost all of the material can be found at local hardware, grocery, or drugstoresItemQuantityIsopropyl alcohol1 bottleVaseline ®1 jarPaper towels2 rollsKY jelly ®2 tubesCold cream1 jarSmall hair dryer 1Facial tissues1 box248
Glycerin1 bottleSpray bottle 2Assorted sponges (to apply makeup)Saran Wrap ®1 rollRubber condoms 6Red, blue, <strong>and</strong> black felt-tip pens1 eachCan of waterless h<strong>and</strong> cleaner 1Alka-Seltzer ® tablets1 small bottleMakeup colors: maroon, red, white, blue, brown,yellow, fleshArtificial blood (theatrical supply)1 packPlumber’s putty (get at hardware store; it takes the 1 canplace of mortician’s wax)Duo ® surgical adhesive (theatrical supply) 1 bottleGrease stick, black 1Activated charcoal1 small containerIrrigation bulb (to apply charcoal) 1Tongue depressors (to mold putty)1 boxToothpicks (to mold putty)1 boxSoft <strong>and</strong> stiff bristled artist brushes1 eachScissors1 pairRubber gloves (unsterile)1 boxAdditional MaterialPieces of bone (from baked chicken or turkey)Black blood (for the depths of wounds)—mix charcoal, white petrolatum, <strong>and</strong> bloodpowder.Coagulated blood—mix KY jelly <strong>and</strong> powdered blood.Regular blood—mix stay-flo liquid starch <strong>and</strong> food coloring or powdered blood.Sweat (diaphoresis)—mix two parts glycerin <strong>and</strong> one part water. Use in spray bottle.AshesDirtPieces of broken clear plastic or Plexiglas249
Skin PreparationWhere makeup is to be applied, first apply a thin layer of cold cream. This is very important formakeup removal later. In areas where wounds are to be attached (glued prostheses or moldedputty), clean the skin of all oil <strong>and</strong> grease with a paper towel <strong>and</strong> alcohol.Wound SimulationApplying makeup color is better done with rubber gloves or the small sponges than with yourbare fingers. When using putty, use a tongue blade <strong>and</strong> toothpick to smooth <strong>and</strong> shape.• Shock. Use white makeup. Apply a small amount to the center of the forehead <strong>and</strong> eachcheek. Smooth it out uniformly until the skin has a pale appearance. Do not apply themakeup too heavily or the model will look like a clown.• Cyanosis. Use medium blue makeup. Apply a tiny amount to the nose, lips, earlobes, <strong>and</strong> fingernails.It is best to use this in conjunction with the “shock” makeup.• Diaphoresis. Mix two parts glycerin <strong>and</strong> one part water in a spray bottle. Spray it on the patientjust before the student begins evaluation. Keep out of patient’s eyes—it burns.• Blood. Simulated blood is used in wounds <strong>and</strong> on clothing to give a dramatic effect. You willneed blood of regular consistency, “clotted” blood, <strong>and</strong> “black” blood. Be very careful whenusing artificial blood, because it stains carpet <strong>and</strong> even some tile. Place a plastic sheet underthe patient to prevent the blood from coming into contact with tile or carpet.• Burns. Cover the area with a thin layer of red or maroon makeup. Do not smooth it out uniformly;burns are not uniform. Now scatter several “blisters” of Vaseline ® scattered over thearea. Cover this with Saran Wrap ® or facial tissue <strong>and</strong> press it down. You will have very realisticblisters where the Saran Wrap ® covers the globs of Vaseline ® . Facial tissue can betorn to look like broken blisters. Apply black grease paint around the edges of the SaranWrap ® . Spray the area with a small amount of the glycerin–water mixture, <strong>and</strong> apply a thinlayer of ashes, which should cover the edges well <strong>and</strong> give a uniform appearance. Donburned clothing.• Basilar skull fracture. Put a few drops of blood in either ear. Allow a small amount to trickledown the face. Apply black makeup around eyes to simulate “raccoon eyes.”• Abrasions. Apply maroon liner to the area with a makeup brush or sponge. Smooth <strong>and</strong> thinthe edges so they blend into the skin. Cover the wound with a thick layer of Duo ® surgicaladhesive <strong>and</strong> dry with hair dryer. When it is dry, pick <strong>and</strong> tear the center of the adhesive toresemble sloughed, abraded skin. Rub a small amount of maroon <strong>and</strong> red cream over <strong>and</strong> underthe adhesive layer. Apply a small amount of glycerin <strong>and</strong> then clotted blood. Dirt alsoadds a realistic touch.• Contusions. Since bruises are usually raised in the center, it is best to use an area of bonyprominence for bruises. Apply red <strong>and</strong> maroon cream, mixed together. Thin the outside edgein an irregular manner. Use a brush to apply blue liner to the outer one-third of the redmaroonarea. Do not blend in completely. It should have a mottled appearance.• Lacerations. First clean the skin well with alcohol. With plumber’s putty fashion a thin layer(1/8-inch thick at the thickest part) on the clean skin. Feather the edges. Use the edge of the250
tongue blade to make a gash across the putty. Use flesh-colored makeup over the entire area<strong>and</strong> the surrounding skin to blend the putty <strong>and</strong> skin. Apply black blood to the depth of thewound. Mix clotted blood <strong>and</strong> ashes <strong>and</strong> dab the mixture on the area; then, pour a smallamount of blood into the gash <strong>and</strong> allow it to trickle down.• Sucking chest wound. Clean the skin with alcohol. Apply putty with one-half of an Alka-Seltzer ® tablet embedded in it. Feather the edges, <strong>and</strong> make a hole in the putty to resemble apenetrating wound. Apply maroon or red makeup. Dab on a mixture of blood <strong>and</strong> ashes. Nowmake a hole down to the Alka-Seltzer ® tablet. Just before the student comes in, pour a smallamount of artificial blood down the hole onto the tablet. It will bubble like a sucking chestwound.• Penetrating object. This wound is simulated with the same technique as lacerations <strong>and</strong> suckingchest wounds. Use enough putty to secure the penetrating object. Do not use heavy objects(they will pull the putty loose) or sharp objects (they may cause real lacerations). Useplastic, not glass.• Protruding intestines. You may use the commercial moulage for this or make very realisticintestines from two rubber condoms filled with KY jelly. The ends are tied off <strong>and</strong> wrappedaround each other to simulate loops of intestines. Vascular markings are made with the red<strong>and</strong> blue felt-tip pens. Attach these to the skin, <strong>and</strong> apply clotted <strong>and</strong> regular artificial blood.• Open fractures. Commercial moulage is best for this, but if you must, apply <strong>and</strong> blend puttyto the area. Incise the putty with a toothpick or tongue blade, then apply makeup to simulatebruised <strong>and</strong> torn flesh. Use black blood in the base of the wound, <strong>and</strong> then add bone fragments(small) <strong>and</strong> clotted blood.ClothingA good source of old clothing (other than your closet) is the Salvation Army or Goodwill store.They usually have some clothing in poor condition, which can be purchased for very little cost.Get the largest sizes available. If you plan to teach courses regularly, it is best to cut the clothingat the seams <strong>and</strong> sew in Velcro ® strips so the clothing can be “ripped open” for exam of the patient<strong>and</strong> then stuck back together for the next group.251