

1 - O Scale Trains Magazine Online
1 - O Scale Trains Magazine Online
1 - O Scale Trains Magazine Online
- No tags were found...

You also want an ePaper? Increase the reach of your titles
YUMPU automatically turns print PDFs into web optimized ePapers that Google loves.
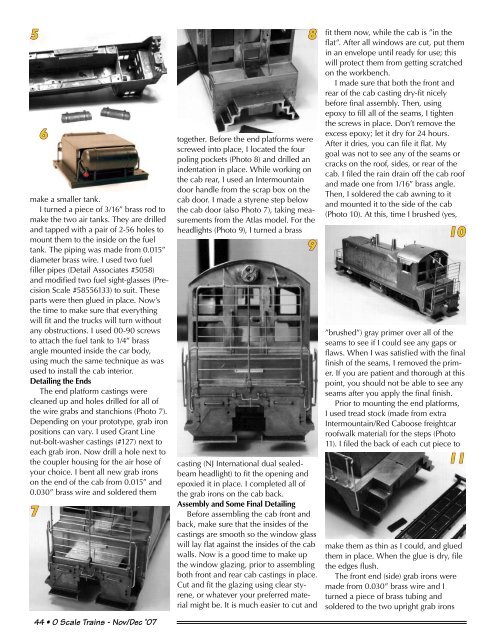
5make a smaller tank.I turned a piece of 3/16” brass rod tomake the two air tanks. They are drilledand tapped with a pair of 2-56 holes tomount them to the inside on the fueltank. The piping was made from 0.015”diameter brass wire. I used two fuelfiller pipes (Detail Associates #5058)and modified two fuel sight-glasses (Precision<strong>Scale</strong> #58556133) to suit. Theseparts were then glued in place. Now’sthe time to make sure that everythingwill fit and the trucks will turn withoutany obstructions. I used 00-90 screwsto attach the fuel tank to 1/4” brassangle mounted inside the car body,using much the same technique as wasused to install the cab interior.Detailing the EndsThe end platform castings werecleaned up and holes drilled for all ofthe wire grabs and stanchions (Photo 7).Depending on your prototype, grab ironpositions can vary. I used Grant Linenut-bolt-washer castings (#127) next toeach grab iron. Now drill a hole next tothe coupler housing for the air hose ofyour choice. I bent all new grab ironson the end of the cab from 0.015” and0.030” brass wire and soldered them7644 • O <strong>Scale</strong> <strong>Trains</strong> - Nov/Dec ’078together. Before the end platforms werescrewed into place, I located the fourpoling pockets (Photo 8) and drilled anindentation in place. While working onthe cab rear, I used an Intermountaindoor handle from the scrap box on thecab door. I made a styrene step belowthe cab door (also Photo 7), taking measurementsfrom the Atlas model. For theheadlights (Photo 9), I turned a brass9casting (NJ International dual sealedbeamheadlight) to fit the opening andepoxied it in place. I completed all ofthe grab irons on the cab back.Assembly and Some Final DetailingBefore assembling the cab front andback, make sure that the insides of thecastings are smooth so the window glasswill lay flat against the insides of the cabwalls. Now is a good time to make upthe window glazing, prior to assemblingboth front and rear cab castings in place.Cut and fit the glazing using clear styrene,or whatever your preferred materialmight be. It is much easier to cut andfit them now, while the cab is ”in theflat”. After all windows are cut, put themin an envelope until ready for use; thiswill protect them from getting scratchedon the workbench.I made sure that both the front andrear of the cab casting dry-fit nicelybefore final assembly. Then, usingepoxy to fill all of the seams, I tightenthe screws in place. Don’t remove theexcess epoxy; let it dry for 24 hours.After it dries, you can file it flat. Mygoal was not to see any of the seams orcracks on the roof, sides, or rear of thecab. I filed the rain drain off the cab roofand made one from 1/16” brass angle.Then, I soldered the cab awning to itand mounted it to the side of the cab(Photo 10). At this, time I brushed (yes,10”brushed”) gray primer over all of theseams to see if I could see any gaps orflaws. When I was satisfied with the finalfinish of the seams, I removed the primer.If you are patient and thorough at thispoint, you should not be able to see anyseams after you apply the final finish.Prior to mounting the end platforms,I used tread stock (made from extraIntermountain/Red Caboose freightcarroofwalk material) for the steps (Photo11). I filed the back of each cut piece to11make them as thin as I could, and gluedthem in place. When the glue is dry, filethe edges flush.The front end (side) grab irons weremade from 0.030” brass wire and Iturned a piece of brass tubing andsoldered to the two upright grab irons


