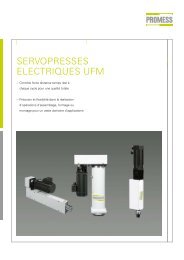
Manual - Promess Gesellschaft für Montage
Manual - Promess Gesellschaft für Montage
Manual - Promess Gesellschaft für Montage
- No tags were found...

You also want an ePaper? Increase the reach of your titles
YUMPU automatically turns print PDFs into web optimized ePapers that Google loves.
PROMESS21 Lubrication advice................................................................................................. 8521.1 Gear box oil.....................................................................................................................................9522 Software Update ................................................................................................... 96• Index ...................................................................................................................... 983© <strong>Promess</strong> <strong>Montage</strong>- und Prüfsysteme GmbH BerlinUFM NC-Modul V3
PROMESS1 IntroductionThe UFM-NC-MODULE system is a powerful tool to rapidly setup, alter, optimize and adapt press andpositioning tasks.The basic element is the electro-mechanical assembly unit from PROMESS, consisting of:• assembly unit with motor, transducer and distance measuring device,• motor power amplifier,• NC module for NC control of the assembly program,• programming and user software.Several press units can be connected via a network and programmedfrom a single programming device.The following figure shows a block schematic:UNIT1UNIT2UNIT3UNITnServoamplifierServoamplifierServoamplifierServoamplifierNCModuleNCModuleNCModuleNCModuleProgrammingunitPLC-control4© <strong>Promess</strong> <strong>Montage</strong>- und Prüfsysteme GmbH BerlinUFM NC-Module V3
PROMESS1.1 Contents of supplyOptionMounting plateMechanical unitAC – Servo motorPresssafety controlS.G.-amplifier34LVNCModule12Option• PC• Monitor• KeyboardFS5PC• Electro-mechanical press unit,• SG–amplifier in diecast aluminium housing (SG = Strain Gauge)• Power module• NC module• PLC interface (basic function)• Optional mounting plate for the installation of the control cabinet, including Emergency Stopcircuitry according to EN 4181, Stop Cat. Dimensions H * W * D = 773 * 492 * 300 mm (Units > 60kN: H * W = 1896 * 499 mm)• Connection cable, confectioned:1. Connection cable motor – power amplifier (power cable), length 5 m2. Connection cable motor – power unit (resolver), length 5 m3. Connection cable SG amplifier – control unit, length 5 m4. Connection cable proximity switch in OT – SG amplifier, length = 2 m5. Interface cable (RS 485, RS232)• Optional PC with monitor + keyboard5© <strong>Promess</strong> <strong>Montage</strong>- und Prüfsysteme GmbH BerlinUFM NC-Modul V3
PROMESS1.2. TransportThe units are supplied packaged in standard cases. The belt drive protection is not mounted tofacilitate the use of lifting equipment when unpacking the unit. Please follow the instructions below toremove the unit:Use a broad double belt, placed under the motor plate and around the mounting flange, to unload thepress unit.ATTENTION:Do not put any loads on the proximity and limit switches when attaching the lifting device!There is also the possibility of using an eyebolt, attached to the thread of the ball screw, to unload thepress unit.After the unit has been unloaded, inspect it for visible transport damages.The press unit and related servo amplifier may only be installed in appropriate and suitable locations.In particular, please observe all protection regulations. Should you require information concerningrequirements about the admissible locations, please contact the manufacturer.After the installation of the press unit, please make sure you comply with the manufacturer's specificmeasures before operation:Mount the belt protection, prior to connecting the power cable.Only use the power cables supplied.Assemble the power amplifier with the supplied filters and choking coils according to the poweramplifier manual instructions.Make sure all cables are correctly installed. Avoid laying power and data cables next to each other.6© <strong>Promess</strong> <strong>Montage</strong>- und Prüfsysteme GmbH BerlinUFM NC-Module V3
PROMESS3.1 Risk analysisRisk estimationFrequency of exposureAccident probabilityseldom often great smallPossible injuries 1ACategory 1Minor injuries,crushing of the hand andfingersCategory 2Major injuries,loss of fingers,severe crushing of the handCategory 3DeathSevere crushing of the head2B3C1D2E3FCountermeasuresDangers through mechanical malfunctionsType of malfunctionGuides: wear, blocking after beingdamagedThrust bearing: wear, damageBall screw: wear, damagePossibleinjuriesNoneNoneNoneCountermeasuresBroken drive belt:No brake function after the belt isrupturedCog-belt coupling loosenedSlippage of the cog-wheel on theaxle, wrong positioning, forceexceededTransducer, destroyed throughexcessive loadCable breakage, force transducerCable breakage, limit switchesCable breakage, motor resolverCable breakage, power cable1A 3F Category 1 and21A 3F Category 1 and2NoneNoneNoneNoneNoneNone10-fold safety level against ruptureunder normal working conditionsThe couplings are self-retaining, loosescrews can only result in the couplingloosening itself when the press unit isexerted to extremely strong vibrationsor shocks.9© <strong>Promess</strong> <strong>Montage</strong>- und Prüfsysteme GmbH BerlinUFM NC-Modul V3
PROMESS4 Software installationPlace the disk or CD-ROM in the appropriate drive. Go to the Windows start button (bottom far left),select 'Execute' and then type “Setup”. Follow the on-screen instructions to install the program.Connect your PC with the press unit NC module via the serial interface RS 232 or RS 485(a separate board is needed in your PC). If you connect via RS 485, you must bridge pins 4 and 9.• Position of the NC module in the power amplifierRS 485RS 232Pin1 0V2 /TX3 /RX4 NC5 NC6 TX7 RX8 NC9 0VPin1 Schirm2 TXD3 RXD4 DTR5 GND6 DSR7 RTS8 CTS9 NC10© <strong>Promess</strong> <strong>Montage</strong>- und Prüfsysteme GmbH BerlinUFM NC-Module V3
PROMESS5 Program startStart the program with the help of the icon installed.During start up, the program scans the whole system to determine which modules are connected. Thisscanning takes place provided the option "automatic" has been selected under “polling of the stations”(new or substitute modules are always supplied with the station number 31 set). The station numberdesired must be entered in parameter 20.29 of the Unidrive. For details on how to enter parameters,please see the Unidrive manual, page 5-5 (parameterisation).If you only want to establish a connection to a specific station, you should select “manual”.Once a station has been detected, the following station window is opened:The program stored in the NC module is automatically loaded and displayed.If there are any communication problems, check the configuration of the interface first.! ! !Before you start the unit for the first time, please check whether the calibration factor iscorrect. To do this, open „program parameter“ in the menu „service“ and check under„calibration“. You will find the right calibration factor in the „Proprietary CalibrationCertificate“, you have got with the UFM and on the mechanical unit.11© <strong>Promess</strong> <strong>Montage</strong>- und Prüfsysteme GmbH BerlinUFM NC-Modul V3
PROMESS6 Program windowThe main window:Histogram: On/OffMeas. variableEditorVariableSignal progressStep listStatusinformationStatus line7 Screen settingsVarious windows may be displayed on the screen. The windows can easily be opened, closed ortoggled, so that any combination is possible. The windows can be selected or de-selected via themenu “View”.12© <strong>Promess</strong> <strong>Montage</strong>- und Prüfsysteme GmbH BerlinUFM NC-Module V3
PROMESS• LEDsThe LEDs show the status of the I/Os of the PLC – interface (basic function):The following conditions are displayed:- Start reference positioning (I)- Start (I)- Confirmation (O)- Ref. (Error / reference request) (O)- NOK (O)- OK (O)• Pushbuttons NC moduleThe buttons are used to initiate the following functions:- E-Stop: The program can only be resumed after a reference positioning.- Stop: The program execution is interrupted. Resume with “Start”.- Step: The next step in the program cycle is executed.- Start: The complete program cycle is started.- Ref..: A reference positioning is executed.• Program pushbuttonsNew programSaveProgram PresetGraphics,zoom outGraphics,zoom inSend program toNC moduleOpen databaseOpenprogramPrintDeletestepAddstepGraphics,full viewArrange stationsGet programfrom NC module13© <strong>Promess</strong> <strong>Montage</strong>- und Prüfsysteme GmbH BerlinUFM NC-Modul V3
PROMESS• Analog inputsThe values for force, distance and the external analog signal are displayed here.• Status lineStatus of communication between the PC and NC module113Step counterStatusError messages8 <strong>Manual</strong> positioningYou will find the item “<strong>Manual</strong> positioning” in the service menu.Use this window to control the axis in manual mode.Enter the values required for position, speed, acceleration and excessive load limit.Jogging - press and hold down the respective button to move the axis in thedirection desired at the speed programmed. As soon as you let go of thebutton the axis stops.Continuous motion, the axis is positioned the equivalent distance you haveentered. The axis moves along the programmed distance. If the button isreleased the press will stop. To continue moving along the distance, press thebutton again.14© <strong>Promess</strong> <strong>Montage</strong>- und Prüfsysteme GmbH BerlinUFM NC-Module V3
PROMESS9 ProgrammingTo generate a new program, first select “New” from the drop down menu “File” or click on thecorresponding button in the toolbar.Select the function required before you start generating your press program:All functions for the generation can also be selected with the right mouse button, if you click in the steplist. With the help of the right mouse button, it is also possible to copy and paste program steps.All generation functions can also be called up via the right mouse button if you click within the step list.It is also possible, using the right mouse button, to copy and insert program steps.Menu by clicking the right mouse buttonMemory requirement of the individual program stepssee: Program parameter (Standard parameter) page4815© <strong>Promess</strong> <strong>Montage</strong>- und Prüfsysteme GmbH BerlinUFM NC-Modul V3
PROMESSSaved programs can be reopened under “Open Program”.If you want to delete a program, please click with the right mouse button on the chosen program andon the menu that is opened then, on the function “Delete”.9.1 PositioningThis function block is used to move the press ram to any position, both in absolute and relative mode.The actual motion curve can be registered, but in addition also the force – distance – development canbe monitored (see monitoring). It is also possible to position according to any variable value. (Workingwith variables, please refer to the chapter Variable).Click the button “Positioning” in the drop-down menu Function.The following window is opened:Enter the values required in the following fields :Current positionCurrent forceCurrent value of anadditional analogue sensor• Position (positions may be reached in either relative or absolute mode).• Speed• Acceleration• Brake ramp• Overload limit (Please choose the input for overload)• Signal source (Please choose the input for monitoring)• Limit curve teach-in: A teach-in curve for this function is established, when the next teach-incycle is started. Existing limit curves are overwritten. The distance of the limit curves relative theactual curve may be set in the service menu under configuration => control parameters =>parameters in field, teach-in strategy.16© <strong>Promess</strong> <strong>Montage</strong>- und Prüfsysteme GmbH BerlinUFM NC-Module V3
PROMESS• Cycle stop: Select this point, when you want to stop the cycle after having executed the activefunction.9.2 Press to ForceThis function block is used to press to a given force, the distance may be expressed as absolute orrelative values. The actual motion curve can be registered, but in addition also the force – distancedevelopment can be monitored (see monitoring).Click the button “Press on block“ in the drop-down menu Function.The following window is opened:Current positionKurrent forceCurrent value of anadditional analogue sensorIn the following fields enter the values needed:• Force: the required switch off force can be entered directly or via a variable• Pre-position: Up to this position, positioning is done at the speed value entered(the position can be reached in relative or absolute mode),• Speed: Speed up until the force level is reached,• Acceleration: Positioning acceleration,• Max. press-in position: This is the max. position of the press ram,17© <strong>Promess</strong> <strong>Montage</strong>- und Prüfsysteme GmbH BerlinUFM NC-Modul V3
PROMESS• Press-in speed (feed): Speed at the beginning of the force level. With increasing force, the speedis reduced to 10 % of the press force entered. The change of speed is executed via a brake rampof 1000 mm/s 2 ,• Add limit force to the current force at pre-position: If this function is activiated, the switch-offcriterion from the force at reaching the pre-position plus the value entered under force isdetermined. Up to the pre-position, the movement with the nominal load is monitored for collision.• Signal source (Please choose the input for monitoring)• Recording of values: The force-way-course is recorded for the movement. Enter the desirednumber of reading points (maximum 200).• Teach-in of limit curves: A teach-in curve for this function is established, when the next teach-incycle is started. Existing limit curves are overwritten. The distance of the limit curves relative to theactual curve may be set in the service menu under configuration => control parameters =>parameters in field, teach-in strategy,• Cycle stop: Select this point, if you want to stop the cycle after having executed the activefunction.18© <strong>Promess</strong> <strong>Montage</strong>- und Prüfsysteme GmbH BerlinUFM NC-Module V3
PROMESS9.3 Press to signalThis function is very similar to the press on force block, however in this case you press to an externalsignal that you can select from the signal source. You can select between an external analog signal ofa switch signal. If you want to set the switch signal via the bus, you can use the freely programmableinputs 1 and 2.If you do not set the switch signal via the bus, but as a 24 VDC signal, you must first select the option“User I/O“ in the standard settings under “Program Parameter“. The reference input then becomesinput PLC 1 and the start input becomes input PLC 2. The start and reference run can then only beexecuted via the bus system.19© <strong>Promess</strong> <strong>Montage</strong>- und Prüfsysteme GmbH BerlinUFM NC-Modul V3
PROMESSOnce you have selected one of the switch signals, define the threshold or switching limit that shouldtrigger the movement end using the signal limits. (On = Stop, when level is "high", Off = Stop, whenlevel is "low")Enter the pre-position, speed, acceleration and overload value for the force. Also define the maximumposition and the pressing speed.• ExtensionUse this extension to configure the monitoring and, if necessary, a control once the switch-off criteriaare reached.• Hold signalIf you select this point, you can regulate the external input values; i.e. the module changes itsposition so that the signal remains constant for the given time.• Teach-in of limit curves: A teach-in curve for this function is established, when the next teach-incycle is started. Existing limit curves are overwritten. The distance of the limit curves relative theactual curve may be set in the service menu under configuration => control parameters =>parameters in field, teach-in strategy,• Cycle stop: Select this point, if you want to stop the cycle after having executed the activefunction20© <strong>Promess</strong> <strong>Montage</strong>- und Prüfsysteme GmbH BerlinUFM NC-Module V3
PROMESS9.4 Delay timeProgramming of delay times during the execution of the program cycle. The delay time is entered inmilliseconds.9.5 CalibrationThis function is used to calibrate the input of force or additional analog input values. Select the inputdesired by using the arrow.9.6 VariablesThere are 12 variables available in the process. By the use of this function you can assign a numericalvalue, or the value of an external sensor via the analog input, to a variable of your choice.In addition, you can execute calculations by means of the variable.21© <strong>Promess</strong> <strong>Montage</strong>- und Prüfsysteme GmbH BerlinUFM NC-Modul V3
PROMESS9.7 Conditional jumpUse this function to program jumps in your program.9.8 Motion ControlThis component makes it possible to keep the force or any other connected signal constant over acertain period of time. This means, the joining unit moves back and (or) forth within a range that hasto be determined, in order to eliminate the deviations from the control size. This process is alsomonitored by a overload limit for the force, to avoid destruction of components.• Control SizeFirst, select the size to be controlled. You can choose between the force input and the definedvirtual analog inputs under “Program Parameters / Analog Inputs”.• Control DeviationHere, you set, how the unit should react to deviations from the control size.22© <strong>Promess</strong> <strong>Montage</strong>- und Prüfsysteme GmbH BerlinUFM NC-Module V3
PROMESS+ A positive control deviation leads to a forward movement of the spindle.(Example: Control value = 200, actual value = 202 => move forward; actual value = 199 =>move backward)- A negative control deviation leads to a forward movement of the spindle.(Example: Control value = 200, actual value = 202 => move backward; actual value = 199 =>move forward)• Control SpeedEnter the speed, by which the control deviation should be moved out.• AccelerationEnter the acceleration, by which the control deviation should be moved out.• OverloadThis force monitors the control process.• Min. Control Position / Max. Control PositionEnter here the range, within which the control may be performed. The entry can be made absoluteor relative. Basis of the relative way is the position at the entry into the control component.!!! If the permitted positioning range is exceeded, the part is declared NIO. Theprogram continues the cycle. No reference run is requested.• DurationPlease enter here the time, for which the control process should be performed. The time startswith the first reaching of the control value.• Cycle StopChoose this option, if the cycle should be stopped after this function has been executed.9.9 Program endWith this function you can define the end of your program cycle. Mandatory in program structuresusing conditional jumps. This input is not necessary in simple cycles without conditional jumps. Theprogram returns to the first step and awaits a new Start after the last step has been executed.23© <strong>Promess</strong> <strong>Montage</strong>- und Prüfsysteme GmbH BerlinUFM NC-Modul V3
PROMESS9.10 Set outputsUsing Profibus DP you can set or reset 8 freely programmable outputs in the program process.When program control is implemented via the Profibus, it is possible to define 2 standard inputs andoutputs as freely programmable outputs. Outputs or inputs 1 and 2 are then no longer available in theProfibus.The outputs can be set directly or linked with variables.In the above example, output 2 is set when the value of variable 1 is greater than 200.9.11 Analog outputIt is possible, using this function, to output the value of a variable, the actual position, the actual forceor the actual analog input signal via the two analog outputs.You must first define the analog output (see Chapter 14.1.8 Analog output)24© <strong>Promess</strong> <strong>Montage</strong>- und Prüfsysteme GmbH BerlinUFM NC-Module V3
PROMESS9.12 Set statusWith the help of these function you can influence the total status, if necassary. To characterize the“manipulatet” status in the database, the bit 15 (16384) is set in the stored status9.13 Dialog windowWith the help of this function you can generate a user dialog.The following inputs are possible:• Acknowledge: Choose this if you only want to display a message, the user has to confirm.The message can consist of max 30 characters.• DB Ident Number: Input of the Ident number, to store to part in the database.• DB User: Input of the username, to store in the database.• Variable 1-12: Input of the value for a variable via the keyboard.25© <strong>Promess</strong> <strong>Montage</strong>- und Prüfsysteme GmbH BerlinUFM NC-Modul V3
PROMESS• Single execution: With this switch you decide whether the window is opened in every cycle,or only once. When the switch is not set, the window pops up every cycle. When the switch isset, the window pops up once, after loading a part program or homing. up every cycle.• Cycle Stop: If you choose this switch, the unit has to be started again, when you havefinished the dialog.When you run the cycle, the following window pops up:!!! Every input has to be confirmed with „OK“ The cycle stops until you confirm the input,or if you have chosen “Cycle stop” until cycle start is set again.26© <strong>Promess</strong> <strong>Montage</strong>- und Prüfsysteme GmbH BerlinUFM NC-Module V3
PROMESS10 Force - Distance - DevelopmentIn order to register and monitor the force – distance – development of the press process, pleaseproceed as follows:In the desired motion mode activate the following functions:10.1 Register measuring valuesAll measuring values are registered for this motion if this option has been activated.Under How many you should enter the number of supporting points. The points are evenly dispersedover the entire distance. An “A“ is entered in the function list to earmark this step. The development forthis particular step is displayed in the graphics window in the form of a sub-window.10.2 MonitoringWhen this function is activated, the force-distance-development is monitored by means of limit curves.The limit curves consist of a chain of connected straight lines.27© <strong>Promess</strong> <strong>Montage</strong>- und Prüfsysteme GmbH BerlinUFM NC-Modul V3
PROMESSMouse coordinatesSupport pointsUpper limit curveActual curveLower limit curve• Teach-in limit curveWhen this function is selected, limit-curves are recorded of the actual curve after the next step.The number of supporting points may be determined via the button “Parameters“(Max. 20 supporting points).The distance of the limit curve during the learning process from the actual curve can be definedglobally via the register card “Program parameter“ in the service menu for all programs.28© <strong>Promess</strong> <strong>Montage</strong>- und Prüfsysteme GmbH BerlinUFM NC-Module V3
PROMESS10.3 Edit limit curvesRight-click in the graphics to edit the path of the force-distance curve. You can also open the menu“Graphics“ and select one of the edit functions from the drop-down menu.If you want to edit an existing support point you must first select the upper or lower limit curve. Thenclick with the cursor on the point you want to edit. Press and hold down the left mouse button and pullthe point to the new position.In a similar way, click on either the upper or lower limit curve if you want to add or delete supportpoints. Subsequently with the cursor on the point where you want to add a support point, click the leftmouse button. Press and hold down the left mouse button and pull the point to the position where youwant to insert a new point. Existing points in between will be deleted.11 Zoom graphicsThere are several options to zoom graphics:• via the buttonsoptimal view enlarge reduce• via the menu “Graphics“ or right-clicking in the graphics windowScaling to nominal valuesReduce curve viewIncrease curve view• by using the mousePress and keep the shift button pressed, then with the left mouse button pressed draw a rectanglecorresponding to the view required.29© <strong>Promess</strong> <strong>Montage</strong>- und Prüfsysteme GmbH BerlinUFM NC-Modul V3
PROMESS12 Data12.1 Record measurement valuesUse this function to record and monitor force measurement values or external signals at any positionrequired. In addition, the max value, min value or middle value between specific positions can bedetermined. Up to a maximum of 4 measurement variables can be saved. It is also possible record avariable relative to the end of a movement.Select the variable and the required type of measurement value recording. Then define the requiredposition or start and end point of the measurement value recording. The measurement values can berecorded as “absolute” or “relative”. If relative measurement value recording is selected, the referencemeasurement is taken as the position the press module is located in when the function is called.To record a value relative to the end of a movement, please choose “Behind position”. Enter thedistance as a positive relative number. When the end of the next movement is reached, the value willbe recorded relative to the postion of these step. If you choose “Behind position” you have to programthese step always just before the movement you want to gauge the value.The recorded measurement variables can be monitored using upper and lower limit values. The “OK“or “NOK“ evaluation occurs independently of any limit curve monitoring. In the “NOK” case, the displayof the measurement variable has an orange background.30© <strong>Promess</strong> <strong>Montage</strong>- und Prüfsysteme GmbH BerlinUFM NC-Module V3
PROMESSThe values are, if the step is monitored, saved together with the relevant limits from the limit curve.You can transmit the values as follows:• In an ASCII text file (the values are overwritten after every cycle)• Via the fieldbus system (Profibus DP, CAN Open, Interbus - S)• In the program-internal database12.1.1 Save measurement values as ASCII dataTo save the ASCII data, please activate the data export under "Configuration / file settings"The data are saved in the selected directory under the following name:Sn_Programname_GnSn = Station number nGn = Measurement variable nThe file is structured as follows:Measurementvalue# SPosition EPosition APosition UL AValue LL1 33.00mm 34.00mm 33.42mm 2300N 2178N2100NStart position End position Actual position Upper limitwhere the valueis recordedLower limit31© <strong>Promess</strong> <strong>Montage</strong>- und Prüfsysteme GmbH BerlinUFM NC-Modul V3
PROMESS12.1.2 Save measurement values via Profibus DP, CAN Open, Interbus - S .The data within the <strong>Promess</strong> program are saved in Microsoft Access format and can beedited/evaluated at any time with the Access program.The values recorded using the function “Measure“ can also be transmitted as measurement variablesvia the bus systems (for further details, see bus system manuals)12.1.3 Save measurement values in databaseThe requirements for data storage are as follows:Pentium class PC.MS Access or DAO 3.5 / 3.6 driver installed (available from <strong>Promess</strong>).Data storage facility to hold the database, orLAN network installed with relevant server.At least one press module actively connected with the PC.To store measurement values in the database, you must activate data storage under the Service /Program parameter in the register card “Data storage”.Selection of datapath32© <strong>Promess</strong> <strong>Montage</strong>- und Prüfsysteme GmbH BerlinUFM NC-Module V3
PROMESSThe data path for the data to be stored can be set using the buttons. This gives you the choice ofsaving the data locally or decentrally in a network (LAN). For decentralised data storage, theconnected PC must have the relevant network card. It can also be specified at this point whether eachstation (if more than one present) should write to a central file or to an individual database. It must benoted, however, that the data may be stored and distributed across the local hard drive and than onemust save several files. The database itself offers the opportunity of being used by many stationssimultaneously.The measurement values are saved with the data, time, actual position, force value or signal value. Ifthe movement to the selected position is also monitored then the limit values are also written to thedatabase.• The data volume to be transmitted or saved can be influenced by using the following switches:• Save measurement values: The values recorded with the function “Measure“ are saved inthe database• Save curves: The curves recorded with the function “Monitor“ are saved in thedatabase• Always load curve from station: The transmission of the curves from the stationalways occurs. The switch “Curves” determines whetherthe curve is only displayed graphically or also saved inthe database.• Only load curve from station in case of error: The curves are only transmitted from thestation if an “NOK” occursIf the database is activated, the status data of the cycle are always saved.Leave the window with “OK“If a database is not present, the following message appears:Reply with “OK“ to create a database.12.1.4 Database maintenanceThe size of the database is generally limited to 650 MByte. Further on you can limit the size by timeand by number of entrees. When a limit is reached, a new database is produced. The name is of the33© <strong>Promess</strong> <strong>Montage</strong>- und Prüfsysteme GmbH BerlinUFM NC-Modul V3
PROMESSdatabase is extended by a counter. The data are always a stored in the datbase with the highestnumber. Please enter a zero to stop a creating databases by time or number.12.1.5 Database StructureThe database is divided into three tables:1. Data2. Curves3. Measurement ValuesThe tables are linked by the cycle ID.34© <strong>Promess</strong> <strong>Montage</strong>- und Prüfsysteme GmbH BerlinUFM NC-Module V3
PROMESS* Data type: 0 = X-value upper limit1 = Y-value upper limit2 = X-value lower limit3 = Y-value lower limit4 = X-value actual value5 = Y-value actual value** Status binary codes:Bit 1 (1) = OverloadBit 2 (2) = Reference ErrorBit 3 (4) = Force or signal too early (i.e. the switch-off force was exceeded duringthe pre-positioning)Bit 4 (8) = No force and/or signal within the set rangeBit 5 (16) = Emergency-offBit 6 (32) = Upper limit of the envelope curve exceededBit 7 (64) = Lower limit of the envelope curve exceededBit 8 (128) = Tracking errorBit 9 (256) = Force transducer outside the permitted offset area35© <strong>Promess</strong> <strong>Montage</strong>- und Prüfsysteme GmbH BerlinUFM NC-Modul V3
PROMESS(This message means that the zero point of the force transducer wasshifted by more than 10%. This was probably caused by an overload.The joining module cannot be loaded anymore to the nominal load.Please perform an immediate re-calibration of the transducer).Bit 10 (512) = Maximum travel range exceededBit 11 (1024) = Not usedBit 12 (2048) = AD converter has reached maximum valueBit 13 (4096) = Start signal was cancelled during the movementBit 14 (8192) = Not usedBit 15 (16283) = Not usedBit 16 (32768) = Status manual set12.2 Call up saved measurement valuesTo recall saved values, select “Data call” in the “File” menu or actuate the corresponding button.Database call upMeasurementvalueFilterCycle dataThe following database view is opened.Values fromthe function“Measure”The data from all connected stations are stored in the sequence of their occurrence in time. Thewindow that displays the measurement values only opens if you have used the function “Measure“ inyour program. To update the values, actuate the “Cycle data“ button. Use the “Measure“ button toshow all values that have been collected using the “Measure” function.To navigate within the database, you can either use the scroll bars on the side and at the bottom, oruse the navigator buttons (arrow keys) at the bottom of the PC screen.Previous recordNext record36© <strong>Promess</strong> <strong>Montage</strong>- und Prüfsysteme GmbH BerlinUFM NC-Module V3Cycle data
PROMESSJump to start ofdatabaseJump to end of database.• Database filtersTo display a reduced amount of data from a station or program you must define filters.To define a database filter, use the button in the top symbol bar or in the footer bar. In the newwindow, you can set filters to specific values in specific columns.You can filter according to the following criteria:- Counter- Cycle ID- Program ID- Program name- Stations ID- Station- Date- Time- Status- Identifier- User37© <strong>Promess</strong> <strong>Montage</strong>- und Prüfsysteme GmbH BerlinUFM NC-Modul V3
PROMESS- NOK- OK- Force or signal too early- No force or signal not reached- Upper limit broken- Lower limit broken- OverloadThe filters can be linked with “and” or “or” conditions.Example:You want to define the NOK components for a specific program (test2.ppg).First define the following filter with the program name.Activate the condition with the “Add” button.In order to filter with the NOK component of the program test2, select the link “and“ and enter thecondition “NOK = 1“. (You could also filter using “OK = 0 „. 1 stands for the condition “True“, while 0stands for the condition “Not true“)Add the condition and then apply the filter. All the NOK components in program test2 are displayed.38© <strong>Promess</strong> <strong>Montage</strong>- und Prüfsysteme GmbH BerlinUFM NC-Module V3
PROMESS• Show curvesBy activating the appropriate control button, the database view also displays the curves and statusinformation.39© <strong>Promess</strong> <strong>Montage</strong>- und Prüfsysteme GmbH BerlinUFM NC-Modul V3
PROMESS13 PrintingThe following print options can be selected:• Curves report: Printout of graphic with status messages for the displayed step• Program listing: CNC program• Stations window: Screenshot13.1 Printer settingsThis menu item for configuring your printer can be reached from the file menu.40© <strong>Promess</strong> <strong>Montage</strong>- und Prüfsysteme GmbH BerlinUFM NC-Module V3
PROMESS13.2 Printing graphicsThe graphic of the currently displayed curve, together with the status of the press operation, areavailable using the function “Report“ in the file menu.41© <strong>Promess</strong> <strong>Montage</strong>- und Prüfsysteme GmbH BerlinUFM NC-Modul V3
PROMESS13.3 Printing the CNC programUse the button “Print“ or the file menu item “Print“ to print out the CNC program.42© <strong>Promess</strong> <strong>Montage</strong>- und Prüfsysteme GmbH BerlinUFM NC-Module V3
PROMESS14 Service14.1 Program parametersThe program parameters are retrieved via the menu "Service".14.1.1 Standard settings<strong>Manual</strong> MotionThe standard values for manual mode can be set here.You can also decide whether inputs/outputs 1 and 2 should be used as standard inputs or as freelydefinable inputs/outputs. This selection is only useful if the module is controlled via the Profibus. Inputsand outputs 1 and 2 are then no longer available in Profibus.Input "Start Reference run" = Freely prog. input I1Input "Cycle Start" = Freely prog. input I2Output "OK" = Freely prog. output O1Output "NOK" = Freely prog. output O243© <strong>Promess</strong> <strong>Montage</strong>- und Prüfsysteme GmbH BerlinUFM NC-Modul V3
PROMESSYou have different options to save the program in the NC module:1. In the non-volatile storage (fixed-digit storage: The programs remain stored after the power isswitched off. Storage size: 154 Words).2. In the volatile storage: The programs are lost after the power is switched off and have to bereloaded from the PC or the link module after system is switched back on (storage size: 722words).Required storage of the individual program steps:CommandNo. OfWordsControlledWords• Positioning 7 1 *• Press to Force 8 1 *• Delay Period 2• Program End 1• Variable 2• Conditional Jump 2• Taring 1• Joining on Signal 9 1 *• MeasuringIndividual Value on Actual 1 2PositionIndividual Value on2 2Position XMin, Max, Mean Value 3 2• Output 2• Input 2• Analog Output 2• Status 1* every point of the upper / lower envelope curve needs one additional word• Ethernet module textTo describe a station, please enter the text here. This text is shown in the respective station window.Ethernet module text44© <strong>Promess</strong> <strong>Montage</strong>- und Prüfsysteme GmbH BerlinUFM NC-Module V3
PROMESS14.1.2 Program settingsUse this register card to set the press unit nominal values for position, acceleration, speed and force.You can also determine the number of decimal places to display force, distance and additional analoginput values.14.1.3 Analog InputIn this register card you can define additional virtual analog inputs, which you can use in the function„Join upon Signal“ and in the „control component“. You can choose between external analog input 1,external analog input 2, the power input, an incremental transducer and the engine power. You can45© <strong>Promess</strong> <strong>Montage</strong>- und Prüfsysteme GmbH BerlinUFM NC-Modul V3
PROMESSset the physical interface via analog type. Enter also the nominal value and, if necessary, the offset ofyour analog source.14.1.4 Program parametersOn the register card "Program parameters" you enter the offset value of the actual force during teachin.The data entry is expressed as a percentage of the nominal load.• Expansion parameterThis is used to compensate for the expansion of the press frame caused by the force produced duringthe positioning process. Input is based on the nominal load. The value is stored related to the activepart program, so you can store different values for different part programs. The compensation is linear.14.1.5 GraphicsIn this menu you can set the colors of the various curves that are going to be displayed.46© <strong>Promess</strong> <strong>Montage</strong>- und Prüfsysteme GmbH BerlinUFM NC-Module V3
PROMESS14.1.6 Profibus DB participant addressEnter the address you wish to assign to the station.• Exchange data wordsData word 1 on the Profibus is exchanged with data word 3.14.1.7 CAN OpenEnter the participant address and the timeout time for the bus.Select the required baud rate.• Exchange data wordsUse this switch to exchange data word 1 transmitted to the bus with data word 3.14.1.8 Analog output47© <strong>Promess</strong> <strong>Montage</strong>- und Prüfsysteme GmbH BerlinUFM NC-Modul V3
PROMESSThe system has two analog outputs that can be used to output the following values:• Variables 1 - 4• Position• Force• Analog inputDefine the nominal value or the physical output for the respective outputs. Assign these using thefunction "Analog output", see Chapter 9.11 Analog output.48© <strong>Promess</strong> <strong>Montage</strong>- und Prüfsysteme GmbH BerlinUFM NC-Module V3
PROMESS14.2 In / outputsUse this menu to check the digital inputs and outputs as well as the analog inputs.14.3 Change station addressIf you do not know the station address of the connected unit, you can search for it using the buttons “?31-1“. Once you have entered the new station address, you can implement changes using the button“Change station address from n to m“.49© <strong>Promess</strong> <strong>Montage</strong>- und Prüfsysteme GmbH BerlinUFM NC-Modul V3
PROMESS14.4 Parameter NC moduleOnce the press module is successfully installed, we recommend that the parameter sets of the unit bebacked up. To do this, open the item “Unidrive parameter” in the service menu, then click on thebutton “NC->Host“ in the new window to load the NC module values onto the PC.Then back up the values on floppy disk. Use the “Host->NC“ button to send saved values to the NCmodule after the power unit is changed. It is possible to load parameter sets for download to the NCmodule using the “Import“ button.50© <strong>Promess</strong> <strong>Montage</strong>- und Prüfsysteme GmbH BerlinUFM NC-Module V3
PROMESS14.4.1 Service Window Bus SystemsUse this window to check the entered bits or the output bits that are transmitted via the Profibus.Depending on the levels selected by the PLC, either I/O or variable information is displayed. Forfurther information regarding the Profibus module, please refer to the Profibus manual.I/O levelVariable level51© <strong>Promess</strong> <strong>Montage</strong>- und Prüfsysteme GmbH BerlinUFM NC-Modul V3
PROMESS14.4.2 Link Module Inputs / OutputsHere, you can have the condition of the inputs and/or outputs of the link module displayed. If you wantto set an output, please click on the button.52© <strong>Promess</strong> <strong>Montage</strong>- und Prüfsysteme GmbH BerlinUFM NC-Module V3
PROMESS15 Register an NC module to the PCWhen started, the program scans to determine which modules are connected. This scanning takesplace provided the option “Automatic" has been selected under “Polling of the stations“. (New orsubstitute modules are always supplied with station number 31). If you only want to establish acommunication with a single station, you should select “<strong>Manual</strong>“ in stead of “Automatic".When a station has been detected, the following station window is opened:The program stored in the NC module is automatically loaded and displayed.No communication?Proceed to configure the communication via the menu option “Configuration" in the menu “File“(please refer to Chapter 13 "Configuration")• Select the COM-port number of the interface you are using (baud rate = 19200 Baud)• Polling error: Check if you have selected the proper COM-port.15.1 Register a new station!!! This is only active, if you use the RS232 or RS485. Using the Ethernet module you have to registerthe module under „configuration“ (17.1.1 and 18.4.1)Open this point in the menu “File“Select the station number you want to open, or select “Auto Poll".53© <strong>Promess</strong> <strong>Montage</strong>- und Prüfsysteme GmbH BerlinUFM NC-Modul V3
PROMESS15.2 Switching ProgramsThe programs in the NC-module can be switched manually via the PC or via the PLC. If you use thePC, please open the program, which you would like to send to the NC-module and confirm it in thefollowing window with „Yes“.If you want to switch programs via the PLC, you first have to enter the programs in an allocation table,because the program call via the PLC can only be performed binary code figures.Program Pre-selectionYou can reach the allocation table via the file menu. Select the menu item „Program Pre-selection“, orthe respective button on the task bar.The allocation is executed by a „double click“ in the column Program Name. Choose the desiredprogram in the Explorer window that pops up.For the process for the program change via the PLC see Chapter 20.7 Transfer of program number,and/or in the description of the used bus system.54© <strong>Promess</strong> <strong>Montage</strong>- und Prüfsysteme GmbH BerlinUFM NC-Module V3
PROMESS16 Error messagesThe following error messages may be displayed in a message window:• Overload• Emergency stop• Reference switch defectiveThe following coded errors can be displayed in the status bar:• U = Overload• R = Reference error• F = Force or signal too early (i.e. the switch-off force was exceeded during the pre-positioning)• N = No force or signal within the set path window• E = Emergency Stop• UL = Upper limit of generating curve exceeded• LL = Lower limit of generating curve exceeded• FE = Contouring error• T = Force transducer outside permissible offset range.(This message means that the zero point of the force transducer is displaced by more than 10%.This is probably due to an overload. The press module can no longer be loaded up to the nominalload. The transducer should be recalibrated immediately)These messages will also be output via any connected bus systems or the Link-Module.55© <strong>Promess</strong> <strong>Montage</strong>- und Prüfsysteme GmbH BerlinUFM NC-Modul V3
PROMESS17 Configuration17.1 Serial communication RS232/RS485You can set the COM-port and baud rate used on your PC here.• Polling of the stationsYou can also determine whether the stations connected should be automatically registered to the PCduring the program start or if you want to carry out the registration manually. Enter the numbers of thestations, which will be automatically registered, in the corresponding fields in the registry card.The following Baud rates are available:• RS 232 19200 Baud• RS 485 max. 38400• Link Module 115kBaud56© <strong>Promess</strong> <strong>Montage</strong>- und Prüfsysteme GmbH BerlinUFM NC-Module V3
PROMESS17.1.1 Serial communication Ethernet modulePlease choose Ethernet for communication.The connected Ethernet modules are shown, by clicking on the „Find” button. Active modules aremarked by the green LED. Modules which have been connected are still shown, but marked asinactive. You can choose the stations you want to connect. Only chosen modules are polled by thesoftware. If you want to delete a station please enter zero as IP address.The station text is entered in program parameter in the service menu. (chapter 14.1.1)57© <strong>Promess</strong> <strong>Montage</strong>- und Prüfsysteme GmbH BerlinUFM NC-Modul V3
PROMESS17.2 GeneralSelect the language for the UFM software here.In addition, you can also specify the start settings of the window and the password settings.17.2.1 Password protectionThe following program functions can be password protected:• Edit program• Load, save program• Quit program• Start movement (reference move, start , step, manual moving)Call up the password settings in the file menu using “Configuration”. Select the register card “General“.Default delivery password is “Bach”Under validity period, enter the period in minutes for which the protected functions are enabled afterthe password is entered. Once this period is expired, the password must be entered again.58© <strong>Promess</strong> <strong>Montage</strong>- und Prüfsysteme GmbH BerlinUFM NC-Module V3
PROMESS17.3 ASCII Data export• File settingsData path for ASCII data exportDefine the file path of the ASCII data export via the RS232 in the register card “File settings” using the“File/Configuration” menu. If a warning before the overwriting of data, you have to activate therespective button.17.4 Layout (Display Error Messages)Here, you can minimize the display of the error messages, if you are bothered by the pop-ups. Errormessages are then only displayed in the status line.59© <strong>Promess</strong> <strong>Montage</strong>- und Prüfsysteme GmbH BerlinUFM NC-Modul V3
PROMESS18 Link Module18.1 Functions Link Module• 12 Inputs / 12 Outputs(DC-separated, max. Switching capacity of the outputs: 50mA)• Storage for 128 NC - Programs• Connectivity of Joining Modules!!! The link module cannot be used at the same time as a bus system!• Inputs / OutputsThe following functionalities can be assigned to the12 inputs and outputs: A maximum of 8 freeliyprogramable inputs and/or outputs for controlling theprocess within programs for the UFM NC-moduleand the transfer of process-specific messages to thesuperordinate control.Function Inputs:• 8 freely defined inputs• 7 Inputs for the transfer of a maximum of• program numbers• Transfer interval program No. (Strobe)• Reference run• Start• Writing• Stop• Jog + Move stamp out• Jog – Move stamp back• PC key-lockFunction Outputs:• 8 freely defined outputs7 inputs for the transfer of a maximum of 128 programnumbers• Transfer interval receipt program No. Strobe Cycle end• Cycle stop• PC Life (Connection PC - NC Modul = OK)• IO• NIO••••••••••••QuitOverload limit exceeded (E overloaded)Reference run not successful (E reference)Block force before block window (E force early)Block force not reached (E no force)Emergency-off (E EmergencyOff)Upper envelope curve or upper limit measurementvariable exceeded (E U limit)Lower envelope curve or lower limit measurementvariable exceeded (L O limit)Nominal force of the joining unit exceeded (E force error)Fuel set outside the permitted range of 10% (E sensorerror)Route exceeded the max. permitted position (E Maxposition)Axis is being adjusted (Being adjusted)• Linking of NC-ModulesThe link module can speed up the communication, when several terminals are connected to a PC, because theconnection to the PC can be run at a higher Baud rate than the connection PC – NC-module. Furthermore, datathat is transferred in several sets can be buffered by the link module, which accelerated the transfer, as there areno waiting periods due to the slower communication with the NC-module.60© <strong>Promess</strong> <strong>Montage</strong>- und Prüfsysteme GmbH BerlinUFM NC-Module V3
PROMESSThe Baud rate selected in the PC is automatically recognized by the link module.The following Baud rates link module – PC are available:9600 Baud, 19200 Baud, 38400 Baud, 57600 Baud, 115200 Baud(Max. Baud Rate NC-Module 38400 Baud)• Program StorageThe program storage serves as storage for a maximum of 128 NC-programs for the UFM NCmodule,which can be submitted by the superordinate control. The assignment of theprograms is performed via the allocation table, which is stored in the link module.Measurements and TerminalAssignmentPin Inputs Outputs1 nc A12 nc 24 VDC3 E1 A24 GND A35 E2 24 VDC6 E3 A47 GND A58 E4 24 VDC9 E5 A610 GND A711 E6 24 VDC12 E7 A813 GND A914 E8 24 VDC15 E9 A1016 GND A1117 E10 24 VDC18 E11 A1219 GND20 E1261© <strong>Promess</strong> <strong>Montage</strong>- und Prüfsysteme GmbH BerlinUFM NC-Modul V3
PROMESSOutputsInputsSupplyClamp 1 = 0 VDCClamp 2 = 24VDCPower supplyPin 1 = 0 VDCPin 2 = 24 VDCmax. 500mA Linkmoduleplus consumption externalsenor (total max 1A)RS 485 from to PC the PCRS 485 to to NC-Module the M d lRS 23262© <strong>Promess</strong> <strong>Montage</strong>- und Prüfsysteme GmbH BerlinUFM NC-Module V3
PROMESS18.2 Configuration Link ModulePlease select the respective item in the service menu for the configuration of the inputs / outputs of thelink module.Firmware Version of the LinkModuleSerial Number LinkModulePlease choose here thefunction, which you would liketo assign to the respectiveoutputs and/or inputs.Please set here the desired Baudrate between link module and NCmodule.If this button is activated, the compiled process programs are loaded during a program changefrom the link module and not from a possibly connected PC, after they were loaded into the linkmodule (see 18.3)18.3 Link Module Sending and Loading of ProgramsTo send a compiled program from the PC to the link module or to load the programs stored in the linkmodule to toe PC, you have to complete the following steps:Open the item “Program Pre-select” in the file menu. Assign the set-up programs to the programnumbers. This is performed by double-clicking on the corresponding field in the column programname. In the next window, choose the file, which you would like to allocate.The sending (PC>link) and reading (link>PC) of the programs to the link module or from the linkmodule is performed via the respective buttons.63© <strong>Promess</strong> <strong>Montage</strong>- und Prüfsysteme GmbH BerlinUFM NC-Modul V3
PROMESSTo delete a program, please mark it and activate the button to delete the program.Deleting ofprogramsLoading the programsfrom the link module:Sending the programs tothe link module: If you edit a program on the PC, it is crucial that you re-enter it into theallocation table.64© <strong>Promess</strong> <strong>Montage</strong>- und Prüfsysteme GmbH BerlinUFM NC-Module V3
PROMESS18.4 Ethernet-ModuleFunctions:• Networking of NC modules• 12 In-- / 12 Outputs (in preparation)• Storage of NC – programs (in preparation)power supplyPin 1 = 0 VDCPin 2 = 24 VDCRS 485 to NC-ModuleRS 232 connection toPCEthernet connection toLAN65© <strong>Promess</strong> <strong>Montage</strong>- und Prüfsysteme GmbH BerlinUFM NC-Modul V3
PROMESS18.4.1 IP Address Ethernet moduleTo enter the IP address please load the utility „Chip Tool“ that was delivered by PROMESS.To scan for connected Ethernet modules please call „Find“ at the menu „Chip“.serial number Ethernet chipPlease note the serial numbers.Now please call „IP config“ in menu „Chip“ and enter the serial number of the Ethernet chip, IPaddress and the net mask.66© <strong>Promess</strong> <strong>Montage</strong>- und Prüfsysteme GmbH BerlinUFM NC-Module V3
PROMESS67© <strong>Promess</strong> <strong>Montage</strong>- und Prüfsysteme GmbH BerlinUFM NC-Modul V3
PROMESS19 Technical appendix19.1. General description and designThe mechanical partsDetermining features are:• robust construction designed for a long life even under the most severe operational conditions,• simple design through the realization of the principle “transparent engineering”.The following figure shows the design of the unit:Cog belt driveForcetransducerAC – servo motorBall screwPress ram68© <strong>Promess</strong> <strong>Montage</strong>- und Prüfsysteme GmbH BerlinUFM NC-Module V3
PROMESS19.1.2 Weights MechanicsArtikelnr. Bezeichnung [kg]64020 UFM 01/100/400 8,274003 UFM 03/100/120 14,474005 UFM 05/200/240 27,274012 UFM 12/200/240 38,674020 UFM 20/180/150 7274023 UFM 20/350/230 80,674040 UFM 40/175/150 14174043 UFM 40/330/240 15874060 UFM 60/175/150 14174065 UFM 60/330/240 178,574080 UFM 80/330/240 212,674101 UFM 100/330/200 220,674151 UFM 150/400/145 37074243 UFM 240/350/120 39519.2 Specifications and technical featuresSpecificationValueRapid traversev max = 150 - 240 mm/sTime that reference force is kept T halte > at least 5s.Repeatability without load: < 0.005 mm,under constant load: < 0.010 mm,Play-free ball screw(omits stick-slip and reduces load peaks)Springing of the press ram under nominal load:50 – 80 µm,Spring stiffness: 150 N/µm - 250 N/µmCapacity of the screw spindle and the C dyn = 2,5 - 3* nominal loadthrust bearingUseful lifeSafety standardEMC – immunityAxis controlForce measuringDrive unitC stat = 5 - 6 * nominal loadAt least 25000 operating hours,Verification through a spindle life calculation is supplied onrequestCertificate of complianceMotor, choking coil, net filterThe unit is equipped with a resolver and resolverinterface, the amplifier delivers the usual incrementalsignals for NC-axis-controls with the 3 lines A, B, ZStrain-gauges integrated in the press unitPrecision: 0.5 %AC servo motor19.3 The driveAC servo motor with resolver, digital servo amplifier, with 380 – 480 VAC / 48 - 62 Hz.Capacity reserves through ample system dimensioning.69© <strong>Promess</strong> <strong>Montage</strong>- und Prüfsysteme GmbH BerlinUFM NC-Modul V3
PROMESS19.4 Power amplifierNAME UFM01/100/400 UFM03/100/150 UFM05/200/240 UFM12/200/240 UFM20/180/150 UFM20/350/230 UFM40/175/150 UFM40/330/240Servo amplifier Unidrive 1401 Unidrive 1402 Unidrive 1403 Unidrive 1405 Unidrive 1404 Unidrive 1405 Unidrive 2402 Unidrive 2402Constructionsize1 2NAME UFM60/175/150 UFM60/330/240 UFM80/330/240 UFM100/330/200 UFM150/400/145 UFM100/330/200Servo amplifier Unidrive 2402 Unidrive 2403 Unidrive 3401 Unidrive 3401 Unidrive 3401 Unidrive 3404Constructionsize2 3Size 1:Unidrive Type 1401 1402 1403 1404 1405Article number: 0121 0122 0123 0124 0125Nominal unit capacity / kVA *) 1.4 1.9 2.6 4.0 6.6Max. motor nominal capacity / kW 0.75 1.1 1.5 2.2 4.0Max. motor nominal capacity / HP 1.0 1.5 2.0 3.0 5.0Nominal unit current / A 2.1 2.8 3.8 5.6 9.5Max. unit current during 60 sec. / A 3.2 4.2 5.7 8.4 14.3Max. unit current during 4 sec. / A (closed loop only) 3.7 4.9 6.7 9.8 16.6Unit input current / A 5.4 5.9 6.3 7.1 9.5Recommended cable cross-section / mm 2 2.5Usable cable cross-section / mm 2 2.5Mains voltage 50 / 60 Hz3 AC 380V to 480V +/- 10%, 48 – 62 HzUnit output voltage3 AC 0V .... U netRecommended mains fuse (slow) / A 6 10 10 10 16Losses / W at 12 kHz frequency 70 90 100 150 250Ventilationintegrated fanWeight4 kgProtection class IP 40Size 2:Unidrive Type 2401 2402 2403Article number: 9642 - ... 0126 0127 0128Nominal unit capacity / kVA *) 8.3 11.0 17.0Max. motor nominal capacity / kW 5.5 7.5 11.0Max. motor nominal capacity / HP 7.5 10.0 15.0Nominal unit current / A 12.0 16.0 25.0Max. unit current during 60 sec. / A 18.0 24.0 37.5Max. unit current during 4 sec. / A (closed loop only) 21.0 28.0 43.8Unit input current / A 13.7 16.8 27.0Recommended cable cross-section / mm 2 2.5 4.0 4.0Usable cable cross-section / mm 2 4.0Mains voltage 50 / 60 Hz3 AC 380V to 480V +/- 10%, 48 – 62 HzUnit output voltage3 AC 0V .... U netRecommended mains fuse (slow) / A 16 20 35Losses / W at 12 kHz frequency 300 390 470Ventilationintegrated fanWeight8 kgProtection class IP 40Size 3:Unidrive Type 3401 3402 3403 3404 3405Article number: 9642 - ... 0131 0132 0133 0134 0135Nominal unit capacity / kVA *) 23.0 27.0 32.0 41.0 53.0Max. motor nominal capacity / kW 15.0 18.5 22.0 30.0 37.0Max. motor nominal capacity / HP 20.0 25.0 30.0 40.0 50.0Nominal unit current / A 34.0 40.0 46.0 60.0 77.070© <strong>Promess</strong> <strong>Montage</strong>- und Prüfsysteme GmbH BerlinUFM NC-Module V3
PROMESSMax. unit current during 60 sec. / A 51.0 60.0 69.0 90.0 115.5Max. unit current during 4 sec. / A (closed loop only) 59.5 70.0 80.5 105.0 134.8Unit input current / A 34.0 39.0 49.0 59.0 74.0Recommended cable cross-section / mm 2 6.0 10.0 10.0 16.0 25.0Cable connectionM8 - screwsMains voltage 50 / 60 Hz3 AC 380V to 480V +/- 10%, 48 – 62 HzUnit output voltage3 AC 0V .... U netRecommended mains fuse (slow) / A 35 50 60 70 80Losses / W at 12 kHz frequency 500 *) 620 *) 730 *) 890 *) 940 **)Ventilationintegrated fanWeight22 kgProtection class IP 40*) at 6 kHz frequency**) at 3 kHz frequency71© <strong>Promess</strong> <strong>Montage</strong>- und Prüfsysteme GmbH BerlinUFM NC-Modul V3
PROMESS19.5 Force measuringForce measuring is done using strain gauges integrated in the press unit. The advantage of thisarrangement is that there are no moving cables and the connection cables can be placed outside ofthe operating area.The nominal values of the force transducers may change, due to the mounting conditions, thereforeeach transducer is calibrated after assembly. The calibration result is documented in a test protocol.Technical data of the force transducer:Precision class: 0.5 %*Input voltage:10 VBridge resistance:352 ΩReference temperature: 23 o CNominal temperature -20 ...+60 o Crange:Zero signal: < 3%*Limit load: 150 %Burst load: 500 %* all percentages stated are related to the nominal load• Pin assignment:Input voltage +Input voltage -Data +Data -Shieldbrownyellow+greenwhiteblack19.6 Distance measuringDistance measured with resolver on motor.The resolver transmits a sine-formed signal, which is transformed into an incremental signal in thepower amplifier. This signal is in turn output from the power amplifier in the form of a differential signali.e. the usual tracks A, B and C and their inverted signals are available.Alternatively, distance measuring may be done by means of an integrated scale (magnetic or optical).Resolution with resolver: 2.5 µm, magnetic scale: 5µm, optical scale: < 1µm.72© <strong>Promess</strong> <strong>Montage</strong>- und Prüfsysteme GmbH BerlinUFM NC-Module V3
PROMESS19.7 Electrical connectionsIf you have acquired the press unit in the form of components without the mounting plate,please refer to the user manual of the Unidrive power supply for data on the electricalconnections.The optionally supplied connection cable set must be connected according to the numbering key.!! Preferably install the motor cable in a conduit, separated from the data cables.• Input voltage 380 – 480 VAC / 48 - 62 HzFuses:Press modules Fuses Cable cross-sectionUFM 01/100/400 6 A / K 1,5 mm 2UFM 03/100/120 10 A / K 2,5 mm 2UFM 05/200/240 10 A / K 2,5 mm 2UFM 12/200/240 16 A / K 2,5 mm 2UFM 20/180/150 10 A / K 2,5 mm 2UFM 20/350/230 16 A / K 2,5 mm 2UFM 40/175/150 20 A / K 4 mm 2UFM 40/330/240 20 A / K 4 mm 2UFM 60/175/150 20 A / K 4 mm 2UFM 60/330/240 35 A / K 4 mm 2UFM 80/330/240 35 A / K 6 mm 2UFM 100/330/200 35 A / K 6 mm 2UFM 150/400/245 35 A / K 6 mm 2UFM 240/350/120 70 A / K 16 mm 2Connection 220 VACFuse: 4ACable cross-section: 1.5 mm 2 73© <strong>Promess</strong> <strong>Montage</strong>- und Prüfsysteme GmbH BerlinUFM NC-Modul V3
PROMESS19.8 SG pre-amplifierThe force transducer is driven by an analog SG pre-amplifier.Technical data:Precision class 0.2%Nominal resolution1 mV/VFine-tuning range of the nominal resolution ±20 %Input voltage for the SG bridge10 VDCSignal output0 - 20 mATemperature coefficient:- of the zero point < 0.07 %- of the amplification < 0.07 %Power supply:- Voltage range 19 ... 28 VDC- Current consumption ca. 35 mAOperating temperature range-25 ...+60 o CStorage temperature range-40 ...+70 o CProtection class according to DIN 40050: IP 40Pin assignmentForce Transducer1 - Supply - (ye)3 2 - Supply + (br)2 4 3 - not used6 4 - Bridge + (gr)1 5 5 - Bridge - (wt)6 - not useddescription of contact pins0Offset45BA 604312VGain1 - Supply 0V (wt)2 - Supply 24V (gr)3 - not used4 - Out 20mA (br)5 - Out 0mA (ye)Output / Supply Voltage74© <strong>Promess</strong> <strong>Montage</strong>- und Prüfsysteme GmbH BerlinUFM NC-Module V3
PROMESS19.9 Transducer calibrationThe integrated SG transducer can be calibrated in various ways. You can use a referencetransducer or a spring with known and constant spring characteristics. You can calibrate theelectronics using a calibration resistor connected to the system.Sequence of operations to calibrate the system:Note: The hints, concerning the calibration, are kept very general and must be understood asan aid only. The sequence of operations described may cause damage to the press unit, theadapters or parts, depending on the offset of the reference point, the type of tool and partadapters used.PROMESS accepts no responsibility for damages occurring during calibration.•••••••Press the Emergency Stop,Install the reference transducer in the adapter. Ensure that the nominal load of the reference unitcorresponds to the permissible load of the press unit,Release the Emergency Stop,Make a reference positioning,Select the register card "Sensor input" in the system configuration to verify the permissible load,Exit from the menu and select the manual mode of the press unit (F5),Position the unit close to the reference transducer,Verify the zero point of the analog signal. To do this, toggle to the service menu and select the pointInputs/Outputs.Digital display force(Channel 1): 0 – 4000!! Zero point = 2000Adjust if necessary to the value 2000 with the potentiometer P2 (zero point displacement).(See diagram of amplifier)Change to manual travel (F5)75© <strong>Promess</strong> <strong>Montage</strong>- und Prüfsysteme GmbH BerlinUFM NC-Modul V3
PROMESSBefore applying a load, set the speed to a very low value (e.g. 0.5 mm/s)Travel in small steps to ca. 80 % of the nominal load. Keep an eye on the force display in theright half of the window.Warning! If you reach the overload limit, an Emergency Stop is triggered.Adjust the amplifier using the potentiometer P1 (amplification) until the display of the press unit is thesame as the display of the reference transducer. Move the unit back.Warning:Please avoid staying in this position for too long at higher loads.Relieve the unit during the adjustment procedure.Repeat this step until you are certain that the system is correctly calibrated.Move the unit to the reference position.Disengage the Emergency Stop and remove the reference transducer.To calibrate the unit on a regular basis, PROMESS recommends that a calibration program becreated.This program could appear as follows:Program step Function Description1 Positioning Position just before referencetransducer2 Press to block Application of specific force3 Holding period 2 s Recording of applied force4 Positioning Return of unitLocation of the adjustment potentiometerAmplificationP1Zero point displacement P260 mm65 mm80 mm76Output© <strong>Promess</strong> <strong>Montage</strong>- und Prüfsysteme GmbH BerlinUFM NC-Module V3
PROMESS19.10 Wheight of tooolsThe maximal allowable weight for the assembly units can be taken from the table below:Artikelnr. Bezeichnung Nennlast (kN) Gewicht (kg)64002 UFM01 1 0,574003 UFM03 3 274005 UFM05 5 574012 UFM12 12 87402X UFM20 20 207404X UFM40 40 207406X UFM60 60 507408X UFM80 80 80741XX UFM100 100 and higher 100If the weights are higher, you have to to add a holding brake to the unit, to avoid the bagging of theram in case of lost power. Stempel77© <strong>Promess</strong> <strong>Montage</strong>- und Prüfsysteme GmbH BerlinUFM NC-Modul V3
PROMESS19.11 Integration of a holding break into the controlThe break must be integrated into the control due to the function. The holding break should only beused, when heavy tools are needed for the assembly operation. Tools with extreme weight mightcause the ram, to move downwards in case, the axis is not in control-loop (disabled).Precaution:The holding break cannot be used to reach higher safety demands, e.g. due to EN954-1, cat. 4. Inthese cases, a mechanical safety break with integrated monitoring functions must be used.When must the break be activated?The break must hold the ram of the assembly unit in position, when:• The emergency-circuit is opened (e.g. when the protecting door with safety switches isopened or the red emergency button is pressed down),• The drive is disabled or switched off,• The drive has an internal fault and is disabled (control-loop is off).PROMESS provides a PROFIBUS-output for these cases:“DRIVE-DISABLE”When this output is set, the break can be activated.Technical data of the breakThe break is a permanently-exitated single-disk-break, which is operated with direct current.Nominal current: 0,75A.Protecting circuit:Due toe the inductivity of the break voltage preaks will be occur, when the break is disactivated(current is switched off). The voltage can reach 1000 V. To avoid these peaks, a protecting circuitshould be used.PROMESS recommends to use a Varistor R - type 069-X3022.+Switching contactU N-Rholding breakPrecaution:As the holding break is a permanent-magnet-break, the right polarity hasto be regarded, when the break is wired.78© <strong>Promess</strong> <strong>Montage</strong>- und Prüfsysteme GmbH BerlinUFM NC-Module V3
PROMESS20 PLC Interface1. RemarksThe interface is designed to ensure a complete handshake, so that times do not have to beprogrammed or considered for the signal transmission.2. AcknowledgementThe output signal "Ack." is used to confirm "System ready" and to acknowledge the detection of a PLCsignal.3. Signal descriptionSignal Function MeaningReference motion Input Start of reference motionCycle start Input Cycle startOK Output Part OK and cycle endNOK Output Part NOK and cycle endAck Output Acknowledgement signalReference request Output Reference request from the NC moduleOK/NOK Outputs Program interruption / cycle stop20.1 Reference motion after start-upReference requestAckReference motion startDescription•••••After a start-up of the NC module, the reference request and Ack are setThe PLC sets the signal reference motion,The NC module acknowledges the signal by resetting the Ack signal,The PLC resets the signal start reference motion, when the signal reference request has beenreset by the NC module,The NC module confirms that the signal start reference motion has been reset, by setting the Acksignal.If the signal start reference motion is cancelled during execution of the command, the PC stops thereference motion and the signal reference request remains set.79© <strong>Promess</strong> <strong>Montage</strong>- und Prüfsysteme GmbH BerlinUFM NC-Modul V3
PROMESS20.2 Reference motion without a requestReference requestAckReference motionDescription••••The PLC sets the signal reference motion,The NC module confirms the signal by resetting the Ack signal and setting the signal referencerequest,The PLC resets the signal start reference motion, when the signal reference request has beenreset,The NC module confirms that the signal start reference motion has been reset by setting the Acksignal.If the signal start reference motion is cancelled during execution of the command, the PC stops thereference motion and the signal reference request remains set.80© <strong>Promess</strong> <strong>Montage</strong>- und Prüfsysteme GmbH BerlinUFM NC-Module V3
PROMESS20.3 Cycle startDescriptionHome requestLife Bit4t st bStart1Ack25OKNOK3t at prg••••The PLC sets the start signalThe NC module confirms the signal by resetting the Ack signal and resetting OK or NOKThe PLC detects the cycle end through the signal OK or NOKThe NC module confirms the start-signal reset, by setting the Ack signalIf the signal start is cancelled during the program cycle, the NC module stops the motion and thesignals Ack, OK and NOK are set.20.4 Emergency Stop during a motionEmergency-StopAckStartRef-requestDescription••••In the case of an Emergency Stop, the Emergency Stop chain is opened,The press unit reacts by stopping the motion,The PLC resets the start signal, when an Emergency Stop situation is detected,After clearing the Emergency Stop situation, the PC confirms the flank change of the EmergencyStop signal after the start-signal has been reset,81© <strong>Promess</strong> <strong>Montage</strong>- und Prüfsysteme GmbH BerlinUFM NC-Modul V3
PROMESS20.5 Emergency Stop during standstillEmergency-StopAckDescription•••In the case of an Emergency Stop, the Emergency Stop chain is opened,The NC module confirms by resetting the Ack,Closing of the Emergency Stop chain is responded to by setting the Ack.82© <strong>Promess</strong> <strong>Montage</strong>- und Prüfsysteme GmbH BerlinUFM NC-Module V3
PROMESS20.6 Cycle StopRef. request.L Bitt sStart145QuitOK23NOKCycle stopt sch6t at bt a >= 10ms, t b >= 20ms, t sch = Duration of program step to cycle stopts = Save data in databaseDescriptionThe PLC sets the start signal when live bits are present and no reference request is present.The NC module acknowledges the signal by resetting the acknowledgement.The PLC recognizes the cycle stop from the OK or NOK signal plus Quit or from the signal cycle stop.(This signal is only available via the bus system or the expansion module)The PLC resets the start signal.Setting the start signal again continues the cycle.The outputs OK or NOK plus Quit are reset.83© <strong>Promess</strong> <strong>Montage</strong>- und Prüfsysteme GmbH BerlinUFM NC-Modul V3
PROMESS20.7 Transfer of program numberE StartE Reference startE Prog. Bit 1E Prog. Bit 21E Prog. Bit nE Strobe2 4A Prog. Bit 1A Prog. Bit 23A Prog. Bit nA Strobe Prog.5t bt loadt at a >= 10ms, t b >= 20ms, t load = Program load timeDescription:Assignment of binary coded program numberSet strobe for transferReflection of program numberStrobe acknowledgement after program loadedReset strobe of PLC and NC module84© <strong>Promess</strong> <strong>Montage</strong>- und Prüfsysteme GmbH BerlinUFM NC-Module V3
PROMESS21 Lubrication advicePreliminary RemarksAll electro-mechanical presses from PROMESS must be re-lubricated. Over-lubrication should beavoided, however, damage to the bearings due to overheating caused by over-lubrication is not to beexpected. Over-lubrication as no negative consequences.Lubrication PointsThe following components are lubricated ex works:• The gliding guides: Lubrication Points A and B,• The ball screw: Lubrication Point C,• The thrust bearing: Lubrication Point D.AMOUNT OF LUBRICANT FOR LUBRICATION POINTS A AND B: Approx. 1 sq cmThe lubrication points A and B consist of two opposite lubrication fittings in the centre of the presscasing.AMOUNT OF LUBRICANT FOR LUBRICATION POINT C:Lubrication point C is located behind the seal cap M20*1,5. To re-lubricate the ball screw nut,complete the following steps:•• Remove the cover flap,• manually move the spindle slowly downwards, until you see the lubrication opening onthe now open drill hole.• Please screw in the lubrication fittingTypeUFM 3 - 12threatM6UFM20-150 M8 × 1UFM 240mounted• Now you can be re-lubricate with a lubrication press.85© <strong>Promess</strong> <strong>Montage</strong>- und Prüfsysteme GmbH BerlinUFM NC-Modul V3
PROMESSAMOUNT OF LUBRICANT FOR LUBRICATION POINT D:The thrust bearing – especially on the units starting at 20kN nominal load – must be lubricated verycarefully. As from the lubrication fitting to the rolling body running path also hollow spaces have to befilled, the following lubricant amounts are necessary:Type C [sq cm] D [sq cm] Interval [strokes]UFM 01 0,15 *2 000 000UFM 03 – UFM 05 0.3 0.32 000 000UFM 12 0.6 0.82 000 000UFM 20 / 30 1 1700 000UFM 40 – UFM 100 1.8 2700 000* Lubrication fitting behind the front coverThread for lubrication fittingType Thread Thread extensionUFM 03 / 05/ 12 / 20 / 30M6UFM 40 / 60 / 80 / 175 /150 M8 * 1UFM 40 / 60 / 80 / 330 /240 M8 * 1 M6UFM 100 / 330 /200 M8 * 1 M6UFM 150 / 400 / 145 M8 * 1UFM 240 / 350 /120 M8 * 1LubricantA high-quality roll bearing lubricant must be used.PROMESS recommends the following lubricant brands:Klüber - ISOFLEX NBU 15, Klüber - ISOFLEX NCA 15, FAG ARCANOL and comparable types.86© <strong>Promess</strong> <strong>Montage</strong>- und Prüfsysteme GmbH BerlinUFM NC-Module V3
PROMESSDABC253.5253.5377.5A30°30°CDSchmierstellen:A - NutschmierungB - NutschmierungC - SpindelschmierungD - LagerschmierungBBearb.Gepr.NormmittelDIN 716812.02.0410.02.04PaulsenLechlerPROMESSGes. für <strong>Montage</strong>- undPrüfsysteme mbHSchaffhausener Str. 52 D-12099 Berlin Telefon 030/628872-0SchmiermöglichkeitenUFM 05/200Maástab1:5MaßA OAUWerkstoff, Halbzeug740057400587© <strong>Promess</strong> <strong>Montage</strong>- und Prüfsysteme GmbH BerlinUFM NC-Modul V3
PROMESSDAB418391C247247CDA45°BSchmierstellen:A - NutschmierungB - NutschmierungC - SpindelschmierungD - LagerschmierungBearb.Gepr.NormmittelDIN 716814.10.03Paulsen14.10.03LechlerPROMESSGes. für <strong>Montage</strong>- undPrüfsysteme mbHSchaffhausener Str. 52 D-12099 Berlin Telefon 030/628872-0SchmiermöglichkeitenUFM 12/200Maástab1:5MaßA OAUWerkstoff, Halbzeug740127401288© <strong>Promess</strong> <strong>Montage</strong>- und Prüfsysteme GmbH BerlinUFM NC-Module V3
PROMESSInitiator ohnemech. EndschalterInitiator mitmech. EndschalterABC425.5425.5538.5513.561430°A60°Schmierstellen:A - NutschmierungB - NutschmierungC - SpindelschmierungD - LagerschmierungBDC60°Bearb.Gepr.NormDIN-ISO2768-m03.03.0503.03.05PaulsenLechlerPROMESSGes. für <strong>Montage</strong>- undPrüfsysteme mbHNunsdorfer Ring 29 D-12277 Berlin Telefon 030/628872-0SchmiermöglichkeitenUFM 20/350/230Maßstab1:5MaßA OAUWerkstoff, Halbzeug740237402389© <strong>Promess</strong> <strong>Montage</strong>- und Prüfsysteme GmbH BerlinUFM NC-Modul V3
PROMESSInitiator ohnemech. EndschalterDInitiator mitmech. EndschalterABC335.5335.5448.5423.552430°A60°Schmierstellen:A - NutschmierungB - NutschmierungC - SpindelschmierungD - LagerschmierungBDC60°Bearb.Gepr.NormDIN-ISO2768-m09.02.0609.02.06PaulsenLechlerPROMESSGes. für <strong>Montage</strong>- undPrüfsysteme mbHNunsdorfer Ring 29 D-12277 Berlin Telefon 030/628872-0SchmiermöglichkeitenUFM 20/180/150Maßstab1:5MaßA OAUWerkstoff, Halbzeug740207402090© <strong>Promess</strong> <strong>Montage</strong>- und Prüfsysteme GmbH BerlinUFM NC-Module V3
PROMESSInitiator ohnemech. EndschalterDInitiator mitmech. EndschalterABC335.5335.5448.5423.552430°A60°Schmierstellen:A - NutschmierungB - NutschmierungC - SpindelschmierungD - LagerschmierungBDC60°Bearb.Gepr.NormDIN-ISO2768-m09.02.0609.02.06PaulsenLechlerPROMESSGes. für <strong>Montage</strong>- undPrüfsysteme mbHNunsdorfer Ring 29 D-12277 Berlin Telefon 030/628872-0SchmiermöglichkeitenUFM 30/180/230Maßstab1:5MaßA OAUWerkstoff, Halbzeug740217402191© <strong>Promess</strong> <strong>Montage</strong>- und Prüfsysteme GmbH BerlinUFM NC-Modul V3
PROMESS92© <strong>Promess</strong> <strong>Montage</strong>- und Prüfsysteme GmbH BerlinUFM NC-Module V3
PROMESSDBACBMaßC D ABearb.Gepr.Norm23.6.97Werkstoff, HalbzeugKreibichPROMESS180mm HubSchmiermöglichkeiten<strong>Gesellschaft</strong> für produktions-techn. Messen GmbHSchaffhausener Str. 44-50 D-12099 BerlinFügeeinheit 40 / 60kN74040 / 74060Tel.: (030) 628935-0MaßstabA OAU 985005031:293© <strong>Promess</strong> <strong>Montage</strong>- und Prüfsysteme GmbH BerlinUFM NC-Modul V3
PROMESSD620CAB404374374A30°CDB30°Schmierstellen:A - NutschmierungB - NutschmierungC - SpindelschmierungD - LagerschmierungUm die Spindel zu schmieren, muß die Presse um ca. 117 mm ausgefahrenwerden. Dieser Wert kann um ± 3 mm variieren, da der Näherungsschalter nichtbei jeder Presse an der gleichen Stelle vom Stempel bedämpft wird.mittelDIN 7168Bearb.Gepr.Norm06.11.03Paulsen06.11.03LechlerPROMESSGes. für <strong>Montage</strong>- undPrüfsysteme mbHSchaffhausener Str. 52 D-12099 Berlin Telefon 030/628872-0SchmiermöglichkeitenUFM 80/330Maástab1:10MaßA OAUWerkstoff, Halbzeug740807408094© <strong>Promess</strong> <strong>Montage</strong>- und Prüfsysteme GmbH BerlinUFM NC-Module V3
PROMESS21.1 Gear box oilFor those press modules containing a gearbox, the oil must be changed after 5,000 operating hours orat latest after 4 years.Type of gear box Typ UFM Quantity OilMPS 0 UFM 20/180/150 40 ml Klüber, D68EPMPS 1 UFM 40/175/150125 ml Klüber, D68EPUFM 60/175/150MPS 2 UFM 80300 ml Klüber, D68EPUFM 10095© <strong>Promess</strong> <strong>Montage</strong>- und Prüfsysteme GmbH BerlinUFM NC-Modul V3
PROMESS22 Software UpdateIf you update the software in the PC, it will also be necessary to overwrite the firmware in the NCmodulewith a newer version. This will be necessary if the PC software displays the following messageafter restarting:!!! The firmware can only be updated using the RS 232 interface (Com 1 - 4).If the PC and the module are connected via the RS 485, you will also require connection via the RS232.Start the program "UFM_UPDATE.EXE" in the installation directory "UFM_NC.EXE". You will see thefollowing start window.Create the connection to the NC module by clicking on the "Find" button. Once the program has foundthe station, the "UPDATE" button is activated.!!! Please shut down the UFM NC Module software, or disconnect the station you want to update.If you use the Ethernetmodule please choose the IP adress of the station you like to update.Before continuing with "Update", please press the Emergency Stop button to disconnect the motorfrom the power component.96© <strong>Promess</strong> <strong>Montage</strong>- und Prüfsysteme GmbH BerlinUFM NC-Module V3
PROMESSSelect the file "Node_1.BFH“ in the following dialog box to download the firmware to the NC module.Once selected, the software will initiate the download of the system files or binary coded firmware.Once download is successfully completed, close the program.! After the successful update, it is essential to back up your parameter set.97© <strong>Promess</strong> <strong>Montage</strong>- und Prüfsysteme GmbH BerlinUFM NC-Modul V3
PROMESS• IndexAcknowledgement ................................................ 79 Pin assignment..................................................... 72Analog inputs........................................................ 14 PLC interface........................................................ 79Analog output ................................................. 24, 47 Polling of the stations ........................................... 56Analoge Input ....................................................... 45 Positioning............................................................ 16ASCII data export data path ................................. 59 Power amplifier..................................................... 70Baud rate.............................................................. 56 Press to Force ...................................................... 17Cable cross-section .............................................. 73 Press to signal...................................................... 19Calibration ............................................................ 21 Printer settings ..................................................... 40CAN Open ............................................................ 47 Printer setup ......................................................... 40Conditional jump................................................... 22 Printing graphics................................................... 41Configuration ........................................................ 56 Printing the CNC program .................................... 42Configuration Link-Module.................................... 63 Profibus DB participant address ........................... 47Contents of supply.................................................. 5 Program end......................................................... 23Control of external signal...................................... 20 Program parameters........................................43, 46Correct usage ......................................................... 7 Program pushbuttons ........................................... 13Cycle Stop ............................................................ 83 Program settings .................................................. 45Cycle Stop ............................................................ 83 Program start........................................................ 11Database filters..................................................... 37 Program window................................................... 12Database maintenance......................................... 33 Programming........................................................ 15Database Structure............................................... 34 Pushbuttons ......................................................... 13Delay time............................................................. 21 Record measurement values................................ 30Dialog window ...................................................... 25 Register a new station.......................................... 53Distance measuring.............................................. 72 Register an NC module ........................................ 53Drive ..................................................................... 69 Register measuring values ................................... 27Edit limit curves .................................................... 29 Safety precautions.................................................. 7Error messages .................................................... 55 Save measurement values as ASCII data............ 31Error messages / Link-Module.............................. 60 Save measurement values in database................ 32Ethernet-Module ................................................... 65 Save measurement values via bus systems......... 32Expansion parameter ........................................... 46 Screen settings..................................................... 12Filters.................................................................... 37 Serial communicationRS232/RS485 .................... 56Force - distance - development ........................... 27 Serielle communikation Ethernetmodule .............. 57Force measuring................................................... 72 Service ................................................................. 43Force transducer outside permissible offset ......... 55 Set outputs ........................................................... 24Force transducer outside the permitted offset area......................................................................... 35Set status ............................................................. 25SG pre-amplifier ................................................... 74Functions Linkmodule........................................... 60 Signal description PLC interface .......................... 79Fuses.................................................................... 73 Signal flow cycle start........................................... 81General description and design ............................ 68 Signal flow during Emergency Stop during standstillGraphics colours curves ....................................... 46......................................................................... 82I/O Configuration .................................................. 43 Signal flow Emergency Stop during a motion ....... 81In / outputs............................................................ 49 Signal flow reference motion after start-up........... 79Integration of a holding break into the control....... 78 Signal flow reference motion without a request .... 80Introduction............................................................. 4 Signal process of Emergency Stop during standstillIP address Ethernetmodule .................................. 66......................................................................... 84Language.............................................................. 58 Software installation ............................................. 10LEDs..................................................................... 13 Software Update................................................... 95Link Module Sending and Loading of Programs ... 63 Start settings of window........................................ 58Linking of NC-Modules ......................................... 60 Station address .................................................... 49Link-module.......................................................... 60 Switching Programs.............................................. 54Linkmodule Inputs- / Outputs................................ 52 Teach-in strategy.................................................. 16Lubrication advice................................................. 85 Technical appendix .............................................. 68Main window......................................................... 12 Technical features ................................................ 69<strong>Manual</strong> operation.................................................. 14 Transducer calibration.......................................... 75<strong>Manual</strong> positioning................................................ 14 Transport ................................................................ 6<strong>Manual</strong> registration ............................................... 56 Type of Memory Programs in the NC Module ...... 44Measurement variables ........................................ 30 Unidrive Parameter input...................................... 11Monitoring............................................................. 27 Variables .............................................................. 21Motion Control ...................................................... 22 Weights Mechanics .............................................. 69Parameter NC module.......................................... 50 Zoom .................................................................... 29Password protection ............................................. 58 Zoom grahics........................................................ 2998© <strong>Promess</strong> <strong>Montage</strong>- und Prüfsysteme GmbH BerlinUFM NC-Module V3