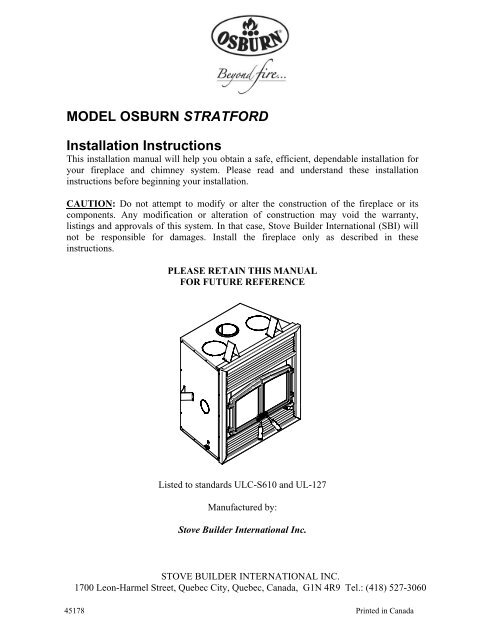
Owner's Manual Osburn Stratford Wood Fireplace - Rural Energy ...
Owner's Manual Osburn Stratford Wood Fireplace - Rural Energy ...
Owner's Manual Osburn Stratford Wood Fireplace - Rural Energy ...
You also want an ePaper? Increase the reach of your titles
YUMPU automatically turns print PDFs into web optimized ePapers that Google loves.
2. CERTIFICATION LABEL5
3.2.6 Primary AirThere is no flue damper in the OSBURN STRATFORD. As in common with air tight stoves, thecombustion air control sets the flow of air entering the firebox. This allows for a more precisecontrol of the fire. The combustion air control is located below the door on the right side. Themain source of air (primary air) entering the firebox can be diminished by moving the aircombustion control from right to left. The primary air is fully opened when the air control iscompletely moved to the right. The combustion air control should be in the closed position(primary air) when the fireplace is not in use. This will minimize air leakage up the chimney. Thecombustion air control should be opened before opening the door to minimize the possibility ofback draft coming into the room.SLOWMEDIUMACCELERATED3.2.7 Combustion SettingsFigure 1Accelerated CombustionThe maximum heat output for the OSBURN STRATFORD is achieved by burning with the doorclosed and the combustion air opened. By this method, the OSBURN STRATFORD can produceup to 75,000 BTU of heat per hour. However, it will be necessary to reload with wood every oneor two hours. This is the least efficient method of burning the OSBURN STRATFORD. Usecaution when firing with the combustion air control wide open. Only burn cordwood in thismanner. Small dry pieces of softwood and construction scraps will burn very intensely using thismethod and may damage the firebox.9
Medium CombustionThis is the recommended mode of operating the OSBURN STRATFORD and should be the onenormally used since it will deposit the least amount of creosote on the glass and in the chimney.The combustion air control must be ¾ closed. The precise setting will depend on many factors,including chimney length and the moisture content of the wood.For instance, a long chimney will necessitate closing the combustion air control. To obtain theproper combustion, close the combustion air control completely, then open it about ¼" to ½".Three medium size pieces of wood should be burning on a bed of hot coals. The heat output willbe approximately 35,000 BTU per hour and the loading time will be about every 3-4 hours.Softwoods may be burned using this method but the time will be substantially reduced.Slow CombustionWhen the air combustion control is completely closed, the fireplace is in a slow combustionphase. If the heart is hot enough, slow combustion will not stop the fire, but there will be anoticeable change in the flame pattern. The flames will be slow and may appear dirty if the woodis too wet (moisture content of 20% and more). Do not allow the wood to burn without flame,since this will produce excessive creosote in the unit.Creosote may accumulate on the glass door. This method of burning should be used only afteroperating the OSBURN STRATFORD with the air control opened to produce a hot fire for aboutan hour or at medium pace for at least 2 hours. Slow combustion can be used at night in order toreduce the heat output and to prolong the burn. The refuelling interval time will be between 6-8hours.3.2.8 Smoking − Causes and TroubleshootingTo reduce the likelihood of smoking when opening the door, set the combustion air controls tothe right (accelerated) before opening the door. Your fireplace has been designed and tested toprovide smoke free operation. Occasionally, there may be a small amount of smoking uponlighting the fire, until the chimney heats up but this should not continue. If the fireplace continuesto smoke it is probably for one of the following reasons:A. Negative pressure in the houseAs the fire burns, air goes up the chimney. This air must be replaced through leakage into thehouse or through the fresh air kit. When operating the OSBURN STRATFORD, open a nearbywindow temporarily to check if there is adequate air supply replacement. If opening awindow solves the problem, the house is under negative pressure.B. Fans operating (e.g. : range hood)These fans draw air out of the house and may actually cause a negative pressure in the house.Turn off all fans and open a nearby window to determine if this is the cause of the problem.10
C. Wet woodWet or tarred wood will smoulder and smoke instead of burning properly.D. Dirty or blocked chimneyCheck to make sure the chimney is clear and clean.E. Chimney not long enoughThe minimum chimney height is 15 feet (4.6m). not including the fireplace’s height. Thechimney must extend at least 3 feet (915 mm) above its point of contact with the roof and atleast 2 feet (0.6 m) higher than any roof or wall within 10 feet (3 m) of it. When installed withoffsets, the minimum chimney height is 15 feet (4.6 m). Additional height will increasedraught and will decrease the tendency to smoke.F. Poor chimney draftWith no fire, there should be sufficient draught to exhaust cigarette smoke introduced underthe baffle. Chimneys installed against an outside wall without protection may generate backdraught problems which will cause start-up problems. To prevent this, open a nearby window,roll up a piece of paper and light it. Then, hold it in the upper part of the firebox to warm upthe chimney. Wait until the draught is sufficient, then start the fire.IMPORTANT NOTESA. Do not block the hot air vents to the fireplace as this will cause the fireplace to overheat.B. Never start a fire using gasoline, kerosene, charcoal lighter fluid or any other combustibleliquid.C. Do not burn coal. The sulphur in coal will corrode the firebox.D. Do not burn driftwood which has been in the ocean or salt water. The salt will corrode thefirebox and chimney.E. Do not abuse the unit by burning paper, or cardboard or construction material such as pressedwood, plywood or lumber.F. Do not allow the wood to smoulder or burn without flame, since this will produce excessivecreosote in the unit.11
3.3 MAINTAINING YOUR OSBURN STRATFORD3.3.1 Creosote – Formation and Need for RemovalWhen wood is burned slowly without a flame, it produces tar and other organic vapours whichcombine with expelled moisture to form creosote. The creosote vapors condense in ; therelatively cool chimney flue of a slow-burning fire. As a result, creosote residue accumulates onthe flue lining. When ignited this creosote makes an extremely hot fire.The chimney shall be inspected at least twice a year during the heating season to determine whena creosote build-up has occurred.When creosote has accumulated it shall be removed to reduce the risk of a chimney fire.3.2.2 Chimney MaintenanceRegular chimney inspection and maintenance combined with proper operation will preventchimney fires. Keep your chimney clean. Do not allow more than 1/16″ creosote build up in yourchimney. The amount of creosote will depend on variables such as frequency of use and type offire. We recommend that you:A. Initially inspect the chimney system weekly. From this, you will learn how often it will benecessary to clean your chimney.B. Have your chimney cleaned by a qualified chimney sweep. If you wish to clean ityourself, we recommend using a stiff plastic or non-metallic brush. If a metal brush isused, its size should be slightly smaller than the flue to avoid damaging the chimney. Donot use a brush that will scratch the stainless steel interior of the chimney.C. Do not expect chemical cleaners to keep your chimney clean. The rain cap can beremoved for inspection and/or cleaning of the chimney.3.3.3 Top Baffle Removal Prior to Cleaning the ChimneyBefore starting to clean your chimney, we recommend that you remove the top baffle to avoidcreosote dust collection at the top of the baffle. Follow these steps to set the top baffle out of theway:1. Remove the front air tube by pulling out the cutter pin on the side of the tube. They arelocated at the top, underneath the baffle.2. Lift the baffle and slide it out of the fireplace. You now have access to the chimney.12
FRONT AIRTUBEFigure 23.3.4 Dealing with a Chimney FireRegular chimney maintenance and inspection can prevent chimney fires. If you have a chimneyfire, follow these steps:1. Close the fireplace door and the combustion air controls;2. Alert your family of the possible danger;3. If you require assistance, alert your fire department;4. If possible, use a dry chemical fire extinguisher, baking soda or sand to control the fire. Donot use water as it may cause a dangerous steam explosion;5. Check outside to ensure that sparks and hot embers coming out of the chimney are notigniting the roof;6. Do not use the fireplace again until your chimney and fireplace have been inspected by aqualified chimney sweep or a Fire Department Inspector;3.3.5 Plated Finish MaintenanceUse a glass cleaner and a soft cloth to polish the plated finish on the door frame. Do not useabrasives such as steel wool, steel pads or an abrasive polish for they may scratch the finish.13
3.3.6 Disposal of AshesDo not attempt to clean the fireplace when the unit is hot. Ashes should be placed in a metalcontainer with a tight fitting lid. The closed container of ashes should be placed on a noncombustiblefloor or on the ground, well away from combustible materials pending final disposal.If the ashes are disposed of by burial in soil or otherwise locally dispersed they should be retainedin the closed container until all cinders have thoroughly cooled. Do not attempt to clean the stovewhen the unit is hot.3.3.7 Refractory ReplacementThe intense heat of the fire will normally cause hairline cracks in the refractory. These cracks canbe minimized by proper curing as described in “First Fires”. They will not normally diminish theeffectiveness of the refractory. If large cracks develop, then the refractory should be replaced. Toreplace the refractory bricks, follow these steps:1. Remove the andiron2. Remove the bottom stone3. Remove the side stone retainers4. Remove the left stone5. Remove the right stone6. Remove the back stone643To install the new bricks, follow theabove steps in reverse.521Figure 33.3.8 Glass Care – ReplacementThe glass used for the OSBRUN STRATFORD is a high temperature ceramic glass (1400º F). Donot abuse the glass door by striking or slamming shut. If the glass breaks, it must be replacedwith an identical ceramic glass. Tempered glass or ordinary glass will now withstand the hightemperatures of the OSBURN STRATFORD. Replacement glass should be purchased from a<strong>Osburn</strong> dealer (see “Replacement Parts”, in Section 7 – APPENDIX). Do not operate the unitwith a cracked or broken glass.14
3.3.9 Glass Care – CleaningThe OSBURN STRATFORD is designed to keep the glass clean under normal operatingconditions. If the OSBURN STRATFORD is operated continuously with the combustion aircontrols closed, the glass will tend to get dirty unless the fuel, firebox and glass are maintained athot. To clean the glass, there are a number of specially designed cleaners. Your authorized<strong>Osburn</strong> dealer can recommend a suitable cleaner which is available in your area. Regularhousehold glass cleaners will not clean creosote. Do not use abrasives such as steel pads, steelwool or oven cleaner as they will scratch the glass. Only wash when the stove is cold.3.3.10 Gasket ReplacementRemove the doors from the unit and lay them on a clean, unabrasive surface. To replace thegasket around the door frame, first remove the old gasket and adhesive. Make sure that thesurface is totally clean before applying new adhesive (a high temperature silicone caulking ratedfor at least 500ºF, 260ºC, is suitable) or adhesion problems may result. Apply the adhesive insidethe door groove (gasket channel) and install the new gasket with a gentle pressure. Let dry for atleast 24 hours. To replace the glass gasket, simply remove the glass retainers holding the glass tothe door frame. Remove the glass and peel off the gasket surrounding it. Replace it by a new,self-adhesive glass gasket. The proper replacement gaskets are available from your <strong>Osburn</strong>dealer in the following dimensions:Gasket Length DimensionsAround each glass 51 ½" (131 cm) U SHAPEOn each door frame 41 ¼" (105 cm) Flat ¼" x ½"Along the door joint 14" (36 cm) Flat ¼" x ½"15
3.4 FIREPLACE INSTALLATION3.4.1 Locating the OSBURN STRATFORDA. The best location to install your fireplace is determined by considering the location ofwindows, doors, and the traffic flow in the room where the fireplace is located, allowingspace in front of the unit for the heart extension and the mantel, and taking into considerationthe location of the hot air ducts (optional), outside air kit and chimney. If possible, you shouldchoose a location where the chimney will pass through the house without cutting floor or roofjoists.B. Usually, no additional floor support is needed for the fireplace. The adequacy of the floor canbe checked by first estimating the weight of the fireplace system. Weights are given in theappendix. Next, measure the area occupied by the fireplace which is normally 36¾" × 26".Note the floor construction and consult your local building code to determine if additionalsupport is needed.C. The OSBURN STRATFORD may be installed directly on the floor or on a raised base (forproper guidelines, refer to “Heart Extension Requirements”) and a minimum of 7 feet (2.15m) measured from the base of the appliance to the ceiling is required. The hearth extension isto be installed only as illustrated in the drawing below.16
3.4.2 Heart Extension RequirementsThe OSBURN STRATFORD may be installed directly on a combustible floor; however, thecombustible floor in front of the fireplace must be covered with a non-combustible material (tile,marble, stone, etc.). The hearth extension floor area shall extend at least 16" in front and at least8" on each side of the fireplace opening. (see figure 4). The floor protector in front of the fireplacemust have a R value of 1.53 or greater.Convert specification to R-value:k-factor is given with a required thickness (T) in inches: R=1/k x TC-factor is given: R=1/CCOMBUSTIBLESHELFAREA WHEREWOOD MANTELCAN BE INSTALLED6.000"17" MIN.50" MIN.3"45°16"41 3/4"NON COMBUSTIBLEMATERIALFigure 43.4.3 Framing, Facing, Mantel, and Combustible ShelfThe construction of the framing, facing, and mantel must be in accordance with the standards andthe following illustrations (figures 4 to 11):A. Frame the fireplace using 2" × 3" or heavier lumber.B. WARNING: Combustible framing material cannot be used in the space directly above thefireplace, except for the studs above the facing that support the facing material and mantel.This area must remain empty for a height of 7′ (2,15 m) measured from the base of theappliance.C. Frame the fireplace with vertical studs at the sides of the fireplace running from floor toceiling (see figure 6). Position the studs back from the front edge of the fireplace, a space the17
thickness of the facing material so that the facing can be installed flush with the fireplacefacing (within limitations of figure 11). Frame headers between the vertical studs only asfollows:− Place 2" × 3" or 2" × 4" headers, only along the upper part of the front, side and backfaces. Do not put wood or any combustible material within the area above the fireplaceexcept on the front facing.− Place headers only as required to support the facing and mantel.D. WARNING: DO NOT PACK REQUIRED AIR SPACES WITH INSULATION OROTHER MATERIALS.THE FIREPLACE MUST NOT BE IN CONTACT WITH ANY INSULATION ORLOOSE FILLING MATERIAL. COVER THE INSULATION WITH GYPROCPANELS AROUND THE FIREPLACE.36 3/4"19 13/16"36"10 1/4"2"53 23/32"8 3/32"37 31/32"22 7/8"12 13/32"24 1/32"26"20"1 1/2"75 31/32"Figure 5 Figure 77' MIN.38"43 1 4 "43 3/16"36"24 1/32"36 3 4 "Figure 6 Figure 818
Banks Have the Opportunity to Surround Future MobilePayment Offerings with Value Now- Preemptively protecting the franchise in paymentsDeliver TransactionInformationExpand theDeviceMobilePaymentsLeverage theCloudDeliverLocational Value- Let’s look at some of the opportunities and ideas2328 April 2010 © 2010 Charles Wickenden cwickenden@gmail.com
The hot air grilles can be installed in the same room as the fireplace, or one or both of the grillescan be installed in adjacent or upper rooms. Installing the ducts at different elevations will tend toexhaust more heat out of the higher grilles (figure 15).FIRESTOPFIRESTOP13" X 13"10' MAX.10' MAX.Figure 14ROOF SUPPORTRAIN CAPCOLLARFLASHINGATTIC RADIATIONSHIELDFIRESTOPFACINGFigure 1523
The duct system must be installed respecting the following:1. Remove the plates closing up the 8" dia. holes on top of the fireplace. Then, cut the insulationin order to obtain two 8" dia. openings. Insert the ducting into each opening and fix it in placeusing the 6 steel brackets supplied (3 for each duct).2. Maintain at least a 2" (50 mm) clearance between the ducts and the firestop; the required holesize for the hot air grilles (outlet) is 8¼" × 8¼" (210 mm × 210 mm).3. The maximum number of elbows in a run of duct is two.4. Maintain at least 10" (254 mm) clearance from the outlet grille framing to a combustibleceiling, side wall or mantel.5. When passing through a combustible wall or floor, a firestop must be installed at the wall orfloor penetration. The hole size must be in accordance with the duct manufacturer’sinstructions.6. Do not connect the hot air ducts to a central heating system. Malfunction of the heatingsystem’s fan will cause the fireplace to overheat.8. Do not use insulated flexible ducts as they may overheat.9. Do not use tees or any other components than the ones specifically listed here.10. All ducts must extend upwards or horizontally. Never route the ducting downwards.11. The hot air outlet grilles must be installed with the louvers pointing downwards in order toprevent overheating adjacent ceilings.12. Always install the two outlet grilles when using the hot air outlet kit and blocking the upperlouver of the fireplace.3.5.2 Central Forced Air Kit (Not tested under EPA certification)The knock-outs provided on the back and on the sides of the OSBURN STRATFORD allow theconnection of insulated flexible pipe which enables you to heat adjacent rooms up to 50 feet fromthe fireplace (see figure 18).The ducting system must be installed as described below:A) Remove the knock outs at the back and/or the side of the fireplace and cut the insulationaround the hole. Fix the adapter into place with screws. You can use more than one outleton the fireplace (figure 16);B) Attach the 5″ flexible pipe, using the collars provided. Important: Make sure that theplastic wrapping around the flexible pipe is not in contact with the fireplace;C) Attach the flexible pipe to the fan’s air inlet using the collars provided (figure 17);24
D) Attach a flexible pipe to the fan’s air outlet and route the flexible pipe to the chosenlocation. The ducting system can be installed either in an upper room or in a lower room;E) At that point, the flexible pipe can be attached to any air distribution grille.F) Make the electrical connections to the PC Board as explained with the forced air kitowner’s manual.Since the forced air kit requires electricity, make sure that the connections to the fan have beenmade according to the local codes and comply with their requirements (see instruction providedwith the kit).INSULATEDFLEX PIPEINSULATION5"Ø FLEXADAPTERALUMINUMTAPECOLLARFANFigure 16 Figure 17ROOMFANFANBASEMENTFigure 1825
3.6 FRESH AIR KIT (Optional)During operation, the fireplace requires fresh air for combustion and draws air out of the house. Itmay starve other fuel burning appliances such as gas or oil furnaces. As well, exhaust fans maycompete for air, causing negative pressure in the house, resulting in smoke entering the housefrom the fireplace. This situation is aggravated in modern airtight houses. To overcome thisproblem, we strongly recommend that you install fresh air kit. Check with local authoritieshaving jurisdiction in your area, it may be mandatory.3.6.1 Outside Air InstallationThe fresh air kit may be installed according to the following requirements:A) Duct length should be kept to a minimum. The maximum length of a 3" I.D. (76 mm)insulated flexible duct is 10 ft. (3 m).B) The outside wall termination must not be installed more than 10 ft. (3 m) above the baseof the fireplace.C) The fresh air must come from outside the house. The air intake must not draw air from theattic, from the basement, or from a garage.D) The outside wall termination should be installed where it is not likely to be blocked bysnow or exposed to extreme wind and away from automobile exhaust fumes, gas meterand other vents.E) The outside termination may be installed above or below floor level.F) If more fresh air is needed (airtight house or conduit exceeding 10 ft or 3 m), two intakesmay be installed, providing twice the quantity of incoming fresh air; you may alsoincrease both conduits to 4 inches, with the use of a 3 to 4 inch adaptor, again increasingsubstantially the quantity of incoming fresh air.The fresh air kit contains the following components:1- A 3" flex adapter;2- 2 pipe clamps;3- An outside air register;4- Plate for room air intake;5- 6 screws;6- 3” to 4” adaptor.To complete the fresh air kit installation, you will need a 3" insulated flexible pipe. Use thelength required for your installation while respecting the maximum length of 10 ft (3 m).Make a 3 1/4" (83 mm) hole in the outside wall of the house at the chosen location. From outside,place the outside air register in the hole (open side down) and fasten the register to the wall, withscrews as shown (see figure 6). Place the insulated pipe over the register tube and over the26
fireplace’s outside air connector (see figure 6 & 7). At each end, carefully pull back the insulationand plastic cover, exposing the flexible pipe. Attach the flexible pipe using pipe clamps. For abetter seal, you may also use aluminum tape. Wrap the tape around the joint between the flexiblepipe and the air inlets. Carefully push the insulation and plastic cover back over the pipe. Fix theplastic in place using aluminum tape.FRESH AIR INTAKEALUMINUMTAPEPLASTICCOVEROUTSIDEINTAKEOUTSIDE AIRCONNECTION TO THEFIREPLACEFIREPLACEFIRE PLACECONNECTIONALUMINUM TAPE3" FLEXIBLE PIPEFLEXIBLE PIPESCREWPLASTIC COVERINSULATIONOPENINGFACINGDOWNALUMINUMTAPEWALLALUMINUM TAPE INSULATIONFigure 19 Figure 203.7 DOOR OVERLAY INSTALLATIONOVERLAYDOOR FRAMEFigure 21In order to install the door overlay, simply place the overlay over the door frame. From behindthe door frame, locate the 4 attachment holes and use the 4 screws provided with the overlay tosecure it to the door frame.27
4. THE CHIMNEY4.1 CHIMNEY INSTALLATION NOTES1. If possible, install an interior chimney as it will provide better performance. In areas withcontinuous temperatures below −18° C (0° F), the use of an exterior chimney increases thelikelihood of operating problems such as low draught, high rate of creosoting, and poor startupcharacteristics. Exterior chimneys are also prone to down-drafting and flow reversal.Installations, which are located on lower floors in the house, such as in a basement, incombination with outside chimney, are especially prone to flow reversal.2. The OSBURN STRATFORD is listed only with chimney systems described in table 2.3. A chimney venting a fireplace shall not vent any other appliance.4. The minimum chimney height is 15 ft. (4.6 m).5. All chimney installations must include at least one support. Reducing the amount of chimneyweight on the fireplace will help avoid the noise created when the fireplace expands. This canbe achieved by having the chimney supported by the supports. The maximum chimney lengththat should be supported by the fireplace is 9 ft. (2.75 m) for 2" Solid Pack Chimney, 12 ft.(3.7 m) for 1" Solid Pack Chimney, and 26 ft. (8 m) for AC Triple Wall Chimney.6. The chimney must extend at least 3 ft. (1 m) above its point of contact with the roof and atleast 2 ft. (0.6 m) higher than any wall, roof or building within 10 ft. (3 m) of it (Figure 21).7. If the chimney extends higher than 5 ft.(1.5 m) above its point of contact with theroof, it must be secured using a roofbrace.8. A rain cap must be installed on top of thechimney. Failure to install a rain cap maycause corrosion problems.9. Cut and frame square holes in all floors,ceilings, and roof that the chimney will gothrough to provide a 2" (50 mm)clearance between the chimney and anycombustible materials. Do not fill this 2″space with insulation or any othercombustible material.10. Portions of the chimney which mayextend through accessible spaces must beenclosed to avoid contact withcombustible materials or damage thechimney.10'2' MIN.Figure 223' MIN.28
4.2 CHIMNEY INSTALLATION INSTRUCTIONS1. Cut and frame the holes in the ceiling, floor and roof where the chimney will pass (see figure23). Use a plumb bob to line up the center of the holes. Make sure that the size of the floorand ceiling holes are in accordance with the chimney manufacturer’s instructions.Figure 232. From below, install a firestop supplied by the chimney manufacturer in each ceiling/floorseparation through which the chimney will pass. At the attic level, install an attic radiationshield from above (see figure 24).3. Follow the chimney’s manufacturers’ instructions and place the first chimney length on hefireplace. For all chimneys, you must use an anchor plate supplied by the chimneymanufacturer before installing the first chimney length (see figure 24). Continue installingchimney lengths making sure to lock each length in place.4. Every time the chimney passes through a ceiling or a wall, install the appropriate firestop.When you reach the desired height, install the roof support. (Refer to instructions includedwith the support.).5. Then, put the roof flashing in place and seal the joint between the roof and the flashing withroofing pitch (see figures 24). For sloping roofs, place the flashing under the upper shinglesand on top of the lower shingles. Nail the flashing to the roof, using roofing nails.6. Place the storm collar over the flashing, and tighten it with the bolt supplied. Finally, seal thejoint between the storm collar and the chimney, using silicone caulking.7. Install the chimney cap.8. When a ventilated roof flashing is installed, precautions are to be taken not to caulk or sealthe ventilating openings.29
EXAMPLE OF TYPICAL CHIMNEY INSTALLATIONRAIN CAPCOLLARATTICRADIATIONSHIELDFLASHINGFIRESTOPANCHORPLATEOUTSIDEAIR KITFigure 2430
When you build a combustible chase enclosure for chimney sections above the roof, refer to thechimney manufacturer for clearances to combustible materials.Figure 25 – Example of a combustible chase enclosure installation above the roof31
4.3 OFFSET CHIMNEY INSTALLATIONThe minimum chimney height when using elbows is:<strong>Fireplace</strong> modelOSBURN STRATFORDChimney modelAll modelsVertical installation 15 ft. (4.6 m)Two (2) elbows 15 ft. (4.6 m)Four (4) elbows 17 ft. (5.2 m)Table 1After reaching the location requiring the elbow, proceed as follows:1. Install the first elbow; turn it in the required direction. Secure it to the chimney according tothe chimney manufacturer’s instructions. In many cases, it is recommended to secureconnections with three (3) ½" (12 mm) metal screws.2. Install the necessary chimney lengths to achieve the required offset. Lock the chimneylengths together according to the chimney manufacturer’s instructions. In many cases, it isrecommended to use three (3) ½" (12 mm) screws. If the offset length is made of two (2)chimney lengths or more, many chimney manufacturers may require that you use an offset orroof support halfway up the offset. If penetrating a wall, install a wall radiation shieldsupplied by the chimney manufacturer (see figures 26 & 27).3. Use another elbow to turn the chimney vertically. Secure the elbow.4. Use a plumb bob to line up the centre of the hole. Cut a hole for the chimney in theceiling/floor. Frame this hole as described previously.5. From below, install a firestop supplied by the chimney manufacturer (see figure 24).6. A support must be used on the first 15' section (4.6 m).7. Continue with the regular installation.32
SUPPORTSTRAPSSTRAPSCHIMNEYANCHOR PLATEFigure 26RAIN CAPCOLLARROOF FLASHINGOFFSET SUPPORTFRAMING2" X 3"INSULATED WALLRADIATION SHIELDFigure 2733
TABLE 2 - LISTED CHIMNEYS FOR YOUR OSBURN STRATFORDCHIMNEYMANUFACTURERBRANDTYPEINNERDIAMETERSelkirk Ultra-Temp (UT) 1" Solid Pack 6"Selkirk Super Pro (SPR) 1" Solid Pack 6"Selkirk Super Vent (JSC) 1" Solid Pack 6"Selkirk Hart & Cooley (TLC) 1" Solid Pack 6”Selkirk Sure-Temp (ST) 1" Solid Pack 6”Selkirk CF Sentinel (CF) 2" Solid Pack 6"Selkirk Super Pro 2100 (ALT) 2" Solid Pack 6"Selkirk Super Vent 2100 (JM) 2" Solid Pack 6"Security Chimney ASHT+ 1" Solid Pack 6"Security Chimney S-2100 2" Solid Pack 6"Simpson Dura-Vent Dura Tech 1" Solid Pack 6"Simpson Dura-Vent Dura Plus AC Triple Wall 6"American Metal Model HSS AC Triple Wall 6"American Metal Model HS AC Triple Wall 6"ICC Excel 2100 1" Solid Pack 6"Oliver Macloed Nova-Temp HT 6103 + 1" Solid Pack 6"Oliver Macloed Nova-Temp HT 6000 + 2" Solid Pack 6"Note: See next page for mandatory components34
TABLE 3 – LIST OF MANDATORY COMPONENTSCHIMNEYMANUFACTURERMANDATORY COMPONENTSTYPE/BRANDSelkirkSecurity ChimneySimpson Dura-Vent• Ventilated roof flashing.• Must have joist protector at the rooflevel if the fireplace is to be usedwith a fireguard (see section 5)• Joist protector at the roof level (seesection 5)• Requires insulated attic radiationshield unless chimney is enclosed atthe attic level.• Ventilated roof flashing with joistprotector at the roof level (see section5)Ultra-Temp, SuperPro, Super vent.ASHT +Dura TechICC • Ventilated roof flashing Excel 2100American Metal• Chimney cannot be enclosed at theattic level.HS, HSSNOTE: The floor protector in front of the fireplace must have a R value of 1.53 or greater.35
4.4 ANGLED WALL RADIATION SHIELDWhen passing through a combustible wall with the chimney at a 30° or 45° angle (30° or 45° inCanada and 30° only in the USA), an angled firestop or wall radiation shield provided by thechimney manufacturer must be installed. Only one is required. Follow the chimneymanufacturer’s installation instructions.In cold climate locations, it is recommended that you use the insulated wall radiation shield sinceit will maintain the home’s thermal barrier.GYPROCINSULATED WALLINSULATED WALLRADIATION SHIELDFigure 2836
4.5 CHIMNEY SUPPORT INSTALLATIONUniversal Roof SupportThis support has three possible uses:1. It must be used on a roof to support the chimney.2. It may be used on a floor, ceiling or roof above an offset to support the chimney above theoffset.3. It may be used on a floor, ceiling or roof as a supplementary support.For roof support installation, refer to the instructions provided with the support by the chimneymanufacturer. Many manufacturers will provide the maximum height of chimney that can besupported by the support. Make sure you respect those parameters.Universal Offset SupportThis support is used to support the chimney above an offset. When the chimney offset is used topass through a wall, this support may be used on the wall to support the chimney. For offsetsupport installation, refer to the instructions provided with the support by the chimneymanufacturer. Many manufacturers will provide the maximum height of chimney that can besupported by the support. Make sure you respect those parameters.4.6 CHIMNEY CHASE AND MULTIPLE TERMINATIONSFor the purpose of this manual, a chimney chase is considered a part of the chimney systemrather than part of a building. The termination must be placed a minimum of 18" (460 mm) abovethe chase.For installations where more than one chimney is located in the same chase or within the samearea, we suggest that their terminations be separated by at least 16" (410 mm) horizontally, and18" (460 mm) vertically. This separation is to prevent smoke migrating from one chimney toanother (see figure 29).37
18"457.2mm18"457.2mm16"406.4mm16"406.4mm18"457.21mmFigure 2938
4.7 INSTALLATION INSTRUCTIONS FOR MASONRY APPLICATIONWARNING: Before starting the installation, the masonry chimney must be inspected by aqualified sweep.The following requirements must be respected:1. The chimney must be absolutely clear of any soot residue or creosote. Check for cracks, loose or missing bricksthat could inhibit correct installation of the liner.2. The clearance to combustible must be a minimum of 1" between the outside of the masonry and any woodframing or loose insulation.3. The chimney must be built in accordance with the current building code.4. No other appliance can be connected to the same chimney.Installation:The chimney must be relined with a stainless steel liner of the same diameter as the outlet of the fireplace. Forconnection at 30 o or 45° angle, a special connector must be used to connect the liner to the insulated chimney.Verify availability and installation instructions for this connector with the chimney manufacturer.Follow these steps:See typical installation illustrated below.1. Position the fireplace in its location.Temporarily install the elbow on the topof the fireplace and, using a level, markwith an oval the location where the flueliner will enter the masonry chimney.1"2. In the middle of the oval, drill a hole inthe masonry chimney at 45° or 30°.FIRESTOPHIGH TEMP3. Increase the size of the hole until a 45°CEMENTor 30° liner elbow can be easily slippedSPECIALthrough.CONNECTORSTAINLESS4. Slide the liner down from the top of the3 X SCREWSSTEEL LINERmasonry chimney until you reach theINSULATEDLENGTHhole level.7'5. Slip through the hole a 45° or 30° linerelbow and connect it to the liner.INSULATEDELBOW6. Add a small liner section to the linerelbow which will allow the liner toextend at least 12" (measured at the topof the liner) from the masonry chimney.7. Seal the opening around the liner withhigh temperature refractory cement.8. Then, follow the chimney manufacturer’s instructions to connect the extended liner section to the specialchimney connector.39
5. OPTIONSGravity kit:Includes: one deflector, two 90 o elbows, and two outlet grillesand frames, .Part No.:#AC01309Central forced air kit:Includes: one blower, one 5" flex adapter, 3 pipe clamps,And one control box with heat sensor and PC Board.#AC01310Outside air kitIncludes: one 3" flex adapter, 2 pipe clamps, and oneoutside wall register.#AC03500Rigid fireguardIncludes: one rigid fireguard.#AC01308Joist protectorIncludes: one joist protector kit*#AC03510*May be required if the chimney manufacturer does not supply joist protectors.40
6. APPENDIXSPECIFICATIONSWeight: 385 lbsHeight: 38"Width: 36¾"Depth: 26"CLEARANCE TO COMBUSTIBLESThe following clearances meet the minimum requirements for a safe installationSide wall:17" (43 cm) measured from the outside door frame.Side mantle: 0” (must have a depth no greater than 3”).In front of fireplace : 36"Ceiling:7 ft. (2.15 m) measured from the base of the fireplace.<strong>Fireplace</strong> enclosure: Bottom: 0"Side: 0"Back: 0"Top: Do not fill the space above the fireplace with any material(except the wood framing).Chimney:2" (50 mm)Combustible shelf : 50" (127 cm) measured from the base of the fireplace for a shelf witha depth of 6" or less.52" (132 cm) measured from the base of the fireplace for a shelfwith a depth of more than 6" (15 cm), but less than 12" (30 cm).REPLACEMENT PARTSDescription Part No. Description Part No.Front air tube (1) PL53030 Flue insulation collar 21152Air tube (2) – second from front PL53031 Blowers 44073Air tube (3) – third from front PL53032 Door glass SE53240Back air tube (4) PL53033 Door handle 30560Vermiculite baffle 21134 Air control handle 30561Top insulation (2 ½” thick) 21150Door gasketAC06100Glass gasketAC0640041
Exploded view for replacement parts42
List of replacement parts43
7. OSBURN LIMITED LIFETIME WARRANTYThe warranty of the manufacturer extends only to the original consumer purchaser and is not transferable. Thiswarranty covers brand new products only, which have not been altered, modified nor repaired since shipment fromfactory. Proof of purchase (dated bill of sale), model name and serial number must be supplied when making anywarranty claim to your OSBURN dealer.This warranty applies to normal residential use only. Damages caused by misuse, abuse, improperinstallation, lack of maintenance, over firing, negligence or accident during transportation are not covered bythis warranty.This warranty does not cover any scratch, corrosion or discoloration caused by over firing, abrasives or chemicalcleaners. Any defect or damage caused by the use of unauthorized parts or others than original parts void thiswarranty. An authorized qualified technician must perform the installation in accordance with the Instructionssupplied with this product and all local and national building codes. Any service call related to an improperinstallation is not covered by this warranty.The manufacturer may require that defective products be returned or that digital pictures be provided to support theclaim. Returned products are to be shipped prepaid to the manufacturer for investigation. If a product is found to bedefective, the manufacturer will repair or replace such defect and reasonable transportation fees will be refund.Repair work covered by the warranty, executed at the purchaser domicile by an authorized qualified technicianrequires the prior approval of the manufacturer. Labour cost and repair work to the account of the manufacturer arebased on predetermined rate schedule and must not exceed the wholesale price of the replacement part. All labourand freight costs covered by this warranty are limited according to the table below.The manufacturer at its discretion may decide to repair or replace any part or unit after inspection and investigationof the defect. The manufacturer may, at its discretion, fully discharge all obligations with respect to this warranty byrefunding the wholesale price of any warranted but defective parts The manufacturer shall in no event be responsiblefor any special, indirect, consequential damages of any nature, which are in excess of the original purchase price ofthe product.WARRANTY APPLICATIONDESCRIPTIONPARTSLABOUR &FREIGHTCombustion chamber (welds only), castings, and convector airmate Lifetime 5 yearsPlating (defective manufacture) – subject to limitations above Lifetime n/aSecondary air tubes, vermiculite baffle, C-Cast baffle and handleassembly5 years n/aStainless steel baffle and parts 5 years 3 yearsCarbon steel baffle and parts 2 years 1 yearBlowers, thermal switches, rheostat, and other controls 2 years 1 yearPaint, refractory stones, gasket, ceramic blankets, and ceramic glass(thermal breakage only)1 year n/aShall your unit or a components be defective, contact immediately your OSBURN dealer. Prior to your call makesure you have the following information necessary to your warranty claim treatment:• You name, address and telephone number;• Bill of sale and dealer’s name;• Serial number and model name as indicated on thenameplate fixed to the back of your unit;• Nature of the defect and any relevant information.Before shipping your unit or defective component to our plant, you must obtain from your OSBURN dealeran Authorization Number. Any merchandise shipped to our plant without authorization will be refusedautomatically and returned to sender.44


