Syncro Rice Cooker - Breville
Syncro Rice Cooker - Breville
Syncro Rice Cooker - Breville
You also want an ePaper? Increase the reach of your titles
YUMPU automatically turns print PDFs into web optimized ePapers that Google loves.
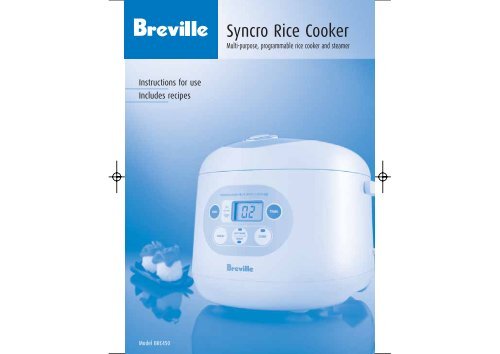
<strong>Syncro</strong> <strong>Rice</strong> <strong>Cooker</strong>Multi-purpose, programmable rice cooker and steamerInstructions for useIncludes recipesModel BRC450
ContentsPageIntroduction 3<strong>Breville</strong> recommends safety first 4Know your <strong>Breville</strong> <strong>Syncro</strong> <strong>Rice</strong> <strong>Cooker</strong> 6Operating your <strong>Breville</strong> <strong>Syncro</strong> <strong>Rice</strong> <strong>Cooker</strong> 7Functions 9<strong>Rice</strong> cooking tables 11Cooking tips 13Steaming foods 14Care and cleaning 18RecipesR2Congratulationson the purchase of your new <strong>Breville</strong> <strong>Syncro</strong> <strong>Rice</strong> <strong>Cooker</strong>2
<strong>Breville</strong> recommends safety firstWe at <strong>Breville</strong> are very safety conscious. We design and manufacture consumer products with the safety of you,our valued customer, foremost in mind. In addition, we ask that you exercise a degree of care when using anyelectrical appliance and adhere to the following precautions.Important safeguards for your<strong>Breville</strong> <strong>Syncro</strong> <strong>Rice</strong> <strong>Cooker</strong>• Carefully read all instructions before operating andsave for future reference.• Remove any packaging material and promotionalstickers before using the <strong>Syncro</strong> <strong>Rice</strong> <strong>Cooker</strong> for thefirst time.• Do not place the <strong>Syncro</strong> <strong>Rice</strong> <strong>Cooker</strong> near the edgeof a bench or table during operation. Ensure thesurface is level, clean and free of water.• Do not place the <strong>Syncro</strong> <strong>Rice</strong> <strong>Cooker</strong> on or near ahot gas or electric burner, or where it could touch aheated oven. Place appliance at least 20cm awayfrom walls and curtains.• Do not use on metal surfaces, for example, a sinkdrain board.• Use only the removable cooking bowl suppliedwith the <strong>Syncro</strong> <strong>Rice</strong> <strong>Cooker</strong>. Do not use a damagedor dented removable cooking bowl. Replacebefore using.• Never plug in or switch on the <strong>Syncro</strong> <strong>Rice</strong> <strong>Cooker</strong>without having the removable cooking bowl placedinside the outer housing.• Do not put liquid into the outer housing. Only theremovable cooking bowl is designed to contain liquid.• Do not touch hot surfaces; use potholders to removethe removable cooking bowl and steaming tray.• Open the lid carefully to avoid scalding fromescaping steam.• Do not allow water from the lid to drip into thehousing, only into the removable cooking bowl.• Always ensure the power is switched off at thepower outlet and the cord is unplugged from thepower outlet before attempting to move theappliance, when not in use and before cleaning orstoring. Allow all parts to cool before disassemblingfor cleaning.• To protect against electric shock, do not immersethe outer housing, cord or power plug in water orany other liquid.• Do not move the rice cooker during cooking.• Do not leave the rice cooker unattended when in use.• Keep the appliance clean. Follow the cleaninginstructions provided in this book.Important safeguards for all electrical appliances• Unwind the cord before use.• Do not let the cord hang over the edge of a tableor counter, touch hot surfaces or become knotted.• This appliance is not intended for use by youngchildren or infirm persons unless they have beenadequately supervised by a responsible person toensure that they can use the appliance safely.• Young children should be supervised to ensure thatthey do not play with the appliance.• It is recommended to inspect the applianceregularly. Do not use the appliance if power supplycord, plug or appliance becomes damaged in anyway. Return the entire appliance to the nearestauthorised <strong>Breville</strong> Service Centre for examinationand/or repair.• Any maintenance, other than cleaning, should beperformed at an authorised <strong>Breville</strong> Service Centre.• This appliance is for household use only. Do not usethis appliance for anything other than its intendeduse. Do not use in moving vehicles or boats. Do notuse outdoors.• The installation of a residual current device(safety switch) is recommended to provideadditional safety protection when using electricalappliances. It is advisable that a safety switchwith a rated residual operating current notexceeding 30mA be installed in the electrical circuitsupplying the appliance. See your electrician forprofessional advice.45
Know your <strong>Breville</strong> <strong>Syncro</strong> <strong>Rice</strong> <strong>Cooker</strong>Operating your <strong>Breville</strong> <strong>Syncro</strong> <strong>Rice</strong> <strong>Cooker</strong>10 cup capacitycooks up to 20 cups of cookedrice at a timeHeavy duty non-stickremovable cooking bowlwith level indicatorVacuum sealed lidwith steam ventLCD displaywith automatic ‘keep warm’setting, keeps rice warmand moistBefore first use, remove all promotional labels andany packaging materials and wash the non-stickremovable cooking bowl, steaming tray, measuringcup and serving spoon in hot soapy water, rinse anddry thoroughly.How to cook riceStep 1Use the <strong>Syncro</strong> <strong>Rice</strong> <strong>Cooker</strong> measuring cup provided tomeasure the required quantity of rice (refer to cookingtables – page 12). Always measure level cups, notheaped (Fig 1).Step 2Place the rice into a separate bowl and wash rice byrinsing with cold water to remove any excess starch.The rice is ready for cooking when water runs clearfrom the rice.Step 3Ensure the exterior of the removable cooking bowl isclean before placing it in the outer housing, this willensure proper contact with the inner cooking surface.(Fig 2).Fig.2Fig.1Timer selectionCancel buttonReheat settingRemovable cord1 level <strong>Syncro</strong> <strong>Rice</strong> <strong>Cooker</strong> measuring cup =150grams uncooked rice1 level <strong>Syncro</strong> <strong>Rice</strong> <strong>Cooker</strong> cup uncooked rice =2 <strong>Syncro</strong> <strong>Rice</strong> <strong>Cooker</strong> cups cooked rice (approx.)The maximum quantity of uncooked white riceto be cooked = 10 <strong>Syncro</strong> <strong>Rice</strong> <strong>Cooker</strong> cupsThe minimum quantity of uncooked white rice tobe cooked = 2 <strong>Syncro</strong> <strong>Rice</strong> cooker cupsStep 4Add the washed rice to the removable cooking bowl,ensuring rice is spread evenly across the bottom ofthe bowl and not heaped to one side (Fig 3).Fig.3NoteIncludes measuring cupand serving spoonSteaming trayideal for vegetables, seafoodand poultry (not shown)67
Operating your <strong>Breville</strong> <strong>Syncro</strong> <strong>Rice</strong> <strong>Cooker</strong> continuedFunctionsStep 5Add water using the following ratios:White <strong>Rice</strong> = 1 cup water : 1 cup riceBrown <strong>Rice</strong> = 1 1 ⁄2 cups water : 1 cup rice(see table on Page 12 for more details)Step 6Lock the lid into position.Step 7Plug into a 230/240 volt power outlet and thenswitch the power on at power outlet. The red light onthe ‘Start’ button will begin to flash.Step 8An arrow will appear on the LCD screen aligned tothe ‘Cook’ function. If Quick Cook or Porridge/Soupfunctions are required, press the ‘Menu’ button onceto select ‘Quick Cook’ function or twice to select‘Porridge/Soup’ function.Step 9To commence cooking, press the ‘Start’ button. Thered light on the ‘Start’ button will illuminate. Twodashes will appear on the LCD screen and remainuntil 12 minutes before the end of the cooking timewhen ’12 MIN’ shows on the screen and counts downin 1-minute increments (for ‘Cook’ function only).Step 10When cooking is complete, the <strong>Syncro</strong> <strong>Rice</strong> <strong>Cooker</strong>will automatically switch to the ‘Keep Warm’ setting.The red light on the start button will go out and thered light on the ‘Keep Warm’ button will illuminate.The LCD screen will show ‘0’ HR WARM and will countup in 1-hour increments (up to 24 hours).Step 11Open the lid and turn the rice over with the servingspoon provided. Replace the lid and allow the rice tostand for 10-15 minutes before serving. This allowsany excess moisture to be absorbed, resulting in afluffier rice texture.Step 12To stop the ‘Keep Warm’ function, press the Cancelbutton and switch off at the power outlet and unplugthe cord.<strong>Rice</strong> can be kept in the automatic ‘Keep Warm’function for up to 24 hours, however for optimalrice quality limit the Keep Warm to 5-8 hoursonly. Do not open the lid until ready to serve(except for when turning over rice after cookingis complete or as suggested in the recipes).NoteImportant• Always place liquid into the removable cookingbowl, or be ready to add oil, butter or margarine,before pressing the ‘Start’ button.• To prevent scratching the non-stick surface of theremovable cooking bowl or steaming tray, alwaysuse wooden or plastic utensils.ALWAYS OPEN AND LIFT THE LID CAREFULLY TO AVOID SCALDING FROM ESCAPING STEAM.Cook• The most common cooking function suitable forcooking larger quantities up to 10 cups of rice.• An arrow will appear on the LCD screen aligned tothe ‘Cook’ function when the rice cooker is turnedon. Press the ‘Start’ button to commence cookingand two dashes ‘--‘ will appear on the screen.• At 12 minutes before the end of the ’Cook’function, ’12 MIN’ will appear on the LCD screenand count down in 1 minute increments.Quick Cook• Speeds up the cooking time of the rice, suitable forcooking small amounts of rice (less than 4 <strong>Syncro</strong><strong>Rice</strong> <strong>Cooker</strong> cups).• An arrow will appear on the LCD screen aligned tothe ‘Cook’ function when the rice cooker is turnedon. Press the ‘Menu’ button once and the arrowwill align to the ‘Quick Cook’ function. Press the‘Start’ button to commence cooking and twodashes ‘--‘ will appear on the LCD screen.• Does not show the last 12 minutes of cooking timeon the LCD screen.Porridge/Soup• Can be used to cook porridge and soup.• An arrow will appear on the LCD screen aligned tothe ‘Cook’ function when the rice cooker is turnedon. Press the ‘Menu’ button twice and the arrowwill align to the ‘Porridge/Soup’ function. Press the‘Start’ button to commence cooking and twodashes ‘--’ will appear on the LCD screen.• The Porridge/Soup function will cook for up to 2hours. Cooking of various amounts of porridge orsoup will have to be monitored throughout thecooking time (refer Chart on Page 12).• Does not show the last 12 minutes of cooking timeon the LCD screen.Keep Warm• When cooking is complete on the Cooking, QuickCooking and Porridge/Soup functions, the <strong>Syncro</strong><strong>Rice</strong> <strong>Cooker</strong> will automatically switch to the ‘KeepWarm’ function. The red light on the start buttonwill go out and the upper red light on the ‘KeepWarm/Reheat’ button will illuminate. The LCDscreen will show ‘0’ HR WARM and will count up in1-hour increments (up to 24 hours).• The ‘Keep Warm’ function can be selectedindependently by pressing the ‘Keep Warm/Reheat’button once and its upper red light will illuminate.The start button does not have to be pressed. TheKeep Warm function will commence once the KeepWarm button has been selected. The LCD screenwill show ‘0’ HR WARM and will count up in 1-hourincrements (up to 24 hours).• <strong>Rice</strong> can be kept in the automatic ‘Keep Warm’setting for up to 24 hours, however for optimal ricequality, limit the Keep Warm to 5-8 hours only.Reheat• This function can be selected independently toreheat cold cooked rice to serving temperature.• Loosen the cold cooked rice grains and spray withwater before reheating to prevent rice over-drying,burning or sticking to the bowl.• Press the ‘Keep Warm/Reheat’ button twice (itslower red light will illuminate) to commence thereheat function. The start button does not have tobe pressed. The LCD screen will show two dashesthroughout the Reheat function.89
Functions continued<strong>Rice</strong> cooking tablesCancel• The Cancel button can be pressed at any time tocancel programming functions or stop the cookingor keep warm/reheat functions.TimerThe Timer feature can be used to preset the finishingcooking time, allowing you to set the timer andfunction and the <strong>Syncro</strong> <strong>Rice</strong> <strong>Cooker</strong> will do the rest.It will automatically switch to the ‘Keep Warm’function once the cooking time has elapsed, ensuringmeals are ready to serve.• The Timer feature can be used on all cookingfunctions.• The Timer feature cannot be used with the KeepWarm/Reheat button.• ‘Cook’ and ‘Quick Cook’ functions finishing timescan be preset between 1 and 15 hours.• ‘Porridge/Soup’ function finishing time can bepreset between 2 and 15 hours.• To preset the Timer, select the desired function bypressing the ‘Menu’ button, then press the ‘Timer’button to coincide with your selected finishingtime. Press ‘Start’ button to begin thecooking/timer cycle.The rice measuring cup provided with your <strong>Syncro</strong><strong>Rice</strong> <strong>Cooker</strong> is used in the following tables.• The <strong>Syncro</strong> <strong>Rice</strong> <strong>Cooker</strong> measuring cup is not astandard metric measuring cup.• 1 <strong>Syncro</strong> <strong>Rice</strong> <strong>Cooker</strong> measuring cup is equalto 150g of uncooked rice and 175 ml of water.• 1 Australian Standard Metric Measuring cup isequal to 200g of uncooked rice• If your <strong>Syncro</strong> <strong>Rice</strong> <strong>Cooker</strong> measuring cup islost or misplaced, use another cup butmaintain the same cooking ratios and ensureyou do not exceed the 10 cup maximum linein the removable cooking bowl:White <strong>Rice</strong> = 1 cup water : 1 cup riceBrown <strong>Rice</strong> = 1 1 ⁄2 cups water : 1 cup rice• The <strong>Syncro</strong> <strong>Rice</strong> <strong>Cooker</strong> measuring cup can beused to measure the rice and thecorresponding line in the removable cookingbowl used to measure the water. This will givea higher proportion of water to rice and issuitable for cooking ‘sticky-style’ rice or‘congee-style’ rice porridge.Note1011
<strong>Rice</strong> cooking tables continuedCooking tipsWhite riceUncooked white rice Cold tap water Cooked rice Cooking time ‘Cook’ Cooking time ‘Quick Cook’(<strong>Syncro</strong> <strong>Rice</strong> <strong>Cooker</strong> cups) (<strong>Syncro</strong> <strong>Rice</strong> <strong>Cooker</strong> cups) (approximate) (approximate) (approximate)(<strong>Syncro</strong> <strong>Rice</strong> <strong>Cooker</strong> cups) (minutes) (minutes)Brown rice2 2 4-6 30-35 25-304 4 8-10 35-40 30-356 6 12-14 40-458 8 16-18 45-5010 10 20-22 50-55Uncooked brown rice Cold tap water Cooked rice Cooking time ’Cook’(<strong>Syncro</strong> <strong>Rice</strong> <strong>Cooker</strong> cups) (<strong>Syncro</strong> <strong>Rice</strong> <strong>Cooker</strong> ups) (approximate) (approximate)(<strong>Syncro</strong> <strong>Rice</strong> <strong>Cooker</strong> cups)(minutes)Porridge / soup2 3 5-6 55-604 6 10-12 60-656 9 15-17 65-70Uncooked rolled oats Cold tap water Cooked porridge Cooking time(<strong>Syncro</strong> <strong>Rice</strong> <strong>Cooker</strong> cups) (<strong>Syncro</strong> <strong>Rice</strong> <strong>Cooker</strong> cups) (approximate) (approximate)(<strong>Syncro</strong> <strong>Rice</strong> <strong>Cooker</strong> cups)(minutes)2 3 3-4 20-254 6 7-8 30-356 9 10-11 40-45Uncooked quick oats Cold tap water Cooked porridge Cooking time(<strong>Syncro</strong> <strong>Rice</strong> <strong>Cooker</strong> cups) (<strong>Syncro</strong> <strong>Rice</strong> <strong>Cooker</strong> cups) (approximate) (approximate)(<strong>Syncro</strong> <strong>Rice</strong> <strong>Cooker</strong> cups)(minutes)2 3 3-4 15-204 6 7-8 25-306 9 10-11 30-35Uncooked white rice Cold tap water Cooked rice porridge Cooking time(<strong>Syncro</strong> <strong>Rice</strong> <strong>Cooker</strong> cups) Measure to water level (approximate) (approximate)in cooking bowl (<strong>Syncro</strong> <strong>Rice</strong> <strong>Cooker</strong> cups) (hours)1/2 4 5-6 1-23/4 6 10-11 1-21 8 13-14 1-211/2 10 17-18 1-2<strong>Rice</strong> cooking tips• Add a little extra water for fluffier rice and a littleless water for firmer rice.• Washed rice will have some extra water adheringafter rinsing. This extra water will extend thecooking time slightly. Reduce the measured amountof water to compensate, if required.• Some rice varieties may require more water forcooking, such as wild rice blends, Arborio rice orshort grain rice. Follow the directions on the packetor use the brown rice cooking table.• Due to the additional water needed to cook brownrice, some starchy water bubbles may rise to the lidwhile cooking. For best results, wash brown ricebefore cooking and allow to stand on the ‘KeepWarm’ setting for 20 minutes after cooking toabsorb the remaining moisture.Porridge and soup cooking tips• Stir oats half way through cooking and just beforeserving for smooth, lump free porridge.• Monitor the oats when cooking. The required lengthof cooking time depends on personal preference forthe texture of the porridge.• Ensure sufficient water is used with oats if longercooking is required.• Quick cooking oats can be substituted for rolledoats but the cooking time will be shorter.• A variety of vegetable-style soups can be cookedusing the Porridge/Soup function. Ensure there issufficient liquid and simmer the ingredients for upto 2 hours for full flavour development. Do notallow soup ingredients to exceed the 10-cupmaximum line.• Congee-style rice porridge can be cooked on thePorridge/Soup function for up to 2 hours. Therequired length of cooking time depends onpersonal preference for the texture of the porridge.<strong>Rice</strong> variationsSavoury ricePrepare the rice in the <strong>Syncro</strong> <strong>Rice</strong> <strong>Cooker</strong> asspecified, substituting all the water with the samequantity of chicken, beef, fish, or vegetable stock.Sweet ricePrepare the rice in the <strong>Syncro</strong> <strong>Rice</strong> <strong>Cooker</strong> as specifiedsubstituting half the water with apple juice, orangejuice or pineapple juice. Cooking rice with milk orcream is not recommended as it will burn onto thebottom of the removable cooking bowl.Saffron riceAdd 1 ⁄4 teaspoon of saffron powder or 2 saffronthreads to every 2 cups of water. Use the white ricecooking tables. Mix well.Arborio riceIs short round-grained pearly rice often used forItalian risotto cooking. Use the brown ricecooking tables.Jasmine riceJasmine rice is fragrant long grain rice. Use the whiterice cooking tables.Basmati riceBasmati rice is an aromatic long grain rice. Use thewhite rice cooking tables.Wild riceIt is not recommended to cook wild rice alone in the<strong>Syncro</strong> <strong>Rice</strong> <strong>Cooker</strong> as it requires a substantial amountof water. It is possible to cook wild rice as a blendwith white or brown rice.Brown <strong>Rice</strong>To soften the bran layer of long-grain or calrosebrown rice, use the ‘Cook’ function of the <strong>Syncro</strong><strong>Rice</strong> <strong>Cooker</strong>.1213
Steaming foodsSteamed foods retain most of their nutritional valuewhen cooked in the <strong>Syncro</strong> <strong>Rice</strong> <strong>Cooker</strong>. Foods maybe steamed by placing food in the steaming trayover stock or water and closing the lid. Keep the lidclosed while steaming food unless the recipe orchart specifically states to open the lid. By openingthe lid unnecessarily steam is lost and the cookingtime will be extended.1. Measure 3 <strong>Syncro</strong> <strong>Rice</strong> <strong>Cooker</strong> cups or more ofwater or stock into the removable cooking bowl.Use up to a maximum of 6 <strong>Syncro</strong> <strong>Rice</strong> <strong>Cooker</strong>cups of water.2. Place food to be steamed directly onto thesteaming tray and insert into the removablecooking bowl. (Refer to the Steaming Charts onthe page 15 for approximate cooking times).3. Place removable cooking bowl with thesteaming tray into the outer housing and closethe lid.4. Plug into a 230/240-volt power outlet and thenswitch on. The red ‘Start’ light will flash.5. Select the ‘Cook’ function by pressing the ‘Start’button and two dashes ‘--‘ will appear on theLCD screen. The red light on the ‘Start’ buttonwill illuminate.6. When steaming is finished, carefully open thelid and remove foods from the <strong>Syncro</strong> <strong>Rice</strong><strong>Cooker</strong> steaming tray. If further steaming isrequired ensure sufficient water is in theremovable cooking bowl. If not, add more hotwater or stock.7. If no further steaming is required, press theCancel button and switch the <strong>Syncro</strong> <strong>Rice</strong> <strong>Cooker</strong>off at the power outlet and then unplug thecord. Allow to cool before cleaning.Generally, the amount of water required forsteaming (3-6 cups water or stock) will beretained throughout the steaming process andthis will prevent the LCD screen showing the last12 minutes of cooking and/or automaticallyswitching to the Keep Warm function.However, monitor the water level and do not letthe removable cooking bowl boil dry duringsteaming. Hot liquid can be added during thesteaming process.The Keep Warm function can be selectedindependently after the Cancel button hasbeen pressed.NoteHints and tips for steaming vegetables• Smaller pieces will steam faster than larger pieces.• Try to keep vegetables to a uniform size to ensureeven cooking.• Fresh or frozen vegetables may be steamed.• If steaming frozen vegetables, do not thawbefore cooking.• The size and shape of vegetables, as well aspersonal taste, may call for adjustments to thecooking time. If softer vegetables are required,allow extra cooking time.• Do not allow water or stock to reach the steamingtray. The steaming will not be effective.Vegetables Preparation & tips Quantity Cooking time(minutes)Artichoke remove the hard 2 medium 40-45outer leaves and stalkAsparagus trim, leave as spears 2 bunches 22-24Beans top and tail, leave whole 250g 23-25Beetroot trim, do not break skin 300g 22-23small-mediumBroccoli cut into florets 250g 18-20Brussel Sprouts cut a cross in the base 375g 27-29Cabbage large pieces 500g 20-22Carrots cut into strips 3 medium 24-26Capsicums cut into strips 3 medium 24-26Cauliflower cut into florets 375g 27-29Celery slice into strips 3 stalks 15-16Chickpeas soak for 12 hours 1 cup dried 50-55Corn whole corn cobs 2 small cobs 30-32Mushrooms whole, unwashed 300g 18-20Onions (pickling) peeled, leave whole 6 medium 30-35Snow peas topped and tailed 250g 14-15Peas fresh, peeled 250g 18-20frozen 250g 14-15Potatoes new, whole 6 (100g each) 50-60Sweet Potato cut into pieces 300g 30-35KumeraPumpkin cut into pieces 300g 30-35Spinach (English) leaves and 1⁄2 bunch 15-20stems cleanedSquash (baby) topped and tailed 350g 15-20Turnips peeled, sliced and 350g 25-27cut to 50g piecesZucchini sliced 350g 15-201415
Steaming foods continuedHints and tips for steaming fishand seafood• Season fish with fresh herbs, onions, lemon etc.before cooking.• Ensure fish fillets are in a single layer and donot overlap.• Fish is cooked when it flakes easily with a fork andis opaque in colour.Type Cooking time Suggestions and tips(mintues)Fish – fillets 18-20 Steam until opaque and easy to flake.– whole 25-30 A cutlet is cooked when the centre bone is able to be– cutlets 22-24 easily removedLobster – tails 28-30 Remove underside of shellMussels – in shell 22-24 Steam until just openedClams and Pipis 18-20 Steam until just openedPrawns – in shell 18-20 Steam until pinkScallops 14-16 Steam until opaqueOysters – unopened 20-22 Steam until the top shell starts to open.If the top shell does not completely open, it will need to beopened with a knifeHints and tips for steaming poultry• Select similar sized pieces of poultry foreven cooking.• For even cooking results arrange poultry in asingle layer.• Remove visible fat and skin.Type Cooking time Suggestions and tips(mintues)Breast fillet 30-35 Place skin side upHints and tips for steaming dumplings• Fresh or frozen dumplings and savoury bunscan be steamed.• Place small pieces of baking paper, or cabbage orlettuce leaves, under the dumplings to avoidsticking to the steaming tray.• To obtain a browned appearance, sear the chickenbefore steaming.• Check poultry is cooked by piercing the thickest part.The poultry is cooked when the juices run clear.Drumstick 40-45 Place thickest part to outside of stainless steel steaming trayThigh fillet 28-30 Place thickest part to outside of stainless steel steaming trayType Cooking time Suggestions and tips(mintues)BBQ pork or chicken buns 20-22 Cook from frozenDumplings – frozen 18-20 Separate before cookingDumplings – fresh 15-161617
Care and cleaningSwitch the <strong>Syncro</strong> <strong>Rice</strong> <strong>Cooker</strong> off at the power outletand then unplug. Allow all parts to cool beforeremoving the removable cooking bowl. Wash theremovable cooking bowl and steaming tray in hot,soapy water, rinse and dry thoroughly.<strong>Breville</strong> does not recommend that any parts of your<strong>Syncro</strong> <strong>Rice</strong> <strong>Cooker</strong> are washed in a dishwasher asharsh detergents and hot water temperatures maystain or distort the removable cooking bowland accessories.Do not use abrasive cleaners, steel wool, ormetal scouring pads as these can damage thenon-stick surface.The outer housing can be wiped with a damp clothand then dried thoroughly.If rice has cooked onto the bottom of theremovable cooking bowl, fill the bowl with hot,soapy water and leave to stand forapproximately 10 minutes before cleaning.That’s the idea <strong>Breville</strong> Customer Service CentreAustralian Customers✉ <strong>Breville</strong> Customer Service CentreLocked Bag 2000Botany NSW 2019AUSTRALIA☎ Customer Service: 1300 139 798Fax (02) 9384 9601Email Customer Service: askus@breville.com.auNew Zealand Customers✉<strong>Breville</strong> Customer Service CentrePrivate Bag 94411GreenmountAuckland, New Zealand☎ Customer Service: 09 271 3980Fax 0800 288 513Email Customer Service: askus@breville.com.auwww.breville.com.au<strong>Breville</strong> is a registered trademark of <strong>Breville</strong> Pty. Ltd. ABN 98 000 092 928DO NOT IMMERSE THE OUTER HOUSING OR POWER CORD IN WATER OR ANY OTHER LIQUIDAS THIS MAY CAUSE ELECTROCUTION.© Copyright. <strong>Breville</strong> Pty. Ltd. 2005<strong>Syncro</strong> is a trademark of <strong>Breville</strong> Pty. Ltd.Due to continual improvements in design or otherwise, the product youpurchase may differ slightly from the one illustrated in this booklet.Model BRC450 Issue 1/0518
RecipesDelicious recipesIncludes instructions for use
Contents<strong>Rice</strong> recipesChicken andbasil risotto4-6<strong>Rice</strong> recipesSteamed recipesPageR3R102 tablespoons olive oil2 tablespoons butter1 clove garlic, crushed1 Spanish onion, finely chopped2 <strong>Syncro</strong> <strong>Rice</strong> <strong>Cooker</strong> cups Arborio rice3 cups chicken stock2 x 150g chicken breasts, steamed then thinly sliced2 tomatoes, diced1⁄2 cup grated Parmesan cheese2 tablespoons finely sliced fresh basil leavesFreshly ground black pepper1. Place oil and butter into the removable cookingbowl. Using the ‘Cook’ function, press the Startbutton. Heat for 15 minutes, add garlic and onion.Cook for 2 minutes, stirring constantly. Add rice,stir to coat with oil.3. Add the stock, close the lid and cook until ’Cook’function switches to ‘Keep Warm’. Stir onceduring cooking.4. Stir rice and fold through chicken, tomatoes,cheese, basil and pepper. Close the lid and standfor 10 minutes on ‘Keep Warm’ before serving.Tomato andzucchini risotto4-62 tablespoons olive oil1 small leek, washed, trimmed and thinly sliced2 cloves garlic, crushed1 1 ⁄2 <strong>Syncro</strong> <strong>Rice</strong> <strong>Cooker</strong> cups Arborio rice440g can diced tomatoes1⁄2 cup dry white wine3 cups chicken stock1⁄2 cup grated Parmesan cheese1 cup grated zucchini2 tablespoons toasted pine nuts1. Place the oil into the removable cooking bowl.Using the ‘Cook’ function, press the Start button.Heat for 15 minutes, add leek and garlic. Cook for2 minutes, stirring constantly. Add rice, stir to coatwith oil.2. Add tomatoes, wine and stock. Close the lid andcook until ’Cook’ function switches to ‘Keep Warm’.Stir once during cooking.3. Stir rice and fold in cheese, zucchini, and pinenuts. Close the lid and stand for 10 minutes on‘Keep Warm’ before serving.Measurements used are Australian standardmetric cups and spoons except where measuringwith <strong>Syncro</strong> <strong>Rice</strong> <strong>Cooker</strong> is specified.NoteR2R3
<strong>Rice</strong> recipes continuedRisotto of smokedchicken and eggplant4-6Rich cheesy risotto4-6Mushroom risotto4-6Seafood paella4-630g butter2 tablespoons olive oil1 small leek, washed, trimmed and sliced1 clove garlic, crushed1 1 ⁄2 <strong>Syncro</strong> <strong>Rice</strong> <strong>Cooker</strong> cups Arborio rice3 1 ⁄2 cups chicken stock1 teaspoon turmeric1 teaspoon freshly grated lime rind250g roasted marinated eggplant, chopped300g smoked boned chicken breast,skinned and diced1 tablespoon finely shredded basil1⁄2 cup toasted pine nutsBlack pepper, to taste1. Place butter and oil into the removable cookingbowl. Using the ‘Cook’ function press the Startbutton. Heat for 15 minutes, add leek and garlic.Cook for 2 minutes, stirring constantly. Add rice,stir to coat with oil.2. Add stock, turmeric and rind. Close the lid until‘Cook’ function switches to ’Keep Warm’.Stir once during cooking.3. Stir rice and fold through eggplant, chicken, basil,pine nuts and pepper. Close lid and stand for10 minutes on ‘Keep Warm’ before serving.60g butter2 tablespoons olive oil1 small Spanish onion, finely diced2 cloves garlic, crushed1 1 ⁄2 <strong>Syncro</strong> <strong>Rice</strong> <strong>Cooker</strong> cups Arborio ricePinch saffron powder4 cups chicken stock1 teaspoon grated lemon rind1⁄4 cup grated Swiss cheese1⁄4 cup grated Parmesan cheese1⁄2 cup Brie cheese, finely chopped1 tablespoon snipped garlic chivesFreshly ground black pepper, to taste1. Place butter and oil into the removable cookingbowl. Using ‘Cook’ function, press the Start button.Heat for 15 minutes, add onion and garlic. Cookfor 2 minutes, stirring constantly. Add rice, stir tocoat with oil.2. Add saffron, stock, and rind. Close the lid and cookuntil ‘Cook’ function switches to ‘Keep Warm’. Stironce during cooking.3. Stir rice and fold through cheeses, chives andpepper. Close the lid and stand for 10 minutes on‘Keep Warm’ before serving.2 tablespoons olive oil2 tablespoons butter1 brown onion, finely diced150g button mushrooms, sliced2 1 ⁄2 <strong>Syncro</strong> <strong>Rice</strong> <strong>Cooker</strong> cups Arborio rice3 cups chicken stock1⁄4 cup grated Parmesan cheese1 tablespoon chopped flat leaf parsley1. Place butter and oil into the removable cookingbowl. Using ‘Cook’ function, press the Start button.Heat for 15 minutes, add onion and mushrooms.Cook for 5 minutes or until the mushrooms aresoft, stirring constantly. Add rice, stir to coatwith oil.2. Add stock. Close the lid and cook until ’Cook’function switches to ‘Keep Warm’. Stir onceduring cooking.3. Stir rice and fold through cheese and parsley.Close the lid and stand for 10 minutes on ‘KeepWarm’ before serving.1⁄4 cup olive oil1 Spanish onion, diced3 cloves garlic, crushed1 teaspoon freshly grated ginger1 1 ⁄2 <strong>Syncro</strong> <strong>Rice</strong> <strong>Cooker</strong> cups long grain rice, washed4 cups seafood or chicken stock500g mixed seafood (prawns, calamari, octopus,mussel meat, white fish fillet)1⁄2 cup roasted red capsicum, peeled and chopped1 tablespoon fresh lime juice2 tomatoes, diced1⁄4 teaspoon chilli powder2 tablespoons chopped fresh coriander1. Place oil into the removable cooking bowl. Usingthe ‘Cook’ function, press the Start button. Heat for15 minutes, add onion, garlic and ginger. Cook for2 minutes, stirring constantly. Add rice, stir to coatwith oil.2. Add stock. Close the lid and cook for 10 minutes.Stir in seafood, capsicum and lime juice. Close thelid and cook until ’Cook’ function switches to‘Keep Warm’.3. Stir rice mixture and fold through tomatoes, chilliand coriander. Close the lid and stand for10 minutes on ‘Keep Warm’ before serving.R4R5
<strong>Rice</strong> recipes continuedSushi rice4 <strong>Syncro</strong> <strong>Rice</strong> <strong>Cooker</strong> cups short grainwhite rice, washed4 cups water2 tablespoons rice vinegar2 tablespoons castor sugar1⁄2 teaspoon salt1 tablespoon rice vinegar, extra1. Place washed rice and water into removablecooking bowl and close the lid.2. Using the ‘Cook’ function, press the Start buttonand cook until ‘Cook’ function switches to‘Keep Warm’.3. Stir rice, close the lid and stand for 10 minutes on‘Keep Warm’.4. Transfer rice to a large, shallow dish and spreadto cool.5. Heat vinegar, sugar and salt in a small saucepanand stir over a low heat until sugar dissolves.Sprinkle vinegar mixture over rice, mix well.6. Use immediately as required in Sushi recipes.Some Sushi recipes require the rice to be shapedby hand. To do this, combine 1 tablespoon ricevinegar with 1 ⁄4 cup water. Use this mixture tokeep hands wet while shaping rice. Any leftoverSushi <strong>Rice</strong> can be frozen.That’s the idea RECOMMENDED USAGE – SEAWEED ROLLS6 sheets Nori seaweedSushi <strong>Rice</strong>Wasabi paste, to tasteAdd any combination of filings such as:Smoked salmon, thinly slicedJapanese pickled ginger and vegetablesFinely sliced cucumberSashimi salmon or tunaCustard eggAvocadoCooked asparagusFresh crabFinely shredded lettuceMayonnaise1. Place a sheet of seaweed, shiny side down on asheet of baking paper or a bamboo rolling mat.2. Spread a portion of the rice over a third of theNori sheet, leaving a border.4. Spread a very thin layer of wasabi paste in anarrow line down the centre of the rice. Top witha selection of fillings.5. Using the paper or mat as a guide, roll up the Norisheet to enclose the filling. Press to seal the edges.6. Use a very sharp knife to cut the roll neatly intosmall portions.7. Repeat with remaining Nori sheets and filling.Chill until ready to serve.Capsicum andrice salad4-61 <strong>Syncro</strong> <strong>Rice</strong> <strong>Cooker</strong> cup white rice, washed1 <strong>Syncro</strong> <strong>Rice</strong> <strong>Cooker</strong> cup brown rice, washed1 <strong>Syncro</strong> <strong>Rice</strong> <strong>Cooker</strong> cup wild rice mix, washed5 cups chicken stock375g marinated roasted capsicum, finely sliced125g fetta cheese, diced150g pitted black Kalamata olives2 tablespoons basil pesto3⁄4 cup Caesar salad dressing, prepared1⁄2 cup Italian salad dressing, prepared2 tablespoons sweet Thai chilli sauce1. Place washed rice and stock into the removablecooking bowl and close the lid.2. Using ‘Cook’ function, press the Start button andcook until ’Cook’ function switches to ‘Keep Warm’.Stir once during cooking.3. Allow rice to stand, covered with lid, for 10minutes on ‘Keep Warm’.4. Transfer rice to a large, shallow dish and spread tocool. This helps to keep rice grains separate.5. In a large serving bowl, toss cooled rice withcapsicum, Fetta cheese and olives.6. Combine pesto, salad dressings and chilli sauce ina screw top jar. Shake well and toss through ricesalad just before serving.Serve chilled.Oriental wildrice salad4-62 tablespoons oil2 cloves garlic, crushed4 shallots, thinly sliced2 1 ⁄4 <strong>Syncro</strong> <strong>Rice</strong> <strong>Cooker</strong> cups wild rice mix, washed4 cups chicken stock200g snow peas, blanched1⁄4 cup smoked almonds, halved2 tablespoons balsamic vinegar3 teaspoons soy sauce1 teaspoon sesame oil2 tablespoon sweet Thai chilli sauce2 tablespoons rice wine vinegar1. Place oil into the removable cooking bowl. Usingthe ‘Cook’ function, press the Start button. Heat for15 minutes, add garlic and shallots. Cook for 2minutes, stirring constantly. Add rice, stir to coatwith oil.2. Add stock, close the lid and cook until ’Cook’function switches to ‘Keep Warm’. Stir onceduring cooking.3. Allow rice to stand, covered with lid, for 10minutes on ‘Keep Warm’.4. Transfer rice to serving dish. Stir in snow peasand almonds.5. Combine vinegar, soy sauce, sesame oil, chillisauce and vinegar in a screw top jar and shakewell. Toss through salad to serve.Serve warm.R6R7
<strong>Rice</strong> recipes continuedTurkish pilaf4-63 tablespoons ghee or clarified butter1 tablespoon olive oil1 Spanish onion, diced2 cloves garlic, crushed1 teaspoon lightly crushed cardamom seeds1 teaspoon ground cuminFreshly ground black pepper1 teaspoon turmeric1 teaspoon salt1 bay leaf3 <strong>Syncro</strong> <strong>Rice</strong> <strong>Cooker</strong> cups Basmati rice, washed6 cups chicken stock1⁄2 cup shelled pistachio nuts, finely chopped100g chopped dried apricots100g chopped dried figs2 tablespoons chopped fresh coriander1. Place butter and oil into the removable cookingbowl. Using the ‘Cook’ function, press the Startbutton. Heat for 15 minutes, add onion, garlic,spices, bay leaf, salt and pepper. Cook for 2minutes stirring constantly. Add rice, stir to coatwith oil.2. Add stock, close the lid and cook until ’Cook’function switches to ‘Keep Warm’. Stir onceduring cooking.3. Stir rice and fold through nuts, apricots, figs andcoriander. Cover with lid and stand for 10 minuteson ‘Keep Warm’ before serving.Mango tropicalcreamed rice1 3 ⁄4 <strong>Syncro</strong> <strong>Rice</strong> <strong>Cooker</strong> cups short grain whiterice, washed1 cup mango nectar1 cup water450g can sliced peaches, drained, juice reserved2 teaspoons lime rind1⁄2 cup coconut cream1⁄4 cup passionfruit pulp1 tablespoon cinnamon sugar1. Place rice, mango nectar, water, and reservedpeach juice into the removable cooking bowl andstir to combine. Close the lid and using the ‘Cook’function, press the Start button. Cook until ’cook’function switches to ‘Keep Warm’. Stir onceduring cooking.3. Stir rice mixture and fold through lime rind,coconut cream and passionfruit pulp. Close the lidand stand for 10 minutes on ‘Keep Warm’.4. Serve warm with peaches and dusted withcinnamon sugar.4Wild berry rice1 1 ⁄2 <strong>Syncro</strong> <strong>Rice</strong> <strong>Cooker</strong> cups short grain white rice,washed2 cups water1⁄4 cup warmed honey2 tablespoons butter, melted1 cup cream1⁄2 cup fresh or frozen blueberries1⁄2 cup fresh or frozen raspberries1⁄2 cup fresh or frozen blackberries1⁄2 cup fresh or frozen strawberries1⁄4 cup icing sugar1⁄4 cup water2 tablespoons port4-61. Place rice and water into the removable cookingbowl. Cover with lid and using the ‘Cook’ function,press the Start button.2. Cook until ’Cook’ function switches to ‘KeepWarm’. Stir once during cooking.3. Stir rice and fold in honey, butter, and cream.Cover with lid and stand for 10 minutes on’Keep Warm’.4. Place blueberries, raspberries, blackberries,strawberries, icing sugar, water and port into thebowl of a food processor or blender and processuntil smooth.5. Fold berry mixture through rice mixture thentransfer to serving glasses.6. Serve topped with extra berries and creamif desired.R8R9
Steamed recipesSteamed whole fish withginger and shallot4Steamed salmon fillet withtomato and basil salsa4Steamed vegetable(gado gado)4Steamed chicken breastwith ginger and spinach41 x 300-400g whole snapper or bream,cleaned and scaled1⁄2 bunch coriander2 tablespoons soy sauce1 tablespoon peanut oil2cm piece fresh ginger, cut into matchsticks3 shallots, finely sliced1 lime, sliced1. Wash and dry the fish. Cut 2 slits at a 45° anglethrough each side of the fish. Into each slit, placesome ginger and a slice of lime.2. Place half of the coriander into the cavity of thefish. Place the fish into the steaming tray.3. Pour water or stock into the removable cookingbowl. Close the lid and using the ‘Cook’ function,press the Start button. When the water is boiling,insert fish in the steaming tray into removablecooking bowl, close the lid and steam fish for 15minutes or until cooked when tested.4. Remove fish and place onto a serving platter.5. Combine soy, oil and shallots, pour over the fish.Serve immediately with steamed jasmine rice.1 tablespoon olive oil2 shallots, diced1⁄4 cup white wine vinegar2 ripe tomatoes, diced10 basil leaves, finely sliced1 tablespoon balsamic vinegar2 tablespoons olive oil2 x 150g salmon filletsSalt and pepper, if desired3 <strong>Syncro</strong> <strong>Rice</strong> <strong>Cooker</strong> cups fish stock1. Heat a frypan on medium heat, add the oil anddiced shallots cook for a minute to soften theshallots, add the vinegar and let the mixturereduce by half. Add the tomatoes and bring themixture to the boil, then remove from heat.Cool the salsa mixture then add basil, balsamicvinegar, and oil.2. Place salmon fillets into the steaming tray andsprinkle with salt and pepper.3. Place the stock into the removable cooking bowl.Close the lid and using the ‘Cook’ function, pressthe Start button. When the stock is boiling, insertthe salmon fillets in the steaming tray intoremovable cooking bowl, close the lid and cookfor 6-8 minutes for medium or 10 minutes forwell done.4. Remove salmon. Serve hot with Tomato and BasilSalsa and mixed salad leaves.1 bunch baby bok choy, trimmed and sliced1 small head broccoli, cut into florets10 snow peas1 carrot, peeled and thinly sliced300g hard tofu, cubed3 <strong>Syncro</strong> <strong>Rice</strong> <strong>Cooker</strong> cups of water250ml peanut sauce (recipe below)1. Place half the vegetables and tofu into steamingtray. Place water into the removable cooking bowl.Close the lid and using the ‘Cook’ function, pressthe Start button. When the stock is boiling, insertthe vegetables in the steaming tray into removablecooking bowl, close the lid and cook for 5-7minutes. Remove vegetables, keep warm. Ensuresufficient water is in removable cooking bowl.Repeat steaming with the remaining vegetables.2. Place the vegetables and tofu onto a servingplatter and drizzle with warm Peanut Sauce.PEANUT SAUCE1 onion, chopped1 clove garlic2cm piece fresh ginger, chopped1 tablespoon oil1 teaspoon curry powder (preferably Malaysian)1 tablespoon soy sauce1⁄4 cup crunchy peanut butter1 teaspoon chilli paste2 teaspoons brown sugar1 cup coconut milk1. Place the onion, garlic and ginger into a foodprocessor and process until fine.2. Heat oil in a saucepan over medium heat. Addonion mixture and gently fry for 3-4 minutes.3. Add curry powder and soy sauce. Stir well beforeadding peanut butter, sugar, and chilli paste.4. Add the coconut milk and stir thoroughly until thesauce is smooth.5. Increase the heat then cook for 5 minutes.1 tablespoon minced ginger1⁄2 bunch coriander finely sliced2 x 150g chicken breast supremes, skin on1 cup Stones green ginger wine200g baby spinach1 punnet (50g) baby corn1. Combine ginger and coriander. Place half ofthe mixture under the skin of each chickenbreast supreme.2. Place the breasts in a single layer into a shallowdish. Pour over the ginger wine, cover andmarinate for 20 minutes.1. Place the marinated chicken into steaming tray.2. Place water into the removable cooking bowl.Close the lid and using the ‘Cook’ function, pressthe Start button. When the water is boiling, insertthe chicken breasts in the steaming tray into theremovable cooking bowl, close the lid and cook for10-15 minutes or until chicken cooked whentested. Remove chicken and keep warm.3. Place spinach and corn into steaming tray.4. Ensure sufficient water is in removable cookingbowl. Insert steaming tray and close the lid,cook for another 7-10 minutes or until vegetablesare cooked.5. Serve the chicken on top of the vegetables with adrizzle of soy sauce.R10R11
NotesNotesR12R13


