ProSeries Professional Network Installation Guide for Tax ... - Intuit
ProSeries Professional Network Installation Guide for Tax ... - Intuit
ProSeries Professional Network Installation Guide for Tax ... - Intuit

Create successful ePaper yourself
Turn your PDF publications into a flip-book with our unique Google optimized e-Paper software.
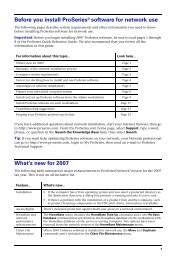
Be<strong>for</strong>e you install <strong>ProSeries</strong> ® software <strong>for</strong> network useThe following pages describe system requirements and other in<strong>for</strong>mation you need to knowbe<strong>for</strong>e installing <strong>ProSeries</strong> software <strong>for</strong> network use.Important: Be<strong>for</strong>e you begin installing <strong>ProSeries</strong> software, be sure to read the <strong>ProSeries</strong>Getting Started <strong>Guide</strong>. We also recommend that you review all the in<strong>for</strong>mation in this guide.For in<strong>for</strong>mation about this topic...Look here...Summary of the network installation process Page 1Computer system requirements Page 3Factors <strong>for</strong> deciding how to install and use <strong>ProSeries</strong> software Page 4Advantages of network installations Page 5Prepare your networked computer system Page 6Install and set up <strong>ProSeries</strong> software from the Admin workstation Page 9Install <strong>ProSeries</strong> software on each workstation Page 17Troubleshooting suggestions Page 21Keeping your <strong>ProSeries</strong> products up-to-date Page 23If you have additional questions about network installation:1 Start your Internet browser, then go to http://www.proseries.com.2 From the <strong>ProSeries</strong>.com home page, select Support.3 Type a word, phrase, or question in the Search the Knowledge Base field, then selectSearch.Tip: If you want help optimizing <strong>ProSeries</strong> software on your network, your <strong>Network</strong>professional can go to http://www.proseries.com, login to My <strong>ProSeries</strong>, then send an e-mail to<strong>ProSeries</strong> Technical Support.Summary of the network installation processFollowing is a summary of how to prepare your networked system and then install <strong>ProSeries</strong>software <strong>for</strong> network use. Note that certain details vary from system to system.Tip: For more detailed in<strong>for</strong>mation, refer to the applicable sections of this guide.Prepare to install the network version of the <strong>ProSeries</strong> programTake the following steps be<strong>for</strong>e you begin the <strong>ProSeries</strong> installation procedure.Tip: For instructions related to shared folders, mapped drives, rights, and permissions, refer tothe documentation <strong>for</strong> your operating system and/or network software.1 Decide which drive on the server (if you have a client-server network) or the servingcomputer (if you have a peer-to-peer network) you will install <strong>ProSeries</strong> shared networkcomponents.2 On the drive you chose, create a folder named <strong>ProSeries</strong>.3 Make the <strong>ProSeries</strong> folder a shared folder, and assign it the name “<strong>ProSeries</strong>.”4 Within the <strong>ProSeries</strong> folder, create a folder named ProNetyy (where yy represents the lasttwo digits of the tax year).1
<strong>Network</strong>ComponentRecommendationMinimum RequirementWorkstationscreenresolution<strong>Network</strong>infrastructureInternetBrowserInternetServiceProvider (ISP)Internetconnection1024 x 768 or higher 1024 x 768 or higher100 Mbps optimized connectionenvironment (<strong>Network</strong> Interface Cards,Cat V cabling, switches, and routers)A WAN is recommended <strong>for</strong> customerswith multiple locations and more than2000 client files.Microsoft Internet Explorer 6.054 Mbps optimized connectionenvironment including wirelessenvironments (<strong>Network</strong> Interface Cards,Cat V cabling, switches, and routers)Note: Internet Explorer 6.0 is installed if Internet Explorer 6.0 or later isn’t alreadyinstalled.An ISP is required <strong>for</strong> features that use the Internet, such as electronic filing and theonline delivery of products and product updates.<strong>ProSeries</strong> software works with most ISPs. Contact your ISP if you have a specificquestion.High-speed Internet connection, such asT-1, DSL, or cable modem*Dial-up Internet connection is no longersupported.High-speed Internet connection, such asT‐1, DSL, or cable modem*Dial-up Internet connection is no longersupported.Factors <strong>for</strong> deciding how to install and use <strong>ProSeries</strong>softwareImportant: If you are going to install <strong>ProSeries</strong> software <strong>for</strong> network use, we stronglyrecommend that you purchase <strong>ProSeries</strong>/<strong>Network</strong> Version (if you haven’t already) be<strong>for</strong>e youbegin the software installation process. If you haven’t purchased <strong>ProSeries</strong>/<strong>Network</strong> Version,the <strong>ProSeries</strong> software won’t be licensed <strong>for</strong> network use, and you won’t be able to print ore‐file returns until your product licensing in<strong>for</strong>mation includes a <strong>Network</strong> License.How you install and use <strong>ProSeries</strong> software depends on several factors, including the numberof computers that will be running the <strong>ProSeries</strong> program.One computer. If you are going to use <strong>ProSeries</strong> software on one computer, install the program<strong>for</strong> stand‐alone use on that computer’s hard drive. See “Installing <strong>ProSeries</strong> software <strong>for</strong>stand‐alone use” in the <strong>ProSeries</strong> Getting Started <strong>Guide</strong>.Multiple computers. If you are going to use <strong>ProSeries</strong> software on more than one computer,you have three options <strong>for</strong> installing and using the program. See the following table.To use <strong>ProSeries</strong>software this way...Each preparermaintains anindependent set ofclientsInstall the program this way...Go to each computer and install <strong>ProSeries</strong> software <strong>for</strong> stand‐alone use.4 www.proseries.com
To use <strong>ProSeries</strong>software this way...Preparers share clientsand regularly reviewreturns <strong>for</strong> otherpreparersPreparers work in theoffice sharing andreviewing returns.Some preparers uselaptop or notebookcomputers to begin andprepare returns at clientsites.Install the program this way...1. Go to the computer that you choose to be the <strong>ProSeries</strong> Admin workstation,then install <strong>ProSeries</strong> software <strong>for</strong> network use. You’ll (a) install <strong>ProSeries</strong>network components to a shared folder, and (b) install and set up the <strong>ProSeries</strong>program on that computer’s hard drive.2. Go to each computer that will serve as a User workstation that runs the<strong>ProSeries</strong> program and accesses the <strong>ProSeries</strong> network components from theshared folder, then install and set up the <strong>ProSeries</strong> program.1. Go to the computer that you choose to be the <strong>ProSeries</strong> Admin workstation,then install <strong>ProSeries</strong> software <strong>for</strong> network use. You’ll (a) install <strong>ProSeries</strong>network components to a shared folder, and (b) install and set up the <strong>ProSeries</strong>program on that computer’s hard drive.2. Go to each computer that will serve as a User workstation that runs the<strong>ProSeries</strong> program and accesses the <strong>ProSeries</strong> network components from theshared folder, then install and set up the <strong>ProSeries</strong> program.3. Go to each laptop or notebook computer, then install and set up <strong>ProSeries</strong>software <strong>for</strong> stand‐alone use on that computer’s hard drive.Important: If a preparer is going to prepare returns on a laptop or notebook computer thatwill be mobile (in a manner permitted by the <strong>ProSeries</strong> Software License Agreement), install<strong>ProSeries</strong> software <strong>for</strong> stand-alone use on the hard drive of that laptop or notebook computer.Important: If you install <strong>ProSeries</strong> software <strong>for</strong> stand-alone use on a laptop or notebookcomputer, be sure to use the Copy/Backup and Restore commands when “moving” client filesfrom the network to the laptop or notebook computer, or from the laptop or notebookcomputer to the network. In HomeBase, first select one or more client files. Next, go to the Filemenu, select Client File Maintenance, then select Copy/Backup or Restore.Tip: The Access Rights feature can control access to the software and specific features oncomputers on which <strong>ProSeries</strong> software is installed <strong>for</strong> stand-alone use, and/or computers thatserve as <strong>ProSeries</strong> workstations when <strong>ProSeries</strong> is installed <strong>for</strong> network use.Advantages of network installationsThe following table lists some of the features that you can take advantage of when you install<strong>ProSeries</strong> software <strong>for</strong> network use:This feature...InternetconnectionClient filelockingPay-Per-ReturnControl/Access<strong>ProSeries</strong>options andfeaturesOffers this advantage with network use...Only the <strong>ProSeries</strong> Admin workstation (which is the computer from which you install<strong>ProSeries</strong> software) needs an Internet connection.The <strong>ProSeries</strong> program prevents more than one user from opening a client file at thesame time, which helps prevent client data from being overwritten.All workstations share one pay-per-return account.Some features (such as Task Scheduler) can be changed only from the <strong>ProSeries</strong> Adminworkstation.Users can set up most <strong>ProSeries</strong> options and features on their workstations.Note: Some <strong>ProSeries</strong> options and features (such as access rights, firm/preparerin<strong>for</strong>mation, global billing options, standard letters, and standard invoices) are thesame <strong>for</strong> all workstations. If a user changes one of these “global” options or features,the change affects all workstations.5 www.proseries.com
This feature...Data entryElectronic filingOffers this advantage with network use...Employer and payer data entered on all workstations is entered in the Employer/PayerEIN database, and that data is then available to all workstations.The program manages electronic filing factors (such as the assignment of DCNs toreturns and extensions) across all <strong>ProSeries</strong> workstations in the network.Prepare your networked computer systemBe<strong>for</strong>e you can install <strong>ProSeries</strong> software, you must prepare your networked computer system.The specific steps appropriate <strong>for</strong> your system depend on the type of network and the way it’sset up.It’s helpful to know some network-related terms be<strong>for</strong>e you start. The table below explainssome of the more common terms.TermClient-server networkPeer-to-peer networkMapped drive<strong>ProSeries</strong> Adminworkstation<strong>ProSeries</strong> UserworkstationShared folderPrimary file locationExplanationA network setup where only one computer (the server) shares resources used byone or more workstations (the clients).Up to 10 computers that are linked together. One or more systems may shareresources.Any drive or shared resource that has a drive letter assigned to it.The computer from which <strong>ProSeries</strong> software is installed to the server or servingcomputer.You can designate any computer to be the <strong>ProSeries</strong> Admin workstation (includingthe network administrator’s computer), but once you choose a <strong>ProSeries</strong> Adminworkstation, it should remain the <strong>ProSeries</strong> Admin workstation throughout thetax season.A computer that runs the <strong>ProSeries</strong> program and accesses the <strong>ProSeries</strong> networkcomponents from the shared folder.The folder that is set up by the <strong>Network</strong> Administrator to be shared in the networksystem. The <strong>ProSeries</strong> shared folder is the location where <strong>ProSeries</strong> networkcomponents and client files reside. (Note: “Folder” and “directory” are synonyms.)This is the location where the program stores all current-year client files. Thislocation can be set only from the <strong>ProSeries</strong> Admin workstation.For more in<strong>for</strong>mation about shared folders, drive mapping, and access rights, refer to yournetwork vendor’s documentation.If you have additional questions about preparing your networked system <strong>for</strong> the networkversion of <strong>ProSeries</strong>, go to http://www.proseries.com, select Support, type a word, phrase, orquestion in the Search the Knowledge Base field, then select Search.Step 1 - Decide which computer will be the Admin workstationYour first step is deciding which computer will be the <strong>ProSeries</strong> Admin workstation. Use thefollowing in<strong>for</strong>mation to help you decide.● ● Internet access. The computer that you select to be the <strong>ProSeries</strong> Admin workstationshould have an Internet connection because product updating via the Internet must bedone at the <strong>ProSeries</strong> Admin workstation.6 www.proseries.com
● ● Type of network. Determine whether you’re using a client-server network or a peer-topeernetwork.• Client-server network. You install <strong>ProSeries</strong> software from the <strong>ProSeries</strong> Adminworkstation to the server’s hard drive. With this type of system, the <strong>ProSeries</strong> Adminworkstation and the server are two different computers. The <strong>ProSeries</strong> Adminworkstation can be used as a workstation, but the server is not used as a workstation.• Peer-to-peer network. You install <strong>ProSeries</strong> software on the <strong>ProSeries</strong> Adminworkstation’s hard drive. With this type of system, the <strong>ProSeries</strong> Admin workstationcan be used as a workstation.● ● Per<strong>for</strong>mance. If your network is a client-server network, we recommend that you don’tuse the server as a <strong>ProSeries</strong> User workstation. Doing so can degrade networkper<strong>for</strong>mance.● ● Rights. The Admin workstation is the only computer that has rights to at least someaspects of the following features: Product Updating, Customer In<strong>for</strong>mation, Primary FileLocation, Firm Name and Address, Master Password, Electronic Filing Password, BankProducts Registration In<strong>for</strong>mation, Client Analyzer New Query Notifications, DatabaseMaintenance, and HomeBase Tune-up.Tip: If you need to make a different computer the <strong>ProSeries</strong> Admin workstation during the taxseason, contact <strong>ProSeries</strong> Technical Support <strong>for</strong> assistance.Step 2 - Create a shared folder named <strong>ProSeries</strong>Important: Be<strong>for</strong>e you begin the installation process, we recommend that you:●●●●Create a folder on the drive to which you will be installing <strong>ProSeries</strong> shared networkcomponents, and name that folder <strong>ProSeries</strong>Make that new folder a shared folder, and assign it the name “<strong>ProSeries</strong>”If you don’t take these steps be<strong>for</strong>e you begin the installation process (from the Adminworkstation), you must make the folder on the drive where you install the <strong>ProSeries</strong> sharednetwork components a shared folder be<strong>for</strong>e you install the program on the user workstations.Tip: For in<strong>for</strong>mation about how to make a folder a shared folder, see the documentation <strong>for</strong>your operating system.Factors to consider<strong>ProSeries</strong> folder. For best results, use <strong>ProSeries</strong> as the name of the shared folder within whichyou will install the shared network components <strong>for</strong> the <strong>ProSeries</strong> software. This will be theshared folder that all workstations will access when running the <strong>ProSeries</strong> program. If youinstall the network version of <strong>ProSeries</strong> in future tax years, you can install the shared networkcomponents <strong>for</strong> that software to the <strong>ProSeries</strong> shared folder.Netshare and other folder names. If you installed last year’s <strong>ProSeries</strong> shared networkcomponents to a folder within a shared folder that had a name other than <strong>ProSeries</strong>, you caninstall this year’s <strong>ProSeries</strong> shared network components to another folder within that sharedfolder. For example, if you installed last year’s <strong>ProSeries</strong> shared network components toProNetLY within a shared folder named Netshare, you can install this year’s <strong>ProSeries</strong> sharednetwork components to ProNetTY within the Netshare shared folder if you want to maintainthe same structure and naming conventions. (In the preceding example, LY represents the lasttwo digits of last tax year and TY represents the last two digits of this tax year.)Peer-to-peer network. If you are running a peer‐to‐peer environment, you can install <strong>ProSeries</strong>shared network components to the C:\ drive and share the whole C:\ drive. However, if youdo this, you give everyone on your network access to all files and folders on the C:\ drive. Werecommend that you share the <strong>ProSeries</strong> folder on the C:\ drive instead.7 www.proseries.com
File caching. If you’re using a shared NTFS drive, take the following steps to turn off filecaching <strong>for</strong> the shared folder:1 Go to Windows Explorer, right mouse click on the shared folder that you created <strong>for</strong> the<strong>ProSeries</strong> shared network components, then select Sharing.2 Click Caching in the dialog box, make sure there isn’t a check in the “Allow caching offiles in this shared folder” box, then click OK.Step 3 - Map drives if appropriateWe recommend that you use mapped drives (rather than UNC), and that the drive with the<strong>ProSeries</strong> shared network components be mapped to the same drive letter <strong>for</strong> all workstations.Factors to considerMapped to same drive letter. If you’re an existing <strong>ProSeries</strong> network user and have allcomputers mapped to the same drive letter, you don’t have to change anything. Install<strong>ProSeries</strong> software as you did in prior years.Mapped to different drive letters. If all of your workstations are mapped to a network sharedfolder using different drive letters, you don’t have to re-map the workstations.New computers. If you’re an existing <strong>ProSeries</strong> network user and you’ve added new computersto your network, we recommend that you set them up the same way as the existingworkstations on your network.New user. If you are installing <strong>ProSeries</strong> software <strong>for</strong> the first time, you can install <strong>ProSeries</strong>shared network components directly to a shared folder without mapping drives. You can runthe workstation installation and setup from all other computers by accessing this sharedfolder.UNC instead of mapped drives. UNC stands <strong>for</strong> “Universal Naming Convention” or “Uni<strong>for</strong>mNaming Convention.” UNC uses the following <strong>for</strong>mat:\\server-name\shared-folder-pathIf you use UNC instead of mapped drives, the shared folder doesn’t have to be mapped to anetwork letter as long as all workstations can access the shared folder. However, if you useUNC instead of mapped drives, you must use UNC exclusively.Important: Don’t use both UNC and mapped drives.Integration with other software. The <strong>ProSeries</strong> program integrates properly with software suchas <strong>ProSeries</strong>\Practice Manager and <strong>ProSeries</strong>\Fixed Asset Manager only if the <strong>ProSeries</strong>software is installed to mapped drives.Step 4 - Review Workstation operating system access rightsYou will install <strong>ProSeries</strong> files to a ProNetTY folder in a shared folder (where TY represents thelast two digits of the tax year). There will also be a ProPDF folder (<strong>for</strong> the PDF version of anyclient files that you choose to create) in that shared folder.● ● Access. Each workstation must be able to access the shared folder where you will beinstalling <strong>ProSeries</strong> shared network components.● ● Windows-based servers. If you’re using Windows XP (<strong>Professional</strong>), all users need to be amember of the Administrators group.● ● Novell servers. All users need Read, Write, File Scan, Modify, Erase, Delete, and Createrights (including access control), but they don’t need the Supervisor Right.● ● Peer‐to‐peer networks. The network shared folder needs to be set to Full Control.For more in<strong>for</strong>mation about access rights, refer to your network vendor’s documentation.8 www.proseries.com
Install and set up <strong>ProSeries</strong> software from the AdminworkstationInstalling and setting up <strong>ProSeries</strong> software <strong>for</strong> network use involves the following threesteps:●●●●●●Step 1: Install to this computer (ADMIN workstation)Step 2: Complete Licensing (Connected Customer)Step 3: Install to other network computers (USER workstations)Steps 1 and 2 are discussed in this section. Step 3 is discussed on page 17.When you install <strong>ProSeries</strong> software so multiple computers (also known as workstations)can use the program in a networked environment, you install the software from the first<strong>ProSeries</strong> CD that you receive (or via the Internet from <strong>ProSeries</strong>.com). Each <strong>ProSeries</strong> CDcontains the latest version of every <strong>ProSeries</strong> tax product that is currently available.Important: We strongly recommend that you install the program from the <strong>ProSeries</strong> CDthat you receive so you can download <strong>ProSeries</strong> products via the Internet as soon aspossible. For more in<strong>for</strong>mation, see “Keeping your <strong>ProSeries</strong> products up-to-date” onpage 23.Be<strong>for</strong>e you install <strong>ProSeries</strong> software, note the following in<strong>for</strong>mation:● ● Release Notes. Read the printed Release Notes and any other material thataccompanied the <strong>ProSeries</strong> CD.THE RELEASE NOTES MAY CONTAIN, AMONG OTHER THINGS, ADDITIONALLICENSING TERMS THAT GOVERN THE USE OF THE PROSERIES SOFTWARE ANDRELATED SERVICES.● ● Packing slip. The packing slip that accompanied the <strong>ProSeries</strong> CD contains yourCustomer Number and ZIP code, which is in<strong>for</strong>mation that you will need tocomplete the product licensing procedure. No other product licensing in<strong>for</strong>mation isprinted on the packing slip.Important: Your software will be licensed <strong>for</strong> network use during the product licensingprocedure if you’ve purchased <strong>ProSeries</strong>/<strong>Network</strong> Version. If your product licensingin<strong>for</strong>mation doesn’t include a <strong>Network</strong> License, you can enter and save client data, butyou can’t print or e‐file returns until you update your product licensing in<strong>for</strong>mation.To install <strong>ProSeries</strong> software <strong>for</strong> network use from the <strong>ProSeries</strong> Admin workstation:Step 1: Install to this computer (ADMIN workstation)1 Go to the <strong>ProSeries</strong> Admin workstation.2 Close all open applications and turn off any virus‐protection utilities.3 If you’re installing from a <strong>ProSeries</strong> CD, insert the <strong>ProSeries</strong> CD into the appropriatedrive. Don’t remove the CD from the drive until the installation process is complete.If you’re installing from an .EXE file that you downloaded from the <strong>ProSeries</strong> Website, navigate to the location where the file was saved, and then double-click the .EXE file (or if using FireFox, double-click the .EXE file in the Downloads window).4 In the <strong>ProSeries</strong> <strong>Installation</strong> dialog box, click Install <strong>ProSeries</strong> Software.If the <strong>ProSeries</strong> <strong>Installation</strong> dialog box doesn’t appear automatically:a. Go to the Windows taskbar, click Start, then select Run.b. In the Run dialog box, type x:\CDSETUP (where x represents the letter ofthe drive containing the <strong>ProSeries</strong> CD), then click OK.When thec. <strong>ProSeries</strong> <strong>Installation</strong> dialog box appears, click Install <strong>ProSeries</strong>Software, then continue to Step 5 .9 www.proseries.com
5 In the Welcome dialog box, click Next when you’re ready to continue.6 A System Warning dialog box appears if the computer doesn’t meet the minimum systemrequirements <strong>for</strong> this year’s <strong>ProSeries</strong> software. (For more in<strong>for</strong>mation, see “Computersystem requirements” on page 3.)If the System Warning dialog box appears, read the in<strong>for</strong>mation, then do one of thefollowing:• Click Cancel to exit the installation program, then correct the identified situation(s).After the computer meets the minimum system requirements, go back to Step 1 andstart the installation procedure again.• Check the box indicating that you understand you may not receive technical support<strong>for</strong> issues you may encounter while using the <strong>ProSeries</strong> program, then click Next tocontinue to Step 7 .Important: We strongly recommend that you click Cancel and correct the situation(s)identified in the System Warning dialog box.Tip: Go to http://www.proseries.com <strong>for</strong> more in<strong>for</strong>mation about how systemrequirements can affect the operation of the <strong>ProSeries</strong> program.7 In the Software License Agreement dialog box, read the <strong>ProSeries</strong> License Agreement tounderstand the scope of your rights to use <strong>ProSeries</strong> software.• Select I accept the terms of the license agreement if you agree to accept all the terms ofthe <strong>ProSeries</strong> License Agreement, then click Next and continue to Step 8 .• Select I do not accept the terms of the license agreement if you don’t agree to acceptall the terms of the <strong>ProSeries</strong> License Agreement, then click Cancel and exit theinstallation program.Important: If you find the terms of the <strong>ProSeries</strong> License Agreement unacceptable, donot install the software. Contact <strong>ProSeries</strong> Customer Service <strong>for</strong> a refund instead.8 In the Select an <strong>Installation</strong> Type dialog box, select <strong>Network</strong>, then click Next.Select <strong>Network</strong> hereif it isn’t already selected.10 www.proseries.com
9 In the Review <strong>Network</strong> <strong>Installation</strong> Steps dialog box, review the summary of the threesteps required <strong>for</strong> network installation, then click Next.You’re at the beginning of Step 1now.10 In the Computer Name dialog box, enter a name <strong>for</strong> the current workstation (such as“Admin” or the name of the person who typically uses the workstation), then click Next.The name from the WindowsSystem Properties dialog boxappears here.If you enter a different name <strong>for</strong><strong>ProSeries</strong>, that name won’t beused by Windows or any othersoftware.11 In the Choose Destination Location dialog box, review the path shown in the LocalFolder field and the path (if any) shown in the <strong>Network</strong> Folder path.12 Note the following:• Local Folder (this computer). This field shows C:\ProWinYY or x:\ProWinYY (where xrepresents the drive where last year’s <strong>ProSeries</strong> program was installed, not Drive X, andYY represents the last two digits of the tax year).<strong>Network</strong> Folder (shared data).• This field shows a location similar to C:\<strong>ProSeries</strong>\ProNetYY, C:\Netshare\ProNetYY, x:\<strong>ProSeries</strong>\ProNetYY, or x:\Netshare\ProNetYY(where x represents a drive, but not necessarily Drive X, and YY represents the last twodigits of the tax year), or it might be blank.11 www.proseries.com
If you accept:* The locationshown in the LocalFolder field, and* The locationshown in the<strong>Network</strong> Folderfield (if a location isshown), thenClick Next and go toStep 15 .If you want toselect a differentlocal location, clickthis Changebutton. See Step13 <strong>for</strong> instructions.If you want to enteror select a differentnetwork location,click this Changebutton. See Step14 <strong>for</strong> instructions.If you accept the recommended folders, click Next and proceed to Step 15 .If you don’t accept the recommended folders:• Local Folder. Follow the instructions in Step 13 if you want to change the entry in theLocal Folder field.• <strong>Network</strong> Folder. Follow the instructions in Step 14 if you want to change the entry inthe <strong>Network</strong> Folder field.13 Local Folder. To install the <strong>ProSeries</strong> program to a local drive on the Admin workstationother than the drive that’s shown in the Local Folder (this computer) field, first click theChange button to the right of the Local Folder (this computer) field to open the ChooseFolder dialog box.Next, take the following steps:a. Select the local drive where you want to install the <strong>ProSeries</strong> program.b. Go to the Path field, type ProWinYY (where you type the last two digits of thetax year in place of “YY”) after the drive that you selected, then click OK.c. If you are prompted to create the ProWinYY folder, click Yes.d. When you return to the Choose Destination Location dialog box, continuewith Step 14 .14 <strong>Network</strong> Folder. To install the <strong>ProSeries</strong> shared networkcomponents to a location other than the location that’sshown in the <strong>Network</strong> Folder (shared data) field, firstclick the Change button to the right of the <strong>Network</strong>Folder (shared data) field to open the Choose Folderdialog box.Next, take the following steps:a. Select the drive where you want to install the <strong>ProSeries</strong>shared network components.b. Go to the Path field, then type “<strong>ProSeries</strong>\ProNet09”after the drive you selected, then click OK.c. If you are prompted to create the <strong>ProSeries</strong> or ProNet09folder on the drive that you’ve selected, click Yes.When you return to thed. Choose Destination Location dialog box, click Next.Continue with Step 15 .12 www.proseries.com
15 In the Product Selections dialog box, select all the products that you expect to use <strong>for</strong> thecurrent tax year, then click Next. (If you used a <strong>ProSeries</strong> program <strong>for</strong> the prior tax year,the products that were installed last year may already be selected.)These check boxes are <strong>for</strong> state products.This section explainshow to use this dialogbox.These check boxes are<strong>for</strong> federal products.Tip: If you select a stateproduct, be sure toselect thecorresponding federalproduct.Tip: Every <strong>ProSeries</strong> tax product is shown in this dialog box, including products that maynot be available yet. Select all <strong>ProSeries</strong> tax products that you intend to use this taxseason. You can install additional products later, as described in “Keeping your <strong>ProSeries</strong>products up-to-date” on page 23. Any products you select here that you haven’tpurchased as unlimited will be installed <strong>for</strong> pay‐per‐return use.16 If any of the products you selected aren’t on the <strong>ProSeries</strong> CD, you’ll see the <strong>Installation</strong>Note dialog box. Review the list of products that will be installed later (when they becomeavailable), then click OK.17 In the <strong>Installation</strong> Details dialog box, review the network installation details. If necessary,use the scroll bar to see in<strong>for</strong>mation about all the products that are selected <strong>for</strong>installation, and to see in<strong>for</strong>mation about required and available disk space.These are the local and networkfolders that you selected in theChoose Destination Locationdialog box.These are the products that youselected in the ProductSelection dialog box.Disk Space in<strong>for</strong>mation isshown below the productselection in<strong>for</strong>mation.Use thescroll barto see allthedetails.Click Printto printthecontentsof thisdialogbox.Note the following about the contents of the <strong>Installation</strong> Details dialog box:• Selected folders—If you entered or changed a location, you’ll see “(Changed by user).”13 www.proseries.com
• Products selected <strong>for</strong> installation—The status <strong>for</strong> each product is “(will be installed)”or “(not yet available)” depending on whether the product is included on the <strong>ProSeries</strong>CD.Important: Click Print so you can refer to this in<strong>for</strong>mation if you contact TechnicalSupport in the future.If you want to change any of the in<strong>for</strong>mation shown in the <strong>Installation</strong> Details dialogbox, click the Back button to return to the applicable dialog box.When you’re ready to proceed with the installation procedure, click Next.18 Products installed. Wait while the installation program installs all available <strong>ProSeries</strong> taxproducts that you selected, then verifies that all applicable files were installed correctly.<strong>Installation</strong> Failed dialog box. If you see the <strong>Installation</strong> Failed dialog box, a product wasnot installed properly. Click Help to find a possible solution, then click Exit to exit theinstallation program.19 Copy CD to network. Wait while the contents of the <strong>ProSeries</strong> CD are copied to thenetwork folder. A dialog box and progress bar keep you in<strong>for</strong>med.20 Additional components. Wait while additional components, such as any necessary fonts,Internet Client software, the <strong>ProSeries</strong> User’s <strong>Guide</strong>, search engine software, a PDF printdriver, and <strong>ProSeries</strong> Product Licensing components are installed. Dialog boxes andprogress bars keep you in<strong>for</strong>med.21 Internet Explorer. If Microsoft Internet Explorer 6.0 or later isn’t installed on yourcomputer, the installation program installs Internet Explorer 6.0 be<strong>for</strong>e continuing.<strong>ProSeries</strong> software requires portions of Internet Explorer 6.0 or later to run properly.22 Restart Windows message. Restart the computer if you are prompted to do so. When theinstallation program resumes, proceed to the next section, “Step 2: Complete Licensing(Connected Customer)”.If the installation program doesn’t resume after you restart the computer, start the<strong>ProSeries</strong> program by double-clicking the <strong>ProSeries</strong> shortcut icon on the Windowsdesktop.The Connected Customer Wizard will begin automatically. Go to “Set up the <strong>ProSeries</strong>program from the Admin workstation” on page 14.Step 2: Complete Licensing (Connected Customer)23 In the Step 2: Complete Licensing (Connected Customer) dialog box, review thesummary of the next steps in the network installation process, then click Next.24 If the installation program is able to launch the Connected Customer Wizard: TheConnected Customer Wizard begins <strong>for</strong> the <strong>ProSeries</strong> Admin workstation. Proceed to thenext section, “Set up the <strong>ProSeries</strong> program from the Admin workstation” now.If the installation program isn’t able to launch the Connected Customer Wizard: Youreturn to the <strong>ProSeries</strong> <strong>Installation</strong> dialog box. Click Exit to return to the Windowsdesktop, then start the <strong>ProSeries</strong> program by double‐clicking the <strong>ProSeries</strong>shortcut icon.The Connected Customer Wizard will begin. Continue with the next section,“Set up the <strong>ProSeries</strong> program from the Admin workstation.”Set up the <strong>ProSeries</strong> program from the Admin workstationImportant: The <strong>ProSeries</strong> program should start from the <strong>ProSeries</strong> Admin workstation the firsttime. Don’t install <strong>ProSeries</strong> software on other workstations until you’ve set up the programfrom the <strong>ProSeries</strong> Admin workstation.14 www.proseries.com
Tip: The <strong>ProSeries</strong> Getting Started <strong>Guide</strong> contains more in<strong>for</strong>mation about several of thefeatures that are discussed next.25 Connected Customer Wizard. The Connected Customer Wizard connects to an <strong>Intuit</strong><strong>ProSeries</strong> server via the Internet, then prompts you <strong>for</strong> your Customer Number and ZIPcode. After you provide that in<strong>for</strong>mation, the wizard:• Retrieves your firm in<strong>for</strong>mation• Per<strong>for</strong>ms product licensing• Checks the server <strong>for</strong> relevant products and product updates.If the server has products or product updates that weren’t available from the <strong>ProSeries</strong> CD,the wizard downloads and installs those products and product updates.26 <strong>Network</strong> License. If the product licensing in<strong>for</strong>mation that’s downloaded by theConnected Customer Wizard didn’t include a <strong>Network</strong> License, you’ll see the Your<strong>Network</strong> License is Missing dialog box.If you select License now, stophere and call CustomerService.You’ll seeyourCustomerNumberhere.If you select Continue withoutlicensing, click OK andcontinue—but remember thatyou won’t be able to print ore‐file returns until productlicensing has obtained a<strong>Network</strong> License.Select License now then call Customer Service at 1-800-374-7317, or select Continuewithout licensing then click OK.27 <strong>ProSeries</strong> Update. Wait while the <strong>ProSeries</strong> Update program downloads then installs anyapplicable products and product updates available via the Internet.When the results of that process appear in the <strong>ProSeries</strong> Update dialog box, review thestatus of each product, select Details if you want to see more in<strong>for</strong>mation, select Print ifyou want to print the in<strong>for</strong>mation, then select Close.28 Prior Year Settings Transferred dialog box. If the program transferred last year’s <strong>ProSeries</strong>preferences and settings, the Prior Year Settings Transferred dialog box appears. If you seethis dialog box, review the in<strong>for</strong>mation, then select OK.The Options Setup Wizard will start if the program transferred electronic filingin<strong>for</strong>mation from last year. Proceed to Step 30 .29 Offering electronic filing? If the program wasn’t able to transfer last year’s <strong>ProSeries</strong>preferences and settings, or if it didn’t transfer electronic filing in<strong>for</strong>mation from last year,a dialog box will ask whether you plan to offer electronic filing. If you answer Yes, theOptions Setup Wizard starts.30 Options Setup Wizard. The Options Setup Wizard helps you set up certain parts of theprogram. For more in<strong>for</strong>mation, see “Using the Options Setup Wizard” in the <strong>ProSeries</strong>Getting Started <strong>Guide</strong>.31 <strong>Network</strong> License. If your product licensing in<strong>for</strong>mation still doesn’t include a <strong>Network</strong>License, you’ll see the Your <strong>Network</strong> License is Missing dialog box again. We stronglyrecommend that you contact Customer Service at 1-800-374-7317 to resolve the issuebe<strong>for</strong>e you continue.15 www.proseries.com
32 User workstation installation instructions. Next, you’ll see the Workstation InstallInstructions dialog box that lists the Step 3: Install USER Workstations instructions <strong>for</strong>installing and setting up the <strong>ProSeries</strong> program on each user workstation in your network.These instructions are specific to your system and are based on the destination locationthat was in the <strong>Network</strong> Folder (shared data) field in the Choose Destination Locationdialog box when the installation program ran from the Admin workstation.Important: We strongly recommend that you click Print so you can refer to a printedcopy of the instructions in the Step 3: Install USER Workstation dialog box while you areinstalling the software and setting up each user workstation.The following illustration is an example of the Workstation Install Instructions dialogbox.The instructions you see arespecific to your system and arebased on the destination locationin the <strong>Network</strong> Folder (shareddata) field in the SelectDestination Location dialog box.Click here to print the instructions.Tip: There are instructions <strong>for</strong>:• A client-server network• A peer‐to‐peer network where the <strong>ProSeries</strong> shared network components were installedto a local drive on a computer that isn’t the <strong>ProSeries</strong> Admin workstation• A peer‐to‐peer network where the <strong>ProSeries</strong> shared network components were installedto a local drive on the <strong>ProSeries</strong> Admin workstation• <strong>Installation</strong>s that used UNC instead of mapped drives33 Transfer last year’s client files? Next, you are asked if you want to transfer last year’s clientfiles. Select Yes or No.Tip: The transfer procedure is a way to start this year’s <strong>ProSeries</strong> client files using the relevantdata in last year’s <strong>ProSeries</strong> client files. The amount of time it takes to transfer client dataepends on the computer and the number of client files involved. If you transfer data fromclient files now, when you subsequently start the program on a user workstation it takes sometime <strong>for</strong> the program to synchronize with that data. For more in<strong>for</strong>mation, see “Transferringdata from last year’s <strong>ProSeries</strong> client files” on page 5 of the <strong>ProSeries</strong> Getting Started <strong>Guide</strong>.16 www.proseries.com
Install <strong>ProSeries</strong> software on each User workstationAfter you’ve finished installing and setting up the program from the <strong>ProSeries</strong> Adminworkstation, take the following steps to install the <strong>ProSeries</strong> program on each computer thatwill be used as a <strong>ProSeries</strong> workstation.Step 3: Install to other network computers (USER workstations)To install the <strong>ProSeries</strong> program <strong>for</strong> network use on a user workstation:1 Log on to the user workstation, then close any open applications and turn off anyvirus‐protection utilities.2 Go to the Windows taskbar, click Start, then select Run.3 In the Open field in the Run dialog box, type the path that was shown in the instructionsin the Step 3: Install USER Workstations dialog box that appeared when <strong>ProSeries</strong> startedon the <strong>ProSeries</strong> Admin workstation.4 Select OK in the Run dialog box to start the User Workstation installation program.5 In the Welcome dialog box, click Next when you’re ready to continue.6 If a System Warning dialog appears, see Step 6 on page 10 of this guide.7 In the Software License Agreement dialog box, read the <strong>ProSeries</strong> License Agreement,then select I accept the terms of the license agreement and click Next, or select I do notaccept the terms of the license agreement and click Cancel.8 In the Computer Name dialog box, enter a name <strong>for</strong> the current user workstation (such asthe name of the person who typically uses the workstation), then click Next.The name from the WindowsSystem Properties dialog boxappears here.If you enter a different name <strong>for</strong><strong>ProSeries</strong>, that name won’t beused by Windows or any othersoftware.Be sure to enter a unique name <strong>for</strong>each <strong>ProSeries</strong> User workstationto avoid having duplicateworkstation names.17 www.proseries.com
9 In the Choose Destination Location dialog box, review the path shown in the LocalFolder field. Note the following:Local Folder (this computer). The Local Folder field shows C:\ProWinYY or x:\ProWinYY(where x represents the local drive where last year’s <strong>ProSeries</strong> program was installed andYY represents the last two digits of the current tax year).If you accept thelocation shown inthe Local Folderfield, click Nextand go to Step 11 .If you want toselect a differentlocal location, clickthe Browse button,then see Step 10<strong>for</strong> instructions.If you accept the recommended local folder, click Next and proceed to Step 11 .If you don’t accept the recommended local folder, follow the instructions in Step 10 .10 Local Folder. To install the <strong>ProSeries</strong> program to a local drive on the User workstationother than the drive that’s shown in the Local Folder (this computer) field, click theBrowse button to the right of the Local Folder (this computer) field to open the ChooseFolder dialog box, then take the following steps:a. Select the local drive where you want to install the <strong>ProSeries</strong> program.b. Go to the Path field, type the folder name ProWinYY (where you type the lasttwo digits of the tax year in place of “YY”) after the drive you selected, thenclick OK.c. If you are prompted to create the ProWinYY folder on the drive that you’veselected, click Yes.d. When you return to the Choose Destination Location dialog box, continuewith Step 11 .11 In the <strong>Installation</strong> Details dialog box, review the network installation details. If necessary,use the scroll bar to see in<strong>for</strong>mation about all the products that are selected <strong>for</strong>installation, and to see in<strong>for</strong>mation about required and available disk space.This is the local folder that wasselected in the ChooseDestination Location dialogbox.These are the products thatwere selected in the ProductSelection dialog box duringStep 1 of the installationprocedure from the Adminworkstation.Disk Space in<strong>for</strong>mation isshown below the productselection in<strong>for</strong>mation.Use thescroll barto see allthedetails.18 www.proseries.com
Important: Click Print so you can refer to this in<strong>for</strong>mation if you contact TechnicalSupport in the future.If you want to change in<strong>for</strong>mation shown in the <strong>Installation</strong> Details dialog box, click theBack button to return to the applicable dialog box.When you’re ready to proceed with the installation procedure, click Next.12 The installation program installs all available <strong>ProSeries</strong> tax products that were selectedfrom the <strong>ProSeries</strong> Admin workstation during Step 1 of the installation procedure, thenverifies that all applicable files were installed correctly.<strong>Installation</strong> Failed dialog box. If you see the <strong>Installation</strong> Failed dialog box, a product wasnot installed properly. Click Help to find a possible solution, then click Exit to exit theinstallation program.13 Additional components. Wait while additional components, such as any necessary fonts,Internet Client software, search engine software, a PDF print driver, and <strong>ProSeries</strong> ProductLicensing components are installed. Dialog boxes and progress bars keep you in<strong>for</strong>med.14 Internet Explorer. If Microsoft Internet Explorer 6.0 or later isn’t installed on yourcomputer, the installation program installs Internet Explorer 6.0 be<strong>for</strong>e continuing.<strong>ProSeries</strong> software requires portions of Internet Explorer 6.0 or later to run properly.15 Restart Windows message. Restart the computer if you are prompted to do so. When theinstallation program resumes, go to Step 18 on page 20.If the installation program doesn’t resume after you restart the computer, start the<strong>ProSeries</strong>program by double-clicking the <strong>ProSeries</strong> shortcut icon on the Windows desktop. Go toStep 18on page 20.16 Setup Complete. Inthe Setup Completedialog box, clickFinish.17 If the LaunchWe recommend<strong>ProSeries</strong> option you leave thewas selected: The checkmark in theLaunch <strong>ProSeries</strong><strong>ProSeries</strong> program check box.starts on the userworkstation. Go toStep 18 now.If the Launch <strong>ProSeries</strong> option wasn’t selected: You return to the <strong>ProSeries</strong> <strong>Installation</strong>dialog box. Click Exit to return to the Windows desktop, then start the <strong>ProSeries</strong> programby double‐clicking the <strong>ProSeries</strong> shortcut icon. Continue with Step 18 .19 www.proseries.com
18 The HomeBase Reconciliation dialog box appears if the <strong>ProSeries</strong> program detects thatthe HomeBase database on the User workstation needs to be updated with the latestin<strong>for</strong>mation in the client files stored with the shared network components.This progress bar keeps youin<strong>for</strong>med about status of theHomeBase Reconciliationoperation.Important: The amount of time it takes <strong>for</strong> the program to update the HomeBasedatabase on a User workstation depends on the number of client files that have beentransferred, created, and/or edited since the last time the program started on that Userworkstation.When the HomeBase Reconciliation operation concludes, the program clears theHomeBase Reconciliation dialog box from the screen.19 Options Setup Wizard. The Options Setup Wizard starts and helps you set up certain partsof the program. For more in<strong>for</strong>mation, see “Using the Options Setup Wizard” in the<strong>ProSeries</strong> Getting Started <strong>Guide</strong>.20 <strong>Network</strong> License. If the productlicensing in<strong>for</strong>mation that wasdownloaded by the ConnectedCustomer Wizard didn’t include a<strong>Network</strong> License, you’ll see the<strong>Network</strong> License Missing dialog boxshown next. Follow the instructions inthis dialog box to resolve the situation.Important: You can’t print or e-filereturns until your <strong>ProSeries</strong> software isproperly licensed and the productlicensing in<strong>for</strong>mation <strong>for</strong> your firmincludes a <strong>Network</strong> License.21 Transfer last year’s client files? Next,you are asked if you want to transfer last year’s client files. Select Yes or No.Tip: The transfer procedure is a way to start this year’s <strong>ProSeries</strong> client files using therelevant data in last year’s <strong>ProSeries</strong> client files. The amount of time it takes to transferclient data depends on the computer and the number of client files involved. For morein<strong>for</strong>mation, see “Transferring data from last year’s <strong>ProSeries</strong> client files” in the <strong>ProSeries</strong>Getting Started <strong>Guide</strong>.22 Important: Repeat Step 1 through Step 21 in “Install <strong>ProSeries</strong> software on each Userworkstation” (beginning on page 17) <strong>for</strong> each computer that will be used as a <strong>ProSeries</strong>user workstation.20 www.proseries.com
Keeping your <strong>ProSeries</strong> products up-to-dateYou can use the following methods to update <strong>ProSeries</strong> products that were previously installedand to install <strong>ProSeries</strong> products that haven’t been installed yet.Important: Most product updating activities must be per<strong>for</strong>med from the <strong>ProSeries</strong> Adminworkstation.Task SchedulerThe Task Scheduler program can keep your <strong>ProSeries</strong> tax products up to date automatically.1 Go to the <strong>ProSeries</strong> Admin workstation and start the <strong>ProSeries</strong> program.2 Go to the Tools menu, select Options, then select Task Scheduler.3 Make sure the Download New/Update Existing Products task is enabled.Important: When Task Scheduler installs a new <strong>ProSeries</strong> tax product or updates an existing<strong>ProSeries</strong> tax product in the shared folder, that new product or product update becomesavailable to all the workstations on which the <strong>ProSeries</strong> program is installed <strong>for</strong> network use.However, if <strong>ProSeries</strong> is running on a user workstation, exit the program then restart it to copythe new products and product updates to the local folder on that user workstation.To see more in<strong>for</strong>mation about Task Scheduler after you finish setting up the program:• Use the Search Help feature on the Help toolbar and in the Help Center, or• Click the Help button on the toolbar, select User’s <strong>Guide</strong> in the Help Center,then go to chapter 5, “Task Scheduler.”<strong>ProSeries</strong> Update menuYou can initiate the product updating procedure from the <strong>ProSeries</strong> Update menu.1 Go to the <strong>ProSeries</strong> Admin workstation and start the <strong>ProSeries</strong> program.2 Go to the Update menu and select Select and Download New Products or UpdateInstalled Products.3 If you selected Select and Download New Products and you want to select additionalproducts <strong>for</strong> installation, select those products in the Product Selections dialog boxbe<strong>for</strong>e you select Next in that dialog box.Important: When the product updating procedure installs a new <strong>ProSeries</strong> tax product orupdates an existing <strong>ProSeries</strong> tax product in the shared folder, that new product or productupdate becomes available to all the user workstations on which the <strong>ProSeries</strong> program isinstalled <strong>for</strong> network use.To see more in<strong>for</strong>mation about the Select and Download New Products and Update InstalledProducts commands:• Use the Search Help feature on the Help toolbar and in the Help Center, orClick the• Help button on the toolbar, select User’s <strong>Guide</strong> in the Help Center,then go to chapter 2, “Updating <strong>ProSeries</strong> <strong>Tax</strong> Products.”23 www.proseries.com
<strong>ProSeries</strong> CDsYou can update installed products and install new products from <strong>ProSeries</strong> CDs that youreceive in the future using the installation program on the <strong>ProSeries</strong> CD.Important: You receive additional <strong>ProSeries</strong> CDs (after the initial <strong>ProSeries</strong> CD that youreceive) only if you request and purchase the <strong>ProSeries</strong> CD Ensemble. The products andproduct updates on a <strong>ProSeries</strong> CD are the same products and product updates that areavailable <strong>for</strong> download days or weeks be<strong>for</strong>e you receive the <strong>ProSeries</strong> CD.Important: When you update installed products and install new products from <strong>ProSeries</strong> CDsthat you receive, you must run the installation program (on the <strong>ProSeries</strong> CD) from the<strong>ProSeries</strong> Admin workstation be<strong>for</strong>e you run it from each user workstation on which the<strong>ProSeries</strong> program was previously installed <strong>for</strong> network use.1 Go to the <strong>ProSeries</strong> Admin workstation and make sure the <strong>ProSeries</strong> program isn’trunning.2 Insert the <strong>ProSeries</strong> CD into the appropriate drive of the <strong>ProSeries</strong> Admin workstation.3 Follow the installation instructions on the screen.4 If you see the Updates Available dialog box, click Update.If you see the All Products are Up-To-Date dialog box, click Exit.5 Go to a workstation on which the <strong>ProSeries</strong> program was installed <strong>for</strong> network use andmake sure the <strong>ProSeries</strong> program isn’t running.6 Go to the Windows taskbar, click Start, then select Run.7 In the Open field in the Run dialog box, type the path that you typed when you installedthe <strong>ProSeries</strong> program on that user workstation.That path will probably be x:\<strong>ProSeries</strong>\ProNetYY\WKSTN\setup.exe, where x representsa drive on your system, but not necessarily Drive X, and YY represents the last two digitsof the tax year.Tip: This is the path that was shown in the instructions in the Step 3: Install USERWorkstations dialog box that appeared the first time <strong>ProSeries</strong> started on the <strong>ProSeries</strong>Admin workstation.8 Follow the installation instructions on the screen.9 If you see the Updates Available dialog box, click Update.If you see the All Products are Up-To-Date dialog box, click Exit.10 Repeat Step 5 through Step 9 <strong>for</strong> each additional workstation on which the <strong>ProSeries</strong>program is installed <strong>for</strong> network use.To see more in<strong>for</strong>mation about installing and updating <strong>ProSeries</strong> tax products from <strong>ProSeries</strong>CDs:• Use the Search Help feature on the Help toolbar and in the Help Center, or• Click the Help button on the toolbar, select User’s <strong>Guide</strong> in the Help Center,then go to chapter 2, “Updating <strong>ProSeries</strong> <strong>Tax</strong> Products.”© 2011 <strong>Intuit</strong> Inc. All Rights Reserved. <strong>Intuit</strong>, the <strong>Intuit</strong> logo, <strong>ProSeries</strong>, and QuickBooks, among others, areregistered trademarks of <strong>Intuit</strong> Inc. in the United States and other countries. Other parties’ trademarks and/orservice marks are the property of their respective owners.24 www.proseries.com