
Create successful ePaper yourself
Turn your PDF publications into a flip-book with our unique Google optimized e-Paper software.
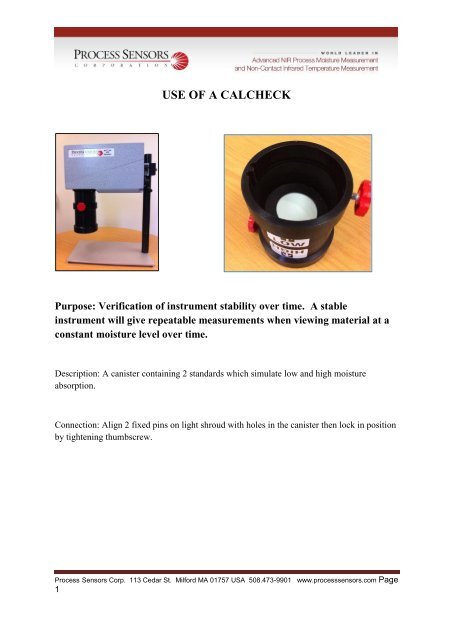
<strong>USE</strong> <strong>OF</strong> A <strong>CALCHECK</strong>Purpose: Verification of instrument stability over time. A stableinstrument will give repeatable measurements when viewing material at aconstant moisture level over time.Description: A canister containing 2 standards which simulate low and high moistureabsorption.Connection: Align 2 fixed pins on light shroud with holes in the canister then lock in positionby tightening thumbscrew.<strong>Process</strong> <strong>Sensors</strong> <strong>Corp</strong>. 113 Cedar St. Milford MA 01757 USA 508.473-9901 www.processsensors.com Page1
Primary Use: As a stability check1. With the MCT set to the same CAL channel as used to measure the product, note downthe MCT reading from the low side of the canister.2. Undo the thumbscrew holding the canister in position, invert it, and then retighten.Note the MCT reading again.3. Future readings, taken at two weekly or monthly intervals should lie within +/- 0.2* ofthe initial recorded value, if this isn't the case, the gauge may not be functioningoptimally.* With a span of 25. Higher spans will give rise to larger deviations from the initial calcheck readings.Secondary Use: As a means of approximate transfer of calibrations fromone MCT 360 to another MCT NIR instrument ( Please note that thecalibration transfer will not be as accurate as using a couple of real samplesat high and low moisture values as the samples do not have the exact sameabsorption characteristics as the check standards)1. The values for the high and low Cal checks should be obtained for a specific productcalibration from the original instrument if not already known.2. Set any subsequent sensors to the default span of 25 and default zero of -20. Attachthe canister to the light shroud with “low” showing uppermost. Obtain the sensorreading.Remove the canister and invert it and reattach to the light shroud with “high” showinguppermost. Note the new sensor reading.3. Select Cal Routine in the Operator Interface menu and enter the number of data pairsas 3. Enter the data pairs of sensor reading and known values from step 1, enteringthe high value or the low value twice in order to generate 3 data pairs. Press“calculate” to obtain the span and zero values that will make the sensor read theoriginal values of the calchecks. Save this calibration setting under the appropriateproduct code.Note that when using the Check Standards with a gauge set up with multiple calibrationcodes, check that you are always reading the Cal Check on the same productcalibration.<strong>Process</strong> <strong>Sensors</strong> <strong>Corp</strong>. 113 Cedar St. Milford MA 01757 USA 508.473-9901 www.processsensors.com Page2