Thermo Orion Star A113 Manual
Thermo Orion Star A113 Manual
Thermo Orion Star A113 Manual

Create successful ePaper yourself
Turn your PDF publications into a flip-book with our unique Google optimized e-Paper software.
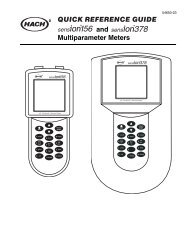
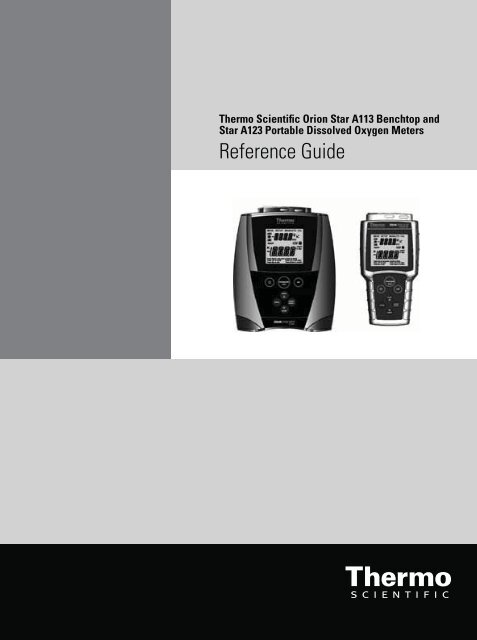
<strong>Thermo</strong> Scientific <strong>Orion</strong> <strong>Star</strong> <strong>A113</strong> Benchtop and<br />
<strong>Star</strong> A123 Portable Dissolved Oxygen Meters<br />
Reference Guide
Ross and the COIL trade dress are trademarks of <strong>Thermo</strong> Fisher Scientific, Inc. and<br />
its subsidiaries.<br />
AQUAfast, AQUASensors, BOD AutoEZ, ionplus, KNIpHE, LogR, No Cal, ORION, perpHect,<br />
PerpHecT, pHISA, pHuture, Pure Water, Sage, ROSS, ROSS Ultra, Sure-Flow, Titrator PLUS, and<br />
TURBO2 are registered trademarks of <strong>Thermo</strong> Fisher Scientific, Inc. and its subsidiaries.<br />
A+, All in One, Aplus, AUTO-BAR, AUTO-CAL, Auto-ID, AUTO-READ, AUTO-STIR,<br />
Auto-Test, AutoTration, CISA, digital LogR, DuraProbe, EZ <strong>Star</strong>tup, ISEasy,<br />
Low Maintenance Triode, Minimum Stir Requirement, MSR, NISS, Optimum Results, <strong>Orion</strong> Dual<br />
<strong>Star</strong>, <strong>Orion</strong> <strong>Star</strong>, SAOB, SMART AVERAGING, SMART STABILITY, <strong>Star</strong> LogR, <strong>Star</strong> Navigator 21,<br />
Stat Face, Triode are trademarks of <strong>Thermo</strong> Fisher Scientific, Inc. and its subsidiaries.<br />
Guaranteed Success and The Technical Edge are service marks of <strong>Thermo</strong> Fisher Scientific, Inc.<br />
and its subsidiaries.<br />
© 2011 <strong>Thermo</strong> Fisher Scientific Inc. All rights reserved. All trademarks are the property of<br />
<strong>Thermo</strong> Fisher Scientific, Inc. and its subsidiaries.<br />
The specifications, descriptions, drawings, ordering information and part numbers within this<br />
document are subject to change without notice.<br />
This publication supersedes all previous publications on this subject.
<strong>Thermo</strong> Scientific <strong>Orion</strong> <strong>Star</strong> <strong>A113</strong> Benchtop & <strong>Star</strong> A123 Portable Dissolved Oxygen Meters<br />
Table of Contents<br />
Chapter 1 Introduction ..........................................................1<br />
Chapter 2 Meter Overview. ......................................................3<br />
Connections.......................................................... 3<br />
Display Information ................................................... 4<br />
Keypad Information ................................................... 5<br />
Meter Maintenance ................................................... 5<br />
Chapter 3 Meter Setup . .........................................................7<br />
Navigating the Setup Menu ............................................ 7<br />
Setup Examples....................................................... 9<br />
DO Calibration Selection . . . . . . . . . . . . . . . . . . . . . . . . . . . .9<br />
Read Type Selection ..............................10<br />
Chapter 4 Calibration and Measurement .........................................11<br />
DO Calibration and Measurement...................................... 11<br />
Entering Barometric Pressure .......................11<br />
Entering Salinity Correction Value . ...................11<br />
DO Calibration...................................12<br />
Water-Saturated Air Calibration ..............12<br />
<strong>Manual</strong> Calibration (Winkler Titration)..........12<br />
DO Measurement ................................13<br />
Temperature Measurement and Calibration ............................. 13<br />
Temperature Measurement.........................13<br />
Temperature Calibration ...........................14<br />
Chapter 5 Data Storage and Review .............................................15<br />
Automatic Datalog with AUTO-READ Mode ........................... 15<br />
<strong>Manual</strong> Datalog with Continuous Read Mode ........................... 15<br />
Viewing Stored Readings (the Data Log) ............................... 15<br />
Chapter 6 Customer Services ...................................................17<br />
Meter Error Codes.................................................... 17<br />
Troubleshooting Guide................................................ 18<br />
Assistance . . . . . . . . . . . . . . . . . . . . . . . . . . . . . . . . . . . . . . . . . . . . . . . . . . . . . . . . . . 18<br />
Warranty and Registration . ........................................... 18<br />
WEEE Compliance ................................................... 18<br />
Declaration of Conformity . ............................................ 19<br />
Meter Specifications................................................. 20<br />
Ordering Information ................................................. 21<br />
Chapter 7 Appendix. ...........................................................23<br />
Salinity Correction................................23<br />
Notes............................................................... 24
This page intentionally left blank.
Chapter 1 Introduction<br />
Thank you for your purchase of the <strong>Orion</strong> <strong>Star</strong> <strong>A113</strong> benchtop dissolved oxygen (DO) or <strong>Star</strong> A123 portable dissolved<br />
oxygen (DO) meter. These meters are capable of measuring dissolved oxygen levels in % saturation or mg/L units,<br />
and temperature of the solution and the membrane. These meters are to be used with <strong>Orion</strong>’s Polarographic dissolved<br />
oxygen probe (sold separately).<br />
The <strong>Orion</strong> <strong>Star</strong> <strong>A113</strong> benchtop DO meters are IP54-rated. The <strong>Orion</strong> <strong>Star</strong> A123 portable DO meters feature a<br />
waterproof, IP67-rating.<br />
Please read this reference guide thoroughly. Any use outside of these instructions may invalidate your warranty and<br />
cause permanent damage to the meter<br />
<strong>Thermo</strong> Scientific <strong>Orion</strong> <strong>Star</strong> <strong>A113</strong> Benchtop & <strong>Star</strong> A123 Portable Dissolved Oxygen Meters<br />
1
This page intentionally left blank.
Chapter 2 Meter Overview<br />
Connections<br />
Figure 1<br />
1. Power source:<br />
a. Power adapter (included with <strong>Orion</strong> <strong>Star</strong> <strong>A113</strong> benchtop DO meters, sold separately for <strong>Star</strong> A123<br />
portable DO meters) – Select the appropriate wall socket plug. Slide off the clear plastic cover, and slide<br />
on the plug plate into the groove on the back of the adapter.<br />
b. Batteries (included with and factory-installed on <strong>Star</strong> A123 portable DO meters, sold separately for <strong>Star</strong><br />
<strong>A113</strong> benchtop DO meters) – Select four AA batteries. Confirm that the meter is off and remove the<br />
battery compartment cover. On the <strong>Star</strong> A123 portable meter, to remove the battery compartment cover:<br />
i. Loosen the screws.<br />
ii. Release the top portion of the battery compartment from the meter (using a coin or your finger.)<br />
iii. Release the bottom portion of the battery compartment (using a coin or your finger). Insert batteries<br />
as shown in the battery compartment housing.<br />
<strong>Orion</strong> <strong>Star</strong> <strong>A113</strong> Benchtop<br />
Push down on tab and lift the<br />
battery cover<br />
2. Prepare the DO probe according to the probe instructions. In general:<br />
<strong>Thermo</strong> Scientific <strong>Orion</strong> <strong>Star</strong> <strong>A113</strong> Benchtop & <strong>Star</strong> A123 Portable Dissolved Oxygen Meters<br />
<strong>Orion</strong> <strong>Star</strong> A123 Portable<br />
Remove screws<br />
a. Unscrew the membrane cap from the DO probe, fill the membrane cap about ¾ full with polarographic<br />
electrolyte solution and screw the membrane cap onto the DO probe.<br />
b. Connect the DO probe to the meter and allow the probe to polarize for about 30 to 60 minutes.<br />
Note: A DO reading of zero and no change in temperature indicates that the DO probe is not fully<br />
connected to the meter. Disconnect the DO probe and then firmly reconnect the DO probe to the meter.<br />
3. Connect the appropriate item as labeled on the meter and as shown in figure 1:<br />
3
Display Information<br />
Display Icon Description<br />
MEAS Indicates that the meter is in the measurement mode.<br />
SETUP Indicates that the meter is in setup mode.<br />
CAL Indicates that the meter is the calibration mode.<br />
MAN Shown when a manual calibration (Winkler titration) is being done. ne<br />
AUTO Shown during water-saturated air calibration. Default setting.<br />
4<br />
Shows the battery status (more bars = more power remaining).<br />
Blinks when power is low and the battery needs to be changed.<br />
(Batteries included and factory-installed with the portable meter <strong>Orion</strong> <strong>Star</strong> A123 DO meter.)<br />
Shown when the meter is running on AC power. (Adapter included with the benchtop meter<br />
<strong>Orion</strong> <strong>Star</strong> <strong>A113</strong> DO meter.)<br />
Shown when the meter is on AUTO-READ mode. Default setting. AR and unit of measurements will blink until the<br />
reading is stable. When the reading is stable it is held on the screen and AR is lit.<br />
Press to take a new reading.<br />
READY Unit of measure will blink until the reading is stable. When the reading is stable, READY is lit.<br />
Appears during calibration and after a calibration is done.<br />
Displayed when a reading is stored into the memory.<br />
Displayed when viewing stored readings.<br />
Secondary<br />
display<br />
Upper display which shows temperature reading in measurement mode and setup menu in setup mode.<br />
Primary display Lower, larger display showing measured value in selected mode.<br />
Instructions Located below the primary display. These phrases aid in the setup menu and calibration modes.<br />
<strong>Thermo</strong> Scientific <strong>Orion</strong> <strong>Star</strong> <strong>A113</strong> Benchtop & <strong>Star</strong> A123 Portable Dissolved Oxygen Meters
Keypad Information<br />
Meter Maintenance<br />
In the measurement screen: Press to take a measurement.<br />
In the setup screen: Press to escape the setup menu.<br />
In the calibration screen: Press to abort calibration.<br />
Press to turn the meter on or off.<br />
For routine meter maintenance, dust and wipe the meter with a damp cloth. If necessary, warm water or a mild waterbased<br />
detergent can be used. Meter maintenance can be performed on a daily, weekly or monthly basis, as required by<br />
the environment in which the meter is operated. Immediately remove any spilled substance from the meter using the<br />
proper cleaning procedure for the type of spill.<br />
<strong>Thermo</strong> Scientific <strong>Orion</strong> <strong>Star</strong> <strong>A113</strong> Benchtop & <strong>Star</strong> A123 Portable Dissolved Oxygen Meters<br />
In the measurement screen:<br />
Press to switch between modes.<br />
In the setup screen:<br />
Press to confirm the selection.<br />
Press to enter the calibration mode. Press to enter the setup mode.<br />
In the measurement screen:<br />
Press to store the data on the screen in continuous<br />
read mode and with data logging on.<br />
In the setup screen:<br />
Press to scroll up in the list of options.<br />
In the measurement screen:<br />
Press to see the stored data.<br />
In the setup screen:<br />
Press to scroll down in the list of options.<br />
5
6<br />
This page intentionally left blank.<br />
<strong>Thermo</strong> Scientific <strong>Orion</strong> <strong>Star</strong> <strong>A113</strong> Benchtop & <strong>Star</strong> A123 Portable Dissolved Oxygen Meters
Chapter 3 Meter Setup<br />
Navigating the Setup Menu<br />
Pressing will take you to the setup menu.<br />
A complete chart showing the main setup levels and submenus is shown after these steps.<br />
1. In the setup menu, press or until the desired main setup level is shown on the top (secondary display) line.<br />
2. Press to enter into the submenu options.<br />
3. For main setup options with more than one submenu:<br />
1.0 Configuration<br />
5.0 Datalog Clear<br />
a. Press or until the desired submenu is shown.<br />
b. Press to enter into the submenu.<br />
c. Press or until the desired option is shown.<br />
d. Press to save your selection.<br />
For main setup options with one submenu:<br />
2.0 General Meter Setup<br />
3.0 Temperature Settings<br />
4.0 Read Type<br />
6.0 Calibration Data<br />
7.0 Factory Reset<br />
a. Press or until the desired option is shown.<br />
b. Press to save your selection.<br />
4. Press to exit the setup menu and return to measurement mode.<br />
<strong>Thermo</strong> Scientific <strong>Orion</strong> <strong>Star</strong> <strong>A113</strong> Benchtop & <strong>Star</strong> A123 Portable Dissolved Oxygen Meters<br />
7
Meter Setup<br />
Setup Menu<br />
Level<br />
8<br />
Secondary<br />
Display<br />
Primary<br />
Display<br />
Description Information<br />
Main 1.0 CONF Configuration Select resolution, barometric pressure correction value, salinity<br />
correction factor and calibration type.<br />
Submenu SRES 0.1, 1 Percent Saturation Unit<br />
Resolution<br />
0.1 is the default.<br />
Submenu CRES 0.01, 01 Concentration Unit<br />
Resolution<br />
0.01 is the default.<br />
Submenu PRES 450.0 to<br />
850.0<br />
Value for <strong>Manual</strong> Barometric<br />
Pressure Correction<br />
Submenu SALT 0 to 45 Value for <strong>Manual</strong> Salinity<br />
Correction Factor<br />
Submenu CALT AIR,<br />
MAN<br />
The default value is 760.0 mm Hg.<br />
The default value is 0 ppt.<br />
DO Calibration Type AIR is for water-saturated air. MAN is for a manual calibration<br />
(Winkler titration). The default is AIR.<br />
Main 2.0 GEN General Meter Setup Automatic meter shut-off<br />
Submenu AUTO ON, OFF Automatic Meter Shut-Off To save battery life, the meter will turn off after<br />
15 minutes without button presses.<br />
On is the default setting.<br />
Note: The meters will supply a polarization current even when the<br />
meter is powered off.<br />
Main 3.0 TEMP Temperature Settings Select temperature units and the temperature used for manual<br />
temperature compensation<br />
Submenu UNIT DEGC,<br />
DEGF<br />
Temperature Unit The default setting is for temperature readout to be displayed in °C.<br />
Main 4.0 READ Read Type<br />
Submenu READ AUTO, AUTO is for AUTO-READ. In AUTO-READ mode, the meter will display the measurement as<br />
CONT CONT is for continuous read. it stabilizes and lock and hold the measurement when it is stable.<br />
Press to take a new measurement.<br />
In Continuous read mode, the meter will continuously measure<br />
and update the display. The unit of measure will flash. When the<br />
reading has been stable, “READY” will appear.<br />
The default setting is AUTO-READ.<br />
Main 5.0 LOG Datalog Clear<br />
Submenu DATA ON, OFF To enable data storage The default is off.<br />
Submenu DEL LAST, Clears stored readings in the The default is no.<br />
ALL, NO datalog.<br />
"NO" does not delete any readings.<br />
"LAST" deletes only the last reading.<br />
"ALL" deletes all of the logged data.<br />
Main 6.0 CAL Calibration Data<br />
Submenu CLR NO, YES Clears the calibration data. The default is no.<br />
Main 7.0 RST Factory Reset<br />
Submenu RST NO, YES Returns all meter settings The default is no. Before selecting yes, please<br />
to the factory defaults and make sure any data that you would like to keep<br />
deletes all stored data<br />
(calibration and datalog).<br />
has been recorded.<br />
<strong>Thermo</strong> Scientific <strong>Orion</strong> <strong>Star</strong> <strong>A113</strong> Benchtop & <strong>Star</strong> A123 Portable Dissolved Oxygen Meters
Setup Examples<br />
DO Calibration Selection<br />
This meter can be calibrated using water-saturated air or the Winkler titration method for a manual<br />
calibration. Air calibration is the default setting on the meter.<br />
1. In measurement mode, press .<br />
2. Press five times so that the top line reads “CALT”.<br />
3. Press to select the calibration type as AIR for water-saturated air calibration or<br />
MAN for a manual calibration (Winkler titration).<br />
a. AIR – An air calibration is performed in water-saturated air using the calibration sleeve.<br />
This is the simplest and most accurate calibration. Due to the inherent differences<br />
between water-saturated air and air-saturated water, 102.3% will be displayed when the<br />
calibrations reading is stable.<br />
i. For the highest accuracy, the calibration temperature should be the same as the<br />
measuring temperature.<br />
ii. Use distilled water to moisten the sponge in the calibration sleeve. Insert the probe into<br />
the sleeve without touching the sponge.<br />
b. MAN – A manual calibration is performed using a water sample with a known<br />
concentration of dissolved oxygen. This method can be used to calibrate the dissolved<br />
oxygen probe to the value achieved by a Winkler titration.<br />
i. A manual calibration involves performing a Winkler titration and using that sample as<br />
a calibration standard. The oxygen level result from the titration is entered in a manual<br />
calibration as the dissolved oxygen value.<br />
4. Press to save configuration and to return measurement mode.<br />
<strong>Thermo</strong> Scientific <strong>Orion</strong> <strong>Star</strong> <strong>A113</strong> Benchtop & <strong>Star</strong> A123 Portable Dissolved Oxygen Meters<br />
9
10<br />
Read Type Selection<br />
1. In measurement mode, press .<br />
2. Press in setup until “4.0” is shown on the top line and “READ” is shown on the lower<br />
line. Press .<br />
3. Press or to select the measurement mode:<br />
CONT = Continuous<br />
AUTO = AUTO-READ<br />
Note: In AUTO-READ mode, the meter will display the measurement as it stabilizes and lock and hold the<br />
measurement when it is stable. AR and unit of measure will blink until the reading is stable. When the reading<br />
is stable it is held on the screen and AR is lit.<br />
Press to take a new measurement.<br />
In Continuous read mode, the meter will continuously measure and update the display. The unit of measure<br />
will flash. When the reading has been stable, “READY” will appear. This read type is useful when performing<br />
an experiment that requires continuous measurements to be taken, regardless of the measurement stability.<br />
4. Press to save selection. Press the key to return to measurement mode.<br />
<strong>Thermo</strong> Scientific <strong>Orion</strong> <strong>Star</strong> <strong>A113</strong> Benchtop & <strong>Star</strong> A123 Portable Dissolved Oxygen Meters
Chapter 4 Calibration and Measurement<br />
DO Calibration and Measurement<br />
Entering Barometric Pressure<br />
Dissolved oxygen readings are dependent on barometric pressure. This needs to be entered manually as mm Hg.<br />
1 mm Hg = 0.03937 inch Hg = 1.3332 hPA (mBar) = 0.01934 PSI.<br />
1. In DO measurement mode, press .<br />
2. Press three times so that the top line reads “PRES”.<br />
3. Press or to enter the barometric pressure.<br />
Note: Holding the button down will make the value change faster.<br />
4. Press to save configuration and to return measurement mode.<br />
Entering Salinity Correction Value<br />
Since the presence of dissolved salts limits the amount of oxygen that can dissolve in water, the relationship between<br />
oxygen concentration and partial pressure varies with sample salinity. The meter default has a salinity correction factor<br />
of 0. To compensate for variations in ionic concentration, enter the salinity of the sample in parts per thousand (ppt). A<br />
table of conductivity versus salinity can be found in the appendix.<br />
1. In DO measurement mode, press .<br />
2. Press four times so that the top line reads “SALT”.<br />
3. Press or to enter the salinity in ppt.<br />
Note: Holding the button down will make the value change faster.<br />
4. Press to save configuration and to return measurement mode.<br />
<strong>Thermo</strong> Scientific <strong>Orion</strong> <strong>Star</strong> <strong>A113</strong> Benchtop & <strong>Star</strong> A123 Portable Dissolved Oxygen Meters<br />
11
12<br />
DO Calibration<br />
This meter can be calibrated using water-saturated air or the Winkler titration method for a manual calibration. This is<br />
dependent on the calibration type chosen in the setup menu.<br />
Water-Saturated Air Calibration<br />
1. In DO measurement mode, press to display the unit "% Sat" or "mg/L".<br />
2. Make sure the DO probe is connected to the meter and fully polarized.<br />
3. Prepare the calibration sleeve or BOD bottle.<br />
i. For the calibration sleeve, remove the cap from the sleeve and remove the sponge from the cap. Wet<br />
the sponge with distilled water and squeeze out excess water. Reassemble the calibration sleeve and<br />
insert the DO probe.<br />
ii. For a BOD bottle, fill the bottle with about 50 mL of distilled water. Insert the DO probe into the BOD<br />
bottle. Use a <strong>Thermo</strong> Scientific <strong>Orion</strong> BOD bottle adapter if the DO probe does not fit directly into the<br />
bottle. Make sure that the probe is suspended about half an inch above the distilled water and there is<br />
no water on the surface of the DO probe membrane.<br />
4. Insert the DO probe and wait five minutes for equilibrium. Press .<br />
5. “CAL” will appear in the upper right of the display. Wait for “READY” to appear and % Sat to stop blinking. The meter<br />
will display 102.3 % saturation and will proceed to the measurement mode.<br />
<strong>Manual</strong> Calibration (Winkler Titration)<br />
1. In DO measurement mode, press to display unit "% Sat" or "mg/L".<br />
2. Make sure the DO probe is connected to the meter and fully polarized.<br />
3. Insert the DO probe and wait five minutes for equilibrium. Press .“CAL” will appear in the upper right of the<br />
display. Wait for “READY” to appear and mg/L to stop blinking.<br />
4. Press or to change the display to match the titrated value.<br />
5. Press to confirm the value. The meter will display slope and will proceed to the measurement mode.<br />
<strong>Thermo</strong> Scientific <strong>Orion</strong> <strong>Star</strong> <strong>A113</strong> Benchtop & <strong>Star</strong> A123 Portable Dissolved Oxygen Meters
DO Measurement<br />
1. Check the barometric pressure and if needed, change value for barometric pressure correction in setup menu 1.0.<br />
2. Press to display DO readings in % saturation or mg/L (units of measure).<br />
3. Rinse the DO probe with distilled water and blot dry. Place the probe into the sample and stir gently.<br />
4. If the meter is in AUTO-READ mode (meter default), press .<br />
If the meter is in continuous read mode, the meter will immediately start taking readings.<br />
Record the DO result and temperature of the sample when “READY” is displayed and the unit of measurements<br />
stops blinking.<br />
Note: If in AUTO-READ mode and memory storage is enabled, the reading will automatically be stored when the “AR”<br />
appears. If in continuous read mode and memory storage is enabled, press to store into the meter’s memory.<br />
5. Remove the DO probe from the sample, rinse with distilled water and blot dry. To continue taking measurements,<br />
place the probe into the next sample and repeat steps 4 and 5.<br />
6. When finished measuring all samples, store probe according to the probe instructions.<br />
Temperature Measurement and Calibration<br />
The <strong>Orion</strong> <strong>Star</strong> <strong>A113</strong> benchtop dissolved oxygen (DO) and <strong>Star</strong> A123 portable dissolved oxygen (DO) meter can show the<br />
temperatures of the solution or the membrane. To read only temperature and see the temperature on the primary, lower<br />
display, follow the instructions below.<br />
Temperature Measurement<br />
1. In the measurement mode, press to display the solution temperature value on the primary display. (The<br />
temperature value at the top, secondary display will match that of the lower, primary display field.)<br />
To view the membrane temperature/electrolyte solution temperature, press . The number will have “m” in<br />
front of it.<br />
2. Rinse with probe with distilled water , blot dry and place into the sample. If the meter is in AUTO-READ mode (meter<br />
default),<br />
press .If the meter is in continuous read mode, the meter will immediately start taking readings.<br />
Note: If in AUTO-READ mode and memory storage is enabled, the reading will automatically be stored when the “AR”<br />
appears. If in continuous read mode and memory storage is enabled, press to store into the meter’s memory.<br />
3. Remove the probe from the sample, rinse with distilled water and blot dry. To continue taking measurements, place<br />
the probe into the next sample and repeat steps 2 and 3.<br />
4. When finished measuring all samples, store electrode according to electrode instructions.<br />
<strong>Thermo</strong> Scientific <strong>Orion</strong> <strong>Star</strong> <strong>A113</strong> Benchtop & <strong>Star</strong> A123 Portable Dissolved Oxygen Meters<br />
13
14<br />
Temperature Calibration<br />
The meter temperature display has a relative accuracy of ± 0.1 °C. The temperature sensors on the DO probe<br />
may have varying temperature accuracies, usually ± 0.5 °C to ± 2 °C. Use this function only if it is necessary to<br />
calibrate the temperature readings. Since the temperature offset calculated during the calibration is applied to all<br />
future temperature measurements, recalibrate if a different probe is used.<br />
1. In the measurement mode, press to display the solution temperature or the membrane temperature,<br />
denoted by a “m” is front.<br />
2. Rinse the probe and NIST-traceable thermometers with distilled water, blot dry and place into a solution with<br />
a known, stable temperature.<br />
Note: It is recommended that two NIST-traceable thermometers be used to measure and verify the temperature<br />
of the solution.<br />
Press .<br />
3. Wait for the readings to stabilize (about 5 to 10 minutes) and “READY” to stop flashing.. The meter will display<br />
the original temperature read by the probe. Press<br />
the thermometer.<br />
or keys to enter the temperature value read by<br />
Note: The calculated offset will be applied to all future temperature readings. To abort, press to end without<br />
saving and return to the measurement mode.<br />
4. When finished, press to save and end calibration.<br />
<strong>Thermo</strong> Scientific <strong>Orion</strong> <strong>Star</strong> <strong>A113</strong> Benchtop & <strong>Star</strong> A123 Portable Dissolved Oxygen Meters
.<br />
Chapter 5 Data Storage and Review<br />
<strong>Orion</strong> <strong>Star</strong> <strong>A113</strong> benchtop dissolved oxygen and A123 portable dissolved oxygen meters have a 50 point datalog memory.<br />
Automatic Datalog with AUTO-READ Mode<br />
1. In measurement mode, press .<br />
2. Press three times in setup until “4.0” is shown on the top line and “READ” is shown on the lower line.<br />
Press .<br />
3. Press the or to show “AUTO” on the second line. Press to save selection.<br />
4. Press to show “5.0” on the top line and “LOG” on the lower line. Press .<br />
5. Press to show “ON” on the second line. Press to save selection.<br />
6. Press to return to measurement mode. Each time the reading is locked onto the screen with the “AR” icon.<br />
The reading will automatically be stored in the datalog.<br />
<strong>Manual</strong> Datalog with Continuous Read Mode<br />
1. In measurement mode, press .<br />
2. Press three times until “4.0” is shown on the top line and “READ” is shown on the lower line. Press .<br />
3. Press or to show “CONT” on the second line. Press key to save selection.<br />
4. Press to show “5.0” on the top line and “LOG” on the lower line. Press .<br />
5. Press to show “ON” on the second line. Press to save selection.<br />
6. Press to return to measurement mode.<br />
7. In the measurement mode, press to store the reading into the meter’s memory.<br />
Viewing Stored Readings (the Data Log)<br />
1. In measurement mode, press .<br />
2. Press or to scroll through the memory points.<br />
3. Press to review the reading stored at that point.<br />
<strong>Thermo</strong> Scientific <strong>Orion</strong> <strong>Star</strong> <strong>A113</strong> Benchtop & <strong>Star</strong> A123 Portable Dissolved Oxygen Meters<br />
15
16<br />
This page intentionally left blank.<br />
<strong>Thermo</strong> Scientific <strong>Orion</strong> <strong>Star</strong> <strong>A113</strong> Benchtop & <strong>Star</strong> A123 Portable Dissolved Oxygen Meters
Chapter 6 Customer Services<br />
Meter Error Codes<br />
Display Reason Solution<br />
Solution or<br />
membrane<br />
temperature is<br />
out of range<br />
Calibration<br />
slope error<br />
Verify that the sample temperature is within the range of 0 to 50 °C.<br />
Clean the DO probe according to the probe user guide.<br />
Place the probe into the sample and press . If error still appears, replace probe.<br />
Connect the probe to the meter, power on the meter and allow the probe to polarize for at<br />
least 30 minutes.<br />
For an air calibration, check that the sponge in the calibration sleeve is damp and there is no water on<br />
the probe membrane. Clean the DO probe according to the probe user guide.<br />
Re-calibrate the DO probe.<br />
Memory is full The meter will automatically change to the submenu to clear the datalog (“CLR” on the top line,<br />
“NO” on the second).<br />
If the existing memory’s data is still needed:<br />
1. Press to return to the measurement mode and . Record the memory’s data.<br />
2. In measurement mode, press and then 4 times. (“5.0” appears on the top line.)<br />
3. Press . Press to delete the last reading or press to delete all readings.<br />
4. Press to save the change and delete the data accordingly.<br />
If the existing memory’s data can be deleted:<br />
1. Press change to “YES”.<br />
2. Press to clear the datalog.<br />
<strong>Thermo</strong> Scientific <strong>Orion</strong> <strong>Star</strong> <strong>A113</strong> Benchtop & <strong>Star</strong> A123 Portable Dissolved Oxygen Meters<br />
17
Troubleshooting Guide<br />
Assistance<br />
Warranty and Registration<br />
WEEE Compliance<br />
18<br />
Problem: The display freezes and the measurement values will not change.<br />
Solution: The meter is in the AUTO-READ measurement mode (the AR icon appears solid on the left of the display).<br />
Press start a new reading or select continuous read.<br />
Problem: How do I abort a calibration?<br />
Solution: Press abort any meter operation and return to the measurement mode.<br />
After troubleshooting all components of your measurement system, contact Technical Support. Within the United States<br />
call 1.800.225.1480 and outside the United States call 978.232.6000 or fax 978.232.6031. In Europe, the Middle East<br />
and Africa, contact your local authorized dealer. For the most current contact information, or the latest application and<br />
technical resources for <strong>Thermo</strong> Scientific <strong>Orion</strong> products, visit www.thermoscientific.com/water.<br />
To register your new meter and for the most current warranty information,<br />
visit www.thermoscientific.com/water.<br />
This product is required to comply with the European Union’s Waste Electrical & Electronic Equipment (WEEE) Directive<br />
2002/96/EC. It is marked with the symbol above.<br />
<strong>Thermo</strong> Fisher Scientific has contracted with one or more recycling/disposal companies in each EU Member State and<br />
this product should be disposed of or recycled through them. Further information on compliance with these directives,<br />
the recyclers in your country, and information on <strong>Thermo</strong> Scientific <strong>Orion</strong> products that may assist the detection of<br />
substances subject to the RoHS Directive are available at www.thermoscientific.com.<br />
<strong>Thermo</strong> Scientific <strong>Orion</strong> <strong>Star</strong> <strong>A113</strong> Benchtop & <strong>Star</strong> A123 Portable Dissolved Oxygen Meters
Declaration of Conformity<br />
Manufacturer: <strong>Thermo</strong> Fisher Scientific Inc.<br />
Address: Ayer Rajah Crescent<br />
Blk 55 #04-16/24<br />
Singapore 139949<br />
Singapore<br />
Hereby declares that the following products:<br />
Benchtop meters are rated 100 to 240 VAC, 50/60 Hz, 0.5A.<br />
Handheld meters use four non-rechargeable AA batteries.<br />
Equipment Class:<br />
Benchtop Meters Portable Meters<br />
<strong>Orion</strong> <strong>Star</strong> A111 pH <strong>Orion</strong> <strong>Star</strong> A121 pH<br />
<strong>Orion</strong> <strong>Star</strong> A112 Conductivity <strong>Orion</strong> <strong>Star</strong> A122 Conductivity<br />
<strong>Orion</strong> <strong>Star</strong> <strong>A113</strong> DO <strong>Orion</strong> <strong>Star</strong> A123 DO<br />
Measurement, control and laboratory<br />
<strong>Orion</strong> <strong>Star</strong> A-series meters are EMC Class A<br />
Conforms with the following directives and standards:<br />
EN61326-1:2006 Electromagnetic Compatibility (EMC Directive)<br />
Electrical equipment for measurement,<br />
control and laboratory use - EMC requirements<br />
EN61010-1:2001 Safety Standards<br />
UL61010-1:2004 Safety requirements for electrical equipment for measurement,<br />
CAN/CSA C22.2 No. 61010-1-04 control and laboratory use - general requirements<br />
Cheow Kwang Chan<br />
QA/Regulatory Manager<br />
<strong>Thermo</strong> Scientific <strong>Orion</strong> <strong>Star</strong> <strong>A113</strong> Benchtop & <strong>Star</strong> A123 Portable Dissolved Oxygen Meters<br />
Place and Date of Issue:<br />
June 15, 2011<br />
Singapore<br />
19
Meter Specifications<br />
20<br />
Meter Operating Conditions<br />
Operating Ambient Temperature 5 to 45 °C<br />
Operating Relative Humidity 5 to 85 %, non-condensing<br />
Storage Temperature -20 to +60 °C<br />
Storage Relative Humidity 5 to 85 %, non-condensing<br />
Pollution Degree 2<br />
Overvoltage Category II<br />
Weight Portable: 450g<br />
Benchtop: 850g<br />
Size Portable: 5.9cm (H) x 10.5cm (W) x 23.1cm (D)<br />
Benchtop: 9.3cm (H) x 18.0cm (W) x 23.6cm (D)<br />
Regulatory and Safety CE, TUV 3-1, FCC Class A<br />
Power Rating DC Input: 9 VDC 1A<br />
Battery: 4 x AA<br />
Shock and Vibration Vibration: shipping/handling per ISTA #1A.<br />
Shock: drop test in packaging per ISTA #1A<br />
Enclosure (designed to meet) Portable: IP67<br />
Benchtop: IP54<br />
Universal Power Adapter Operating Conditions<br />
Operating Ambient Temperature 0 to 50 °C<br />
Operating Relative Humidity 0 to 90 %, non-condensing<br />
Storage Temperature -20 to +75 °C<br />
Storage Relative Humidity 0 to 90 %, non-condensing<br />
Pollution Degree 2<br />
Overvoltage Category II<br />
Meter Parameter Specifications<br />
Dissolved Oxygen Measurement<br />
Concentration<br />
Range 0 to 20 mg/L<br />
Resolution 0.01, 0.1<br />
Relative Accuracy<br />
% Saturation<br />
± 0.2<br />
Range 0 to 200<br />
Resolution 0.1, 1<br />
Relative Accuracy ±2%<br />
<strong>Manual</strong> Barometric Pressure<br />
Correction<br />
450.0 to 850.0 mm Hg<br />
<strong>Manual</strong> Salinity Factor Correction 0 to 45 ppt<br />
Compatible Probe Type<br />
Temperature Measurement<br />
Polarographic<br />
Range 0 to 50°C<br />
Resolution 0.1<br />
Relative Accuracy ±0.1<br />
Offset Calibration 1 point<br />
Note: Specifications subject to change without notice.<br />
<strong>Thermo</strong> Scientific <strong>Orion</strong> <strong>Star</strong> <strong>A113</strong> Benchtop & <strong>Star</strong> A123 Portable Dissolved Oxygen Meters
Ordering Information<br />
Benchtop meters include electrode arm.<br />
Kits contain meter, probe and appropriate calibration and fill solutions.<br />
CML # Description<br />
STARA1110 <strong>Orion</strong> STAR A111 Benchtop pH Meter<br />
STARA1115 <strong>Orion</strong> STAR A111 Benchtop pH Meter Kit<br />
STARA1120 <strong>Orion</strong> STAR A112 Benchtop Conductivity Meter<br />
STARA1125 <strong>Orion</strong> STAR A112 Benchtop Conductivity Meter Kit<br />
STAR<strong>A113</strong>0 <strong>Orion</strong> STAR <strong>A113</strong> Benchtop Dissolved Oxygen Meter<br />
STAR<strong>A113</strong>5 <strong>Orion</strong> STAR <strong>A113</strong> Benchtop Dissolved Oxygen Meter Kit<br />
STARA1210 <strong>Orion</strong> STAR A121 Portable pH Meter<br />
STARA1215 <strong>Orion</strong> STAR A121 Portable pH Meter Kit<br />
STARA1220 <strong>Orion</strong> STAR A122 Portable Conductivity Meter<br />
STARA1225 <strong>Orion</strong> STAR A122 Portable Conductivity Meter Kit<br />
STARA1230 <strong>Orion</strong> STAR A123 Portable Dissolved Oxygen Meter<br />
STARA1235 <strong>Orion</strong> STAR A123 Portable Dissolved Oxygen Meter Kit<br />
STARA-BEA Benchtop electrode arm for <strong>Orion</strong> <strong>Star</strong> A-series meters<br />
STARA-HB Freestanding Base for use with <strong>Orion</strong> <strong>Star</strong> A-series benchtop electrode arm<br />
STARA-CS Hard Carrying Case for <strong>Orion</strong> <strong>Star</strong> A-series Portable Meters<br />
STARA-AR Armor for <strong>Orion</strong> <strong>Star</strong> A-series Portable Meters, includes electrode holders for<br />
pH, conductivity and DO probes<br />
STARA-ESPH pH Electrode Holder for <strong>Orion</strong> <strong>Star</strong> A-series Armor<br />
STARA-ESCD Conductivity and DO Probe Holder for <strong>Orion</strong> <strong>Star</strong> A-series Armor<br />
9157BNMD <strong>Orion</strong> Triode 3-in-1 pH/ATC Probe, Refillable, epoxy body<br />
9107BNMD <strong>Orion</strong> Triode 3-in-1 pH/ATC Probe, Gel-filled, epoxy body<br />
011050MD <strong>Orion</strong> 2-Electrode Conductivity Cell, K=1.0<br />
083005MD <strong>Orion</strong> Polarographic DO probe , 1.5m cable<br />
<strong>Thermo</strong> Scientific <strong>Orion</strong> <strong>Star</strong> <strong>A113</strong> Benchtop & <strong>Star</strong> A123 Portable Dissolved Oxygen Meters<br />
21
22<br />
This page intentionally left blank.<br />
<strong>Thermo</strong> Scientific <strong>Orion</strong> <strong>Star</strong> <strong>A113</strong> Benchtop & <strong>Star</strong> A123 Portable Dissolved Oxygen Meters
Chapter 7 Appendix<br />
Salinity Correction<br />
Since the presence of dissolved salts limits the amount of oxygen that can dissolve in water, the relationship between<br />
oxygen concentration and partial pressure varies with sample salinity. The meter default has a salinity correction factor<br />
of 0. To compensate for variations in ionic concentration, use the sample’s conductivity measurement to determine the<br />
salinity of the sample. Enter this value in parts per thousand (ppt) to ensure standardized DO measurements.<br />
Conductivity<br />
at 20 °C<br />
(mS/cm)<br />
Salinity<br />
Correction<br />
Value (ppt)<br />
Conductivity<br />
at 20 °C<br />
(mS/cm)<br />
Salinity<br />
Correction<br />
Value (ppt)<br />
<strong>Thermo</strong> Scientific <strong>Orion</strong> <strong>Star</strong> <strong>A113</strong> Benchtop & <strong>Star</strong> A123 Portable Dissolved Oxygen Meters<br />
Conductivity<br />
at 20 °C<br />
(mS/cm)<br />
Salinity<br />
Correction<br />
Value (ppt)<br />
5 3 20 13 35 25<br />
6 4 21 14 36 25<br />
7 4 22 15 37 26<br />
8 5 23 15 38 27<br />
9 6 24 16 39 28<br />
10 6 25 17 40 29<br />
11 7 26 18 42 30<br />
12 8 27 18 44 32<br />
13 8 28 19 46 33<br />
14 9 29 20 48 35<br />
15 10 30 21 50 37<br />
16 10 31 22 52 38<br />
17 11 32 22 54 40<br />
18 12 33 23 56 42<br />
19 13 34 24<br />
This table was calculated from the International Oceanographic Tables, Vol. 1, National Institute of Oceanography<br />
of Great Britain, Womley, Godaming, Surrey, England and Unesco, Paris 1971.<br />
23
24<br />
Notes<br />
<strong>Thermo</strong> Scientific <strong>Orion</strong> <strong>Star</strong> <strong>A113</strong> Benchtop & <strong>Star</strong> A123 Portable Dissolved Oxygen Meters
This page intentionally left blank.
Water Analysis Instruments<br />
North America<br />
166 Cummings Center<br />
Beverly, MA 01915 USA<br />
Toll Free: 1-800-225-1480<br />
Tel: 1-978-232-6000<br />
info.water@thermo.com<br />
Netherlands<br />
Tel: (31) 033-2463887<br />
info.water.uk@thermo.com<br />
India<br />
Tel: (91) 22-4157-8800<br />
wai.asia@thermofisher.com<br />
Japan<br />
Tel: (81) 045-453-9175<br />
wai.asia@thermofisher.com<br />
China<br />
Tel: (86) 21-68654588<br />
wai.asi@thermofisher.com<br />
Singapore<br />
Tel: (65) 6778-6876<br />
wai.asia@thermofisher.com<br />
Australia<br />
Tel: (613) 9757-4300<br />
in Australia (1300) 735-296<br />
InfoWaterAU@thermofisher.com<br />
www.thermoscientific.com/water<br />
© 2011 <strong>Thermo</strong> Fisher Scientific Inc. All rights reserved.<br />
267277-001 Rev. B 07-11<br />
9 0 0 1 : 2 0 0 8