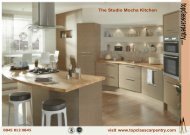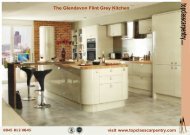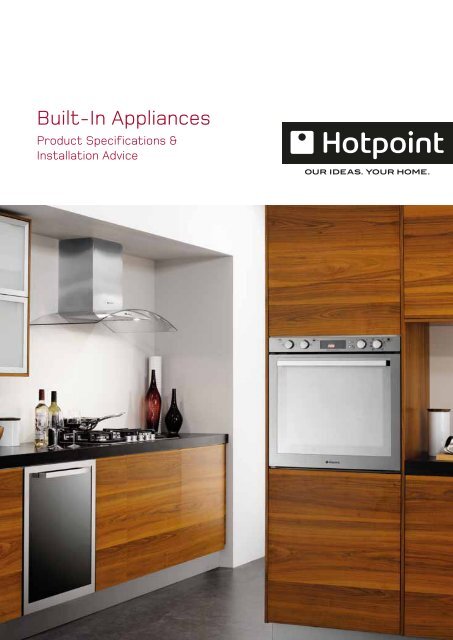
Built-In Appliances - Top Class Carpentry
Built-In Appliances - Top Class Carpentry
Built-In Appliances - Top Class Carpentry

You also want an ePaper? Increase the reach of your titles
YUMPU automatically turns print PDFs into web optimized ePapers that Google loves.
60cm Style <strong>Built</strong>-Under Double OvensProfessional CookersBU82BU72Model NumberColoursX/SS = Stainless Steel B = BrownK = Black W/P = WhiteOven TypeElectric<strong>Top</strong> Oven FunctionsConventionalSolarplus Twin Variable GrillDual Zone Variable GrillMaximum Oven TemperatureMain Oven FunctionsCirculaire FanDefrostSlow CookMaximum Oven TemperatureFeaturesElectronic Timer with Time ControlThermostat LightRetractable ControlsEasy-Grip Proud ControlsOven LightsDouble Glazed DoorAir Flow Cooling FanCleaningCatalytic LinersEquipment<strong>Top</strong> Oven ShelvesMain Oven ShelvesGrill Pan Kit (with handle)Roasting TinPowerTotal Power (W)Supply/Voltage (V/Hz)Energy<strong>Top</strong> Oven Energy Efficiency <strong>Class</strong>Main Oven Energy Efficiency <strong>Class</strong>Total Capacity (Litres)<strong>Top</strong> OvenMain OvenUY46BU82SS•2••2203•••230Both Ovens••Both Ovens•••121•5200230/50BB3351BU72B/K/P•2••2203•••230Both Ovens••Both Ovens•••121•5200230/50BB3351UY46X•2••2203•••230Both Ovens••Both Ovens•••1215200230/50BB3351EG1000EEG1000GModel NumberColoursX = Stainless SteelOven TypeFreestanding Dual Fuel Range CookerHobSolarglo Ceramic ZoneGasNumber of BurnersTriple Ring Wok BurnerDouble Face Burners (2 x 1.5kW)Automatic IgnitionPush Button IgnitionFlame Supervision DeviceCast Iron Pan SupportsGriddle PlateCooking FunctionsConventionalFanFan AssistedQuick DefrostBottom HeatGrillTwin Variable GrillVariable GrillFan GrillingBakingPizzaCirculaire FanOven FeaturesElectronic Timer with Time ControlGlazed DoorOven LightThermostat LightAir Flow Cooling FanCleaningEasy Clean Enamel <strong>In</strong>teriorCatalytic Oven LinersEquipmentShelvesGrill PanEnergyEnergy Efficiency <strong>Class</strong> (Secondary/Main)DimensionsHeight (mm)Width (mm)Depth (mm)EG902GEG1000EX•1 x 1.8kW Oval•53.4kW•3••••••DoubleBoth Ovens•••2 Per Oven•B/B9001000600EG1000GX••73.4kW••4•••••••DoubleBoth Ovens•••2 Per Oven•B/B9001000600EG900EG902GX••53.25kW••3•••••••••••TripleBoth Ovens•••2 + 1•A/B900900600EG900X••53.25kW••3•••••••••••Double••••2•B900900600SpecificationsNB. All gas hobs for use in flats and multi-dwelling buildings in the UK and all installations in the Republic of Irelandmust be fitted with a Flame Supervision Device.BU82, BU72 & UY46On Feet for Easy <strong>In</strong>stallation1011
Experience <strong>In</strong>duction HobsExperience <strong>In</strong>duction & Ceramic HobsCIO642DD* Booster up to 3.0kWCIC642Model NumberColoursB = BevelledC = FramelessFeaturesWidth (cm)Number of Heat Zones<strong>In</strong>ductionTouch ControlPower LevelsPower Level <strong>In</strong>dicatorsTime Control ElementsAudio Signal at End of TimeChild LockPan/Small Tool DetectionPowerTotal Power Output (kW)<strong>In</strong>duction RingDouble <strong>In</strong>duction RingCIO642DDB604••9•4•••7.22 x 1.4kW2 x 2.2kW*CIC642C604••9•4•••7.22 x 1.4kW2 x 2.2kW*CEO647Model NumberColoursC = Frameless B = BevelledZ = Steel Front Profile X = Stainless SteelFeaturesWidth (cm)Number of Heat Zones<strong>In</strong>ductionCeramicHalogenTouch ControlControl KnobsPower LevelsPower Level <strong>In</strong>dicatorsResidual Heat <strong>In</strong>dicatorsChild LockPan/Small Tool DetectionPossible to <strong>In</strong>stall in 60cm Wide Cut-OutPowerTotal Power Output (kW)<strong>In</strong>duction RingHalogen ZoneDouble Ring Hilight ZoneHilight ZoneOval Hilight ZoneCRO742DO CRO642D CRA641D CEM645DCEO647Z604(2 Zones)(2 Zones)•9••••6.81 x 1.4kW1 x 2.2kW*1 x 1.4kW1 x 1.8kWCRO742DOB704••9••••7.01 x 1.0/2.2kW2 x 1.2kW1 x 1.5/2.4kWCRO642DB604••9•••6.51 x 0.7/1.7kW1 x 1.0/2.2kW1 x 1.2kW1 x 1.4kWCRA641DC604••9•••6.61 x 1.0/2.2kW1 x 1.2kW1 x 1.4kW1 x 1.8kWCEM645DX604••12••6.81 x 2.5kW1 x 0.7/1.7kW1 x 1.2kW1 x 1.4kWSpecifications* Booster up to 3.0kW57450448504CIC642CRO742DOCRA641DCEO647, CR0642DCEM645DCIO642DD1415
Experience Gas HobsStyle HobsGE750DGE75DModel NumberColoursX = Stainless Steel I = Ice GlassFeaturesNumber of BurnersWidth (cm)Triple Ring Wok BurnerDouble Ring BurnerRapid BurnerSemi-Rapid BurnerStandard BurnerAutomatic IgnitionFlame Supervision DeviceCast Iron Pan SupportsEnamelled Pan SupportsEquipmentNumber of Pan SupportsFront ControlsGas on GlassPossible to <strong>In</strong>stall in 60cm Wide Cut-OutLPG Conversion Kit <strong>In</strong>cludedGQ641TSGE750DX5751 x 4.1kW/0.9kW1 x 2.6kW2 x 1.65kW1 x 1.0kW•••3•••GE75DX5751 x 3.5kW1 x 2.6kW2 x 1.65kW1 x 1.0kW•••5••••GE641TGQ641TSI4601 x 3.5kW1 x 2.6kW1 x 1.65kW1 x 1.0kW•••3•••GE641TXGE6404601 x 3.6kW1 x 2.6kW1 x 1.65kW1 x 1.0kW•••3••GE640X4601 x 3.0kW2 x 1.65kW1 x 1.0kW•••3••G750T GF640 G640S/G640 CRM641D E604Model NumberColoursX = Stainless Steel W = WhiteB = Brown K = Black C = FramelessFeaturesWidth (cm)Number of Heat ZonesGasCeramicControl KnobsPower LevelsPower Level <strong>In</strong>dicatorsResidual Heat <strong>In</strong>dicatorsSealed PlateNumber of BurnersTriple Ring Wok BurnerRapid BurnerSemi-Rapid BurnerStandard BurnerAutomatic IgnitionFlame Supervision DevicePowerTotal Power Output (kW)Double Ring Hilight Zone (1.0kW/2.2kW)Hilight ZoneSealed PlateSealed Plate 180mmEquipmentNumber of Pan SupportsFront ControlSide ControlsPossible to <strong>In</strong>stall in 60cm Wide Cut-OutLPG Conversion Kit <strong>In</strong>cludedG750TX70•51 x 3.6kW1 x 2.6kW2 x 1.9kW1 x 1.0kW••3•••GF640X/W/K60•41 x 3.25kW1 x 2.6kW1 x 1.65kW1 x 1.0kW••3••G640SX/W/B/K60•41 x 3.0kW2 x 1.9kW1 x 1.0kW••2••G640X/W/B/K60•41 x 3.0kW2 x 1.9kW1 x 1.0kW•2••CRM641DX/C604••12••6.61 x 1kW/2.2kW1 x 1.2kW1 x 1.4kW1 x 1.8kW•E604X/W/B/K604•7.02 x 1.5kW2 x 2.0kW•SpecificationsNB. All gas hobs for use in flats and multi-dwelling buildings in the UK and all installations in the Republic of Ireland must be fitted with aFlame Supervision Device.GE750D & GE75DGQ641TS, GE641T & GE640G750TGF640 E604, G640 & G640S CRM641D1617
Domino Hobs100cm & 90cm HoodsN321 C320 G320LModel NumberLineColoursIX = Stainless SteelFeaturesWidth (cm)Number of Gas Burners<strong>In</strong>ductionCeramicSealed PlateNumber of Heat ZonesAutomatic IgnitionFront Control KnobsTouch ControlResidual Heat <strong>In</strong>dicatorsFlame Failure Gas Cut-Out DevicePowerTotal Power Output (kW)Power Levels<strong>In</strong>duction 145mm<strong>In</strong>duction 210mmRadiant 145mmRadiant 180mmRapid BurnerStandard BurnerSealed Plate 145mmSealed Plate 180mmEquipmentCast Iron Pan SupportsEnamelled Pan SupportsGas on GlassLPG Conversion Kit <strong>In</strong>cludedPan DetectionN321DominoIX29.8•2••3.71 x 1.4kW1 x 2.2kW•C320DominoIX29.8•2••2.91 x 1.2kW1 x 1.7kWG320GG320LDominoIX29.82•••4.01 x 3.0kW1 x 1.0kW2••E320SG320GDominoIX29.82•••4.01 x 3.0kW1 x 1.0kW1•E320SDominoIX29.8•2••3.51 x 1.5kW1 x 2.0kWHT93HS12Model NumberColoursX = Stainless SteelEquipmentTouch ControlElectronic ControlsSlider ControlBoosterHalogen Lights (20W)Lights (40W)Metal FiltersOutput (m 3 /hr)IEC Extraction Rate (m 3 /hr)Charcoal Filter Part No. (Not Supplied)Ducting Size (mm)Noise Level at Max Power dB(A)FeaturesWidth (cm)Chimney HoodIsland HoodHDI9EHDF92HT93X•••23700560C001387421506590•HS12X•23480430C0009071012065100•HDI9EX••42650560C000773771506790•HDF92X••21620560C002429241506590•SpecificationsHT93HS12HDI9ENote: To install more than oneDomino Hob without the Joining Kit,use following formula to work outhob cut-out:max 1100494G320G, C320,E320S, G320L& N321270Cut-out width = (N - 1) x 288 + 268Where N = No. of hobsHDF921819
100cm & 90cm Hoods70cm HoodsHD9TModel NumberColoursX/IX = Stainless SteelEquipmentElectronic ControlsBoosterPush Button ControlsSlider ControlHalogen Lights (20W)Lights (40W)Metal FiltersOutput (m 3 /hr)IEC Extraction Rate (m 3 /hr)Charcoal Filter Part No. (Supplied)Ducting Size (mm)Noise Level at Max Power dB(A)FeaturesWidth (cm)Chimney HoodHTC9T HE9T HS9THD9TX•21550480577721506190•HTC9TX•21420360577721506190•HE9TIX•21420380577721506190•HS9TIX•22400480577721506190•HE7THD7TModel NumberColoursX/IX = Stainless SteelEquipmentElectronic ControlsBoosterSlider ControlsPush Button ControlsHalogen Lights (20W)Lights (40W)Metal FiltersOutput (m 3 /hr)IEC Extraction Rate (m 3 /hr)Charcoal Filter Part No. (Not Supplied)Ducting Size (mm)Noise Level at Max Power dB(A)FeaturesWidth (cm)Chimney HoodHS7THE7TIX•21420380577721506170•HD7TX•21550480577721506170•HS7TIX•21400380577721506170•SpecificationsHD9THTC9THE7THD7THS7THE9THS9T2021
60cm Hoods60cm HoodsHTC6THE6TModel NumberColoursX/IX = Stainless Steel BK = BlackWH = WhiteEquipmentElectronic ControlsBoosterSlider ControlsPush Button ControlsHalogen Lights (20W)Lights (40W)Metal FiltersOutput (m 3 /hr)IEC Extraction Rate (m 3 /hr)Charcoal Filter Part No. (Supplied)Ducting Size (mm)Noise Level at Max Power dB(A)FeaturesWidth (cm)Chimney HoodHD6T HS6T HR62HTC6TX•21420360577721506160•HE6TIX/BK/WH•21400360577721506160•HD6TX•21550480577721506160•HS6TIX•22400360577721506160•HR62X•22470430C00098725(Not Supplied)120/1506560•HTN41HTU32Model NumberColoursX/S = Stainless Steel P = WhiteB = Brown K = BlackEquipmentOn/Off SwitchLight SwitchGrease FilterCharcoal Filter SuppliedCharcoal Filter Part No (if required)Ducting or Recirculating Option3 Speed AirflowOutput (m 3 /hr)IEC Extraction Rate (m 3 /hr)Ducting Size (mm)Noise Level at Max Power dB(A)FeaturesWidth (cm)<strong>In</strong>tegrated HoodCanopy HoodTelescopic HoodVisor HoodHSFHTN41Neutral••••C00115686••2602331205760•HTU32Neutral••••C00135639••2802501206552•HTV10HSFX••••C00135639• (No Lever)•2502301205860•HTV10S/P/B/K••••C00090740••2202301005860•SpecificationsHTC6T HE6T HD6THTN41HTU32HS6THR62HSFHTV102223
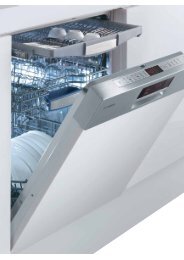
DishwashersLaundryLFT228ALFT114Model NumberEnergyEnergy Efficiency <strong>Class</strong>Wash Performance <strong>Class</strong>Drying Performance <strong>Class</strong>Water Consumption (Litres)FeaturesElectronic ControlHidden Heating ElementNoise Level dB(A)LightsSaltRinse AidPerformanceProgrammesTemperaturesGoodnightRapid (mins)Delay TimerDuo WashEco WashBaskets Fold FlatSuper Sliding BasketsStandard BasketsDivisible Cutlery BasketStandard Cutlery BasketDual Space Upper BasketOverflow Protection SystemSelf Balancing DoorStructureEasy <strong>In</strong>stallation Package (Fast Fix)Cold Fill OnlyRear Foot Adjustable from FrontSupply/Voltage (V/Hz)LST216LST216LFT228AAAA16••49••84353,6,9 hrsAuto••••••••230/50LFT228A & LFT114LFT114AAA16••5143••••••••230/50LFZ338XLST216AAA13••49•6335••••••••230/50LFZ338XAAA14••45LFS114Digital DisplayDigital Display86•2724 hrs••2 Part••••••230/50LFZ338X & LFS114LFS114AAA16••53•42••••••••230/50BHWM129Model NumberTypeWashing MachineWasher DryerSpin SpeedDrum Capacity (kg)EnergyEnergy Efficiency <strong>Class</strong>Wash Performance <strong>Class</strong>Spin Performance <strong>Class</strong>Water Consumption (Normal Cycle)Water Consumption (Normal Cycle & Drying)Control KnobsNumber of Flush ControlsVariable TemperatureProgramme SelectorVariable Spin SpeedDrying LevelsButtonsNumber of ButtonsOn/OffExtra RinseMini LoadEasy IronSuper WashStart/PauseSpin Speed<strong>In</strong>dicator LightsOn/OffDoor LockOptionsStart/PauseWashing PhasesDryingSpecial FeaturesRotating Dispenser DrawerDoor OpeningA Rated Wash at 60ºCDelicate Programme (Silk & Curtains)Number of ProgrammesEco CyclesNumber of Drying CyclesPerformanceElectronic Control (Timer)Balance CheckDetergent RegenerationNormal Cycle (Cotton 60ºC)Time for Wash (Normal Cycle)Energy Consumption (Normal Cycle)Drying Load (kg)Adjustable Spin Speed (rpm)SafetyOverflow SystemCoin Trap Accessible from FrontSupplyCold Fill OnlySupply/Voltage (V/Hz)BHWM129•12006.5AAB643•••6••••••••••••150º••163••••1751.23600-1200•••230/50BHWD129BHWD129•12006.5BAB56963•••6••••••••••••150º••163••••1751.235600-1200•••230/50BHWM129BHWD129Specifications2425
Fridge Drawers & Wine CellarsFreestanding Fridge FreezersNCD191I Fridge DrawersModel NumberEnergyEnergy RatingFeaturesWidth (mm)Gross Capacity (Litres)Net Capacity (Litres)Salad CrispersMeat/Fish BoxesSoft Close MechanismDairy BoxBottle HolderWine RackAdjustable LegsAntibacterial Protection<strong>In</strong>terior LightProduct DimensionsWidth (mm)Height (mm)Depth (mm)OptionalsEDR36 (Decor Panels x 2)NCD191IA+90019015022•••••••89883.5-86.5548Stainless SteelWE26 Wine CellarModel NumberColourX = Fingerprint ResistantStainless SteelFeaturesNo. of Shelves<strong>In</strong>ternal Light<strong>In</strong>ternal FanElectronic ThermostatTemperature RegulationNoise Level dB(A)Product DimensionsWidth (mm)Height (mm)Depth (mm)Requires Housing UnitCapacityGross Capacity (Litres)Net Capacity (Litres)WE26X5••••33598716570•105101Quadrio FF4DModel NumberColourX = Stainless Steel K = BlackDimensions (mm)HeightWidthDepthCapacity/EnergyFridge Gross Capacity in Litres (cu. ft)Freezer Gross Capacity in Litres (cu. ft)Fridge Net Capacity in Litres (cu. ft)Freezer Net Capacity in Litres (cu. ft)Method of Defrost - FridgeMethod of Defrost - FreezerFreezing Capacity (kg/24 hrs)Storage Time if Failure (hrs)Energy RatingEnergy Consumption (kWh/year)Fridge Specifications:ShelvingGlass ShelvesGlass Shelf Above Salad BinDoor FurnitureDeep Door Storage (5 litres/6 cans)FeaturesWine RackSalad BinsDoor Open AlarmFreezer Specifications:Star RatingNumber of Freezer DrawersQuadrio FF4DX/K190 5700723 (773*)300 (10.6)110 (3.9)295 (10.4)94 (3.3)Frost FreeFrost Free812A4203•••2•21Specifications*Depth including handlesWE26Can be <strong>Built</strong>-<strong>In</strong> or <strong>Built</strong>-UnderFor climate class information and advice such as whether your appliance is suitable for use in an outbuilding or location other than akitchen, please call our product information team on 08000 92 19 22 (If calling within the Republic of Ireland please call 0818 36 50 08).NCD191I2627
540Fridge FreezersFridges & FreezersHMB313IHM312AIFFModel NumberEnergyEnergy Efficiency <strong>Class</strong>Energy Consumption (kWh/24 hrs)Conservation After Power Failure (hrs)CapacityTotal Gross Capacity (Litres)Fridge Gross Capacity (Litres)Freezer Gross Capacity (Litres)Total Net Capacity (Litres)Fridge Net Capacity (Litres)Freezer Net Capacity (Litres)FeaturesLCD DisplaySuper CoolHoliday SettingIce PartySuper FreezeReversible DoorsFridgeWine RackGlass ShelvesAntibacterial Protection<strong>In</strong>ternal LightSalad CrispersFlip up Bottle and Can HolderEgg RackMeat BoxAutomatic Defrost FunctionFlexible Door ShelvingFreezerStar RatingFreezing Capacity in 24 Hours (kg)Defrost FunctionNumber Flap CompartmentsNumber Drawer CompartmentsNumber Basket CompartmentsIce Care in Drawer/BasketIce Cube TraysHMB312AAIHMB313IA0.84152772067126420361•••••••••2•Suspended••9Manual12•2HM312AIFFA0.82112612065524820345•••••2Normal••4.5Auto12•2HM315NIHMB312AAIA+0.74152772067126420361•••••2•Normal••6Manual12•2HM315NIA0.841726015510523515085HM315FF•••••2••Normal••4.5Manual4•2HM315FFA0.87122501559523015080•••••2••Normal••4Auto13•2HSZ3021VL HS3022VL HSZ2321LModel NumberEnergyEnergy Efficiency <strong>Class</strong>Energy Consumption (kWh/24 hrs)Conservation After Power Failure (hrs)CapacityTotal Gross Capacity (Litres)Fridge Gross Capacity (Litres)Freezer Gross Capacity (Litres)Total Net Capacity (Litres)Fridge Net Capacity (Litres)Freezer Net Capacity (Litres)FeaturesDisplay TypeReversible DoorsFridgeAntibacterial ProtectionWine RackGlass Shelves<strong>In</strong>ternal LightSalad CrispersFlip up Bottle and Can HolderEgg RackMeat BoxAutomatic Defrost FunctionFlexible Door ShelvingFreezerStar RatingDefrost FunctionGrid Freezer ShelfIce Cube TraysFreezing Capacity in 24 Hours (kg)HSZ3021VLA0.84152972554228924742LCD••••3••Normal••Manual•23HS3022VLA+0.4319319315315LCD•••••3•••HS2321LHSZ2321LA0.722071891820118318LCD••••1••••Manual12HS2321LA0.44225225220220LCD•HZ201B•••1••••HZ201BB0.8414150150130130Mechanical•Manual2 x Flap4 x Drawer212Specifications36m n200 cm 2min13548401775550 min36 min22846560 570HMB313I, HM312AIFF & HMB312AAI540200 cm2minHM315NI & HM315FFHSZ3021VL/HS3022VL HSZ2321L/HS2321L HZ201B2829
Fridges & FreezersCaring for yourHotpoint ApplianceWe have a wide range of spare parts and accessories as well as an array of ProfessionalHome Care cleaning products specially designed for your Hotpoint appliance to keep it inshowroom condition and hygienically clean throughout its life.HS1621HZ141Model NumberEnergyEnergy <strong>Class</strong>Energy Consumption (kWh/24 hrs)Conservation After Power Failure (hrs)CapacityTotal Gross Capacity (Litres)Fridge Gross Capacity (Litres)Freezer Gross Capacity (Litres)Total Net Capacity (Litres)Fridge Net Capacity (Litres)Freezer Net Capacity (Litres)FeaturesReversible DoorsFridgeGlass ShelvesAntibacterial Protection<strong>In</strong>ternal LightSalad CrispersEgg RackAutomatic Defrost FunctionFlexible Door ShelvingFreezerStar RatingDefrost FunctionIce Cube TraysFreezing Capacity in 24 Hours (kg)HUL162HS1621A0.42159159155155••••1•••HZ141B0.77151261269191•Manual19HUZ121HUL162A0.41139139123123••••1•••HUZ121B0.73151001007777HUT161IT•Manual26HUT161ITA0.59111169620987919••••1•••Manual12Fridge Care Spray(500ml Spray)A professional, no rinsecleaning spray with anantibacterial action thatremoves grease anddisinfects all internalsurfaces.Code C00089777Ceramic Hob Care(500ml Spray)Rapidly dissolves all build-upand other residue on glassceramic hobs leaving it inshowroom condition.Code C00089782Deep Cleaning Oven Care(500ml Spray)Dissolves grease and grimebuild up, without scrubbingto professionally deep cleanyour oven.Code C00089772Fridge Keep Fresh MatIdeal for keeping your fruitand vegetables fresher forlonger by improving airflowaround them.Code C00098407Gas Hob Care(250ml Cream)Removes grease and grimeto clean and brighten gashobs.Code C00082076Super Steel Polish(500ml Spray)Cleans and disinfects allStainless Steel surfaces.Ideal for removingsuperficial stains andfingerprints.Code C00093902CleaningLimescale andDetergent RemoverSuitable for Washing Machines* /Washer Dryers and DishwashersProtects your appliancefrom the harmful effectsof limescale build up andhygienically cleans allinternal components as wellas eliminating bad odours.Code C00089780*Not suitable for <strong>Top</strong> LoadingWashing MachinesGrease Filtersand Carbon FiltersContact our team forreplacement filters for yourCooker Hood.HS1621HZ141HUL162, HUZ121& HUT161ITFor more information or to order please call:08448 22 52 25 (if calling within the UK) or 0818 31 34 13 (if calling within the Republic of Ireland)Alternatively visit:www.hotpointservice.co.uk3031
Hotpoint <strong>In</strong>stallation AdviceSo that you understand therequirements and work required toinstall Hotpoint <strong>Built</strong>-<strong>In</strong> <strong>Appliances</strong>,we have created this brief guide * .For full installation information pleaseread individual appliance installationmanuals.OvensSingle Ovens• An appropriate cabinet must be used to ensure theoven works correctly.• The panels of the adjacent cabinets must be madeof heat resistant material. Cabinets of a veneerexterior must be assembled with glue that canwithstand temperatures up to 100ºC.• For the correct centring of the appliance, positionthe four tabs on the side of the oven incorrespondence with the four holes on the side ofthe frame.• To fasten the oven to the cabinet, open the door ofthe oven and attach it by using the screws into theholes located on the perimeter of the frame.• To connect to the power supply please refer to aqualified electrician.• All gas appliances must by law be installed by aqualified and competent person. We recommendthat you only use a gas safe registered engineer ** .<strong>Built</strong>-<strong>In</strong> Double Ovens• An appropriate cabinet must be used to ensure theoven works correctly. Note ventilation requirements.• The panels of the adjacent cabinets must be madeof heat resistant material. Cabinets of a veneerexterior must be assembled with glue that canwithstand temperatures up to 100ºC.• To fasten the oven to the cabinet, open the door ofthe oven and attach it by using the screws into theholes located on the perimeter of the frame.• To connect to the power supply please refer to aqualified electrician.• All gas appliances must by law be installed by aqualified and competent person. We recommendthat you only use a gas safe registered engineer ** .<strong>Built</strong>-Under Double Ovens• All built-under double ovens require no cabinetry,but will slot into a standard 60cm wide aperture.The appliance is on adjustable legs that can beadjusted to a maximum height of 89cm.• The panels of the adjacent cabinets must be madeof heat resistant material. Cabinets of a veneerexterior must be assembled with glue that canwithstand temperatures up to 100ºC.• To fasten the oven to the adjacent cabinets, fit thebrackets supplied, open the door of the oven andattach it by using the screws into the holes locatedon the perimeter of the frame.• To connect to the power supply please refer to aqualified electrician.Cooker Hoods<strong>In</strong>stallationMost hoods should be positioned at a minimum heightof 65cm above an electric hob and 75cm above a gashob. Please check the user handbook or our productinformation line for details by model.There are two types of air extraction methods;Ducted or Recirculation.DuctedWith ducted extraction the hood needs to be mountedon an external wall or linked to an outside wall viaducting along the top of adjacent cabinetry.The maximum ducting length is up to 5m, deducting1.2m for every 90-degree bend.Ducting is available in three diameter sizes 100mm,120mm and 150mm. Generally the larger the ductingdiameter the better the performance.RecirculationThis method is ideal for interior kitchens or wherebuilding work is to be kept to a minimum. If opting forthe recirculation method please remember you willrequire carbon/charcoal filters (not necessarilysupplied with the cooker hood). Check thespecification for the individual product.SuitabilityAs a guideline, the air in a room should be changed6-12 times per hour. Follow these guidelines:1) Calculate the floor area in square metres andmultiply by the height of the room in metres2) Divide by the maximum extraction rate3) The resulting figure should be at least 6, but asclose to 12 as possibleExampleKitchen (HxWxD) 2.1 x 4.5 x 4.2 = 39.7m 3Desired Hood HE63 Output per hour 450m 3 per hour450/39.7 = 11.34The HE63 is therefore suitable for use in this kitchenin ducted extraction mode.Visor/Telescopic Hoods• These hoods are ideal where space is at a premium.They can be mounted on a wall orbe suspended between two wall cupboards.• Using the template supplied, secure the mountingbracket to the wall.• Mount the hood onto the bracket.• With the screws supplied secure the hood inposition and connect the electrical cable to asuitable outlet.• Connect the ducting to the top of the hoodand secure.• If the hood is to be installed in recirculation modeopen the grill panel and make sure the conversionlever is in the recirculation position (if applicable tothat model). Also fit the blanking plate on the top ofthe hood (again if applicable to that model).Canopy Hood• A Canopy Hood is ideal where an unobtrusiveextractor is required as it is built into the cabinetryabove the hob.• Cut out the aperture to 496mm x 261mm.• Remove the grill using the release clips.• Connect the ducting to the hood.• Connect the electrical cable to a suitable outlet.• Fit the hood into the opening.• Secure the hood into the opening.• If the hood is to be installed in recirculation modeopen the grill panel and make sure the conversionlever is in the recirculation position (if applicable).Also fit the blanking plate on the top of the hood(if applicable to that model).<strong>In</strong>tegrated Hood• These hoods are designed to be mounted betweentwo wall cabinets. A matching cabinet door isaffixed to the front and is activated when thedoor is pulled open.• Using the template supplied secure the mountingbracket to the wall.• Mount the hood on to the bracket.• With the screws supplied secure the hood inposition and connect the electrical cable to asuitable outlet.• Connect the ducting to the top of the hoodand secure.• If the hood is to be installed in recirculation modeopen the grill panel and make sure the conversionlever is in the recirculation position.• Offer the décor door to the front of the hood,ensure it is positioned centrally, and hold in positionwith one hand. With the other handdraw a line with a pencil along the bottom of theinner door support.• Lay the décor door face down, on a flat surface.• Remove the door support by sliding thesecuring clips.• Lay the door supports onto the inside of the décordoor and using the pencil line as a guide, ensure it iscentral. Secure the door support to the décor doorusing the screws provided.• Refit the door support together with the décordoor attached to the hood.Chimney Hoods• Designed to be on show, there is a range ofwall mounted chimney hoods and an islandchimney hood available in 60cm, 70cm, 90cmand 100cm widths.• Using the template supplied secure the mountingbracket to the wall.• Mount the hood on to the bracket.• With the screws supplied secure the hood inposition and connect the electrical cable to asuitable outlet.• Connect the ducting to the top of the hoodand secure.• Locate the chimney stack and secure with thebracket provided.• If the hood is to be installed in recirculation modeopen the grill panel and make sure the conversionlever is in the recirculation position. Also fitthe blanking plate on the top of the hood(if applicable to that model).<strong>In</strong>stallation Advice* Any installation work must be undertaken by a suitably qualified and competent person. Hotpoint is not responsible for any incorrectly installedappliances and will not guarantee any appliances that are not installed by a suitably qualified and competent person.** A CORGI registered engineer outside the UK and Northern Ireland.3233
Hotpoint <strong>In</strong>stallation AdviceHobsHotpoint hobs come in three sizes; 60cm, 70cm,and 75cm wide. The 60cm, 70cm and 75cm widehobs should fit into the aperture size of 560mmleft to right and 490mm front to back. Check thespecific requirements for the individual hob first.Hob depth tolerances are +/- 2mm.Electric Hobs• The electric loading of these products isbetween 6.6kW and 7.2kW and therefore requirean electrical circuit of at least 30amp whichmust be isolated by means of a double poleswitch with a minimum 3mm gap.• The supply must be sited within 1m of theproduct.• A minimum 50mm gap must be at the back ofthe hob and the wall, and a 100mm gap eitherside of the hob and any adjacent cabinetry orthe end of a run of worktop.• Most hoods should be positioned at a minimumheight of 65cm above the electric hob.• Electric hobs should only be connected to thepower supply by a qualified electrician.Gas Hobs• Apart from a gas supply, all gas hobs alsorequire a 13amp electrical outlet for thepurpose of gas ignition. The supply must besited within 1m of the product.• A 50mm gap must be allowed between the hobaperture and the wall as well as any adjacentcabinetry and end of worktops.• Any cooker hood should be positioned at aminimum height of 75cm above the gas hob.• All gas appliances MUST by law be installed by aqualified and competent person. We recommendthat you only use gas safe registered engineer ** .• From 1 January 2008 only gas appliances with aflame supervision device fitted as standard canbe installed in flats or multiple occupancydwellings. If you are in any doubt please consultyour retailer or our product information line.• Please note that flame supervision devices area legal requirement on gas appliances for usein the Republic of Ireland.Dishwashers• Measure the height of the aperture into whichthe appliance is to be located (usually 870mm).• Adjust all 4 feet accordingly and level appliancewith a spirit level.• Connect the inlet pipe to the rear ofthe appliance.• Move the appliance in front of the aperture(position to one side). Feed the inlet and outletpipes through side of cabinetry, left or right tofacilitate appropriate installation. Connect towater valves and water outlet.• Connect the electrical plug to a suitable socket.• Check all connections for leaks.• Push the appliance back inside aperture,make a final adjustment to back feet usingthe front-mounted screw to ensure the finalsighting is level.• FIT ANTI-CONDENSATION STRIP TOUNDERSIDE AND FRONT OF WORKTOPThis strip is located in the cutlery basket.If this strip is not included with your dishwasherplease call 08709 07 70 77 and request partnumber C00036547• Secure appliance to underside of worktop withtwo screws.Dishwashers Requiring aCabinet Door• Fit Velcro strips to the front of the appliancedoor in the positions indicated left and right.• Using the template supplied fit the keyways toinside of décor door.• Locate the décor door to the appliance usingthe keyways, hold in position and remove thepaper covers from the Velcro and press into position.• Open the door fully and secure with fourscrews through the appliance door into thedécor door.• Ensure the door in the closed position is inplumb vertically in line with the surroundingcabinetry and adjust feet accordingly.Laundry<strong>Appliances</strong> are height adjustable from 820mm to835mm. A height increase kit is incorporated intothe appliance to increase this to 870mm. <strong>In</strong> additiona top filler piece will allow the appliance to be fittedup to 900mm.Four way hinges fitted to the product allow maximumadjustment to the door to ensure perfect alignment.Drainage can be achieved either through a down pipebetween 60cm and 100cm high or alternativelythrough a waste spigot under the sink trap.• Fit the plastic filler piece (located in the polystyrenepackaging at the top of the appliance) to the topfront of the appliance.• Measure the height of the aperture into which theappliance is to be located (usually 870mm).• Adjust all four feet accordingly and level appliancewith a spirit level.• Connect the hot and cold inlet pipes to the rear ofthe appliance. (Some appliances are cold fill only.)• Move appliance in front of aperture (position to oneside) feed inlet and outlet pipes through side ofcabinetry, left or right to facilitateappropriate installation. Connect to water supplyand water outlet.• Connect electrical plug to a suitable socket.• Turn appliance on and select a wash programme,allow machine to partially fill. Advance programmeto spin and allow machine to empty.• Check all connections for leaks.• Push appliance back inside aperture; make finaladjustment to feet to ensure the final sightingis level.• Mount the hinge supports onto the front ofthe appliance.• Mount the magnetic plate on the opposite side tothe top hinge.• If door is predrilled, fit hinges, magnet and doorbuffer to the door (if not predrilled use thetemplate and drill two holes on either side ofthe door).• Fix the hinges, magnet and buffer to the door.Offer door to appliance and secure hinges.• Ensure the door in the closed position is in plumbvertically in line with the surrounding cabinetry andadjust the feet accordingly.Refrigeration<strong>Built</strong>-<strong>In</strong> Cooling Products• Connect the electrical plug to a socket at therear of the appliance.• Push appliance into cabinet, openappliance doors.• Adjust the appliance so there is a 4mm gapeither side.• Fix slide guides to front of appliance doors.• Open appliance doors as wide as possible,bring the cabinet doors together with theappliance doors.• Locate the slides under the slide guides and fixslides to inner cabinet doors, allowing a 25mmgap between end of slide and the edge ofcabinet door.• Check the gasket is not creased and the doorcloses smoothly.• Seal the gap on the opposite side of the hingeusing the seal provided.• Using the central brackets secure the applianceto the cabinet.• The top and bottom fixings can be secured withthe screws provided<strong>Built</strong>-Under Cooling Products• Connect the electrical plug to a socket at therear of the appliance.• Measure the height of the aperture into whichthe appliance is to be located (usually 870mm).• Adjust all 4 feet accordingly and level appliancewith a spirit level.• Push appliance back inside aperture, and securewith 4 screws provided.• Using template provided mark out and fixhanging brackets to inside of the décor door.• Hang décor door on to appliance door.• Using door levelling screws ensure door is levelwith surrounding cabinetry.• Using feet adjusters ensure door is in plumbvertically in line with surrounding cabinetry.<strong>In</strong>stallation Advice** A CORGI registered engineer outside the UK and Northern Ireland.3435
<strong>In</strong>desit CompanyMorley Way, Peterborough,PE2 9JB, EnglandBrochure No. 66M/05.09/A/P680Published May 2009Supersedes brochure no. 66M/10.08/A/P631