USA Plywood Handbook - Canadian Plywood Association
USA Plywood Handbook - Canadian Plywood Association
USA Plywood Handbook - Canadian Plywood Association

You also want an ePaper? Increase the reach of your titles
YUMPU automatically turns print PDFs into web optimized ePapers that Google loves.
Over Five Decades of Service to the <strong>Plywood</strong> IndustryThe CertiWood TM Technical Centre (formerly named the <strong>Canadian</strong> <strong>Plywood</strong> <strong>Association</strong> or CANPLY) is a non-profit, industry-fundedassociation representing manufacturers of engineered wood products in Canada. Since the association’s name change in 2005 fromCANPLY to CertiWood TM , plywood producing companies have retained the CANPLY trademark and continue to stamp their productionwith the well-known mark. The CANPLY stamp continues to serve as an assurance to buyers that the plywood is produced underCertiWood’s exacting 3rd party quality auditing process and that it will perform in a satisfactory and predictable manner..CANPLY plywood is manufactured by 8 companies belonging to CertiWood TM (Member companies) operating in British Columba,Alberta, and New Brunswick. Together, these companies operate 12 mills and produce over 90% of all structural, construction and industrialplywood manufactured in Canada. Member company plywood production is about two billion square feet (3/8" basis) annually.Approximately 70% is shipped to markets across Canada. The balance (30%) is exported to some 28 countries, among these: theUnited States, Japan, the United Kingdom and Germany.Originally founded in 1950, CertiWood has a long history of service to its Member companies and their customers. Today, CertiWood’spurpose is, “To provide cost-effective certification, quality auditing and testing services to <strong>Canadian</strong> engineered wood products manufacturers”.CERTIFICATION MARKSThe registered certification marks shown below appear on CANPLY EXTERIOR Douglas Fir plywood (DFP), CANPLY EXTERIOR<strong>Canadian</strong> Softwood plywood (CSP) and CANPLY EXTERIOR Poplar <strong>Plywood</strong> manufactured by our members to meet the requirementsof voluntary product standard PS1-07, Structural <strong>Plywood</strong>. CertiWood also certifies its members’ products to meet <strong>Canadian</strong> and otherinternational standards (see below). The CANPLY mark is an assurance to the buyer that the plywood meets the high standards establishedby the industry and has been certified wthin an accredited third party assurance program.Surface Stamp on CANPLY EXTERIOR <strong>Plywood</strong>Edge Stamp on CANPLY EXTERIOR <strong>Plywood</strong> (Sanded and Unsanded grades)Indicates that the plywood has been manufactured by a CertiWoodmember and is quality certifiedIndicates a completely waterproof glue bondPLYCO CANADA BC 000* CANPLY EXTERIOR CSP** GRADE*AB 000, SK 000, NB 000**DFP, ASPEN, POPPanel gradeIndicates species designation: DFP (Douglas Fir plywood),CSP (<strong>Canadian</strong> Softwood plywood), Aspen or Poplar plywoodLicensed mill number of the CertiWood <strong>Association</strong> member.This symbol identifies the patented profiles of CANPLY T&G products formerlyknown as COFI FLOOR & COFI ROOF.Face stamp on COFI FORM Douglas Fir plywood for concrete formwork.INTERNATIONAL CERTIFICATION MARKS:CANADA GERMANY JAPANEUROPEAN UNIONCertiWood CANPLY <strong>Plywood</strong> <strong>Handbook</strong> - <strong>USA</strong> 2
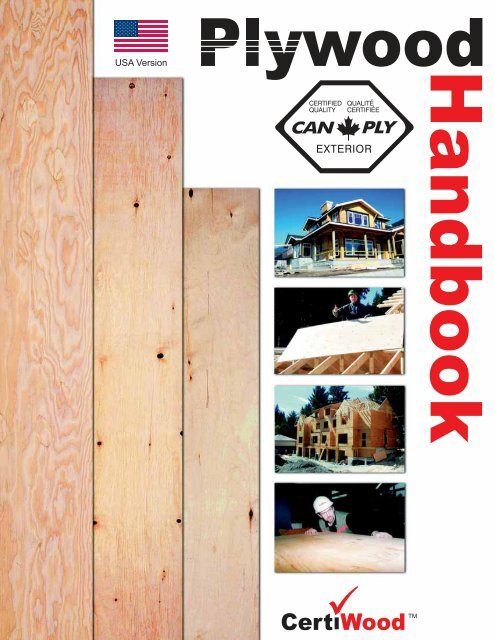
<strong>USA</strong> EditionCANPLY EXTERIOR PLYWOOD<strong>Plywood</strong><strong>Handbook</strong>Information in this brochure pertains toCANPLY EXTERIOR Douglas Fir plywood,CANPLY EXTERIOR SPF plywood andCANPLY EXTERIOR Aspen/Poplar plywood.These products are manufactured bycompanies who are members ofCertWood.CANPLY certification stamps are on allplywood products meeting CertiWood’sQuality Certification Program. CertiWoodcertifies its members plywood to meet standardsinternationally, including U.S.Department of Commerce VoluntaryProduct Standard PS1-07, Structural<strong>Plywood</strong>.This US Edition of <strong>Plywood</strong> <strong>Handbook</strong> hasbeen written to include imperial units whereapplicable. Imperial units in this publicationare presented in one of two ways:a) Imperial units followed by metric units inbrackets. This signifies that the number has ametric origin, which has been converted toimperial units, and rounded to a reasonableimperial unit (soft conversion).b) Imperial units only. This signifies either themeasurement originates from traditionalpractice in industry, or that it has beendirectly converted from metric toimperial without modification (hard conversion).ContentspageCANPLY EXTERIOR <strong>Plywood</strong>....................3Formaldehyde Emissions..........................3Sizes and Thicknesses .............................6<strong>Plywood</strong> Grades and Products.................7Allowable Spans and Loads .....................8Specifying <strong>Plywood</strong>...................................8Floor Sheathing .........................................9Single Layer Subflooring ...........................9Wall Sheathing.........................................12Roof Sheathing........................................14Working with <strong>Plywood</strong> .............................16Glues and Gluing ....................................18Permanent Wood Foundations ...............19Concrete Forms ......................................20<strong>Plywood</strong> in Farm Structures ....................23<strong>Plywood</strong> Structural Assemblies...............23Finishing ..................................................24Preservative Treatments ..........................26Phytosanitary Regulations.......................26Fire Retardant Treatments .......................26Panel ConstructionCANPLY EXTERIOR plywood is anengineered panel built up from sheets ofveneer glued together with a waterproofresin adhesive.The thickness and orientation ofthe plies determine the performance of thepanel. The veneers are united under hightemperature and pressure with a resin gluethat is completely waterproof, making theplywood suitable for use under conditions ofextreme exposure to moisture.SpeciesCANPLY EXTERIOR plywood is made of veneerfrom <strong>Canadian</strong> species, highly regarded for theirquality and durability. Species of CANPLY EXTE-RIOR plywood may be categorized into threegeneral groups: Fir (Douglas Fir), SPF, andAspen/Poplar. Permissible species for faces,backs and inner plies of these groups can befound in Table 1.ManufactureThe manufacturing process begins byconveying selected logs to a debarker wherethey are rotated against a steel claw to stripthe bark and debris from the log surface.The logs are then cut into peeler blocks. Inconformance with today’s standards of sustainableforestry, the logs we harvest arefrom secondary growth forests and average10" in diameter.After conditioning, peeler blocks are movedto a lathe where they are set in the chucksby an automatic charger. Using laser sensors,the block is imaged and automaticallyaligned in the lathe to maximize veneerrecovery. As the block is rotated, the honedsteel blade of the lathe is brought in contactwith it, peeling a continuous sheet of veneer.As veneer is produced it is directed to semiautomaticclippers that scan the veneer, remove oversizedefects and cut it to width for sorting andstacking. Standard widths are stacked automaticallyand random widths manually. Veneer ispassed through moisture sensors and segregatedby moisture content. Segregation is necessaryas veneer with different moisture contentsrequires different drying cycles.Veneer is dried in steam or gas-heated ovens attemperatures ranging from 160 to 200 °C. Thespeed at which the veneer moves through thedryer depends on the thickness of the veneerand its moisture content. After passing throughthe dryer, electronic moisture detectors mark allveneer in excess of the moisture content allowedfor gluing. The veneer is stacked separately andlater re-dried.After dying, the veneer is opticallyscanned, imaged on a computer and furthersorted according to grade. Narrowwidths may be directed through a composerwhere edges are cleaned, squared and“welded” into continuous sheets andclipped into standard widths.3Substandard veneer with oversizeimperfections is either discarded orchanneled to patching machines where theimperfections are neatly replaced withsound wooden patches.Sound veneer then moves to the gluespreader or automatic lay up line where theveneers are uniformly coated with resin glueand laid at right angles to the adjacentveneers. This cross-lamination accounts forplywood’s exceptional two-way strength anddimensional stability.After lay up, the veneer sandwiches go tothe hot press, the key operation in themanufacturing process. Here, dependingupon the thickness of the plywood panel,one or more sandwiches are loaded intoeach press opening. The press is thenhydraulically closed and the panelssubjected to temperature of 300° F and apressure of 200 psi which cures the glue.The resin glue, when cured in the hot press,produces an inert water-proof bond.After removal from the hot press, trim sawscut the plywood panels to the requireddimensions, usually 4' x 8' (1220 mm by2440 mm). Panel edges and panel ends aretrimmed in consecutive operations.Panels are then graded as sheathing orselected for further finishing. Panels to beproduced as sanded grades pass to asander where face and back aresimultaneously sanded smooth. Any minorimperfections remaining in the face andback veneers may be repaired with woodinlays or synthetic filler before thepanels are finally graded by skilled inspectors.All grades of plywood produced byCertiWoodmembers are then stampedwith the registered certification markCANPLY EXTERIOR before leaving the mill.Most wood waste during manufacture iscollected and burned in high efficiencyburners to be converted into heat orelectricity, offsetting most of the mill’senergy needs.NEGLIGIBLE FORMALDEHYDE EMISSIONSInformation developed by numerousorganizations have consistently shown thatformaldehyde emission associated withphenolic resin bonded plywood isextremely low. Results have shown thatformaldehyde emissions are near theminimum levels detectable byformaldehyde emission testing, and thatCANPLY EXTERIOR plywood qualifies forthe most stringent classification levels thathave been established (e.g. JAS F,DIN E1,or EN Release Class A). <strong>Plywood</strong>bonded with phenol formaldehyde has along proven history of negligeableformaldehyde emissions, and thereforesuch plywood certified to PS1-07 isdeemed exempt from CARB (California AirResources Board) requirements.CertiWood CANPLY <strong>Plywood</strong> <strong>Handbook</strong> - <strong>USA</strong>
Table 1. Selected Species used in CANPLY <strong>Plywood</strong>Steps in the manufacture of plywood1. The log emerges from the debarker after havingbeen stripped.2. Logs are conditioned using steam or hot waterto improve peel quality3. At the lathe, a sharp blade peels the log, now called ablock, into a continuous sheet of veneer.CertiWood CANPLY <strong>Plywood</strong> <strong>Handbook</strong> - <strong>USA</strong> 4
4. Green veneer is dried in steam or gasheated ovens.5. Veneers are coated with waterproof glueand laid up into sandwiches.6. The veneer sandwiches are subjected toheat and pressure in the hot press untilthe glue is cured.7. After pressing, the panels are trimmed,squared, and selected for grade.8. Finished panels are carefully inspectedand graded.9. CertiWood quality control inspectorscheck finished panels in inventory.10. <strong>Plywood</strong> samples, selected at random,are tested at the CertiWood TechnicalCentre11. Other samples are subjected to the boilingtest specified by the CSA.12. Some samples are subjected to vacuumpressuretests.13. Samples are shear tested to determine the strength of the glue bond.5 CertiWood CANPLY <strong>Plywood</strong> <strong>Handbook</strong> - <strong>USA</strong>
CertiWood members produce a widerange of CANPLY EXTERIOR plywoodgrades and products. Grade names in generalare based on the quality of the veneersused for the face and back of the panel. Thefour qualities of veneer utilized by membersare designated by the letters A (the highestgrade), B, C and D. CANPLY EXTERIORplywood grades are shown in Table 2. A listof proprietary CANPLY EXTERIOR plywoodproducts is given in Table 3.interlock to ensure the effective transmissionof loads across joints, eliminating differentialdeflection between adjoining panel edgesFigure 1 - Patented EASY T&G - Floor profileCANPLY EXTERIOR plywood is alsoavailable edge sealed, treated with chemicalrelease agents, and with resin impregnatedcellulose fibre overlays. Overlays producethe highest quality concrete finish. They alsohelp protect the plywood from oil and water,simplify form stripping and extend theservice life of concrete forms.<strong>Plywood</strong> is also manufactured with overlayswhich improve the appearance anddurability of the panel. The overlays arebonded to the outer veneers of the plywoodby heat and pressure. This process sealsthe overlay to the wood to form aninseparable bond stronger than the wooditself. The resin content of the overlaydetermines whether the final product is calledMedium or High Density Overlaid plywood.Medium DensityThe resin impregnated face presents asmooth uniform surface intended for highquality paint finishes. Some evidence of theunderlying grain may appear. Overlay isproduced in a natural buff colour and certainother colours.Popular uses for Medium Density Overlaidplywood are flat, lap and bevel sidings; andsundecks, soffits and accent panels inresidential construction. Other applicationsinclude boats, highway signs and manyother commercial uses.High DensityThe resin impregnated face is hard, smooth,and chemically resistant. No further finishingwith paint or varnish is necessary. The overlayis usually produced in a whitish semiopaquecolour but other colours may beused by manufacturers for identification.Major uses for High Density Overlaid plywoodinclude fine finish concrete formwork,storage bins, liquid tanks and signs.Mill specialties are variations of the plywoodgrades and products shown in Tables 2and 3. These panels are manufactured by anumber of member companies andmarketed under their own brand names.Mill specialities include patterned, overlaid,textured, brushed, embossed, striated,grooved and pre-finished panels fordecorative use.T&G plywood has a factory-machinedtongue along one of the long edges and agroove along the other. T&G panelsCertiWood CANPLY <strong>Plywood</strong> <strong>Handbook</strong> - <strong>USA</strong>Figure 2 - Patented EASY T&G - Roof profileFigure 3 - Conventional T&Gand making the use of blocking or H-clips atlongitudinal joints unnecessary.CertiWood members manufacture twopatented T&G panels, under one name –(Figure 1 and 2). These panelshave T&G edges specifically designed forroof and floor sheathing. Panel installation isfast and easy with these patented edgeprofiles, exclusive to CertiWood members.Additionally, panels are available withthe conventional T&G(Figure 3).All plywood bearing the registeredcertification mark CANPLY EXTERIOR issuitable for concrete formwork because it ismanufactured with waterproof glue.CANPLY EXTERIOR DFP is available insanded and unsanded grades and inspecial high strength constructions.CANPLY EXTERIOR SPF is also available insanded and unsanded grades. Sandedgrades produce a smooth, wood grain finishvalued by many architects. Unsandedgrades are suitable for formwork where theappearance of the concrete is less importantsuch as in sub-surface foundations.6formwork.for superior concreteCOFI FORM SP PLUS is a specialhigh-strength construction of an all overlaidDouglas Fir panel designed specifically foruse as concrete formwork. Meeting PS1-07Structural 1 grade requirements, thesepanels are significantly stiffer than standardconstruction of DFP in wet serviceconditions because of stricter limits onspecies and ply thicknesses duringmanufacture. COFI FORM PLUS is thestiffest Douglas Fir panel manufactured byCertiWood members (Table 3).Mills are capable of widths ranging from24” to 49”, and lengths up to 98”, howeverCANPLY EXTERIOR <strong>Plywood</strong> is mostlymanufactured in a size of 1220 mm by 2440mm, the metric equivalent of the familiar 4 ftby 8 ft panel. Net face widths for T&Gprofiled panels are approximately 5/8” lessthan nominal widths.CANPLY plywood is manufactured in arange of thicknesses from 1/4” (6mm) to1-1/4” (31.5mm). Nominal thicknesses forsheathing grades and single-floor gradescan be found in Table 4. CANPLY plywoodpanels are also available in custom sizesand thicknesses on special order.
Table 2. CANPLY EXTERIOR <strong>Plywood</strong> GradesProduct*SpeciesVeneer Grades**FaceInnerPliesBackCharacteristicsTypical ApplicationsA-AA-BB-BA-CB-CDFPDFPDFP orAspen/PoplarDFPDFP orAspen/PoplarAABABCCCCCABBCCSanded on both sides. Best appearanceboth faces. May contain neat woodpatches, inlays or synthetic patchingmaterial.Sanded one side only. Best appearanceone side only. May contain neat woodpatches, inlays or synthetic patchingmaterial.Furniture, cabinet doors, partitions,shelving, concrete forms and opaquepaint finishesWhere appearance or smooth sandedsurface of one face is important.Cabinets, shelving, concrete forms.C-C PLUGGEDUNDERLAYMENTDFPSPFAspen/PoplarDFPSPFAspen/PoplarCPLUGGEDCPLUGGEDDDCDUniform touch sanded surface withopenings in the face filled.Flooring underlayment and combinedsubfloor and underlayment. Hoarding.C-CC-DDFPSPFAspen/PoplarDFPSPFAspen/PoplarCCCDCDUnsanded. Face may contain limited sizeknots, knotholes and other minor defects.Roof, wall and floor sheathing.Hoarding. Packaging. Constructionuse where sanded material is notrequired.MDO 1 SideMDO 2 SidesDFPSPFDFPSPFCPLUGGEDCPLUGGEDCCCCPLUGGEDSmooth, resin-fibre overlaid surface.Ideal paint base.Siding, soffits, paneling, built-infitments, signs, any use requiring asuperior interior or exterior paintsurface.Table 3. CANPLY EXTERIOR Proprietary ProductsProduct*SpeciesGrades**CharacteristicsTypical ApplicationsEASY T&GROOFDFPSPFC-CC-DMilled with patented edge profile for easyinstallation and edge support without H-clipsRoof sheathing and decking forresidential, commercial and industrialconstruction.EASY T&GFLOORDFPSPFAspen/PoplarC-CC-DC-C PLUGGEDUNDERLAYMENTMilled with a patented edge profile for fast,easy installation.Floor and heavy roof sheathing forresidential, commercial and industrialconstruction.COFI FORM SPPLUSDFP(All DouglasFirconstruction)OVERLAID1 or 2 SIDESSpecial all Douglas Fir panels with greaterstiffness and strength providing improvedproperties particularly in wet serviceconditions. Overlaid with specialtyresin fibre overlay on face and/or back.Concrete forms and other uses wherewet service conditions or superiorstrength requirements are encountered.***All grades and products including overlays bonded with waterproof resin glue.For complete veneer grade descriptions, see Voluntary Product Standard PS1-95.7CertiWood CANPLY <strong>Plywood</strong> <strong>Handbook</strong> - <strong>USA</strong>
SPAN RATED CANPLY PLYWOODCANPLY EXTERIOR plywood manufacturedto PS1-07 and marked as C-C, C-D, C-CPlugged or Underlayment is usually accompaniedby a “span rating”. The numbers in thespan rating are presented as a fraction in themarking of sheathing grades of plywood,and as a single number for C-C Pluggedand Underlayment (Table 4). These numbersdescribe the maximum allowable center tocenter distance, in inches, which the plywoodmay span. For sheathing grades, thefirst number refers to spacing of roofframing, and the second number relates tospacing of the floor framing. For singlefloor grades, the number refers to thespacing of the floor joists. Maximum spansset out by span ratings are inline withcommonly accepted building practices, andare predicated on normal use conditions,however consultation with the local buildingcode is recommended. To properly specifyCANPLYEXTERIOR plywood, refer to Figure A.Table 4. Allowable Spans and Loads for Sheathing and Single-Floor ContinuousOver Two or More Spans with Strength Axis Perpendicular to Supports. a(Based on 2000 International Building Code Provisions for Conventional Light-Frame Construction)Performance tested panelsThrough performance testing accordingto PS1-07, most thicknesses of CANPLYEXTERIOR SPF have upgraded span ratingbecause of excellent demonstratedperformance in roof and floor applications.These performance tests have been designedto evaluate panel strength, stiffness, anddurability. Performance rated productsundergo quarterly product evaluation toensure that the strict levels established forstrength and stiffness are maintained.Allowable loadsTable 4 gives allowable live loads and totalloads for CANPLY EXTERIOR plywood spanrated sheathing and single floor grades.Allowable loads are developed for panelscontinuous over two or more spans with thestrength axis perpendicular to supports.Values are based on 2000 InternationalBuilding Code provisions for conventionallight-frame construction.Figure A - Specifying CANPLY EXTERIOR <strong>Plywood</strong>To write a correct specification for plywood, the main points to consider are:PS1-07 Bond ClassificationPanels certified under PS1-07 are categorizedinto two bond classifications: Exposure 1 andExterior. Although all panels of CANPLYEXTERIOR plywood employ phenolformaldehyde adhesive, which is completelywaterproof and able to withstand conditionsof extreme exposure to moisture, due tocompositional factors the plywood issegregated into two different classifications.Exposure 1 panels are intended forprotected construction and industrial useswhere the added bond durability of awaterproof adhesive is required. Exteriorrated plywood is manufactured toretain its glue bond when repeatedlywetted and dried or otherwise subjectedto long-term weathering or to exposure ofsimilar severity.CertiWood CANPLY <strong>Plywood</strong> <strong>Handbook</strong> - <strong>USA</strong>8
SHEATHING, SIDING AND PANELINGFloor SheathingGeneralCANPLY EXTERIOR plywood provides anideal floor beneath resilient flooring andcarpeting. <strong>Plywood</strong> goes down flat andstays flat for a smooth, uniform surface.When exposed to moisture duringconstruction, some swelling may occur, butit is substantially less than panels made withparticles, strands or wafers. Also, panelsreturn to original thickness as they dry,eliminating the need to sand the jointsbefore applying the next layer. EASY T&Gand conventional T&G plywood panels maybe used to further reduce labour andmaterial costs by eliminating the need forcostly blocking at panel edges.<strong>Plywood</strong> panels for subflooring and singlelayer subflooring should be applied with facegrain perpendicular to supports and with jointsparallel to joists staggered. An approximate1/16” (2 mm) gap should be left between allsquare edges of adjacent panels. EASY T&GFloor is designed to butt at the tip of thetongue leaving a 1/32” (1 mm) gap on theface and underside.To ensure the best possible performance,plywood floors should be protected fromrain and snow shortly after installation toprevent excessive moisture pickup.SubflooringFor subflooring that does not come intodirect contact with floor finishing materialor is used under plywood underlayment,hardwood flooring or concrete, C-C or C-Dgrade plywood is suitable. (see Table 4).Single Layer SubflooringEASY T&G, conventional T&G plywood orsquare-edge plywood with edgessupported by blocking can be applied tofloor joists forming a single layer subfloor.Minimum plywood thicknesses for varioussupport spacings and finish floorings aregiven in Table 4. Underlayment or C-Cplugged grade plywood is recommendedfor single-layer subfloors intended for useunder most carpeting.Single-layer floors (combination subfloorand underlayment) for use under resilientfloor finishes such as linoleum*, rubber, andsynthetic sheets or tiles, and some types ofglued-on carpets which normally require theuse of underlayment, are recommendedonly for prefabricated structures or forapplications where panels are fully protectedagainst damage and moisture before andafter installation and are not permitted foruse under ceramic tiles applied withadhesive. 24 o.c. span rated, Underlaymentor C-C Plugged plywood, 23/32” thick, isrecommended for support spacings up to 16”.For best performance, elastomeric glueshould be applied between plywood andsupports and into T&G profiles beforenailing with annular grooved nails. Finalnailing should be left until the finishedflooring is to be laid, at which time theplywood should have dried to theapproximate conditions that will exist in thestructure during occupancy.HardwoodflooringUnderlayment usedto compensate fordifference in thickness between resilientand wood flooringWall to wallCarpetUnderlayment usedto compensate fordifference in thickness between carpet andresilient flooringCombined subfloorand underlayment<strong>Plywood</strong> Subfloor and UnderlaymentThe surface should be prepared asrecommended by the floor coveringmanufacturer.* Check subfloor/underlaymentrecommendations of floor coveringmanufacturer.Resilient flooringCANPLY plugged& touch sandedplywoodunderlaymentCANPLYC-C or C-D gradeplywood subflooringEdge blocking(not necessarywith T&Gplywood)Resilient flooringCANPLY premiumgrade plywoodunderlaymentCANPLY C-C orC-D subflooringResilient flooringCANPLYspan-rated, tongueand grooved,underlayment orC-C plugged gradeplywood forsingle-layer floor9CertiWood CANPLY <strong>Plywood</strong> <strong>Handbook</strong> - <strong>USA</strong>
UnderlaymentPlugged and touch sanded grades of 5/16”or 3/8”, or special underlayment panelsmade by several CertiWood members, arerecommended for use as underlaymentunder resilient floor finishes such aslinoleum, rubber and synthetic sheets ortiles, ceramic tiles and those types of gluedoncarpets for which the manufacturerrecommends the use of underlayment. Forceramic tiles applied with adhesive, 15/32”thick underlayment is recommended wheresupports are spaced wider than 12”on centre.Underlayment panels should not be installeduntil wood subfloors, concrete, plaster andlumber framing have dried to theapproximate conditions that will exist in thestructure during occupancy. Also,underlayment panels should be allowed toacclimatize in room conditions. To achievethis, it is recommended that the panels beplaced separately on edge around the roomfor a minimum of 48 hours prior toinstallation of the finished floor.Underlayment panels should be laid at rightangles to subflooring panels with joints inunderlayment staggered and offset at least8” from joints in subflooring, and with endsand edges butted to light contact. Unlessspecified otherwise by the manufacturer,underlayment panels should be fastenedfollowing the provisions of the InternationalResidential Code 2003, Table R602.3(2).Preparation of underlayment prior toapplying floor covering should be done asrecommended by the floor coveringmanufacturer. Such a recommendationshould include specification for suitable filler.Field-Glued SubfloorsThis technique provides stiffer, better qualityfloors. With new adhesives & gluing techniquesavailable, field-glued combined subfloor andunderlayment plywood floors save moneywhile providing premium quality construction.Material and labour costs are reduced withthe single floor system, which combines thefunctions of both structural subflooring andsmooth underlayment in a single layer ofplywood. Floor stiffness is also increasedfrom 20% to 70% (depending upon the sizeand spacing of the joists and thickness ofplywood) compared to conventional floorconstruction because the glued plywoodfloor and joists act together as a composite,stiff T-beam unit.Builders who have adopted this floor systemhave experienced an added benefit -minimum call backs to repair floor squeaks.With field-glued plywood subfloors, the gluefirmly bonds the plywood and joists togetherto help prevent the differential movementbetween the joists and the subfloor; whichcan cause squeaks.Table 5. Approximate Glue Coverage per Gallon for Various Bead SizesFt. per gallonBead Diameterinches (mm)1/8” (3)3/16” (5)1/4” (6)5/16” (8)3/8” (10)Gallonsper 1000 ft.0.61.62.34.06.4Note: 1 U.S. Gallon equals 3.78 litres; 4 Quarts equals 1 GallonSpliced Floor JoistsIf T&G plywood is used, no blocking isnecessaryWhere joists arecontinuous over bearingpoints, they may beend-butted, not lapped, toprovide continuous nailingGluesSeveral brands of elastomeric glue suitablefor field use are available from buildingsupply dealers. Most are convenientlypackaged in spouted, ready-to-use cartridgesfor caulking guns. Some brands are availablein bulk for use with portable pneumaticsystems. These special constructionadhesives are not be confused with ordinarydrywall glues. Use only glues specified forconstruction purposes and apply accordingto manufacturer’s instructions.ASTM D3498-01 establishes minimumperformance and test requirements forelastomeric construction adhesives forbonding plywood to lumber framing.Gluing ConditionsGlues are formulated to provide adequatebonds to unseasoned lumber, which makestheir use practical under normal siteconditions. With several of the adhesivesavailable, gluing can be done in belowfreezing weather provided the temperaturerises above freezing reasonably soon after thefloor is applied. However, for best results theambient temperature should be abovefreezing. Gluing should never be done whentemperatures are continually below freezingbecause none of the adhesives currentlyavailable can develop adequate shearstrength under such conditions. Theadhesive should be kept as warm as possibleduring cold weather to ensure ease ofapplication.CertiWood CANPLY <strong>Plywood</strong> <strong>Handbook</strong> - <strong>USA</strong> 10Joist1600620430250150Edge blocking forsquare edgeplywoodCANPLY plywoodsplice platesBeamIt is advisable to plan placement ofEASY T&G panels to minimize cutting, wasteand labour. Panels should be placed with theface grain at right angles to the supports. Endjoints, which must occur over supports,should be staggered. When placing thetongued edge of a panel into the groove of apreviously placed panel, care should be takento ensure that tongues and grooves are notdamaged. Note that each T&G panel isstamped “THIS SIDE DOWN” to ensurecorrect placement. The recommendedapplication sequence for EASY T&G plywoodis as follows:1. Follow Storage and Handlingrecommendations on page 16, and DO NOTmix CANPLY EASY T&G with other T&G’s.2. It is important that the first row of panelsbe aligned straight and true. To ensure this,measure a panel width in from the ends of thetwo outside joists and snap a chalk linebetween these points. This line will also act asa boundary when applying glue for the firstrow of panels of a field-glued plywood subfloor.3. For a regular subfloor, lay the first row ofEASY T&G panels with the grooved edgealong the chalk line and tack in position withfour to six nails per panel. Do not nail within 6”of the grooved edge in any row until thetongues of the following row are in position.For a field-glued plywood subfloor, lay a1/8” to 1/4” (3 mm to 6 mm) diameter bead ofglue along the joists or beams apply glue in aserpentine pattern. Where panel ends will
EASY T&G Floor Installationbutt on the joists, lay two beads of glue toensure that each panel end will be glued.Apply only enough glue to lay one or twopanels at a time (unless the gluemanufacturer’s instructions permitcovering a larger area in advance of layingthe panels). See Table 5.Nail panels securely in position takingcare not to nail within 6” (150 mm) of thegrooved edge until the tongues of thefollowing row are in position.4. Place a second row of EASY T&Gpanels along the other side of the chalkline with the tongues fitting into thegrooves of the panels in the first row andhaving the end joints between plywoodpanels staggered relative to the first row.Do not attempt to force a tight jointbetween panel faces as the EASY T&GFloor and conventional T&G is designedto butt at the tip of the tongue leaving a1/32” (1 mm) gap on the face andunderside. An approximate 1/16”(2 mm) gap should also be left betweenpanel ends to allow for expansion ofthe plywood and shrinkage in thejoist thickness.5. Sheathe the remaining floor area. For afield-glued subfloor apply glue in advance ofeach panel and nail each panel securely inplace within the glue manufacturer’s specifiedassembly time. For extra stiffness, a bead ofglue, either continuous or intermittent, may besqueezed into the grooves before mating thepanels. If applying a regular subfloor, thepanels can be nailed securely to the joists atthis stage. If the plywood is being used ascombined subfloor and underlayment as abase for resilient flooring, panel nailing shouldbe left until the finish flooring is to be laid, atwhich time nailing should be completed andthe nail heads set.6. Protect floor from excessive moisture.Hints to Reduce Nail Popping in FloorsNail popping is the term used to describe thetendency of some nails to rise above the plywoodsurface after driving. It becomes a problemin subfloor and underlayment applicationsonly if nails are driven into unseasoned lumberjoists. As the lumber shrinks, the wholedepth of the joist is reduced,including thedepth of the nail hole. With the nail holereduced in depth the nail head is raised abovethe surface of the plywood because the nailitself cannot increase the depth of the hole.This causes humps or blisters on the surfaceof resilient flooring. The tendency for nails topop can be reduced by:1. Selecting lumber joists so that memberswith similar crowns will be placed sideby side.2. Use dry products, such as K.D. lumber orengineered I-Joists, whenever possible.If unseasoned lumber is used, do not fastenplywood permanently until the joists haveattained equilibrium moisture content.3. Using the shortest possible annularlygrooved nails consistent with therecommendations given in Table 2304.9.1 inthe 2003 IBC. Drive nails at a slight angleand set all nail heads prior to layingresilient flooring.11CertiWood CANPLY <strong>Plywood</strong> <strong>Handbook</strong> - <strong>USA</strong>
Wall SheathingCANPLY EXTERIOR plywood used as wallsheathing stabilizes the building frameworkand makes diagonal and corner bracingunnecessary. Damage to finish materials inthe structure due to uneven settling of theframe is minimized when plywood sheathingis used because plywood adds rigidity to thebuilding. This rigidity is especially importantwhen walls are prefabricated on the floorand then tilted into position, or where wallsare to contain large areas of glass. <strong>Plywood</strong>sheathing also contributes to the overallthermal performance of the wall because thelarge panels mean fewer joints throughwhich air can leak and heat can escape.Minimum plywood thicknesses and spanratings for wall sheathing are given in Table2308.9.3(3) of the International BuildingCode 2003 (IBC). Fastening schedules mayalso be found in the IBC, Table 2304.9.1. Formaximum performance of the plywood,panels should be applied with the face grainperpendicular to the studs. <strong>Plywood</strong> panelsshould not be applied to form a tie betweenthe bottom plate and the floor joists orheader or sill, since shrinkage of the lumbermay cause the plywood sheathing tobuckle. A strip of plywood along the joistheader, as shown in the illustration willextend sheathing to the required lower limitof the wall and provide a flush surface for theexterior siding material. A 1/8” gap shouldbe left between panels to allow forexpansion.Siding and PanelingCombined Sheathing and CladdingThis siding system, sometimes called asingle skin finish, is a sound and economicalmethod of wall construction in whichplywood is applied directly to the studs toperform the dual role of structural sheathingand finish siding.Available in a range of patterns and textures,plywood siding panels combine the naturalcharacteristics of wood - warmth, beautyand durability - with the superior strengthand stiffness imparted by cross-laminatedconstruction. This form of construction isone of the least expensive ways to enclosespace. Minimum thickness requirements,support spacings and fastening schedulesfor plywood siding can be found in Table2308.9.3(2) and Table 2304.9.1 of theInternational Building Code 2003.<strong>Plywood</strong> Siding<strong>Plywood</strong> can be used in panel form or cutand applied as lap or level siding. Sheathinggrades of plywood make an economicalcladding with a pleasing rustic appearance.These grades are especially attractive whenthe plywood is stained with a heavy bodiedstain and the joints are covered with battensStagger panelsfor maximumstrengthLeave 1/8” gapbetween paneledges.CANPLY EXTERIORplywood stripHeader<strong>Plywood</strong> Wall Sheathingor moulding. When the plywood is to bepainted, Medium Density Overlaidplywood should be used. This type ofplywood has a smooth, durable, resinimpregnated surface ideal for a long lastingpaint finish. Textured, grooved,factory-primed and pre-finished sidingpanels are also available. Hot-dippedgalvanized nails should be used withplywood siding to avoid rust streaks. It maybe desirable to use colour-matched nails forsome pre-finished panels. If battens areapplied over pre-finished siding, the battensshould be nailed separately so that they canbe removed for refinishing withoutdamaging the siding.Wood, Metal and Vinyl SidingSiding should be nailed directly to the studsthrough the sheathing. All vertical jointsshould occur over studs. Nails should becorrosion-resistant.Red Cedar Shingles and Shakes<strong>Plywood</strong> applied perpendicular to the studsprovides a stiff nailing base for shingles andshakes. They should be nailed directly tothe sheathing with hot-dipped galvanizednails driven flush, but not so that the headcrushes the wood.StuccoIf self-furring metal lathe is used, it may benailed directly over the plywood sheathingafter applying building paper. Nails shouldbe hot-dipped galvanized, have large headsand be driven through the plywood into thestuds. If wire mesh is used, it should beattached with furring nails or staples.CertiWood CANPLY <strong>Plywood</strong> <strong>Handbook</strong> - <strong>USA</strong> 12Top plateStudsPaintCANPLY EXTERIORplywood subfloorJoistsSill plateFoundationCorner BoardsFlat PanelCorner BoardsLap or BevelButtedButtedSquare CornerFlat PanelCorner StopButtedSquare CornerLap or BevelCornerMouldingOpen JointTypical Exterior Wall Corner Details
Typical Wall Construction DetailsVertical joints must occur over framingand be covered with battens, otherwisea weather membrane is necessary.Leave a 1/8” gap between panels edges.Leave a 1/8” gap betweenpanels edges.No diagonal wallbracing required withsingle skin constructionNo diagonal wallbracing required withsingle skin constructionInsulation as requiredInsulation as requiredBuilding paperNailsthrough battenshould penetratestud at least1-1/2”<strong>Plywood</strong> panel sidingButt joints must be caulked<strong>Plywood</strong> panel sidingUniform Panel - Board and BattenGrooved Panel - VerticalVertical joints must occur over framingand be covered with battens, otherwisea weather membrane is necessary.Leave a 1/8” gap between panels edges.Buttjoints must be caulkedLap or 1”flashhorizontaljoints withz-flashing.No diagonal wallbracing required withsingle skin constructionInsulation as requiredBlocking athorizontal jointsInsulation as requiredBuilding paperBattens toconceal buttjoints at panel ends<strong>Plywood</strong> panelsiding installed horizontally, nail asrequired for vertical applicationShingle wedgeunder vertical joints(lap siding only).Stagger butt jointsover studs<strong>Plywood</strong> lap sidingGrooved Panel - HorizontalLap SidingNote: Typical wall construction details are per section R703.3 and Table R703.4 of the International Residential Code. Illustrationsreflect minimum requirements set out in the IBC. Wall assemblies should be designed according to local climate conditions.13CertiWood CANPLY <strong>Plywood</strong> <strong>Handbook</strong> - <strong>USA</strong>
Brick or Masonry Veneer<strong>Plywood</strong> sheathing should be covered withasphalt-impregnated paper with horizontal jointslapped not less than 2”, and vertical joints not lessthan 6”. Brick or masonry should be set at least1” from face of sheathing. Metal ties may besecured by nailing through the sheathing to thestuds.Soffits<strong>Plywood</strong> cut to correct size and nailed directly toroof joists, rafters or outriggers can act as soffits.Use 1/4” for supports up to 16” on centre and5/16” for 24” spacings. Cut-to-size and ventedsoffits are available from many building supplydealers. It is a good idea to stain or prime thesoffit panels before installation. This will save muchwork later. MDO provides a superior paint surface.The illustrations opposite show two methods ofplacing vents in plywood soffits.Roof Sheathing<strong>Plywood</strong> roof sheathing offers time and moneysaving advantages while contributing to theoverall strength and rigidity of the structure. Insome cases it may be possible to reduce roofconstruction costs by using fewer rafters spannedby a thicker than usual sheathing panel. Thehigh-strength, low weight, skid-resistant deckprovided by plywood sheathing is ideal for all typeof roofing materials, from red cedar shingles andshakes to built-up roofing.Sloped SoffitRafterTop PlateWall studsCANPLY EXTERIORplywood wall sheathingHorizontal SoffitRafterTop plateStudContinuous nailerOutriggerCANPLY EXTERIORplywood wallsheathingCANPLY EXTERIORspan rated plywoodroof sheathingFasciaCANPLY EXTERIORplywood soffitIntermittent screenedsoffit ventsCANPLY EXTERIORspan rated plywoodroof sheathingFasciaCANPLY EXTERIORplywood soffitScreen vent runslength of soffitTable 4 gives span rating requirements for theapplication of CANPLY EXTERIOR plywood roofsheathing. Panels should be applied with the facegrain at right angles to supports to obtainmaximum strength. A 1/8” gap should be leftbetween panels to allow for expansion. Table2304.9.1 of the IBC contains fastening schedulesfor plywood roof sheathing.During construction, the rafter header should beapplied first. The first row of plywood panelsshould then be nailed flush with the outside edgeof the header to give a true roof edge. The fasciaboard is then applied to cover the rafter headerand the edge of the plywood sheathing. Thismethod of construction will also help stopleakage into the soffit if water should back upthe eave.Vented SoffitsFace GrainDirectionFor maximum strength, placeplywood panels across raftersand stagger jointsNo H-Clips required withCANPLY EASY T&G RoofLeave 1/8” gapbetween panel edges.H-clips are an alternative to solid blocking andshould be installed under the followingrecommendations:1. One H-clip should be spaced at mid-pointbetween each support, except two equallyspaced between supports 48” on center.Roof rafterTop plateFasciaRafter headerSee Table 2304.9.1 of theIBC 2003 for fasteningschedules2. H-clips should fit the plywood snugly.3. Abutting plywood sheets should be fitted asclosely as clips permit, providing the 1/8”separation required by the building code ismaintained. Occasional misfit of abutting sheetsmay be tolerated providing resulting gaps atmaximum opening do not exceed 1/4”.EASY T&G Roof SheathingCertiWood CANPLY <strong>Plywood</strong> <strong>Handbook</strong> - <strong>USA</strong> 14
Roof PlateTop PlateAn alternative to sheathing with regularCANPLY EXTERIOR plywood is to useEASY T&G panels. These panels aremanufactured specially for roof sheathingand have a new, patented edge profile thatresults in a stiffer roof and eliminatesdifferential deflection as well as the need forH-clips.Install EASY T&G with tongued edge up (i.e.,pointing toward the top of the roof). Anexception may be made where triangularcut-offs are made, such as when sheathinghipped roofs. When square edge plywoodis used on hipped roofs, the triangularcut-offs are flipped over and used on theother end of the same row. This is not possiblewith EASY T&G when all panels areinstalled with tongued edge up. Instead,install one side of the roof with the tonguededge up and the other side with the tonguededge down (i.e., pointing toward the eaves).The triangular cut-offs from one side of theroof can then be used on the otherside with no loss of footage.Panels should be installed with the grainacross supports and applied so that jointsparallel to rafters are staggered. A 1/8”gap between the ends of adjacent panels isrequired. Correct spacing between the longedges of adjacent panels is inherent in thedesign of the edge profile.Finish Material over <strong>Plywood</strong> Roof SheathingMany types of roofing materials have provensatisfactory under various service conditionswhen applied over plywood roof sheathing.The most common materials used on slopingroofs are Western Red Cedar shinglesand shakes, asphalt shingles and tiles. Forflat or flat-pitched roofs, built-up roofing isgenerally used. Rolled roofing is suitable fortemporary use but is not recommended forpermanent installation over plywood roofsheathing.When a plywood flat roof deck is to carrypedestrian traffic, it must be considered as afloor or walking deck and the plywoodthickness selected accordingly. Surfacemembranes conventionally used as roofcoatings are rarely suitable for pedestriantraffic and should not be used on walkingdecks. However, special coatings which areboth waterproof and abrasion-resistant havebeen developed in recent years andtheir use on plywood walking decksis recommended.15CertiWood CANPLY <strong>Plywood</strong> <strong>Handbook</strong> - <strong>USA</strong>
WORKING WITH PLYWOODStoring and Handling<strong>Plywood</strong>, like any other panel product,requires proper handling and storage.Despite its sturdy cross-laminatedconstruction, face veneers, panel edges andpanel corners are vulnerable to damageand should always be protected.<strong>Plywood</strong> is manufactured at a low moisturecontent and while small changes in moisturecontent will not appreciably affect itsdimensions, large changes should be avoidedsince they may encourage checking of theface veneer with consequent impairment ofits qualities as a paint base. It is goodpractice to store plywood which is to be usedfor interior finish under conditions thatapproximate those it will experience in service.Points to watch when handling plywood are:1. Store plywood panels flat and level.2. Keep finish faces inward and coverstacks to protect from bumping andabrasion.3. Protect panel edges and corners.This is especially important withtongue and groove plywood.4. Carry panels on edge (always beingcareful not to damage faces, edgesand corners).5. When plywood is used as a finishingmaterial, deliver to job-site at the lastpossible moment.6. Protect panels from sunlight, water orexcessive humidity by covering plywoodbundles with plastic or tarp.7. Use three supports as dunnage toprevent sagging.SawingHand sawingFor handsaw work, panels should be sawnface (good side) up with the angle betweensaw teeth and panel surface as flat aspossible. This prevents face veneer splintering.Generally, an 8 or 10 point cross-cut saw ora 10 point panel saw gives the best results.Hand Power sawingA sharp carbide tip combination blade set toprotrude no more than 1/2” through thepanel and firm panel support will giveexcellent results with a hand power saw.Panels should be sawn face down.Table Power sawingPanels kept face up on a table power saware cut cleaner. A combination blade filedwith less than normal hook is best for mostwork. The blade should be set to protrudeno more than 1/2”. In general, a blade of 10”diameter or more works best.A table extension will help in handling fullsized panels. When using a radial arm saw,the orientation of the plywood panel willCertiWood CANPLY <strong>Plywood</strong> <strong>Handbook</strong> - <strong>USA</strong>depend on the type of cuts being made.The instruction manual accompanying theradial arm saw should be consulted.DrillingHand brace and bit, power drill or drill pressall work easily with plywood. Holes of largediameter are best cut with a brace andexpansion bit rather than with a high-speeddrill. For power drilling, spur bits give goodresults. Reversing the panel as soon as thebit point is through and completing the cutfrom the other side will ensure a clean cutwithout splintering.Small holes are readily cut with either handor power drills. As a general rule, the largerthe hole the slower the drill speed.Clean cuts can be obtained with all methodsof drilling, if the panel has firm support andis backed with scrap wood to preventsplintering.RoutingRouters can be used to V-groove, shiplap orrebate edges of panels. Special bits areavailable for moulding and chamfering. Usesharp bits and work carefully across thepanel. Deep cuts in panel edges should bemade in two stages. For specific instructions,see the router manufacturer’s literature.Bending<strong>Plywood</strong> panels can easily be bent when dryinto mild simple curves. Table 6 gives drycold bend radii for the most commonplywood thicknesses. As shown in the table,plywood can be bent more sharply when thebend is perpendicular to the direction of theface grain. These radii are based on panelsselected at random with no regard todefects such as knots, patches and shortgrain. Without selection, a small percentageof panels bent to these radii may beexpected to break. To obtain smaller radii,i.e. sharper curves, the panels must besoaked or steamed.Saw-kerfing the back of the panel to make itbend more easily is not recommended if theplywood is to be used structurally.Compound curves are virtually unobtainablewith a single plywood panel and should notbe attempted.Table 6. Cold Bend Radii<strong>Plywood</strong>Thickness5/16”3/8”1/2”5/8”3/4”25/32”16Edge FinishingPlanes used on plywood edges are workingon grain that goes in both directionsbecause of cross lamination of the plies. Forthis reason a sharp plane with shallow set isrecommended. A light jack plane will workwell on most jobs and planing in from theends towards the centre helps prevent theends from splintering.Power tools will help get a smooth edge. Apower saw with a carbide tip blade canproduce a smooth edge if the first cut ismade more generous than is necessary andthe edge is then cut to size with a hollowgroundblade. With a jointer it is best to feedthe wood into the jointer head slowly. With adisc sander, feed the panel slowly againstthe sander at a slight angle so that the areaof edge contact is on the downward side ofthe rotating disc.SandingWhen finish-sanding the panel face, workwith the grain using even pressure and regularstrokes. Use fine sandpaper for finaleasing and smoothing the edges and forrubbing down between coats of paint.Fasteners<strong>Plywood</strong> can be fastened to framing materialsand other materials can be fastened toplywood with a number of devices such asnails, staples, screws, bolts, clips, and glue.Of these, nails, staples, and glue are themost commonly used.NailsNails are available in a variety of lengths,diameters, heads points, shank styles andcoatings.For most construction uses, common nailswill be satisfactory. Where greaterwithdrawal resistance is required, such as insubflooring and underlayment nailing, ringthread, spiral or annular grooved nailsshould be used. Coated nails are notgenerally used with plywood; galvanizednails usually hold better and are less likelyto cause staining if the plywood is exposedto the weather.Bending Axis Parallelto Face Grain (ft)2.33.37.9121619Bending Axis Perpendicularto Face Grain (ft)4.97.912162023
The length of nail for a specific purpose isdetermined by the thickness of plywoodthrough which it must be driven. Table 7 givesrecommended nail lengths for the thicknessof plywood used in finish carpentry work, andTable 8 gives nail lengths for use with unsandedplywood. Nail lengths for the thicknessesof plywood used in sheathing applications arefound in Table 2304.9.1 of the IBC.StaplesStaples are similar in nature to nails and areoften used interchangeably. Staple sizesconforming to the requirements of theInternational Building Code for plywoodsheathing and subfloor attachment are givenin Table 2304.9.1.ScrewsScrews are primarily employed to fastenplywood used in finish carpentry work, cabinetry,displays and boat building. Screw sizesfor the most commonly used thicknesses ofplywood together with the diameters of thescrew shank clearance and pilot holes aregiven in Table 9.BoltsBolts have only limited use in plywoodconstruction. Bolt holes should be 1/16”(2 mm) larger than the bolts. A tight fit requiringforcible driving of the bolts in notrecommended. With common bolts, awasher or metal plate or strap should beinserted between the plywood and the bolthead and between the plywood and the nut.Nuts should be tightened snugly but not so asto crush the wood under the washer, plateor strap.1. Plow bolts have flush heads with fins toprevent turning.2. Carriage bolts normally are more usefulwith plywood than common bolts.3. The speed nut system is a bolt with aself locking sheet metal nut.H-ClipsH-clips provide panel edge supports in lieu ofblocking. They are used to reduce differentialdeflection between adjoining panel edges.One H-clip should be spaced at midpointbetween each support, except two equallyspaced between supports 48” on center.Using EASY T&G panels eliminates the needfor H-clips, and prevents differential deflectionbetween adjoining panel edges.Screws may be counter-sunk but care shouldbe taken to avoid breaking the surface grainof the plywood panel.In general, sheet metal or drywall screws holdbetter. Flathead screws set flush have moreholding power than round-head screws of thesame size. Under round head screws, awasher will give extra strength.1 2 3Table 7. Nails for <strong>Plywood</strong> used in Finish Carpentry<strong>Plywood</strong>Thickness1/4” - 15/32”Nail Length(in.)1½H-ClipNailTypeCasing or FinishingCounter sink1/2” - 19/32”1½2Casing or Finishing5/8” - 7/8”2Casing or FinishingShank clearancePilot holeTable 8. Nails and Staples for Unsanded <strong>Plywood</strong><strong>Plywood</strong>ThicknessCommon(in.)Nail LengthRing Thread(in.)Staple Length(in.)5/16”-3/8”21¾1½1/2”-3/4”21¾2Grommets and InsertsMetal grommets and inserts are employedwhen plywood is used for removable panels.Several types are manufactured for thispurpose.1 21. Grommet is fitted with countersunk holdand crimped to form socket forremovable wood screw.2. Grommet designed for round headscrew has slotted hole for paneladjustment.25/32”-1”2¼1. Staples shall not be less than 1/32” (1.6 mm) in diameter or thickness with not less than3/8” (9.5 mm) crown driven with crown parallel to framing.2. All nails should be long enough that no less than half their length penetrates into thesecond member.Table 9. Screws for <strong>Plywood</strong>Screw Size<strong>Plywood</strong>Thickness1/4”5/16”-3/8”15/32”-1/2”19/32”-5/8”23/32”-7/8”(in.)¾11¼1½1½(No.)666810 or 122Shank Clearance(in.)9/649/649/6411/643/16 or 7/32NAPilot Hole(in.)1/161/161/165/643/32 or 7/6417CertiWood CANPLY <strong>Plywood</strong> <strong>Handbook</strong> - <strong>USA</strong>
GLUES AND GLUINGGluesGlue plays an important role in plywoodconstruction, both in nonstructuralapplications such as flush panel doors,furniture, cabinets and built-ins and instructural uses such as web beams,stressed skin panels and similar plywoodstructural components.Because of the many developments inrecent years in the field of wood adhesives,and the varied conditions of service underwhich glued wood products are expected toperform satisfactorily, the selection of aproper adhesive is important and issometimes a complex problem. The followingnotes on the most common types of glues ingeneral use today should help make theselection of a suitable glue for a specific jobsomewhat easier. It is important to note thatplywood treated with wood preservatives orfire-retardants is difficult to glue. Also, if thewood is to be treated after gluing, the choiceof adhesives is severely limited.Casein glue is one of the older woodworkingglues and is still readily available in powderform. When mixed with water it forms a glueof moderately high dry strength and moderateresistance to water, damp atmospheres andintermediate temperatures. Casein isgenerally applied and pressed at roomtemperature. It is not recommended forexterior exposure and is used primarily forlaminating structural timbers for interior use.Contact and rubber-based glues - other thanthose elastomeric construction adhesivesdeveloped specifically for field-gluedplywood subfloors (see page 10) andaffixing plywood wall paneling to studs andstrapping - are not suitable for structuraluses. One of the main disadvantages ofthese types of glues is that their drystrengths are generally lower than those ofconventional wood working glues and thejoint tends to creep under prolongedloading, losing its original configuration.This joint deformation remains even after theload is removed.Contact adhesives are developed for bondingtwo surfaces together without the use ofclamps. Unlike many conventional wetbonding glues, contact adhesives areapplied to each surface to be bonded,allowed to dry, then joined together withpressure. The two dried adhesive coatingsfuse together to form a uniform bond ofimmediate strength. Generally speaking,the higher the pressure, the more uniformthe bond will be.Common uses for contact adhesives involvethe bonding of non-porous materials tothemselves or other non-porous materials.Uses also include gluing hard or texturedsurfaced materials such as metal, high densityplastic laminates, vinyl and other fabrics toplywood surfaces.Polyvinyl acetate glues, often called ‘whiteglues’, are valuable for non-structural interioruses such as assembling flush panel doors,cabinets and furniture. They are notrecommended for exterior exposure becausethey are inherently elastic and have low resistanceto heat and moisture. The glue joint alsotends to creep under external loads and withdimensional changes in the wood caused bychanges in moisture content.Synthetic resin adhesives now surpass most ofthe older glues in importance for bondingplywood.Urea resin adhesives, available in dry powder orliquid forms, are used extensively forfurniture, cabinet and door construction, andsimilar general assembly work. They are alsoused in some areas of marine constructionwhere the joint is not subject to excessively hightemperatures and high humidity conditions. Ingeneral, urea resins are high in both wet and drystrength, moderately durable under dampconditions, and have moderate to low resistanceto temperatures above 120° F.Resorcinol, phenol-resorcinol and phenolformaldehyderesin adhesives, similar to thetype of thermo-setting glue used to makeplywood, are required for gluing plywood andlumber into products that must withstand stressand exposure to the elements. Such usesinclude marine work and plywood structuralcomponents such as beams and stressed skinpanels. For such high strength uses a gluemust develop shearing stresses between thetwo surfaces being joined and therefore shouldbe stronger than the wood itself in shear. Thesethree types of adhesives are high in both wetand dry strength, very resistant to moisture anddamp conditions, and more resistant than wooditself to high temperatures.Table 10. Guide to Nail Gluing<strong>Plywood</strong>Thickness1/4” - 3/8”15/32” - 7/8”Nail Length(inches)1½2Nail TypeCommonCommonEpoxy resins are used for more specializedapplications such as bonding metals,plastics and some masonry materials tothemselves and to plywood. Their use inwood-to-wood bonding is limited since theirpermanence has not been adequatelyestablished. Epoxy resins are marketed intwo parts, resin and curing agent, for mixingat the point of use.Of invaluable assistance to the glue user isthe technical assistance provided by adhesivemanufacturers. Many reputable gluemanufacturers maintain staffs of technicallytrained personnel willing to assist the glueuser in the selection and use of the type ofadhesive best suited to job requirements.NOTE: To achieve the optimum glue bondbetween members it is imperative that the gluemanufacturer’s recommendations in regard towood moisture content, shelf life, pot life, workinglife, mixing, spreading, assembly time, timeunder pressure, and ambient temperature befollowed.GluingGluing pressure can be applied tosecondary gluelines (i.e. gluelines other thanthe primary gluelines used in themanufacture of the plywood itself) by manymethods,including weights, presses,clamps and nails. Whatever the method, itshould be capable of exerting a pressureon the glueline of 100 - 150psi.Weights, presses and clamps are oftenimpractical for many gluing operations,particularly in the fabrication of large plywoodstructural assemblies. In suchcases, gluelinepressure may be developed by nails-atechnique known as nail-gluing. Nail sizesand spacings for various thicknesses ofplywood are given in Table 10 and aresuggested as a guide to nail-gluing. Nailspacings recommended for nail-gluingtechniques are closer than thoserecommended for field glued sub-floorsbecause in the former the nails are usedto develop uniform pressure alongthe glueline so that the adhesive canNail SpacingNails spacing shall not exceed 3” ocalong each row for plywood up to 5/16”thick or 4” for plywood 1/2” and thicker.One row of nails shall be used for each2” width or part thereof of contact area tobe glued.Rows shall be spaced such thatthe distance to the edge of the contactarea is approximately half the distancebetween rows. Nails in adjacent rowsshall be staggered to provide evenglueline pressure and to reduce thedanger of splitting the lumber.CertiWood CANPLY <strong>Plywood</strong> <strong>Handbook</strong> - <strong>USA</strong>18
perform as a structural fastener whereas inthe latter, the elastomeric glue servesprimarily to stiffen the subfloor and preventmovement that may cause floor squeaks.PERMANENT WOOD FOUNDATIONSPermanent Wood Foundations (PWFs) are acomplete wood-frame foundation system forlow-rise residential, school, industrial, commercialand other types of buildings. Builtwith preservative treated wood, they are anextension of the familiar wood-frame systemwith the frame walls carried below ground toserve as the foundation.The first documented uses of wood foundationsof this type were in the Mark III and IVexperimental homes built in 1961 and 1963at <strong>Canadian</strong> Forces base, Rockcliffe(Ottawa) by the National House Builders<strong>Association</strong> (now the <strong>Canadian</strong> HomeBuilders’ <strong>Association</strong>), in cooperation withCanada Mortgage and Housing corporation,the Institute for Research in Constructionand Forintek Canada. The foundation wallsfor both homes were built of preservativetreated lumber framing and plywood sheathing.Forintek Canada scientists have inspectedthose wood foundations regularly since constructionand report that treated wood foundationscan be expected to perform as wellas similarly treated wood in ground contactin other situations. Good performance oftreated wood in ground contact has beenwell established. Many of the major structuresof the world are supported on preservative-treatedwood piles, another form ofwood foundation.In the Permanent Wood foundations systemall wood exposed to decay hazard is pressuretreated with preservatives. The preservativespermanently impregnate the woodcells to penetration and concentration levelsthat make the wood resistant to attack bydecay organisms and termites. The treatedwood is then dried, resulting in an odourlessproduct with a colour characteristic of thepreservative used.Wood foundations lend themselves to plantfabrication or to on-site construction. If thefoundation wall panels are fabricated in theplant, they can be assembled on jig tablesused to frame the upper walls. This speedsup erection at the site, and usually results incost savings and improved quality control.The plywood-sheathed wood frameprovides automatic dimensional controlsbecause plywood panels are square and aremanufactured to precise dimensions.Construction can take place in most weatherconditions, and can be completed fasterthan with traditional foundations, resultingin reduced construction and lowerlabour costs.The PWF system has many advantages overconventional foundations such as morecomfortable living areas, speedier erectionand reduced energy costs.Wood frame foundation walls are readilyinsulated to the same high standards as therest of the house, resulting in warm, low-costliving space. They can be finished on theinterior and on the exposed exterior withconventional coverings and finishes.In accordance with the internationalresidential code for one-and two-familydwellings, PWF’s shall be designed andinstalled to to AF&PA Report No.7. Allframing materials including plywood shallbe pressurepreservatively treated and driedafter treatement in accordance with AWPA C22.CONCRETE FORMSCANPLY EXTERIOR plywood is suitablefor all concrete forming applications.Load/span tables for various thicknesses ofCANPLY EXTERIOR Douglas Fir plywood,and overlaid plywood, together with otherdesign data, are given in the CertiWoodpublication Concrete Formwork.The Advantages of <strong>Plywood</strong> for ConcreteFormingThe selection of formwork materials shouldbe based on maximum overall operatingeconomy consistent with safety and thequality of finish required. Many contractorshave found that, for the reasons notedopposite, CANPLY EXTERIOR plywoodsatisfies the requirements of economy,safety and quality for the majority ofconcrete formwork applications.HandlingIt is generally acknowledged that thegreatest damage to forms occurs during thevarious handling operations. Thoroughplanning of the whole forming operation willkeep handling to a minimum. In the interestsof speed and efficiency, mechanicalhandling devices should be used wheneverpossible.To slow the drying rate and minimize facechecking, panels should be stored on a flatdry surface and stacked face to face. Panelsshould be protected against sun and rainbut free air circulation must be provided.Release Agents for <strong>Plywood</strong> Concrete FormsThe application of a release agent to theform face facilitates stripping the formworkand prevents scaling of the concrete surfacewhen the forms are removed.Many proprietary brands of release agentsare available in North America. Thesebrands vary in composition to suite various19applications but may for general purposesbe divided into three broad categories:lacquers and paints, oils and greases, andemulsions. It is recommended thatcontractors use only proprietary brands ofrelease agents applied according to themanufacturer’s instructions.StrippingTo minimize damage during form removal,stripping procedures should be studiedduring form planning with reference tosurface contours and special conditions.While forms must be left in place a sufficienttime to permit proper curing and protectionof the fresh concrete, it is generally desirableto remove forms as soon as theserequirements have been met.CANPLY EXTERIOR plywood is a ruggedmaterial, but like other types of panel forms,plywood can be damaged by prying withcrowbars or by dropping panels on theiredges from a height. If a good release agenthas been properly applied to the plywood,stripping should present no difficulty.If it is necessary to use force, wooden wedgesshould be used rather than metal pries.CleaningProper supervision of forming operations onthe job site should extend to the cleaningand repair of forms. <strong>Plywood</strong> forms, incommon with all other types, should becleaned immediately after stripping.Concrete particles may be removed byusing a wide blunt blade, straw broom orburlap. Many contractors use a powerdrivennylon brush. There are also severalproprietary solutions available for softeningconcrete adhering to the plywood.Projecting nails should be withdrawn toprevent scarring of panels when stacking.Panels should be stacked flat, preferably outof the sun to reduce face checking.RepairingIt is recommended that plywood forms beinspected after each use and repairs suchas patching or renailing carried out as required.<strong>Plywood</strong> forms should be clean and drybefore repairs are carried out. Where thegrade of plywood and the type of form aresuitable, the plywood may be reversed.Small splits and depressions can be filledwith a suitable patching compound sandedflush. Unwanted holes through the plywoodmay be patched by:1. Driving a wooden plug in tightly andsanding flush.2. Backing up the hole with scrap wood,CertiWood CANPLY <strong>Plywood</strong> <strong>Handbook</strong> - <strong>USA</strong>
filling with patching compound andsanding flush.3. Driving a metal patching disc into theplywood face.Experience has shown that even if a plywoodform is damaged beyond economical repairs,the plywood itself can be salvaged andusefully re-employed in numerous fields, forexample as stiffening gussets on newformwork, as rough foundation formwork, andin those areas where formwork is difficult toremove and must be left in place.Concrete FormsContractors should obtain their hardwareonly from recognized suppliers who canfurnish proof of the strength of theiraccessories by laboratory or field tests.Although many different types of formhardware have been developed, all standardtypes are suitable for use with plywood. Ofparticular interest are various kinds of hightensile steel ties or bolts which have beenspecifically designed for plywood.Snap-ties made from high tensile wire arepopular as an inexpensive method of formsupport. These ties are designed to preventthe forms from separating under pressure.Stripping the forms should be done onlyafter concrete has set. After the forms havebeen removed, a tie breaker is applied to theexposed end of the snap-tie and bent atright angles as close to the wall surface aspossible. The unit is then turned with aclockwise circular motion until the snap-tiebreaks at break-off point.If column centres are set so that the distancebetween faces of beams is a multiple of thepanel width plus an allowance to facilitatepanel removal, whole panels of plywoodmay be used without cutting for slab forms.Wall Forms: Site BuiltIt is economical to fabricate as much of theformwork as possible on the ground, makingsections as large as can be convenientlyhandled by the lifting equipment or manpoweravailable. Where small pieces arerequired for such things as stepdowns andspecial shapes, plywood can be cut to theexact size required. Horizontal jointsbetween panels may be backed up by headersproduce a smoother joint.StrengthImpact ResistanceSplit ProofStabilityLess HandlingReusabilityFewer JointsFor special circumstances where a smoothjoint-free or fin-free surface is required, theuse of tongue and groove plywood with thejoints taped with thin, pressure-sensitiveplastic tape should be considered. It shouldbe noted however that special care must betaken to prevent damage to the T&G edges.Nails to fasten plywood to supports shouldbe as small and as few as practical.For plywood up to 9/16” (14 mm) thick,nails should be 1 3/4” long. For 11/16”(17 mm) plywood, nails should be 2” long.Why <strong>Plywood</strong> for Formwork?Cross-lamination of veneers tends to equalize strength of panelwith and across face grain, permitting the panel to act as a platewhen suitably supported.Cross-lamination results in high resistance to impact.Nails can be driven close to panel edge without causing splitting.Construction of plywood creates a panel which is shrink resistant.Large panel size reduces number of pieces required. Reduceson-site labour.The number of re-uses is related to care in handling and stripping,and reduction of panel cutting my modular detailing. Five to20 uses are common for quality finish industrial work. Between50 and 100 uses can be expected for residential foundations.With fewer joints than boards and other materials, plywood formsare tighter. There is less leakage.For most commercial concrete finishes a rodor bar tie with integral spreaders iscustomary. Such ties generally have a notchor similar reduction in section which allowsthe tie to be broken back a set distance fromthe wall surface.Detailing for <strong>Plywood</strong>Formwork costs can be substantiallyreduced if certain basic details ofdimensioning are borne in mind by buildingplanners. Beams and columns preferablyshould have the same outside dimensionsfrom foundation to roof, allowing beam andcolumn forms to be re-used withoutalteration.A column should preferably be the samewidth as a beam framing into it. The columnform then becomes a rectangular or squarebox with no cutouts, and the slab forms donot require cutting at the column corners.It is highly desirable that columns, beams,stairwells and other items be sodimensioned that 4’x8’ panels of plywood canbe cut with a minimum of waste.InsulationSalvage ValueEasy to BendSmooth FaceSimplicity of RepairLess Storage SpaceT&G Edges AvailableEase of Fabrication<strong>Plywood</strong> helps protect concrete from rapid temperature changesand assists in retention of concrete heat in freezing weather.Even after many re-uses, plywood may be put to work in countlessother applications such as subflooring, ramps, protectivebarriers and temporary structures.<strong>Plywood</strong> can be bent dry to radii determined by thickness of plywood,direction of bend and the bending procedure itself.Soaking or steaming permits bending to shorter radii. (Table 5)Large, flat plywood panels provide a concrete surface of uniformsmoothness. Rubbing down and filling are kept to a minimum.Complex tools are not needed to patch and repair plywood.Uniform size of large, flat plywood panels makes them easy tostore - on or off the job.Tongue and groove plywood panels may be used to constructforms on the site, eliminating the need for blocking at paneledges and providing a smooth, joint free surface.<strong>Plywood</strong> is easily sawn, bored, routed, etc., with ordinary woodworkingtool and therefore lends itself to special requirements ofcustom form jobs.CertiWood CANPLY <strong>Plywood</strong> <strong>Handbook</strong> - <strong>USA</strong>20
Wall Forms: Panel SystemsIn forming of large areas, standard sizedprefabricated panels can be used for moststructures. As the ties pass through predrilledholes it is essential that the forms bealigned correctly on a level footing. Panelform systems can be divided into two broadclasses - unframed and framed.Unframed FormsUnframed forms are usually 3/4”(19 mm)plywood panels. The number of studs orwalers is limited. Forms are aligned bymeans of toe plate and top waler. Ties areinserted through holes cut in the panels. Aslip-through bar or rod passed through theends of ties holds panels together. Forms ofthis type are most commonly used for residentialand other foundations below grade,and for concrete walls above grade wherethe highest architectural finish is notrequired. They are easy and light to handle,requiring little framing lumber. Fabricationby the contractor is simple. Anotheradvantage is that both faces of plywood canbe used.Framed FormsThese forms consist of a plywood face from7/16”(11 mm )to 3/4”(19 mm) with wood ormetal frames.Framed forms assist in the production of thehighest quality wall obtainable and by thenature of their construction withstandrougher use than unframed forms. This formsystem lends itself to gang forming.Column FormsThere are several methods of formingsquare and rectangular columns. Wheneverpossible, the size of the column should beselected to permit the use of standard 4’x8’plywood panels.Slab Forms<strong>Plywood</strong> is easily adapted to accommodatea variety of support spacings and sectionchanges in slab forming. Concrete may bepoured on panels placed directly over supportingframework. In all cases, the formworkmust safely support the vertical andhorizontal loads placed upon it.Miscellaneous FormsA wide variety of decorative effects can beachieved by pouring concrete intoprepared moulds constructed of plywood.To achieve these special effects, plywoodcan be bent when dry into mild, simplecurves.Table 6 gives dry, cold-bend radii for mostcommon thicknesses of plywood.Note thatplywood can be bent more sharply whenthe bend is perpendicular to the direction ofthe face grain rather than across its width.To obtain sharper curves, the plywood mustbe soaked or steamed. Saw-kerfing theback of the panel to make it bend moreeasily is not recommended for structuralapplications such as concrete formwork.Precautions When Forming in Hot and ColdWeatherHot WeatherIn hot weather, concrete must be keptmoist during the curing period. <strong>Plywood</strong>forms will prevent almost all moistureleakage, but exposed surfaces should becovered with wetted tarpaulins or curingmembrane. It is also advisable to spraythe exterior surfaces of the forms withwater.Cold WeatherLower temperatures cause concrete toharden and gain strength more slowly,hence a longer curing time is required toreach specified strength. Below 30°F(-1 °C), common practice is to use heatedenclosures or insulating coverings, inaddition to heating the concrete itself.For winter concreting, formwork shouldprevent both heat and moisture loss.<strong>Plywood</strong> forms are particularly suitable inthis respect because of their good insulatingproperties. In some cases plywood formshave been found sufficient protection attemperatures between 25°F (-4 °C) and30°F (-1 °C) to avoid use of extra insulation,except at corners and exposed concretesurfaces where heat losses are higher. Atlower temperatures, insulated reusableplywood panels have been employedwith good results, especially withheated concrete.21Framed Forms18”30”30”18”12” 24” 24” 24” 12”8’A standard 2’x8’ light modular framed panelof 11/16” (17 mm)plywood and 2”x4” lumberPanel clampA bolt and wedge device ensures a tight fitbetween frame panels.CertiWood CANPLY <strong>Plywood</strong> <strong>Handbook</strong> - <strong>USA</strong>
Center section reinforcedDetail of clamp in placeSteel strappingLumber bracing is always necessarybecause strapping alone will not supportplywood forms.A typical 2x8 ft metal framedpanel. One of the advantagesof these patented panelsystems is that the framingprotects the plywood edges.The metal frames themselveshave a long life and theplywood can be easilyreplaced or reversed.Detail of panel clampSlab FormsPre-framed form panel<strong>Plywood</strong> panelJoistsColumn FormsExample of framing members supportingplywood forms for concrete slabs.Concrete may be poured on panelsplaced directly over joists.Preframed plywood panels may alsobe used.Miscellaneous FormsWaler and tie rodAs tie rod does not adequatelysupport the plywood; thismethod is limited to columnsup to 1 ft square.<strong>Plywood</strong>Double walers can be 2”x4”,2”x6”, 2”x8”or 4”x4”.Special steel column clampsare readily available forcolumn widths up to 6’.CertiWood CANPLY <strong>Plywood</strong> <strong>Handbook</strong> - <strong>USA</strong>1”x4” stakeConcrete222”x4”lumberGravelSmooth, curved concrete surfaces can bereadily obtained as plywood can be bentto a very small radius, particularlywhen wet.
PLYWOOD IN FARM STRUCTURESFarm BuildingsGood farm buildings are the result offore-sight, careful planning, and the correctuse of modern building materials. Changesin agriculture have resulted in a shift fromconventional frame construction for farmbuildings to clear span structures such asarched rafter, rigid frame, pole frame, andtrussed rafter buildings that are designed foreconomy in construction,efficiency inoperation, and adaptability to futurerequirements.Farm buildings sheathed with CANPLYEXTERIOR plywood meet theserequirements because they are easy to buildand can be closed in fast using readilyavailable materials.Stud Wall and Truss BuildingsStud wall construction combined withplywood gusseted trusses for the roofsystem is generally considered most suitablefor heated, insulated livestock buildingssuch as swine and poultry barns. Thebottom chords of trusses provide aframework on which to attach the plywoodceiling. This results in flat ceilings whichcontribute to good air circulation and ventilation.Stud walls are easy to insulate.Ventilation equipment can be installed in thewalls, and air intakes can be readilydesigned for walls or ceilings.The great selection of economicallydesignedtrusses now available addsflexibility to such buildings. Wood trussesare economical for all widths of farm buildingsup to 40 ft and have been used forspans to 65ft.Pole Frame Buildings<strong>Plywood</strong> sheathed pole frame buildingshave proven their worth as hay shelters,open-front shelters, loose housing for diarycattle, and machinery sheds. They are lowin cost, flexible in design, and easy to erect.Since the poles provide stability to thebuilding, no expensive foundations arenecessary and the plywood roof and wallsheathing nailed to the frame acts as a largediaphragm, adding strength and rigidity tothe entire structure.Arched Rafter BuildingsAn arched rafter building should beconsidered whenever an economicpost-free, high ceiling building with a span inexcess of 60 ft is required. Arches are availablefor several custom fabricators in a varietyof engineered designs. This type ofstructure derives its strength from the combinationof glue-laminated lumberarches and plywood sheathing. Generally,for spans under 40 ft, the cost of an archrafter building is slightly higher than that of arigid frame building of comparable size.Gambrel Roof Arch BuildingThe gambrel roof is a shape long associatedwith the traditional North American barn.This popular roof form constructed of fourlumber rafters connected by nailed plywoodgussets provides an aesthetically pleasingclear span building using a minimumnumber of lumber members. Thesebuildings are used for conventional twostoreybarn roofs as well as for single-storeystructures for storage of produce, grain ormachinery and in the wider spans arepopular for such uses as riding areas.<strong>Plywood</strong> sheathing nailed to the framesprovides the necessary strength andbracing to complete the building shell.Rigid Frame BuildingsA rigid frame building is one of the mosteconomical clear-span farm buildingsavailable. Essentially, rigid frames are threehingedarches formed by four straightpieces of lumber joined at crown andhaunches by nailed Douglas Fir plywoodgussets. Frames are usually spaced at 24”on center and sheathed withCANPLY EXTERIOR plywood whichbecomes an integral part of the structureand provides stability and resistance toracking. The substitution of other sheathingmaterials may endanger structuralsoundness. Rigid frame buildings areeconomical for spans up to 40ft.Farm Buildings PlansPlans for farm buildings are available from anumber of sources including retail lumberdealers, building material manufacturers,and contractors and consulting firmsspecializing in farm building and design.Some of the best and most comprehensiveplans were developed by Canada PlanService, a co-ordinated program of theFederal and Provincial Departments ofAgriculture across Canada. These plansmay be requested from agriculturalrepresentatives, Provincial Departments ofAgriculture, agricultural research stations orfrom Canada Plan Service.23PLYWOOD STRUCTURAL ASSEMBLIESStressed Skin PanelsAn alternative to roof construction usingtrusses and sheathing, stressed skin panelscreate an open, unobstructed loft that canbe used for living and storage space.Stressed skin panels are longitudinalframing members (webs) covered on one orboth sides with CANPLY EXTERIOR plywoodflanges (skins). The plywood is glued andnailed to the webs so that the assemblyfunctions as an efficient structural unit.The panels are fastened to the floor structureat the eaves and normally fastened togetherat the ridge. Adjacent panels are lapped soas to be self-supporting and provide asmooth roof surface. No internal bracing isrequired. Openings in the panels can beframed during fabrication to accommodateskylights or windows.Design data is available fromCertiWoodand also in the <strong>Canadian</strong>design code CSA O86 Engineering Designin Wood.Nailed <strong>Plywood</strong> BeamsNailed plywood beams can be built easilyand quickly from CANPLY EXTERIORplywood and seasoned lumber. No specialskills, tools, materials or manufacturing facilitiesare required. Beams can be fabricatedin workshops or at the job site.When assembled, nailed plywood beamsare light, strong, rigid and ready forimmediate use without the delays associatedwith lengthy glue-curing periods typical ofglued beams. Nailed plywood beams aresuitable for a variety of interior applicationssuch as ridge beams in cabins and cottages,lintels in garages and carports, andfloor and roof beams in residential and lightcommercial construction.Design criteria and load-span data areavailable from CertiWood and also in the<strong>Canadian</strong> design code CSA O86Engineering Design in Wood.FINISHINGSelection and Application of FinishesLong life and enduring beauty of almost anywood depends upon protecting the surfacewith a properly applied coating. <strong>Plywood</strong>requires the same basic protection againstthe elements.CertiWood CANPLY <strong>Plywood</strong> <strong>Handbook</strong> - <strong>USA</strong>
The waterproof glue used in themanufacture of CANPLY EXTERIORplywood will withstand exposure indefinitely,but to assure maximum life and beauty ofthe wood itself it is necessary to give closeattention to surface finishing techniques.Procedures for finishing plywood differ littlefrom those used to finish other woods and avariety of attractive finishes is possible forboth interior and exterior applications.There is seldom one “best” finish that canbe recommended for plywood. Factorssuch as the condition of the surface, themethod of the application, the conditions tobe encountered in service - probably themost important factor - the service expected,and the economics of initial cost versusappearance and durability must be considered.This section describes some of the finishesavailable for plywood and their methods ofapplication. It is extremely important thatcare be taken in selecting the most suitablefinish for the purpose intended and applyingit according to the manufacturer’sinstructions. There is no better assuranceof satisfaction than the correct finishproperly applied.Care and StorageThe importance of proper care and storageof plywood prior to finishing cannot beover-emphasized. <strong>Plywood</strong> which willbecome part of the decorative schemeshould be handled as carefully as trimmaterial, sidings or other quality finishproducts. Many early paint failures can betraced directly to improper handling andstorage. Moisture can enter the panel priorto finishing during storage in damp or humidareas, or because of delay in priming theplywood after installation, or because ofomission of the edge seal. (The latter twoare important only if the panels are to beexposed outdoors.) Thus all panels shouldbe stored in a cool, dry place out of thesunlight. They should be well covered if leftoutdoors during construction. The primecoat and edge seal for panels intended forexterior exposure should be applied assoon as possible.Water repellent coatings do not serve as asubstitute for the prime paint coat. They will,however, retard moisture pickup until theprime coat can be applied and, providingthey do not have a wax base, shouldprovide an improved surface for painting.CheckingUnprotected plywood exposed to theweather may look unsightly in a few months.This is not because the plywood itselfdeteriorates but because of the tendency ofthe surface veneer to check; a phenomenoncommon to all wood in which hundreds oftiny hairline cracks open up parallel to theface grain. These tiny cracks or checks arecaused by the wood fibres separating at thegrowth boundaries as the fibres swell orshrink as the result of rapid changes inmoisture content. Checking has noappreciable degrading effect on thestrength of plywood because plywood’sstrength lies predominately in the directionof the grain. However, checking seriouslymars the appearance of the plywood, andonce it has occurred is difficult to hide withpaint alone.There are various products available underproprietary brand names that are claimed tobe compounded especially to help plywoodresist checking and reduce grain raise.These products can be applied by brush orspray. Two coats are usually recommended.They penetrate and seal the wood andreportedly help stabilize the face veneeragainst dimensional changes dueto moisture.Where checking has occurred because ofimproper storage, the panel surface mustbe reconditioned before finishing to obtainthe best appearance and performance.This is also true of old paint surfaces thathave deteriorated to the point of needingrenewal.Medium Density Overlaid plywood(described on page 7) is not susceptible tochecking because of its resin-fibre overlay.Edge Treatments - Exterior and InteriorExposed and concealed edges of plywoodin exterior applications should be sealedwith paint as described following. Exposedpanel edges should also be covered withwood battens or moulding fastened withcorrosion-resistant nails.Concealed edges of plywood in interiorapplications need not be sealed. Forappearance, the end grain of exposedpanel edges can be hidden either with woodfiller applied to the edges and then sandedand painted or with an edge trim of woodmoulding, wood veneer, or proprietaryclamp-on edging.Joint TreatmentsThe tendency in recent years has been toaccentuate the joints between plywoodpanels rather than trying to hide them. Thissimplifies construction and can be quiteattractive. Most often these joints are madeby easing the edge of each panel with a 45degree bevel, about 1/8”(3 mm) deep.Joists are commonly accentuated innaturally finished panels and frequently inpainted panels. Butted joints covered withbattens or moulding are also used to furtheremphasize the panelizations.FasteningsOn exterior walls and in excessively damplocations, the type of fastener used tosecure the plywood to the framing has animportant bearing on the appearance anddurability of the finish. For long service andfreedom from rust staining, corrosionresistantfasteners should be used.EXTERIOR FINISHESEdge SealingAll plywood edges, exposed or concealed,should be sealed with one or more heavycoats of exterior primer or aluminum-basedpaint. This prevents moisture migration intothe edges. Edge sealing can readily bedone when the panels are in a stack. In verydamp locations, panel backs should beprimed with a coat of exterior primer.StainA stain finish is ideal for unsanded plywoodpanels exposed to the weather. A heavybodiedstain is particularly recommendedand will provide an attractive finish requiringlittle maintenance.Stains are available which haveconsiderable hiding power but do notobscure the plywood grain. Creosote basestains penetrate deep into the plywood,producing rich lively colours that enhancegrain beauty but leave little or no surface filmto crack and blister. Stains containing waterrepellents are thought to be useful indeferring checking.Stains are among the easiest of finishes toapply. The usual requirements for a cleandry surface apply. Successive coats shouldbe allowed to dry before the next coat isapplied. One or two coat systems shouldbe used depending upon the manufacturer’srecommendation and the pigmentationin the stain (penetrating stains usuallyrequire two coats). Since colour uniformitydepends upon equal pigment distribution,stains should be thoroughly mixed beforeapplication and from time to time duringapplication.Checking in stained plywood usually occursduring the first six months of outdoorexposure. With heavily pigmented darkstains, best results are obtained by applyinga first coat and allowing any checking tooccur, then six months or so later a secondcoat can be applied so that the checks arefilled with stain. When the stain weathers orfades so that refinishing is indicated, little orno surface preparation is needed.Pre-stained specialty plywood sidingproducts in a variety of colours are availablefrom some manufacturers.CertiWood CANPLY <strong>Plywood</strong> <strong>Handbook</strong> - <strong>USA</strong>24
Stain cannot be used successfully on overlaidplywood. Sanded panels may bestained if desired.PaintPaint is not recommended for application tothe standard grades of plywood used inexposed locations. Under severe exposureconditions, checking of the surface veneermay cause paint deterioration. When a paintfinish is desired, the use of Medium DensityOverlaid (MDO) plywood is recommended.This smooth, uniform surface provides anexcellent degree of adherence, allowingpaint resins to firmly grip the surface resultingin excellent durability, exceeding that of paintfinishes on ordinary wood. Paint flow is evenand smooth, penetrating the surfaceuniformly resulting in more attractive appearanceand more efficient paint use. Paintingrecommendations are as follows:Surface PreparationMedium Density Overlaid plywood needs nosurface preparation. No pre-sanding orsealer coats are required. However, it isimportant that the surface has been allowedto dry for at least 48 hours and is completelyclean before applying your first coatof paint.Prime CoatAny good primer, properly formulated anddesigned for exterior exposure, may be usedwith satisfactory results. The limitations maybe listed as follows:1. Strict adherence to the paintmanufacturer’s recommendations.2. Compatibility of the prime coat to the topcoat must be considered. In this respect theuse of flexible film-forming primers, such assome of the latex or oleoresinous baseformulations, are not recommended whenthey are to be top coated with a hardfilm-forming primer over coated with a softer,more flexible film-forming finish coat.Top or Finish CoatNearly all good quality paints formulated forexterior finish are acceptable as a top orfinish coat. As with the prime coat, the manufacturer’srecommendations must befollowed and the compatibility of the top coatto the primer must be considered. Checkbefore you paint!With the advent of the many new syntheticresins and their possible combinations , it isalmost impossible to evaluate all systemsand formulations relative to theirperformance on Medium Density Overlaidplywood. However, experience and testingto date permits the following more specificrecommendations:For exterior exposure such as in agricultural,residential, marine and sign applications, thebest results have been obtained with selfprimedlong or medium oil alkyd finishes andenamels, vinyl alkyd enamels and phenolicenamels applied over medium or long oilalkyd primers.Most latex paints of the styrene-butadiene,acrylic and polyvinyl acetate emulsion typehave exhibited satisfactory results whetherself primed or applied over alkyd primers.Systems not recommended are self primedblister resistant titanium paints, polyvinylacetate homopolymer latexes, lacquers, andpaints containing zinc oxide.If non-overlaid plywood has been used anda paint rather than a stain finish is desired,top quality exterior paint should be appliedas follows:Prime the panels carefully front and backwith oil-base undercoat or aluminum-basepaint. If aluminum-base paint is used as aprimer ensure that it is of the type specifiedfor wood and not for general purposes ormetals. Ensure that the undercoat and subsequentcoats seal the edge grain. A threecoat finish with an intermediate coat ofundercoat (but not aluminum-base paint)mixed half and half with finish colour will lookbest. For the final coat apply the paintun-thinned.Low lustre and porous type paint systemswhich permit the capillary flow of moisturethrough the paint film should not be usedbecause the frequent wetting and drying ofthe plywood surface will lead to abnormallyearly checking and paint failure.Refinishing Painted and Checked <strong>Plywood</strong>A good repaint system for refinishingchecked plywood is an exterior acrylic latexpaint formulated for wood and applied in twocoats over a compatible oil-base primer.Although some of the open checks may stillbe visible, this flat finish tends to mask thechecks and presents a satisfactoryappearance. Checks may reappearbecause of moisture changes, but the paintsystem will maintain its bond withoutshowing the typical curling and flaking of anoil paint. The procedure is as follows:1. Thoroughly wire brush the old paint surfaceand sand if necessary to provide asmooth surface for repainting. (If paint deteriorationis well advanced, it may be advisableto remove all the flaking paint down tothe bare wood.) Old paint can also beremoved by liquid paint removers, scrapingor special paint removing tools.2. Wipe off dust and excess chalk.3. Apply a brush coat of oil-base primer.4. When dry, apply two coats of acrylic latexpaint.25For better appearance and performance, theopen checks may be filled with any suitablesynthetic patching compound (a number ofwhich are available under specific brandnames) and the surface repainted with latexpaint as described above. The plywoodshould be thoroughly dry to ensure thatexisting checks are fully open to the filler. Ifcarefully applied, the compound will fill theopen checks and, after sanding, provide asmooth, void free surface for repainting.<strong>Plywood</strong> refinished by this method andexposed to severe weather conditions willeventually show some surface roughness asthe filler is forced out of the checks by therepeated working of the fibres of the faceveneer, and paint failure may eventuallyoccur as a result of this movement.Clear FinishesClear finishes for exterior exposure havebeen found to be generally unsatisfactoryand are not recommenced for use onplywood. Clear coatings quickly failbecause of the lack of protective pigmentsand thus require constant andcostly maintenance.Textured CoatingsProprietary surface coatings containingfibrous or granular materials in a liquidvehicle are available for use over plywoodand have proven more satisfactory forexterior use than conventional paints. It isclaimed that certain types of texturedcoatings are highly resistant to alkali andacid conditions and are not susceptible tothe atmospheric conditions found in industrialand coastal areas. Service life of 10 to 20years is claimed for some types. Coatingsof this nature which conceal and protect theplywood appear to be one of the bestmethods of finishing plywood for exteriorexposure and their use is recommended.OverlaysThere are many overlays and coatingssuitable for exterior use with plywood. Mostcommon are fibreglass and variousproprietary brands of synthetic membranes.INTERIOR FINISHESSurface Preparation<strong>Plywood</strong> for interior applications will usuallybe one of the sanded or textured grades andwill require little surface preparation otherthan to ensure that the surface isthoroughly clean and that all blemishes havebeen filled with wood filler and sandedsmooth. Whenever practical, fill the plywoodedge grain before painting. Always use finesandpaper and sand with the grain, neveracross it. Do not paint over dust or spots oilor glue.CertiWood CANPLY <strong>Plywood</strong> <strong>Handbook</strong> - <strong>USA</strong>
When painting plywood, all knots and pitchstreaks should be spot-primed with sealer.For best results use good quality paints andfollow the paint manufacturer’s instructions.Paint and EnamelConventional wall and woodwork paints andenamels may be used. For surfaces whichwill be cleaned frequently, use washablepaints or enamels. First, brush on flat paintor enamel undercoat. Thin if desired.Second, apply a second coat of undercoattinted to shade of finish coat. For gloss finishmix equal parts flat undercoat and glossenamel for second coat. Third, apply finalcoat as it comes from can. A two-step finishwithout second undercoat may be used asan alternative.Interesting textured surfaces may beobtained by priming as above, followed by aheavy coat of stippling paint. Use brush,roller or sponge to texture. When usingwater-thinned paint, first seal plywood withclear resin sealer, shellac or flat white oilpaint, then paint according to manufacturers’instructions for a sealed surface.Natural FinishesFor an easy, inexpensive blonde finish, firstapply interior white undercoat thinned sograin pattern shows through. Tint if colour isdesired. Second, apply clear shellac, flatvarnish or lacquer.Attractive and economical one-coat stainwaxes are also available in various colours.If a dark stain is preferred, first apply coat ofclear resin sealer to subdue grain contrast.A luxurious light stain glaze can be obtainedas follows: First apply white undercoatthinned with an equal part of paint thinner.Wipe or dry brush for more grain showthrough. Second, apply one coat thinnedwhite shellac or clear resin sealer. Third, toprovide colour, apply interior undercoat orenamel thinned as in step one. Wipe or drybrush to proper colour tone. Fourth, applyone coat of flat varnish. Rub down with steelwool for added lustre.PRESERVATIVE TREATMENTSFor most construction uses plywoodrequires no preservative protection otherthan conventional finishes. However, whenplywood is to be exposed to adverseconditions such as wood-decaying fungi,marine borers or wood-destroying insects, itshould be treated with suitable wood preservative.The chemical treatment creates abarrier which preserves the wood fromdeterioration and protects it against insectattack. Each veneer of the panel must bepenetrated by the chemical if the protectionis to maintain its integrity.CertiWood CANPLY <strong>Plywood</strong> <strong>Handbook</strong> - <strong>USA</strong>Preservatives applied by dip, brush or spray,although useful in some circumstances, areeffective only over the short-term becausethe treatment is superficial. The optimumpenetration and retention of the preservativecan be achieved only by pressure impregnation.Since the service life of plywood exposed todecay can be increased by preservativetreatment, the annual cost of treatedplywood under these conditions could besubstantially below that of untreated plywood.Preservative Penetration and Retention<strong>Plywood</strong> can be penetrated by preservativesmore readily than solid wood of the samespecies. Rotary-cut veneer develops manysmall fissures which flatten out in the press.These minute cracks are hard to detect withthe naked eye but are readily penetrated bypreservative under pressure.<strong>Plywood</strong> contains some end grain on all fouredges and end grain can be penetratedmuch more easily than edge grain. This,plus the lower moisture content of theplywood, helps make the treatment uniformthroughout the thickness of the panel. Suchpenetration means that plywood can be cutafter treatment without any loss ofpreservative protection at the cut edgealthough application of a field cutpreservative (available from treating companies)for critical end uses is recommended.Various pressure treatments (differing mildly)are available, but the general principle offorcing a preservative solution into theplywood under controlled vacuum, pressureand temperature is common to all.Preservative retention is generally specifiedin terms of the weight of preservative percubic foot of wood treated. As plywood isan absorptive product, it achieves requiredretention standards more easily than sawnlumber. Like lumber, the ability to accepttreatment varies with species. Forpermanent wood foundations wheretreatment specifications are extremely strict,wood foundation standards limit speciespermitted for this end use. Only easilytreatable species are recommended.Retention by plywood of creosote andpetroleum mixtures varies from 16 to25 lb/ft 3 (256 to 400 kg/m 3 ). Retention ofwater-borne preservatives varies from 0.25to 0.62 lb/ft 3 (4 to 10 kg/m 3 ) after drying. Fireretardant treatments require a retention of3 to 5 lb/ft 3 (48-80 kg/m 3 ). The amount ofpreservative retained in a water-bornetreatment as compared with an oil treatmentis less because the solvent is removed bydrying in the former, whereas both preservativeand solvent remain in the wood in the latter.It should be noted that oil-basedpreservatives will leach out over time thusaffecting the appearance of the plywood.26EXEMPT FROM PHYTOSANITARY REGULATIONSCANPLY EXTERIOR plywood undergoesextreme temperatures and pressures duringthe manufacturing process, which ensuresCANPLY plywood is free of living organismswhen the manufacturing process is complete.CANPLY EXTERIOR plywood hasbeen acceptedinternationally under all known phytosanitaryregulations for the past 30 years. AgricultureCanada’s Food Production and InspectionBranch recognizes <strong>Canadian</strong> Softwood<strong>Plywood</strong> as a“processed product”, and thereforedeems phytosanitary certificaton unnecessary.FIRE-RETARDANT TREATMENTS & COATINGSUnder certain conditions wood membersare required by building and fire codes tomeet minimum standards of fire resistanceor flame spread. <strong>Plywood</strong> has a nominalFlame Spread Rating of 150 and a SmokeDeveloped Rating of 100, and falls into aClass III (or C) interior finish classification.Where Class I (or A) or Class II (or B)classificationsare stipulated, the plywood must betreated to reduce flame spread over thesurface of the panel. There are a number oftreatments that have proved successful inthis regard, the two most common beingpressure impregnation with water-bornesalts and surface coating with fire-retardant paints.Pressure Impregnation<strong>Plywood</strong> impregnated with a fire-retardantchemical is usually a proprietary brandname product available only from pressuretreated companies. This type of treatedplywood is effective as a fire-retardant finishbut it is generally restricted to interiorexposure because of the possibility that theprotective salts will leach out of the plywoodif exposed to the weather.Some treatments may reduce panelstrength. Strength modification factors mustbe determined by testing.Surface CoatingsFire-retardant surface coatings that reducethe combustibility of plywood can be appliedby brush or spray wherever conventionalpainting is possible. The reaction of thesecoatings under the influence of flame andthe actual mechanism of protection variesaccording to the composition of the coating.Some of the basic mechanisms ofprotection are as follows:InsulationIn which thick coatings insulate the plywoodagainst high temperatures.Crust FormationIn which coating melts under heat, coveringthe plywood with an impermeable insulatingcrust that prevent therelease of combustiblegas from the plywood and at the same timedeprives the plywood of oxygen.Heat AbsorptionIn which the coating absorbs the heat andmaintains the temperature of the protectedsurface below its ignition point.
Table 16. Recommended Applications of Preservative Treated CANPLY EXTERIOR <strong>Plywood</strong>ExposurePreservative Treatment*Typical ApplicationsContact with sea water, exposed tomarine borer attack.Subject to severe insect and fungusattackCreosoteChromated copper arsenateAmmoniacal copper arsenateCreosoteChromated copper arsenateAmmoniacal copper arsenateBox pontoons, wharf bulkheads, scows,floats, flood gates.Structures in tropical or semi-tropical areaswhich use plywood in the form of subflooring,roof and wall sheathing, interior and exteriorpaneling and in structural componentssuch as beams and stressed skin panel.Fences, permanent trench and tunnel lining,septic tanks, retaining walls and signs.Contact with ground, fresh water,chemicals, high humidities.Contact with chemicals and highhumidities or subject to insect orfungus attack but not in contactwith wet ground or water.Contact with ground (wet or dry)and subject to attack by insectsand decay organisms. Extralong-term performance requiredCreosoteChromated copper arsenateAmmoniacal copper arsenateCreosoteAcid copper chromateFCAPChromated zinc chlorideChromated copper arsenateAmmoniacal copper arsenateChromated copper arsenateAmmoniacal copper arsenatePermanent trench and tunnel lining, retainingwalls, cribbing, snow sheds, floats, irrigationstructures, tanks, troughs, plant boxes, liningwet process industries, dropping trays(poultry), septic tanks, some chemical storagetanks, industrial sewers, smelter roofs.Lining in buildings with humid conditionsdropping trays (poultry), exterior use wherepoor ventilation is conducive to decay, signs,marine installations and boat structures notimmersed in water, and outdoor usessubject to repeated wetting and drying.Permanent wood foundation systems.*For detailed specifications for the preservatives listed, contact the AWPA.Intumescent InsulationIn which the coating swells when heated to forma thick insulation layer that delays the spread offlame and heat transmission to the protectedsurface. Intumescent coatings are of the greatestcommercial importance.EFFECTS OF PRESERVATIVES AND FIRERETARDANTS ON THE STRENGTH OFPLYWOODAcid salts have a hydrolytic effect on wood ifthey are present in large concentrations.However, concentrations used in preservativetreatments of wood are sufficiently small thatthe strength properties are not greatly affectedunder normal use conditions. For plywoodpressure impregnated with preservativechemicals in accordance with AmericanWood Preservers’ <strong>Association</strong> (AWPA), noreduction in capacities applies. For plywoodtreated with other potentially strengthreducing chemicals, consult the chemicaltreatment supplier or treater for any strengthreducing factors. Tests show that plywoodtreated with coaltar creosote andpreservative oils developed no reduction inbond strength of the plywood. Similar testsand experience have shown no adverseeffect on the durability of the bond strengthwhen CANPLY EXTERIOR waterproofglue plywood is pressure treated withwater-borne salts preservatives.Visit the CANPLY Website to find the latest info on<strong>Canadian</strong> <strong>Plywood</strong>:• Member Mill Contact Information• Downloadable Literature• Online seminars• Detailed species guide• Fun, easy do-it-yourself PlyPlans27CertiWood CANPLY <strong>Plywood</strong> <strong>Handbook</strong> - <strong>USA</strong>
Why <strong>Plywood</strong>?Simply because it outperforms all substitute wood-based panels on the market today.<strong>Plywood</strong> is a highly stable panel. When exposed to moisture or high humidity,plywood is up to seven times more resistant to thickness swell thansubstitute wood-based panels. <strong>Plywood</strong> also returns to its originaldimensions when it dries.<strong>Plywood</strong> is stronger than substitute wood-based panels in the four importantengineering strength properties of bending, tension, compression and planarshear and plywood weighs up to 40% less than substitute wood-based panelsof equivalent thickness.<strong>Plywood</strong> is a highly impact-resistant panel and continues to perform evenwhen wet.<strong>Plywood</strong> has over 50 years of proven service as a structural panel for homesand construction and remains, according to surveys, the panel of choice byhome buyers, contractors, architects and engineers.<strong>Plywood</strong> is manufactured from logs averaging 10 inches in diameter frommanaged sustainable forests. 100% of the log is utilized for either veneer, orby-products, such as 2x4 lumber, landscaping ties or chips for pulp and paper.Nothing is wasted.<strong>Plywood</strong> manufacturing, because it is a value added process, employs fourtimes as many people compared to the manufacture of substitute wood-basedpanels - using the same volume of logs.#100 - 375 Lynn AvenueNorth Vancouver, BCV7J 2C4Tel: (604) 981-4190Fax: (604) 981-4196Toll Free: 1-866-981-4177email: info@certiwood.comVisit our Websites:CANPLY: www.canply.orgCertiWood TM : www.certiwood.comThe information contained herein is provided for general reference and not as a representation or statement of any standards or specifications referredto. CertiWood does not warrant the accuracy of any information contained herein. Readers are advised to consult official sources for accurate andtimely information applicable to specific circumstances. CertiWood, its directors, officers, employees, contractors, servants and agents shall not beresponsible or liable for any claim, cause of action, loss, damage, expense, business interruption, injury or death due to any cause whatsoever or howsoeverrelated to the information contained herein, including negligence, misrepresentation, or breach of any statutory or other duty of care on the partof CertiWood, its directors, officers, employees, contractors, servants or agents.© Copyright 2009Printed in Canada04/09 1K