Page 1 This device complies with Part 15 of the FCC Rules ...
Page 1 This device complies with Part 15 of the FCC Rules ...
Page 1 This device complies with Part 15 of the FCC Rules ...

Create successful ePaper yourself
Turn your PDF publications into a flip-book with our unique Google optimized e-Paper software.
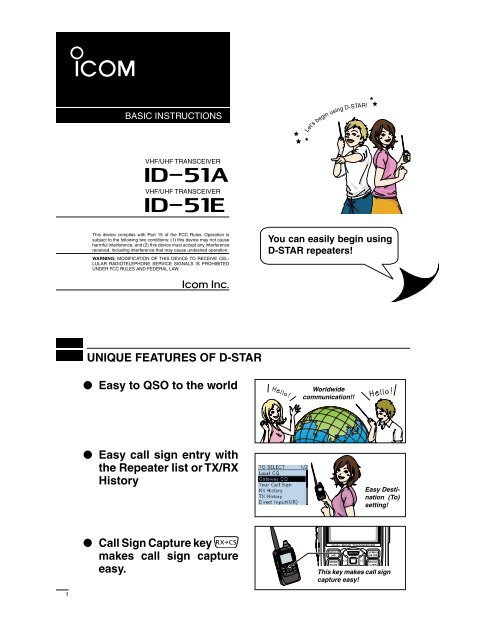
New2001BASIC INSTRUCTIONSLet’s begin using D-STAR!VHF/UHF TRANSCEIVERVHF/UHF TRANSCEIVER<strong>This</strong> <strong>device</strong> <strong>complies</strong> <strong>with</strong> <strong>Part</strong> <strong>15</strong> <strong>of</strong> <strong>the</strong> <strong>FCC</strong> <strong>Rules</strong>. Operation issubject to <strong>the</strong> following two conditions: (1) this <strong>device</strong> may not causeharmful interference, and (2) this <strong>device</strong> must accept any interferencereceived, including interference that may cause undesired operation.WARNING: MODIFICATION OF THIS DEVICE TO RECEIVE CEL-LULAR RADIOTELEPHONE SERVICE SIGNALS IS PROHIBITEDUNDER <strong>FCC</strong> RULES AND FEDERAL LAW.You can easily begin usingD-STAR repeaters!New2001New2001UNIQUE FEATURES OF D-STAREasy to QSO to <strong>the</strong> worldWorldwidecommunication!!Easy call sign entry <strong>with</strong><strong>the</strong> Repeater list or TX/RXHistoryEasy Destination(To)setting!Call Sign Capture keymakes call sign captureeasy.<strong>This</strong> key makes call signcapture easy!1
New2001PREPARATIONIMPORTANT!Before starting D-STAR, entering and registering your call sign (MY) are needed, as described below.STEP 1 Entering your call sign (MY) into <strong>the</strong> transceiver.gateway repeater. You have completed <strong>the</strong> steps!!STEP 1 Enter your call sign into <strong>the</strong> transceiverExample: Enter “JA3YUA” as your own call sign into <strong>the</strong> MYcall sign memory [MY1].q Hold down [ ] for 1 second toturn ON <strong>the</strong> power. ] for 1 second toturn OFF power. power source voltage are displayed,<strong>the</strong> operating frequencyappears.STEP 2 Registering your call sign (MY) to aw Push [MENU] . MENU screen is displayed.e Push D-pad( !) to select <strong>the</strong>root item (“My Station”), and<strong>the</strong>n push D-pad(Ent).D-pad(Ent)()MENU screenPREPARATION[ ]r Push D-pad( !) to select “MyCall Sign,” and <strong>the</strong>n push D-pad(Ent). displayed.Go to step tContinued on <strong>the</strong> next page<strong>This</strong> is page 2.New2001New2001PREPARATIONt Push D-pad( !) to select MYcall sign memory channel “1”([MY1]).D-pad(Ent)()i Push D-pad(#) to move <strong>the</strong>cursor to <strong>the</strong> second digit.NOTE: Your call sign mustmatch <strong>the</strong> call sign registeredto your gateway repeater. (p. 4)3y Push [QUICK] , and <strong>the</strong>npush D-pad(!) to select“Edit.” Then, push D-pad(Ent)to enter <strong>the</strong> call sign editmode. u Rotate [DIAL] to select <strong>the</strong>first digit. (Example: J) selectable. "). . Move cursor, <strong>the</strong>n rotate[DIAL]. to enter a space.Keys used for inputSelects/exits <strong>the</strong>MENU screenMoves <strong>the</strong>cursorGo to step o[DIAL]SelectsDeletesEdit modeShows <strong>the</strong>QUICK MENUo Repeat steps u and i toenter your own call sign <strong>of</strong>up to 8 characters, includingspaces.( For example: First J, <strong>the</strong>n A,<strong>the</strong>n 3, <strong>the</strong>n Y, <strong>the</strong>n U, <strong>the</strong>n A)!0 Push D-pad(Ent) to set <strong>the</strong>call sign. note.!1 Push D-pad(Ent) again tosave and return to <strong>the</strong> MYCALL SIGN screen. !2 Push [MENU] to exit <strong>the</strong>MENU screen.CompletedBeeps
New2001PREPARATION Convenient!If necessary, enter a note <strong>of</strong> up to 4 characters, such as <strong>the</strong>model <strong>of</strong> <strong>the</strong> transceiver, name, area name, and so on, afteryour call sign.q Push D-pad(#) until <strong>the</strong> cursormoves to <strong>the</strong> right <strong>of</strong> <strong>the</strong> “/”.w Repeat steps u and i to <strong>the</strong> left toenter a desired 4 character note.(Example: ID51)In <strong>the</strong> next step, register yourcall sign to a gateway repeater.Now, you can begin using D-STAR!RXTXNew usersstart here!Access <strong>the</strong> repeater p. 17How to use <strong>the</strong> RX History p. 21Capturing a call sign p. 25 Calling a destination station p. 31 Troubleshooting p. 35STEP 2 Register your call sign to a gateway repeaterTo use a repeater gateway, you must register your call sign<strong>with</strong> a gateway repeater, usually one near your home location.I can begin usingD-STAR!!If needed, ask <strong>the</strong> gateway repeater administrator forcall sign registration instructions.Completed!!4New2001New2001TABLE OF CONTENTSD-STAR OperationStartConfirm you canaccess your localrepeater?YES Go to page 17NOReply to a call?YESNOHow to easily reply using <strong>the</strong> callingstation’s call sign?Call Sign Capture key Go to page 25RX History Go to page 21Answer <strong>the</strong> questions,and figure out youroperating steps!Use a repeater?YESNO Go to page 33Making a call in your local area?(Local area call)YES Go to page 27NOMaking a call to ano<strong>the</strong>r area?(Gateway call)To a specific stationTo anyone Go to page 295NOTE: <strong>This</strong> chart may not apply to your specific environment.
New2001TABLE OF CONTENTSD-STAR OperationO<strong>the</strong>r functionsSaving settingsGo to page 37Recording a QSOconversationGo to page 39TroubleshootingGo to page 35Checking yourposition usingGPSThe destination call sign is alreadyprogrammed?YES Go to page 31NO Go to section 9 <strong>of</strong> <strong>the</strong> CD AdvancedInstruction PDF for callsign programming. Then, Go topage 31 <strong>of</strong> this manual. If you have received a callfrom <strong>the</strong> station before, <strong>the</strong>call sign may be in RX History.(p. 21)Learn about<strong>the</strong> new builtin functionsGo to page 47Go to page 43Checking yourroute using <strong>the</strong>GPS loggerfunctionGo to page 456New2001TABLE OF CONTENTSUNIQUE FEATURES OF D-STAR ..................... 1PREPARATION ............................................ 2–16Enter your call sign into <strong>the</strong> transceiver ................................2Register your call sign to a gateway repeater .......................4TABLE OF CONTENTS ........................................................5FOREWORD ........................................................................FEATURES ...........................................................................EXPLICIT DEFINITIONS ....................................................10IMPORTANT .......................................................................10SUPPLIED ACCESSORIES ...............................................10ABOUT THE SUPPLIED CD ..............................................11D Starting <strong>the</strong> CD ......................................................11PRECAUTIONS ..................................................................12BATTERY CAUTIONS ........................................................14D Battery caution.......................................................14D Charging caution....................................................<strong>15</strong>D Charging time.........................................................<strong>15</strong>IMPORTANT NOTES ..........................................................16D When using <strong>the</strong> GPS receiver................................16D Spurious signals.....................................................16D About charging at power ON..................................161 ACCESS THE REPEATER .................... 17–20STEP1 Select <strong>the</strong> DR mode .........................................17STEP2 Select your Access repeater (“FROM”) ............17STEP3 Select <strong>the</strong> Destination repeater (“TO”) .............1STEP4 ...202 HOW TO USE THE RX HISTORY .......... 21–24STEP1 View <strong>the</strong> received call sign ...............................21STEP2 Save <strong>the</strong> destination call sign intoyour call sign memory from <strong>the</strong> RX History ......223 CAPTURING A CALL SIGN .................. 25–26STEP1 Set <strong>the</strong> received call sign to <strong>the</strong> destination .....26STEP2 Hold down [PTT] to transmit .............................264 MAKING A LOCAL AREA CALL .......... 27–28STEP1 Set “FROM” (Access repeater) .........................27STEP2 Set “TO” (Destination) .......................................28STEP3 Hold down [PTT] to transmit .............................285 MAKING A GATEWAY CALL ................ 29–30STEP1 Set “FROM” (Access repeater) .........................2STEP2 Set “TO” (Destination) .......................................30STEP3 Hold down [PTT] to transmit .............................307
TABLE OF CONTENTS6 CALLING A DESTINATION STATION .. 31–32STEP1 Set “FROM” (Access repeater) .........................31STEP2 Set “TO” (Destination) .......................................32STEP3 Hold down [PTT] to transmit .............................327 MAKING A SIMPLEX CALL ................. 33–34STEP1 Set “FROM” (Simplex channel) .........................33STEP2 Hold down [PTT] to transmit .............................348 TROUBLESHOOTING ........................... 35–369 SAVING SETTINGS .............................. 37–38STEP1 Saving settings into memory ............................37STEP2 View <strong>the</strong> saved contents ...................................3810 RECORDING A QSO ONTO AMICROSD CARD ................................... 39–42 About using a microSD card .....................................3STEP1 Inserting <strong>the</strong> microSD card ...............................3STEP2 Format <strong>the</strong> microSD card .................................40STEP3 Recording a QSO audio ...................................41STEP4 ......................4211 GPS OPERATION ................................. 43–44STEP1 Receiving GPS data from <strong>the</strong> internalGPS receiver ....................................................43STEP2 Displaying your position ....................................4412 GPS LOGGER FUNCTION ................... 45–46STEP1 Receiving GPS data from <strong>the</strong> internalGPS receiver ....................................................45STEP2 Turning ON <strong>the</strong> GPS Logger function ...............4613 INTRODUCING NEW FUNCTIONS ...... 47–48Voice Recorder function ................................................47Two bands monitoring plus BC Radio ...........................47Auto Position Reply function .........................................48Voice TX function ..........................................................48Speech function ............................................................48 ...............................................4814 RESETTING .......................................... 49–50 Resetting...................................................................4<strong>15</strong> INFORMATION ............................................ 51COUNTRY CODE LIST ................................................51<strong>FCC</strong> INFORMATION .....................................................51INDEX ......................................................... 52–548New2001New2001FOREWORD or ID-51E VHF/UHF TRANSCEIVER is designed and build <strong>with</strong>Icom’s superior technology and craftsmanship combining traditionalanalog technologies <strong>with</strong> <strong>the</strong> new digital technology,Digital Smart Technologies for Amateur Radio (D-STAR), for With proper care, this product should provide you <strong>with</strong> years<strong>of</strong> trouble-free operation. choice, and hope you agree <strong>with</strong> Icom’s philosophy <strong>of</strong> “technologyfirst.” Many hours or research and development wentinto <strong>the</strong> design <strong>of</strong> your ID-51A or ID-51E. Incorporated (Japan) in Japan, <strong>the</strong> United States, <strong>the</strong> United Kingdom,Germany, France, Spain, Russia and/or o<strong>the</strong>r countries. - o<strong>the</strong>r countries. Micros<strong>of</strong>t Corporation in <strong>the</strong> United States and/or o<strong>the</strong>r countries.FEATURES Dual independent receivers in one radio;receives two bands simultaneouslyTwo band monitoring plus <strong>the</strong> Broadcast(BC) Radio watch or Triple-watch cannot be made. Rapid charging is possible, and <strong>the</strong> chargingtime period is approximately 3 hours<strong>with</strong> <strong>the</strong> supplied battery pack. (Half periods<strong>of</strong> <strong>the</strong> ID-31A/E) Built-in GPS receiver allows you to checkyour current position, or automatically senda reply <strong>with</strong> your position to <strong>the</strong> calledID-51A/E Voice recorder records your QSO conversation,voice audio for TX and microphonevoice audio microSD card slot that can accept differentcards to backup settings, various memories,<strong>the</strong> GPS log and so on
New2001EXPLICIT DEFINITIONSSUPPLIED ACCESSORIESWORDR DANGER!R WARNING!CAUTIONNOTEDEFINITIONPersonal death, serious injury or an explosionmay occur.Personal injury, fire hazard or electric Equipment damage may occur. The following accessories are supplied <strong>with</strong> <strong>the</strong> transceiver.q Antenna .......................................................................... 1w Hand strap ..................................................................... 1e Battery charger (BC-167SA/SD/SV)* ............................. 1r Belt clip .......................................................................... 1t .................................................... 1y CD (Including <strong>the</strong> CS-51 CLONING SOFTWARE) ................. 1* Not supplied, or <strong>the</strong> shape is different, depending on <strong>the</strong>transceiver version.IMPORTANTqweREAD ALL INSTRUCTIONS carefully and completelybefore using <strong>the</strong> transceiver.SAVE THIS INSTRUCTION MANUAL— <strong>This</strong> instructionmanual contains basic operating instructions for <strong>the</strong>ID-51A/ID-51E.rty10New2001New2001ABOUT THE SUPPLIED CDThe following instructions and installers are included on <strong>the</strong>CD. Instructions for <strong>the</strong> basic operations, <strong>the</strong> same as this manual Instructions for <strong>the</strong> advanced operations and more detailsare described than in this manual A glossary <strong>of</strong> HAM radio terms Instructions for <strong>the</strong> CS-51 cloning s<strong>of</strong>tware installation anduse Installer for <strong>the</strong> CS-51 cloning s<strong>of</strong>tware ® Reader ® InstallerInstaller for Adobe ® Reader ®D Starting <strong>the</strong> CDq Insert <strong>the</strong> CD into <strong>the</strong> CD drive. below is automatically displayed.w Opens <strong>the</strong>BasicInstructions(this manual)Installs <strong>the</strong>CS-51Opens <strong>the</strong>AdvancedInstructionsOpens <strong>the</strong>CS-51InstructionsGlossary11A PC <strong>with</strong> <strong>the</strong> following Operating System is required. ® Windows ® 8, Micros<strong>of</strong>t ® Windows ® 7 , Micros<strong>of</strong>t ®Windows Vista ® or Micros<strong>of</strong>t ® Windows ® XPInstalls <strong>the</strong> Adobe ® Reader ® Opens <strong>the</strong>Quits <strong>the</strong> menu screenTo read <strong>the</strong> guide or instructions, Adobe ® Reader ® is required.If you have not installed it, please install <strong>the</strong> Adobe ® Reader ®on <strong>the</strong> CD or downloaded it from Adobe Systems Incorporated’swebsite.
New2001PRECAUTIONSR DANGER! NEVER short <strong>the</strong> terminals <strong>of</strong> <strong>the</strong> bat- R DANGER! Use and charge only specified Icom battery charged <strong>with</strong> Icom chargers. Using third-party or counterfeit <strong>the</strong> battery to burst.R WARNING RF EXPOSURE! <strong>This</strong> <strong>device</strong> emitsRadio Frequency (RF) energy. Caution should be observedwhen operating this <strong>device</strong>. If you have any questions regardingRF exposure and safety standards, please refer to <strong>the</strong>Federal Communications Commission Office <strong>of</strong> Engineeringand Technology’s report on Evaluating Compliance <strong>with</strong> <strong>FCC</strong>Guidelines for Human Radio Frequency ElectromagneticFields (OET Bulletin 65).R WARNING! NEVER hold <strong>the</strong> transceiver so that<strong>the</strong> antenna is very close to, or touching exposed parts <strong>of</strong><strong>the</strong> body, especially <strong>the</strong> face or eyes, while transmitting. Thetransceiver will perform best if <strong>the</strong> microphone is 5 to 10 cm(2 to 4 inches) away from <strong>the</strong> lips and <strong>the</strong> transceiver is vertical.R WARNING! NEVER operate or touch <strong>the</strong> trans- may damage <strong>the</strong> transceiver.R WARNING! NEVER operate <strong>the</strong> transceiver <strong>with</strong>an earphone, headphones or o<strong>the</strong>r audio accessories at highvolume levels. Hearing experts advise against continuoushigh volume operation. If you experience a ringing in yourears, reduce <strong>the</strong> volume level or discontinue use.R WARNING! NEVER operate <strong>the</strong> transceiver whiledriving a vehicle. Safe driving requires your full attention—anything less may result in an accident.R WARNING! NEVER connect <strong>the</strong> transceiver to apower source <strong>of</strong> more than 16 V DC or use reverse polarity.<strong>This</strong> could cause a fire or damage <strong>the</strong> transceiver.CAUTION: MAKE SURE <strong>the</strong> flexible antenna and Exposing <strong>the</strong> inside <strong>of</strong> <strong>the</strong> transceiver to water will result inserious damage to <strong>the</strong> transceiver.After exposure to water, clean <strong>the</strong> battery contacts thoroughly<strong>with</strong> fresh water and dry <strong>the</strong>m completely to remove any wateror salt residue.1234567891011121314<strong>15</strong>1617181912New2001New2001PRECAUTIONSCAUTION: DO NOT use harsh solvents such as benzineor alcohol to clean <strong>the</strong> transceiver, because <strong>the</strong>y candamage <strong>the</strong> transceiver’s surfaces.DO NOT push <strong>the</strong> PTT unless you actually intend to transmit.DO NOT operate <strong>the</strong> transceiver near unshielded electricalblasting caps or in an explosive atmosphere.DO NOT use or place <strong>the</strong> transceiver in direct sunlightor in areas <strong>with</strong> temperatures below –20°C (–4˚F) or above+60°C (+140˚F).Place <strong>the</strong> unit in a secure place to avoid inadvertent use bychildren.The BP-273 meets IPX4 requirements for splash resistance.When it is connected, <strong>the</strong> transceiver corresponds to IPX4.Even when <strong>the</strong> transceiver power is OFF, a slight current still <strong>the</strong> transceiver when not using it for a long time. O<strong>the</strong>rwise, and will need to be recharged or replaced.BE CAREFUL! The transceiver will become hot whenoperating it continuously for long periods <strong>of</strong> time.BE CAREFUL! The transceiver meets IPX7* requirementsfor waterpro<strong>of</strong> protection. However, once <strong>the</strong> transceiverhas been dropped, waterpro<strong>of</strong> protection cannot beguaranteed because <strong>of</strong> possible damage to <strong>the</strong> transceiver'scase or waterpro<strong>of</strong> seal.* Only when <strong>the</strong> BP-271 or BP-272 (option), flexible antenna,[MIC/SP] cap, [DATA/DC IN] cap and [micro SD] slot capare attached.13
New2001BATTERY CAUTIONSR DANGER! NEVER short <strong>the</strong> terminals (or charging termi- - Simply carrying <strong>with</strong> or placing near metal objects such as a R DANGER! Use and charge only specified Icom battery charged <strong>with</strong> Icom chargers. Using third-party or counterfeit burst.D Battery cautionR DANGER! DO NOT hammer or o<strong>the</strong>rwise impact <strong>the</strong> battery.Do not use <strong>the</strong> battery if it has been severely impacted ordropped, or if <strong>the</strong> battery has been subjected to heavy pressure.Battery damage may not be visible on <strong>the</strong> outside <strong>of</strong> <strong>the</strong> or any o<strong>the</strong>r damage, <strong>the</strong> cells inside <strong>the</strong> battery may ruptureor catch fire.R DANGER! NEVER temperatures above +60˚C (+140˚F). High temperature buildupin <strong>the</strong> battery, such as could occur near fires or stoves,inside a sun heated car, or in direct sunlight may cause <strong>the</strong>battery to rupture or catch fire. Excessive temperatures mayalso degrade battery performance or shorten battery life.R DANGER! DO NOT expose <strong>the</strong> battery to rain, snow, seawater,or any o<strong>the</strong>r liquids. Do not charge or use a wet battery.If <strong>the</strong> battery gets wet, be sure to wipe it dry before using.R DANGER! NEVER internal battery gas may cause it to rupture, or may cause anexplosion.R DANGER! NEVER solder <strong>the</strong> battery terminals, or NEVER R DANGER! Use <strong>the</strong> battery only <strong>with</strong> <strong>the</strong> transceiver forwhich it is specified. Never use a battery <strong>with</strong> any o<strong>the</strong>r equipment,or for any purpose that is not specified in this instructionmanual.R DANGER! If fluid from inside <strong>the</strong> battery gets in your eyes,blindness can result. Rinse your eyes <strong>with</strong> clean water, <strong>with</strong>outrubbing <strong>the</strong>m, and see a doctor immediately.R WARNING! Immediately stop using <strong>the</strong> battery if it emitsan abnormal odor, heats up, or is discolored or deformed. Ifany <strong>of</strong> <strong>the</strong>se conditions occur, contact your Icom dealer ordistributor.R WARNING! Immediately wash, using clean water, any part<strong>of</strong> <strong>the</strong> body that comes into contact <strong>with</strong> fluid from inside <strong>the</strong>battery.14New2001New2001<strong>15</strong>BATTERY CAUTIONSR WARNING! NEVER put <strong>the</strong> battery in a microwave oven, <strong>This</strong> could cause a fire, overheating, or cause <strong>the</strong> battery torupture.CAUTION: Always use <strong>the</strong> battery <strong>with</strong>in <strong>the</strong> specified temperaturerange, –20˚C to +60˚C (–4˚F to +140˚F). Using <strong>the</strong>battery out <strong>of</strong> its specified temperature range will reduce <strong>the</strong>battery’s performance and battery life.CAUTION: Shorter battery life could occur if <strong>the</strong> battery is leftfully charged, completely discharged, or in an excessive temperatureenvironment (above +50˚C; +122˚F) for an extendedperiod <strong>of</strong> time. If <strong>the</strong> battery must be left unused for a longtime, it must be detached from <strong>the</strong> radio after discharging.You may use <strong>the</strong> battery until <strong>the</strong> battery indicator shows half- temperature range:–20˚C (–4˚F) to +50˚C (+122˚F) (<strong>with</strong>in a month). –20˚C (–4˚F) to +20˚C (+68˚F) (<strong>with</strong>in a year).D Charging cautionR DANGER! NEVER extremely high temperatures, such as near fires or stoves,inside a sun-heated vehicle, or in direct sunlight. In such environments,<strong>the</strong> safety/protection circuit in <strong>the</strong> battery will activate,causing <strong>the</strong> battery to stop charging.R WARNING! DO NOT charge or leave <strong>the</strong> battery in <strong>the</strong> batterycharger beyond <strong>the</strong> specified time for charging. If <strong>the</strong> batteryis not completely charged by <strong>the</strong> specified time, stop chargingand remove <strong>the</strong> battery from <strong>the</strong> battery charger. Continuingto charge <strong>the</strong> battery beyond <strong>the</strong> specified time limit may causea fire, overheating, or <strong>the</strong> battery may rupture.R WARNING! NEVER insert <strong>the</strong> transceiver (battery attachedto <strong>the</strong> transceiver) into <strong>the</strong> charger if it is wet or soiled.<strong>This</strong> could corrode <strong>the</strong> battery charger terminals or damage<strong>the</strong> charger. The charger is not waterpro<strong>of</strong>.CAUTION: DO NOT charge <strong>the</strong> battery outside <strong>of</strong> <strong>the</strong> specifiedtemperature range: 0˚C to +40˚C (+32˚F to +104˚F).Icom recommends charging <strong>the</strong> battery at +25˚C (+77˚F). Thebattery may heat up or rupture if charged out <strong>of</strong> <strong>the</strong> specifiedtemperature range. Additionally, battery performance or batterylife may be reduced.BE SURE to turn <strong>the</strong> transceiver power OFF while charging<strong>with</strong> <strong>the</strong> supplied BC-167S BATTERY CHARGER. The battery transceiver’s power is ON.D Charging timeCharger BC-167S(Supplied)BC-202(Optional)BP-271 (Supplied) Approx. 3 hours Approx. 2 hoursBP-272 (Optional)Approx. 4.5 hours Approx. 3.5 hours
New2001IMPORTANT NOTESD When using <strong>the</strong> GPS receiver ing<strong>the</strong> ID-51A or ID-51E inside a vehicle, you may not receiveGPS signals. We recommend you use it near a window.Please avoid <strong>the</strong> areas shown in <strong>the</strong> following: 2. DO NOT use where <strong>the</strong> air bags could deploy.3. DO NOT use where it becomes a driving obstacle. by <strong>the</strong> U.S. Department <strong>of</strong> Defence. The Department is responsiblefor accuracy and maintenance <strong>of</strong> <strong>the</strong> system. Anychanges by <strong>the</strong> Department may affect <strong>the</strong> accuracy andfunction <strong>of</strong> <strong>the</strong> GPS system. litesignals. tions:1. Tunnels or high-rise buildings 3. Under a bridge or viaduct4. In remote forested areas5. Under bad wea<strong>the</strong>r conditions (rainy or cloudy day) near <strong>the</strong> 440.205 MHz. <strong>This</strong> is due to signals made in <strong>the</strong>internal circuit and does not indicate a transceiver malfunction.D Spurious signalsDepending on <strong>the</strong> combination <strong>of</strong> <strong>the</strong> operating band andmode, <strong>the</strong> Dualwatch or Triple-watch operation may generatecertain spurious signals, or noise may be heard. These do notindicate a transceiver malfunction.D About charging at power ON in approximately 3 hours. But <strong>with</strong> this rapid circuit, <strong>the</strong> bat- sure to turn OFF <strong>the</strong> power before charging.When “Charging (Power ON)”* is set to ON in <strong>the</strong> MENU screen, to [DC IN].) But this operation may generate certain spurioussignals; <strong>the</strong> S-meter appears, or noise may be heard.*MENU > Function > Charging (Power ON) (Default: OFF) operating condition. and <strong>the</strong> current capacity must be more than 2.5 A to charge <strong>the</strong> receive signals correctly, set “Charging (Power ON)”* to OFF, anddisconnect <strong>the</strong> external DC power cable from [DC IN].16New20011ACCESS THE REPEATERNew2001 access your local area repeater (Access repeater), and if yoursignal is successfully sent to a destination repeater.If your call sign (MY) has not been set, or your call sign hasnot been registered on a D-STAR repeater, see page 2.STEP 1 Select <strong>the</strong> DR modeSTEP 2 Select your Access repeater (“FROM”)Example: Your Access repeater is Hirano/Japan in <strong>the</strong> Repeaterlist.q Push D-pad( $) to select“FROM” (Access repeater),and <strong>the</strong>n push D-pad(Ent).Hold down for 1 second. The repeater list, described in thismanual, may differ from your transceiver’spreloaded list.D-pad(Ent)()“FROM” is selected.VFO modew Push D-pad( !) to select “RepeaterList,” and <strong>the</strong>n pushD-pad(Ent).17If you want to return to <strong>the</strong> VFO mode, hold downagain for 1 second.DR modeYou have four o<strong>the</strong>r ways toselect your access repeater,o<strong>the</strong>r than selecting it from repeaterlist. See <strong>the</strong> AdvancedInstructions for more details. Rotating [DIAL] Searching for <strong>the</strong> nearest repeaters Selecting from <strong>the</strong> TX History Searching for a repeater using<strong>the</strong> DR mode scanGo to step e
New2001ACCESS THE REPEATER1e Push D-pad( !) to select <strong>the</strong>repeater group where youraccess repeater is listed, and<strong>the</strong>n push D-pad(Ent). r Push D-pad( !) to select youraccess repeater, and <strong>the</strong>npush D-pad(Ent). t If <strong>the</strong> selected repeater nameis displayed in “FROM” on<strong>the</strong> DR mode screen, <strong>the</strong> accessrepeater setting is completed.CompletedCompleted sign, its frequency, duplex setting, frequency <strong>of</strong>fset andGateway call sign are automatically set. your transceiver’s preprogrammed list.1ACCESS THE REPEATER Continued on <strong>the</strong> next pageRepeater areaRepeatercall signGo to step t18New2001New20011 ACCESS THE REPEATERSTEP 3 Select <strong>the</strong> Destination repeater (“TO”)Example: Your destination repeater is Hamacho/Japan in <strong>the</strong>repeater list.q Push D-pad( %) to select “TO”(Destination repeater), and<strong>the</strong>n push D-pad(Ent).e Push D-pad( !) to select <strong>the</strong>repeater group where yourdestination repeater is listed,and <strong>the</strong>n push D-pad(Ent). D-pad(Ent)()“TO” is selected.r Push D-pad( !) to select yourdestination repeater, and<strong>the</strong>n push D-pad(Ent). w Push D-pad( !) to select select“Gateway CQ,” and <strong>the</strong>npush D-pad(Ent).Go to step eGo to step tGo to step e
New2001ACCESS THE REPEATER1t If <strong>the</strong> selected repeater namein step r is displayed in “TO”on <strong>the</strong> DR mode screen, <strong>the</strong>destination repeater setting iscompleted.STEP 4q Hold down [PTT] for approximately1 second to access<strong>the</strong> repeater.CompletedCheck whe<strong>the</strong>r you can access <strong>the</strong> repeaterw If you get a reply call, or “UR?”appears on <strong>the</strong> LCD <strong>with</strong>in 3seconds, your signal reachedyour access repeater and yourcall was successfully sent fromyour destination repeater.Successfully sent! to various repeaters bychanging <strong>the</strong> “TO” setting!1ACCESS THE REPEATERTransmittingGo to step wNOTE: See page 35 for status indications after a reply isreceived.20New20012HOW TO USE THE RX HISTORYNew2001When a DV call is received, <strong>the</strong> call signs <strong>of</strong> <strong>the</strong> caller, <strong>the</strong>called station and <strong>the</strong> called station’s access repeater arestored in <strong>the</strong> RX history file.Up to 50 calls can be stored.<strong>This</strong> section describes how to view <strong>the</strong> RX history screen andhow to save <strong>the</strong> displayed call signs to memory.JM1ZLK listeningon JP3YHHport A...Oh!When receiving a The S-meter appearsand <strong>the</strong> caller’s callsign is displayed.STEP 1 View <strong>the</strong> received call signq Hold down for 1 second. RX HISTORYrecord numberRX messageRepeater call sign<strong>of</strong> <strong>the</strong> called stationw Push D-pad( !) to view o<strong>the</strong>rRX history.D-pad(Ent)()RX HISTORY screen (RX01)Caller station(upper)** A note maybe displayedafter “/”.Called station(lower)Received dateand timeRX HISTORY screen (RX02)21NOTE: If you push D-pad(Ent) while in <strong>the</strong> RX HISTORYscreen, <strong>the</strong> detailed contents <strong>of</strong> <strong>the</strong> RX history are displayed.
New2001HOW TO USE THE RX HISTORY2STEP 2Save <strong>the</strong> destination call sign into yourcall sign memory from <strong>the</strong> RX Historyq While in <strong>the</strong> RX HISTORYscreen, push D-pad(!) to select<strong>the</strong> RX HISTORY record<strong>with</strong> <strong>the</strong> call sign that youwant to save to memory.Call sign to be savedw Push D-pad(Ent), and <strong>the</strong>npush [QUICK] .Go to step ee Push D-pad( !) to select “ToYour Memory,” and <strong>the</strong>n pushD-pad(Ent).r Push D-pad( !) to select <strong>the</strong>call sign that you want to save,and <strong>the</strong>n push D-pad(Ent). The display changes to <strong>the</strong>YOUR CALL SIGN EDITscreen, and <strong>the</strong>n <strong>the</strong> call signis automatically saved.Go to step t2HOW TO USE THE RX HISTORY Continued on <strong>the</strong> next page22New2001New20012 HOW TO USE THE RX HISTORYSTEP 2Save <strong>the</strong> destination call sign into your call signmemory from <strong>the</strong> RX History (Continued)t Push D-pad( !) to select“NAME,” and <strong>the</strong>n push D-pad(Ent). D-pad(Ent)()y Rotate [DIAL] to select adesired character to enter aname <strong>of</strong> up to 16 characters,including spaces.Go to step uAbout text entry D-pad(") to move <strong>the</strong> push [QUICK] to change<strong>the</strong> character to an upper caseor lower case letter. [QUICK] to open <strong>the</strong> inputInput mode selectionmode selection window.window- Push D-pad(!") to select<strong>the</strong> desired Upper case letters,Lower case letters, Numbers or Symbols.- To enter symbols, select “!”#,” and <strong>the</strong>n push D-pad(Ent)to open <strong>the</strong> symbol character selection window. And rotate[DIAL] to select <strong>the</strong> desired symbol character, and<strong>the</strong>n push D-pad(Ent). to delete <strong>the</strong> selectedcharacter, symbol or number, or hold down [CLR]to continuously erase <strong>the</strong> characters, first to <strong>the</strong> right, and<strong>the</strong>n to <strong>the</strong> left <strong>of</strong> <strong>the</strong> cursor.23
New2001HOW TO USE THE RX HISTORY2u After entering <strong>the</strong> name, pushD-pad(Ent). o Push D-pad( !) to select “YES,”and <strong>the</strong>n push D-pad(Ent).2i Push D-pad( !) to select“,” and <strong>the</strong>npush D-pad(Ent).The saved call sign is displayed on<strong>the</strong> YOUR CALL SIGN screen as aselectable destination.CompletedHOW TO USE THE RX HISTORYGo to step o“TOM” is addedShows TOM’scall sign24New20013CAPTURING A CALL SIGNNew2001After you receive <strong>the</strong> repeater’s signal, <strong>the</strong> calling station’scall sign can be captured by holding down <strong>the</strong> Call Sign Cap- received call.JG3LUK listeningon JP3YHHport A...Wow! I only have tohold down !BeepsWhile receivingWhen receiving acall from “JG3LUK.”The Call Sign Capture key is here! What is <strong>the</strong> Call Sign Capture key?? last received station call sign as a temporary destination, and 25
New2001CAPTURING A CALL SIGN3STEP 1 Set <strong>the</strong> received call sign to <strong>the</strong> destinationSTEP 2 Hold down [PTT] to transmitHold down for 1 second. <strong>the</strong> station call sign is announced if<strong>the</strong> RX>CS Speech function is setto ON in <strong>the</strong> MENU screen.(MENU > SPEECH > RX>CS SPEECH)q While holding down [PTT], level.3Beeps inga call sign.BeepsJG3LUKWhile holding down .After releasing .NOTE: rotate [DIAL] while holding down . <strong>the</strong> power save is ON, <strong>the</strong> call sign may not be receivedcorrectly. In that case, “--------” appears, an error beep w Push or [CLR] toreturn to <strong>the</strong> previous call signsetting.TransmittingReturn to <strong>the</strong> previousscreenCAPTURING A CALL SIGN26New20014MAKING A LOCAL AREA CALLNew2001A Local area call can be made when “Local CQ” is used to set“CQCQCQ” in “TO” (Destination).STEP 1 Set “FROM” (Access repeater)JG3LUKlistening onJP3YHH port A...RepeaterJG3LUKlistening onJP3YHHport A...q Push D-pad( !) to select“FROM,” and <strong>the</strong>n pushD-pad(Ent).D-pad(Ent)()w Push D-pad( !) to select “RepeaterList,” and <strong>the</strong>n pushD-pad(Ent).Repeater areae Push D-pad( !) to select <strong>the</strong>repeater group where youraccess repeater is listed, and<strong>the</strong>n push D-pad(Ent). What is a Local Area Call??To call through your local area (access) repeater.r Push D-pad( !) to select youraccess repeater, and <strong>the</strong>npush D-pad(Ent). 27
New2001MAKING A LOCAL AREA CALL4STEP 2 Set “TO” (Destination)STEP 3 Hold down [PTT] to transmitq Push D-pad( %) to select “TO,”and <strong>the</strong>n push D-pad(Ent).D-pad(Ent)()w Push D-pad( !) to select “LocalCQ,” and <strong>the</strong>n push D-pad(Ent). Convenient!The Local CQ call is used to call anyone, but you can call aspecific station by simply saying <strong>the</strong>ir call sign. at your normal voice level.< Communication examplefor a Local area call>JG3LUKJA3YUA listening onJP3YHH port A.JA3YUA, this is JG3LUK.Hello, how are you?JG3LUK, this is JA3YUA.Thanks for <strong>the</strong> nice QSO and Ihope to talk to you again soon.<strong>This</strong> is JA3YUA now clear <strong>of</strong><strong>the</strong> JP3YHH repeater.TransmittingJA3YUA4MAKING A LOCAL AREA CALLJA3YUA28New200<strong>15</strong>MAKING A GATEWAY CALLNew2001A Gateway call can be made when a destination repeater isselected in “TO” (Destination).STEP 1 Set “FROM” (Access repeater)JM1ZLKcalling toJP1YIUport A...RepeaterRepeaterJM1ZLKcalling toJP1YIUport A...q Push D-pad( !) to select“FROM,” and <strong>the</strong>n push D-pad(Ent).D-pad(Ent)()w Push D-pad( !) to select “RepeaterList,” and <strong>the</strong>n pushD-pad(Ent).Repeater areaRepeater areae Push D-pad( !) to select <strong>the</strong>repeater group where youraccess repeater is listed, and<strong>the</strong>n push D-pad(Ent). What is a Gateway Call??To call through your local area (access) repeater, repeatergateway, and <strong>the</strong> Internet to your destination repeater.r Push D-pad( !) to select youraccess repeater, and <strong>the</strong>npush D-pad(Ent).
New2001MAKING A GATEWAY CALL5STEP 2 Set “TO” (Destination)q Push D-pad( %) to select “TO,”and <strong>the</strong>n push D-pad(Ent).D-pad(Ent)()w Push D-pad( !) to select“Gateway CQ,” and <strong>the</strong>n pushD-pad(Ent).e Push D-pad( !) to select <strong>the</strong>repeater group where yourdestination repeater is listed,and <strong>the</strong>n push D-pad(Ent). r Push D-pad( !) to select <strong>the</strong>destination repeater, and<strong>the</strong>n push D-pad(Ent). STEP 3 Hold down [PTT] to transmit at your normal voice level. it is a repeater call sign.< Communication examplefor a Gateway call>JM1ZLKJA3YUA calling toJP1YIU port A.JA3YUA, this is JM1ZLK.Hello, how are you?JM1ZLK, this is JA3YUA.Thanks for <strong>the</strong> nice QSO and Ihope to talk to you again soon.<strong>This</strong> is JA3YUA now clear <strong>of</strong><strong>the</strong> JP3YHH repeater.TransmittingJA3YUAJA3YUA Convenient!The Gateway CQ call is used to call any repeater, but you cancall a specific station by simply saying <strong>the</strong>ir call sign.5MAKING A GATEWAY CALL30New20016CALLING A DESTINATION STATIONNew2001 tionstation call sign is selected in “TO” (Destination).When you call an individual station call sign through a gateway,<strong>the</strong> signal is automatically sent to <strong>the</strong> last repeater that<strong>the</strong> station accessed. So, even if you don’ JM1ZLK,this is JG3LUKlistening onJP3YHH Port A...RepeaterRepeaterJM1ZLK,this is...STEP 1 Set “FROM” (Access repeater)q Push D-pad( !) to select“FROM,” and <strong>the</strong>n push D-pad(Ent).D-pad(Ent)()w Push D-pad( !) to select “RepeaterList,” and <strong>the</strong>n pushD-pad(Ent).e Push D-pad( !) to select <strong>the</strong>repeater group where youraccess repeater is listed, and<strong>the</strong>n push D-pad(Ent). r Push D-pad( !) to select youraccess repeater, and <strong>the</strong>npush D-pad(Ent). 31
New2001CALLING A DESTINATION STATION6STEP 2 Set “TO” (Destination)q Push D-pad( %) to select “TO,”and <strong>the</strong>n push D-pad(Ent).D-pad(Ent)()STEP 3 Hold down [PTT] to transmitWhile holding down [PTT], your normal voice level.w Push D-pad( !) to select“Your Call Sign,” and <strong>the</strong>npush D-pad(Ent).e Push D-pad( !) to select <strong>the</strong>destination station, and <strong>the</strong>npush D-pad(Ent). < Communication example<strong>with</strong> a destination station>JM1ZLK(TOM)JM1ZLK, this is JG3LUK listeningon JP3YHH port A.JG3LUK, this is JM1ZLK.Hello, how are you?JM1ZLK, this is JG3LUK.Thanks for <strong>the</strong> nice QSO and Ihope to talk to you again soon.<strong>This</strong> is JG3LUK now clear <strong>of</strong><strong>the</strong> JP3YHH repeater.TransmittingJG3LUKJG3LUK6CALLING A DESTINATION STATION32New20017MAKING A SIMPLEX CALLNew2001 repeater) in <strong>the</strong> DR mode.NOTE: Depending on <strong>the</strong> transceiver's version, <strong>the</strong> fre- ciesfor your operating area.JG3LUKcalling atABC park...STEP 1 Set “FROM” (Simplex channel) q Push D-pad( !) to select“FROM,” and <strong>the</strong>n pushD-pad(Ent).D-pad(Ent)()JG3LUKcalling atABC park... w Push D-pad( !) to select “RepeaterList,” and <strong>the</strong>n pushD-pad(Ent).Go to step e What is a Simplex Call??A simplex call is a direct call to ano<strong>the</strong>r station, not using arepeater.33
New2001MAKING A SIMPLEX CALL7STEP 2 Hold down [PTT] to transmite Push D-pad( !) to select “25:Simplex,” and <strong>the</strong>n push D-pad(Ent).q While holding down [PTT], level. transmit output power level.w Release [PTT] to receive.r Push D-pad( !) to select“433.450,” and <strong>the</strong>n pushD-pad(Ent). “FROM.” - If a station call sign is set in“TO”, select “Local CQ” in <strong>the</strong>TO SELECT screen to set“TO” to “CQCQCQ.” <strong>the</strong> VFO mode, <strong>the</strong> LCD changesas shown to <strong>the</strong> right.TransmittingNOTE: The simplex frequencies can be changed in <strong>the</strong>MENU screen. See <strong>the</strong> PDF type Advanced Instruction (MENU > DV memory > Repeater List)7MAKING A SIMPLEX CALL34New20018TROUBLESHOOTINGNew2001To communicate through <strong>the</strong> repeater, your signal must access to <strong>the</strong> repeater. When your signal accesses your local repeater,but it is not sent to <strong>the</strong> destination repeater, <strong>the</strong> repeater replies <strong>with</strong> an status message.PROBLEM POSSIBLE CAUSE SOLUTION REF.After your call, <strong>the</strong> repeater doesnot return a status reply.After your call, <strong>the</strong> repeater replies‘UR?’ and its call sign. er. immediately replied. <strong>of</strong>fset, or duplex setting. try again. p. 17— ——After your call, <strong>the</strong> repeater replies‘RX’ or ‘RPT?’ and <strong>the</strong> accessrepeater’s call sign. isteredon a gateway repeater, or <strong>the</strong> registeredcontents do not match your transceiver’ssetting. p. 2 wayrepeater, or confirm <strong>the</strong> registration <strong>of</strong>p. 4<strong>the</strong> call sign.After your call, <strong>the</strong> repeater replies‘RPT?’ and call sign <strong>of</strong> <strong>the</strong>destination repeater.After your call, <strong>the</strong> access repeaterreplies ‘RPT?’ and its call sign. tionrepeater. busy. wrong. Wait for a while, and try it again. sign.p. 17——35
New2001TROUBLESHOOTING8PROBLEM POSSIBLE CAUSE SOLUTION REF.Even holding down , <strong>the</strong> DR mode will not appear.Even holding down , <strong>the</strong>received call sign will not set to<strong>the</strong> destination call sign.A Local area call can be made,but <strong>the</strong> Gateway call or destinationstation call cannot bemade.Position data cannot be received.After transmitting, “L” appearson <strong>the</strong> LCD. CLONING SOFTWARE on <strong>the</strong> CD. transceiver. rectlyreceived <strong>the</strong> call sign. received during scanning, <strong>the</strong> call sign maynot be received correctly. In that case, “--------” appears and error beeps sound, and a replycall cannot be made. D-STAR repeater. on <strong>the</strong> Menu screen, but an external GPS receiveris not connected. item on <strong>the</strong> Menu screen. While receiving through <strong>the</strong> internet, some (poor data throughput performance). Register your own call sign (MY) on a gatewayrepeater, or confirm <strong>the</strong> registration <strong>of</strong>p. 4<strong>the</strong> call sign. in <strong>the</strong> GPS Set item on <strong>the</strong> Menu screen. —When <strong>the</strong> transceiver receives corrupted “L” is displayed, even if it is a Local area call.Sec. 17 <strong>of</strong> <strong>the</strong>Advanced InstructionPDF Advanced InstructionPDF—8TROUBLESHOOTING“DV” and “FM” icons alternately While in <strong>the</strong> DV mode, an FM signal is received. <strong>the</strong>re are no FM signals on <strong>the</strong> original frequency.—36New2001SAVING SETTINGSNew2001When “FROM” (Access repeater) and “TO” (Destination) settingsare saved, <strong>the</strong> settings can be selected by rotating [DIAL].STEP 1 Saving settings into memoryIn <strong>the</strong> DR mode, select <strong>the</strong> settingsto be saved into memory.Shows <strong>the</strong> settingsto be saved.DR mode screenw Rotate [DIAL] to select a programed is selected, <strong>the</strong>memory name will not be programmed.37q Hold down [S.MW] for1 second to enter <strong>the</strong> SelectMemory write mode.BeepsGo to step wSelect Memory write modeNOTE: DO NOT hold down[S.MW] for more than2 seconds. O<strong>the</strong>rwise <strong>the</strong>setting contents will becopied to <strong>the</strong> VFO.e Hold down [S.MW] for 1second to save <strong>the</strong> settingsinto <strong>the</strong> channel. mode, <strong>the</strong> saved memory contentsare briefly displayed. automatically programmed as<strong>the</strong> Memory name.Up to 16 alphanumeric characterscan be programmed for <strong>the</strong>memory name.
New2001SAVING SETTINGSSTEP 2 View <strong>the</strong> saved contentsq Push [M/CALL] to select<strong>the</strong> Memory mode. ” appears.Station AStation BHamacho areaw Rotate [DIAL] to select <strong>the</strong>stored channel. Memory mode screenStored channelis selectedM-CH 11 M-CH 006 M-CH 010SAVING SETTINGS9“FROM” and “TO”names are automaticallyprogrammed as<strong>the</strong> Memory name.How useful! I only haveto rotate [DIAL]!Hirano area38New200110RECORDING A QSO ONTO A microSD CARDNew2001 About using a microSD cardD Usable microSD cardsA microSD or microSDHC card is not supplied <strong>with</strong> <strong>the</strong>transceiver. Please purchase a card to use.Read <strong>the</strong> instructions <strong>of</strong> <strong>the</strong> microSD card thoroughly beforeuse. and microSDHC cards: (As <strong>of</strong> December 2012)Maker Kind <strong>of</strong> <strong>the</strong> card Capacity ® microSDHC8 GB16 GBmicroSD 2 GB4 GB32 GBBE CAREFUL! While reading or writing data from or to <strong>the</strong>card; NEVER turn OFF <strong>the</strong> transceiver. It will corrupt <strong>the</strong>data or damage <strong>the</strong> card.Also be careful in <strong>the</strong> following cases: and <strong>the</strong> batteries are near exhaustion. ternalpower is turned OFF.STEP 1 Inserting <strong>the</strong> microSD cardq Turn OFF <strong>the</strong> transceiver.w Lift OFF <strong>the</strong> [micro SD] slot cover on <strong>the</strong> side panel.e With <strong>the</strong> terminals facing <strong>the</strong> front, insert <strong>the</strong> card into <strong>the</strong> BE CAREFUL! DO NOT touch <strong>the</strong> terminals. pull out <strong>the</strong> card. NEVER remove <strong>the</strong> card. It will corrupt <strong>the</strong> data ordamage <strong>the</strong> card.r Firmly close <strong>the</strong> [micro SD] slot cover.NEVER forcibly or inverselyinsert <strong>the</strong> card.It will damage <strong>the</strong> cardand/or <strong>the</strong> slot.[micro SD] slotmicroSD cardTerminals facing<strong>the</strong> frontSlot cover
New2001RECORDING A QSO ONTO A microSD CARD10STEP 2 Format <strong>the</strong> microSD cardWhen using a preformatted brand new microSD card, formattingis not necessary. However, we still recommend you formatit in <strong>the</strong> following way to get <strong>the</strong> card’s best performance.IMPORTANT!Formatting a card erases all its data. Before formatting any q Turn ON <strong>the</strong> transceiver. ” appears when <strong>the</strong> microSD card is inserted. ” and “ while accessing <strong>the</strong> microSDcard.w Push [MENU] to enter<strong>the</strong> Menu screen.e Push D-pad( !) to select “SDCard,” <strong>the</strong>n push D-pad(Ent).t The confirmation screen “FormatOK?” appears.y Push D-pad( !) to select“YES,” <strong>the</strong>n push D-pad(Ent)to format. display shows <strong>the</strong> formattingprogress.Shows <strong>the</strong> formattingprogressRECORDING A QSO ONTO AmicroSD CARD10r Push D-pad( !) to select “Format,”<strong>the</strong>n push D-pad(Ent).D-pad(Ent)()Go to step tu After formatting, <strong>the</strong> displayautomatically returns to <strong>the</strong>SD CARD menu.Push [MENU] to returnto <strong>the</strong> frequency display.40New2001New200110 RECORDING A QSO ONTO A microSD CARDSTEP 3 Recording a QSO audioq Push [QUICK] to enter w Push D-pad( !) to select“.”D-pad(Ent)()NOTE: BC Radio audio cannot be recorded.D To stop recordingq Push [QUICK] to enter w Push D-pad( !) to select“.”e Push D-pad(Ent) to startvoice recording. cordingstarted” and auto- screen. ” appears while <strong>the</strong> transceiveris recording. ” appears while <strong>the</strong> recordingis paused. you manually stop recording, or<strong>the</strong> card becomes full. reaches 2GB, <strong>the</strong> transceiverautomatically creates a newfile, and continues recording.While pausinge Push D-pad(Ent) to stopvoice recording. cordingstopped,” and auto- screen. Convenient!When <strong>the</strong> PTT Automatic Recording function is set to ON in<strong>the</strong> MENU screen, <strong>the</strong> recording automatically starts when[PTT] is pushed.( MENU > Voice Memo > QSO Recorder > Recorder Set >PTT Auto REC)41While recording
New2001RECORDING A QSO ONTO A microSD CARD10STEP 4 Playing back <strong>the</strong> recorded audioq Push [MENU] to enter<strong>the</strong> Menu screen.w Push D-pad( !) to select <strong>the</strong>root item (Voice Memo), and<strong>the</strong>n push D-pad(Ent) to go to<strong>the</strong> next level.D-pad(Ent)()( MENU > Voice Memo >QSO Recorder > Play Files)e Refer to <strong>the</strong> menu sequenceshown directly above andpush D-pad(!) to select, and<strong>the</strong>n push D-pad(Ent) to enter,one or more times until<strong>the</strong> last screen is displayed.r Push D-pad( !) to select <strong>the</strong>folder that contains <strong>the</strong> fileyou want to play, and <strong>the</strong>npush D-pad(Ent). <strong>of</strong> <strong>the</strong> year (4 digits), <strong>the</strong> monthand <strong>the</strong> day (2 digits each).t Push D-pad( !) to select <strong>the</strong>file that you want to play, <strong>the</strong>npush D-pad(Ent) to play it displayed, and <strong>the</strong> file starts to y Push [MENU] or [CLR] played.RECORDING A QSO ONTO AmicroSD CARD10Go to step r42New200111GPS OPERATIONNew2001The ID-51A/E has a built-in internal GPS receiver. You can mode.See <strong>the</strong> PDF type Advanced Instruction for more details <strong>of</strong><strong>the</strong> GPS operation.STEP 1Receiving GPS data from <strong>the</strong> internalGPS receiverq Push [MENU] to enter<strong>the</strong> Menu screen.w Push D-pad( !) to select <strong>the</strong>root item (GPS), and <strong>the</strong>npush D-pad(Ent) to go to <strong>the</strong>next level.r Push D-pad( !) to select “InternalGPS.”GPS Select screen43D-pad(Ent)()( MENU > GPS > GPS Set>GPS Select)e Refer to <strong>the</strong> menu sequenceshown directly above andpush D-pad(!) to select, and<strong>the</strong>n push D-pad(Ent) to enter,one or more times until<strong>the</strong> last screen is displayed.Go to step rt Push [MENU] to exit <strong>the</strong>Menu screen. ceivingdata, as illustrated be- valid data is received. - If “Manual” was selected, <strong>the</strong>icon does not appear. to receive, but depending on <strong>the</strong> minutes. If you have difficultiesreceiving, we recommend thatyou try a different location.
New2001GPS OPERATION11STEP 2 Displaying your positionConfirm <strong>the</strong> GPS icon is displayedon <strong>the</strong> LCD.The top <strong>of</strong> <strong>the</strong>compass is North.LatitudeLongitudeq Push [QUICK] to enter w Push D-pad(!) to select <strong>the</strong>“GPS position” item, and <strong>the</strong>npush D-pad(Ent).D-pad(Ent)()Your course headingis Northwest.Your course headingis 306 degrees.Shows <strong>the</strong> displayedpositionis yours.GPS Position screen (MY)Grid LocatorAltitudeSpeedTimethat <strong>the</strong>displayeddata wasacquired.How convenient! position and altitude!!GPS OPERATION11e The first MY GPS positionscreen appears. (1/5)44New200112GPS LOGGER FUNCTIONNew2001The GPS Logger function allows you to store <strong>the</strong> GPS positiondata (Latitude, Longitude, Altitude, Positioning state, Course,Speed and Date) onto a microSD card, as your route. ingcourse on a mapping s<strong>of</strong>tware.NOTE:The GPS logger function requires a microSD card. STEP 1Receiving GPS data from <strong>the</strong> internalGPS receiver45q Push [MENU] to enter<strong>the</strong> Menu screen.w Push D-pad( !) to select <strong>the</strong>root item (GPS), and <strong>the</strong>npush D-pad(Ent) to go to <strong>the</strong>next level.D-pad(Ent)()( MENU > GPS > GPS Set>GPS Select)e Refer to <strong>the</strong> menu sequenceshown directly above andpush D-pad(!) to select, and<strong>the</strong>n push D-pad(Ent) to enter,one or more times until<strong>the</strong> last screen is displayed.Go to step rr Push D-pad( !) to select “InternalGPS.”t Push [MENU] to exit <strong>the</strong>Menu screen. ceivingdata, as illustrated be- valid data is received. - If “Manual” is selected, <strong>the</strong> icondoes not appear. to receive, but depending on <strong>the</strong> minutes. If you have difficultiesreceiving, we recommend thatyou try a different location.
New2001GPS LOGGER FUNCTION12STEP 2 Turning ON <strong>the</strong> GPS Logger functionq Push [MENU] to enter<strong>the</strong> Menu screen.w Push D-pad( !) to select <strong>the</strong>root item (GPS), and <strong>the</strong>npush D-pad(Ent) to go to <strong>the</strong>next level.r Push D-pad(!) to select“ON.”t Push [MENU] to exit <strong>the</strong>Menu screen. D-pad(Ent)()( MENU > GPS > GPS Logger> GPS Logger)e Refer to <strong>the</strong> menu sequenceshown directly above andpush D-pad(!) to select, and<strong>the</strong>n push D-pad(Ent) to enter,one or more times until<strong>the</strong> last screen is displayed.Go to step rYou can display your route as you move, if you import <strong>the</strong> logfile into a mapping s<strong>of</strong>tware. compatible <strong>with</strong> all mapping s<strong>of</strong>tware. your PC.NOTE: ceivercontinuously stores <strong>the</strong> position data from <strong>the</strong>GPS receiver, even if <strong>the</strong> transceiver is rebooted. To cancelthis function, turn <strong>the</strong> function OFF.While this function is ON, and when <strong>the</strong> transceiver isturned OFF, <strong>the</strong> log file will be closed. Then <strong>the</strong> transceiveris turned ON and positioning is carried out by <strong>the</strong>GPS receiver, a new log file will be created. maticallypaused.GPS LOGGER FUNCTION1246New200113INTRODUCING NEW FUNCTIONSNew2001<strong>This</strong> section introduces new functions built into <strong>the</strong> ID-51A/E. NEW! Voice Recorder functionThe microphone audio can be recorded.Audio from an external microphone can also be recorded. record up to a maximum <strong>of</strong> about 37 hours. If <strong>the</strong> fi le size exceeds2 GB, a new fi le is automatically created in <strong>the</strong> same folder, and <strong>the</strong>recorded voice audio is saved <strong>the</strong>re. RecordingNEW! Two band monitoring plus BC RadioWhen <strong>the</strong> transceiver receives 2 amateur bands on <strong>the</strong> MAINband and SUB band, you can still listen to <strong>the</strong> Broadcast (BC)Radio.You can comfortably standby listening to <strong>the</strong> BC Radio.Also, <strong>the</strong> transceiver can be used as just a BC Radio. In thiscase, <strong>the</strong> o<strong>the</strong>r modes are in a sleep state. MAIN bandReceiving on <strong>the</strong> MAIN bandI should bring a camera,extra clo<strong>the</strong>s, lights, towel,sunglasses and transceiverfor my climbing trip.Listening to <strong>the</strong> BC RadioTriple-watchReceiving on <strong>the</strong> SUB bandSUB band47NOTE: <strong>This</strong> function requires a microSD card.
New2001INTRODUCING NEW FUNCTIONS13NEW!Auto Position Reply functionNEW!Speech functionWhen you receive a call addressed to your own call sign, but ceiver,this function automatically replies <strong>with</strong> your own callsign and transmits your position. w Your position is automaticallytransmitted.NEW!q A call addressed toyour own call sign.Your stationVoice TX functionYou can transmit recorded audio once or repeatedly, which isuseful for D-STAR events. <strong>This</strong> is JA3YUADestination(ID-51)e After receiving, <strong>the</strong>screen shows <strong>the</strong>position.Repeat Voice TXwaiting screenHold down [SPCH] for 1 second to audibly announce <strong>the</strong>displayed frequency and operating mode, or call sign. at <strong>the</strong> display.See <strong>the</strong> PDF type Advanced Instructionfor details. Home CH beep function [DIAL] speech function Mode speech functionNEW!Unwanted frequencyTemporary Skip function a scan, for a set period. INTRODUCING NEW FUNCTIONS13JA3YUANOTE: <strong>This</strong> function requires a microSD card.48New200114RESETTINGNew2001 ResettingThe display may occasionally display erroneous information(for example when first applying power). <strong>This</strong> may be causedexternally by static electricity or by o<strong>the</strong>r factors.If this problem occurs, turn OFF power.After waiting a few seconds, turn ON power again. If <strong>the</strong> problempersists, perform a <strong>Part</strong>ial reset or an All reset.A <strong>Part</strong>ial reset resets operating settings to <strong>the</strong>ir default values(VFO frequency, VFO settings, menu contents) <strong>with</strong>out clearing<strong>the</strong> items below: BE CAREFUL! An All reset clears all programming andreturns all settings to <strong>the</strong>ir factory defaults. See <strong>the</strong> PDFtype Advanced Instruction for more details.D <strong>Part</strong>ial resetq Push [MENU] to enter<strong>the</strong> Menu screen.w Push D-pad( !) to select <strong>the</strong>root item (O<strong>the</strong>rs), and <strong>the</strong>npush D-pad(Ent) to go to <strong>the</strong>next level.D-pad(Ent)()( MENU > O<strong>the</strong>rs > Reset ><strong>Part</strong>ial Reset)e Refer to <strong>the</strong> menu sequenceshown directly above andpush D-pad(!) to select, and<strong>the</strong>n push D-pad(Ent) to enter,one or more times until<strong>the</strong> last screen is displayed.Go to step r
New2001RESETTING14r The “<strong>Part</strong>ial Reset?” dialogappears.t Push D-pad( !) to select “Yes,”and <strong>the</strong>n push D-pad(Ent). -TIAL RESET,” <strong>the</strong>n <strong>the</strong> partialreset is completed.Shows “PARTIAL RESET”RESETTING14Default screen50New2001<strong>15</strong>INFORMATIONNew2001COUNTRY CODE LIST 123456781011121314<strong>15</strong>1617Country Codes Country CodesAustriaBelgiumBulgariaCroatiaCzech RepublicCyprusEstoniaFinlandFranceGermanyGreeceHungaryIcelandIrelandItalyLatviaATBEBGHRCYDKEEFIFRDEGRHUISIEITLV1820212223242526272830313233LiechtensteinLithuaniaLuxembourgMaltaNe<strong>the</strong>rlandsNorwayPolandPortugalRomaniaSloveniaSpainSwedenSwitzerlandUnited KingdomLILTLUMTNLNOPLPTROSKSIESSECHTRGB<strong>FCC</strong> INFORMATION <strong>This</strong> equipment has been tested and found to comply <strong>with</strong> <strong>the</strong>limits for a Class B digital <strong>device</strong>, pursuant to part <strong>15</strong> <strong>of</strong> <strong>the</strong><strong>FCC</strong> <strong>Rules</strong>. These limits are designed to provide reasonableprotection against harmful interference in a residential installation.<strong>This</strong> equipment generates, uses and can radiate radi<strong>of</strong>requency energy and, if not installed and used in accordance<strong>with</strong> <strong>the</strong> instructions, may cause harmful interference to radiocommunications. However, <strong>the</strong>re is no guarantee that interferencewill not occur in a particular installation. If this equipmentdoes cause harmful interference to radio or televisionreception, which can be determined by turning <strong>the</strong> equipment<strong>of</strong>f and on, <strong>the</strong> user is encouraged to try to correct <strong>the</strong> interferenceby one or more <strong>of</strong> <strong>the</strong> following measures: ceiver. from that to which <strong>the</strong> receiver is connected. for help.CAUTION: Changes or modifications to this <strong>device</strong>, not expresslyapproved by Icom Inc., could void your authority tooperate this <strong>device</strong> under <strong>FCC</strong> regulations.51
New2001INDEXAAccess repeaterAccess repeater (“FROM”) setting .................................17Access <strong>the</strong> repeater .......................................................17 .................20Auto Position Reply function ...............................................48BBatteryCautions .........................................................................14CCallGateway call ...................................................................2Gateway call to a destination station ..............................31Local area call ................................................................27Simplex call ....................................................................33Call signCall sign Capture ...........................................................25 ....................................................25Entering your own call sign into <strong>the</strong> transceiver ...............2ChargingCaution ...........................................................................<strong>15</strong>Charging at power ON ...................................................16Charging time .................................................................<strong>15</strong>Communication exampleFor Gateway call ............................................................30For Local area call..........................................................28With a destination station ...............................................32Country code list .................................................................51DDestination repeater (“TO”) setting .....................................1DR modeSelection ........................................................................17EExplicit definitions ...............................................................10Entering your own call sign into <strong>the</strong> transceiver ...................2F<strong>FCC</strong> information .................................................................51Features ...............................................................................Unique features <strong>of</strong> D-STAR ..............................................1Foreword ...............................................................................Format <strong>the</strong> microSD card ...................................................40GGateway call .......................................................................2Communication example ................................................30What is a Gateway Call?? ..............................................2Gateway call to a destination station ..................................31Communication example ................................................32GPSDisplaying your position .................................................44GPS Logger function ......................................................45GPS operation ...............................................................43GPS Position screen ......................................................44When using <strong>the</strong> GPS receiver ........................................16Receiving GPS data from <strong>the</strong> internal GPS receiver .....43INFORMATION<strong>15</strong>52New2001New2001INDEXIIMPORTANT NOTES ..........................................................16About charging at power ON ..........................................16When using <strong>the</strong> GPS receiver ........................................16Spurious signals .............................................................16Inserting <strong>the</strong> microSD card .................................................3LLocal area call ....................................................................27Log file ................................................................................46Local area callCommunication example ................................................28What is a Local Area Call?? ...........................................27MMENU screen .......................................................................2microSD cardFormat ............................................................................40Inserting .........................................................................3Recording a QSO audio .................................................41Recording a QSO onto a microSD card .........................3 ....................................42Stop recording ................................................................41Using ..............................................................................3Voice Recorder function .................................................47Voice TX function ...........................................................48NNew functions .....................................................................47Speech function .............................................................48Voice Recorder function .................................................47Voice TX function ...........................................................48 ................................................48Two band monitoring plus BC Radio ..............................47P<strong>Part</strong>ial reset ........................................................................4 ........................................42Power ....................................................................................2Precautions .........................................................................12Preparation ...........................................................................2Enter your call sign into <strong>the</strong> transceiver ...........................2Register your call sign to a gateway repeater ..................4RReceiving GPS data from <strong>the</strong> internal GPS receiver ..........43RecordRecording a QSO audio .................................................41Recording a QSO onto a microSD card .........................3Stop recording ................................................................41Resetting ............................................................................4<strong>Part</strong>ial reset ....................................................................4RX historyHow to use <strong>the</strong> RX history .............................................21Save <strong>the</strong> destination call sign from <strong>the</strong> RX History ........22View <strong>the</strong> received call sign .............................................2<strong>15</strong>3
New2001INDEXSSaveSave <strong>the</strong> destination call sign from <strong>the</strong> RX History ........22Saving settings ...............................................................37View <strong>the</strong> saved contents ................................................38Simplex call ........................................................................33Simplex channel setting .................................................33What is a Simplex Call?? ...............................................33VView <strong>the</strong> received call sign .................................................21View <strong>the</strong> saved contents .....................................................38Voice Recorder function .....................................................47Voice TX function ................................................................48YYour position .......................................................................44Speech function ..................................................................48Spurious signals .................................................................16Stop recording ....................................................................41Supplied accessories..........................................................10Supplied CD ...................................................................11Starting <strong>the</strong> CD ..............................................................11TTable <strong>of</strong> contents ..................................................................7 .....................................................48Text entry ............................................................................23Keys used for input ...........................................................3Two band monitoring plus BC Radio ..................................47Troubleshooting ..................................................................35UUnique features <strong>of</strong> D-STAR ..................................................1Using a microSD card .........................................................354New2001#02 Europe#03 U.K.#04 Italy AT BE CY DK EE FI FR DE GR HU IE IT LV LT LU MT NL PL PT SK SI ES SE GB IS LI NO CH BG RO TR HR AT BE CY DK EE FI FR DE GR HU IE IT LV LT LU MT NL PL PT SK SI ES SE GB IS LI NO CH BG RO TR HR AT BE CY DK EE FI FR DE GR HU IE IT LV LT LU MT NL PL PT SK SI ES SE GB IS LI NO CH BG RO TR HRA-7056H-1EXPrinted in Japan© 2012 Icom Inc.