Sparcraft
Sparcraft
Sparcraft
- No tags were found...
Create successful ePaper yourself
Turn your PDF publications into a flip-book with our unique Google optimized e-Paper software.
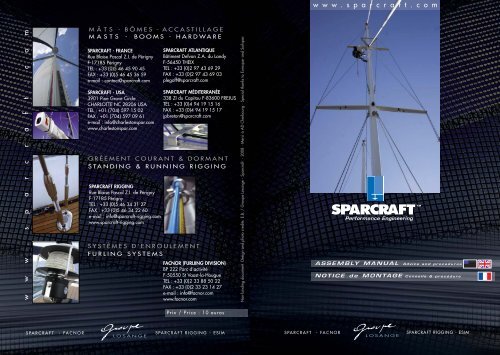
1UNPACKING AND CHECKINGInventoryDepending on where it is being delivered, the mastis packed in various materials: plastic, padding,wooden battens.- carefully unpack the mast and check the overall condition in orderto identify any problems;- the condition of the packaging can be a determining factorin this checking process;- before being sent, all our masts are inspected byour experts. The rare problems that are found tendto occur during transportation, which is why it isimportant to carry out a check on delivery;- sort out and count all the necessary parts;- when unpacking, avoid cutting the messenger lines and scratchingthe mast. Please be careful when using a cutter, knife or other sharpinstrument.Please be careful to avoid scratching the mastREMINDER- <strong>Sparcraft</strong> masts are delivered with running rigging (orthe halyard messenger lines) attached and stuck to themast;- spars and standing rigging are kept separate in order tominimise the risk of damage during transportation.Traceability: number check.For <strong>Sparcraft</strong>, each rig is unique, which is why we giveit an identification number enabling you to know whereit has come from and which route it has taken. This is away for us to guarantee the quality. Please note downthese numbers in this booklet.- MAST (engraved near where the sail joins) N° _ _ _ _ _ _ _ _ _ _ _ _- BOOM (near the gooseneck) N° _ _ _ _ _ _ _ _ _ _ _ _- STANDING (on the bottom tip of the backstay) N° _ _ _ _ _ _ _ _ _ _PREPARATION OF THE MAST AND EQUIPMENT2Preparation of the tools necessary for the operation- identify each element of the mast and standing rigging;- prepare the tools required for stepping the mast and theadjustments;- use the right equipment: this avoids damaging the equipment(mallet instead of a hammer, for example).Setting up and protecting the mast- set the mast down on Trestles, which have beenprotected by foam or other soft material.The centre of gravity of the mast (where it is balanced to work on) isdefined by a red mark on the mast packing. Indicate this mark (afterunpacking) with a strip of red tape.2 /www.sparcraft.comwww.sparcraft.com / 3
3Drilling holes and pre-assemblyWe are talking here of a pre-assembly, not a final assembly- without fixing - of the aerials and lights:- pass the cables through using the messenger lines;- carry out the drilling, put in position the brackets;- carry out the pre-assembly of the mast head equipmentand deck lighting, taking care not to damage the sheaves;- run through the cables that are required (additional lightsand VHF) or planned for the future;- Fill in around the holes to make them watertight;- position the VHF aerial upside down (risk when being lifted);- check the holes at the foot of the mast.Take particularcare when drillingnot to damageanythingPRE-ASSEMBLY CONNECTIONSFITTING THE STANDING RIGGINGThe standing rigging ("side rigging") is fitted by starting at thetop of the mast and gradually feeding it down step by step to thefoot. The diagonal rigging (intermediate shrouds) and the spreadersare fitted during this process.The standing rigging will be placed on either side of the mast.Fitting of shellsThe shells are placed into the mast (before the cables are threadedthrough the holes in the spreaders) in three simple stages:Fitting Rotation Positioning90°55.14Passing through the messenger linesYou can leave one or more messenger linesin case of any future connections.RUNNING RIGGINGFront side - fore halyards / Rear side - rearhalyardsRun the halyards through using the messenger lines (not forthe pre-assembled halyards). Position the mast:- front side downwards for the fore halyards;- rear side downwards for the rear halyards;- check that all of the halyards are clear, (not caught anywhere),are parallel to the exit holes from the mast and arefree to move (exit from sheaves);- make a knot to hold each halyard in place (“figure of eight knot”).An aluminium rivet is placed into the top hole to stop the shell falling outduring the stepping of the mast. Ensure the shell is in place before insertingthe rivet. This rivet does not serve any structural purpose, as oncethe mast is erected, the shells are kept firmly in place by the rigging tension.Types of masthead rigfixing a safety rivet- Side shells: come ready fitted (with rivet attachment);- T-terminal: Line up the terminal at 90° and turn it 90° to fit into its housing.Fix a stopper in place to prevent it falling out (particularly for therunners);- External masthead rig (on tangs): never apply tension to the bolts thatpass through (risk of squashing the mast). Secure the attachment makingsure to open up the split pin once the swage eyes are in place.4 /www.sparcraft.comwww.sparcraft.com / 5
5.45.55.65.7Special precautions with continuous rigging- check the cable housing (front or rear) is correctlypositioned before screwing the spreader tip fittings inplace: the way the top and intermediate shrouds passthrough the tips of the spreaders is determined by theposition order of the cables on the chain plate on the boat(in general the lower holes on the chain plate are for theintermediate shrouds);- Otherwise, the default arrangement is: cap shrouds onthe back and intermediate shrouds on the front.Check the positioning of the cables before fixing the tips of the spreadersLine up the side rigging alongside the mast- continuous rigging: side by side while carefully protecting the mastand the turnbuckles (see below);- discontinuous rigging: tighten V1 by attaching a rope between theboom vang attachment and each turnbuckle and stretch D1 out along themastFit the backstay and runners- backstay: check the direction of the pin (pin towards the mast);It is advisable to protect this with sticky tape;- runners: pins towards the mast.Fit the forestay- Staysail stay (if applicable): attach it to the length of the mast;- forestay and furler: Lay the furler on the ground on padding to protectit (do not store the furler on the mast) and fit it at the end.PRECAUTIONS BEFORE STEPPING THE MASTChecks and preparation of the turnbuckles- unscrew the turnbuckles (pin removed) by turning thebody clockwise;- the turnbuckles are designed with right and left hand threads.Position the body with the right screw on the bottom (traditionalscrew direction);- Think ahead: with the mast stepped, nothing must stop theturnbuckles from being tightened quickly (shrouds and forestay)to keep the shape;- keep the turnbuckles clean. Lubricate if required with <strong>Sparcraft</strong>Rigging grease;- protect the turnbuckles (cloths and/or tape) to avoid knocks duringhandling.Final check- check each pin is in place;- tie the standing and running rigging to the mast (forestay slack);- check that the turnbuckles and pins are compatible with the deck fittingsand chain plate;- Mast fitted to the keel: measure the distance under the deck and comparewith the distance between the foot and deck stop.Protect any parts that jut out- It is recommended that all sensitive elements of yourrig be protected. A simple piece of rigging tape can beplaced on clevis and split pins. This will help preventunnecessary wear to sails. This mark can also be usedas an indicator during checks on all the fittings.- attach the foam protection to the front side of thespreaders to avoid contact with the furler when moving the mast.68 /www.sparcraft.comwww.sparcraft.com / 9
6 PRECAUTIONS BEFORE STEPPING THE MAST) Continue toMasthead equipment- Fitting of equipment (navigation lights,...) on land:complete this installation at the end. Cut down theamount of times you have to climb the mast and makesure they fit before stepping;- Fitting from the top: prepare the fragile elements (aerials and/or windindicators), but do not fix them until the mast is stepped and checked(temporary fitting of aerial upside down before lifting). Please consult theinstructions from the manufacturers of such equipment and the recommendationsfrom the crane-driver during the lifting process.Checking the cables and connections- any electric shock can cause corrosion.Please check the condition of the cables andthe bulbs in the navigation lights. Have them tested ifnecessary;- Check the electrical connections and protect them withan appropriate product.Final visual checkPlanted mast should read keel stepped mast : check the positionof the watertight system inside the mast (generally foundat the lowest halyard exit). You should only see daylightthrough the central tube for the electric cables. No light shouldpass through the main sectionHOISTINGPrecautions during hoistingThe operation needs to be carefully planned due to the high risksinvolved, concerning the equipment and the safety of thosetaking part in the operation.- Avoid lifting in strong winds;- stabilise the boat.- At each stage, all of the cables are together and the running andstanding rigging are attached to the foot of the mast except for the forestay(or furler) which is loose and ready to be attached.Please note: We are giving you a tried and tested method for stepping themast, but it is up to you to decide whether this is suitable dependingon your rig configuration, the crane and the environment:SlingThe hook must be fitted with a safety catch. Add an additional turnaround the jaws of the sling.- place the sling strop above the centre of gravity of the mast asmarked by the sticky tape (balance point) and knot it tight using a bowline;- take the sling from its hoisting point to the bottomof the mast and fix it to the gooseneck fitting;- pull in and bring together any surplus strop;- tie a tow rope between the anchorage point and theboom vang attachment (or gooseneck fitting);- Depending on the size of the mast and configuration,prepare a tow rope from the tip of the top spreader.gooseneckSafety procedures:Wrap theriggingaround themast andprotect theturnbucklesThe lifting and attachment strops must be suitable for the load and tightlyknotted. Position the mast above the deck of the yacht. Guide the mastinto place with the help of the tow ropes.710 /www.sparcraft.comwww.sparcraft.com / 11
8Fitting the furler: pleaseread the instructions suppliedby the manufacturer.8.1PUTTING THE MAST IN PLACESecuring a deck stepped mast- place the foot of the mast into its base;fix the standing rigging: forestay, babystay, cap shrouds,lower shrouds, runners, backstay just to secure the mast.Tighten the turnbuckles simply by hand to begin with (seebelow).Securing a keel stepped mastThe mast must be perpendicular to the vertical of the boat.- fit the items (wedge and flange) from the mastsleeve kit. The deck must be clear and the collar fixedwith flange ready to receive the mast;- two people guide the mast into its collar above thedeck and give instructions before crossing the deck.A third person helps with these operations and givesinstructions from inside the boat.- pass the electric cables carefully through the deckcollar;- lower the mast;- simple step: guide the mast into its housing;- U-shaped step: the same to fix the mast with theaxis going through the simple step;The exact position of the axis depends on the adjustmentrequired: the further forward the axis, thegreater the rake. The neutral point is of course in themiddle (see the adjustments section12).Neutral position in themiddle of the stepN.B.: to avoid any damage to the mast as it is lowered, protect it (plasticfilm or padding).PUTTING THE MAST IN PLACE- fit the forestay to its attachment;- fit the lower shrouds, then the main shrouds. Hand tightenthe turnbuckles (Do not use a spanner) to obtain a balance(bd/td);- fit the backstay(s);N.B.: on some models, the backstay is calculated precisely toensure the correct tension when under strain.If it is difficult to fit: ensure that the mast is not leaning forward,release the stay completely (turnbuckles or link plates),release D1 (lower shrouds), tighten slightly V1 (cap shrouds)and using the mainsail halyard fixed to a solid point (cleat, travellertrack), swing the mast backwards to allow the backstay(s) to be attached.- With the backstay(s) in place, tighten by hand all of the turnbuckles tosecure the mast.Free the slingWhen the mast is safely in place and secured, release the sling.Remove the return knot at the foot of the mast.Sleeve kit- Line up the bolts in their respective placesand squeeze the elastomer seal in order toensure it is completely watertight. Tobe safe, ensure that the seal is uniformlytight, in order to avoid anyrisk of leaking. This needs to befirmly tightened. We recommend that for the aluminiumsystem with screwed seals that the screw be protectedwith a special product (duralac, Teg gel...)- have available a silicon joint or PU glue to ensurecontact between the seal and mast and the sleeve in thehousing. Leave to dry for 24 hours before use;(continued)8.212 /www.sparcraft.comwww.sparcraft.com / 13
MAST FITTED TO THE KEELDeck tie rodsAs the halyards are attached to the collaron the deck, it is essential to compensatefor the load they exert upwards.It is therefore necessary to fitone or two deck tie rods,according to the size of themast, between the collar andthe stepped part of the mast.If this key part is forgotten, seriousstructural problems could result.Mast jack: please see the specificinstructionsBOOM AND POLE9 11Installation of theboomPositioning theboom on the ball joint on thegooseneck fitting:-manoeuvres with a short-handedcrew:With the help of the topping lift ordirectly with the mainsailhalyard, ease the weight on theboom;-once raised to a comfortable position, insert the front tip of the boominto the gooseneck.N.B.: for some models, the ball joint is fitted in a different direction (deliveredupside down). Keep it this way up (Do not turn over).- fit seals or collars on either side of the joint, according to the originalassembly;- lock in position with a pin or bolt.10HALYARD EXITSAngle the blocks to suit thehalyard exitsAngling the halyard channelsand your choices of on-board organisation.- bring the running rigging to the foot of themast to allow the layout to enter the cockpit andgo on to the blocks;- for the halyard layouts: angle the blocks to themast exits to avoid early wear on the runningrigging. The way it is spread out depends onthe recommendations from the manufacturerTaking in a reef withcontinuous riggingReefing is carried out from the cockpit,and the fitting process is no different thanthat of a classic boom.place.Pole- check the mechanisms are working properly.Lubricate if necessary;- adjust the lengths of the topping lift and boom vang.Mark adjustment points on these with the mast in14 /www.sparcraft.comwww.sparcraft.com / 15
13.313.4ADJUSTMENTS, RECOMMENDATIONSTension of the head rigging with sweptback spreadersSpecial instructions: swept-back spreaders support the mast from thesides and lengthways. By increasing the tension, the mast is pushedforward at the level of the spreaders creating a curve. Carryout the following step by step procedure to obtain the correctrake / pre-bend / tension:1. adjust the rake with the forestay, then tighten the backstay(cf 13.1);2. centre the mast sideways using the shrouds and tightenthem symmetrically to obtain a regular bend of the mast(20 cm for a 35’);3. apply tension to the lower shrouds, then the intermediateshrouds checking the mast is upright and with theright bend;4.Complete the adjustment to the tension in the sameorder and then after sailing trials. The tension on the capshrouds (V1) and lower shrouds (D1) must be high.Regularly check the vertical alignment along the sail track.Please note for discontinuous rigging: the turnbuckles on the intermediates(D2) must be completely open during the adjustment of the V1D1,and can be closed once the tension of V1D1 is complete. The tension onD2 must be low: close the turnbuckles by hand and two spanner turns.Tension on the fractional rigging withswept-back spreadersProceed as in section 13.3, but take intoaccount the following characteristics:- increasing the tension on the cap shroudspushes the mast forward creating apre-bend;- tightening the lower and intermediateshrouds will reduce the bend;ADJUSTMENTS, RECOMMENDATIONS- a slight permanent bend is desirable;- leave a pre-bend of 6 to 7 cm. The cap, intermediate and lowershrouds must then be taut;- adjust the running backstays to finish, as they work in opposition to therest of the rig;- when the back angle of the spreaders is below 15°, the tension requiredon the running backstay is high, in order to support the mast backwards;- If the rear angle of the spreaders is above 15°, the spreaders will alsosupport the mast lengthways and the tension on the backstay does notneed to be so high. However, be careful not to exceed the limit to avoida mast inversion.Tension of fractional rigging within-line spreaders- proceed as in section 13.3. Note:- The rigging with in-line spreaders is adjusted aswith top rigging, the only difference being theaddition of backstays for the tension of the forestay;- The mast should always be adjusted with acertain bend forwards/backwards,otherwise the curve of the mast may beinverted particularly in strong winds.Avoid a negativebend (“curvedbackwards”)the babystays adjust the bend of the mid-sectionof the mast. If they are too tight in relationto the backstays, they can cause theinversion of the mast bend.13.518 /www.sparcraft.comwww.sparcraft.com / 19
15ADJUSTMENT INDICATIONSMasthead rigIn-linespreadersSwept-backspreadersFractional rigSwept-backspreadersIn-linespreaders1. Rake adjust the forestay, then apply tension to the running backstayCOMMENTAIRES2. Side+ pre-benda straightmastadjust the cap shrouds symmetrically to obtain:a regularpre-benda regularpre-benda straightmast3. TensionTighten thelowershrouds foreand aft,then adjustthe intermediateshroudsTighten thelowershrouds, thenadjustthe intermediateshroudsMore tension onthe cap shroudspushes the mastforward creatinga bend;More tension onthe lower andintermediateshrouds reducesthe bend;Is adjustedlike a mastheadrigapart fromthe tensionon the runningbackstays4. FinaladjustmentCommentsApply the final tension respecting the same orderCheck under sail making sure the mast is straightAdjustment ofthe intermediatesat eachdiagonal turnbuckleAdjust the runningbackstay atthe end (works inopposition to therest of the rigging)Adjust toobtain a certainbendforwards orbackwards toavoid aninversion ofthe curve ofthe mast instrong winds22 /Adjust only for a very small amount of pre-bend on furling mastswww.sparcraft.comwww.sparcraft.com / 23
12UNPACKING AND CHECKING❑ Inventory / Reminder❑ Note down the serial numbers- Mast N° _ _ _ _ _ _ _ _ _ _ _ _- Boom N° _ _ _ _ _ _ _ _ _ _ _ _- Standing rigging N° _ _ _ _ _ _ _ _ _ _ _ _PREPARATION mast and equipment❑ Preparation of the tools required❑ Installation of the mast and centre of gravityP2 to P3P3P12 to P13P U T T I N G T H E MAST IN PLACE❑ Care with the mast❑ Special instructions for a mast fitted to the keel (8.1)❑ Sleeve kit (8.2)P14❑ Fitting deck tie rodsP14❑ Angling the blocksMAST FITTED TO THE KEELHALYARD EXITS89103PRE-ASSEMBLY CONNECTIONS❑ Drilling and pre-assemblyP4P15BOOM AND POLE❑ Installation of the boom /taking in a reef with continuous rigging114RUNNING RIGGING❑ Passing the halyards through and checksFITTING THE STANDING RIGGING P5 to 8P4❑ PoleP16CATAMARANS❑ Special characteristics / Pre-adjustment before fitting125❑ Insertion of shells / types of masthead gear (5.1)❑ Installation of spreaders and tip fittings (5.2)❑ Precautions with discontinuous rigging (5.3)❑ Precautions with continuous rigging (5.4)❑ Line up all the side rigging against the mast (5.5)❑ Fit the runner and backstays (5.6) ❑ Fit the forestay (5.7)P17 to 19A D J U STMENTS, RECOMMENDATIONS❑ Marks ❑ Rake (13.1)❑ Tension of the masthead rigging with in-line spreaders (13.2)❑ Tension of masthead rigging with sweptback spreaders (13.3)❑ Tension of fractional rigging with sweptback spreaders (13.4)❑ Tension of fractional rigging with in-line spreaders (13.5)1367PRECAUTIONS BEFORE STEPPING THE MAST P9 to 10❑ Checking and preparing the turnbuckles ❑ Protection❑ Electrical equipment ❑ Visual checkRAISING THE MAST❑ Precautions when hoisting❑ The sling❑ Safety during the manoeuvreP11P20 to 21ADJUSTMENTS AND SEA TRIALS❑ Checking the tuning under sail❑ Precautions on arrival back in harbour❑ Maintenance / Trimming the sailsP22ADJUSTMENT INDICATIONS141524 /www.sparcraft.comwww.sparcraft.com / 25


