Owner's Manual
Owner's Manual
Owner's Manual

You also want an ePaper? Increase the reach of your titles
YUMPU automatically turns print PDFs into web optimized ePapers that Google loves.
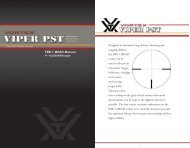
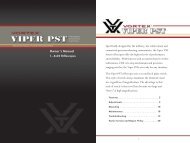
PRECISIONSHOOTINGTACTICALFIRST FOCAL PLANE RIFLESCOPESOwner’s <strong>Manual</strong>6–24x50 FFP Riflescopes4–16x50 FFP RiflescopesSpecifically designed for the tactical, law enforcementand committed precision shooting communities, the®Viper PST series of riflescopes offer the highest levelsof performance and reliability. With features such asmatched turret/reticle subtensions, CRS zero stopmechanisms and precision ranging reticles, the ViperPSTs are ready for any situation.This Viper PST FFP series use a first focal planereticle. This style of reticle maintains its subtensionsregardless of magnification change—the reticle appearsto grow and shrink as the magnification changes. Themain advantage to this style reticle is that the reticlesubtensions used for ranging, holdovers and wind driftcorrections are always accurate at any magnification.Features . . . . . . . . . . . . . . . . . . . . . . . . . . . . . . 2Adjustments . . . . . . . . . . . . . . . . . . . . . . . . . 3Mounting . . . . . . . . . . . . . . . . . . . . . . 10Maintenance . . . . . . . . . . . . . . . . . . . . . 18Troubleshooting . . . . . . . . . . . . . . . . . . 19Vortex Service and Repair Policy . . . . . . . . . . 201
Riflescope AdjustmentsThe Vortex Viper PST RiflescopeFast Focus Illumination KnobEyepieceElevationMagViewAdjustment KnobSide ParallaxFocus KnobReticle FocusMagnificationAdjustment RingWindageAdjustment KnobReticle FocusVortex Viper PST riflescopes use a fast focus eyepiece designedto quickly and easilyadjust the focus on theriflescope’s reticle.To adjust the reticlefocus:1. Look through theriflescope at a blank whitewall or up at the sky.2. Turn the eyepiece focusAdjust the reticle focusknob in or out until the reticle image is as crisp as possible.Note: Try to make this particular adjustment quickly, as the eyewill try to compensate for an out-of-focus reticle.Radius BarZeroReferenceTurret CapRetaining ScrewsObjectiveLensIncludes a4-Inch SunshadeOnce this adjustment is complete, it will not be necessaryto re-focus every time you use the riflescope. However,because your eyesight may change over time, you shouldre-check this adjustment periodically.LinesWarningLooking directly at the sun through a rifl escope, or any opticalinstrument, can cause severe and permanent damage to your eyesight.2 3
Variable Power AdjustmentsTo change magnifications, turn the magnification ring to thedesired level. TheVortex MagViewsystem will provide alow light reference formagnification level.IlluminationAdjustmentsThe Vortex ViperPST riflescopes use avariable intensity reticleIlluminationKnobReplacing the Illumination Battery1. Unscrew the outer cap with a coin.2. Remove the battery.3. Replace with a new CR2032 battery.Battery CapMagViewillumination system to aid in low light performance. To activate theillumination, rotate the adjustment knob in either direction.The illumination knob allows for 10 levels of brightness intensity;an off click between each level allows the shooter to turn theillumination off and return to a favored intensity level with justone click. The top five settings (6, 7, 8, 9 and 10) are visible in thedaytime, depending on the background color. Settings below 6 arefor low light use when the user’s eyes have adjusted to lower lightlevels. Lowest settings are for use with night vision devices.Customizable Rotational Stop (CRS)Vortex Viper PST riflescope elevation turrets incorporate theunique CRS rotation stop feature. After the rifle is sighted in,the design of the CRS allows a shooter to quickly and easilyreturn to an original zero point when using the elevation turretto dial-in temporary bullet drop corrections.The CRS feature is particularly useful when dialing largemulti-revolution elevation corrections. Without this feature,the shooter must pay very careful attention when dialing theselarge corrections. If the shooter loses track of the number ofrevolutions, the original zero point may become lost whenreturning the adjustment. Viper PST riflescopes equipped withthe CRS allow the elevation dial to be quickly spun back tooriginal zero without having to carefully count revolutions orclicks.Once the CRS shims are installed after sight-in, the elevationdial will stop turning shortly past the original zero point whenbeing returned (turning clockwise direction) from a temporaryelevation adjustment. The shooter can then turn the elevationknob a partial turn in a counter-clockwise direction until thezero reference and radius bar are correctly aligned—achievingthe original zero point.See CRS shim installation in theBore Sighting and Final RangeSight-in sections.CRS Shims8 9
Riflescope MountingTo get the best performance from your Vortex Viper PSTriflescope, propermounting is essential.Although not difficult,the correct steps mustbe followed. If you areunsure of your abilities,it would be best touse the services of aqualified gunsmith.Centering of the ReticleThe Vortex Viper PST riflescope is pre-set from the factorywith the reticle in the center of the adjustment ranges.If you have changed the settings and wish to approximatelyreset the reticle to the center, this can be done easily:1. Turn the windage or elevation dial as far as possible in eitherdirection. Do not force the dial. As soon as any any resistance is felt,stop turning.2. Carefully count the dial rotations while turning the dial backin the opposite direction. Stop turning as soon as resistance is felt.Rings and BasesMount an appropriate base and matching rings to yourrifle according to the manufacturer’s instructions. TheVortex Viper PST riflescopes require 30mm rings.Vortex Optics highly recommends using the VortexOptics Precision Matched 30mm ring sets which may bepurchased from an authorized Vortex riflescope dealer.These rings will mount to any Picatinny spec base.Note: If shooting at distances in excess of 800 yards with 4–16x50or 6–24x50 models, Vortex Optics recommends use of a 20 MOAcanted Picatinny rail or 30mm rings with adjustable offsets. Thesecan be purchased through companies such as Badger Ordnance,Barrett Mfg., EGW, Burris, and others.If using an aftermarket base and ring setup, use thelowest ring height that will provide complete clearanceof scope and rifle—avoiding any contact with barrel,receiver, bolt handle or any other part of the rifle. Alow mounting will help assure proper cheek weld, aid inestablishing a solid shooting position, and promote fasttarget acquisition.3. Turn the dial the other direction to half the amount ofrotations counted in step one.Complete this procedure for both windage and elevationdials to approximately center the reticle.10 11
Eye Relief and Reticle AlignmentAfter installing the bottom ring halves on the mounting base,place the riflescope on the bottom ring halves and loosely installthe upper ring halves. Before tightening the scope ring screws,adjust for maximum eye relief to avoid injury from recoil:1. Set the riflescope to the middle of its magnification range.2. Slide the riflescope as far forward as possible in the rings.3. While viewing through the riflescope in a normalshooting position, slowly slide the riflescope back towardsthe shooter’s face—paying attention to the field of view. Justas the full view is visible, stop.4. Without disturbing the front-back placement, rotatethe riflescope until the vertical crosshair exactly matchesthe vertical axis of the rifle. Use of a reticle leveling tool, aweight hung on a rope, or an adjustable set of feeler gaugeswill help with this procedure.Bore SightingInitial bore sighting of the riflescope will save time andmoney at the range. This can be done by using a mechanicalor laser bore sighter according to the manufacturer’sinstructions or by removing the bolt and sighting throughthe barrel on some rifles.To visually bore sight a rifle:1. Place the rifle solidly on a rest and remove the bolt.2. Sight through the bore at a target approximately 100 yardsaway.3. Move the rifle and rest until the target is visually centeredinside the barrel.4. With the target centered in the bore, make windage andelevation adjustments until the reticle crosshair is also centeredover the target.5. After aligning the reticle, tighten and torque the ringscrews down per the manufacturer’s instructions.Use of an adjustable set of feelergauges between a one-piecebase and fl at bottom sectionof the rifl escope to square therifl escope (and reticle) to thebase.Visually bore-sighting a rifl e.12 13
Final Range Sight-In and CRS Stop SetAfter the riflescope has been bore-sighted, final sight-in andCRS stop set should be done at the range using the exactammunition expected to be used while shooting. Sight in andzero the riflescope at the preferred distance. 100 yards is themost common zero distance, although a 200 yard zero may bepreferred for long range applications.Be sure the reticle is in focus (see Reticle Focus) and set theparallax adjustment to match the distance being used forsight-in:Setting the CRS Stop and Indexing Elevation KnobAfter obtaining a satisfactory zero, the CRS stop can be set ifdesired:1. Loosen the three turret cap retaining screws on theelevation turret. Gently pull the turret cap straight up and offof the turret post, being careful not to rotate the turret post.2. Slide the CRS shims on the center section of the turret postbelow the V-grooved part.Place CRS shimsin this groove.1. Following all safe shooting practices, fire a three-shot groupas precisely as possible.2. Next, adjust the reticle to match the approximate center ofthe shot group (see section on Windage and Elevation Adjustment).Note: If the rifl e is very solidly mounted and cannot be moved, simplylook through the scope and adjust the reticle until it is centered on thefi red group.3. Carefully fire another three-shot group and see if the bulletgroup is centered on the bullseye.Alternate shim installation direction180 degrees with each shim.This procedure can be repeated as many times as necessaryto achieve a perfect zero.Use as many shims as necessary tocompletely fi ll up the space. Donot try to force in a last shim oncethe clearance is very close—a tinyremaining gap is normal.14 15
1. After filling the center gap on the post with shims, replacethe elevation cap.2. Align the turret cap so the “0” mark on the cap matches upwith the “0” reference line on the turret post. Again, be surenot to rotate the actual turret mechanism in the process.3. Re-tighten the retaining screws,but do not overtighten. Use ofthumb and forefinger on the shortend of the hex wrench will providesufficient force.Indexing the Windage KnobAlign the elevation turret cap.1. Loosen the three retaining screws on windage turret cap.2. Carefully rotate the cap until the “0” mark on the capmatches up with the “0” reference line on the turret post. Besure that the cap is freely turning and that you don’t rotate theactual turret mechanism.3. Re-tighten the windage knob retaining screws, but do notovertighten. Use of thumb and forefinger on the short end ofthe hex wrench will provide sufficient force.Once the windage and elevationknobs are correctly indexed to thezero mark, temporary correctionscan be safely dialed into thescope without worry of losing theoriginal zero.Using the CRS Zero StopOnce the CRS shims are installed, the elevation dial willstop turning shortly past the original zero point when beingreturned (turning clockwise direction) from a temporaryelevation adjustment.Point at which theknob stops turning.Turn the elevation knob a partial turn in a counter-clockwisedirection until the Radius Bar is correctly aligned with scopeaxis and zero marks match. This setting will match the originalzero point.Correct alignment forzero point.If re-zeroing at a future time, be sure to remove all CRSshims before sight-in.Align the windage turret cap.16 17
MaintenanceCleaningThe fully waterproof and fogproof Vortex Viper PSTriflescope requires very little routine maintenance otherthan periodically cleaning the exterior lenses. The exteriorof the scope may be cleaned by wiping with a soft, dry cloth.When cleaning the lenses, be sure to use products, such asthe Vortex Fog Free cleaning products or Lens Pen, that arespecifically designed for use on coated optical lenses.• Be sure to blow away any dust or grit on the lensesprior to wiping the surfaces.• Using your breath, or a very small amount of water orpure alcohol, can help remove stubborn things like driedwater spots.LubricationAll components of the Vortex Viper PST riflescopes arepermanently lubricated, so no additional lubricant should beapplied.Note: Other than to remove the turret caps, do not attempt todisassemble any components of the rifl escope. Disassembling ofrifl escope may void warranty.StorageIf possible, avoid exposing your Vortex riflescope to directsunlight or any very hot location for long periods of time.TroubleshootingSighting-in ProblemsMany times, problems thought to be with the scope are actuallymount problems. Be sure the mounts are tight to the rifle andthe scope is secured so it doesn’t twist or move in the rings.An insufficient windage or elevation adjustment range mayindicate problems with the base mount, base mount holes drilledin the rifle’s receiver, or barrel/receiver alignment.Check for Correct Base and Ring Alignment1. Re-center the scope reticle (see Centering of the Reticle).2. Attach bore sighter, or remove bolt and visually boresight rifle.3. Look through the scope. If the reticle appears way off centeron the boresighter image or when compared to the visuallycentered target when looking through rifle’s bore, there maybe a problem with the bases or rings being used. Confirmthat correct base and rings are being used—and in the properorientation.Grouping ProblemsThere are many issues that can cause poor bullet grouping.• Maintain a good shooting technique and use a solid rest.• Check that all screws on rifle’s action are properly tightened.• Be sure rifle barrel and action are clean and free of excessiveoil or copper fouling.• Check that rings are correctly torqued per the manufacturer’sinstructions.• Some rifles and ammunition don’t work well together—trydifferent ammunition and see if accuracy improves.18 19
Vortex Service and Repair PolicyUnconditional Lifetime WarrantyVortex Optics wants you to shootand use your Viper PST riflescopeunder any conditions withcomplete confidence—that’s whyour warranty is straightforwardand simple:• Fully transferable• No warranty card needed• No receipt neededUnconditional LifetimeWarrantywww.vortexoptics.comRest assured, if this riflescope should ever require repair, allyou need to do is contact Vortex for absolutely free service.Call 800-426-0048 or e-mail service@vortexoptics.com.Vortex Optics2120 West Greenview DriveMiddleton, Wisconsin 53562USADual Use: Shooting Tactical / Hunting<strong>Manual</strong> #1-P2Patents Pending on MagView System, Radius BarDual Use: Shooting Tactical / Hunting20