
You also want an ePaper? Increase the reach of your titles
YUMPU automatically turns print PDFs into web optimized ePapers that Google loves.
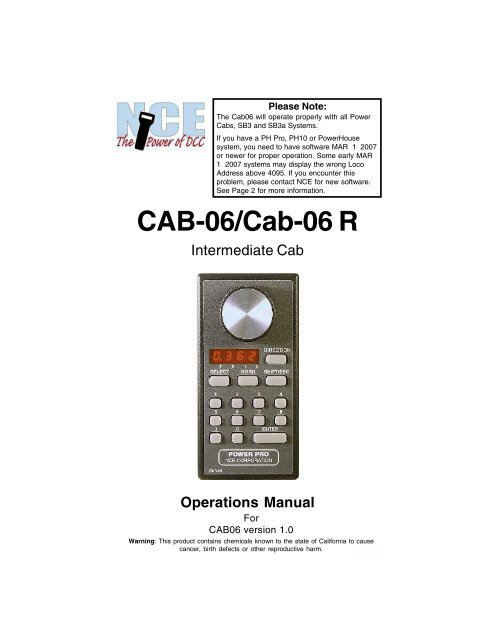
Please Note:The <strong>Cab06</strong> will operate properly with all PowerCabs, SB3 and SB3a Systems.If you have a PH Pro, PH10 or PowerHousesystem, you need to have software MAR 1 2007or newer for proper operation. Some early MAR1 2007 systems may display the wrong LocoAddress above 4095. If you encounter thisproblem, please contact <strong>NCE</strong> for new software.See Page 2 for more information.CAB-06/Cab-06 RIntermediate CabOperations ManualForCAB06 version 1.0Warning: This product contains chemicals known to the state of California to causecancer, birth defects or other reproductive harm. Page 1
Before you do Anything Else . . .The Cab 06 comes to you with its Cab Address set to 3. If you are usingit as the additional Cab for a Power Cab, you’re all set. You don’t needto do anything. However, if you are using one of our other systems andyou already have a Cab that is set to Cab Address 3, then you will needto change its number.Setting the Cab Address:1) Turn on the DCC system.2) Unplug your <strong>Cab06</strong> from the cab bus.3) Plug the cab back in while holding down the SELECT button.4) Release the SELECT key.5) The cab will now enter its internal setupprogram indicated by “Adxx” on the LED displaywhere xx is the current cab bus address.6) If you DO NOT wish to change the address just press SHIFT/ESC toexit.7) If you wish to change the address type in the new address number.Addresses 1-63 are valid for all systems except thePower Cab (3) or the SB3a (2-5). Press the ENTERkey. Pressing the “SHIFT/ESC” at any time willcancel the operation. If you enter Cab Address 00,the <strong>Cab06</strong> will reset to its factory settings.8) When you see: “nor” or “Ard” press the Shift/Esckey to exit setup mode.Make sure you have the right softwareWith the Power Cab, SB3 or SB3a you have the right software.However, if you have a PH Pro, PH10, CS02 or PowerHouse, you needto check which software you have:• Using your ProCab or Power Cab.• With the system on, press the Prog/Esc key 5 times (Set CMDStation). Press the Enter key once. On the bottom line will be a date.The one you’re looking for is MAR 1 2007B. If you have an earlierversion, call 585-265-0231 to place a chip order.Page 2Last Revised 14 June, 2011© 2011 <strong>NCE</strong>Corporation
<strong>Cab06</strong> Operations ManualTo the right is an illustration of theCAB06 Intermediate Cab. Followingis a description of the variouscontrols and indicators.LED DISPLAYThis 4 digit display normallyindicates the current locomotiveaddress and its forward/reversestatus (decimal points above the“F” and “R”).SPEED KNOBThis knob controls the speed of thelocomotive. It turns a digitalencoder inside the plastic case. Ifthe cab is set to “yard” mode theknob is “center off”, turning it to theleft goes faster in reverse, turningit to the right goes faster inforward.DIRECTION KEYPressing the DIRECTION key willcause the loco to change direction. This button is disabled when thecab is in “yard” mode.SELECTThis selects the locomotive/consist to operate. Type in the loco/consistnumber, then press ENTER.HORNThis button is factory set to operate Function 2 for the horn/whistlefeature of DCC sound systems. Unlike other keys which togglefunctions on and off this key is momentary, activating the functiononly as long as the button is held down. If you want Function 2 totoggle on and off use the “2” button. This button also turns on thecab if it is radio equipped.Page 3
SHIFT/ESCAll of the buttons of the CAB06 have several different uses. Forexample, the SELECT button acts as Select Loco but it may also beused as Select Accessory if SHIFT is pressed before pressingSELECT. The SHIFT button selects the “shift level” of the other cabbuttons. Pressing SHIFT once puts the cab at Shift Level 1. Thedecimal point above the “1” on the LED display will light indicatingShift Level 1. If SHIFT is pressed a second time the “2” will light (“1”turns off) indicating Shift Level 2. If SHIFT is pressed a third timeboth the “1” and “2” go out indicating Shift Level 0.The CAB can be set up to have 0, 1, 2 or 3 shift levels (level 3 hasboth the “1” and “2” lit).When the cab is waiting for you to enter numbers the SHIFT buttonacts as the ESC (escape) key.NUMBER KEYSThe keys 0 through 9 serve two purposes. First, when operating alocomotive if a number key is pressed it toggles the correspondingfunction on the loco (if that function is connected and supported bythe decoder). The second purpose is for entering numeric data that isrequired for selecting a locomotive or other device. Use the 0 key forHeadlight and the 1 key for Bell if you have a sound system.HEADLIGHTThe “0” button (the headlight is Function 0) toggles the Headlight onand off.ENTERUsed to confirm numeric input.SETTING UP YOUR CAB06Just as every locomotive has a separate number (address in DCCterms) each cab needs a separate address so the command stationcan distinguish one cab from another. Each CAB06 is shipped fromthe factory with the address of 3. If this is not your first CAB06 youwill have to change the address before using the cab.Entering Setup mode for the CAB06:1) Turn on the DCC system.2) Unplug your <strong>Cab06</strong> from the cab bus.Page 4
3) Plug the cab back in while holding down the SELECT button.4) Release the SELECT key.5) The cab will now enter its internal setupprogram indicated by “Adxx” on the LED displaywhere xx is the current cab bus address.Setting the cab address (also reset to factory settings):1) If you DO NOT wish to change the address just press ENTER tomove on to the Yard/Normal option.2) If you wish to change the address type in the new address.• If you are using the <strong>Cab06</strong> with a Power Cab, the <strong>Cab06</strong> addressmust be 3.• If you are using the <strong>Cab06</strong> with an SB3, SB3a, SB5 or SB10 the<strong>Cab06</strong> address must be in the range of 2-5.• All other systems can use the <strong>Cab06</strong> in the 1-63 range.3) If you enter cab address 00 the cab will reset to its factorysettings. This finishes setting the cab address.Set Yard/Normal mode:If the cab is set to Yard mode, the knob is“center off” and turning it to the left will increasethe speed in reverse while turning it to the rightwill increase the speed in forward.1) The LED will display “Ard” if the cab is in Yard mode or “nor” if itis in Normal mode.2) If you DO NOT wish to change this press ENTER to move on tothe Ballistic Tracking Rate option.3) If you wish to change the operating mode press 0 for Normalmode or 1 for Yard mode. Pressing “SHIFT/ESC” at any time willcancel the operation.Page 5
Set Ballistic Tracking Rate:Ballistic tracking provides a means where the speed will ramp up/down quickly if the knob is turned fast and it will ramp up/downslowly if the knob is turned slowly. This gives you very fine controlby turning the knob slowly yet allows quickly changing speed if youwant by turning it fast. The factory setting is 3. Lower numbers willlower the sensitivity and higher numbers will increase the sensitivityto how fast the knob is turned. The valid range is 0 to 7. If you entera number outside this range it will not be accepted and the cab willcontinue to wait for a number in the range of 0 to 7.1) The LED will display “baLx” where x is thecurrent tracking rate.2) If you DO NOT wish to change this pressENTER to move on to the Shift Level.3) Any digit between 0-7 is valid . Pressing “SHIFT/ESC” will cancelthe operation.Set the Maximum number of shift levels:1) The LED will display “SH x” where x is thecurrent maximum “shift” level.2) If you DO NOT wish to change this pressENTER to move on to the display cab softwareversion number.3) Any digit between 0-3 is valid. Pressing “SHIFT/ESC” cancels theoperation.Show Cab Version NumberThis is an identifier that will show youwhich version of the cab is yours.Page 6
<strong>Cab06</strong> R - Radio Equipped OperationAbout your wireless <strong>Cab06</strong>:The wireless version of the <strong>Cab06</strong> is designed to eliminate the need fortethered operation of an <strong>NCE</strong> Cab. It is equipped with an internalantenna. The radio is battery powered and will supply power for both caboperation and the radio itself. The Cab has a built in battery chamber forfour AAA battery cells.Wireless communications:We are continuously asked about the operating distance of the wirelesscab. There are many factors governing the useful range of wirelessproducts. The <strong>Cab06</strong> R operates in the ISM (Industrial, Scientific andMedical) radio band at 916.5 MegaHertz (Mhz). Many cordless phones,wireless computer networks, home automation systems, and wirelesssecurity devices also operate in this portion of the radio band and allcontribute to radio interference. In any radio system, propagation of theradio signal will suffer in the presence of ‘in band’ intererence. Whendevices operate in the same frequency band they may contributeinterference to the point where your cab may not work at all. On theother hand your wireless cab may interfere with the operation of theother devices you already own. Radio waves are like one big ‘cocktailparty’ where everyone is talking at once. A device using these radiowaves must attempt to sort out what ‘voices’ are relevant to itsoperation and which ones are ‘noise’. If there is too much noise it can’tdo this successfully and will operate poorly or not at all. Indoor radiopropagation is an issue for special consideration. The human bodyreadily absorbs RF energy in the frequency band used by the <strong>Cab06</strong>radio. Placement of the base station can mitigate blocking of the radiosignal due to human body absorption. In most indoor situations ‘deadspots’ can be found where reception is very difficult. These can occureven if there appears to be a direct line of sight between the transmitterand receiver. These dead spots, or ‘nulls’, are the result of multiple radiotransmission paths between two points caused by reflections off metalobjects such as steel beams, screen wire, concrete rebar, metal doorand window frames, ceiling tile frames, model railroad track, etc. Nullsoccur where the path lengths differ by an odd ½ wavelength (about6 inches at 900 MHz). Deep nulls are usually very localized and can beavoided by moving slightly, usually only a few inches. When performingcomplex tasks involving many messages displayed on the Cab,communications between the cab and command station may take longerthan expected thus slowing down your operation. In these instances youmay find it more expedient to plug in the cab while doing extensiveprogramming or system setup.Page 7
Operation of the Radio Cab:To turn on the cab:Press “HORN” key. The <strong>Cab06</strong> will activate and the LED on top of thecase very briefly flash. Once the cab communicates with the basestation normal operations can begin just as if you were plugged in to thecab bus.Description of LED activity:The LED on top of the cab will flicker every time it communicates withthe base station. A regular pulse of this LED indicates good qualitycommunications. The flickering will become erratic when you are gettingout of range from the base station. You can use this LED “heart beat” to‘map out’ weak signal areas and ‘nulls’ of the layout room. Priority isplaced on commands getting from the cab to the base station. As youapproach the maximum range of the cab, updates to the LED (on/off)will lag behind the commands being sent to the base. If the base stationis not able to read the LED updates it will try to re-send them 16 timesbefore giving up. The base station LEDs flash brightly when it is tryingto send display update information.To turn off the cab:Just let it “timeout” and shut itself off. Optionally, you can press theSHIFT key then the HORN key at the same time. The <strong>Cab06</strong> will turnoff.Automatic shutdown:As it comes from the factory, the cab will automatically shut itself offafter 10 minutes of inactivity.Cab Addresses:The wireless <strong>Cab06</strong> works best when set to cab addresses in the rangeof 19-49. It will operate more slowly when set in the range of 2-17.Tips:• We recommend having several of our UTP or DIN plug-in panels locatedaround the layout where you can plug in the cab in case the batterygoes dead or conditions such as severe interference cause loss ofcontrol via radio. We usually hang a short cab cable about 2 feet longfrom a small number these panels to facilitate plugging in during anemergency.Page 8
• The cab may not operate when you get within 1 foot (300mm) of thebase station (other cabs will still operate normally). This is due to’overloading’ of the base station receiver.• The cab works better while it is vertical rather than pointing towards thebase station.• In crowded layout rooms we’ve had good luck attaching the base stationto the ceiling with its antenna pointing down.This equipment generates, uses, and can radiate radio frequency energy and, if notinstalled and used in accordance with the manufacturer's instruction manual, maycause interference with radio and television reception. This equipment has been testedand found to comply with the limits for a Class B digital device pursuant to Part 15 ofthe FCC Rules.This device and been tested and found to comply with Part 15 of the FCC Rules.Operation is subject to the following two conditions:1) This device may not cause harmful interference.2) This device must accept any interference received, including interference that maycause undesired operation.Notice: The FCC regulations provide that changes or modifications not expresslyapproved by <strong>NCE</strong> Corporation could void your authority to operate this equipment.These limits are designed to provide reasonable protection against harmful interferencein a residential installation. However, there is no guarantee that interference willnot occur in a particular installation. If this equipment does cause harmful interferencewith radio or television reception, which can be determined by turning the equipment offand on, you are encouraged to try to correct the interference by one or more of thefollowing measures:• Reorient the receiving antenna.• Relocate the system with respect to the receiver.• Move the system away from the receiver.• Plug the system into a different outlet so that the system and the receiver are ondifferent branch circuits.If necessary, consult a representative of <strong>NCE</strong> Corporation or an experiencedradio/television technician for additional suggestions.WarrantyThis product is fully factory tested and warranted against manufacturing defects for aperiod of 1 year. As the circumstances under which this product is installed can not becontrolled, failure of the product due to installation problems can not be warranted. Thisincludes misuse, miswiring, operation under conditions beyond the design range of theproduct. No guarantees are expressed or implied as to the suitability of the product forits intended use by the purchaser. No guarantees can be made as to thecommunications range or performance of this product in the presence of radio or otherelectromagnetic interference. It is possible that interference can cause undesiredoperation including loss of control of speed, direction etc. Damage to purchaser’sequipment due to loss of control is not warranted or covered by <strong>NCE</strong>.For warranty or non-warranty service, call 585-265-0230 Monday through Friday9:00am till 4:00pm.Page 9
Appendix A<strong>Cab06</strong> Shift ReferenceSHIFT/ESC Normal First Shift Second Shift Third ShiftSELECT Select Loco Select Accy Select MacroDIRECTION Direction Recall Set RecallsHORN Horn 28/1280 F0 F10 F20 Speed 01 F1 F11 F212 F2 F12 F223 F3 F13 F234 F4 F14 F245 F5 F15 F256 F6 F16 F267 F7 F17 F278 F8 F18 F289 F9 F19Enter Accepts last Entry Refresh Display<strong>Cab06</strong> Radio On/OffRadio On = HORNRadio Off = Hold SHIFT while pressing HORNSpare copy of rear labelSEL -Loco ^SEL - AccyDIR -Direction ^DIR - Recall0-9 -F0-F9 ^0-9 - F10-F19HORN -Horn ^Horn -^^SEL -Macro ^^^SEL -^^DIR - ^^^DIR - Set Recall^^0-9 -F20-F28 ^^^0 - Speed 0^^HORN - ^^^HORN- 28/128Horn -Radio On ^+Horn - Radio OffSetup -hold Select while plugging inAdnn -Sel cab address (1- 63)Nor -0=normal, 1=yar dBAL -Ballis tic trac king (1-7)SH-n -Max shift level (0-3)Page 10