Experiment RP-2: The Effect of Gravity on Breathing - iWorx
Experiment RP-2: The Effect of Gravity on Breathing - iWorx
Experiment RP-2: The Effect of Gravity on Breathing - iWorx
- No tags were found...
Create successful ePaper yourself
Turn your PDF publications into a flip-book with our unique Google optimized e-Paper software.
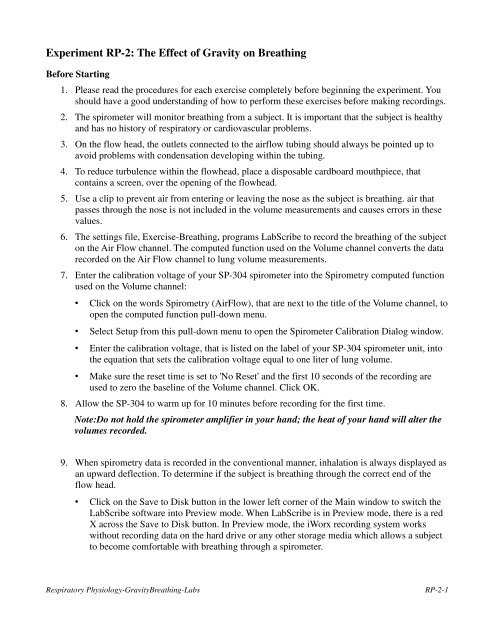
<str<strong>on</strong>g>Experiment</str<strong>on</strong>g> <str<strong>on</strong>g>RP</str<strong>on</strong>g>-2: <str<strong>on</strong>g>The</str<strong>on</strong>g> <str<strong>on</strong>g>Effect</str<strong>on</strong>g> <str<strong>on</strong>g>of</str<strong>on</strong>g> <str<strong>on</strong>g>Gravity</str<strong>on</strong>g> <strong>on</strong> <strong>Breathing</strong>Before Starting1. Please read the procedures for each exercise completely before beginning the experiment. Youshould have a good understanding <str<strong>on</strong>g>of</str<strong>on</strong>g> how to perform these exercises before making recordings.2. <str<strong>on</strong>g>The</str<strong>on</strong>g> spirometer will m<strong>on</strong>itor breathing from a subject. It is important that the subject is healthyand has no history <str<strong>on</strong>g>of</str<strong>on</strong>g> respiratory or cardiovascular problems.3. On the flow head, the outlets c<strong>on</strong>nected to the airflow tubing should always be pointed up toavoid problems with c<strong>on</strong>densati<strong>on</strong> developing within the tubing.4. To reduce turbulence within the flowhead, place a disposable cardboard mouthpiece, thatc<strong>on</strong>tains a screen, over the opening <str<strong>on</strong>g>of</str<strong>on</strong>g> the flowhead.5. Use a clip to prevent air from entering or leaving the nose as the subject is breathing. air thatpasses through the nose is not included in the volume measurements and causes errors in thesevalues.6. <str<strong>on</strong>g>The</str<strong>on</strong>g> settings file, Exercise-<strong>Breathing</strong>, programs LabScribe to record the breathing <str<strong>on</strong>g>of</str<strong>on</strong>g> the subject<strong>on</strong> the Air Flow channel. <str<strong>on</strong>g>The</str<strong>on</strong>g> computed functi<strong>on</strong> used <strong>on</strong> the Volume channel c<strong>on</strong>verts the datarecorded <strong>on</strong> the Air Flow channel to lung volume measurements.7. Enter the calibrati<strong>on</strong> voltage <str<strong>on</strong>g>of</str<strong>on</strong>g> your SP-304 spirometer into the Spirometry computed functi<strong>on</strong>used <strong>on</strong> the Volume channel:• Click <strong>on</strong> the words Spirometry (AirFlow), that are next to the title <str<strong>on</strong>g>of</str<strong>on</strong>g> the Volume channel, toopen the computed functi<strong>on</strong> pull-down menu.• Select Setup from this pull-down menu to open the Spirometer Calibrati<strong>on</strong> Dialog window.• Enter the calibrati<strong>on</strong> voltage, that is listed <strong>on</strong> the label <str<strong>on</strong>g>of</str<strong>on</strong>g> your SP-304 spirometer unit, intothe equati<strong>on</strong> that sets the calibrati<strong>on</strong> voltage equal to <strong>on</strong>e liter <str<strong>on</strong>g>of</str<strong>on</strong>g> lung volume.• Make sure the reset time is set to 'No Reset' and the first 10 sec<strong>on</strong>ds <str<strong>on</strong>g>of</str<strong>on</strong>g> the recording areused to zero the baseline <str<strong>on</strong>g>of</str<strong>on</strong>g> the Volume channel. Click OK.8. Allow the SP-304 to warm up for 10 minutes before recording for the first time.Note:Do not hold the spirometer amplifier in your hand; the heat <str<strong>on</strong>g>of</str<strong>on</strong>g> your hand will alter thevolumes recorded.9. When spirometry data is recorded in the c<strong>on</strong>venti<strong>on</strong>al manner, inhalati<strong>on</strong> is always displayed asan upward deflecti<strong>on</strong>. To determine if the subject is breathing through the correct end <str<strong>on</strong>g>of</str<strong>on</strong>g> theflow head.• Click <strong>on</strong> the Save to Disk butt<strong>on</strong> in the lower left corner <str<strong>on</strong>g>of</str<strong>on</strong>g> the Main window to switch theLabScribe s<str<strong>on</strong>g>of</str<strong>on</strong>g>tware into Preview mode. When LabScribe is in Preview mode, there is a redX across the Save to Disk butt<strong>on</strong>. In Preview mode, the <strong>iWorx</strong> recording system workswithout recording data <strong>on</strong> the hard drive or any other storage media which allows a subjectto become comfortable with breathing through a spirometer.Respiratory Physiology-<str<strong>on</strong>g>Gravity</str<strong>on</strong>g><strong>Breathing</strong>-Labs<str<strong>on</strong>g>RP</str<strong>on</strong>g>-2-1
• Click <strong>on</strong> the Preview butt<strong>on</strong>. Have the subject inhale through the spirometer flowhead.Click <strong>on</strong> the AutoScale butt<strong>on</strong> at the upper margin <str<strong>on</strong>g>of</str<strong>on</strong>g> the Air Flow and Volume channels. Ifthe flowhead is oriented properly, the traces <strong>on</strong> the Air Flow and Volume channels will goup during inhalati<strong>on</strong>. If the traces <strong>on</strong> these channels go down during inhalati<strong>on</strong>, have thesubject breathe through the other end <str<strong>on</strong>g>of</str<strong>on</strong>g> the flowhead, or reverse the positi<strong>on</strong>s <str<strong>on</strong>g>of</str<strong>on</strong>g> the airflowtubes at the outlets <str<strong>on</strong>g>of</str<strong>on</strong>g> the flowhead.Note: If the user clicks the Preview butt<strong>on</strong> and an error window appears the Main windowindicating the <strong>iWorx</strong> hardware cannot be found, make sure the <strong>iWorx</strong> unit is turned <strong>on</strong> andc<strong>on</strong>nected to the USB port <str<strong>on</strong>g>of</str<strong>on</strong>g> the computer. <str<strong>on</strong>g>The</str<strong>on</strong>g>n, click <strong>on</strong> the OK butt<strong>on</strong> in the error window.Pull down the LabScribe Tools menu, select the Find Hardware functi<strong>on</strong>, and follow thedirecti<strong>on</strong>s <strong>on</strong> the Find Hardware dialogue window10. Click <strong>on</strong> the Stop butt<strong>on</strong>.11. Before proceeding to the actual exercises, make sure the LabScribe s<str<strong>on</strong>g>of</str<strong>on</strong>g>tware in set to Recordmode. Click <strong>on</strong> the Save to Disk butt<strong>on</strong>, in the lower left corner <str<strong>on</strong>g>of</str<strong>on</strong>g> the Main window, to changeLabScribe from Preview mode to Record mode. When LabScribe is in Record mode, there is agreen arrow <strong>on</strong> the Save to Disk butt<strong>on</strong>.Exercise 1: <strong>Breathing</strong> While SittingProcedureAim: To measure breathing parameters in a sitting subject.1. Instruct the subject to:• Sit quietly and become accustomed to breathing through the spirometer flowhead.• Breathe normally before any recordings are made.• Hold the flowhead so that its outlets are pointed up.• Remove the flowhead from his or her mouth and hold it at the mouth level in a positi<strong>on</strong> thatprevents a breath from moving through the flowhead.Note: <str<strong>on</strong>g>The</str<strong>on</strong>g> LabScribe s<str<strong>on</strong>g>of</str<strong>on</strong>g>tware will zero the Volume channel during the first ten sec<strong>on</strong>ds <str<strong>on</strong>g>of</str<strong>on</strong>g>recording. No air should be moving through the flow head during this time.2. Type Sitting in the Mark box that is to the right <str<strong>on</strong>g>of</str<strong>on</strong>g> the Mark butt<strong>on</strong>.3. Click <strong>on</strong> the Record butt<strong>on</strong>. After waiting ten sec<strong>on</strong>ds for the Volume channel to zero, have thesubject place the flowhead in his or her mouth and begin breathing. Press the Enter key <strong>on</strong> thekeyboard to mark the recording.4. Click the AutoScale butt<strong>on</strong>s <str<strong>on</strong>g>of</str<strong>on</strong>g> the Air Flow and Volume channels. Notice the slowly movingwave <strong>on</strong> the Volume channel. Record ten breaths, which normally takes about 90 sec<strong>on</strong>ds torecord.Respiratory Physiology-<str<strong>on</strong>g>Gravity</str<strong>on</strong>g><strong>Breathing</strong>-Labs<str<strong>on</strong>g>RP</str<strong>on</strong>g>-2-2
5. Type Forced in the Mark box. Press the Enter key <strong>on</strong> the keyboard as the subject inhales asdeeply as possible. After reaching his or her maximum inhalati<strong>on</strong> volume, the subject shouldexhale as quickly and as completely as possible.6. After the forced exhalati<strong>on</strong> is complete, the subject should c<strong>on</strong>tinue to breathe normally throughthe spirometer for five breath cycles.7. Click Stop to halt recording. Your data may look like Figure <str<strong>on</strong>g>RP</str<strong>on</strong>g>-2-L1.8. Select Save As in the File menu, type a name for the file. Choose a destinati<strong>on</strong> <strong>on</strong> the computerin which to save the file, like your lab group folder). Designate the file type as *.iwxdata. Click<strong>on</strong> the Save butt<strong>on</strong> to save the data file.Figure <str<strong>on</strong>g>RP</str<strong>on</strong>g>-2-L1: Air flow and lung volumes <str<strong>on</strong>g>of</str<strong>on</strong>g> the normal and forced breathing <str<strong>on</strong>g>of</str<strong>on</strong>g> a subject whilesitting.Data Analysis-Normal <strong>Breathing</strong> at Rest1. Scroll through the recording and find the secti<strong>on</strong> <str<strong>on</strong>g>of</str<strong>on</strong>g> data recorded when the subject wasbreathing while resting.2. Use the Display Time ic<strong>on</strong>s to adjust the Display Time <str<strong>on</strong>g>of</str<strong>on</strong>g> the Main window to show at least fivecomplete breathing cycles <strong>on</strong> the Main window. Four adjacent breathing cycles can also beselected by:• Placing the cursors <strong>on</strong> either side <str<strong>on</strong>g>of</str<strong>on</strong>g> a group <str<strong>on</strong>g>of</str<strong>on</strong>g> five complete breathing cycles; and• Clicking the Zoom between Cursors butt<strong>on</strong> <strong>on</strong> the LabScribe toolbar to expand the fourselected breathing cycles to the width <str<strong>on</strong>g>of</str<strong>on</strong>g> the Main window.Respiratory Physiology-<str<strong>on</strong>g>Gravity</str<strong>on</strong>g><strong>Breathing</strong>-Labs<str<strong>on</strong>g>RP</str<strong>on</strong>g>-2-3
Figure <str<strong>on</strong>g>RP</str<strong>on</strong>g>-2-L2: <str<strong>on</strong>g>The</str<strong>on</strong>g> LabScribe toolbar.3. Click <strong>on</strong> the Analysis window ic<strong>on</strong> in the toolbar (Figure <str<strong>on</strong>g>RP</str<strong>on</strong>g>-2-L2) or select Analysis from theWindows menu to transfer the data displayed in the Main window to the Analysis window(Figure <str<strong>on</strong>g>RP</str<strong>on</strong>g>-2-L3).4. Look at the Functi<strong>on</strong> Table that is above the uppermost channel displayed in the Analysiswindow. <str<strong>on</strong>g>The</str<strong>on</strong>g> mathematical functi<strong>on</strong>s, V2-V1 and T2-T1 should appear in this table. Values forV2-V1 and T2-T1 <strong>on</strong> each channel are seen in the table across the top margin <str<strong>on</strong>g>of</str<strong>on</strong>g> each channel.5. Minimize the height <str<strong>on</strong>g>of</str<strong>on</strong>g> the Air Flow channel by clicking <strong>on</strong> the arrow to the left <str<strong>on</strong>g>of</str<strong>on</strong>g> the channel’stitle to open the channel menu. Select Minimize from this menu to reduce the height <str<strong>on</strong>g>of</str<strong>on</strong>g> thechannel display.6. Maximize the height <str<strong>on</strong>g>of</str<strong>on</strong>g> the trace <strong>on</strong> the Volume channel by clicking <strong>on</strong> the arrow to the left <str<strong>on</strong>g>of</str<strong>on</strong>g>the channel’s title to open the channel menu. Select Scale from the menu and AutoScale fromthe Scale submenu to increase the height <str<strong>on</strong>g>of</str<strong>on</strong>g> the data <strong>on</strong> that channel.7. Once the cursors are placed in the correct positi<strong>on</strong>s for determining the volumes <str<strong>on</strong>g>of</str<strong>on</strong>g> each breathcycle, the values <str<strong>on</strong>g>of</str<strong>on</strong>g> the parameters in the Functi<strong>on</strong> Table can be recorded in the <strong>on</strong>-linenotebook <str<strong>on</strong>g>of</str<strong>on</strong>g> LabScribe by typing their names and values directly into the Journal.8. <str<strong>on</strong>g>The</str<strong>on</strong>g> functi<strong>on</strong>s in the channel pull-down menus <str<strong>on</strong>g>of</str<strong>on</strong>g> the Analysis window can also be used to enterthe names and values <str<strong>on</strong>g>of</str<strong>on</strong>g> the parameters from the recording to the Journal. To use thesefuncti<strong>on</strong>s:• Place the cursors at the locati<strong>on</strong>s used to measure the volumes <str<strong>on</strong>g>of</str<strong>on</strong>g> the breath cycle.• Transfer the names <str<strong>on</strong>g>of</str<strong>on</strong>g> the mathematical functi<strong>on</strong>s used to determine the volumes to theJournal using the Add Title to Journal functi<strong>on</strong> in the Volume Channel pull-down menu.• Transfer the values for the volumes to the Journal using the Add Ch. Data to Journalfuncti<strong>on</strong> in the Volume Channel pull-down menu.9. On the Volume channel, use the mouse to click <strong>on</strong> and drag the cursors to specific points <strong>on</strong> therecording to measure the following volumes:• Tidal Volume (TV), which is the volume <str<strong>on</strong>g>of</str<strong>on</strong>g> air inhaled or exhaled during a normal breathingcycle. To measure the tidal volume <str<strong>on</strong>g>of</str<strong>on</strong>g> the subject during breathing at rest, place <strong>on</strong>e cursorin the trough prior to inhalati<strong>on</strong>, and the sec<strong>on</strong>d cursor <strong>on</strong> the peak <str<strong>on</strong>g>of</str<strong>on</strong>g> the cycle. <str<strong>on</strong>g>The</str<strong>on</strong>g> valuefor the V2-V1 functi<strong>on</strong> <strong>on</strong> the Volume channel is the tidal volume.(Figure <str<strong>on</strong>g>RP</str<strong>on</strong>g>-2-l3).• Breath Period, which is the durati<strong>on</strong> <str<strong>on</strong>g>of</str<strong>on</strong>g> each breathing cycle. To measure the breath period<str<strong>on</strong>g>of</str<strong>on</strong>g> the subject during breathing at rest, place <strong>on</strong>e cursor <strong>on</strong> a peak <str<strong>on</strong>g>of</str<strong>on</strong>g> a breath cycle, and thesec<strong>on</strong>d cursor <strong>on</strong> the peak <str<strong>on</strong>g>of</str<strong>on</strong>g> an adjacent cycle. <str<strong>on</strong>g>The</str<strong>on</strong>g> value for T2-T1 <strong>on</strong> the Volume channelis the period <str<strong>on</strong>g>of</str<strong>on</strong>g> that breath cycle (Figure <str<strong>on</strong>g>RP</str<strong>on</strong>g>-2-L4).10. Record the values in the Journal using the <strong>on</strong>e <str<strong>on</strong>g>of</str<strong>on</strong>g> the techniques described in Steps 7 or 8.11. Repeat the measurements <str<strong>on</strong>g>of</str<strong>on</strong>g> tidal volume and breath period <strong>on</strong> two additi<strong>on</strong>al normal breathcyclesRespiratory Physiology-<str<strong>on</strong>g>Gravity</str<strong>on</strong>g><strong>Breathing</strong>-Labs<str<strong>on</strong>g>RP</str<strong>on</strong>g>-2-4
Figure <str<strong>on</strong>g>RP</str<strong>on</strong>g>-2-l3: <strong>Breathing</strong> pattern <str<strong>on</strong>g>of</str<strong>on</strong>g> a subject at rest, displayed <strong>on</strong> the Volume channel in the Analysiswindow. <str<strong>on</strong>g>The</str<strong>on</strong>g> cursors are positi<strong>on</strong>ed <strong>on</strong> the trough and the peak <str<strong>on</strong>g>of</str<strong>on</strong>g> the breath cycle to measure the tidalvolume (TV) with V2-V1 functi<strong>on</strong>.Figure <str<strong>on</strong>g>RP</str<strong>on</strong>g>-2-L4: Normal breathing pattern <str<strong>on</strong>g>of</str<strong>on</strong>g> a subject at rest, displayed <strong>on</strong> the Volume channel in theAnalysis window. <str<strong>on</strong>g>The</str<strong>on</strong>g> cursors are positi<strong>on</strong>ed <strong>on</strong> the peaks <str<strong>on</strong>g>of</str<strong>on</strong>g> successive breath cycles to measure thebreath period with the T2-T1 functi<strong>on</strong>.12. Average the three values obtained for each parameter and enter the means in a table in theJournal. You can open and close the Journal by clicking <strong>on</strong> its ic<strong>on</strong> <strong>on</strong> the LabScribe toolbar(Figure <str<strong>on</strong>g>RP</str<strong>on</strong>g>-2-L2).13. Record the means for the tidal volume and breath period in Table <str<strong>on</strong>g>RP</str<strong>on</strong>g>-2-L2.14. Calculate the normal breathing rate <str<strong>on</strong>g>of</str<strong>on</strong>g> the subject at rest using the following equati<strong>on</strong>:Breath Rate (breaths/minute) = 60 sec<strong>on</strong>ds/minute / mean breath period (sec/breath)15. Multiply the mean tidal volume by the breathing rate to calculate the volume <str<strong>on</strong>g>of</str<strong>on</strong>g> air passing inand out <str<strong>on</strong>g>of</str<strong>on</strong>g> the resting subject’s lungs each minute.16. Record the values for these calculati<strong>on</strong>s in Table <str<strong>on</strong>g>RP</str<strong>on</strong>g>-2-L2.Respiratory Physiology-<str<strong>on</strong>g>Gravity</str<strong>on</strong>g><strong>Breathing</strong>-Labs<str<strong>on</strong>g>RP</str<strong>on</strong>g>-2-5
Data Analysis-Forced Expirati<strong>on</strong> at Rest1. Use the slider or the arrows <strong>on</strong> the scroll bar, at the bottom <str<strong>on</strong>g>of</str<strong>on</strong>g> the Analysis window, to positi<strong>on</strong>data recorded when the subject exhaled with maximum force in the window.2. Use the Display Time ic<strong>on</strong>s to adjust the Display Time <str<strong>on</strong>g>of</str<strong>on</strong>g> the Analysis window to show theforced expirati<strong>on</strong> curve and the two normal breaths, that occur before the force expirati<strong>on</strong> curve,<strong>on</strong> the same window. <str<strong>on</strong>g>The</str<strong>on</strong>g>se breathing cycles can also be selected by:• Placing the cursors <strong>on</strong> either side <str<strong>on</strong>g>of</str<strong>on</strong>g> the group <str<strong>on</strong>g>of</str<strong>on</strong>g> appropriate breathing cycles; and• Clicking the Zoom between Cursors butt<strong>on</strong> <strong>on</strong> the LabScribe toolbar to expand the selectedbreathing cycles to the width <str<strong>on</strong>g>of</str<strong>on</strong>g> the Main window.<str<strong>on</strong>g>The</str<strong>on</strong>g> segment <str<strong>on</strong>g>of</str<strong>on</strong>g> the recording displayed inthe window should be like the recording in Figure <str<strong>on</strong>g>RP</str<strong>on</strong>g>-2-L5.3. Use the same techniques used earlier to record volumes in the Journal by:• Typing the names and values <str<strong>on</strong>g>of</str<strong>on</strong>g> the parameters directly into the Journal, or;• Transferring the names and values <str<strong>on</strong>g>of</str<strong>on</strong>g> the parameters into the Journal by using the Add Titleto Journal and the Add Ch. Data to Journal functi<strong>on</strong>s in the Volume Channel menu.4. Place the cursors <strong>on</strong> the forced expirati<strong>on</strong> data displayed <strong>on</strong> the Volume channel to measure thefollowing volumes using the V2-V1 and T2-T1 functi<strong>on</strong>s. Check the labels <strong>on</strong> Figure <str<strong>on</strong>g>RP</str<strong>on</strong>g>-2-L5to identify the volumes that you will measure:• Tidal Volume (TV), by placing <strong>on</strong>e cursor in the trough before the inhalati<strong>on</strong> segment <str<strong>on</strong>g>of</str<strong>on</strong>g> theresting breath and the sec<strong>on</strong>d cursor <strong>on</strong> the peak <str<strong>on</strong>g>of</str<strong>on</strong>g> that resting breath cycle. <str<strong>on</strong>g>The</str<strong>on</strong>g> value forthe V2-V1 functi<strong>on</strong> <strong>on</strong> the Volume channel is the tidal volume.• Inspiratory Reserve Volume (IRV), by placing <strong>on</strong>e cursor <strong>on</strong> the peak <str<strong>on</strong>g>of</str<strong>on</strong>g> the normal breathprior to the maximum inhalati<strong>on</strong> and the sec<strong>on</strong>d cursor <strong>on</strong> the peak <str<strong>on</strong>g>of</str<strong>on</strong>g> the forced breathcycle. <str<strong>on</strong>g>The</str<strong>on</strong>g> value for the V2-V1 functi<strong>on</strong> <strong>on</strong> the Volume channel is the inspiratory reservevolume.• Forced Vital Capacity (FVC), by placing <strong>on</strong>e cursor <strong>on</strong> the peak <str<strong>on</strong>g>of</str<strong>on</strong>g> the forced breath cycleand the sec<strong>on</strong>d cursor <strong>on</strong> the flat line after the subject has expelled all the air from his or herlungs. <str<strong>on</strong>g>The</str<strong>on</strong>g> value for the V2-V1 functi<strong>on</strong> <strong>on</strong> the Volume channel is the forced vital capacity.• Expiratory Reserve Volume (ERV), by placing <strong>on</strong>e cursor in the trough before maximalinhalati<strong>on</strong> and the sec<strong>on</strong>d cursor <strong>on</strong> the flat line after subject has expelled all the air from hisor her lungs. <str<strong>on</strong>g>The</str<strong>on</strong>g> value for the V2-V1 functi<strong>on</strong> <strong>on</strong> the Volume channel is the expiratoryreserve volume.• Forced Expiratory Volume at 1 Sec<strong>on</strong>d (FEV 1), by placing <strong>on</strong>e cursor <strong>on</strong> the peak <str<strong>on</strong>g>of</str<strong>on</strong>g> themaximum breath cycle and the sec<strong>on</strong>d cursor <strong>on</strong> the data point that is <strong>on</strong>e sec<strong>on</strong>d after thepeak. Use the T2-T1 functi<strong>on</strong> to determine the data point that is <strong>on</strong>e sec<strong>on</strong>d after the peak.<str<strong>on</strong>g>The</str<strong>on</strong>g> value for the V2-V1 functi<strong>on</strong> <strong>on</strong> the Volume channel is the forced expiratory volume at<strong>on</strong>e sec<strong>on</strong>d.• Forced Expiratory Volume at 3 Sec<strong>on</strong>ds (FEV 3), by placing <strong>on</strong>e cursor <strong>on</strong> the peak <str<strong>on</strong>g>of</str<strong>on</strong>g> themaximum breath cycle and the sec<strong>on</strong>d cursor <strong>on</strong> the data point that is three sec<strong>on</strong>ds after thepeak. Use the T2-T1 functi<strong>on</strong> to determine the data point that is three sec<strong>on</strong>ds after the peak.Respiratory Physiology-<str<strong>on</strong>g>Gravity</str<strong>on</strong>g><strong>Breathing</strong>-Labs<str<strong>on</strong>g>RP</str<strong>on</strong>g>-2-6
Exercise 2: <strong>Breathing</strong> While StandingProcedureAim: To measure various breathing parameters in a standing subject.Repeat Exercise 1 while the subject is standing.Data Analysis1. Use the same techniques used in Exercise 1 to measure the data recorded in Exercise 2. Recordthe measurements in the Journal. Report the appropriate measurements in Table <str<strong>on</strong>g>RP</str<strong>on</strong>g>-2-L2 andTable <str<strong>on</strong>g>RP</str<strong>on</strong>g>-2-L3.2. Determine the values for the calculated parameters taken from the recordings <str<strong>on</strong>g>of</str<strong>on</strong>g> normal andforced breathing while standing. Report these values <strong>on</strong> Table <str<strong>on</strong>g>RP</str<strong>on</strong>g>-2-L2 and Table <str<strong>on</strong>g>RP</str<strong>on</strong>g>-2-L3.Exercise 3: <strong>Breathing</strong> While Supine (face up)ProcedureAim: To measure various breathing parameters in a subject who is lying face up (supine).1. <str<strong>on</strong>g>The</str<strong>on</strong>g> subject should lie down <strong>on</strong> their back and relax.2. Assist the subject when he or she is removing and replacing the flowhead in his or her mouth.Place the flowhead <strong>on</strong> the benchtop near the subject’s head in a positi<strong>on</strong> that prevents any air tomove through the flowhead.3. Repeat Exercise 1 while the subject is supine.Data Analysis1. Use the same techniques used in Exercise 1 to measure the data recorded in Exercise 2. Recordthe measurements in the Journal. Report the appropriate measurements in Table <str<strong>on</strong>g>RP</str<strong>on</strong>g>-2-L2 andTable <str<strong>on</strong>g>RP</str<strong>on</strong>g>-2-L3.2. Determine the values for the calculated parameters taken from the recordings <str<strong>on</strong>g>of</str<strong>on</strong>g> normal andforced breathing while standing. Report these values <strong>on</strong> Table <str<strong>on</strong>g>RP</str<strong>on</strong>g>-2-L2 and Table <str<strong>on</strong>g>RP</str<strong>on</strong>g>-2-L3.Questi<strong>on</strong>s1. What effect does lying down have <strong>on</strong> the minute volume (the total amount <str<strong>on</strong>g>of</str<strong>on</strong>g> air breathed intothe lungs in a minute)?2. What effect does lying down have <strong>on</strong> the various lung volumes, including tidal volume?3. Would the blood pressure in the pulm<strong>on</strong>ary capillaries at the bottom <str<strong>on</strong>g>of</str<strong>on</strong>g> a lung be the same as theblood pressure in the capillaries at the top <str<strong>on</strong>g>of</str<strong>on</strong>g> a lung in the standing individual? Which areawould have the lower blood pressure?Respiratory Physiology-<str<strong>on</strong>g>Gravity</str<strong>on</strong>g><strong>Breathing</strong>-Labs<str<strong>on</strong>g>RP</str<strong>on</strong>g>-2-8
4. With the answer to Questi<strong>on</strong> 4 in mind, if lower blood pressure allows more pulm<strong>on</strong>arycapillaries to be open, where in the lung would you expect to find more collapsed capillaries, atthe base or at the apex?5. If some capillaries are collapsed, what is the functi<strong>on</strong>al effect <strong>on</strong> the diffusi<strong>on</strong> <str<strong>on</strong>g>of</str<strong>on</strong>g> O 2and CO 2?6. Would you expect any difference in capillary blood pressures in the apex or in the base <str<strong>on</strong>g>of</str<strong>on</strong>g> thelungs in a subject who is lying down?7. If the blood pressure in all pulm<strong>on</strong>ary capillaries is the same, would you expect the capillariesto be open or collapsed?8. If all pulm<strong>on</strong>ary capillaries are open when lying down, what is the functi<strong>on</strong>al effect <strong>on</strong> thediffusi<strong>on</strong> <str<strong>on</strong>g>of</str<strong>on</strong>g> O 2and CO 2?9. If the demands for O 2and CO 2are the same in either body positi<strong>on</strong>, should tidal volume andbreathing rate be affected by body positi<strong>on</strong>? Do you see this?10. Would you expect any difference in the levels <str<strong>on</strong>g>of</str<strong>on</strong>g> O 2and CO 2in the exhaled air <str<strong>on</strong>g>of</str<strong>on</strong>g> a subject whois standing or lying down?Tabulati<strong>on</strong> ~Table <str<strong>on</strong>g>RP</str<strong>on</strong>g>-2-L2: Normal <strong>Breathing</strong> Volumes and Rates While Sitting, Standing, and RecliningSit Stand SupineMean Breath Period (sec/breath)<strong>Breathing</strong> Rate (breaths/min)Mean Tidal Volume (mls/breath)Minute Air Flow Rate (liters/min)Respiratory Physiology-<str<strong>on</strong>g>Gravity</str<strong>on</strong>g><strong>Breathing</strong>-Labs<str<strong>on</strong>g>RP</str<strong>on</strong>g>-2-9


