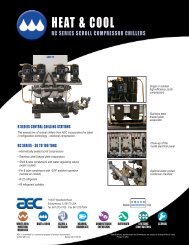
RC Series Scroll Compressor Central Chiller - Central Chillers
RC Series Scroll Compressor Central Chiller - Central Chillers
RC Series Scroll Compressor Central Chiller - Central Chillers

You also want an ePaper? Increase the reach of your titles
YUMPU automatically turns print PDFs into web optimized ePapers that Google loves.
<strong>RC</strong> <strong>Series</strong><strong>Scroll</strong> <strong>Compressor</strong> <strong>Central</strong> <strong>Chiller</strong>Part Number: A0551796Bulletin Number: AE3-630.2Effective: 10/1/07Write Down Your Serial Numbers Here For Future Reference:______________________________________________________________________________________________________________________________________________________We are committed to a continuing program of product improvement.Specifications, appearance, and dimensions described in this manual are subject to change without notice.DCN No. ____________© Copyright 2008All rights reserved.
<strong>Scroll</strong> <strong>Compressor</strong> <strong>Central</strong> <strong>Chiller</strong>s Chapter 1: Safety ii
Please note that our address and phone information has changed.Please reference this page for updated contact information.These manuals are obsolete and are provided only for their technical information, data and capacities.Portions of these manuals detailing procedures or precautions in the operation, inspection, maintenanceand repair of the products may be inadequate, inaccurate, and/or incomplete and shouldn’t be reliedupon. Please contact the ACS Group for more current information about these manuals and theirwarnings and precautions.Parts and Service DepartmentThe ACS Customer Service Group will provide your company with genuine OEM quality parts manufactured to engineeringdesign specifications, which will maximize your equipment’s performance and efficiency. To assist in expediting your phoneor fax order, please have the model and serial number of your unit when you contact us. A customer replacement parts listis included in this manual for your convenience. ACS welcomes inquiries on all your parts needs and is dedicated toproviding excellent customer service.For immediate assistance, please contact:• North, <strong>Central</strong> and South America, 8am – 5pm CST +1 (800) 483-3919 for drying, conveying, heating and coolingand automation. For size reduction: +1 (800) 229-2919.North America, emergencies after 5pm CST (847) 439-5855North America email: acsuscanadacustserv@corpemail.com• Mexico, <strong>Central</strong> & South AmericaEmail: acslatinamericacustserv@corpemail.com• Europe, Middle East & Africa +48 22 390 9720Email: acseuropecustserv@corpemail.com• India +91 21 35329112Email: acsindiacustserv@corpemail.com• Asia/Australia +86 512 8717 1919Email: acsasiacustserv@corpemail.comSales and Contracting DepartmentOur products are sold by a worldwide network of independent sales representatives. Contact our Sales Department for thename of the sales representative nearest you.Let us install your system. The Contract Department offers any or all of these services: project planning; system packagesincluding drawings; equipment, labor, and construction materials; and union or non-union installations.For assistance with your sales or system contracting needs please Call:North, <strong>Central</strong> and South America +1 (262) 641-8600 or +1 (847) 273-7700 Monday–Friday, 8am–5pm CSTEurope/Middle East/Africa +48 22 390 9720India +91 21 35329112Asia/Australia +86 512 8717 1919Facilities:ACS offers facilities around the world to service you no matter where you are located. For more information, please visit us atwww.acscorporate.comUnited States:ACS Schaumburg – Corporate Offices1100 E. Woodfield RoadSuite 588Schaumburg, IL 60173Phone: + 1 847 273 7700Fax: + 1 847 273 7804ACS New Berlin – Manufacturing Facility2900 S. 160 th StreetNew Berlin, WI 53151Phone : +1 262 641 8600Fax: + 1 262 641 8653Asia/Australia:ACS Suzhou109 Xingpu Road SIPSuzhou, China 215126Phone: + 86 8717 1919Fax: +86 512 8717 1916Europe/Middle East/Africa:ACS WarsawUl. Działkowa 11502-234 WarszawaPhone: + 48 22 390 9720Fax: +48 22 390 9724IndiaACS IndiaGat No. 191/1, Sandbhor ComplexMhalunge, Chakan, Tal Khed,Dist. Pune 410501, IndiaPhone: +91 21 35329112Fax: + 91 20 40147576
Shipping InformationUnpacking and InspectionYou should inspect your <strong>Scroll</strong> <strong>Compressor</strong> <strong>Central</strong> <strong>Chiller</strong> for possible shipping damage.Thoroughly check the equipment for any damage that might have occurred in transit, such asbroken or loose wiring and components, loose hardware and mounting screws, etc.In the Event of Shipping DamageAccording to the contract terms and conditions of the Carrier, the responsibility of theShipper ends at the time and place of shipment.Notify the transportation company’s local agent if you discover damage.Hold the damaged goods and packing material for the examining agent’s inspection. Do notreturn any goods before the transportation company’s inspection and authorization.File a claim with the transportation company. Substantiate the claim by referring to theagent’s report. A certified copy of our invoice is available upon request. The original Bill ofLading is attached to our original invoice. If the shipment was prepaid, write us for areceipted transportation bill.Advise customer service regarding your wish for assistance and to obtain an RMA (returnmaterial authorization) number.If the Shipment is Not CompleteCheck the packing list as back-ordered items are noted on it. You should have: <strong>Scroll</strong> <strong>Compressor</strong> <strong>Central</strong> <strong>Chiller</strong> Bill of lading Packing list Operating and Installation packet Electrical schematic and panel layout drawings Component instruction manualsRe-inspect the container and packing material to see if you missed any smaller items duringunpacking.If the Shipment is Not CorrectIf the shipment is not what you ordered, contact the parts and service departmentimmediately at (847) 273 7700. Have the order number and item number available.Hold the items until you receive shipping instructions.ReturnsDo not return any damaged or incorrect items until you receive shipping instructions from theshipping department.<strong>Scroll</strong> <strong>Compressor</strong> <strong>Central</strong> <strong>Chiller</strong>siii
Table of ContentsCHAPTER 1: SAFETY ..............................................................VII1-1 How to Use This Manual ............................................................................................viiSafety Symbols Used in this Manual................................................................... vii1-2 Warnings and Precautions ........................................................................................viii1-3 Responsibility ............................................................................................................. ixGeneral Responsibility.......................................................................................... ixOperator Responsibility ......................................................................................... xMaintenance Responsibility.................................................................................. xiReporting a Safety Defect .................................................................................... xiCHAPTER 2: FUNCTIONAL DESCRIPTION............................ 122-1 Models Covered in This Manual................................................................................ 122-2 General Description................................................................................................... 122-3 Standard Features..................................................................................................... 12Mechanical Features ...........................................................................................12Electrical Features...............................................................................................13Controller Features..............................................................................................13Standard Features on Remote Condensers........................................................132-4 Options...................................................................................................................... 142-5 Safety Devices and Interlocks ................................................................................... 14CHAPTER 3: INSTALLATION .................................................. 163-1 Uncrating the Equipment........................................................................................... 163-2 Rigging and Placing the <strong>Chiller</strong> ................................................................................. 163-3 Making Electrical Connections .................................................................................. 173-4 Setup Procedures...................................................................................................... 18Piping Considerations .........................................................................................18Making Process Water Connections ...................................................................19Making Tank Piping Connections........................................................................19Water Connection Sizing Considerations............................................................21Galvanic Corrosion Considerations.....................................................................21Water Treatment Considerations.........................................................................21Making Water-Cooled Condenser Connections ..................................................22Installing the Remote Air-Cooled Condenser ......................................................23Checking Motor Direction ....................................................................................24Changing fan rotation direction............................................................................243-5 Initial Start-up ............................................................................................................ 25Pre-Startup Checks .............................................................................................25Water-Cooled <strong>Central</strong> <strong>Chiller</strong> Startup..................................................................28Remote Air-Cooled <strong>Central</strong> <strong>Chiller</strong> Startup..........................................................28Determining Flow Rate........................................................................................29Shutdown ............................................................................................................29CHAPTER 4: OPERATION ....................................................... 304-1 Start-up...................................................................................................................... 30<strong>Scroll</strong> <strong>Compressor</strong> <strong>Central</strong> <strong>Chiller</strong>s Chapter 1: Safety iv
Water-Cooled <strong>Central</strong> <strong>Chiller</strong>...............................................................................30Remote Air-Cooled <strong>Central</strong> <strong>Chiller</strong> ......................................................................304-2 Controller Description................................................................................................ 31Identifying Control Panel Indicator Lights and Switches for the Standard andAdvanced Controllers ..........................................................................................314-3 Controller Operation (Standard Controller) ............................................................... 33Using the Standard Touchscreen Interface.........................................................33Main Menu Screen ..............................................................................................34<strong>Compressor</strong> Status Screen .................................................................................35Process and Recirculation Pump Status Screens...............................................36Active Alarm List and Alarm History Screens......................................................37Configuration Menu Screen.................................................................................38Viewing and Setting System Temperatures ........................................................42Hourmeters Screen .............................................................................................434-4 Controller Operation (Advanced Controller) .............................................................. 45Using the Advanced Touchscreen Interface........................................................45Accessing the Main Menu Screen.......................................................................46Viewing <strong>Compressor</strong> Status ................................................................................48Viewing <strong>Chiller</strong> Pump Status ...............................................................................50Viewing Active Alarms and Alarm History Screens .............................................51Configuration Menu Screen.................................................................................53Viewing and Setting System Temperatures ........................................................56Viewing <strong>Compressor</strong> Run Times.........................................................................58Viewing Pump Run Times ...................................................................................594-5 Operation Procedures ............................................................................................... 604-6 Shutdown................................................................................................................... 60CHAPTER 5: MAINTENANCE .................................................. 615-1 Maintenance Schedule.............................................................................................. 615-2 Preventative Maintenance......................................................................................... 62Lubrication...........................................................................................................62Condenser Maintenance .....................................................................................625-3 Corrective Maintenance ............................................................................................ 63Evaporator Maintenance .....................................................................................63Pump Motor Seal.................................................................................................63Makeup Valve......................................................................................................63CHAPTER 6: TROUBLESHOOTING ........................................ 646-1 Introduction................................................................................................................ 64CHAPTER 7: APPENDIX .......................................................... 677-1 Optional Components................................................................................................ 677-2 Technical Specifications............................................................................................ 67Model Number Nomeclature................................................................................67Typical Two-Circuit 30-100 Ton Remote Water Cooled <strong>Chiller</strong> Specifications....68Typical Two-Circuit 30-100 Ton Remote Air Cooled <strong>Chiller</strong> Specifications.........69Remote Condenser Models Specifications..........................................................707-3 Drawings & Diagrams................................................................................................ 707-4 Pump Tank Spare Parts List ..................................................................................... 717-5 Returned Material Policy ........................................................................................... 71<strong>Scroll</strong> <strong>Compressor</strong> <strong>Central</strong> <strong>Chiller</strong>sv
Credit Returns .....................................................................................................71Warranty Returns ................................................................................................717-6 Safety Tag Information .............................................................................................. 72<strong>Central</strong> <strong>Chiller</strong> Safety Tags .................................................................................727-7 <strong>Central</strong> <strong>Chiller</strong> Identification (Serial Number) Tag..................................................... 727-8 Technical Assistance................................................................................................. 73Parts Department ................................................................................................73Service Department.............................................................................................73Sales Department................................................................................................73Contract Department ...........................................................................................73<strong>Scroll</strong> <strong>Compressor</strong> <strong>Central</strong> <strong>Chiller</strong>s Chapter 1: Safety vi
Chapter 1: Safety1-1 How to Use This ManualUse this manual as a guide and reference for installing, operating, and maintaining your scrollcompressor central chiller. The purpose is to assist you in applying efficient, proventechniques that enhance equipment productivity.This manual covers only light corrective maintenance. No other maintenance should beundertaken without first contacting a service engineer.The Functional Description section outlines models covered, standard features, and safetyfeatures. Additional sections within the manual provide instructions for installation, preoperationalprocedures, operation, preventive maintenance, and corrective maintenance.The Installation chapter includes required data for receiving, unpacking, inspecting, and setupof the scroll compressor central chiller. We can also provide the assistance of a factorytrainedtechnician to help train your operator(s) for a nominal charge. This section includesinstructions, checks, and adjustments that should be followed before commencing withoperation of the <strong>Central</strong> <strong>Chiller</strong>. These instructions are intended to supplement standardshop procedures performed at shift, daily, and weekly intervals.The Operation chapter includes a description of electrical and mechanical controls, inaddition to information for operating the <strong>Central</strong> <strong>Chiller</strong> safely and efficiently.The Maintenance chapter is intended to serve as a source of detailed assembly anddisassembly instructions for those areas of the equipment requiring service. Preventivemaintenance sections are included to ensure that your <strong>Central</strong> <strong>Chiller</strong> provides excellent, longservice.The Troubleshooting chapter serves as a guide for identification of most common problems.Potential problems are listed, along with possible causes and related solutions.The Appendix contains technical specifications, drawings, schematics, parts lists, andavailable options. A spare parts list with part numbers specific to your machine is providedwith your shipping paperwork package. Refer to this section for a listing of spare parts forpurchase. Have your serial number and model number ready when ordering.Safety Symbols Used in this ManualThe following safety alert symbols are used to alert you to potential personal injury hazards.Obey all safety messages that follow these symbols to avoid possible injury or death.DANGER! DANGER indicates an imminently hazardous situation that, if not avoided,will result in death or serious injury.WARNING!Caution!WARNING indicates a potentially hazardous situation or practice that, ifnot avoided, could result in death or serious injury.CAUTION indicates a potentially hazardous situation or practice that, ifnot avoided, may result in minor or moderate injury or in property damage.<strong>Scroll</strong> <strong>Compressor</strong> <strong>Central</strong> <strong>Chiller</strong>s Chapter 1: Safety vii of 73
1-2 Warnings and PrecautionsOur equipment is designed to provide safe and reliable operation when installed and operatedwithin design specifications, following national and local safety codes. This may include, butis not limited to OSHA, NEC, CSA, SPI, and any other local, national and internationalregulations.To avoid possible personal injury or equipment damage when installing, operating, ormaintaining this equipment, use good judgment and follow these safe practices: Read and follow these operation and installation instructions when installing,operating, and maintaining this equipment. If these instructions becomedamaged or unreadable, additional copies are available from the manufacturer. Follow all SAFETY CODES. Wear SAFETY GLASSES and WORK GLOVES. Work only with approved tools and devices. Disconnect and/or lock out power before servicing or maintaining the equipment. Use care when LOADING, UNLOADING, RIGGING, or MOVING thisequipment. Operate this equipment within design specifications. OPEN, TAG, and LOCK ALL DISCONNECTS before working on equipment.You should remove the fuses and carry them with you. Make sure the equipment and components are properly GROUNDED before youswitch on power. When welding or brazing in or around this equipment, make sure VENTILATION isADEQUATE. PROTECT adjacent materials from flame or sparks by shielding withsheet metal. An approved FIRE EXTINGUISHER should be close at hand andready for use if needed. Do not restore power until you remove all tools, test equipment, etc., and theequipment and related components are fully reassembled. Only PROPERLY TRAINED personnel familiar with the information in thismanual should work on this equipment.We have long recognized the importance of safety and have designed and manufactured ourequipment with operator safety as a prime consideration. We expect you, as a user, to abideby the foregoing recommendations in order to make operator safety a reality.<strong>Scroll</strong> <strong>Compressor</strong> <strong>Central</strong> <strong>Chiller</strong>s Chapter 1: Safety viii
1-3 ResponsibilityThese machines are constructed for maximum operator safety when used under standardoperating conditions and when recommended instructions are followed in the maintenanceand operation of the machine.All personnel engaged in the use of the machine should become familiar with its operation asdescribed in this manual.Proper operation of the machine promotes safety for the operator and all workers in itsvicinity.Each individual must take responsibility for observing the prescribed safety rules as outlined.All warning and danger signs must be observed and obeyed. All actual or potential dangerareas must be reported to your immediate supervisor.General ResponsibilityNo mater who you are, safety is important. Owners, operators and maintenance personnelmust realize that every day, safety is a vital part of their jobs.If your main concern is loss of productivity, remember that production is always affected in anegative way following an accident. The following are some of the ways that accidents canaffect your production:• Loss of a skilled operator (temporarily or permanently)• Breakdown of shop morale• Costly damage to equipment• DowntimeAn effective safety program is responsible and economically sound.Organize a safety committee or group, and hold regular meetings. Promote this group fromthe management level. Through this group, the safety program can be continually reviewed,maintained, and improved. Keep minutes or a record of the meetings.Hold daily equipment inspections in addition to regular maintenance checks. You will keepyour equipment safe for production and exhibit your commitment to safety.Please read and use this manual as a guide to equipment safety. This manual contains safetywarnings throughout, specific to each function and point of operation.<strong>Scroll</strong> <strong>Compressor</strong> <strong>Central</strong> <strong>Chiller</strong>s Chapter 1: Safety ix
Operator ResponsibilityThe operator’s responsibility does not end with efficient production. The operator usually hasthe most daily contact with the equipment and intimately knows its capabilities andlimitations.Plant and personnel safety is sometimes forgotten in the desire to meet incentive rates, orthrough a casual attitude toward machinery formed over a period of months or years. Youremployer probably has established a set of safety rules in your workplace. Those rules, thismanual, or any other safety information will not keep you from being injured while operatingyour equipment.Learn and always use safe operation procedures. Cooperate with co-workers to promote safepractices. Immediately report any potentially dangerous situation to your supervisor orappropriate person.REMEMBER:• NEVER place your hands or any part of your body in any dangerous location.• NEVER operate, service, or adjust the chiller without appropriate training and firstreading and understanding this manual.• Before you start the chiller check the following:• Remove all tools from the chiller;• Be sure no objects (tools, nuts, bolts, clamps, bars) are laying in thechillers operating area;• If your chiller has been inoperative or unattended, check all settings before starting theunit.• At the beginning of your shift and after breaks, verify that the controls and otherauxiliary equipment are functioning properly.• Keep all safety guards in place and in good repair. NEVER attempt to bypass, modify,or remove safety guards. Such alteration is not only unsafe, but will void the warrantyon your equipment.• When changing control settings to perform a different mode of operation, be sureselector switches are correctly positioned. Locking selector switches should only beadjusted by authorized personnel and the keys removed after setting.• Report the following occurrences IMMEDIATELY:• unsafe operation or condition• unusual chiller action• leakage• improper maintenance• NEVER stand or sit where you could slip or stumble into the chillerwhile working on it.• DO NOT wear loose clothing or jewelry, which can be caught while working on achiller. In addition, cover or tie back long hair.<strong>Scroll</strong> <strong>Compressor</strong> <strong>Central</strong> <strong>Chiller</strong>s Chapter 1: Safety x
• Clean the chiller and surrounding area DAILY, and inspect the machine for loose,missing or broken parts.• Shut off power to the chiller when it is not in use. Turn the switch to the OFFposition, or unplug it from the power source.Maintenance ResponsibilityProper maintenance is essential to safety. If you are a maintenance worker, you must makesafety a priority to effectively repair and maintain equipment.Before removing, adjusting, or replacing parts on a machine, remember to turn off all electricsupplies and all accessory equipment at the machine, and disconnect and lockout electricalpower. Attach warning tags to the disconnect switch.When you need to perform maintenance or repair work on equipment above floor level, use asolid platform or a hydraulic elevator. If there is a permanently installed catwalk on yourequipment, use it. The work platform should have secure footing and a place for tools andparts. DO NOT climb on equipment, machines, or work from ladders.If you need to repair a large component, use appropriate handling equipment. Before you usehandling equipment (portable “A” frames, electric boom trucks, fork trucks, overhead cranes)be sure the load does not exceed the capacity of the handling equipment or cause it to becomeunstable.Carefully test the condition of lifting cables, chains, ropes, slings, and hooks before usingthem to lift a load.Be sure that all non-current carrying parts are correctly connected to earth ground with anelectrical conductor that complies with current codes. Install in accordance with national andlocal codes.When you have completed the repair or maintenance procedure, check your work and removeyour tools, rigging, and handling equipment.Do not restore power to the equipment until all persons are clear of the area. DO NOT startand run the machine until you are sure all parts are functioning correctly.BEFORE you turn the machine over to the operator for production, verify all equipmentenclosure panels, guards and safety devices are in place and functioning properly.Reporting a Safety DefectIf you believe that your equipment has a defect that could cause injury, you shouldimmediately discontinue its use and inform the manufacturer.The principle factors that can result in injury are failure to follow proper operating procedures(i.e. lockout/tagout), or failure to maintain a clean and safe working environment.<strong>Scroll</strong> <strong>Compressor</strong> <strong>Central</strong> <strong>Chiller</strong>s Chapter 1: Safety xi
Chapter 2: Functional Description2-1 Models Covered in This ManualThis manual provides operation, installation, and maintenance instructions for <strong>Scroll</strong><strong>Compressor</strong> <strong>Central</strong> <strong>Chiller</strong>s. Model numbers are listed on the serial tag. Make sure youknow the model and serial number of your equipment before contacting the manufacturer forparts or service.Our scroll compressor central chillers are designed to generate cooled water or air at carefullycontrolled temperatures for use in plastic processing systems. <strong>Scroll</strong> <strong>Compressor</strong> <strong>Central</strong>chilling systems are sized to meet the specific requirements stated by the Customer at thetime of purchase.2-2 General Description<strong>Scroll</strong> compressor central water chilling stations are available in water-cooled and remote aircooleddesigns. They differ only in the condensing media used. These units are configuredwith two independent circuits using multiple compressors for each circuit. This manual listsinformation specific to these units.<strong>Scroll</strong> <strong>Compressor</strong> central chilling stations may be configured with stainless steel pump tanksfor use as reservoirs for chilled water processes. These dual-well models hold hot and coldwater before and after it is pumped through the chiller. Tanks have recirculation pump(s) tosend return water to the chiller and process pump(s) to pump cooled water directly to process.Standby pumps may be utilized to distribute pump service or to allow uninterrupted chilleroperation during pump maintenance.Properly installed, operated, and maintained <strong>Scroll</strong> <strong>Compressor</strong> <strong>Central</strong> chilling stationsprovide many years of reliable operation. To get the most satisfaction from your newchiller, read and follow the instructions in this manual.2-3 Standard FeaturesMechanical Features• Two independent refrigeration circuits• High-efficiency scroll compressors• Stainless steel brazed plate evaporators• Cleanable shell and tube condensers (water-cooled models)• Two-way water regulating valve (water-cooled models)• High and low refrigerant pressure safeties• Evaporator water piping manifold (Condenser manifold optional)• HCFC-22 refrigerant• 1 year warranty on parts and labor<strong>Scroll</strong> <strong>Compressor</strong> <strong>Central</strong> <strong>Chiller</strong> Chapter 2: Functional Description 12
Electrical Features• 2 remote single circuit condensers with variable speed lead fans and fan cycling (aircooledmodels)• NEMA 12 electrical enclosure• Touch-safe branch circuit fusing• Liquid line solenoid and shut-off valves• Chilled water flow switchesController Features• Allen Bradley Micrologix 1500 PLC control with PanelView 300 Micromonochrome/key pad interface• Digital low temperature freezestat• Auto/Manual control mode switch for emergency operation• 3 year warranty on controllerStandard Features on Remote Condensers• Direct-drive 3-phase fan motors with ball bearings and internal overload protection(lead fan is a 1-phase fan motor)• Electronic variable-speed control of lead fan and fan cycling for constant condenserhead pressure control• Fans are 30” (76 cm) in diameter and have PVC-coated steel fan guards; 1½ hp (1.12kW) variable-speed fans are 26” (66 cm) in diameter• Internal baffles between fan cells• UL listed in the United States and Canada• Patented floating tube coil to eliminate tube sheet leaks• Copper tube condenser coils have corrugated aluminum fins• Weather-proof control panel with factory-mounted door interrupt switch• High-efficiency condenser coil, designed for optimum performance• Aluminum housing provides corrosion protection for outdoor applications<strong>Scroll</strong> <strong>Compressor</strong> <strong>Central</strong> <strong>Chiller</strong> Chapter 2: Functional Description 13
2-4 OptionsOptions marked with “*” indicate options that can be factory installed or retrofitted in thefield.• Advanced control package including: AB SLC 5/04 PLC with PanelView 1000 colortouch screen, control of up to nine additional chillers, cooling tower system, watertreatment system, and DH+ communication capabilities• General Fault audible/visual alarm with elevated light stack• Non-fused rotary thru-the-door disconnect switches• Electrical operation available in 208, 460, and 575 volts, 60 Hz; 200, 380, and 415volts, 50 Hz• UL/ C UL-listed electrical subpanel• Water cooled condenser manifold• Onsite startup2-5 Safety Devices and InterlocksThis section includes information on safety devices and procedures that are inherent to the<strong>Chiller</strong>. This manual is not intended to supersede or alter safety standards established by theuser of this equipment. Instead, the material contained in this section is recommended tosupplement these procedures in order to provide a safer working environment.At the completion of this section, the operator and maintenance personnel will be able to dothe following:• Identify and locate specific safety devices.• Understand the proper use of the safety devices provided.• Describe the function of the safety device.Safety Circuit StandardsSafety circuits used in industrial systems protect the operator and maintenance personnelfrom dangerous energy. They also provide a means of locking out or isolating the energy forservicing equipment.Various agencies have contributed to the establishment of safety standards that apply to thedesign and manufacture of automated equipment. The Occupational Safety and HealthAdministration (OSHA) and the Joint Industrial council (JIC) are just a few of theorganizations that have joined with the plastics industry to develop safety standards.Every effort has been made to incorporate these standards into the design of the chiller;however, it is the responsibility of the personnel operating and maintaining the equipment tofamiliarize themselves with the safety procedures and the proper use of any safety devices.<strong>Scroll</strong> <strong>Compressor</strong> <strong>Central</strong> <strong>Chiller</strong> Chapter 2: Functional Description 14
Fail Safe OperationIf a safety device or circuit should fail, the design must be such that the failure causes a“Safe” condition. As an example, a safety switch must be a normally open switch. The switchmust be held closed with the device it is to protect. If the switch fails, it will go to the opencondition, tripping out the safety circuit.At no time should the safety device fail and allow the operation to continue. Forexample, if a safety switch is guarding a motor, and the safety switch fails, the motor shouldnot be able to run.Safety Device Lock-OutsSome safety devices disconnect electrical energy from a circuit. The safety devices that areused on these chillers are primarily concerned with electrical power disconnection and thedisabling of moving parts that may need to be accessed during the normal operation of themachine.Some of the safety devices utilize a manual activator. This is the method of initiating thesafety lock out. This may be in the form of a plug, lever or a handle. Within this lockablehandle, there may be a location for a padlock. Personnel servicing the equipment shouldplace a padlock in the lockout handle.In addition to the safety devices listed above, these chillers are equipped with a line cordplug. This allows the operator or maintenance personnel to unplug the chiller from its powersource and tag it out. The plug can then be tagged with any number of approved electricallockout tags available at most electrical supply stores.WARNING! Always disconnect and lockout all electrical power and pneumatic (i.e. compressed air)sources prior to servicing or cleaning the chiller. Failure to do so may result in seriousinjury. No one but the person who installed the lockout may remove it.<strong>Scroll</strong> <strong>Compressor</strong> <strong>Central</strong> <strong>Chiller</strong> Chapter 2: Functional Description 15
Chapter 3: Installation3-1 Uncrating the EquipmentWARNING! Due to the size and weight of the <strong>Scroll</strong> <strong>Compressor</strong> <strong>Chiller</strong>, the manufacturerrecommends using bonded professional millwrights to unload and move the chiller.1. Rig the chiller from the frame only, using spreader bars to prevent load transfer toany chiller components.2. Rig the frame from at least four points and balance the load before lifting to clear theskid.3. Use a forklift of adequate size when lifting the chiller by the fork pockets.4. Insert the forks all the way into the pockets and be sure to balance the load beforelifting the chiller to clear the skid. Lift only as high as necessary.5. Use a pry bar to free the skid if necessary.6. Lower slowly.Caution!Due to the weight of these units, use extrme caution when moving andplacing <strong>Scroll</strong> <strong>Compressor</strong> <strong>Central</strong> Chilling Stations.3-2 Rigging and Placing the <strong>Chiller</strong>As with all equipment installations, follow all applicable codes and regulations.1. Locate close to the process to reduce piping expense.2. Locate adjacent to drain and city water sources.3. Consult a structural engineer to assure that the floor, mounting pad or structural steelsupport is of adequate strength.4. Allow for required service clearances necessary for condenser maintenance and easyaccess to all components. See page ?? in the Appendix for specific information.<strong>Scroll</strong> <strong>Compressor</strong> <strong>Central</strong> <strong>Chiller</strong> Chapter 3: Installation 16
3-3 Making Electrical Connections<strong>Scroll</strong> <strong>Compressor</strong> <strong>Central</strong> Chilling systems are designed for three-phase voltage operation.Refer to the unit nameplate for proper voltage and amperage requirements.Note: Make sure you provide a correctly sized and protected supply of electricalpower to the unit.Refer to National Electric Code (NEC) Article 430-24 through 430-26 forproper feeder conductor and supply disconnect sizing.Maintain a safe ground and disconnect the power supply before servicingthe unit. A qualified electrician should make electrical connections, anddisconnect and lock out electricity using OSHA 29CFR 1910.147 standardswhen you need a service call.Check serial tag voltage and amperage requirements and make sure your electrical serviceconforms before making any electrical connections. Total running amps for the <strong>Scroll</strong><strong>Compressor</strong> <strong>Central</strong> Chilling systems are listed on the nameplate. Customer connections canbe run to the supply terminals from either side of the unit. Make sure that all three phases arewired correctly. If not wired properly, the unit will run backwards. Again, check the unitnameplate for correct voltage and amperage. <strong>Compressor</strong>s must be wired in sequence.If not wired properly, the unit can be damaged if run backwards.DANGER! Improper electrical connections can damage the unit and cause serious operator injuryor death!Bring properly sized power leads and ground from a fused disconnect (installed by yourelectrician) to the unit. Provide external overcurrent protection to the unit, using circuitbreakers or fuses. If you use fuses, make sure that they are dual-element time-delay fuses,sized according to your electrical code. Make sure that all electrical connections are tight.Note:The following MUST be followed when making electrical connections foryour central chiller:1. Electrical connections must comply with all applicable electricalcodes.2. The chiller must be grounded in accordance with NEC Article250.3. Voltage must be within plus or minus ten percent (±10%) of thenameplate rating with 2% imbalance between legs.4. Make sure your installer provides external protection.Check the electrical wiring schematicprovided in your Customer Information packetfor additional information.<strong>Scroll</strong> <strong>Compressor</strong> <strong>Central</strong> <strong>Chiller</strong> Chapter 3: Installation 17
Note:• Never switch contactor leads or motor leads for reversing rotation.• Do not use contactor or motor leads for phase matching.• <strong>Compressor</strong> noise from reverse rotation is noticeable. Do not run inthis mode for more than ten (10) seconds.• Reverse rotation can cause suction and discharge pressures to beapproximately equal; amp draws will be lower than normal.• If you discover that compressor rotation is reversed, correct it byswitching any two main power leads into the disconnect switch ordistribution block on the unit.Check your work and proceed to the next section.3-4 Setup ProceduresThis section provides the procedures necessary for configuring your <strong>Scroll</strong> <strong>Compressor</strong><strong>Central</strong> <strong>Chiller</strong>.Configuration of your chiller includes making process water connections, tank pipingconnections, water-cooled condenser connections, and connecting the remote air-cooledcondenser. We recommend that you carry out these procedures in the order given here.Note: Before carrying out these procedures, install all equipment as described inthis section.Piping ConsiderationsPiping systems vary with process application and pump tank configuration. Typical systemconfiguration drawings are provided in this manual; the details may or may not apply to yourapplication. Piping systems must be designed by a person knowledgeable in piping systemdesign and configuration. Our Contracting Department can design and install a piping systemtailored to your process.• All piping returning to the pump tank must be equipped with an inverted trap with avacuum breaker at the high point of the system to prevent mains from siphoning intothe pump tank.• Run mains full size in order to reduce pressure drop in the system and providemaximum pressures at the ends of the mains.<strong>Scroll</strong> <strong>Compressor</strong> <strong>Central</strong> <strong>Chiller</strong> Chapter 3: Installation 18
Making Process Water ConnectionsAll ModelsAll central chilling stations have two chilled water connections per unit, and on water-cooledmodels, one more set of water connections for condenser water:To ProcessThe chilled water manifold allows one-point connections of TO PROCESS piping. The Sch.40 steel piping includes butterfly valves at each evaporator for flow balancing and circuitisolation; optional pressure gauges can be installed.The chilled water supply outlet leading to the process being controlled.From ProcessThe chilled water return for water returning back to the chiller from the process to be cooledand recirculated.Control ProbeThis central chilling station is equipped with two control probes which sense temperatures.One probe measures the temperature of the hot well and the other does the same for the coldwell of the reservoir. These temperatures are used by the PLC controller to sequence thecompressors, based on load.Making Tank Piping ConnectionsIf you have purchased the <strong>Scroll</strong> <strong>Compressor</strong> central chilling station with the optionalintegral pump tank, please proceed with this section.Note: Thermocouplings for chillers must be installed on both the hot and coldsides of the tank.Chilled Water CircuitMake the process cooling water supply connection at the P1 manifold at the left side of thepump tank at the exposed connection. Bring the process cooling water return connection tothe Hot well of the tank on the right side at the flanged connection.Warm coolant (water and ethylene glycol mixture) returns from the process to the tank, thengets pumped through the evaporator where it is cooled. The coolant flows to the process andreturns to repeat the cycle.<strong>Scroll</strong> <strong>Compressor</strong> <strong>Central</strong> <strong>Chiller</strong> Chapter 3: Installation 19
Freezestat ControlThe unit can be equipped with a freezestat control which shuts down the compressor if thechilled water temperature approaches the freezing point. The chilled water pump on thesystem will continue to run. It is factory-set at 40°F (4ºC).If you want lower chilled water temperatures, you’ll need to mix process water withindustrial- (not automotive) grade ethylene or propylene glycol with rust inhibitor to provideprotection down to 20°F (12ºC) below the operating temperature you want. Figure 1 belowshows the proper mixtures needed to provide protection to 20°F (12ºC) below the operatingtemperature you want. You can then reset the freezestat cutout temperature to a temperature10°F (6ºC) below the operating temperature you selected.Caution! Make sure all freezestat adjustments are performed by a qualifiedrefrigeration service technician.The manufacturers product warranty does not cover system freeze-up!Figure 1: Freezing Protection Curve60Ethylene glycol required for evaporator freeze protection50Ethyleneglycolpercent byvolume403020100-50ºF -40ºF -30ºF -20ºF -10ºF 0ºF 10ºF 20ºF 30ºF 40ºF 50ºF 60ºF-46ºC -40ºC -34ºC -29ºC -23ºC -18ºC -12ºC -7ºC -1ºC 4ºC 10ºC 16ºCChilled water operating temperature ºF / ºCReturnBring the chilled water returning from the process to the pump tank warm From Processside. This line is sized according to the flow rate from the process to the pump tank. SeePage 16 for more information on piping considerations.Caution! Do not use the <strong>Scroll</strong> <strong>Compressor</strong> <strong>Central</strong> <strong>Chiller</strong> to support piping.MakeupConnect a city water source to maintain water level in the pump tank.Note: If glycol is to be added to the system, DO NOT DO THIS!OverflowConnect the OVERFLOW outlet to an approved, trapped drain to permit excess water in thepump tank to overflow to the drain. The overflow line is sized according to the size of thepump tank.<strong>Scroll</strong> <strong>Compressor</strong> <strong>Central</strong> <strong>Chiller</strong> Chapter 3: Installation 20
Flow SwitchThis central chiller station is equipped with a flow switch which shuts down the chiller if theevaporator water flow falls below a safe operating gallons-per-minute (liters-per-minute)flow rate.Control NippleAll central chilling station evaporators have two control nipples. The flow switch, freezestat,and flush port are located in the control nipple. Optional pressure gages can be mounted inthe control nipples to aid in achieving proper flow through the evaporator and balancingflows.Coupling mounts for customer-installed pressure gauges are included on both control nipples.Pressure drop between evaporator entering water pressure and evaporator leaving waterpressure can be converted to gallons per minute using the pressure drop charts provided.To DrainConnect to a 1½” line (approx. 63 mm) leading to an approved, trapped drain. You can drainthe pump tank if necessary.Note: If glycol is added to the system, DO NOT DO THIS!Water Connection Sizing ConsiderationsNote:• Run all external chilled water connections with adequate size to theprocess.• Provide the largest possible openings and passages for the flow ofchilled water through platens, dies, molds, or other pieces ofequipment.• Minimum external pressure drop is critical for proper operation.Galvanic Corrosion ConsiderationsWater circuit piping components are primarily ferrous (iron) and react electro-chemicallywith non-ferrous metallic materials such as copper. Some water has dissolved minerals thatwill greatly accelerate the reaction between dissimilar metals.Use PVC or ferrous piping to minimize galvanic action. If piping must be copper, usedielectric unions at the chiller.Water Treatment ConsiderationsWater treatment is important in any piping system. In some locations, raw water may be usedin the system without problem; in other locations, it will result in large deposits of scale andcorrosion.We offer a complete line of water treatment equipment. Contact your sales representative forwater testing and treatment options.<strong>Scroll</strong> <strong>Compressor</strong> <strong>Central</strong> <strong>Chiller</strong> Chapter 3: Installation 21
Making Water-Cooled Condenser Connections<strong>Scroll</strong> compressor water-cooled chilling stations use city or tower water as a cooling medium.All external condenser supply and discharge piping and connections should be of adequatesize. See page xx for unit connection sizes.Two connections are made to each unit:Condenser Water InThe condenser water manifold allows one-point connection of TO TOWER (drain) andFROM TOWER (city water) piping. Sch. 40 steel include butterfly valves for eachcondenser. Drain points are at the bottom of the header.The city or tower water supply inlet is located at the side or rear of the chiller.• Water pressure ≥25 psi (≥172.4 kPa/≥1.72 bars)• Water temperature ≤85°F (≤29ºC)Condenser Water OutThe return outlet, located at the chiller side or rear is connected to a cooling tower inlet, asewer or other approved discharge receiver.• A water regulating valve is a standard feature in the condenser waterout line.Caution! The water regulating valve is set at the factory.It must not be adjusted except by a qualified refrigeration technician.High Pressure CutoutThis unit is equipped with an electro-mechanical safety feature which opens the controlcircuit if the system condensing pressure exceeds a safe level. The table below lists themanufacturer settings for this safety feature:High pressure cutout settingModel psi kPa barsWater-cooled chilling stations 290 psi 2,000 kPa 20 barsRemote air-cooled chilling stations 375 psi 2,586 kPa 26 barsNote:The high pressure cutout is a manual reset control, so you should reset itonce.If the problem persists, call a refrigeration service technician to analyze theproblem and to reset the control.<strong>Scroll</strong> <strong>Compressor</strong> <strong>Central</strong> <strong>Chiller</strong> Chapter 3: Installation 22
Low Pressure CutoutThis encapsulated switch safety feature prevents the compressor suction pressure fromdropping below a pre-set point. It is factory set to open the control circuit when pressuredrops below a safe level. The chiller will need to be restarted when the suction pressurereaches above 65 psi (448.2 kPa/4.5 bars). The table below lists the settings at which thecontrol circuit will be open or reset.Opens control circuit @ Resets control circuit @Model psi kPa bars psi kPa barsWater-cooled chilling stations 15 psi 103.4 kPa 1.0 bars 30 psi 206.9 kPa 2.1 barsRemote air-cooled chilling stations 15 psi 103.4 kPa 1.0 bars 30 psi 206.9 kPa 2.1 barsInstalling the Remote Air-Cooled Condenser<strong>Scroll</strong> compressor central chillers use the surrounding air to cool the remote condenser. Allmodels have variable speed fans and low ambient controls to allow proper operation down to-20°F (-29ºC) outdoor air temperature.Install the remote air cooled condenser where there is:• Greater than or equal to -20°F (-29ºC) air temperature.• Free passage of air for condensing.• Adequate structural support.• Protection from strong winds and drifting snow.• Provisions for removal of heated air from the area.• No steam, hot air or fume exhausts drawn into the condenser coils.• Service accessibility. See page XX for clearance requirements.<strong>Central</strong> <strong>Chiller</strong> condensing pressurewith 95ºF (35ºC) condenser airR-22 = 260 psi (1,793 kPa/17.93 bars)Note: Due to the variables involved in remote air-cooled condenser installations,no set or standard piping procedure exists. Each installation must bedesigned and installed by qualified persons. Follow the instructions suppliedwith the condenser.<strong>Scroll</strong> <strong>Compressor</strong> <strong>Central</strong> <strong>Chiller</strong> Chapter 3: Installation 23
Checking Motor Direction<strong>Compressor</strong>Note:• Unit must be wired in sequence (ABC) and checked before start up.• Never switch contactor leads or motor leads for reversing rotation.• Do not use contactor or motor leads for phase matching.• Reverse rotation can cause suction and discharge pressures to beapproximately equal; amp draws will be lower than normal.• If you discover that compressor rotation is reversed, correct it byswitching any two main power leads into the disconnect switch ordistribution block on the unit.Water PumpA positive pressure of 20 to 30 psi (137.9 to 206.8 kPa/1.38 to 2.07 bars) on the TOPROCESS line indicates correct pump rotation.Condenser FanOn central chillers with remote air-cooled units, air should draw through the condenser anddischarge up from the condenser.Changing fan rotation direction• Disconnect and lock out power at the fused disconnect.• If all fans are going backwards, reverse any two main power leads.• If only some of the fans are going backwards, switch any two of theirrespective motor leads.<strong>Scroll</strong> <strong>Compressor</strong> <strong>Central</strong> <strong>Chiller</strong> Chapter 3: Installation 24
3-5 Initial Start-upPre-Startup ChecksNote: These lists assume the installation information in this manual have beenread and followed.Have new chillers started up and checked by a qualified refrigerationservice technician.The manufacturer offers factory startup for your <strong>Scroll</strong> <strong>Compressor</strong> <strong>Central</strong><strong>Chiller</strong>. Call the Manufacturers’ Service Department at (800) 423-3183 formore details.Water-Cooled <strong>Central</strong> <strong>Chiller</strong>1. Check the shipping papers against the serial tag to be sure chiller size, type andvoltage is correct for the process.2. Check the transformer primary voltage connections to be sure they are configured forthe electrical power you are using.3. The voltage at the main power connection must be within plus or minus ten percent(±10%) of the voltage listed on the serial tag.4. Tighten all electrical connections.5. Phase imbalance must be less than two percent (
• <strong>Compressor</strong> noise from reverse rotation is noticeable. Do notrun in this mode for more than ten (10) seconds.• Reverse rotation can cause suction and discharge pressures tobe approximately equal; amp draws are lower than normal.• If you discover that compressor rotation is reversed, correct it byswitching any two main power leads into the disconnect switchor distribution block on the unit.17. Open the 1” (approx. 25 mm) makeup water valve and allow the tank to fill until theautomatic float valve shuts off. The float level should be adjusted so the standingwater level is 8” (20 cm) from the top of the tank.18. Check for proper pump rotation direction. To confirm proper rotation:a. Observe a pump pressure gauge connected to the suction and discharge sidesof the pump casing through two ¼” (approx. 6.4 mm) gauge cocks.b. Close the gauge cock leading to the pump suction and open the gauge cockleading to the pump discharge.c. Close the discharge butterfly valve, crack it open, then start the pump andobserve the gauge.1. If the gauge indicates within 15 psi (103.4 kPa/1.03 bars) belowthe pump curve, pump rotation is correct. Pump rotation isclockwise opposite the shaft end.2. If the gauge indicates 20 psi (137.9 kPa/1.38 bars) or morebelow the pump curve, the pump is running backwards. Reverserotation by interchanging any two power mains to the pumpmotor or starter.3. Recheck the pressure to be sure it increased.19. Check the water level in the pump tank to be sure the pump does not run dry whilethe system piping is being filled.20. Check your work and proceed to the Startup procedure.Remote Air-Cooled <strong>Central</strong> <strong>Chiller</strong> Startup Checklist1. Check the shipping papers against the serial tag to be sure chiller size, type andvoltage is correct for the process.2. Check the transformer primary voltage connections to be sure they are configured forthe electrical power you are using.3. The voltage at the main power connection must read within plus or minus ten percent(±10%) of the voltage listed on the serial tag.4. Phase imbalance must be less than two percent (
9. The optional or field installed chilled water supply and return valves must be open.10. Thermocouples need to be installed in both the hot and cold sides of the tank.11. Be sure the tank and chilled water circuit piping are filled with a water/glycolmixture. The water/glycol mix should provide freeze protection to 20°F below theleaving water temperature you’ve selected.12. The air cooled condenser should have an adequate supply of air for proper operation.13. Connect the main power to the unit and bump-start it to check for proper rotationdirection. If the fans are operating backwards, reverse any two main power leads atthe incoming terminal block.14. Remove all tools, foreign matter and debris from the pump tank reservoir and piping.15. Complete all piping leading to and from the pump tank. Observe all applicable codes.16. Complete all electrical wiring. Observe all applicable codes.17. Prepare all related equipment in the system for operation.Note:• Never switch contactor leads or motor leads for reversing rotation.• Do not use contactor or motor leads for phase matching.• <strong>Compressor</strong> noise from reverse rotation is noticeable. Do not run inthis mode for more than ten (10) seconds.• Reverse rotation can cause suction and discharge pressures to beapproximately equal; amp draws are lower than normal.• If you discover that compressor rotation is reversed, correct it byswitching any two main power leads into the disconnect switch ordistribution block on the unit.18. Open the 1” (approx. 25 mm) makeup water valve and allow the tank to fill until theautomatic float valve shuts off. The float level should be adjusted so the standingwater level is 8” (20 cm) from the top of the tank.19. Check for proper pump rotation direction. To confirm proper rotation:a. Observe a pump pressure gauge connected to the suction and discharge sidesof the pump casing through two ¼” (approx. 6.4 mm) gauge cocks.b. Close the gauge cock leading to the pump suction and open the gauge cockleading to the pump discharge.c. Close the discharge butterfly valve, crack it open, then start the pump andobserve the gauge.1. If the gauge indicates within 15 psi (103.4 kPa/1.03 bars) belowthe pump curve, pump rotation is correct. Pump rotation isclockwise opposite the shaft end.2. If the gauge indicates 20 psi (137.9 kPa/1.38 bars) or morebelow the pump curve, the pump is running backwards. Reverserotation by interchanging any two power mains to the pumpmotor or starter.<strong>Scroll</strong> <strong>Compressor</strong> <strong>Central</strong> <strong>Chiller</strong> Chapter 3: Installation 27
3. Recheck the pressure to be sure it increased.20. Check the water level in the pump tank to be sure the pump does not run dry whilethe system piping is being filled.21. Check your work and proceed to the Startup procedure in the following section.Water-Cooled <strong>Central</strong> <strong>Chiller</strong> Startup1. Start the chiller by pushing the Start button on the control panel of the unit.2. The touchscreen will display the Main Menu screen.3. If your chiller has been setup to control the pump tank, the recirculation pump willturn on first, then after 5 seconds the process pump will turn on. If configured with astandby pump, the lead/lag will control which pump turns on.4. Fifteen (15) seconds after the last pump turns on the first compressor will turn on.Based on the temperature of the water the controller will turn on compressors every15 seconds.5. Adjust the Freezestat cut-out, located in the main electrical enclosure, to 10°F (6ºC)below the process temperature set point you want.Note: If the recirculation pump does not turn on (or that the flow switch is notsatisfied) the compressors will not be allowed to turn on.6. Check the pump(s) amp draws and pressures. The amp draws below the servicefactor amps.7. Operate the chiller, looking for leaks and listening for unusual noises or vibrationsthat could indicate improper operation.Remote Air-Cooled <strong>Central</strong> <strong>Chiller</strong> Startup1. Start the chiller by pushing the Start button on the control panel of the unit.2. The touchscreen will display the Main Menu screen.3. If your chiller has been setup to control the pump tank, the recirculation pump willturn on first, then after 5 seconds the process pump will turn on. If configured with astandby pump, the lead/lag will control which pump turns on.4. Fifteen (15) seconds after the last pump turns on the first compressor will turn on.Based on the temperature of the water, the controller will turn on compressors every15 seconds.5. Adjust the Freezestat cut-out, located in the main electrical enclosure, to 10°F (6ºC)below the process temperature set point you want.Note: If the recirculation pump does not turn on (or that the flow switch is notsatisfied) the compressors will not be allowed to turn on.6. Check the pump(s) amp draws and pressures. The amp draws must be within thepump(s) running load and service factor amps.7. Operate the chiller, looking for leaks and listening for unusual noises or vibrationsthat could indicate improper operation.<strong>Scroll</strong> <strong>Compressor</strong> <strong>Central</strong> <strong>Chiller</strong> Chapter 3: Installation 28
8. Check condenser fans for pressure switch settings as shown in the table below:Fan Set on Set offnumber psi kPa bars psi kPa bars1 not applicable; Fan 1 is a variable-speed fan2 240 1,654.8 16.5 190 1,310.1 13.13 265 1,827.2 18.3 215 1,482.4 14.84 285 1,965.1 19.7 235 1,620.3 16.25 305 2,102.9 21.1 255 1,758.2 17.6Determining Flow RateTo determine flow:1. Close the gauge cock leading to the pump suction side and open the gauge cockleading to the pump discharge.2. Start the pump and make note of the discharge pressure in psi (kPa/bars).3. Check the pump curve for the appropriate horsepower pump at the discharge pressurepsi.4. Project this point down to find the flow in gpm (lpm).5. Process pumps can be left wide open if running amps are below full load amps.Shutdown1. Ready process and related equipment for shut down.2. Close the water make up valve.3. If the system is to be drained, open the 2” drain valve.<strong>Scroll</strong> <strong>Compressor</strong> <strong>Central</strong> <strong>Chiller</strong> Chapter 3: Installation 29
Chapter 4: Operation4-1 Start-upWater-Cooled <strong>Central</strong> <strong>Chiller</strong>1. Start the chiller by pushing the Start button on the control panel of the unit.2. The touchscreen will display the Main Menu screen.3. If your chiller has been setup to control the pump tank, the recirculation pump willturn on first, then after 5 seconds the process pump will turn on. If configured with astandby pump, the lead/lag will control which pump turns on.4. Fifteen (15) seconds after the last pump turns on the first compressor will turn on.Based on the temperature of the water the controller will turn on compressors every15 seconds.5. Adjust the Freezestat cut-out, located in the main electrical enclosure, to 10°F (6ºC)below the process temperature set point you want.Note: If the recirculation pump does not turn on (or that the flow switch is notsatisfied) the compressors will not be allowed to turn on.6. Check the pump(s) amp draws and pressures. The amp draws below the servicefactor amps.7. Operate the chiller, looking for leaks and listening for unusual noises or vibrationsthat could indicate improper operation.Remote Air-Cooled <strong>Central</strong> <strong>Chiller</strong>1. Start the chiller by pushing the Start button on the control panel of the unit.2. The touchscreen will display the Main Menu screen.3. If your chiller has been setup to control the pump tank, the recirculation pump willturn on first, then after 5 seconds the process pump will turn on. If configured with astandby pump, the lead/lag will control which pump turns on.4. Fifteen (15) seconds after the last pump turns on the first compressor will turn on.Based on the temperature of the water, the controller will turn on compressors every15 seconds.5. Adjust the Freezestat cut-out, located in the main electrical enclosure, to 10°F (6ºC)below the process temperature set point you want.Note: If the recirculation pump does not turn on (or that the flow switch is notsatisfied) the compressors will not be allowed to turn on.6. Check the pump(s) amp draws and pressures. The amp draws must be within thepump(s) running load and service factor amps.7. Operate the chiller, looking for leaks and listening for unusual noises or vibrationsthat could indicate improper operation.<strong>Scroll</strong> <strong>Compressor</strong> <strong>Central</strong> <strong>Chiller</strong> Chapter 4: Operation 30
4-2 Controller DescriptionIdentifying Control Panel Indicator Lights and Switches for the Standard andAdvanced ControllersSystem OnThe green System On indicator lights when the main power switch is on and the controlcircuit is energized.StartThe Start push-button lets you energize the unit.StopThe Stop push-button lets you de-energize the unit.Touchscreen InterfaceThe touchscreen interface gives you control over the chilling station. It has an easy-to-usecontrol menu that lets you quickly change or adjust chiller settings and also gives you all theoperation information you need to control the unit effectively.See Page 28 for more information on the Standard touchscreen interface operation. See Page43 for more information on the Advanced touchscreen interface operation.Figure 1: Standard Touchscreen Controller<strong>Scroll</strong> <strong>Compressor</strong> <strong>Central</strong> <strong>Chiller</strong> Chapter 4: Operation 31
Figure 2: Advanced Touchscreen Controller<strong>Scroll</strong> <strong>Compressor</strong> <strong>Central</strong> <strong>Chiller</strong> Chapter 4: Operation 32
4-3 Controller Operation (Standard Controller)Using the Standard Touchscreen InterfaceIntroductionThe Standard touchscreen interface lets you control your <strong>Scroll</strong> <strong>Compressor</strong> central chillingstation. You can do such things as:• Control compressors and optional pumps• View current statuses of operation, such as pressures, temperatures,and capacities• Handle alarm conditionsThis section lists special instructions for operating either touchscreen interface.Note: The screens shown in this section are sample screens. Actual screenrepresentations may be slightly different in appearance, but are no differentin operation.On all screens in this controller, the F4 button is reserved for the previous screen function.Some screens, such as the chiller status screen, do not have sufficient space to display aprompt that the F4 performs this function. However, the F4 button will always move to theprevious screen and will eventually return to the Main Menu.The Standard touchscreen interface is the “manager” of your central chilling station. Thescreen contains screen buttons you can press to control system operation.For example, if you need to resolve an alarm condition, press the or buttons onthe right side of the screen to highlight “ACTIVE ALARM LIST”. The screen will tell youwhat alarm is active and you may clear the alarm by touching the F1 button located to thelower left of the terminal.To return to the Main Menu screen at this point, press the F4 button of the terminal, locatedin the lower right corner. The Main Menu screen then displays.Some screens let you directly control the operation of the chilling station, while others are forinformation purposes and are “display-only” screens. This section distinguishes betweenoperation and display screens.<strong>Scroll</strong> <strong>Compressor</strong> <strong>Central</strong> <strong>Chiller</strong> Chapter 4: Operation 33
Main Menu ScreenTo start the Standard touchscreen interface:• Push the ON/OFF button on the cabinet.The chillers’ control panel energizes and the System On indicator turns on.The Main Menu screen displays:Main Menu ScreenThe Main Menu screen lets you gain access to:• “COMPRESSOR STATUS” contains the compressor status display screen• “PROC PUMP STATUS” screen shows pumps that are configured to operate.• “RECI<strong>RC</strong> PUMP STATUS” contains the recirculation pump status if the chiller wasconfigured to operate the chilled water pump tank.• “ACTIVE ALARM LIST” shows all of the active alarms. Those alarms which arecurrently preventing the chiller from functioning, if fatal alarm, or those that show acondition which needs to be looked at in a short period of time.• “ALARM HISTORY” contains the last twenty-five (25) alarms that were activated.• “CONFIGURATION MENU” contains the chiller setup parameters (i.e. chillersetpoint, and high and low temperature alarm setpoints)• “HOUR METERS” this screen shows the amount of time that the compressor orpump has been operating.The following sections in this chapter list the information you need to navigate through thesescreens for monitoring and operating your central chilling station with the Standard ControlPackage.<strong>Scroll</strong> <strong>Compressor</strong> <strong>Central</strong> <strong>Chiller</strong> Chapter 4: Operation 34
<strong>Compressor</strong> Status ScreenTo view the status of the chiller compressors, start at the Main Menu screen, then:1. Press the or buttons on the right side of the screen to highlight“COMPRESSOR STATUS”2. Press ↵The compressor status screen displays:<strong>Compressor</strong> Status ScreenThe <strong>Compressor</strong> Status screen shows the status for compressors within the system. Onlycompressors that are included in the system will be shown on this screen. <strong>Compressor</strong>s willdisplay one of the following states:1. OFFLINE – This indicates that the compressor has been turned off in thecompressor enable/disable screen. The compressor will not be called to operate untilit has been re-enabled.2. READY – Indicates that the compressor is enabled and ready to run. However, thecurrent loading does not require the compressor to be running. This compressor willbe automatically started when needed.3. RUNNING – <strong>Compressor</strong> is currently running.4. FAULT – A safety on the compressor indicates a fault condition and the compressorhas been deactivated. Once the problem is remedied, the compressor will return to aREADY state unless it is put in the OFFLINE state.<strong>Scroll</strong> <strong>Compressor</strong> <strong>Central</strong> <strong>Chiller</strong> Chapter 4: Operation 35
Process and Recirculation Pump Status ScreensNote: If your chiller system was configured to operate the pump(s) of the chilledwater pump tank, the user may view the status of the process andrecirculation pumps.To view the status of the pumps, start from the Main Menu, then:1. Press the or buttons to highlight either “PROC PUMP STATUS”or“RECI<strong>RC</strong> PUMP STATUS”.2. Press ↵The Pump Status Screen appearsPump Status ScreenOnly pumps that are included in the system will be shown on this screen. Pumps will displayone of the following states:1. OFFLINE – This indicates that the pump has been turned off in the pumpenable/disable screen. The pump will not be called to operate until it has been reenabled.2. READY – Indicates that the pump is enabled and ready to run. However, the currentnumber of pumps specified to run does not require this pump to operate.3. RUNNING – Pump is currently running.4. FAULT – A safety on the pump indicates a fault condition and the pump has beendeactivated. Once the problem is remedied, the pump will return to a READY stateunless it is put in the OFFLINE state.<strong>Scroll</strong> <strong>Compressor</strong> <strong>Central</strong> <strong>Chiller</strong> Chapter 4: Operation 36
Active Alarm List and Alarm History ScreensThese two screens let you view any active alarm conditions as well as the alarm history or theentire history. The list of system alarms that are tracked are as follows:• Chilled Water High Temperature Alarm• Chilled Water Low Temperature Alarm• <strong>Compressor</strong> Motor Protector Fault (One for each compressor)• Chilled Water Circuit Low Flow (One per chilled water circuit)• Chilled Water Circuit Freezestat (One per chilled water circuit)• Chilled Water Circuit High Pressure (One per chilled water circuit)• Chilled Water Circuit Low Pressure (One per chilled water circuit)• Pump motor overload (One per system pump)If an alarm condition occurs the follow screen is displayed:Alarm Condition ScreenTo acknowledge the alarm, press F1 to clear the alarm. It will then appear in the alarmhistory screen. Except for High and Low Water Temperature, and Low Refrigerant Pressure,these alarms are considered fatal and maintenance must be preformed in order to allow thechiller to fully run. Should a compressor or pump turn off from an alarm condition, theremaining will shut down and display FAULT in the status screen for the device.Once a device has gone offline you will need to contact a licensed professional (electrician orrefrigeration sevice company) to bring the device back online.Caution!Never attempt to service a unit until a qualified electrician has opened andlocked out the main disconnect using OSHA 1910.147 standards.All electrical connections must be done by a qualified electrician.WARNING! Disconnect all power to the unit, let the unit cool down, and turn off the water prior toany servicing.Failure to do so can result in SERIOUS INJURY OR DEATH!<strong>Scroll</strong> <strong>Compressor</strong> <strong>Central</strong> <strong>Chiller</strong> Chapter 4: Operation 37
Configuration Menu ScreenThis screen allows the operator to configure the settings for the compressors, pumps, chillersetpoint, and high and low temperature alarm setpoints.Operating the chiller compressorsTo enable or disable the individual compressors, start at the Main Menu, then:1. Press the or buttons on the right side of the screen to highlight“CONFIGURATION MENU”2. Press the ↵ buttonThe configuration menu screen displays:<strong>Chiller</strong> Configuration Screen3. Press the or button to highlight either “CIR 1 COMP ENABLES” or“CIR 2 COMP ENABLES”4. Press the ↵The compressor enable screen displays:<strong>Scroll</strong> <strong>Compressor</strong> <strong>Central</strong> <strong>Chiller</strong> Chapter 4: Operation 38
<strong>Compressor</strong> Enable ScreenThese screens allow the customer to toggle the compressors between ON-LINE and OFF-LINE. As the operator presses the F1 or F2 button, the corresponding compressor statechanges between ON-LINE and OFF-LINE.Setting <strong>Compressor</strong> Rotation Timesand Activating <strong>Compressor</strong> Lead/Lag OperationWhile in the Configuration Menu, the compressor rotation screen allows the customer toenable or disable the rotation of compressors. While viewing the screen for the applicablerotation, pressing F1 will toggle the rotation function On or Off. Pressing the F2 button willpresent an entry screen which will allow the entry of a rotation interval. Acceptable range is50-200 hours.The compressor rotation screen displays:<strong>Compressor</strong> Rotation Screen<strong>Scroll</strong> <strong>Compressor</strong> <strong>Central</strong> <strong>Chiller</strong> Chapter 4: Operation 39
Operating <strong>Chiller</strong> PumpsTo turn on and off the pumps, start from the Main Menu, then:1. Press the or buttons to highlight either “CONFIGURATION MENU”.2. Press ↵3. Highlight “PUMP ENABLES” to4. Press ↵The Pump Enables Screen appearsPump Enables ScreenAny pump that is disabled to the OFF-LINE position will not be called to operate. Simplytoggle the F1 key on the enable/disable screen to toggle the state of the pump from the ON-LINE to OFF-LINE state.<strong>Scroll</strong> <strong>Compressor</strong> <strong>Central</strong> <strong>Chiller</strong> Chapter 4: Operation 40
Setting Pump Rotation Timesand Activating Pump Rotation OperationWhile in the Configuration Menu, the pump rotation screen allows the customer to enable ordisable the rotation of compressors. While viewing the screen for the applicable rotation,pressing F1 will toggle the rotation function On or Off. Pressing the F2 button will presentan entry screen which will allow the entry of a rotation interval. Acceptable range is 50-200hours.The compressor rotation screen displays:<strong>Compressor</strong> Rotation Screen<strong>Scroll</strong> <strong>Compressor</strong> <strong>Central</strong> <strong>Chiller</strong> Chapter 4: Operation 41
Viewing and Setting System TemperaturesTo view the actual process temperature, select the “COMPRESSOR STATUS”, “PROCPUMP STATUS”, or the “RECI<strong>RC</strong> PUMP STATUS” screens from the main menu. Theprocess temperature is located on the bottom-right of the screen.For example, the compressor status displays:<strong>Compressor</strong> Status ScreenNote: If you have a metric version of the <strong>Central</strong> <strong>Chiller</strong> controller, the screensdisplay in converted metric values.Setting System TemperaturesThe chiller setpoints are set through the configuration menu. Starting from the Main Menu:1. Press the or buttons to highlight “CONFIGURATION MENU”2. Press ↵3. Highlight “CW TEMP SETPOINT”, “CW TEMP HIGH LIMIT”, or “CW TEMPLOW LIMIT”4. Press ↵5. While on the parameter screen, simply press the F1 button to make the parameterchange. A numeric entry screen will appear. Use the and buttons toselect the digit, and the and buttons to increase and decrease that digit.Once the value is correct, press the ↵ button to make the change. In the event thatthe value is outside the range specified by MAX or MIN, the value entered will bethe corresponding MAX or MIN.<strong>Scroll</strong> <strong>Compressor</strong> <strong>Central</strong> <strong>Chiller</strong> Chapter 4: Operation 42
Hourmeters ScreenViewing <strong>Compressor</strong> Run TimesFrom the Main Menu, use the or buttons to highlight the “HOURMETERS”menu. <strong>Scroll</strong> to select the compressors. Then press ↵ to display the hourmeter.Note: this is a complete list of all components that may be included in the system.Any component that is not included in the system will not accumulate time.The <strong>Compressor</strong> Run Time screen displays:<strong>Compressor</strong> Run Time Display ScreenTwo hourmeters are kept for each compressor in the system. The first is a lifetime meter.This measures the total time that the compressor has been operational in the lifetime of thechiller. The second is a resettable hourmeter. This hourmeter can be cleared to monitor runtime on specific intervals. In order to clear the resettable hourmeter, press the F1 button (asprompted on the screen)<strong>Scroll</strong> <strong>Compressor</strong> <strong>Central</strong> <strong>Chiller</strong> Chapter 4: Operation 43
Viewing Pump Run TimesFrom the Main Menu, use the or buttons to highlight the “HOURMETERS”menu. <strong>Scroll</strong> to select the pump. Then press ↵ to display the hourmeter.Note: this is a complete list of all pumps that may be included in the system. Anypump that is not included in the system will not accumulate time.The Pump Run Time screen displays:Pump Run Time Display ScreenTwo hourmeters are kept for each compressor in the system. The first is a lifetime meter.This measures the total time that the pump has been operational in the lifetime of the chiller.The second is a resettable hourmeter. This hourmeter can be cleared to monitor run time onspecific intervals. In order to clear the resettable hourmeter, press the F1 button (as promptedon the screen).<strong>Scroll</strong> <strong>Compressor</strong> <strong>Central</strong> <strong>Chiller</strong> Chapter 4: Operation 44
4-4 Controller Operation (Advanced Controller)Using the Advanced Touchscreen InterfaceIntroductionThe Advanced touchscreen interfaces let you control your <strong>Scroll</strong> <strong>Compressor</strong> <strong>Central</strong> Chillingstation. You can do such things as:• Control compressors and optional pumps• View current statuses of operation, such as pressures, temperatures,and capacities• Handle alarm conditionsThis section lists special instructions for operating either touchscreen interfaces.Note: The screens shown in this chapter are sample screens. Actual screenrepresentations may be slightly different in appearance, but are nodifferent in operation. Also, the PLC is configured based on optionsand system configuration at the time of order. These screens are thebasic ones to startup the chiller.The Advanced touchscreen interface is the “manager” of your scroll compressor centralchilling station. This screen contains screen buttons you can press to control systemoperation.For example, if you need to resolve an alarm condition, press the Up or Down arrow buttonson the right side of the screen to highlight “ACTIVE ALARMS”. Press ↵ and the screenwill display all active alarms.To return to the Main Menu screen at this point, press the Menu button on the screen, locatedin the lower right corner. The Main Menu screen then displays.Some screens let you directly control the operation of the chilling station, while others are forinformation purposes and are “display-only” screens. This section distinguishes betweenoperation and display screens.Figure 3: Advanced Touchscreen Controller<strong>Scroll</strong> <strong>Compressor</strong> <strong>Central</strong> <strong>Chiller</strong> Chapter 4: Operation 45
Accessing the Main Menu ScreenTo start the <strong>Central</strong> <strong>Chiller</strong> Advanced touchscreen interface:• Push the ON/OFF button on the cabinet.The chiller control panel energizes and the System On indicator turns on.The Main Menu screen displays:Figure 4: Main Menu ScreenThe Main Menu screen lets you gain access to:• ”Chilled Water System Status” contains information on the status of thecompressors and pumps within the system.• “Active Alarms” contains the current alarm(s) of the system• “Al;arm History” contains the last thirty (30) alarms that were activated.• If the chiller was configured to operate the chilled water pump tank, there are threescreens to configure and view the pump tank setup. The configuration screen allowsfor the user to turn on or off any of the pumps as well as configuring the lead/lagrotation (if multiple pumps were configured)• “<strong>Chiller</strong> Configuration” shows the configuration of the chiller itself including thechiller temperature setpoint, temperature alarm settings, as well as setting up thelead/lag rotation, and the ability to turn on and off the compressors.<strong>Scroll</strong> <strong>Compressor</strong> <strong>Central</strong> <strong>Chiller</strong> Chapter 4: Operation 46
• “<strong>Compressor</strong> Hourmeters” contains the lifetime and resettable hour meters toshow the number of hours that the compressors have been running• “Chilled Water Process Pump Hourmeters” and “Chilled Water RecircPump Hourmeters” contains the lifetime and resettable hour meters to show thenumber of hours that the process and recirculation pumps have been running.• “PanelView Utilities” and “ACS Service” are both password protected sections ofthe PLC that are used to configure the display and the initial configuration of thechiller and system.The following sections in this chapter list the information you need to navigate through thesescreens for operating and monitoring your central chilling station with the Advanced ControlPackage.<strong>Scroll</strong> <strong>Compressor</strong> <strong>Central</strong> <strong>Chiller</strong> Chapter 4: Operation 47
Viewing <strong>Compressor</strong> StatusStaging1. The system uses a PID control algorithm to regulate the chilled water temperature.As the required control effort increases or decreases, the system compressors areturned on or off to keep the temperature at the specified set-point2. <strong>Compressor</strong> anti-recycle time is three (3) minutes.To view the status of the chiller compressors, start at the Main Menu screen, then:1. Press the Up or Down buttons on the right side of the screen to highlight “ChilledWater System Status”2. Press ↵The chiller status screen displays:Figure 5: Chilled Water System Status ScreenThe <strong>Chiller</strong> Status screen shows the status for compressors within the system. Onlycompressors that are included in the system will be shown on this screen. <strong>Compressor</strong>s willdisplay one of the following states:1. OFFLINE – This indicates that the compressor has been turned off in thecompressor enable/disable screen. The compressor will not be called to operate untilit has been re-enabled. The color code for this indication is black.<strong>Scroll</strong> <strong>Compressor</strong> <strong>Central</strong> <strong>Chiller</strong> Chapter 4: Operation 48
2. READY – Indicates that the compressor is enabled and ready to run. However, thecurrent loading does not require the compressor to be running. This compressor willbe automatically started when needed. The color code for this indication is yellow.3. RUNNING – <strong>Compressor</strong> is currently running. The color code for this indication isgreen.4. FAULT – A safety on the compressor indicates a fault condition and the compressorhas been deactivated. Once the problem is remedied, the compressor will return to aREADY state unless it is put in the OFFLINE state. The color code for thisindication is red.<strong>Scroll</strong> <strong>Compressor</strong> <strong>Central</strong> <strong>Chiller</strong> Chapter 4: Operation 49
Viewing <strong>Chiller</strong> Pump StatusNote: If your chiller system was configured to operate the pump(s) of thechilled water pump tank, the user may view the status of the processand recirculation pumps.To view the status of the pumps, start from the Main Menu, then:1. Press the Up or Down buttons to highlight either “Chilled Water SystemStatus”.2. Press ↵The Pump Status Screen appearsFigure 6: Pump Status ScreenOnly pumps that are included in the system will be shown on this screen. Pumps will displayone of the following states:1. OFFLINE – This indicates that the pump has been turned off in the pumpenable/disable screen. The pump will not be called to operate until it has been reenabled.The color code for this indication is black.2. READY – Indicates that the pump is enabled and ready to run. However, the currentnumber of pumps specified to run does not require this pump to operate. The colorcode for this indication is yellow.<strong>Scroll</strong> <strong>Compressor</strong> <strong>Central</strong> <strong>Chiller</strong> Chapter 4: Operation 50
3. RUNNING – Pump is currently running. The color code for this indication is green.4. FAULT – A safety on the pump indicates a fault condition and the pump has beendeactivated. Once the problem is remedied, the pump will return to a READY stateunless it is put in the OFFLINE state. The color code for this indication is red.Viewing Active Alarms and Alarm History ScreensThese two screens let you view any active alarm conditions as well as the alarm history forthe entire history. The list of system alarms that are tracked are as follows:• Chilled Water High Temperature Alarm• Chilled Water Low Temperature Alarm• <strong>Compressor</strong> Motor Protector Fault (One for each compressor)• Chilled Water Circuit Low Flow (One per chilled water circuit)• Chilled Water Circuit Freezestat (One per chilled water circuit)• Chilled Water Circuit High Pressure (One per chilled water circuit)• Chilled Water Circuit Low Pressure (One per chilled water circuit)• Pump motor overload (One per system pump)If an alarm condition occurs the follow screen is displayed:Figure 7: Alarm Condition Screen<strong>Scroll</strong> <strong>Compressor</strong> <strong>Central</strong> <strong>Chiller</strong> Chapter 4: Operation 51
To acknowledge the alarm, press the alarm silence button to clear it. It will then appear in thealarm history screen. Except for High and Low Water Temperature, and Low RefrigerantPressure, these alarms are considered fatal and maintenance must be preformed in order toallow the chiller to fully run. Should a compressor or pump turn off from an alarm conditionthe remaining will shut down and display FAULT in the status screen for the device.If a fault occurs, that compressor or circuit is deactivated. The load will automatically shift toany other compressors that are currently ON-LINE, but not running. Lead/Lag rotation willcontinue to function. <strong>Compressor</strong>s that are faulted will be removed from the rotation order.Once a device has gone offline you will need to contact a licensed professional (electrician orrefrigeration sevice company) to bring the device back online.Caution!Never attempt to service a unit until a qualified electrician has opened andlocked out the main disconnect using OSHA 1910.147 Standards.WARNING! Disconnect all power to the unit, let the unit cool down, and turn off the water prior toany servicing.Failure to do so can result in SERIOUS INJURY or DEATH!<strong>Scroll</strong> <strong>Compressor</strong> <strong>Central</strong> <strong>Chiller</strong> Chapter 4: Operation 52
Configuration Menu ScreenThis screen allows the operator to configure the settings for the compressors, pumps, chillersetpoint, and high and low temperature alarm setpoints.Operating the chiller compressorsTo enable or disable the individual compressors, start at the Main Menu, then:1. Press the Up or Down buttons on the right side of the screen to highlight “<strong>Chiller</strong>Configuration”2. Press the ↵ buttonThe configuration menu screen displays:Figure 8: <strong>Chiller</strong> Configuration Screen3. Touch the screen corresponding with the compressor you want to bring On-Line orOff-Line. The background color of the square turns green for On-Line and black forOff-line.<strong>Scroll</strong> <strong>Compressor</strong> <strong>Central</strong> <strong>Chiller</strong> Chapter 4: Operation 53
Operating <strong>Chiller</strong> PumpsTo turn on and off the pumps, start from the Main Menu, then:1. Press the Up or Down buttons to highlight either “Chilled Water Pump TankConfiguration”.2. Press ↵The Pump Enables Screen appearsFigure 9: Chilled Water Pump Tank Configuration ScreenAny pump that is disabled to the OFF-LINE position will not be called to operate. Simplypress the button of the desired pump to toggle the state of the pump from the ON-LINE toOFF-LINE state.Setting <strong>Compressor</strong> Rotation Times and Activating <strong>Compressor</strong> Rotation Operation<strong>Scroll</strong> <strong>Compressor</strong> <strong>Central</strong> <strong>Chiller</strong> Chapter 4: Operation 54
The system automatically rotates the compressor order to generate a Lead/Lag rotation. Anytime a compressor is faulted or manually taken OFF-LINE, it will be removed from theLead/Lag rotation. Once the fault is cleared or manually put ON-LINE, the compressor isreturned to the Lead/Lag rotation at the end of the rotation order.While in the Configuration Menu, the compressors can be setup in a rotation configurationusing interval hours. By pressing the “<strong>Compressor</strong> Rotation Interval” button, a numerickeypad will be displayed and allow the user to change the timeframe of the interval(Maximum 400 minutes to 40 hours).To activate the rotation operation touch the “<strong>Compressor</strong> Rotation” button. The status ofthe button will change to Enabled (green background), or Disabled (red background).Setting Pump Rotation Times and Activating Pump Rotation OperationThe system automatically rotates the pump order to generate a Lead/Lag rotation. Any time apump is faulted or manually taken OFF-LINE, it will be removed from the Lead/Lag rotation.Once the fault is cleared or manually put ON-LINE, the pump is returned to the Lead/Lagrotation at the end of the rotation order.While in the Chilled Water Pump Tank Configuration Menu, the pump lead/lag (rotation) canbe enabled or disabled. Simply press the Process or Recirculation Pump Interval button onthe screen to toggle between Enabled and Disabled.The interval between rotating pumps may also be setup in this screen. Press the CW PumpRotation Interval button to bring up the time entry screen. Acceptable range is 50-200 hours.<strong>Scroll</strong> <strong>Compressor</strong> <strong>Central</strong> <strong>Chiller</strong> Chapter 4: Operation 55
Viewing and Setting System TemperaturesTo view the actual process temperature start at the Main Menu and1. Use the Up or Down arrows to highlight “Chilled Water System Status”2. Press ↵The system status displays:Figure 10: Chilled Water System Status ScreenNote: If you have a metric version of the controller, the screens display inconverted metric values.<strong>Scroll</strong> <strong>Compressor</strong> <strong>Central</strong> <strong>Chiller</strong> Chapter 4: Operation 56
Setting System TemperaturesThe chiller setpoints are set through the compressor configuration menu. Starting from theMain Menu:1. Press the Up or Down buttons to highlight “<strong>Chiller</strong> Configuration”2. Press ↵3. Touch the “Process Set-point” buttonThe input display screen appears:Figure 11: Temperature Input Display Screen4. Press the “Enter” key on the keypad and press the “Return” button to return to the<strong>Chiller</strong> Configuration screen.<strong>Scroll</strong> <strong>Compressor</strong> <strong>Central</strong> <strong>Chiller</strong> Chapter 4: Operation 57
Viewing <strong>Compressor</strong> Run TimesFrom the Main Menu, use the Up or Down buttons to highlight the “<strong>Compressor</strong>Hourmeters” menu. Then press ↵ to display the hourmeters.Note: this is a complete list of all compressors that may be included in thesystem. Any compressor that is not included in the system will notaccumulate time.The <strong>Compressor</strong> Run Time screen displays:Figure 8: <strong>Compressor</strong> Run Time Display ScreenTwo hourmeters are kept for each compressor in the system. The first is a lifetime meter.This measures the total time that the compressor has been operational in the lifetime of thechiller. The second is a resettable hourmeter. This hourmeter can be cleared to monitor runtime on specific intervals. In order to clear the resettable hourmeter, press the Hour MeterReset button (as prompted on the screen)<strong>Scroll</strong> <strong>Compressor</strong> <strong>Central</strong> <strong>Chiller</strong> Chapter 4: Operation 58
Viewing Pump Run TimesFrom the Main Menu, use the Up or Down buttons to highlight either the “Chilled WaterProcess Pump Hourmeters” or “Chilled Water Recirc Pump Hourmeters” menu.Then press ↵ to display the hourmeters.Note: this is a complete list of all pumps that may be included in the system.Any pump that is not included in the system will not accumulate time.The Pump Run Time screen displays:Figure 9: Pump Run Time Display ScreenTwo hourmeters are kept for each compressor in the system. The first is a lifetime meter.This measures the total time that the pump has been operational in the lifetime of the chiller.The second is a resettable hourmeter. This hourmeter can be cleared to monitor run time onspecific intervals. In order to clear the resettable hourmeter, press the appropriate “HourMeter Reset” button (as prompted on the screen)<strong>Scroll</strong> <strong>Compressor</strong> <strong>Central</strong> <strong>Chiller</strong> Chapter 4: Operation 59
4-5 Operation ProceduresStandard Controller1.Advanced Controller4-6 Shutdown1. Ready process and related equipment for shut down.2. Close the water make up valve.3. If the system is to be drained, open the 2” drain valve.<strong>Scroll</strong> <strong>Compressor</strong> <strong>Central</strong> <strong>Chiller</strong> Chapter 4: Operation 60
Chapter 5: Maintenance5-1 Maintenance ScheduleThe checklist below contains a list of items which should be inspected and/or replaced tokeep your <strong>Central</strong> <strong>Chiller</strong> operating at peak efficiency. Perform each inspection at the regularintervals listed below.System model # Serial #Every weekDate/ByDate/ByDate/ByDate/ByDate/ByDate/ByDate/ByDate/ByDate/ByDate/ByDate/ByDate/ByDate/ByEvery month Jan Feb Mar Apr May Jun Jul Aug Sep Oct Nov DecEvery yearNext scheduledinspectionActual inspectionDate/ByNext scheduledinspectionActual inspectionDate/ByEvery two yearsScheduledreplacement dateActual replacementDate/Work done byScheduledreplacement dateActual replacementDate/Work done by- Photocopy this page for your maintenance records -<strong>Scroll</strong> <strong>Compressor</strong> <strong>Central</strong> <strong>Chiller</strong> Chapter 5: Maintenance 61
5-2 Preventative MaintenanceA systematic preventive maintenance program helps avoid costly down time. Call the ServiceDepartment to arrange a schedule of inspections. This service, described in Bulletin No. 10-106.3, is tailored to fit your maintenance requirements.Inspections include:1. Checking refrigerant suction anddischarge pressures.2. Checking safety and operatingcontrols.3. Checking voltage and amperageof all motors.4. Checking all electricalconnections.5. Checking quantity of refrigerant.6. Checking compressor oil level.7. Checking lubrication of motor andpump bearings.8. Checking circulating pump operation.9. Checking flow through heatexchangers.10. Checking compressor efficiency.11. Checking noise levels.12. Checking cleanliness of equipmentarea.Although the manufacturer does not recommend that you perform these maintenanceprocedures on your own, the two items listed below (performed on a regular basis) willincrease the longevity and efficiency of your unit. It is recommended that you contact themanufacturer to have any maintenance performed on this equipment.LubricationGrease all fan bearings, fan motors, and pump motors that do not have permanently sealedbearings. Remove the grease relief plug (motors only) before adding grease. Failure to do somay dislodge the bearing grease retainer which will eventually cause bearing failure.Lubricate components regularly, based only on the component manufacturer’s specificationsfor frequency and lubricant.<strong>Compressor</strong>s require a special scroll oil (Suniso 3GSA or equivalent); failure to use this oilwhen lubricating will void the warranty.Condenser MaintenanceDirty condenser heat exchange surfaces reduce system capacity. Inspect and clean as needed.Remote Air-CooledBrush or vacuum light dirt accumulations. Avoid bending or damaging the fins. Heavy soilaccumulations on the coil require professional steam cleaning by a qualified refrigerationservice technician. Washing from the outside will only make matters worse.Water-CooledProper water treatment will greatly reduce cleaning intervals.Remove dirt in the condenser tubes with a nylon tube brush. Mineral deposits can be removedby circulating Liquid De-Scaling Solution (Model Number A0502600) through the water sideof the condenser. Follow the directions on the container.The refrigerant side is sealed and requires no routine maintenance.<strong>Scroll</strong> <strong>Compressor</strong> <strong>Central</strong> <strong>Chiller</strong> Chapter 5: Maintenance 62
5-3 Corrective MaintenanceEvaporator MaintenanceThe evaporator(s) may be accessed for back-flushing by removal of the 2” plug (approx. 51mm) in the return control nipple and the flow switch in the supply control nipple. If thesuggested piping recommendations have been followed, one circuit of a multiple circuitchiller may be back-flushed without shutting down the entire system. Check Y-strainer forany clogging.Pump Motor SealPump seals require water for lubrication, so the pump(s) must never be run dry. Always fillthe tank before attempting to operate the pump(s). Seal failures usually follow a period of dryoperation of the pump.Makeup ValvePeriodically inspect the water makeup valve assembly for proper operation. If the valve nolonger shuts off completely or reliably, replace it. The plastic ball float should be buoyant forproper operation..<strong>Scroll</strong> <strong>Compressor</strong> <strong>Central</strong> <strong>Chiller</strong> Chapter 5: Maintenance 63
Chapter 6: Troubleshooting6-1 IntroductionThe utmost in safety precautions should be observed at all times when working on or aroundthe machine and the electrical components. All normal trouble-shooting must beaccomplished with the power off, line fuses removed, and with the machine tagged as out ofservice.The use of good quality test equipment cannot be over-emphasized when troubleshooting isindicated. Use a good ammeter that can measure at least twice the AC and DC current thatcan be encountered for the machine. Be sure that the voltmeter has at least minimumimpedance of 5,000 OHMS-per-volt on AC and 20,000 OHMS-per-volt on DC scales.Popular combination meters, VOM and VTVM can be selected to provide the necessaryfunctions.Before making haphazard substitutions and repairs when defective electrical components aremalfunctioning, we recommend that you check the associated circuitry and assemblies forother defective devices. It is common to replace the obviously damaged component withoutactually locating the real cause of the trouble. Such hasty substitutions will only destroy thenew component. Refer to wiring diagrams and schematics.Locating mechanical problems, should they occur, is relatively straightforward. Whennecessary, refer to the parts catalog section.Problem Possible cause Corrective actionUnit does not run.Unit does not run. (Cont’d.)No power.Wrong voltage supplied to unit.Defective On/Off switch.Control circuit fuse blown.Defective control transformer.Flow switch alarm.Pump motor off on overload.Unit is off on flow switch orpressure switch.Unit is off on flow switch orpressure switch.Check main disconnect, fuses,wiring, and power lead to unit.Voltage must be within plus orminus ten percent (±10%) ofnameplate rating.Replace switch.Replace fuse, checktransformer, check wiring forloose wires, check for shortedcoils on contactors andsolenoids, check crankcaseheater.Replace.Check pump for properrotation.Check active alarm screen.Should have flow alarms.Reset and test motor.Check that the chiller pump isrunning.Check that all valves are open.Check for defective flowswitch.<strong>Scroll</strong> <strong>Compressor</strong> <strong>Central</strong> <strong>Chiller</strong> Chapter 6: Troubleshooting 64
Problem Possible cause Corrective actionPump runs,compressor does not.Pump runs, compressor cycles atshort intervals.Freeze control set higher thantemperature of liquid insystem. (Freezestat alarm)High pressure refrigerantalarm.<strong>Compressor</strong> internal overloadopen. (Alarm)<strong>Compressor</strong> contactor holdingcoil open.Low refrigerant pressureswitch contact open. (Lowpressure alarm)Defective pump motorinterlock to compressor controlcircuit.Broken wire in the compressorcontrol circuit.Freezestat control setting is toohigh. (Freezestat alarm)Refrigerant is too low.Lower freeze control setting to10°F (6ºC) below the leavingtemperature you want.Air cooled units: Check activealarm screen. Check condenserfans for proper rotation. Checkfor dirty condenser. Check forcondenser air obstruction.Check for tripped motoroverload, blown fuses, or badcondenser fan motor.Water cooled units: Check forwater valves turned on. Checkfor dirty condenser. Checkwater flow through condenser.Allow time to cool and reset.Check for high/low voltage.Voltage must be within plus orminus ten percent (±10%) ofnameplate rating.Check 3 phase contactor fusescharge, sensors module.Check for poor compressorelectrical connections.Check compressor rotation onscroll compressors.Repair or replace.Sight glass should be clearwhile comperssor runs. Call forservice if bubbling or foaming.Repair or replace.Locate and repair.Lower set point to 10°F (6ºC)below the leaving watertemperature you want with atleast 15 degrees differential.Check refrigeration charge;check refrigerant sight glass forbubbles or a level in the glass.<strong>Scroll</strong> <strong>Compressor</strong> <strong>Central</strong> <strong>Chiller</strong> Chapter 6: Troubleshooting 65
Problem Possible cause Corrective actionLeaving water temperature is notat set point.Pump pressure is too high.Pump pressure is too low.Process water pressure low,pressure at pump high.Unit runs continuously, but notenough cooling power.Improper water/glycol mixture.Defective freezestat control.Refrigerant charge is low.Restricted water flow.Pump is running in reverse.(Low flow alarm)Check for foreign matter.Evaporator frozen.Restricted condenser air flow.Refrigerant not feeding.Improper water/glycol solution.Poor heat transfer in evaporator.Unit low on refrigerant.Low water flow throughevaporator.Inefficient compressor.Unit under-sized forapplication..Be sure the antifreeze mixtureprotection is right for theprocess.Replace.Call service to find and repairthe leak. Add refrigerant.Check for partially closedvalves etc. Be sure all lines areproperly sized.Check dye strainer.Verify proper rotation; ifincorrect, see ChangingRotation Direction on Page 25for more information.Clean the system. You may alsohave to pull the pump andinspect the impeller. Check forfoam in the water circuit; addanti-foam if needed.Isolate evaporator, thaw out,check for leaks. Check coolantsolution. Coolant solutionshould be good for at least 10ºF(6ºC) below leaving watertemperature.Clean condenser.Check superheat on expansionvalve.Make sure that coolant mixtureprotection is right for theprocess.Backflush and clean evaporator.Call service.Increase flow to design flow of2.4 gpm/ton.Call service.Call sales representative.<strong>Scroll</strong> <strong>Compressor</strong> <strong>Central</strong> <strong>Chiller</strong> Chapter 6: Troubleshooting 66
Chapter 7: Appendix7-1 Optional ComponentsThe following is a list of options which your <strong>Scroll</strong> <strong>Compressor</strong> <strong>Central</strong> <strong>Chiller</strong> may havebeen equipped with:• Advanced control package including: AB SLC 5/04 PLC with PanelView 1000 colortouch screen, control of up to nine additional chillers, cooling tower system, watertreatment system, and DH+ communication capabilities• General Fault audible/visual alarm with elevated light stack• Non-fused rotary thru-the-door disconnect switches• Electrical operation available in 208, 460, and 575 volts, 60 Hz; 200, 380, and 415volts, 50 Hz• UL/ C UL-listed electrical subpanel• Water cooled condenser manifold• Onsite startup7-2 Technical SpecificationsModel Number NomeclatureXC – <strong>Scroll</strong> <strong>Compressor</strong> <strong>Central</strong> <strong>Chiller</strong>Condenser TypeR – Remote Air CooledW – Water CooledNominal Unit Size – Tons (kW)030 – 30 (105.4) 070 – 70 (246.0)040 – 40 (140.6) 080 – 80 (281.2)050 – 50 (175.7) 090 – 90 (316.3)060 – 60 (210.9) 100 – 100 (351.5)XC W 060<strong>Scroll</strong> <strong>Compressor</strong> <strong>Central</strong> <strong>Chiller</strong> Chapter 7: Appendix 67
Typical Two-Circuit 30-100 Ton Remote Water Cooled <strong>Chiller</strong> SpecificationsModel<strong>RC</strong>W-xxx30 40 50 60Cooling Capacity (tons) @ 50°F (10°C) LWT 32.4 41.4 50.2 64.8Capacity stages (qty.) 2 4EER (BTUH/W) 15.65 14.91 15.35 15.66Nominal water flow Evaporator 78 [295.3] 99 [374.8] 120 [454.2] 156 [590.5](gpm) [lpm] Condensers 97 [367.2] 124 [469.4] 151 [571.6] 194 [734.4]Condenser connection (no manifold) Flange Conn. (in.) (2) 2 (2) 2 (2) 2 (2) 2 1/2Evaporator manifold connection Victaulic 3 3 3 3Amp draw, nameplate (460/3/60 V) 56 70 88 111Height 85 [215.9]Dimensions (in.)[cm] Width 66 [167.6] 94 [238.8]Depth 45 [114.3]Shipping weight (lbs)[kg] 1,520[689.5]1,900[861.8]2,120[961.6]2,700[1224.7]Max operating weight (lbs.)[kg] 1,610[730.3]2,010[911.7]2,260[1025.1]2,870[1301.8]Model<strong>RC</strong>W-xxx70 80 90 100Cooling Capacity (tons) @ 50°F (10 °C) LWT 73.1 81.4 90.3 99.2Capacity stages (qty.) 4EER (BTUH/W) 15.15 14.63 14.90 15.16Evaporator 175 [662.4] 196 [741.9] 217 [821.4] 238 [900.9]Nominal water flow(gpm) [lpm]Condensers 219 244 271 298[829.0] [923.6] [1025.8] [1128.1]Condenser connection (no manifold) Flange Conn. (in.) (2) 2 1/2 (2) 2 1/2 2 1/2 / 3 (2) 3Evaporator manifold connection Victaulic 3 3 4 4Amp draw, nameplate (460/3/60 V) 124 138 156 174Height 75 [190.5]Dimensions (in.)[cm] Width 94 [238.8] 115 [292.1]Depth 45 [114.3]Shipping weight (lbs)[kg] 3,000[1360.8]3,300[1496.9]3,580[1623.9]3,880[1759.9]Max operating weight (lbs.)[kg] 3,200[1541.5]3,520[1596.6]3,830[1737.3]4,160[1886.9] Based on 50ºF (10ºC) chilled water supply temperature and 85ºF (29ºC) tower water. Based on 2.4 gpm per ton (9.1 lpm per 3.517 kW). Based on availability of 85ºF (29ºC) tower water at 25 psi (172.4 kPa/1.7 bars) minimum. Multiply 460/3/60 amperage by 2.0 for 208-230/3/60 amperages; multiply by 1.2 for 380/3/60 amperages; multiply by 0.8 for575/3/60 amperages<strong>Scroll</strong> <strong>Compressor</strong> <strong>Central</strong> <strong>Chiller</strong> Chapter 7: Appendix 68
Typical Two-Circuit 30-100 Ton Remote Air Cooled <strong>Chiller</strong> SpecificationsModel<strong>RC</strong>R-xxx30 40 50 60Cooling Capacity (tons) @ 50°F LWT 29.8 38.4 46.2 59.6Capacity stages (qty.) 2 4EER (BTUH/W) 11.36 10.84 11.29 11.11Nominal water flow (gpm)7292111143Evaporator [lpm][272.5] [348.3] [420.2] [541.3]Evaporator manifold connection Victaulic 3 3 3 3No. of condenser fans per condenser 3 2 2 3<strong>Chiller</strong> 56 70 88 111Amp draw, nameplate(460/3/60 V) Condensers (per3.9 7 7 10.5condenser)Dimensions (in.) [cm] of Height 85 [215.9]chillerWidth 60 [152.4] 83 [210.8]Depth 45 [114.3]Dimensions (in.) [cm] of Height 50 [127.0]each condenserWidth 42.5 [108.0]Depth 130 [330.2] 125 [317.5] 125 [317.5] 180 [457.2]Shipping weight (lbs) [kg] <strong>Chiller</strong> 1,340[607.8]1,530[694.0]1,730[784.7]2,120[961.6]Condensers (per5507707901190Max operating weight(lbs.) [kg]condenser)[249.5]<strong>Chiller</strong> 1,350[612.3]Condensers (per610condenser)[276.6][349.3]1,550[703.1]845[383.3][358.3]1,760[798.3]945[428.6][539.8]2,150[975.2]1420[644.1]Model<strong>RC</strong>R-xxx70 80 90 100Cooling Capacity (tons) @ 50°F LWT 67.5 75.4 83.5 91.6Capacity stages (qty.) 4EER (BTUH/W) 10.84 10.64 10.93 11.19Nominal water flow (gpm)162181200220Evaporator [lpm][613.2] [685.2] [757.1] [832.8]Evaporator manifold connection Victaulic 3 3 4 4No. of condenser fans per condenser 3/4 4 4 4<strong>Chiller</strong> 124 138 156 174Amp draw, nameplate(460/3/60 V) Condensers (per10.5/14 14 14 14condenser)Dimensions (in.) [cm] of Height 75 [190.5]chillerWidth 86 [218.4]Depth 45 [114.3]Dimensions (in.) [cm]of Height 50 [127.0]each condenserWidth 42.5 [108.0]Depth 180 [457.2] 235 [596.9]Shipping weight (lbs) [kg] <strong>Chiller</strong> 2,360[1070.5]2,600[1179.3]2,870[1301.8]3,170[1437.9]Condensers (percondenser)1190/1580[539.8/716.7]1580[716.7]1580/1650[716.7/748.4]1650[748.4]Max operating weight(lbs.) [kg]<strong>Chiller</strong>Condensers (percondenser)2,400[1088.6]1420/1805[644.1/818.7]2,640[1197.5]1805[818.7]2,910[1320.0]1805/1895[818.7/859.6]3,220[1460.6]1895[859.6] Based on 50ºF (10ºC) chilled water supply temperature and 95ºF (35ºC) ambient air. Based on 2.4 gpm per ton (9.1 lpm per 3.517 kW) Multiply 460/3/60 amperage by 2.0 for 208-230/3/60 amperages; multiply by 1.2 for 380/3/60 amperages; multiply by 0.8 for575/3/60 amperages<strong>Scroll</strong> <strong>Compressor</strong> <strong>Central</strong> <strong>Chiller</strong> Chapter 7: Appendix 69
Remote Condenser Models SpecificationsFan(s)Refrigeration Each Connections ChargeModel Dia. Motor Amps Air flow Discharge Liquid R-22Number in. hp 460V Fans cfm ODS(in.) ODS(in.) lbs. xxx-30 26 ¾ hp 3 ø 3.9 3 20,500 1 5 /8 1 1 /8xxx-40 30 1 ½ hp 3 ø 7.0 2 23,200 1 5 /8 1 5 /8 12xxx-50 30 1 ½ hp 3 ø 7.0 2 21,900 1 5 /8 1 5 /8 12xxx-60 30 1 ½ hp 3 ø 10.5 3 34,800 2 1 /8 2 1 /8 19xxx-70a 30 1 ½ hp 3 ø 10.5 3 34,800 2 1 /8 2 1 /8 19b 30 1 ½ hp 3 ø 14.0 4 46,400 2 1 /8 2 1 /8 22xxx-80 30 1 ½ hp 3 ø 14.0 4 46,400 2 1 /8 2 1 /8 22xxx-90a 30 1 ½ hp 3 ø 14.0 4 46,400 2 1 /8 2 1 /8 22b 30 1 ½ hp 3 ø 14.0 4 42,400 2 1 /8 2 1 /8 27xxx-100 30 1 ½ hp 3 ø 14.0 4 42,400 2 1 /8 2 1 /8 27 ø represents electrical phase; all motors are 1,140 rpm. Multiply hp by 0.746 to convert to kW. Refrigeration charge is for remote condenser only! To convert cfm to cmh, multiply by 1.699. To convert lbs. to Kg, multiply by 0.454.7-3 Drawings & DiagramsFigure 10: Typical Two-Circuit 30-100 Ton Water Cooled <strong>Chiller</strong><strong>Scroll</strong> <strong>Compressor</strong> <strong>Central</strong> <strong>Chiller</strong> Chapter 7: Appendix 70
7-4 Pump Tank Spare Parts ListPart no. Part description QuantityA0550190 Pressure gauge 1 per pumpA0102396 Float valve, 1” (approx. 25 mm) 1 per tankA0069538 Plastic ball float, 6” (approx. 152 mm) 1 per tankA0102394 Float rod, 10” (25 cm) 1 per tank- Call Parts Dept - Pump seal and casing gasket 1 per pumpCheck your Customer Information Packet for a complete list of spare parts and part numbersfor your central chilling station.7-5 Returned Material PolicyCredit ReturnsPrior to the return of any material authorization must be given by the manufacturer. ARMA number will be assigned for the equipment to be returned.Reason for requesting the return must be given.ALL returned material purchased from the manufacturer returned is subject to 15% ($75.00minimum) restocking charge.ALL returns are to be shipped prepaid.The invoice number and date or purchase order number and date must be supplied.No credit will be issued for material that is not within the manufacturer’s warranty periodand/or in new and unused condition, suitable for resale.Warranty ReturnsPrior to the return of any material, authorization must be given by the manufacturer. ARMA number will be assigned for the equipment to be returned.Reason for requesting the return must be given.All returns are to be shipped prepaid.The invoice number and date or purchase order number and date must be supplied.After inspecting the material, a replacement or credit will be given, at the manufacturer’sdiscretion. If the item is found to be defective in materials or workmanship, and it wasmanufactured by our company, purchased components are covered under their specificwarranty terms.<strong>Scroll</strong> <strong>Compressor</strong> <strong>Central</strong> <strong>Chiller</strong> Chapter 7: Appendix 71
7-6 Safety Tag Information<strong>Central</strong> <strong>Chiller</strong> Safety TagsHot!Read Operationand InstallationManualHigh VoltageInside EnclosureEarth GroundLifting PointPEProtected EarthGround7-7 <strong>Central</strong> <strong>Chiller</strong> Identification (Serial Number) Tag(Located on back of <strong>Chiller</strong>)Company LogoXXX-XX <strong>Series</strong> <strong>Central</strong> <strong>Chiller</strong>Model Number XXX-30Max Drying Capacity HR460V Serial Number 060701R1ǾDate of Manufacture Month/Year4.5AOver-current Protection Device (s) 4.5A TotalFrequency 50/60HzCompressed air supply NoneDryer Mass 400 lbs/(180 KG)Electrical Diagrams &Pneumatic DiagramStreet AddressTelephone NumberCity, State Zip Code<strong>Scroll</strong> <strong>Compressor</strong> <strong>Central</strong> <strong>Chiller</strong> Chapter 7: Appendix 72
7-8 Technical AssistanceParts DepartmentCall toll-free 7am–5pm CST [800] 423-3183 or call [847] 273-7700, Fax [847] 273-7804The ACS Customer Service Group will provide your company with genuine OEM quality partsmanufactured to engineering design specifications, which will maximize your equipment’s performanceand efficiency. To assist in expediting your phone or fax order, please have the model and serialnumber of your unit when you contact us. A customer replacement parts list is included in this manualfor your convenience. ACS welcomes inquiries on all your parts needs and is dedicated to providingexcellent customer service.Service DepartmentCall toll-free 8am–5pm CST [800] 423-3183 or call [847] 273-7700Emergencies after 5pm CST, call [847] 439-5655We have a qualified service department ready to help. Service contracts are available for most of ourproducts.Sales DepartmentCall [847] 273-7700 Monday–Friday, 8am–5pm CSTOur products are sold by a world-wide network of independent sales representatives. Contact our SalesDepartment for the name of the sales representative nearest you.Contract DepartmentCall [847] 273-7700 Monday–Friday, 8am–5pm CSTLet us install your system. The Contract Department offers any or all of these services: project planning;system packages including drawings; equipment, labor, and construction materials; and union or nonunioninstallations.<strong>Scroll</strong> <strong>Compressor</strong> <strong>Central</strong> <strong>Chiller</strong> Chapter 7: Appendix 73