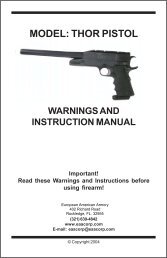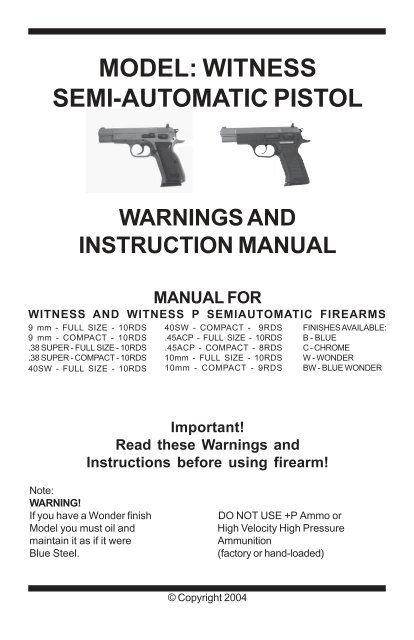
MODEL: WITNESS SEMI-AUTOMATIC PISTOL - EAA
MODEL: WITNESS SEMI-AUTOMATIC PISTOL - EAA
MODEL: WITNESS SEMI-AUTOMATIC PISTOL - EAA
- No tags were found...

Create successful ePaper yourself
Turn your PDF publications into a flip-book with our unique Google optimized e-Paper software.
<strong>MODEL</strong>: <strong>WITNESS</strong><strong>SEMI</strong>-<strong>AUTOMATIC</strong> <strong>PISTOL</strong>WARNINGS ANDINSTRUCTION MANUALMANUAL FOR<strong>WITNESS</strong> AND <strong>WITNESS</strong> P <strong>SEMI</strong><strong>AUTOMATIC</strong> FIREARMS9 mm - FULL SIZE - 10RDS9 mm - COMPACT - 10RDS.38 SUPER - FULL SIZE - 10RDS.38 SUPER - COMPACT - 10RDS40SW - FULL SIZE - 10RDS40SW - COMPACT - 9RDS.45ACP - FULL SIZE - 10RDS.45ACP - COMPACT - 8RDS10mm - FULL SIZE - 10RDS10mm - COMPACT - 9RDSFINISHES AVAILABLE:B - BLUEC - CHROMEW - WONDERBW - BLUE WONDERImportant!Read these Warnings andInstructions before using firearm!Note:WARNING!If you have a Wonder finishModel you must oil andmaintain it as if it wereBlue Steel.DO NOT USE +P Ammo orHigh Velocity High PressureAmmunition(factory or hand-loaded)© Copyright 2004
<strong>MODEL</strong>: <strong>WITNESS</strong> <strong>SEMI</strong>-<strong>AUTOMATIC</strong><strong>PISTOL</strong>WARNINGS AND INSTRUCTION MANUALPLEASE READ THESE INSTRUCTIONSFOR YOUR SAFETY AND THE SAFETY OF OTHERS, this owner’smanual contains important warnings, instructions and safety procedureswhich must be understood BEFORE using this firearm. Read theENTIRE MANUAL and if you do not understand any part of it or theoperation of your pistol, stop and seek professional firearms instruction.You can get a copy of this manual from European American ArmoryCorp. upon request.Record the serial number of your firearm (located on the receiver on theright hand side):# _____________________________________________________and a description of it:______________________________________________________Make a copy of this manual, proof of purchase/sales record forsafekeeping in a secure safe or fireproof container. Such proof isnecessary if the firearm is damaged, stolen or sent in for warranty repair.2
W A R N I N G*YOU RISK PERSONAL INJURY OR DEATH BY HANDLING THIS FIREARM*Before handling any firearm, make sure you know the safety proceduresand most importantly, keep the firearm pointed in a safe direction.Before handling this firearm, read, understand and follow the instructionsin this manual. Always keep this manual with the firearm. If you lend, giveor sell this firearm, be sure the manual goes with it. If there is anythingyou do not understand, seek advice from someone qualified in safehandling of firearms. You must ALWAYS obey the following warnings,instructions and safety procedures:1. Always keep the muzzle pointed in a safe direction.2. Firearms should be unloaded and secured when not actually inuse.3. Don’t rely on your firearm’s safety.4. Be sure of your target and what’s beyond it.5. Use only proper ammunition matching the precise caliber of yourspecific pistol.6. If your pistol fails to fire when the trigger is pulled, handle withcare.7. Always wear ear and eye protection when shooting.8. Be sure the barrel is clear of obstructions before shooting.9. Don’t alter or modify your firearm and have it serviced regularly.10. Learn the mechanical and handling characteristics of your pistol.11. Shoot sober!3
Type Of Ammunition To Be UsedIt is suggested that high quality commercially manufactured ammunition be usedin this firearm. Avoid military surplus or old ammunition as it may not fire withsufficient force to expel the projectile from the barrel. The use of reloaded,high pressure or hand-loaded ammunition can be dangerous and willvoid the warranty.LEAD WARNING: The actual firearm does not contain any lead; however, it doesfire ammunition which contains lead or lead compounds known to the State ofCalifornia to cause cancer, birth defects, reproductive toxicity, and other seriousphysical injury. Those who discharge a firearm, stand near someone whodischarges a firearm or clean firearms are hereby warned of the dangers presentedby lead and lead compounds and should take protective health measures. Avoidexposure to lead while handling and wash your hands after contact. Proper airventilation is absolutely necessary when shooting indoors.N O T I C E<strong>SEMI</strong>-<strong>AUTOMATIC</strong> <strong>PISTOL</strong>S ARE CLASSIFIED AS FIREARMS ORDANGEROUS WEAPONS and are sold by European American Armory Corp.with the specific understanding that we are not responsible in any mannerwhatsoever for their safe handling or resale under local laws and regulations.European American Armory Corp. shall not be responsible in any mannerwhatsoever for malfunctioning of the firearm, for physical injury or for propertydamage resulting in whole or in part from (1) intentional or negligent discharge,(2) improper or careless handling, (3) unauthorized modifications and/or alterationof the internal/safety mechanisms, (4) defective, improper, high pressure, handloaded,or reloaded ammunition, (5) corrosion and/or lack of proper maintenance(6) neglect, or (7) other influences beyond our direct and immediate control. Thislimitation applies regardless of whether liability is asserted on the basis of contract,negligence or strict liability (including any failure to warn). Under no circumstanceshall European American Armory Corp. be liable for incidental or consequentialdamages, such as loss of use of property, commercial loss and loss of earningsor profits.4
FOLLOWING THESE SAFETY RULES CAN SAVE YOURLIFE OR THE LIFE OF SOMEONE ELSEGet competent firearms instruction in safe handling before using this firearm.Please ask your dealer for names of qualified instructors near you. All guns areextremely dangerous if carelessly handled or used. Remember that the firearmuser is the primary “safety” and that reliance on any mechanical safety deviceshould never replace safe handling procedures.This firearm WILL FIRE if a cartridge is in the chamber and the trigger is pulledwhile the safety is disengaged.DO NOT LOAD THIS <strong>PISTOL</strong> UNTIL YOU UNDERSTAND HOW IT OPERATES.KEEP this pistol unloaded at all times except when you are ready to fire and aresure of your target.ALWAYS carry this pistol in a case or original box unloaded.NEVER point this pistol at anything that is not your intended target even if thepistol is unloaded. When loading, unloading, cleaning or handling, always besure the muzzle is pointed in a safe direction and always keep your finger off thetrigger.NEVER assume any gun is unloaded. Before handling, check to make sure thechamber is empty. See Unloading Instructions. Make sure you know that this orany firearm is fully unloaded before displaying or handling it. When handling anyfirearm, keep your fingers away from the trigger at all times until you intend to fire.Get instructions from a competent firearms instructor before using this or anyfirearm. Learn from a professional how to handle, load, unload, operate, fire andcare for your gun.NEVER PLAY with your firearm. It is not a toy and can be a very dangerousweapon that can cause serious personal injury or death.Always keep the gun pointed in a safe direction. Treat every gun as if it isloaded...all the time. NEVER point any firearm (loaded or unloaded) at any personor anything you do not intend to shoot. Always keep your gun unloaded untilready to use and make sure that it is unloaded before cleaning.Keep your finger OFF the trigger until you are actually aiming at the target andready to shoot. Learn to rest your finger outside of the trigger guard.Never rely on a gun’s “safety” to protect you from unsafe gun handling. A safety is5
FOLLOWING THESE SAFETY RULES CAN SAVE YOURLIFE OR THE LIFE OF SOMEONE ELSEonly a mechanical device, not a substitute for using common sense and followinggun safety procedures.Never leave a gun unattended or where it could fall.Store guns and ammunition separately beyond the reach of children. Makesure that they are properly secured so untrained individuals and children will bedenied access to your guns and ammunition.Test your gun’s operation and safeties only at a shooting range while the firearmis pointed in a safe direction.Know your target and what is beyond. Ask yourself what your projectile will hit ifit misses the target or passes through the intended target. Remember, a firedprojectile can travel over a mile (including a ricochet) and is capable of goingthrough walls. Never shoot at hard flat surfaces or water . . . bullets ricochet.Guns and alcohol or drugs do not mix. Don’t take any alcoholic beverages and/ordrugs before or during shooting activities.Never pull a gun toward you by the muzzle. Don’t climb a tree, cross a ditch orfence with a loaded gun.Always empty guns before entering a house, car, truck, boat, RV, camp or anybuilding.When receiving a gun, always open the action and check to make sure thechamber is unloaded.NEVER accept anyone’s word that a gun is “unloaded” or “empty.” You shouldimmediately open the action and check to make sure it is unloaded.Be careful with ALL ammunition. Even “blank” cartridges are deadly at closerange due to the muzzle blast. Make sure your ammunition is new and in goodclean condition. Do NOT oil or grease ammunition as this may damage thecartridge primer. Do NOT tamper with or alter the standard factory ammunition.Keep firearms unloaded when not actually in use. Load the gun only when on therange preparing to fire and unload it before leaving the range.Never put your hand over the muzzle of a gun.ALWAYS WEAR protective shooting glasses and hearing protection when usingfirearms.6
FOLLOWING THESE SAFETY RULES CAN SAVE YOURLIFE OR THE LIFE OF SOMEONE ELSESpectators should be at least 10 feet behind and away from the shooter while theshooter is loading, shooting and unloading. Spectators should wear eye and earprotection and avoid distracting those shooting their firearms.Never drop your gun. If you do drop it, unload it and check it for proper functionbefore using it again.Do NOT alter or modify your gun. Don’t try to change your gun’s trigger pull,because it may affect sear engagement and thereby cause accidental firing.Do NOT remove any internal safety or safety device on the firearm. Safetymechanisms are designed to help protect you from personal injury or death.Properly maintain and keep your gun clean. Keep it in a dry place away fromother metals and water. If your gun shows sign of corrosion or improper operation,have it serviced by a competent gunsmith.Keep the muzzle pointed in a safe direction when loading and unloading yourgun. Never point the muzzle at anyone.If a gun fails to fire when the trigger is pulled, keep it pointed down range at thetarget for 60 seconds. Sometimes slow primer ignition will cause a “hang fire” andthe cartridge will go off after a short pause. If it still fails to fire, keep the muzzlepointed in a safe direction and avoid exposure to the breech, as you attempt tounload your firearm.Never let water, snow, mud or other material enter the barrel. Always be sure thebarrel is free of any obstruction.Use the correct ammunition for your firearm. (See Ammunition Warning)Teach children: 1. NOT to touch guns, bullets, cartridges, shells, flares or anyexplosive device and 2. That if they discover such a dangerous item or weapon,they must immediately report its location to their parents, school teacher orpolice.Remember a firearm has the capability of taking your life or the life of someoneelse. Be careful with your firearm - an accident is almost always the result of notfollowing basic safety rules.7
Use the Security Lock Provided with your PistolThis pistol comes with a security lock to assist inprotecting against unauthorized use. The pistol mustbe unloaded when the security lock and block are inplace on the pistol or if the pistol is locked in its carrycase. See Figure 1.WARNING: Using the security lock and block orlockable case cannot substitute for securing yourfirearm and ammunition in separate, locked locations.Figure 1The security lock operates as follows:A) Remove security lock and block from its packagethat came with the firearm.B) Install security lock on plastic box with gun insideand magazine removed See Figure 2.ORFigure 2C) Install block on trigger and then install security lock on the security block,See Figures 3(a, b, c).Figure 3a Figure 3b Figure 3cW A R N I N GAlways store the key to the security lock: (1) in a separate location away fromthe pistol; (2) in a secure location unknown and not accessible to others, especiallychildren. Whether you secure your firearms by using the supplied security lock,a gun lock or safe or some other mechanism, it is YOUR RESPONSIBILITY tostore your firearms in such a manner that children and other unauthorized personscannot gain access to them.USED FIREARMS - Firearms are sometimes altered to work incorrectly, or partsmay be removed, lost or replaced with incorrect parts. If you got your EuropeanAmerican Armory Corp. firearm as a used gun, BEFORE USING IT you shouldtake it to a good gunsmith who knows European American Armory Corp. firearms,and have him examine it.WRITE EUROPEAN AMERICAN ARMORY CORP. concerning any items orcircumstances that you do not understand and which might relate to your safety8
and the operation of your firearm at: European American Armory Corp., 1426King Street, Cocoa, FL 32922. Phone: (321) 639-4842.W A R N I N G (POTENTIAL OBSTRUCTIONS)BEFORE LOADING or firing a pistol, examine the bore and the firing chamber tobe certain they are clean and free of any obstruction. Even a heavy coat of oil,grease, snow or water may result in damage to the firearm and injury to theshooter and/or persons near the firearm. A misfire or unusual sound upon firing isa signal to cease firing and to examine the chamber and bore. If there is anyobstruction, clear the obstruction and clean the bore and chamber before firing.Any bore obstruction, even if it is only partly blocked, may cause the gun to blowup if it is fired, or may cause damage to the gun such as a bulged barrel. To avoidinjury or death to the shooter or bystanders, check the barrels before shooting orif a shot does not sound normal.W A R N I N GAlways keep the muzzle pointed in a safe direction! Never attempt to load orunload any firearm inside a vehicle, building or other confined space (except aproperly constructed shooting range). Enclosed areas frequently offer nocompletely safe direction in which to point the firearm. If an accidental dischargeoccurs, there is great risk of death, personal injury or property damage. Beforeloading, always clean all, grease and oil from the bores and chambers, andcheck to be certain that no obstructions are in the barrel. Any foreign matter inthe barrels could result in a bulged or burst barrel or other damage to the firearmand could cause serious injury to the shooter or to others.W A R N I N GIf there is any reason to suspect that a projectile is obstructing the barrel,immediately unload the firearm (See Unloading Instructions) and check the chamberand the bore. A projectile or some other matter may be lodged some distancedown the barrel where it can not easily be seen. Check the bore by using acleaning rod to pass through the barrel. If a blockage is in the bore, DO NOTATTEMPT TO SHOOT IT OUT WITH ANOTHER CARTRIDGE, OR BLOW ITOUT WITH A BLANK CARTRIDGE OR A CARTRIDGE FROM WHICH THEBULLET HAS BEEN REMOVED. SUCH TECHNIQUE(S) CAN GENERATEEXCESSIVE PRESSURE, DAMAGE THE FIREARM AND CAUSE SERIOUSPERSONAL INJURY. If the blockage can be removed with a cleaning rod, cleanany unburned powder grains from the bore, chambers and mechanism beforeresuming shooting. If the blockage can not be dislodged by tapping it with acleaning rod, take the firearm to a gunsmith.W A R N I N G (EYE AND EAR PROTECTION)When shooting, full eye and ear protection is mandatory at all times. Shootersand spectators must wear shooting glasses and hearing protection to preventeye injury and hearing loss. Vision and hearing impairment can occur with only9
one moment of non-protection.W A R N I N G (Mechanical Malfunctions)STOP SHOOTING IMMEDIATELY AND UNLOAD YOUR FIREARM if your firearmdevelops: a mechanical malfunction; binding or stoppage; spitting powder/gas; apunctured cartridge primer; a bulged or ruptured cartridge case; or a sound onfiring does not sound quite right. Do NOT try one more shot but unload yourfirearm and take it and the ammunition to a qualified gunsmith or send the firearmback to European American Armory Corp. for examination. Do not assume thatthe pistol is empty merely because you checked the chamber. You must alsocheck the bore for any obstruction inside the barrel.BASIC PARTS OF YOUR <strong>PISTOL</strong>EXTERNAL CONTROL PARTS:Trigger Block Safety: The safety mechanism of the pistol provides protectionagainst accidental and unintentional discharge under normal usage when properlyengaged and in good working order. The safety mechanism is not asubstitute for following safe gun handling rules. Donot disengage the safety unless you are ready to firethe pistol. MAKE SURE YOU UNDERSTAND HOWTHE SAFETY WORKS BEFORE YOU LOAD ORUSE THE <strong>PISTOL</strong>.The safety mechanism is a lever located on the side ofthe pistol’s receiver. See Figure 4. The safety maybe operated with the hammer cocked (fully back) ornot cocked (all the way down) or in the resting position(about half way between fully cocked and not cocked)and with the pistol loaded or unloaded. To place thesafety in the “on” or “safe” position, push the lever upso that it covers the red dot. When in the “on” or “safe”position, the safety blocks the rearward motion of thetrigger so that it cannot be pulled to the rear thusstopping the movement of the hammer. To place thesafety in the “off” or “fire” position, push the safety leverdown. When in the “off” or “fire” position, the red dot isexposed. You have now disengaged the safety andthe pistol is in the ready-to-fire position. See Figure5. It is always a good idea to make sure the gun ispointed in a safe direction during any safety movement.See Figure 6.10Figure 4Figure 5Figure 6
W A R N I N G !Do not touch the trigger while moving the safety. When operating the safety,make sure you move it to the full extent of its travel in the desired direction, eitherfully “on” or fully “off.” Half-safe or partially-safe is UNSAFE.W A R N I N G !The pistol does not incorporate a magazine disconnect safety, so the pistol maybe fired with the magazine removed from the pistol.W A R N I N G !The pistol is designed to and WILL FIRE when the trigger is pulled and the safetymechanism is in the “off” or “fire” position.Your Safety Does: Lock the sear so the trigger cannot be moved rearward. Byblocking the trigger movement the hammer is also blocked from movement. If thehammer is back and the safety is on, you can move the slide to safely check thechamber.Firing Pin Block: The pistol also incorporates anautomatic, internal firing pin block which stops the firingpin from traveling forward. The firing pin block isreleased only by pulling the trigger all the way to therear as is done in firing the pistol. It is located at therear of the under-right hand side of the slide, just infront of the firing pin. See Figure 7.W A R N I N G !Always keep your fingers off the trigger and outside ofthe trigger guard until you are ready to pull the triggerand fire the pistol.W A R N I N G !The pistol is designed to and WILL FIRE when thetrigger is pulled and the safety mechanism is in the“off” or “fire” position.W A R N I N G !Always keep the muzzle pointed in a safe direction!See Figure 8.Figure 7Figure 8Hammer: Located on the rear of the pistol and usedto supply energy to the firing pin to ignite the cartridgeprimer. See Figure 9.11Figure 9
Lowering The Hammer:W A R N I N G !Make sure the pistol is unloaded (see UnloadingInstructions) and pointed in a safe direction!W A R N I N G !Extreme caution must be used when lowering thehammer as the manual safety and automatic firing pinblock are “off” safety when this is being done! If doneincorrectly the pistol may FIRE.W A R N I N G !Your pistol has a resting position or notch on thehammer. This notch is not to be used as a half cockposition. This notch’s sole purpose is an additionalnotch on the hammer so as to allow the sear a chanceto engage the hammer if the trigger is not pulled fullyto the rear.In order to lower the hammer, first move the safety tothe “off” safe position. Grasp the hammer very firmlyand put a finger between the hammer and the firingpin. See Figure 10. Then pull the trigger and slowlylet the hammer move forward past the resting position.See Figure 11. RELEASE THE TRIGGER. Gentlylet the hammer down against the rear of the slide. SeeFigure 12. PUSH THE MANUAL SAFETY LEVERTO THE “ON” OR “SAFE” POSITION.Slide Stop: Locks the slide back when engaged. It islocated on left hand side of the gun. See Figure 13.Figure 10Figure 11Figure 12Figure 13Magazine Release: Locks or holds the magazine inplace and is depressed to release the magazine. SeeFigure 14.Rear Sight: Drift adjustable, unless the gun is shippedwith the optional windage / elevation adjustable sight.See Figure 15.Trigger: A curved trigger is a single action / doubleaction trigger and fires the gun in single action or doubleaction mode. A single action only pistol has a triggerthat is straight in shape and only fires the pistol in12Figure 14Figure 15
single action. See Figure 16. (Single action Trigger)See Figure 17. (Single Action / Double Action Trigger)LOADING AND UNLOADING YOUR<strong>PISTOL</strong>W A R N I N G !Make sure the pistol is pointed in a safe direction andthe trigger block safety is engaged at all times whileloading and unloading. NEVER allow your fingers orother objects to contact the trigger while loading orunloading.W A R N I N G !Do not disengage the trigger block safety until you areready to fire and have the gun pointed safely downrange.Figure 16Figure 17W A R N I N G !Do not load pistol until you are ready to fire.TO LOAD THE MAGAZINE:Figure 181) Press the magazine release button and removethe magazine from the pistol. See Figure 18.2) Load the cartridges into the magazine. Do NOTforce the cartridges into the magazine. Do NOToverload the magazine. See Figure 19.3) Push the magazine up into the pistol firmly untilthe magazine catch locks it into place. Do NOT slamthe magazine into place. See Figure 20.Figure 19TO LOAD THE CHAMBER:MAKE SURE YOUR FINGERS ARE OFF THETRIGGER AND AWAY FROM THE TRIGGER GUARD.Figure 201) With the gun pointed in a safe direction. Move the safety to the “off” positionif the hammer is in the down position or resting position. If the hammer is in thefully cocked position you may bypass this step.2) Hold the pistol grip with one hand, grasp the rear slide serrations as far back13
as possible with your other hand. Pull the sliderearward until it cannot travel any farther. See Figure21.3) Release the slide and allow it to go forward intothe closed position (as powdered by the recoilspring…Do not help / push the slide forward). The slidewill automatically take a cartridge from the magazineand load it into the chamber. See Figure 22.Figure 214) Do NOT put your fingers or hand in front of thebarrel.5) Move the safety to the “on” or “safe” positionIMMEDIATELY!!!!!WARNING! YOUR <strong>PISTOL</strong> IS NOW LOADED ANDREADY TO FIRE, IF THE SAFETY IS MOVED TOTHE OFF OR “FIRE” POSITION AND THE TRIGGERIS PULLED THE GUN WILL FIRE.Figure 22TO UNLOAD:Make Sure the Safety is in the “ON” position andthe gun is pointed in a safe direction. See Figure23.1) Press the magazine release button and removethe magazine from the pistol. See Figure 24.Figure 23W A R N I N G !The pistol does not incorporate a magazine disconnectsafety, so the pistol may be fired with the magazineremoved from the pistol.W A R N I N G !Removing the magazine does not unload the chamber.If a cartridge is in the chamber the pistol can fire withthe magazine removed.Figure 242) To unload the chamber, keep your finger OUT of the trigger guard and OFFTHE TRIGGER and move the safety to the off position…. THE <strong>PISTOL</strong> CANNOW FIRE IF YOU PULL THE TRIGGER, SO BE VERY CAREFUL! Make sureyour fingers are not in the trigger guard. Hold the pistol grip with one hand, graspthe rear slide serrations as far back as possible with your other hand. Pull the14
slide rearward and eject the cartridge in the chamber.See Figure 25.3) Engage the slide stop, so that the slide stays inthe rearward position. See Figure 26.4) Visually check the chamber to insure that thereis no cartridge in the chamber. See Figure 27.Figure 255) To unload the magazine you press the top cartridgein the magazine down forward and out, repeat thisprocedure until the magazine is completely unloaded.See Figure 28.FIRING YOUR <strong>PISTOL</strong>W A R N I N GNever load a cartridge into the chamber until youare ready to fire the pistol.Figure 26W A R N I N GDo not disengage the trigger block safety until the pistolis pointed in a safe direction and you are ready to fire.W A R N I N GIf a cartridge does not fire and the trigger has beenpulled and the trigger block safety is disengaged, Stop!Then do the following: a) Make sure the gun is pointedin a safe direction b) Engage the trigger block safetyc) Wait 60 seconds d) Follow the instructions abovefor unloading the pistol.Figure 27W A R N I N GFigure 28If during firing the sound of any cartridge is noticeablysofter or louder than the previous cartridge fired, Stop!Then do the following: a) Make sure the gun is pointed in a safe direction b)Engage the trigger block safety c) Follow the instructions above for unloading thepistol and d) With the pistol unloaded visually inspect the pistol for barrel blockageor damage. Then inspect the receiver of the pistol for damage before continuing.READ, UNDERSTAND AND FOLLOW ALL WARNINGS ANDINSTRUCTIONS IN THIS MANUAL BEFORE FIRING THE <strong>PISTOL</strong>.15
TO FIRE THE <strong>PISTOL</strong>:1) Make sure the pistol is pointed in a safe directionwith the trigger block safety engaged. See Figure29.2) Make sure you are wearing eye and ear protection.3) Keep your fingers away from the trigger. See Figure30.Figure 294) Push the trigger block safety to the “off” or “fire”position with the red dot showing. See Figure 31.5) Squeeze the trigger. The pistol will fire when youpull or squeeze the trigger with the required force.Figure 306) The pistol will fire one shot with every squeeze ofthe trigger, until the magazine is empty. See Figure32.7) When the magazine is empty, the slide will stayopen. You may remove the magazine and reload themagazine while the slide is locked open by the slidestop. See Figure 33.Figure 318) Insert the loaded magazine into the pistol. Youmay either press down on the slide stop or pull slightlyback on the slide and release it. The slide will closeand reload the chamber. The pistol will then be readyto FIRE. See Figures 34a and 34b.Figure 32Figure 34aFigure 34bFigure 33W A R N I N GIf you fired the pistol and wish to stop firing, immediately push the trigger blocksafety to the “on” or “safe” position. Then follow the unloading instructions abovewhile keeping the muzzle pointed in a safe direction.16
DIRECTIONS FOR DISASSEMBLY /RE-ASSEMBLY OF STANDARD <strong>MODEL</strong>SCOMPACT, FULL SIZE, STEEL AND POLY:1) Make sure the pistol is unloaded (FOLLOWUNLOADING INSTRUCTIONS) and pointed in a safedirection.2) Pull the hammer back to the full cock position. SeeFigure 35.3) Identify the two takedown marks behind the safetylever on the left side of the slide and frame. Pull theslide back slightly and line up the two marks. SeeFigure 36. HINT: Use therear sight for leverage whenlining up the marks.Figure 35Figure 364) Remove the slide stoptakedownlever by pushingon the end sticking out of theright side of the pistol and pullon the lever with your otherhand. See Figures 37a and37b.Figure 37aFigure 37b6) Slide the Barrel / Slide Assembly forward and off thereceiver. See Figure 38.7) Hold the slide upside down. Retract the recoil springand guide and remove the recoil spring and guide as anassembly. See Figure 39.Figure 388) Remove the barrel from the slide. See Figures 40aand 40b.9) NO FURTHER DISASSEMBLY of the pistol isrecommended unless performed by a qualifiedgunsmith. Remember that work done by others andunauthorized gunsmithingby non-factory personnel willVOID the warranty.Figure 3910) To reassemble the pistol,simply reverse theseprocedures.17Figure 40aFigure 40b
DISASSEMBLY AND ASSEMBLY OF THE <strong>WITNESS</strong> LIMITED,<strong>WITNESS</strong> PCARRY AND <strong>WITNESS</strong> HUNTER <strong>PISTOL</strong>S1) Field Stripping. DO NOT USE TOOLS. DO NOTpry or hammer on the pistol.2) Pull the hammer back to the full cock position.See Figure 41.3) Identify the two takedown marks behind the safetylever on the left side of the slide and frame. Pull theslide back slightly and line up the two marks. HINT:Use the rear sight for handy leverage when lining upthe marks. See Figure 41.4) Remove the slide stop-takedown lever by pushingon the end sticking out of the right side of the pistoland pull on the lever with your other hand. See Figures42a and 42b.Figure 41Figure 42a5) Slide the Barrel / Slide Assembly forward and offthe receiver. See Figure 43.6) Hold the slide upside down, retract the recoil springand remove the recoil spring and guide. See Figure44.7) After removing the recoil spring and guide there isa bushing in the dust cover that retains the recoilspring. This is removed by pushing it back towardsthe breech face. See Figure 45.Figure 42b8) Then remove the barrel by pushing it forward. It canthen be removed then from the front of the slide. SeeFigure 46.Figure 43Figure 44 Figure 45 Figure 4618
DISASSEMBLY AND ASSEMBLY OF <strong>WITNESS</strong> GOLD TEAM1) Field Stripping. DO NOT USE TOOLS. DO NOTpry or hammer on the pistol.2) Pull the hammer back to the full cock position.3) Identify the two takedown marks behind the safetylever on the left side of the slide and frame. Pull theslide back slightly and lineup the two marks. HINT:Use the rear sight for handyleverage when lining up themarks. See Figure 47.Figure 474) Remove the slide stoptakedownlever by pushingon the end sticking out of theright side of the pistol andpull on the lever with yourother hand. See Figures 48a and 48b.Figure 48aFigure 48b5) Slide the Barrel / Slide Assembly forward and offthe receiver. See Figure 49.6) After the slide is removed from the frame, hold theslide upside down in your left hand. Put your left thumbon the bottom barrel lug andpush the barrel and recoilspring forward. You will seea small hole in the guide rod.With your right hand you willneed to put a slave pin in thehole. Then release your holdon the barrel. This will trapthe recoil spring, guide andFigure 50abushing and make it onepiece. See Figures 50a and50b.Figure 49Figure 50b7) Then remove the recoil spring and guide by pullingthe unit out toward the breech face. See Figure 51.Remember this spring is compressed and only held inby your slave pin.19Figure 51
8) Now remove the compensated barrel by pulling itforward out of the end of the slide. See Figure 52.SAFE USE OF PORTED ANDCOMPENSATED <strong>PISTOL</strong>SIf you are shooting our <strong>WITNESS</strong> EA Standard SteelPorted, Poly Ported models or our CompetitionCompensated Gold Team, Silver Team or Carry Comppistols in 9mm, 40S&W, .38super, .45ACP, or 10mmyou should always wear shooting glasses and hearingprotection while shooting these pistols. Gases andsmall particles of powder may be blown through theseopenings. You should never shoot these pistols fromyour side or close to any spectators. See Figure 53for an example of a ported barrel and Figure 54 for anexample of a compensated barrel.Figure 52Figure 53MANUFACTURER’S WARNING:This firearm was manufactured to properly perform withthe original parts as designed. It is your duty to makesure any parts you buy are correctly installed and thatneither replacements nor originals are altered orchanged. Your gun is a complex tool with many partsFigure 54that must relate correctly to other parts for safe andaccurate operation. Putting a gun together wrong or with modified parts can resultin a damaged gun, or personal injury or death to you or others. Always let aqualified gunsmith work on your gun or at least, check any work not performed bya gunsmith. Firearms safety is your primary concern. THE GUN OWNER MUSTACCEPT FULL RESPONSIBILITY FOR THE CORRECT REASSEMBLY ANDFUNCTIONING OF THE FIREARM AFTER ANY DISASSEMBLY ORREPLACEMENT OF PARTS.TO CLEAN AND MAINTAIN YOUR <strong>PISTOL</strong>:A) Follow procedures for unloading pistol as described previously.B) Follow procedures for disassembly of pistol as described previously.C) Materials needed to clean this pistol are: a cleaning rod, cotton bore patches,brass bore brush, powder solvent, a small soft brush and good quality gun oil.WARNING: Lead or lead compounds are known to the State of California tocause cancer, birth defects, reproductive toxicity, and other serious physical20
injury. Those who clean firearms should take protective measures to avoid contactor exposure to such chemicals.D) Using the bore brush with powder solvent, scrub the interior of the barrel andchambers to remove any powder and lead residue in the bore. Always and lastly,swab the interior of the barrels with cotton patch with gun oil to coat and protectthe bore and chambers from rust and corrosion.E) Any powder fouling on the firing wall, barrel, etc. can be easily cleaned with abrush and powder solvent.F) All external surfaces should be wiped down with a light coat of rust preventative.Avoid using too much oil as powder, dust or other foreign material may get trappedin the oil. This could lead to congealed deposits which may interfere with thesafe and reliable operation of the pistol.G) USE CAUTION while using solvents in gun bore cleaning. Prolonged or excesscontact with solvents can damage the gun’s bluing and finish. Be sure to wipeaway all excess solvent and then lubricate with oil.H) A gun should be cleaned after firing. In addition, external parts should bewiped with an oiled cloth after handling. A light oil is ordinarily all that is necessaryin cleaning if the gun has not been fired or fired very little. If a gun is used frequently,it must be cleaned after each firing and regularly serviced by a professionalgunsmith. If the gun has been stored, remove all excess oil and/or grease beforefiring. Always check to be sure that no cleaning patch or other obstruction remainsin the bore or chambers before firing.DANGER – AMMUNITION WARNINGFirearms may be damaged and serious personal injury or death to the shooter orbystanders may result from any condition which contributes to the generation ofexcessive pressure or uncontrolled release of gas within the firearm. Such adverseconditions can be caused by bore or chamber obstruction, propellant powderoverloads or by defective, incorrect or improperly loaded and assembled cartridgecomponents. Even the strongest firearm can be blown up as a result of excessivepressure. It is extremely dangerous to use a cartridge whose pressure is greaterthan that developed by cartridges loaded to industry standards.AMMUNITION (CARTRIDGES) NOTICEWe specifically disclaim responsibility for any damage, personal injury or deathoccurring in connection with or as the result of the use of European AmericanArmory Corp. pistols with faulty, nonstandard, remanufactured, hand-loaded orreloaded ammunition, or with cartridges other than factory cartridges for whichthe firearm was originally chambered.21
LUBRICATION WARNINGFiring a pistol with oil, grease or any other material even partially obstructing thebore may result in damage to the pistol and personal injury to the shooter andthose nearby. Do not spray or apply lubricants directly on ammunition. If theprimer or powder charge of a cartridge is affected by the lubricant, they may notfully ignite yet the energy from the primer and/or powder may be sufficient to pushthe projectile or wad into the bore where it may become lodged. Firing a subsequentcartridge into the obstructed bore will damage the pistol and may cause personalinjury to the shooter and those nearby. Use lubricants properly. You are responsiblefor the proper care and maintenance of your firearm and ammunition.LIMITED LIFETIME WARRANTYThis European American Armory Corp. firearm is warranted to the original retailcustomer for Life from date of purchase against defects in material andworkmanship. All parts and labor or replacement at our option are covered.Transportation to and from our repair facilities, government fees, damagecaused by failure to perform normal maintenance, sales outside the United States,damage due to use of high velocity, high pressure, reloaded or other nonstandardammunition, or any unauthorized repair, modification, misuse, abuse, or alterationof the product is not covered by this Limited Warranty.Any implied warranties, including the implied warranties of merchantability andfitness for a particular purpose, are limited to one year from date of original retailpurchase. Consequential or incidental damages and/or expenses, or any otherexpenses are not covered by this warranty.To obtain warranty performance send your firearm with proof of retail purchase,freight prepaid plus $20.00 for return freight to:European American Armory Corp1426 King StreetCocoa, FL 32922Phone: (321) 639-4842NOTICE: It is illegal to ship a firearm with ammunition in the firearm or in thesame packaging. Firearms and ammunition must be shipped separately. Forinformation about shipping ammunition, call European American Armory Corp. at(321) 639-4842.WARNING—ALTERATIONS OR MODIFICATIONSAltering or modifying parts and/or internal safeties is dangerous and will void thewarranty. This pistol was manufactured to perform properly with the original partsas designed. It is your duty to make sure any parts you buy are made for thisfirearm and are installed correctly and that neither the replacements nor originalsare altered or changed. Your gun is a complex precision tool with many parts thatmust relate correctly to other parts in order for proper and safe operation. Putting22
a gun together wrong or with incorrect or modified parts can result in a damagedgun, danger, and personal injury or death to you and others through malfunction.Always have a qualified gunsmith work on your gun or at least check any worknot performed by a gunsmith.YOUR OWNER’S MANUALAlways keep this manual with your firearm. Make sure you understand all thewarnings, operation instructions and safety procedures. When you lend, give orsell the firearm, be sure this manual goes with it. You can get a copy of thismanual from European American Armory Corp. upon request.ALL PARTS ORDERS ARE SUBJECT TO A $10.00 CHARGE FOR SHIPPINGAND HANDLING. Please state Model, Caliber, Serial Number, and Finish Colorwhen ordering. For parts, information and service contact: European AmericanArmory Corp., 1426 King Street, Cocoa, FL 32922. Phone: (321) 639-484223
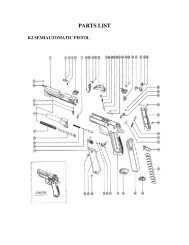
<strong>WITNESS</strong> PARTS EXPLOSION1.1 BARREL2.2 RIGHT GRIP2.3 LEFT GRIP2.4 GRIP SCREWS3.1 TRIGGER3.2 TRIGGER PIN3.3 TRIGGER SPRING3.5 TRIGGER BAR3.6 TRIGGER BAR PIN3.7 TRIGGER BAR SPRING3.8 TRIGGER BAR GUIDE3.9 TRIGGER BAR PLUNGER3.10 TRIGGER BAR PLUNGER PIN4.1 HAMMER4.2 HAMMER PIN4.3 HAMMER SPRING4.4 HAMMER STRUT4.5 HAMMER STRUT PIN4.8 INTERRUPTOR4.9 INTERRUPTOR PIN5.1 FIRING PIN5.3 FIRING PIN SPRING5.4 FIRING PIN RETAINER5.5 FIRING PIN SAFETY5.6 FIRING PIN SAFETY SPRING<strong>WITNESS</strong> PARTS LIST246.1 MAGAZINE6.6 MAGAZINE CATCH6.7 MAGAZINE CATCH PLUNGER6.8 MAGAZINE CATCH SPRING8.1 RECOIL SPRING GUIDE8.3 RECOIL SPRING9.1 SEAR9.2 SEAR PIN9.3 SEAR SPRING10.2 REAR SIGHT11.1 EXTRACTOR11.2 EXTRACTOR PIN11.3 EXTRACTOR SPRING13.1 SEAR ASSEMBLY HOUSINGWITH EJECTOR14.1 SAFETY18.1 SLIDE STOP PIN18.3 SLIDE STOP PIN SPRING18.4 SLIDE STOP PIN SPRING PINA FRAMEB SLIDE
<strong>WITNESS</strong> P PARTS EXPLOSION1.1 BARREL2.5 P REAR INSERT2.6 P FRONT INSERT2.7 P REAR INSERT PIN2.8 P FRONT INSERT PIN3.1 P TRIGGER3.2 P TRIGGER PIN3.3 TRIGGER SPRING3.5 TRIGGER BAR3.6 TRIGGER BAR PIN3.7 TRIGGER BAR SPRING3.8 TRIGGER BAR GUIDE3.9 TRIGGER BAR PLUNGER3.10 TRIGGER BAR PLUNGER PIN4.1 HAMMER4.2 P HAMMER PIN4.3 HAMMER SPRING4.4 HAMMER STRUT4.5 HAMMER STRUT PIN4.8 INTERRUPTOR4.9 INTERRUPTOR PIN5.1 FIRING PIN5.3 FIRING PIN SPRING5.4 FIRING PIN RETAINER5.5 FIRING PIN SAFETY5.6 FIRING PIN SAFETY SPRING<strong>WITNESS</strong> P PARTS LIST256.1 MAGAZINE6.6 MAGAZINE CATCH6.7 MAGAZINE CATCH PLUNGER6.8 MAGAZINE CATCH SPRING8.1 RECOIL SPRING GUIDE8.3 RECOIL SPRING9.1 SEAR9.2 SEAR PIN9.3 SEAR SPRING10.2 REAR SIGHT11.1 EXTRACTOR11.2 EXTRACTOR PIN11.3 EXTRACTOR SPRING13.1 SEAR HOUSING14.1 P SAFETY18.1 SLIDE STOP PIN18.3 SLIDE STOP PIN SPRING18.4 SLIDE STOP PIN SPRING PINA FRAMEB SLIDE
WARNINGChildren are attracted to and can operate firearms thatcan cause severe injuries or death.Prevent child access by always keeping guns lockedaway and unloaded when not in use. If you keep aloaded firearm where a child obtains and improperlyuses it, you may be fined or sent to prison.!!ADVERTENCIAA los ninos los atroen las armaside de fuego y lospueden hacer funcionar. Ellos pueden causarseslesiones graves y la muerte.Evite que los ninos tengon acceso a los armas de fuegoguardandolas siempre con llave y descargadas cuandono las este utilizando. Si usted tiene un arma de fuegocargado en un lugar en que un nono tiene acceso aella y la usa indebidamente. Le pueden dar unamulta a enviarlo a la carcel.Importer:European American Armory Corp1426 King StreetCocoa, FL 32922Phone: (321) 639-4842Manufacturer:Fratelli Tanfoglio, S.n.c.Via Valtrompia 39/4125063 Gardone V.T.Brescia, Italy