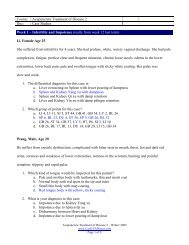
Physical Assessment 2 Class 6 Handout.pdf - CatsTCMNotes
Physical Assessment 2 Class 6 Handout.pdf - CatsTCMNotes
Physical Assessment 2 Class 6 Handout.pdf - CatsTCMNotes
- No tags were found...

You also want an ePaper? Increase the reach of your titles
YUMPU automatically turns print PDFs into web optimized ePapers that Google loves.
<strong>Physical</strong> <strong>Assessment</strong> 2<strong>Class</strong> 6
Objectives•• <strong>Class</strong> 6:• Goals:• Understand applied anatomy of the shoulder joint and pectoral girdle• Be able to examine the shoulder, elbow, wrist and hand• Demonstrate specific test for the shoulder girdle and arm and interpret them• Identify specific muscle groups/ tendons/ nerves affected by joint injury/disease• Know the normal ROM of each joint•• Objectives:• At the end of the class, the student will be able to:• List the questions to be asked when elaborating history of present illness• Describe the principle types of joints, including the three types of synovial• Perform complete shoulder joint examination• Demonstrate tests for the rotator cuff, elbow, and wrist• Identify the components of the CTS and test them• Name the various tests and significance of a positive test
Ortho Tests in this Section• Section 3: Shoulder• 3.1 Empty can test:• 3.2 Speed Test:• 3.3 Drop arm test:• 3.4 Apley’s scratch test:• 3.5 Cross‐over impingement test:• 3.6 Neer Impingment Test:• 3.7 Feagin Test:• 3.8 Clunk Test:• 3.11 Brachial plexus stretch test:• 3.12 Adson’s test:• 3.13 Allen’s test:• 3.14 Roo’s test:•• Section 4: Elbow• 4.1 Resistive tennis elbow test (Cozen’s):• 4.2 Alternative resistive Tennis Elbow Test• 4.3 Golfer’s elbow’s test:• 4.4 Tinel’s test:• 4.5 Pinch Grip test:•• Section 5: Wrist and hand• 5.1 Tap or percussion test:• 5.2 Finkelstein test:• 5.3 Phalen test:• 5.4 Reverse phalen test:• 5.5 Tinel’s test :
Ranges of Motion
*Shoulder Elevators (Lower Slide)
*Shoulder External Rotators
*Shoulder Internal Rotators
*Shoulder Protractors (A) andRetractors (B)
*Superior view of shoulder Rotators
Anterior Shoulder Schematic
Posterior Shoulder Muscle Schematic(2)
Rotator Cuff Muscles
Scapular Shoulder Muscles
Shoulder Joint
Shoulder: Nerves
Brachial Plexus:neurovascular
Thoracic Outlet
Thoracic Outlet (2)
*Orthopedic Test for Shoulder• Section 3: Shoulder• 3.1 Empty can test:• 3.2 Speed Test:• 3.3 Drop arm test:• 3.4 Apley’s scratch test:• 3.5 Cross‐over impingement test:• 3.6 Brachial plexus stretch test• 3.7 Neer Impingment Test• 3.8 Feagin Test:• 3.8 Clunk Test:• 3.9 Adson’s test:• 3.10 Allen’s test:• 3.11 Roo’s test:
*3.1 Empty can test:
*Empty can (Supraspinatus) Test• Instruct the client to stand with both shouldersabducted to 90 degrees, horizontally adductedto thirty degrees, and internally rotated so thathis / her thumbs face the floor.• Resist the client’s attempts to actively forwardelevate both shoulders.• Client reports pain or weakness if supraspinatusmuscle or tendon is involved.• This indicates supraspinatus tendonitis orimpingement.
*3.2 Speed Test:
*3.2 Speed Test:Speed’s Test– Client sits on the table.– Instruct the client to flex the shoulder to 90 degreeswith the elbows fully extended and the forearm fullysupinated. Place your hand the volar (ventral)aspect of the forearm and the other hand on theclient’s bicipital groove.– Instruct the client to move the humerus forwardwhile you resist the movement.– Client reports pain or you elicit tenderness in thebicipital groove suggestive of bicipital tendonitis.
*Drop Arm Test (1)
*Drop Arm Test (2)
*Drop Arm Test• Client sits on the table.• Passively abduct the client’s arm to 90degrees.• Instruct the client to slowly lower the arm tothe side.• Client is unable to slowly return the arm tothe side and has significant amount of painand the arm may drop suddenly to the side.• This is indicative of rotator cuff pathology.
*3.4 Apley’s Scatch Test (Action 1)
*3.4 Apley’s Scatch Test (Action 1)Action 1• Client is seated.• Instruct the client to touch the oppositeshoulder with his hand. Repeat this actionwith the other hand (bilaterally).• Inability (or pain) to touch the oppositeshoulder indicated limited glenohumeraladduction, internal rotation and horizontalflexion.
*3.4 Apley’s Scatch Test (Action 2)
*3.4 Apley’s Scatch Test (Action 2)Action 2• Instruct the client to place the arm overheadand reach behind the back as if he isscratching the upper back. Repeat with theopposite side.• Decreased motion indicates limitedglenohumeral abduction and externalrotation, and scapular upward rotation andelevation.
*3.4 Apley’s Scatch Test (Action 3)
*3.4 Apley’s Scatch Test (Action 3)Action 3• Instruct the client to place the hand on thesmall of the back and reach upwards as far aspossible. Repeat with the opposite side.• Decreased motion on one side is indicative oflimited glenohumeral adduction and internalrotation, and scapular retraction anddownward rotation.
*3.5 Cross‐over Impingement Test
*3.5 Cross‐over Impingement Test• Client is seated.• Stand with one hand on the posterior aspect of client’sshoulder to stabilize the trunk and the other handgrasping the client’s elbow on the test arm.• With the trunk stabilized passively and maximallyhorizontally adduct the test shoulder.• Client complains of:• Superior shoulder pain‐ this indicates acromioclavicularjoint pathology.• Anterior shoulder pain‐ this is indicative of subscapularis,supraspinatus, and / or biceps long head pathology.• Posterior shoulder pain‐ this is indicative of infraspinatus,teres minor and / or posterior capsule pathology.
* 3.6 Brachial Plexus Stretch Test
* 3.6 Brachial Plexus Stretch Test• Instruct the client to sit.• Stand behind the client and place one hand on theside of client’s head and the other hand on client’sshoulder on the same side.• Then laterally flex the head to the opposite side whileapplying gentle downward pressure on the shoulder.• Presence of pain radiating down the ipsilateral armindicates plexus pathology. If the pain is in the neckon the side of lateral flexion suggests a pinched nerveor facet joint impingement.• DO NOT perform this test if cervical fracture ordislocation is suspected.
* 3.7 Neer’s Impingement Test
* 3.7 Neer’s Impingement Test• Have patient sitting• Have patient relax his/her arm• Quickly raise the arm until it is fully elevatedand the humerus connects with theacromion process (full abduction)• If positive for pain, it may indicatesupraspinatus pathology (tear, partial tear,bursitis, impingement)
*3.8 Feagin Test:
*3.8 Feagin Test:• Patient is sitting with arm abducted to 90degrees• Put patients arm over your shoulder• Begin to apply downward pressure over theproximal humerus• Discomfort and pain and apprehension mayindicate GH joint instability (particularly theanterior‐inferior capsular region)
*3.8 Clunk Test:
*3.8 Clunk Test:• Take patients relaxed arm into abduction andexternal rotation. Axially load theglenohumeral joint with pressure. Thencircumduct the humeral head.• Grinding and clunking sensation may indicatea glenoid labral tear
*3.9 Adson’s test:
*3.9 Adson’s test:• The patient’s radial artery is palpated• The patient is instructed to rotate his/herhead to the tested side, extend neck andtake a deep breath (compressing the thoracicoutlet)• This indicates Thoracic Outlet Syndrome,2ndary to scalene compression of thesubclavian artery
*3.10 Allen’s Test
*3.10 Allen’s Test• Patient’s arm is held at 90 degrees ofabduction and 90 degrees of elbow flexion• Patient’s radial pulse is palpated• Patient is instructed to rotate head awayfrom side being held (arm).• If the examiner feels a diminished radialpulse, this is indicative of thoracic outletsyndrome
*3.10 Roos Test
*3.10 Roos Test
*3.10 Roos Test• Patient sits with shoulder and elbows bent to90 degrees.• Patient rapidly opens and closes hands into afist for 3 minutes• Inability to maintain posture/numbness inhands/loss of hand motor function areindicative of a thoracic outlet syndrome
*Orthopedic tests of elbowSection 4: Elbow• 4.1 Resistive tennis elbow test (Cozen’s):• 4.2 Alternative resistive Tennis Elbow Test• 4.3 Golfer’s elbow’s test:• 4.4 Tinel’s test:• 4.5 Pinch Grip test:
*4.1 Resistive tennis elbow test(Cozen’s):
*4.1 Resistive tennis elbow test(Cozen’s):• Patient flexes elbow 30 degrees and extendsthe wrist.• Examiner palpates the lateral epicondyle andtries to force the wrist into flexion (patientresists)• Pain in the wrist extensors and/orlatealepicondyle is indicative of tennis elbow(lateral epicondylitis)
*4.2 Alternative Resistive Tennis Elbow Test
*4.2 Alternative Resistive Tennis Elbow Test• Instruct the client to sit.• Stabilize the involved elbow with one hand andplace the palm of the other hand on the dorsalaspect of client’s hand just distal to the PIPofthe 3 rd digit.• Instruct the client to extend it against resistanceapplied by your hand.• Presence of pain along the lateral epicondyle orobjective weakness of the muscle indicateslateral epicondylitis.
*4.3 Golfer’s Elbow Test
*4.3 Golfer’s Elbow Test• Instruct the client to sit and make a fist on theinvolved side.• Palpate along the medial epicondyle andgrasp client’s wrist with the other hand. Thenpassively supinate the forearm and extend theelbow and the wrist stretching the fingers.• Presence of pain along the medial epicondyleindicates medial epicondylitis
*4.4 Tinel’s Test (Sign)
*4.4 Tinel’s Test (Sign)• Instruct the client to sit with the elbow inslight flexion.• Grasp the client’s wrist (laterally) andstabilize. With the other hand tap the ulnarnerve in the ulnar notch with the indexfinger.• Presence of tingling along the ulnar nervedistribution suggests ulnar nervecompromise.
* 4.5 Pinch Grip Test
* 4.5 Pinch Grip Test (pathology)
* 4.5 Pinch Grip Test• Instruct the client to sit.• Instruct the client to pinch the tips of thethumb and index finger together.• Inability to touch the tips indicates pathologyof the anterior interosseus nerve betweentwo head of pronator muscle.
* Orthopedic Tests form wrist andhand• Section 5: Wrist and hand• 5.1 Tap or percussion test:• 5.2 Finkelstein test:• 5.3 Phalen test:• 5.4 Reverse phalen test:• 5.5 Tinel’s test :
* 5.1 Tap or Percussion Test• Instruct the client to sit with affected fingerextended.• Apply firm tap to the end of the finger beingtested.• Pain at the site of injury may indicate afracture• DO NOT perform this test if the finger isdeformed.
*5.2 Finkelstein test:
*5.2 Finkelstein test:• Instruct the client to sit and form a fist around thethumb.• Grasp client’s forearm with your proximal hand.Grasp client’s wrist with your distal hand. The client’sthumb should be in your thenar eminence.• Stabilize the client’s forearm with your proximal handand ulnarly deviate the client’s wrist with your distalhand.• Presence of pain over abductor pollicis longus andextensor pollicis brevis tendons distally indicatestensosynovitis of these tendons. (de Quervain’sdisease)
* 5.3 Phalen Test
* 5.3 Phalen Test• Instruct the client to sit with dorsal aspect ofboth hands in full contact so that both the wristsare maximally flexed.• Ask the client to press the hands together andmaintain the pressure for 1 minute.• Presence of numbness or tingling in the mediannerve distribution of the fingers (ie, thumb, indexfinger, middle finger, and lateral aspect of ringfinger) indicate carpal tunnel syndrome due tomedian nerve compression.
*5.4 Reverse Phalen Test
*5.4 Reverse Phalen Test• Instruct the client to sit with palmar aspect ofboth hands in full contact so that both the wristsare maximally extended.• Ask the client to apply steady compressive forcethrough his forearms and maintain the positionfor 1 minute.• Presence of numbness or tingling in the mediannerve distribution of the fingers (ie, thumb, indexfinger, middle finger, and lateral aspect of ringfinger) indicate carpal tunnel syndrome due tomedian nerve compression.
* 5.5 Tinel Test
* 5.5 Tinel Test• Instruct the client to sit next to a flat surface.• Tap the volar aspect of the client’s wristoverthe area of the carpal tunnel.• Presence of numbness or tingling in themedian nerve distribution of the fingers (ie,thumb, index finger, middle finger, and lateralaspect of ring finger) indicate carpal tunnelsyndrome due to median nerve compression