QM14DVR4C QUICK INSTALLATION GUIDE 1. Unpack all ... - Q-See
QM14DVR4C QUICK INSTALLATION GUIDE 1. Unpack all ... - Q-See
QM14DVR4C QUICK INSTALLATION GUIDE 1. Unpack all ... - Q-See
- No tags were found...
You also want an ePaper? Increase the reach of your titles
YUMPU automatically turns print PDFs into web optimized ePapers that Google loves.
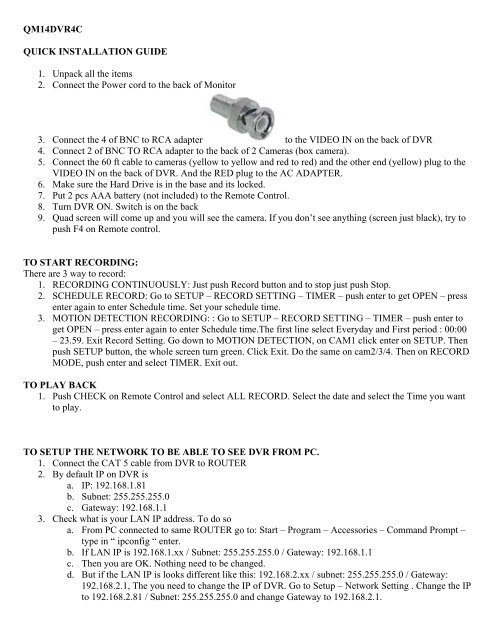
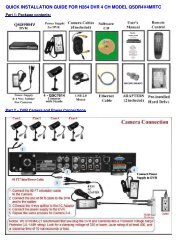
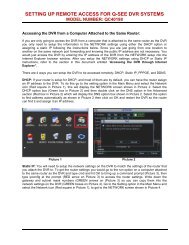
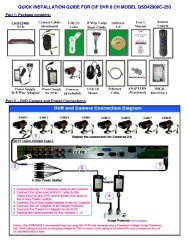
<strong>QM14DVR4C</strong><strong>QUICK</strong> <strong>INSTALLATION</strong> <strong>GUIDE</strong><strong>1.</strong> <strong>Unpack</strong> <strong>all</strong> the items2. Connect the Power cord to the back of Monitor3. Connect the 4 of BNC to RCA adapter to the VIDEO IN on the back of DVR4. Connect 2 of BNC TO RCA adapter to the back of 2 Cameras (box camera).5. Connect the 60 ft cable to cameras (yellow to yellow and red to red) and the other end (yellow) plug to theVIDEO IN on the back of DVR. And the RED plug to the AC ADAPTER.6. Make sure the Hard Drive is in the base and its locked.7. Put 2 pcs AAA battery (not included) to the Remote Control.8. Turn DVR ON. Switch is on the back9. Quad screen will come up and you will see the camera. If you don’t see anything (screen just black), try topush F4 on Remote control.TO START RECORDING:There are 3 way to record:<strong>1.</strong> RECORDING CONTINUOUSLY: Just push Record button and to stop just push Stop.2. SCHEDULE RECORD: Go to SETUP – RECORD SETTING – TIMER – push enter to get OPEN – pressenter again to enter Schedule time. Set your schedule time.3. MOTION DETECTION RECORDING: : Go to SETUP – RECORD SETTING – TIMER – push enter toget OPEN – press enter again to enter Schedule time.The first line select Everyday and First period : 00:00– 23.59. Exit Record Setting. Go down to MOTION DETECTION, on CAM1 click enter on SETUP. Thenpush SETUP button, the whole screen turn green. Click Exit. Do the same on cam2/3/4. Then on RECORDMODE, push enter and select TIMER. Exit out.TO PLAY BACK<strong>1.</strong> Push CHECK on Remote Control and select ALL RECORD. Select the date and select the Time you wantto play.TO SETUP THE NETWORK TO BE ABLE TO SEE DVR FROM PC.<strong>1.</strong> Connect the CAT 5 cable from DVR to ROUTER2. By default IP on DVR isa. IP: 192.168.<strong>1.</strong>81b. Subnet: 255.255.255.0c. Gateway: 192.168.<strong>1.</strong>13. Check what is your LAN IP address. To do soa. From PC connected to same ROUTER go to: Start – Program – Accessories – Command Prompt –type in “ ipconfig “ enter.b. If LAN IP is 192.168.<strong>1.</strong>xx / Subnet: 255.255.255.0 / Gateway: 192.168.<strong>1.</strong>1c. Then you are OK. Nothing need to be changed.d. But if the LAN IP is looks different like this: 192.168.2.xx / subnet: 255.255.255.0 / Gateway:192.168.2.1, The you need to change the IP of DVR. Go to Setup – Network Setting . Change the IPto 192.168.2.81 / Subnet: 255.255.255.0 and change Gateway to 192.168.2.<strong>1.</strong>
TO VIEW DVR FROM PC LOCALLY WITHIN LAN:<strong>1.</strong> Enter the IP of DVR in IE browser eg: http://192.168.<strong>1.</strong>842. Select English, Check Administrator, enter password (default): 888888883. From MENU on top, click Information and select Real Time and click PLAY to live video.TO VIEW DVR FROM PC ON INTERNET<strong>1.</strong> Forward port 80 to the IP of DVR in the ROUTER setup. (refer to your router manual)2. Find out what is the WAN ip address of the Router and enter this IP on IE browser.To back up the file to the computer:- From INFORMATION drop down menu, go to RECORD RESOURCE.- Click Submit then click DOWNLOAD - Save the file.- This saved file has files extension .atm. We need to convert this file to AVI file.- To convert: Put the Inst<strong>all</strong>ation CD in and go to CONVERSION SOFTWARE folder, open up STMTOAVI file.- Click ADD FILE and change the files of type to ".*atm" and select the atm file.- On OUTPATH, select where you want to saved the converted files.- Once it finish, you will get the AVI file and will be playable in Windows Media Player.- If you want to convert this AVI file to DVD format, you need to use your Video Editing software.


