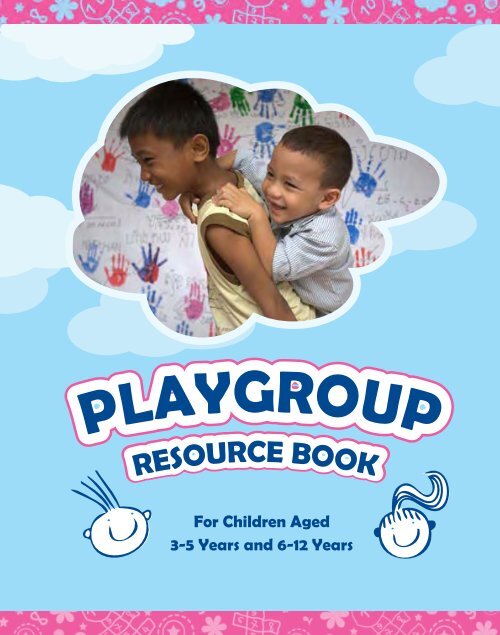
Playgroup Resource Book - FHI 360
Playgroup Resource Book - FHI 360
Playgroup Resource Book - FHI 360

You also want an ePaper? Increase the reach of your titles
YUMPU automatically turns print PDFs into web optimized ePapers that Google loves.
For Children Aged<br />
3-5 Years and 6-12 Years
Family Health International
For Children Aged<br />
3-5 Years and 6-12 Years<br />
This publication is intended to support life skills training for children and may be copied<br />
and distributed as required, provided the source is fully acknowledged.<br />
This <strong>Playgroup</strong> <strong>Resource</strong> <strong>Book</strong> is made possible by the support of the American<br />
people through the United States Agency for International Development (USAID) and through<br />
the Global Fund to Fight AIDS, TB and Malaria (GFATM). The contents in this book are<br />
the sole responsibility of Family Health International (<strong>FHI</strong>) and do not necessarily refl ect the<br />
views of USAID, the United States Government or GFATM.
Content<br />
OVERVIEW ……………......……………………………………………………………………….............................................................7<br />
GETTING STARTED ………......………………………………………………………………………...........................................9<br />
1 Why are playgroups so important?………………………......………………………………………………………………………...........9<br />
2 What is the role of a playgroup facilitator?.……….............................................................………………………………12<br />
3 How can the <strong>Playgroup</strong> <strong>Resource</strong> <strong>Book</strong> be used?....................................……...…………………………………........……14<br />
4 How to organize a playgroup for 3-5 and 6-12 year olds .......................................................................................17<br />
RUNNING A PLAYGROUP ………......………………………………………......................................................23<br />
1 <strong>Playgroup</strong> session for 3-5 year olds……………………………………………......…………………………………………………...........23<br />
2 <strong>Playgroup</strong> session for 6-12 year olds ............………..................................................................………………………………24<br />
3 Facilitator’s notes on running a playgroup.................................................………………………………………........…....…25<br />
1. Thevada tha ..................................28<br />
2. Foxes and geese...............................29<br />
3. Animal voices....................................................30<br />
4. The crow catches the chicken .............................31<br />
5. Clapping hands ..............................................................32<br />
6. Dance to the music .............................................................33<br />
7. Which animal am I? ..............................................................34<br />
8. Body parts .....................................................................................35<br />
9. Where is the shoe? ....................................................................................................................36<br />
10. Our fi ve senses ...........................................................................................................................37<br />
11. Crocodile and tiger ......................................................................................................................39<br />
12. Khmer alphabet song .....................................................................................................................40<br />
13. Bamboo and bamboo shoot ...............................................................................................................41<br />
14. Follow the shape ......................................................................................................................................42<br />
15. Big and small ................................................................................................................................................43<br />
16. Clean hands, healthy body .................................................................................................................44<br />
17. Mother hen .......................................................................................................................................46<br />
18. Self potraits .................................................................................................................................47<br />
19. Different kinds of leaves ....................................................................................................48<br />
20. Collage .............................................................................................................................49<br />
21. Tracing hands ...........................................................................................................50<br />
22. Dressing up ................................................................................................................51<br />
23. Clay modeling ...........................................................................................................52<br />
24. Coloring in pictures .................................................................................................53<br />
25. Draw the story ...............................................................................................54
GAMES/SONGS<br />
1. Chase the dragon’s tail .............................56<br />
2. Stand up ..........................................................................57<br />
3. Line up ...........................................................................................58<br />
4. The ghost, the girl and the monk ......................................................59<br />
5. Peanut relay ................................................................................................61<br />
6. Hopping across the river .............................................................................62<br />
7. Mental maths ......................................................................................................63<br />
8. Opposite clapping ........................................................................................................................................................64<br />
9. The counting game .......................................................................................................................................................65<br />
10. Leak kanseang ...............................................................................................................................................................66<br />
11. Three minus one ...............................................................................................................................................................67<br />
12. The policeperson catches the thief ..................................................................................................................................68<br />
13. Hot potatoes ...............................................................................................................................................................................69<br />
14. Birds fl y ..........................................................................................................................................................................................70<br />
15. Over under game ..........................................................................................................................................................................71<br />
16. Four up ..........................................................................................................................................................................................72<br />
17. This is a krama ..........................................................................................................................................................................73<br />
18. Opposite words .............................................................................................................................................................74<br />
19. The monkey ...................................................................................................................................................................75<br />
20. Traditional Khmer dancing ..................................................................................................................................76<br />
21 I like my neighbors ............................................................................77<br />
22. Object description ..................................................................78<br />
23. Grouping by numbers .....................................................79<br />
24. What am I? .......................................................................80<br />
25. Going shopping ..............................................................82<br />
GROUP LESSONS<br />
1. We are all different yet all the same .......................86<br />
2. Living and non-living things .................................................88<br />
3. Heavy and light ..............................................................................89<br />
4. Story time ...................................................................................................................................................................90<br />
5. Be careful ........................................................................................................................................................................91<br />
6. Clean hands, healthy body ................................................................................................................................................92<br />
7. Learning numbers .............................................................................................................................................................95<br />
8. Earth and sun play ...............................................................................................................................................................97<br />
9. Number hierarchy ...................................................................................................................................................................99<br />
10. Loving and caring for others ..............................................................................................................................................101<br />
11. Confl ict resolution .........................................................................................................................................................................103<br />
12. Take good care of your body ........................................................................................................................................................104<br />
13. My favorite animal .........................................................................................................................................................................107<br />
14. Where do animals live ................................................................................................................................................................108<br />
15. Eating healthily .......................................................................................................................................................................110<br />
16. Thunder run ......................................................................................................................................................................112<br />
17. Litter belongs in trashcans ........................................................................................................................................114<br />
18. Shadows ............................................................................................................................................................116<br />
19. Keeping my promise ..................................................................................................................................118<br />
20. Different ways of drawing .....................................................................................................................120<br />
21. My story ........................................................................................................................................................122<br />
22. Sokha's animals ............................................................................................................................................123<br />
23. Painting ..................................................................................................................................................125<br />
24. Improvisation theatre .....................................................................................................................127<br />
25. A line of dreams ..................................................................................................................128
Overview<br />
Playis<br />
essential to child development and an important component<br />
of Family Health International’s Community Based<br />
Care and Support ("We Can") program. Play can be especially important for orphans<br />
and vulnerable children (OVC) because the physical and emotional trauma they<br />
may face makes them more vulnerable to sadness and ill-health than other children.<br />
Non-structured and structured play become very important support activities for<br />
OVC because of all the good things they can do to improve a child’s physical and<br />
emotional well-being.<br />
The purpose of the <strong>Playgroup</strong> <strong>Resource</strong> <strong>Book</strong> is to guide Implementing Agencies<br />
and Family Care Community Assistants in how to run quality playgroups in their<br />
villages. It gives guidance and step-by-step instructions for organizing playgroups<br />
and facilitating playgroup sessions for children aged 3-5 and 6-12 years old. The<br />
book is designed to allow those facilitating the playgroup sessions the fl exibility to<br />
pick and choose activities, games, songs and group lessons that are suited to the<br />
children they are working with, the time and materials available to them, and their<br />
geographical location and setting.<br />
As the book is designed for use in resource-constrained contexts, all of the activities<br />
require minimal materials and preparation. Where materials are needed, almost<br />
all are readily available in the villages or can be bought at the local market.
Getting Started<br />
1 Why are playgroups<br />
so important? PLAYGROUP RESOURCE BOOK 9<br />
Getting<br />
Play - A Child's Work<br />
Started<br />
Why is play so important for children?<br />
Play is an essential part of child development. It helps children to develop motor, problemsolving<br />
and creative skills, build self-confi dence, and learn how to interact with other<br />
children, while having fun.<br />
Having fun and laughing help to strengthen<br />
children’s well-being by boosting their<br />
health and immune systems and ability<br />
to be resilient when diffi cult physical<br />
and emotional things happen to<br />
them. Children are also able to<br />
express emotions through play,<br />
and this can make play a very<br />
important outlet for children who<br />
are very sad.<br />
Play for a child<br />
is like work for an adult<br />
• A child will develop muscles by playing.<br />
• A child will learn how to be<br />
a friend by playing.<br />
• A child can work out his fears and<br />
fantasies through play.<br />
• A child will learn to understand<br />
feelings by playing.<br />
• A child will learn how to share by playing.<br />
• A child may learn colors and<br />
sizes and shapes and many other<br />
things by playing.<br />
(Evelyn Rooks-Weir and<br />
Millie Ferrer)
PLAYGROUP RESOURCE BOOK Getting Started<br />
10<br />
Play also provides caregivers with opportunities<br />
to better understand the emotional well-being<br />
of a child. Children approach games as they<br />
do life. If a child is very active and<br />
confi dent in game playing, they are<br />
probably the same in life. If a child<br />
is shy and hesitant to play, this may<br />
also be how they approach life.<br />
These are important clues for the<br />
Community Assistant (CA) which will<br />
help them to identify children who<br />
may need more care, support and<br />
attention than others.<br />
What is a playgroup?<br />
A playgroup is a fi xed period of time during which a small group of children participate<br />
in non-structured and structured play – including activities, games, songs and group lessonsfacilitated<br />
by adults or older youths.<br />
Adult/child ratio<br />
There should be at least one adult/older youth per 10 children to ensure that all the children<br />
are given equal attention, and that the adults/older youths are able to identify and pay<br />
particular attention to those children who are shy and withdrawn.<br />
<strong>Playgroup</strong> participants<br />
A playgroup should include OVC and non-OVC to better integrate OVC into the village.<br />
Ideally, there should be more OVC than non-OVC at each playgroup (70% OVC and<br />
30% non-OVC). This is not always possible in some villages, but at least half of the children<br />
should be OVC. Facilitators should focus on supporting the physical and emotional<br />
development of OVC so they do not get overwhelmed by the potentially more assertive<br />
non-OVC children.
Frequency of playgroups<br />
The more a child can play and be with friends, the<br />
more opportunities they will have to develop<br />
informal life-skills, build their self-confi dence<br />
and strengthen their relationships with others.<br />
Ideally, playgroups should be held in each<br />
village once a week. However, as some CAs are<br />
very busy, playgroups may only be possible<br />
on a monthly basis.<br />
How do playgroups affect<br />
children?<br />
Overall<br />
objectives of the<br />
playgroup:<br />
Improve the overall well-being<br />
and developmental skills of OVC<br />
•<br />
Decrease stigma and discrimination<br />
against OVC in the community<br />
•<br />
Provide opportunities for children<br />
to play and have fun in a safe<br />
environment<br />
A <strong>Playgroup</strong><br />
offers children opportunities to:<br />
• Learn new things<br />
• Build self-confidence<br />
• Learn how to get along with other<br />
children and make new friends<br />
• Laugh and have fun with their peers<br />
• Become more independent<br />
• Feel part of the community<br />
• Better understand their culture<br />
and traditional arts<br />
PLAYGROUP RESOURCE BOOK Getting Started<br />
11
PLAYGROUP RESOURCE BOOK Getting Started<br />
12<br />
<strong>Playgroup</strong>s are especially important for OVC.<br />
These children are often negatively affected by<br />
diffi cult and traumatic things that happened<br />
or are happening in their lives, and so every<br />
opportunity for play, fun and laughter makes a<br />
big difference to them.<br />
2 What is the role of a playgroup<br />
facilitator?<br />
The key to a successful playgroup lies in the role of the Family Care Community Assistants<br />
(CAs) who act as playgroup facilitators. The job of the facilitator is to facilitate each<br />
playgroup in a safe, fun and respectful manner.<br />
Who can be a playgroup facilitator?<br />
It is very important that the right CAs are selected as<br />
playgroup facilitators as caring for, protecting and<br />
nurturing children is one of the most important jobs<br />
in the world. Good facilitators are people who:<br />
• Are responsible, mature and mindful of child<br />
safety and protection<br />
• Respect children and can understand the needs<br />
of children at different ages<br />
• Enjoy working with children<br />
• Can let children express themselves creatively and promote<br />
child creativity and child initiative<br />
• Are well-respected and have a good reputation in their communities
Who can help the playgroup facilitator?<br />
Between one and three helpers (depending on the size of the playgroup) should support<br />
the facilitator. Helpers can be CAs from nearby villages, responsible adults in the community<br />
or older youths from the Implementing Agency (IA)'s youth club.<br />
Ideally there should be two older youths (preferably one girl and one boy) per playgroup,<br />
both should be well-known to the CA, and both must be responsible, trustworthy and capable.<br />
Involving older youths in helping to run the playgroups is very important for building the<br />
self-confi dence and skills of youths in managing activities, and developing leadership skills.<br />
Younger children also benefi t from seeing and developing relationships with older youths,<br />
who act as positive role models.<br />
What are playgroup facilitators responsible for?<br />
<strong>Playgroup</strong> facilitators are responsible for:<br />
• Making sure the play site is safe for children<br />
• Preparing safe, simple, inexpensive, easily replaceable play materials and other materials<br />
in advance<br />
• Ensuring that a fi rst-aid kit is available at each playgroup for the management of<br />
minor injuries<br />
• Checking materials and replacing anything that has been lost or broken<br />
• Ensuring that all children and families are informed in advance of when and where the<br />
playgroup will take place<br />
• Ensuring that the majority of the children attending the playgroup are OVC - at least<br />
half of the children should be OVC<br />
• Selecting playgroup activities and preparing any additional materials needed<br />
• Recording name, age and gender of children who attend playgroup<br />
• Implementing playgroup activities according to the <strong>Playgroup</strong> <strong>Resource</strong> <strong>Book</strong> (modifying<br />
activities as and when appropriate)<br />
• Ensuring that nutritious snacks and safe, clean water for drinking is provided during<br />
every playgroup<br />
PLAYGROUP RESOURCE BOOK Getting Started<br />
13
PLAYGROUP RESOURCE BOOK Getting Started<br />
14<br />
• Promoting equal participation of children in activities during the playgroup<br />
• Acting promptly to appropriately manage children who bully (physically or emotionally<br />
hurt) other children<br />
• Noting when a child appears to be in distress and following up immediately to assess<br />
their needs and provide support<br />
• Debriefi ng IA supervisor after the playgroup and writing the playgroup report<br />
3 How can the <strong>Playgroup</strong><br />
<strong>Resource</strong> <strong>Book</strong> be used?<br />
How can the <strong>Playgroup</strong> <strong>Resource</strong> <strong>Book</strong> be used?<br />
The <strong>Playgroup</strong> <strong>Resource</strong> <strong>Book</strong> is for <strong>FHI</strong> Cambodia’s Implementing Agencies, and the<br />
Family Care Community Assistants who are responsible for facilitating playgroups in the<br />
villages in which they work.<br />
How is the <strong>Playgroup</strong> <strong>Resource</strong> <strong>Book</strong> structured?<br />
The <strong>Playgroup</strong> <strong>Resource</strong> <strong>Book</strong> is divided into three parts:<br />
1 Activities for 3-5 year-old children<br />
2 Activities for 6-12 year-old children – Games and songs<br />
3 Activities for 6-12 year-old children – Group lessons<br />
Each activity in the <strong>Playgroup</strong> <strong>Resource</strong><br />
<strong>Book</strong> outlines:<br />
• Duration<br />
• Aim<br />
• Materials needed<br />
• Instructions<br />
• Notes
Additional notes on the activities in the <strong>Playgroup</strong> <strong>Resource</strong> <strong>Book</strong><br />
Selecting activities: The activities offered in the <strong>Playgroup</strong> <strong>Resource</strong> <strong>Book</strong> are ageappropriate;<br />
nevertheless the age-ranges (3-5 and 6-12) are very broad. Therefore,<br />
the facilitator should always be aware of the children’s ages, and should try to detect<br />
their abilities over time, in order to select the most appropriate activities for particular<br />
groups.<br />
Note: Some of the activities offered in the 3-5 year-old section on the <strong>Playgroup</strong> <strong>Resource</strong><br />
<strong>Book</strong> can also be enjoyed by the 6-12 year-old children, and vice-versa.<br />
Working with a very large group: Some of the activities are designed to be done as a<br />
whole group. However, if the group is larger than normal, the facilitator should fi rst divide<br />
the children into two or three smaller groups before carrying out the activity.<br />
Dividing children into smaller groups: Many activities require the children to be divided<br />
into smaller groups. If the activity is competitive, groups should be of mixed age and ability<br />
in order for the activity to be equal and fair. The facilitator can choose any method to<br />
divide the children, including:<br />
1 Any kind of categorization as long as it’s not discriminatory (girls/boys, shoes/no<br />
shoes, short hair/long hair, shorts/pants, likes/dislikes).<br />
2 Giving each child a number as they sit or stand in rows by counting from one up to<br />
the number of groups you need. For example, if you need three groups, count to three<br />
and then all the ones, twos, and threes get together to make three different groups.<br />
3 As above, but mix the children up before giving them a number to make it even more<br />
random. For example, ask the children to get into a line from tallest to shortest, or<br />
oldest to youngest, or biggest hands to smallest hands, and then count down the line<br />
from one up to the number of groups you need.<br />
Choosing a child to be ' it ' : Many activities require one child to be ' it '. The facilitator<br />
can choose any method to choose one child to be ' it ' , including:<br />
1 Choosing a child who hasn’t been ' it ' before and keeping track so that over a period<br />
of a few weeks every child will have been ' it ' at least once.<br />
PLAYGROUP RESOURCE BOOK Getting Started<br />
15
PLAYGROUP RESOURCE BOOK Getting Started<br />
16<br />
2 Choosing a child who is new to the group or<br />
particularly shy to help build their confi dence<br />
and self-esteem (only if they want to<br />
and are ready for this).<br />
3 Asking the children to volunteer themselves<br />
and if you have more than one<br />
volunteer, asking them to play ‘ pao<br />
sing song’ (paper, scissors, stone) -<br />
the winner is ' it '.<br />
Making activities competitive: Many activities can<br />
be played in either a competitive or non-competitive<br />
way. For children aged 3-5, who tend to always want to<br />
win and don’t take losing very well, the facilitator should choose the non-competitive<br />
approach. For children aged 6-12 who are more mature and motivated and enjoy competition<br />
with their peers, the facilitator can choose the competitive approach.<br />
Leading group discussions: Many activities involve leading a discussion with the children.<br />
When doing this the facilitator should be fl exible, and not worry if the discussion does<br />
not follow the questions and answers given exactly, or takes a different order. The most<br />
important thing is that all the children participate and understand the key concepts.<br />
Facilitating arts and crafts activities: Many activities involve the children drawing or<br />
making something. At the end of the session the facilitator should encourage the children<br />
to show what they have made to the group (if they want to) and take the opportunity to<br />
praise and congratulate the children on what they have made. Children should also be<br />
encouraged to take home what they have made to show their families and decorate their<br />
houses.<br />
Ending activities: Some of the activities have no end. It is up to the facilitator to end the<br />
activity when he/she thinks it is appropriate (when everyone has had a turn, when children<br />
show signs of boredom or become too excited, when time is up, for example).
4 How to organize a playgroup<br />
for 3-5 and 6-12 year olds<br />
1 Identify the right team<br />
• The Implementing Agency should identify a Community Assistant to be the playgroup<br />
facilitator and overall person responsible for the playgroup in each village. The<br />
facilitator needs to be a person who enjoys working with children, is responsible, safe,<br />
and well respected in the community. (See ‘Who can be a playgroup facilitator?’<br />
in section 2 for more information)<br />
• The facilitator will also need helpers to manage the playgroups. This is because there<br />
will be two age groups running at the same time for part of the playgroup. Between<br />
one and three helpers (depending on the size of the playgroup) should support<br />
the facilitator. Helpers can be CAs from nearby villages, responsible adults in the<br />
community or older youths from the IA’s youth club. (See ‘Who can help the<br />
playgroup facilitator?’ in section 2 for more information)<br />
2 Choose the right site<br />
• Establish a fixed play site in the<br />
community for every playgroup<br />
session. This is better for children<br />
since it helps promote stability<br />
and routine.<br />
• The site must be safe.<br />
• If running the playgroup at someone’s<br />
house, gain permission from<br />
the house owner.<br />
• If running the playgroup in a school or pagoda,<br />
draw up an agreement with the school or pagoda<br />
leader to ensure that the selected play site will be<br />
available on the selected play days.<br />
PLAYGROUP RESOURCE BOOK Getting Started<br />
17
PLAYGROUP RESOURCE BOOK Getting Started<br />
18<br />
What is a ‘safe’ play site?<br />
A safe play site is one where children will be protected from harm. Harm can come from<br />
people or the environment.<br />
Play sites should be:<br />
• Within a community<br />
• In a peaceful area away from markets and places where there are a lot of people<br />
and traffi c<br />
• Far from roads or fenced off properly to avoid children running into the road<br />
• Free of dangerous objects such as broken glass or metal, rubbish or smelly water, unused<br />
petrol or chemicals etc<br />
• Free of dangerous insects or animals such as mosquitoes, stray and unhealthy dogs,<br />
snakes etc<br />
• Not so big that it is diffi cult to watch over all the children at the same time, but not so<br />
small that the children do not have enough space to run around and play safely<br />
• In a shaded or covered area to protect children from heat and rain<br />
Note: Having parents/caregivers attend playgroups generally improves child safety because<br />
they tend to look out for their children and other children they know.<br />
3 Prepare the play materials<br />
• The play materials needed for the playgroup will vary depending on the activities<br />
chosen, but there should be some play materials that are available at every playgroup<br />
session, and can be used during free play and as back up in case some of the activities<br />
chosen need to be changed at the last minute.<br />
• All toys and play materials used must be safe. There should be no small materials that<br />
children could choke on, or materials that children could otherwise hurt themselves with<br />
(broken toys with sharp edges etc).<br />
• All play materials should be simple, inexpensive and easily replaceable in the event of<br />
breakage or loss.<br />
• Keep all play materials in a container that protects them from dust, insects and water<br />
damage and can be easily transported to the play site.
Play materials that should be available<br />
every playgroup session:<br />
1 Thick plastic sheeting (or straw mats) to place on<br />
the ground to protect children from muddy, dirty<br />
surfaces<br />
2 Stick or piece of chalk to mark the ground<br />
with (depending on whether the ground is<br />
dirt or concrete)<br />
3 Stuffed and/or plastic dolls and animals<br />
4 Blocks and building toys (but not so small<br />
that they can fi t into a child’s mouth)<br />
5 Rubber and/or thatched balls of different sizes (but<br />
not so small that they can fi t into a child’s mouth)<br />
6 Locally made toys (pick-up sticks, feather cocks etc)<br />
7 Scarves or kramas for playing with<br />
8 A variety of storybooks with lots of pictures<br />
9 Coloring books or photocopied pictures that children can color in<br />
10 Sheets of colored and white paper for painting and drawing<br />
11 Colored crayons and pencils<br />
12 Scissors<br />
13 Glue sticks, PVA glue or other non-toxic glue<br />
14 Masking tape<br />
15 Stapler<br />
16 String<br />
Additional materials that should be<br />
available every session:<br />
17 Buckets of clean water for handwashing<br />
18 Gentle moisturizing soap for handwashing<br />
19 Clean kramas or towels for drying hands<br />
20 First Aid Kit in case of injury<br />
Note: Children do not need expensive<br />
toys in order to play. Children are so<br />
creative and imaginative that even the<br />
simplest objects can hold their attention<br />
and be learning tools. Children may also<br />
like to bring their own safe, cheap,<br />
locally available objects that they enjoy<br />
playing with.<br />
PLAYGROUP RESOURCE BOOK Getting Started<br />
19
PLAYGROUP RESOURCE BOOK Getting Started<br />
20<br />
4 Inform the community<br />
• Once the team, play site and basic materials have been purchased, inform the<br />
community about the playgroups - their purpose, who can participate in them and<br />
the date and location. If the play site is in the community it is important that the IA<br />
and playgroup facilitator work with the village leader to do this.<br />
• Invite children to the playgroup - bearing in mind how many facilitators and helpers<br />
there are and available space and resources.<br />
Note: It is important to be clear with communities about how many children can participate<br />
in a playgroup since the number will be limited. If many children want to join playgroup<br />
sessions, the facilitator may need to alternate which children can attend each time. Priority<br />
should always be given to OVC.<br />
• Encourage parents/caregivers to accompany their children to the playgroup and stay<br />
for the duration. This will give children a sense of comfort and safety; parents/caregivers<br />
learn new things about play, child development and their own child; and the bond<br />
between parents/caregivers and their children is increased.<br />
Note: The IA supervisor should try to be available to support the facilitator to inform the<br />
community the fi rst few times they run a playgroup since this can sometimes be very challenging<br />
and stressful.<br />
5 Select the playgroup activities<br />
• At least two days before each playgroup session, select which activities to conduct at<br />
the next playgroup session.<br />
• If additional materials are needed for the activities selected, add these to the container<br />
of regular materials.<br />
Note: For children aged 3-5 years old, the facilitators should choose and prepare material in<br />
advance for two activities.<br />
For children aged 6-12 years old, the facilitators should choose and prepare material in<br />
advance for two games/songs and one group lesson/activity.
6 Arrange for the provision<br />
of nutritious foods and<br />
drinking water<br />
• Nutritious snacks should be given out to<br />
the children at every playgroup.<br />
• In order to help the children grow well<br />
only nutritious snacks should be provided,<br />
for example, fresh fruit, boiled corn, banana and<br />
sticky rice, bean cakes and other sweets or savories<br />
which are locally made and available.<br />
• Also provide safe, clean water for drinking and<br />
clean cups – children get dehydrated easily in hot<br />
weather, especially when they have been engaging<br />
in lots of physical activity.<br />
7 Run the playgroup<br />
Don’t<br />
forget<br />
Children should be<br />
encouraged to wash their<br />
hands at every session,<br />
before having their<br />
snack!<br />
• On the day, pack the play materials and snacks and transport them to the play site.<br />
• Arrive at the play site at least 15 minutes before the start of the playgroup to greet<br />
the village leader as appropriate, debrief team, re-check<br />
site safety and set up materials.<br />
• When the children start to arrive,<br />
welcome them and encourage their<br />
parents/caregivers to stay and<br />
watch.<br />
• Record the names, age and<br />
gender of each of the children<br />
who attend the playgroup (helpers<br />
can be in charge of this).<br />
PLAYGROUP RESOURCE BOOK Getting Started<br />
21
PLAYGROUP RESOURCE BOOK Getting Started<br />
22<br />
• Follow the routine as listed in the ‘Running a playgroup’ section (on pages 23-26), to<br />
give the playgroup it’s structure, and copy the instructions given under the activities<br />
selected to lead the games/songs, group lessons and activities.<br />
• Involve the helpers in order to supervise and support children appropriately. Play is<br />
a dynamic process and the fi rst few times it may be diffi cult to manage lots of creative,<br />
energetic children.<br />
• After concluding the playgroup, pack up and clear play site of any rubbish.<br />
8 Wrap up the playgroup and prepare for the next one<br />
• Check playgroup supplies and replace anything that has been broken or lost for<br />
next time.<br />
• Complete a playgroup report or any other forms required by the Implementing Agency.
Running<br />
a playgroup<br />
The children in the playgroup should be divided into two age groups: 3-5 year olds and 6-<br />
12 year olds. Each age group has a slightly different playgroup routine to follow, but some<br />
activities will be the same for both groups. For example, both groups will have free play<br />
at the beginning of the session, snack halfway through, and a goodbye song at the end.<br />
For these activities, the children can be brought together and they can be done as one<br />
big group. However, if there is not enough space or too many children for this, then they can<br />
be done separately within the different age groups.<br />
Follow the routines below for each age<br />
group, every playgroup session.<br />
ACTIVITY<br />
Free Play<br />
Games/Songs 1<br />
Handwashing<br />
Snack<br />
Games/Songs 2<br />
Goodbye Song<br />
Total<br />
1 <strong>Playgroup</strong> session<br />
for 3-5 year olds<br />
PURPOSE<br />
To give children a chance to play<br />
with toys or their peers<br />
To have some fun and build the<br />
cognitive and other developmental<br />
abilities of children<br />
To teach and encourage good<br />
hygiene before snack<br />
To give children nutritious food<br />
and a chance to rest<br />
To provide one last<br />
opportunity for fun before the end<br />
of the playgroup!<br />
To close the session and<br />
say goodbye<br />
APPROXIMATE TIME<br />
20 - 30 min<br />
20 - 30 min<br />
5 - 10 min<br />
10 - 20 min<br />
15 - 20 min<br />
10 min<br />
80 - 120 min<br />
PLAYGROUP RESOURCE BOOK Running a playgroup<br />
23
PLAYGROUP RESOURCE BOOK Running a playgroup<br />
24<br />
ACTIVITY<br />
Free Play<br />
Games/Songs 1<br />
Group Lesson<br />
or Activities<br />
Handwashing<br />
Snack<br />
Games/Songs 2<br />
Goodbye Song<br />
Total<br />
2 <strong>Playgroup</strong> session for<br />
6-12 year olds<br />
PURPOSE<br />
To give children a chance to play<br />
with toys or their peers<br />
To get children settled and<br />
comfortable with each other<br />
To build the cognitive and other<br />
developmental abilities of children<br />
To teach and encourage good<br />
hygiene before snack<br />
To give children nutritious food<br />
and a chance to rest<br />
To provide one<br />
last opportunity for fun before<br />
the end of the playgroup!<br />
To close the session and<br />
say goodbye<br />
APPROXIMATE TIME<br />
15 - 20 min<br />
10 - 15 min<br />
20 - 30 min<br />
5 - 10 min<br />
10 - 20 min<br />
10 - 15 min<br />
10 min<br />
80 - 120 min<br />
Note: It is very important for children to have routines and schedules as these build confi dence,<br />
a sense of safety, and organizational skills. The playgroup should reinforce this and follow the<br />
same routine each time it is held.
3 Facilitator’s notes on running<br />
a playgroup<br />
Being welcoming<br />
As children may be nervous when fi rst attending a playgroup, always say a few words<br />
of welcome to the whole group at the beginning of every playgroup and spend time<br />
saying goodbye at the end. Clear hellos and goodbyes will give the playgroup more<br />
structure and help children who feel nervous or unsure to relax and feel included.<br />
Being clear<br />
When introducing each activity, use short simple sentences and explain things slowly and<br />
clearly. Ask the children to explain what you have said back to you to check understanding.<br />
If an activity is new to the children or seems complicated, use a few children to help you<br />
demonstrate the activity.<br />
Involving children<br />
Children generally like helping and learn<br />
a lot from doing so. Encourage older<br />
children to help the younger ones<br />
during snack time or during<br />
activities. Younger children can<br />
be encouraged to help each<br />
other by picking up toys and<br />
returning them to the storage<br />
container or putting rubbish in<br />
bins/bags.<br />
PLAYGROUP RESOURCE BOOK Running a playgroup<br />
25
PLAYGROUP RESOURCE BOOK Running a playgroup<br />
26<br />
Encouraging and praising children<br />
Take every opportunity to encourage and praise all the children in the playgroup in order<br />
to build up their self-esteem and feelings of self-worth.<br />
Giving additional support to especially<br />
vulnerable children<br />
Some children attending playgroups may show signs of withdrawal, sadness or distress. In<br />
this case, pay special attention to the child by providing extra encouragement, praise and<br />
care during the playgroup and by providing follow-up support to the child/family at<br />
home. Document this observation and follow-up support in the child’s fi le. Some children<br />
participating in the playgroup may be HIV positive or otherwise unwell, and special<br />
attention and care should also be given to them in line with their physical needs. Give<br />
additional support subtly without singling out or embarrassing individual children.<br />
Respecting and encouraging individual<br />
children’s contributions<br />
Encourage the children to express themselves individually, without being infl uenced by<br />
others. Children should be encouraged to freely say what they think, what they believe, or<br />
what they know. If a child copies others or is infl uenced by others when asked to do something,<br />
encourage individual creativity by spending a bit more time with that child or asking him/<br />
her directly what they think is the best thing to do.<br />
Ensuring mutual respect for all children within the group<br />
Do not accept any form of bullying in the playgroup. No child should be allowed to put-down<br />
or tease others. If it happens, subtly and gently speak to the child/children causing the problems<br />
and explain to them the importance of respect both in the playgroup, and in life.<br />
Respecting voluntary participation<br />
Do not force any child to participate if they don’t want to. Some children might be very shy<br />
and lack self-confi dence. It is okay if they just want to watch. Maybe they will want to join in<br />
during the next playgroup. Provide extra support and encouragement to very shy children<br />
to boost their confi dence in joining activities in the future.
PLAYGROUP ACTIVITIES For Children Aged 3-5 Years<br />
28<br />
Duration: 5 - 10 minutes<br />
1<br />
THEVADA THA<br />
Aim: To develop listening, concentration and coordination skills<br />
Materials needed: None<br />
Instructions:<br />
Ask the children to stand facing you.<br />
Explain that you will do an action and at the same time<br />
give a command to the children to do the same action.<br />
When you give a command starting with the phrase<br />
‘Thevada Tha’, the children must follow your<br />
command. For example, if you say, “Thevada<br />
Tha put your hands on your head”, all the<br />
children should put their hands on their head.<br />
But, when you say something that doesn’t start<br />
with ‘Thevada Tha’, the children should not<br />
follow your command. For example, if you say,<br />
“Put your hands on your head”, the children<br />
should not do this, even if you are!<br />
Any child who follows your command when they shouldn’t<br />
is out of the game. The last child left in the game is the winner.<br />
Some examples of<br />
commands:<br />
• Thevada Tha put your<br />
hands on your hips<br />
• Put your hands in the air<br />
• Thevada Tha close both eyes<br />
• Thevada Tha jump up and down<br />
• Now stop<br />
• Thevada Tha stand on one foot<br />
• Put your hands on<br />
your head<br />
Note: Remember to do the action every time yourself, even when you don’t say, “ Thevada Tha ”,<br />
so that the children have to listen carefully to your commands and not just copy you.
Duration: 10 - 15 minutess<br />
Aim: To develop quick thinking and moving skills<br />
2<br />
FOXES AND<br />
GEESE<br />
Materials needed: 1 stick or piece of chalk (depending on whether the ground<br />
is dirt or concrete)<br />
Instructions:<br />
Mark out a large circle on the ground, with a cross separating the circle into quarters<br />
(see diagram below) using the stick or piece of chalk.<br />
Choose one child to be the fox and ask him/her to stand on the<br />
middle of the cross. Tell the rest of the children that they are<br />
all geese.<br />
Explain that the fox must try to catch the geese. The geese<br />
can run anywhere along the lines drawn (around the<br />
large circle and up and down the cross-shape path) to<br />
get away from the fox but the fox can only run along<br />
the cross-shape path and not around the large circle.<br />
Any goose who gets caught by the fox should leave the circle<br />
and watch the game from the outside. The game ends when all the<br />
geese have been caught by the fox. If there is time to play again, the last goose caught<br />
can be the fox for the next game.<br />
Note: This game can also be played with two children being foxes in the middle.<br />
PLAYGROUP ACTIVITIES For Children Aged 3-5 Years<br />
29
PLAYGROUP ACTIVITIES For Children Aged 3-5 Years<br />
30<br />
Duration: 10 - 15 minutes<br />
3<br />
ANIMAL VOICES<br />
Aim: To develop listening skills and learn about animals<br />
Materials needed: None<br />
Instructions:<br />
Choose one child to be the hunter and ask him/her to stand in front of the other children,<br />
face away from them and close his/her eyes.<br />
Explain that you will whisper the name of an animal to one child. While the hunter is still<br />
facing the other way with his/her eyes closed the child must move closer to the hunter and<br />
make the noise of this animal before moving back to the group. Without turning around<br />
the hunter has to guess what animal noise was being made.<br />
If the hunter guesses the right animal, he/she can turn around and try to identify the child<br />
who made the noise. If the hunter guesses right again, all the children clap. If the hunter<br />
guesses wrong, the other children can help him/her to identify the right child by giving<br />
some clues.<br />
Continue the game for as long as is appropriate; try to give all the children the opportunity<br />
to be the hunter and/or make the animal noise.<br />
Note: When the children understand the game, let them decide which animal they want to<br />
imitate instead of telling them, and help them only if they cannot think of one.
Duration: 5-10 minutes<br />
Aim: To develop quick thinking and moving skills<br />
Materials needed: None<br />
Instructions:<br />
4<br />
THE CROW<br />
CATCHES THE<br />
CHICKENS<br />
Choose one child to be the crow and another child to be the hen and tell the rest of the<br />
children that they are the hen’s chicks. All the chicks must stand in a line behind the hen holding<br />
on to each other’s waists. The child right behind the hen holds on to the hen’s waist.<br />
Explain that the crow must try to catch the chicks from behind the hen and the hen must<br />
run around to try to keep his/her chicks away from the crow. The chicks must move with<br />
the hen and never let go of the waist of the chick or hen in front of them.<br />
The fi rst chick to get caught by the crow leaves the hen and goes to hold on to the waist<br />
of the crow. The second chick to get caught holds on to the waist of the fi rst chick behind<br />
the crow and so on.<br />
The game ends when all the chicks have been caught by the crow. If there is time to play<br />
again, try to give different children the opportunity to be the crow and the hen.<br />
PLAYGROUP ACTIVITIES For Children Aged 3-5 Years<br />
31
PLAYGROUP ACTIVITIES For Children Aged 3-5 Years<br />
32<br />
Duration: 5 - 10 minutes<br />
Aim: To develop counting, listening and rhythmic skills<br />
Materials needed: None<br />
Instructions:<br />
5<br />
CLAPPING<br />
HANDS<br />
Ask the children to sit in a circle. Choose one or more of the following activities depending<br />
on the age and ability of the children.<br />
1 Say a number; the children clap their hands this many times.<br />
2 Hold up a number of fi ngers and say the number of fi ngers you are holding up at the<br />
same time; the children clap their hands this many times.<br />
3 Hold up a number of fi ngers, wait for the children to say the number of fi ngers you are<br />
holding up out-loud; the children clap their hands this many times.<br />
4 Clap a simple rhythm while the children listen; the children copy the clapping rhythm.
Duration: 5 - 10 minutes<br />
Aim: To develop listening, concentration and coordination skills<br />
Materials needed: None<br />
Instructions:<br />
Ask the children to stand facing you.<br />
6<br />
DANCE TO<br />
THE MUSIC<br />
Explain that you will sing a song for the children to dance to (ask some children to sing<br />
with you if you don’t feel confi dent singing alone), but that whenever you stop singing they<br />
must freeze like a statue in whatever position they were in when you stopped singing.<br />
Any child who does not freeze, leaves the dancing area and stands to the side. The last<br />
child left dancing is the winner.<br />
Note: If there is more than one singer, the singers must decide on a signal to stop, for<br />
example, when someone puts a fi nger in front of their lips all the singers must stop.<br />
PLAYGROUP ACTIVITIES For Children Aged 3-5 Years<br />
33
PLAYGROUP ACTIVITIES For Children Aged 3-5 Years<br />
34<br />
Duration: 10 - 15 minutes<br />
Aim: To develop acting and miming skills and learn about animals<br />
Materials needed: None<br />
Instructions:<br />
Ask the children to sit in a circle.<br />
7<br />
WHICH<br />
ANIMAL<br />
AM I?<br />
Explain that you will go into the middle of the circle and pretend to be a particular animal,<br />
using just actions and noises, and the children must guess which animal you are. The fi rst<br />
child to guess right takes your place in the middle of the circle and pretends to be another<br />
animal so the other children can guess.<br />
Play the game for as long as necessary to give every child the opportunity to go in the circle.
Duration: 10 - 15 minutes<br />
Aim: To learn about body parts<br />
Materials needed: None<br />
Instructions:<br />
8<br />
BODY PARTS<br />
Ask the children to sit in a circle. Choose one or more of the following activities depending<br />
on the age and ability of the children.<br />
1 Name a body part; the children point to this body part on themselves.<br />
2 Name a body part; the children point to this body part on a partner.<br />
3 Point to a body part on yourself; the children name it and point to it on themselves.<br />
Note: If there are children in the group who have had any amputations, act sensitively<br />
when talking about this body part, or avoid talking about it if it will make the child feel<br />
awkward or embarrassed.<br />
PLAYGROUP ACTIVITIES For Children Aged 3-5 Years<br />
35
PLAYGROUP ACTIVITIES For Children Aged 3-5 Years<br />
36<br />
Duration: 10 - 15 minutes<br />
Aim: To learn and practice new vocabulary<br />
Materials needed: 1 shoe; 1 chair; 1 bag<br />
Instructions:<br />
Ask the children to sit in a circle.<br />
Explain that you will place the shoe somewhere near the chair and the children must tell<br />
you where it is.<br />
Place the shoe behind the chair, and the children should say, “It’s behind the chair”.<br />
Place the shoe in front of/next to/on top of/under the chair and each time let the<br />
children tell you where it is.<br />
Next, replace the chair with the bag and go through the same process, adding ‘inside’<br />
by putting the shoe inside the bag.<br />
End the activity by summarizing what the children have learned.<br />
9<br />
WHERE IS<br />
THE SHOE?<br />
Note: ‘Left’ and ‘right’ can be confusing if the object is in front of the children. It is better<br />
just to say ‘next to’.
Duration: 15 - 20 minutes<br />
Aim: To learn about the fi ve senses<br />
Materials needed: None<br />
Instructions:<br />
10<br />
OUR FIVE<br />
SENSES<br />
Ask the children to sit in a circle. Lead a discussion using the following questions and<br />
answers:<br />
• “Where are your eyes?” (Children point to their eyes)<br />
• “Where are your ears?” (Children point to their ears)<br />
• “Where is your mouth?” (Children point to their mouth)<br />
• “Where is your nose?” (Children point to their nose)<br />
• “Where are your hands?” (Children show their hands)<br />
• “How many eyes do you have?” (Two)<br />
• “How many ears do you have?” (Two)<br />
• “How many mouths do you have?” (One)<br />
• “How many noses do you have?” (One)<br />
• “How many hands do you have?” (Two)<br />
PLAYGROUP ACTIVITIES For Children Aged 3-5 Years<br />
37
PLAYGROUP ACTIVITIES For Children Aged 3-5 Years<br />
38<br />
• “What can we do with our eyes?” (We see with our eyes)<br />
• “What can we do with our ears?” (We hear with our ears)<br />
• “What can we do with our mouth?” (We taste with our mouth)<br />
• “What can we do with our nose?” (We smell with our nose)<br />
• “What can we do with our hands?” (We touch with our hands)<br />
• “What can I see with my two eyes?”<br />
(My family, my friends, animals, my house, the sky etc)<br />
• “What can I taste with my mouth?”<br />
(Rice, chicken, mango, coconut milk, medicine, my skin, rain water etc)<br />
• “What can I hear with my two ears?”<br />
(Talking, laughter, music, animals, thunder, cars, motos etc)<br />
• “What can I smell with my nose?”<br />
(Good smells – cooking, fl owers, perfume etc. Bad smells – rotting food, rubbish,<br />
chemicals etc)<br />
• “What can I touch with my two hands?”<br />
(My family, my friends, my clothes, trees, plants, animals etc)<br />
End the activity by summarizing what the children have learned.
Duration: 5 - 10 minutes<br />
Aim: To develop listening, concentration and coordination skills<br />
Materials needed: 1 stick or piece of chalk (depending on whether the ground<br />
is dirt or concrete)<br />
Instructions:<br />
Draw a big circle on the ground using the stick or piece of chalk, and tell the children to<br />
pretend that the inside of the circle is an island, and the outside is water.<br />
Explain that when you say, “crocodile”, the children have to jump onto the island (inside<br />
the circle) to escape from the crocodile, and when you say, “tiger”, they have to jump into<br />
the water (outside the circle) to escape from the tiger.<br />
Continue the game for as long as is appropriate.<br />
11<br />
CROCODILE<br />
AND TIGER<br />
Note: Make this game harder by instead of just saying the animal names, tell a story with<br />
the words ‘crocodile’ and ‘tiger’ in it (repeated many times). When the children hear,<br />
“crocodile”, they jump into the circle, and when they hear, “tiger”, they jump outside<br />
the circle.<br />
PLAYGROUP ACTIVITIES For Children Aged 3-5 Years<br />
39
PLAYGROUP ACTIVITIES For Children Aged 3-5 Years<br />
40<br />
Duration: 15 - 20 minutes<br />
Aim: To learn a new song and develop listening, language and musical skills<br />
Materials needed: None<br />
Preparation: Learn the Khmer alphabet song<br />
Instructions:<br />
12<br />
KHMER<br />
ALPHABET<br />
SONG<br />
Ask the children to sit in a circle. Choose one or more of the following activities depending<br />
on the age and ability of the children.<br />
1 Sing the song out loud to the children and teach them to clap their hands in time.<br />
2 Sing the song out loud to the children, one sentence at a time; they repeat each<br />
sentence of the song after you, until they know the whole song well. When the<br />
children know the song well you can sing it altogether, or small groups can take it in<br />
turns to perform it to everyone.<br />
3 Sing the song together with the children and teach them how to act out the words of<br />
the song using simple gestures and actions. When the children know the actions well,<br />
small groups can take it in turns to perform it to everyone.
Duration: 5 - 10 minutes<br />
Aim: To develop listening, concentration and coordination skills<br />
Materials needed: None<br />
Instructions:<br />
Ask the children to stand facing you.<br />
Explain that when you say, “bamboo<br />
shoot”, the children have to crouch, and<br />
when you say, “bamboo”, they have<br />
to stand.<br />
Say the words faster and faster,<br />
and then come back to a slower pace<br />
in order to calm down the children<br />
and end the session.<br />
Continue the game for as long as is<br />
appropriate.<br />
13<br />
BAMBOO<br />
AND BAMBOO<br />
SHOOT<br />
Note: When the children understand the concept, give those who want to, the opportunity<br />
to call out the words.<br />
PLAYGROUP ACTIVITIES For Children Aged 3-5 Years<br />
41
PLAYGROUP ACTIVITIES For Children Aged 3-5 Years<br />
42<br />
Duration: 10-15 minutes<br />
Aim: To learn geometrical shapes<br />
Materials needed: 1 stick or piece of chalk (depending on whether the ground<br />
is dirt or concrete)<br />
Instructions:<br />
Draw a large shape (circle/square/<br />
triangle/rectangle/diamond/oval/<br />
star) on the ground using the stick or<br />
piece of chalk.<br />
Ask the children what the shape<br />
is and then ask them to make the<br />
shape by standing on the outline.<br />
When all of the children form the<br />
shape together perfectly, they should<br />
say (or sing out) altogether, “This is a circle”<br />
or “This is a square” etc.<br />
14<br />
FOLLOW<br />
THE SHAPE<br />
If the children are able, they can carefully walk around<br />
the outline of the shape as a group (it must stay a perfect circle/square/triangle etc).<br />
Repeat this activity with different shapes and end by summarizing what the children<br />
have learned.
Duration: 10-15 minutes<br />
Aim: To learn the difference between big and small<br />
Materials needed: Any clean, safe objects that can be easily found in the village<br />
(fruit, vegetables, shoes, books, pencils etc)<br />
Instructions:<br />
Ask the children to sit in a circle.<br />
Show everyday life objects of different sizes to the children (fruit, vegetables, animals,<br />
shoes, books, pencils etc). Ask them, “Which objects are big and which are small?” and<br />
allow them to point out the big and small objects.<br />
When the children understand the concept, show them two objects which are the same but<br />
different sizes, for example, two differently sized pineapples, and ask, “Which one is<br />
bigger and which one is smaller?” Help the children to understand bigger and smaller.<br />
If the children understand ‘bigger’ and ‘smaller’, show them three objects of different<br />
sizes, and ask them questions such as: “Is this one bigger or smaller than this one?”<br />
and “Which one is the biggest and which one is the smallest?”. Give them time to think<br />
and answer.<br />
End the activity by summarizing what the children have learned.<br />
15<br />
BIG AND<br />
SMALL<br />
PLAYGROUP ACTIVITIES For Children Aged 3-5 Years<br />
43
PLAYGROUP ACTIVITIES For Children Aged 3-5 Years<br />
44<br />
Duration: 20 - 25 minutes<br />
Aim: To understand the importance of clean hands and learn how to wash hands<br />
properly<br />
Materials needed: 2 buckets of clean water; 1 bar of soap; 1 clean krama or<br />
towel<br />
Instructions:<br />
16<br />
CLEAN HANDS,<br />
HEALTHY BODY<br />
Ask the children to sit in a circle. Lead a discussion using the following questions and answers:<br />
• “What are clean hands?” (Hands without dirt or germs on them, which are safe for<br />
eating with)<br />
• “How can we get our hands clean?” (By washing with soap and clean water)<br />
• “What are dirty hands?” (Hands which have touched many things such as the ground,<br />
animals and play things, and have dirt and germs on them)<br />
• “Why is it bad to have dirty hands?” (When our hands are dirty and have germs on<br />
them, the germs can make us sick)<br />
• “What is one way of knowing if our hands are clean or dirty?” (By looking at them)<br />
• “Sometimes we can know if our hands are clean or dirty by looking at them,<br />
but sometimes, the dirt is so small that we cannot see it, so our hands may look<br />
clean but actually they have dirt and germs on them.”
• “Our hands touch many things that are not clean, so we need to wash our hands<br />
often to stop ourselves from getting sick.”<br />
• “When should we wash our hands?” (Whenever they are dirty, after touching<br />
something that is dirty, before and after eating, after going to the toilet, after touching<br />
animals)<br />
Use the buckets of water, soap, and clean krama or towel to show the children how to<br />
wash their hands correctly by following the fi ve simple steps (explain what you are<br />
doing at each step):<br />
1 WET hands<br />
2 LATHER hands with soap<br />
3 RUB hands together for 15 seconds (away from the water) – children can count<br />
slowly to 15, sing their favorite song or recite the Khmer alphabet<br />
4 RINSE hands with clean water<br />
5 DRY hands with a clean krama or towel<br />
When you have fi nished showing the children the fi ve steps, ask them to practice washing<br />
their hands in the same way. Help each child as they take their turn and praise and<br />
encourage them as they go. Remember to change the water in the two buckets, especially<br />
if it is a large group.<br />
End the activity by summarizing what the children have learned.<br />
PLAYGROUP ACTIVITIES For Children Aged 3-5 Years<br />
45
PLAYGROUP ACTIVITIES For Children Aged 3-5 Years<br />
46<br />
Duration: 10 - 15 minutes<br />
Aim: To develop coordination and listening skills<br />
Materials needed: 1 small ball<br />
Instructions:<br />
17<br />
MOTHER HEN<br />
Choose one child to be the Mother Hen and give him/her a ball. Tell the rest of the<br />
children to stand in a line about two meters away from the Mother Hen. They are all<br />
the Mother Hen’s chicks. The Mother Hen must stand facing away from the line of chicks.<br />
Explain that the Mother Hen must throw the ball over his/her shoulder towards the line of<br />
chicks (but without looking at who to throw to). The chicks must try to catch the ball.<br />
The chick who catches the ball holds it behind his/her back with both hands. All the other<br />
chicks hold their hands behind their backs in the same way, but only the chick with the<br />
ball calls out “cheep, cheep, cheep”.<br />
The Mother Hen must then turn around and try to guess who has the ball. If the Mother<br />
Hen guesses right, the chick with the ball is the next Mother Hen and the game repeats.<br />
If Mother Hen doesn’t guess right after two tries, the child with the ball should reveal<br />
him/herself; that child then becomes the next Mother Hen and the game repeats.<br />
Continue the game for as long as is appropriate; try to give all the children the opportunity<br />
to be the Mother Hen.
Duration: 20 - 25 minutes<br />
Aim: To develop creative skills<br />
18<br />
SELF-<br />
PORTRAITS<br />
Materials needed: Paper plates or circles of card/paper (1 per child); colored<br />
crayons or pencils; scissors; stapler or sticky tape; ball of wool or string<br />
Instructions:<br />
Ask the children to sit in a circle and put the colored crayons or pencils in the middle of<br />
the circle.<br />
Give each child a paper plate or circle of card/paper and ask them to draw their faces<br />
on them.<br />
Help the children to cut out the shape of the eyes and to stick or staple a piece of wool<br />
or string to each side of the paper plate or paper circle, so that they can wear them as<br />
masks.<br />
When the children have fi nished give them the opportunity to describe their self-portraits<br />
and what they like about them to the group or to each other.<br />
Tell the children that they all have eyes, ears, nose, mouth, and hair - so they are all alike.<br />
But, as each of these self-portraits look different, so they are all different as well (they<br />
look different, their names are different, they have different families etc). Congratulate<br />
the children on their work.<br />
PLAYGROUP ACTIVITIES For Children Aged 3-5 Years<br />
47
PLAYGROUP ACTIVITIES For Children Aged 3-5 Years<br />
48<br />
Duration: 10 - 15 minutes<br />
Aim: To develop creative skills<br />
Materials needed: Different types of<br />
textured leaves (the children can be given<br />
time to gather these at the beginning of<br />
the session or they can be gathered in<br />
advance by the facilitator); sheets of paper<br />
(1 per child); colored crayons or pencils<br />
Instructions:<br />
Ask the children to sit in a circle and put the different<br />
leaves and the colored crayons or pencils in the middle<br />
of the circle.<br />
19<br />
DIFFERENT<br />
KINDS OF<br />
LEAVES<br />
Give each child a sheet of paper and ask them to choose a leaf from the selection.<br />
Show the children how to rub over their sheets of paper with a crayon or pencil (with the<br />
leaf underneath the paper) until the outline of the leaf can be seen through the paper.<br />
When the children have rubbed over their leaf and made a picture, ask them to swap<br />
their leaves with each other so they can all try again with a different leaf.<br />
When the children have fi nished give them the opportunity to show their leaf rubbings to<br />
the group if they want to. Congratulate the children on their work.
Duration: 20 - 25 minutes<br />
Aim: To develop creative skills<br />
Materials needed: Sheets of paper (1 per child); colored crayons or pencils;<br />
small objects collected in the village (fl owers, grass, leaves, rice, sticks etc); glue;<br />
1 large (poster-sized) sheet of paper or card; coloring books<br />
Instructions:<br />
20<br />
COLLAGE<br />
Ask the children to sit in a circle. Choose one or more of the following activities depending<br />
on the age and ability of the children.<br />
1 Draw simple objects on the children’s sheets of paper (fl ower, star, ball etc). Each<br />
child is to decorate their own piece of paper by gluing their small objects on top.<br />
2 Draw a simple picture on the large (poster-sized) sheet of paper. Encourage all<br />
the children to decorate it by gluing their small objects on top.<br />
3 The children try to represent something on their own by gluing their small objects on<br />
their sheets of paper. They can create a picture, or just make a random shape or<br />
pattern.<br />
4 The children try to represent something as a group by gluing their small objects on<br />
the large (poster-sized) sheet of paper. They can create a picture, or just make a<br />
random shape or pattern.<br />
PLAYGROUP ACTIVITIES For Children Aged 3-5 Years<br />
49
PLAYGROUP ACTIVITIES For Children Aged 3-5 Years<br />
50<br />
Duration: 20 - 25 minutes<br />
Aim: To develop creative skills<br />
Materials needed: Sheets of paper (1 per child); colored crayons or pencils<br />
Instructions:<br />
Ask the children to sit in a circle and put the colored<br />
crayons or pencils in the middle of the circle.<br />
Give each child a sheet of paper.<br />
Show the children how to draw their hand<br />
by placing the palm of their hand fl at on<br />
the paper and drawing around it.<br />
When the children have drawn their<br />
hands, they can color in their drawings<br />
or go on to draw around their feet in the<br />
same way.<br />
When the children have fi nished give them the<br />
opportunity to show their drawings to the group if<br />
they want to. Congratulate the children on their work.<br />
21<br />
DRAWING<br />
OUR HANDS
Duration: 20 - 25 minutes<br />
Aim: To develop role-play and improvisation skills<br />
Materials needed: Adult clothes (skirts, pants, shirts, t-shirts, kramas or<br />
scarves, shoes, hats etc)<br />
Instructions:<br />
Ask the children to sit in a circle and put the different adult clothes in the middle of the circle.<br />
Explain that you will be playing dressing-up.<br />
22<br />
DRESSING UP<br />
Ask for two children to select three pieces of clothing each and to put them on over their<br />
normal clothes. The children may need assistance if they don’t already know how to put<br />
on the clothes.<br />
Once the children are wearing their adult clothes, they can say who they are dressed up<br />
like. For example, the child may say, “I’m dressed up like mummy” or “I’m dressed up<br />
like Grandpa Mao” or “I’m dressed up like my older sister/brother Keo”.<br />
While the children take off their adult clothes, ask for another two volunteers. Play the<br />
game for as long as necessary to give everyone the opportunity to play dressing-up.<br />
Note: If enough old clothes are available, more than two volunteers can be chosen at a time.<br />
PLAYGROUP ACTIVITIES For Children Aged 3-5 Years<br />
51
PLAYGROUP ACTIVITIES For Children Aged 3-5 Years<br />
52<br />
Duration: 15 - 20 minutes<br />
Aim: To develop creative skills<br />
Materials needed: Clay (made in advance – see preparation below)<br />
Preparation: Make modeling clay by combining the following ingredients in a<br />
bowl and kneading until smooth: • 2 cups fl our<br />
• 1 cup salt<br />
• ½ to 1 cup water<br />
• 2 tablespoons vegetable oil<br />
Place the modeling clay in an airtight container to keep it fresh until you need it.<br />
Instructions:<br />
Ask the children to sit in a circle.<br />
23<br />
CLAY<br />
MODELING<br />
Give each child a piece of clay and ask them to make anything they want.<br />
When the children have fi nished give them the opportunity to show their clay models to<br />
the group if they want to. Congratulate the children on their work and tell them that their<br />
models will dry within a few days.<br />
Note: The process of clay-modeling (experimenting with clay on fi ngers) is more important<br />
than the fi nal product; the children do not have to make a model that looks like something<br />
real if they don’t want to.
Duration: 15 - 20 minutes<br />
Aim: To develop creative skills<br />
Materials needed: Coloring books or photocopies of pictures; colored<br />
crayons or pencils<br />
Instructions:<br />
24<br />
COLORING<br />
IN PICTURES<br />
Ask the children to sit in a circle and put the colored crayons or pencils in the middle of<br />
the circle.<br />
Give each child a picture (children can share if there aren't enough) and ask them to<br />
color it in.<br />
When the children have fi nished give them the opportunity to show their pictures to the<br />
group if they want to. Congratulate the children on their work.<br />
Note: The pictures given to the children should be suitable for their age, such as pictures with<br />
simple shapes and/or thick outlines.<br />
PLAYGROUP ACTIVITIES For Children Aged 3-5 Years<br />
53
PLAYGROUP ACTIVITIES For Children Aged 3-5 Years<br />
54<br />
Duration: 20 - 25 minutes<br />
Aim: To develop listening and creative skills<br />
Materials needed: 1 storybook; sheets of paper (1 per child); colored crayons<br />
or pencils<br />
Instructions:<br />
25<br />
DRAW THE<br />
STORY<br />
Ask the children to sit in a circle and put the colored crayons or pencils in the middle of<br />
the circle.<br />
Explain that you will read them a story from the storybook and they must listen carefully.<br />
After you have read the story give each child a sheet of paper and ask them to draw a<br />
picture from the story they have just heard.<br />
When the children have fi nished give them the opportunity to show their pictures to the<br />
group if they want to. Congratulate the children on their work.<br />
Note: If a child does not know what to draw, help them to think of an idea by suggesting<br />
simple things related to the story, for example, a ball, fl ower or character etc.
GAMES/SONGS For Children Aged 6-12 Years<br />
56<br />
Duration: 5 - 10 minutes<br />
Aim: To develop quick thinking, moving and teamwork skills<br />
Materials needed: None<br />
Instructions:<br />
Choose one child to be the dragon’s head and tell the rest of the children that they are<br />
the dragon’s tail. Tell all the children to line up behind the child who is the dragon’s head<br />
and put their hands on the shoulders of the child in front.<br />
Explain that the dragon’s head must try to catch the end of the dragon’s tail (the last child<br />
in the line). The children must move together and shouldn’t let go of the shoulders of the<br />
child in front of them. The dragon’s tail must try to get away from the dragon’s head.<br />
When the end of the dragon’s tail has been caught, the last child in the line is out of the<br />
game and the child who was the dragon’s head takes his/her place and becomes the new<br />
end of the dragon’s tail.<br />
The game ends when all the children have been caught and there are only two children<br />
remaining (the dragon's head and tail).<br />
1<br />
CHASE THE<br />
DRAGON’S TAIL
Duration: 5 - 10 minutes<br />
Aim: To develop, coordination and teamwork skills<br />
Materials needed: None<br />
Instructions:<br />
2<br />
STAND UP<br />
Ask the children to fi nd a partner and sit on the ground back-to-back with him/her, with<br />
their knees bent and elbows linked.<br />
Explain that in their pairs the children must count to three and then try to stand up at the<br />
same time, without unlinking their elbows.<br />
Continue the game long enough for the majority of children to master the task. If any of<br />
the pairs are very good at it, ask them to demonstrate to the rest of the group.<br />
Note: Make this game harder by playing it in groups of threes, fours or fi ves.<br />
GAMES/SONGS For Children Aged 6-12 Years<br />
57
GAMES/SONGS For Children Aged 6-12 Years<br />
58<br />
Duration: 5 - 10 minutes<br />
Aim: To learn to categorize and work as a team<br />
Materials needed: None<br />
Instructions:<br />
3<br />
LINE UP<br />
Ask the children to line up in a particular order, for example: tallest to shortest, longest<br />
hair to shortest hair, oldest to youngest, alphabetical name order etc. The children are to<br />
work together as a team but they are not allowed to talk!<br />
Any kind of order can be used, as long as it is not discriminatory, and does not make<br />
any of the children feel uncomfortable.<br />
Note: This is a good activity for getting the group settled and focused.
Duration: 5 - 10 minutes<br />
Aim: To develop teamwork skills<br />
Materials needed: None<br />
Instructions:<br />
4<br />
THE GHOST,<br />
THE GIRL AND<br />
THE MONK<br />
Divide the children into two teams and ask them to stand in two lines facing each other.<br />
Explain that for this game there needs to be three different actions and noises to represent<br />
a ghost, a girl and a monk. Ask the children to suggest an action and a noise for each one<br />
and then agree on these as a whole group.<br />
Tell the children that in their teams they must decide whether to be a ghost, a girl or a<br />
monk but they must do so secretly, and not tell the other team what they have chosen<br />
(everyone in the same team must be the same thing).<br />
Then ask both teams to face away from each other in their lines and on the count of three,<br />
all the children are to jump around and do the action and noise of the character chosen<br />
by their team.<br />
GAMES/SONGS For Children Aged 6-12 Years<br />
59
GAMES/SONGS For Children Aged 6-12 Years<br />
60<br />
Girls win over monks, monks win over ghosts, and ghosts win over girls (if both teams<br />
are the same character neither team wins). Give one point to the winning team, and<br />
continue the game, keeping track of the score.<br />
Repeat the game as many times as is appropriate.<br />
Note: Make this game more physical by making it so that the winning team chases the other<br />
team if they win. For example, if one team are monks and the other are ghosts, the monks<br />
then chase the ghosts and whoever they catch joins their team for the next round.
Duration: 15 - 20 minutes<br />
Aim: To develop coordination and teamwork skills<br />
Materials needed: Peanut shells (1 per team)<br />
Instructions:<br />
5<br />
PEANUT<br />
RELAY<br />
Divide the children into teams of four or fi ve and give each team one peanut shell. Mark<br />
out a starting and fi nishing line. Ask the teams to line up behind the starting line.<br />
Explain that when you say, “go” the fi rst child in each line must get on their hands and<br />
knees and blow the peanut shell across the ground to the fi nishing line. When they pass<br />
the fi nishing line, they must pick up the peanut and walk/run back to their team. Then<br />
they must give the next child in line the peanut shell and go to the back of the line.<br />
The next child in line takes the peanut shell and does the same thing. The game ends when<br />
all the children in one team have had a turn, and the fi rst child to go is at the front of the<br />
line again. The fi rst team to fi nish is the winning team.<br />
GAMES/SONGS For Children Aged 6-12 Years<br />
61
GAMES/SONGS For Children Aged 6-12 Years<br />
62<br />
Duration: 15 - 20 minutes<br />
Aim: To develop coordination and teamwork skills<br />
Materials needed: 4 large circles of cardboard or paper (2 per team)<br />
Instructions:<br />
6<br />
HOPPING<br />
ACROSS THE<br />
RIVER<br />
Divide the children into two teams and give each team two large circles of cardboard or<br />
paper. Mark out a starting and finishing line and ask the teams to line up behind the<br />
starting line.<br />
Explain that the ground is the river and the children have to pass to the other side of the<br />
river and back again (from the starting line to the fi nishing line and back again). To do this<br />
the children have to pretend that the cardboard or paper circles are rocks and use them<br />
so that they don’t fall in the river.<br />
Tell the children that they must cross the river in pairs. In each pair one child is the helper<br />
and one is the hopper. The helper has to put down the rocks (the cardboard or paper<br />
circles) for the hopper and the hopper has to jump from one rock to the next without falling<br />
in the river.<br />
When the pairs get to the fi nishing line, they switch roles: the hopper becomes the helper<br />
and vice-versa, and they cross back to the starting line. Then they must give the next pair<br />
in line the paper rocks and go to the back of the line.<br />
The next pair in line takes the rocks and does the same thing. The game ends when all the<br />
pairs in one team have had a turn, and the fi rst pair to go is at the front of the line again.<br />
The fi rst team to fi nish is the winning team.
Duration: 10 - 15 minutes<br />
Aim: To develop mathematical thinking<br />
Materials needed: None<br />
Instructions:<br />
7<br />
MENTAL<br />
MATHS<br />
Divide the children into two teams and ask them to make two lines, standing one behind<br />
the other in order of age; the youngest at the front and the oldest at the back. Check<br />
that the children in each corresponding part of the line are roughly at about the same<br />
age or math level (if they are not, move them around so that they are).<br />
Explain that you will be asking some maths questions and ask the children to sit down<br />
in their lines except for the two at the front. Ask the two at the front a maths question<br />
that matches their age and math level (addition and subtraction for the younger ones,<br />
multiplication and division for the older ones).<br />
The child who is the fi rst to answer wins a point for their team (but the rest of the team<br />
cannot help with the answer). Both children go to the back of their lines and the next two<br />
stand up ready for their maths question. The game ends when all the children have faced<br />
a maths question and the fi rst children to be asked a question are at the front of the line<br />
again. The team with the highest score wins.<br />
GAMES/SONGS For Children Aged 6-12 Years<br />
63
GAMES/SONGS For Children Aged 6-12 Years<br />
64<br />
Duration: 5 - 10 minutes<br />
Aim: To develop listening and concentration skills<br />
Materials needed: None<br />
Instructions:<br />
Ask the children to sit facing you.<br />
Explain that you will call out a number and at the same time hold up a different number<br />
of fi ngers. The children must clap their hands the same number of times as the number<br />
called, rather than the number of fi ngers shown. For example, when you say, “three”,<br />
but show only two fi ngers, they should clap their hands three times, not two.<br />
Choose any number, and go faster or slower, according to the children’s ability.<br />
Continue the activity for as long as is appropriate.<br />
8<br />
OPPOSITE<br />
CLAPPING<br />
Note: Make this activity harder by saying a number and asking the children to clap their hands<br />
twice as many times as that number. For example, if you say “two”, the children must clap<br />
their hands four times.
Duration: 5 - 10 minutes<br />
Aim: To develop listening and counting skills<br />
Materials needed: None<br />
Instructions:<br />
Ask the children to sit or stand in a circle.<br />
9<br />
THE<br />
COUNTING<br />
GAME<br />
Explain that each child (going around the circle in a clock-wise direction) is to take it in<br />
turns to say a number, counting from one upwards.<br />
When every child has said a number, explain that now they must go back around the circle<br />
in the opposite direction (anti-clockwise) counting backwards from the highest number<br />
reached to one. The children should all be saying the same numbers they said the fi rst<br />
time around, but this time counting down instead of up, for example, 15, 14, 13, 12,<br />
11…etc<br />
If the children are good at counting and are ready for it, ask them to go around the circle<br />
again in a clockwise direction, but this time counting in twos (2, 4, 6...), in fi ves (5, 10, 15...)<br />
and/or in tens (10, 20, 30 etc). Other multiples can be used, depending on the ability of<br />
the children.<br />
GAMES/SONGS For Children Aged 6-12 Years<br />
65
GAMES/SONGS For Children Aged 6-12 Years<br />
66<br />
Duration: 10 - 15 minutes<br />
Aim: To develop quick thinking and moving skills<br />
Materials needed: 1 krama (or scarf)<br />
Instructions:<br />
10<br />
LEAK<br />
KANSEANG<br />
Ask the children to sit in a circle on the ground with their hands on their knees. Choose one<br />
child to be the runner and give him/her a scarf or krama.<br />
Explain that the runner must walk around the outside of the circle while the other children<br />
sing ‘Leak Kanseng’. The runner must place the krama behind one of the children sitting<br />
in the circle and then run around the circle as fast as they can to take that child’s place.<br />
Meanwhile, the child with the krama placed behind him/her must stand up and use the<br />
krama to try and tag the child on his/her right. To avoid being tagged, the child on<br />
his/her right must also quickly stand up and run around the circle. If the child is tagged,<br />
he/she becomes the new runner and the child who had the krama sits back down in the<br />
circle. If the child is not tagged, the child who had the krama becomes the new runner<br />
and the game starts again.<br />
Continue the game for as long as is appropriate; try to give all the children the opportunity<br />
to run around the circle.<br />
Note: If you and the children don’t know the song, sing another fun song.
Duration: 10 - 15 minutes<br />
Aim: To develop concentration, quick thinking and moving skills<br />
Materials needed: None<br />
Instructions:<br />
Choose two children; one to be the catcher (C), and one to<br />
be the runner (R). Ask the rest of the children to fi nd a<br />
partner and stand one in front of the other in a circle so that<br />
two circles are formed - an inner and an outer circle.<br />
Explain that the runner can run in any direction and that the<br />
catcher must try to catch the runner (see diagram 1). However,<br />
once the runner runs and stops in front of someone in the inner<br />
circle, he/she is safe and can’t be caught anymore. When this<br />
happens the child at the end of that line (in the outer circle - see<br />
the blue spot on diagram 2) becomes the new runner and the<br />
catcher must try to catch him/her. If the catcher catches<br />
the new runner, that runner becomes the new catcher, and the<br />
catcher then becomes the new runner and the game continues.<br />
Play the game for as long as necessary to give every child<br />
the opportunity to be the catcher and/or the runner.<br />
11<br />
THREE<br />
MINUS ONE<br />
C<br />
R<br />
R<br />
Catcher tries to<br />
catch the Runner<br />
Diagram 1<br />
New Runner<br />
Diagram 2<br />
C<br />
Catcher now<br />
tries to catch the<br />
new Runner<br />
GAMES/SONGS For Children Aged 6-12 Years<br />
67
GAMES/SONGS For Children Aged 6-12 Years<br />
68<br />
Duration: 10 - 15 minutes<br />
Aim: To develop concentration, speed and coordination skills<br />
Materials needed: 2 differently colored kramas (or scarves)<br />
Instructions:<br />
Ask the children to stand in a circle. Show them one krama<br />
and say that it is the policeperson and show them the<br />
other krama and say that it is the thief.<br />
Choose two children who are standing directly opposite<br />
each other in the circle. Tie the policeperson krama<br />
around one of their waists with one knot only, and<br />
the thief krama around the other child’s waist with a<br />
double knot. Explain that on the count of three, the<br />
children must untie their kramas and tie them around<br />
the waist of the child on their right. They must always tie<br />
the policeperson krama once and the thief krama twice.<br />
12<br />
THE POLICE<br />
PERSON CATCHES<br />
THE THIEF<br />
As soon as the kramas have been tied, the new children wearing<br />
the kramas must untie them again and tie them around the waist of the child on their right,<br />
and so on and so on. The children must try to tie and untie as quickly as possible as the<br />
policeperson is trying to catch the thief quickly and the thief is trying to get away quickly.<br />
The krama passes around the circle until ‘the policeperson catches the thief’ which<br />
means that both kramas are on the same child.
Duration: 20 - 25 minutes<br />
Aim: To learn and practice reading and writing<br />
Materials needed: Sheets of paper (1 per pair); pens or pencils<br />
Instructions:<br />
13<br />
HOT<br />
POTATOES<br />
Divide the children into pairs: one younger child (who cannot write well) and one older<br />
child (who can write well). Give each pair a sheet of paper and one pen or pencil.<br />
Explain that before you can play the game everyone must help to make the hot potato.<br />
Each pair must write one command - for example, ‘run around the circle’ or ‘hop to the<br />
facilitator’ or ‘do a handstand’ or ‘make a funny face’ – on their sheet of paper. They<br />
must keep their commands secret.<br />
When the pairs have written on their sheets of paper ask one pair to make a ball by<br />
crumpling up their sheet of paper. Then ask them to pass the paper ball to the next pair<br />
so that they can wrap their sheet of paper around the ball, and the next pair can wrap<br />
their sheet of paper around that sheet of paper, and so on. The paper ball will get<br />
bigger and bigger.<br />
When all the pairs have wrapped their sheets of paper around the ball, the game<br />
can begin.<br />
Ask the children to sit in a circle and explain that the paper ball is a hot potato that<br />
they are going to eat. When you start singing the children must pass the hot potato<br />
around the circle quickly (as though it really is hot and burning them) and when you<br />
stop singing, whoever is holding the hot potato has to peel the fi rst layer of paper<br />
off (without ripping it!), and do whatever the command says. When you start singing<br />
again they can pass the hot potato on. The game ends when the last command has been<br />
carried out, and the hot potato has been ‘eaten up’.<br />
GAMES/SONGS For Children Aged 6-12 Years<br />
69
GAMES/SONGS For Children Aged 6-12 Years<br />
70<br />
Duration: 5 - 10 minutes<br />
Aim: To develop listening, concentration and coordination skills<br />
Materials needed: None<br />
Instructions:<br />
Ask the children to stand facing you.<br />
14<br />
BIRDS FLY<br />
Explain that you will call out the names of birds that can fl y, for example, “Robins fl y!”,<br />
“Ducks fl y!”, “Sparrows fl y!” and when you do all the children must run around and fl ap<br />
their arms like wings. But if you call out an animal that can’t fl y, for example “Cows fl y!”<br />
all the children must stand still.<br />
Any child who fl aps their wings when they shouldn’t is out of the game. The last child left<br />
in the game is the winner.
Duration: 10 - 15 minutes<br />
Aim: To develop concentration, coordination and teamwork skills<br />
Materials needed: 2 balls<br />
Instructions:<br />
Divide the children into teams of fi ve or six and give each<br />
team a ball. Mark out a starting and fi nishing line and<br />
ask the teams to line up behind the starting line.<br />
Explain that when you say, “Go!” the child at the<br />
front of the team must pass the ball over his/<br />
her head to the child behind (without turning<br />
around). The next child takes the ball and passes<br />
it under his/her legs (without turning around).<br />
The next child takes the ball and passes it over<br />
his/her head and so on. This ‘over-under’ pattern<br />
continues all the way down the line until the ball reaches<br />
the child at the end of the line. This child must run from the back of the<br />
line to the front and start the ‘over-under’ process again.<br />
15<br />
OVER UNDER<br />
GAME<br />
The game continues until every child has had a turn at the front of the line. When the<br />
child who was at the front of the line at the start of the game is back at the front again,<br />
the whole team must sit down. The fi rst team to sit down is the winner.<br />
GAMES/SONGS For Children Aged 6-12 Years<br />
71
GAMES/SONGS For Children Aged 6-12 Years<br />
72<br />
Duration: 5 - 10 minutes<br />
Aim: To develop observation, quick thinking and moving skills<br />
Materials needed: None<br />
Instructions:<br />
16<br />
FOUR UP<br />
Ask the children to sit in a circle and choose four children to stand up in their places in the<br />
circle.<br />
Explain that there must always be four children standing up in the circle but that<br />
children can only stay standing up for fi ve seconds before they have to sit down<br />
again. This means that other children have to choose when to stand up to ensure that there<br />
are always four children standing up at any one time.<br />
Say that there is no order or pattern to who stands up when, and there should be no<br />
talking during the activity. Anyone can stand up at any time, but there should never be<br />
more or less than four children standing up. For example, if fi ve children stand up at the<br />
same time, one child must sit down again, but if two children sit down and there are<br />
only three children left standing up, one more child must stand up.<br />
Say that children can stand up as many times as they like, the only rule is that they don’t<br />
stay standing up for more than fi ve seconds at a time, but they are free to stand up again<br />
immediately after sitting down.<br />
Continue the activity long enough for the children to master the concept.
Duration: 10 - 15 minutes<br />
Aim: To develop imagination and language skills<br />
Materials needed: 1 krama (or scarf)<br />
Instructions:<br />
Ask the children to sit or stand in a circle.<br />
Take a krama and say, “This is a krama, but it’s not really a krama, it’s a ball”, and<br />
make a ball out of it. Pass the krama to the next child in the circle who must pretend<br />
that the krama is something else, for example, “This is a krama, but it’s not really a<br />
krama, it’s a chair”, and pretend to sit on it, or, “This is a krama, but it’s not really<br />
a krama, it’s a book”, and pretend to read it.<br />
The krama should be passed around the whole circle like this so that everyone gets a turn<br />
to pretend that the krama is something different.<br />
The activity ends when every child has had a turn.<br />
17<br />
THIS IS A<br />
KRAMA<br />
Note: Make this activity harder by using only mime to show what the krama is, but not saying<br />
the word. The other children then have to guess what the krama is by watching the mime<br />
carefully. The child who guesses right is the next to receive the krama.<br />
GAMES/SONGS For Children Aged 6-12 Years<br />
73
GAMES/SONGS For Children Aged 6-12 Years<br />
74<br />
Duration: 10 - 15 minutes<br />
Aim: To learn about opposites and develop vocabulary<br />
Materials needed: None<br />
Instructions:<br />
Divide the children into two teams and ask them<br />
to sit together in their teams, facing you.<br />
Explain that you will call out a word, and the<br />
children must call out the opposite word. The<br />
fi rst team to call out correctly gets one point.<br />
The team with the highest score wins.<br />
18<br />
OPPOSITE<br />
WORDS<br />
Some examples of<br />
opposites:<br />
• Hot/cold • White/black<br />
• Big/small • Good/bad • Tall/short<br />
• Boy/girl • Baby/old person<br />
Brother/sister • Husband/wife<br />
• Move/stand still<br />
• Win/lose • Cry/laugh<br />
• Healthy/sick
Duration: 10 - 15 minutes<br />
Aim: To develop fast moving and teamwork skills<br />
Materials needed: 4 of the children's shoes<br />
Instructions:<br />
Divide the children into groups of fi ve and tell each<br />
group to fi nd a space and mark out a square - using<br />
four shoes to mark out the four corners.<br />
Tell each group to play ‘pao sing song’ (paper,<br />
scissors, stone); whoever loses starts off as the<br />
monkey, and stands in the middle of the square<br />
while the other four children stand on the four<br />
corners of the square.<br />
19<br />
THE<br />
MONKEY<br />
Explain that the children standing on the corners of the square have to try and swap<br />
places with each other without giving the monkey time to reach one of the corners. If the<br />
monkey manages to reach a corner while it is empty, the child who has nowhere to stand<br />
becomes the monkey.<br />
Continue the game for as long as is appropriate; try to give all the children the opportunity<br />
to be the monkey.<br />
GAMES/SONGS For Children Aged 6-12 Years<br />
75
GAMES/SONGS For Children Aged 6-12 Years<br />
76<br />
Duration: 20 - 25 minutes<br />
Aim: To learn a traditional Khmer dance<br />
20<br />
TRADITIONAL<br />
KHMER<br />
DANCING<br />
Materials needed: CD or tape player and music CD or tape (if available)<br />
Instructions:<br />
Teach the children a typical Khmer dance. Demonstrate the steps slowly and ask them<br />
to copy you. (If a CD/tape player is available, play it while the group dances, if not,<br />
then sing/hum a song with the children.)<br />
When the children know the dance well, give them the opportunity to perform it to each<br />
other in small groups, or altogether to another group of children or adults in the community.<br />
Note: If you do not feel comfortable teaching Khmer dance, invite someone in the community<br />
to show or teach the children.
Duration: 5 - 10 minutes<br />
Aim: To develop observation, speed and coordination skills<br />
Materials needed: Chairs (1 per child - if available)<br />
Instructions:<br />
Choose one child to be ‘it’ and ask the rest of the children<br />
to sit in a big circle - on a chair or on one of their shoes<br />
(there should be no empty spaces in the circle). Ask<br />
the child who is ‘it’ to stand in the middle of the circle.<br />
Explain that the child who is ‘it’ must make a statement<br />
that starts with, “I like my neighbors...” and fi nishes<br />
with something like “... who are wearing shorts”.<br />
When the child makes this statement all the children<br />
who are wearing shorts have to leave their spaces<br />
and fi nd a new space (where there is a chair/shoe) as<br />
quickly as they can. At the same time the child who is ‘it’<br />
must also try to fi nd a space to sit in.<br />
21<br />
I LIKE MY<br />
NEIGHBORS<br />
Some examples of<br />
statements:<br />
•<br />
I like my neighbors who<br />
have long hair<br />
•<br />
I like my neighbors who have brothers<br />
•<br />
I like my neighbors who are<br />
wearing something green<br />
The child left standing in the middle of the circle without a space to sit in becomes the new<br />
‘it’ and must make another statement and try to get a new space in the circle.<br />
Continue the game for as long as is appropriate; try to give all the children the opportunity<br />
to be ‘it’.<br />
GAMES/SONGS For Children Aged 6-12 Years<br />
77
GAMES/SONGS For Children Aged 6-12 Years<br />
78<br />
Duration: 10 -15 minutes<br />
Aim: To develop language skills and vocabulary<br />
22<br />
OBJECT<br />
DESCRIPTION<br />
Materials needed: 2-3 objects that are easily found in the village (these can<br />
be household objects or farming tools etc)<br />
Instructions:<br />
Ask the children to sit in a circle. Choose one or more of the following activities depending<br />
on the age and ability of the children.<br />
1 Show each object to the children and ask them to describe it (size, color, shape, what<br />
it is used for, how do you use it etc).<br />
2 Describe a thing that you can see in your surroundings and ask the children to guess<br />
what you are describing. Start each description with the words "I spy with my little<br />
eye something...." For example: I spy with my little eye something that is green and<br />
yellow (a description of bananas).<br />
Note: When the children understand the concept, give them the opportunity to play the role<br />
of the facilitator in the above activities if they want to.
Duration: 5 - 10 minutes<br />
Aim: To develop counting and teamwork skills<br />
Materials needed: None<br />
Instructions:<br />
Ask the children to stand facing you.<br />
Explain that you are going to call out different numbers and when a number is called, the<br />
children have to quickly get into groups of that number. For example, if number four is<br />
called out, the children have to get into groups of four, and if number two is called out,<br />
the children have to get into groups of two.<br />
Play the game for as long as is appropriate.<br />
23<br />
GROUPING<br />
BY NUMBERS<br />
GAMES/SONGS For Children Aged 6-12 Years<br />
79
GAMES/SONGS For Children Aged 6-12 Years<br />
80<br />
Duration: 10 - 15 minutes<br />
Aim: To develop language skills and vocabulary<br />
Materials needed: None<br />
Instructions:<br />
Ask the children to sit in a circle.<br />
Some examples of descriptions:<br />
24<br />
WHAT AM I?<br />
Explain that you will think of an object or living thing and try to describe it to the children as<br />
simply as possible. The children have to guess the object/living thing you are describing.<br />
Mosquito: “I am very small and can fl y. I like to hide in dark<br />
places. I bite humans when I am hungry!”<br />
Flower: “I can be red, pink, yellow, white, purple or orange and<br />
have many petals. I grow from the ground or on trees. I have many<br />
leaves on my body. People sometimes pick me to put inside their<br />
house or put on their hair”.
Dog: “I have four legs and I bark WOOF WOOF. I can be friendly<br />
to people but can also bite people if they make me angry”.<br />
Banana: “I am a long green or yellow fruit. Many people grow<br />
me near their house. You have to peel my skin off fi rst before you<br />
eat me. Inside my fl esh is very pale yellow, almost white”.<br />
Play the game for as long as is appropriate.<br />
Note: When the children understand the concept, give them the opportunity to play the role<br />
of the facilitator if they want to.<br />
GAMES/SONGS For Children Aged 6-12 Years<br />
81
GAMES/SONGS For Children Aged 6-12 Years<br />
82<br />
Duration: 15 - 20 minutes<br />
Aim: To develop language, memory<br />
and concentration skills<br />
Materials needed: Chairs<br />
(1 per child – if available)<br />
Instructions:<br />
25<br />
GOING<br />
SHOPPING<br />
Choose one child to be the shopper and ask the rest of the children to sit in a circle - on a<br />
chair or on one of their shoes (there should be no empty spaces in the circle) while the<br />
shopper stands on the outside of the circle.<br />
Tell the children in the circle that they are all things that can be bought in the market,<br />
for example, rice, bananas, pineapples, mangoes etc, and they must choose to be one<br />
thing each. Go around the circle and ask each child what they have chosen to be. Then<br />
ask the shopper to go through all of the things (with the help of the group) to remind<br />
everyone what is on sale at the market.<br />
Explain that the shopper must pretend to go shopping by walking around the outside of<br />
the circle and calling out the names of things he/she wants to buy, for example, “I<br />
want to buy a mango. I want to buy a cake. I want to buy some rice” etc. Whatever<br />
the shopper calls out, the child who is pretending to be that thing must leave their space<br />
in the circle and follow the shopper as they walk around.
When the shopper has bought everything they want, he/she must say, “I’ve fi nished<br />
shopping!”, and then all the children (including the shopper) have to fi nd a space<br />
(where there is a chair/shoe) as quickly as they can. The child left standing without a<br />
space to sit in becomes the new shopper.<br />
Play the game for as long as is appropriate; try to give different children the opportunity<br />
to be the shopper.<br />
GAMES/SONGS For Children Aged 6-12 Years<br />
83
GROUP LESSONS AND ACTIVITIES For Children Aged 6-12 Years<br />
86<br />
Duration: 15 - 20 minutes<br />
Aim: To learn about differences and similarities between people<br />
Materials needed: 1 brown egg; 1 white egg; 1 bowl<br />
Instructions:<br />
Ask the children to sit in a circle. Lead a discussion using the following questions and answers:<br />
• “Look at yourselves and look at each other, in what ways are you the same?”<br />
(Children point to their two eyes/two ears/mouth/nose/two hands/two arms/two legs/<br />
hair etc)<br />
• “We are the same in many ways, but we are also different in some ways, for<br />
example, we all look a bit different, we all come from different families, we all live<br />
in different places, and we think different thoughts.”<br />
• Show the children the two eggs: one brown, one white. “Are the eggs different to<br />
each other or the same?” (The eggs are both the same as they are both round, both<br />
the same size, both have hard shells, but they are also different because one is<br />
brown and one is white)<br />
• Crack the eggs into a bowl and show that the two eggs are the same on the inside<br />
even though they looked different on the outside.<br />
1<br />
WE ARE ALL<br />
DIFFERENT YET<br />
ALL THE SAME
• “How are the eggs similar to people?” (The eggs are similar to people because<br />
people may look a bit different on the outside but they are very similar on the inside)<br />
• “No matter how someone looks on the outside; whether they have light skin or<br />
dark skin, long hair or short hair, whether they have a disability or not, we are all<br />
very similar on the inside; we all have feelings, hopes, fears, happy days, sad<br />
days, dreams and goals. We should always remember how similar we all are on<br />
the inside, like the eggs, to help us to be kind and considerate to people around us.”<br />
End the activity by summarizing what the children have learned.<br />
Note: If there are children in the group who have had any amputations, act sensitively when<br />
talking about this body part, or avoid talking about it if it will make the child feel awkward<br />
or embarrassed.<br />
GROUP LESSONS AND ACTIVITIES For Children Aged 6-12 Years<br />
87
GROUP LESSONS AND ACTIVITIES For Children Aged 6-12 Years<br />
88<br />
Duration: 20 - 25 minutes<br />
2<br />
LIVING AND<br />
NON-LIVING<br />
THINGS<br />
Aim: To learn about the difference between living and non-living things<br />
Materials needed: None<br />
Instructions:<br />
Ask the children to sit in a circle. Lead a discussion using the following questions and answers:<br />
• “What does the word ‘living’ mean?” (Things that are living are alive and grow)<br />
• “What living things can you see around you?” (People, animals, trees, fl owers)<br />
• “What non-living things (things that are not alive and don’t grow) can you see<br />
around you?” (Electric poles, rocks, houses, boats, books)<br />
Ask the children to go looking for living and non-living<br />
things to bring back to the circle. When the children<br />
bring these things, they have to decide whether they<br />
are living or non-living. They should place all the living<br />
things and all the non-living things in two separate piles.<br />
Ask the children to look through the two piles as a group<br />
and decide together whether the things have been<br />
placed in the correct pile or not. If it is decided that<br />
something has been put in the wrong pile, the children<br />
should move it to the correct pile.<br />
End the activity by summarizing what the children have learned.<br />
Note: Be careful about what<br />
the children collect. Tell them<br />
not to bring back an animal or<br />
anything unhygienic. Some of<br />
the things should be disposed<br />
of in a bin, or put back where<br />
they came from.
Duration: 15 - 20 minutes<br />
Aim: To learn about the difference between heavy and light<br />
Materials needed: Weighing scales (if available)<br />
Instructions:<br />
Ask the children to go and collect some ordinary everyday objects<br />
from their surroundings (for example, feathers, shoes, pens, pots,<br />
kramas, hats, food etc).<br />
Ask the children to sit in a circle and put the objects they have<br />
collected in front of you. Hold up any two of the objects and ask<br />
the children, “Which one do you think is heavier and which one<br />
do you think is lighter?” When a child gives an answer give<br />
him/her both objects, one in each hand, in order to feel which<br />
one is heavier and which one is lighter and to tell the group what<br />
he/she thinks.<br />
If there are weighing scales available, show the children how they<br />
work, and confi rm which object is heavier and which is lighter.<br />
Repeat this activity with different objects, giving different children<br />
the opportunity to answer and hold the objects.<br />
End the activity by summarizing what the children have learned.<br />
3<br />
HEAVY AND<br />
LIGHT<br />
GROUP LESSONS AND ACTIVITIES For Children Aged 6-12 Years<br />
89
GROUP LESSONS AND ACTIVITIES For Children Aged 6-12 Years<br />
90<br />
Duration: 20 -25 minutes<br />
4<br />
STORY TIME<br />
Aim: To develop listening, concentration, language and vocabulary skills<br />
Materials needed: 2 or 3 storybooks<br />
Instructions:<br />
Ask the children to sit in a circle. Choose one or two of the following activities depending<br />
on the age and ability of the children.<br />
1 Describing the story<br />
Choose a book with only pictures and no text. Show the children the book, page by<br />
page; the children describe what they see and what they think is happening in<br />
each picture.<br />
2 Remembering the story<br />
Choose a book with a lot of pictures and a short and simple story. Read the children<br />
the story, showing them the pictures at the same time. Read the story a second time,<br />
but pause after each page and ask the children, “What’s going to happen next?”<br />
The children tell you what is going to happen next in their own words.<br />
3 Retelling the story<br />
Choose a book with a fun and interesting story. Read the children the story.<br />
When you have fi nished, the children re-tell the story in their own words.
Duration: 20 - 25 minutes<br />
Aim: To learn about danger and how to avoid dangerous things or take care around them<br />
Materials needed: None<br />
Instructions:<br />
Ask the children to sit in a circle. Lead a discussion using the following questions and answers:<br />
• "What do the words 'danger' and 'dangerous' mean?" (Something that can hurt<br />
you, something to avoid)<br />
• “Can you name some dangerous things?” (Trucks, cars, motorbikes, fi res, electricity<br />
cables, broken glass, chemicals, farming equipment, snakes, landmines, lakes/rivers)<br />
• “What dangerous things can you see around you” (Children point to any dangerous<br />
things they can see)<br />
• “What can we do so that these dangerous things don't hurt us?" (Not play near<br />
roads, stay away from open fi res, always wear shoes outside, be careful where you<br />
walk and what you touch)<br />
Explain to the children that next you will do some miming (acting without talking) to show<br />
a dangerous thing, and they must try to guess what you are miming. Mime one thing, for<br />
example, a landmine exploding, a snake slithering along, a motorbike going fast, and<br />
ask the children to guess the danger. When a child has guessed correctly, ask the<br />
children to tell you why that thing is dangerous.<br />
After discussion, ask the child who guessed the mime correctly if they would like to mime<br />
something dangerous for the group, continue in this way until everyone who wants to, has<br />
had a turn.<br />
End the activity by summarizing what the children have learned.<br />
5<br />
BEING CAREFUL<br />
GROUP LESSONS AND ACTIVITIES For Children Aged 6-12 Years<br />
91
GROUP LESSONS AND ACTIVITIES For Children Aged 6-12 Years<br />
92<br />
Duration: 20 - 25 minutes<br />
6<br />
CLEAN<br />
HANDS,<br />
HEALTHY BODY<br />
Aim: To understand the importance of clean hands and learn how to wash hands<br />
properly<br />
Materials needed: 3-4 sheets of white paper scrunched into a ball; waterbased<br />
paints (at least 4 colors); petroleum jelly (Vaseline); 2 buckets of clean water;<br />
1 bar of soap; 1 clean krama or towel<br />
Instructions:<br />
Ask the children to sit in a circle. Lead a discussion using the following questions and answers:<br />
• “What are clean hands?”<br />
(Hands without dirt or germs on them, which are safe for eating with)<br />
• “How can we get our hands clean?”<br />
(By washing with soap and clean water)<br />
• “What are dirty hands?”<br />
(Hands which have touched many things such as the ground, animals and play things,<br />
and have dirt and germs on them)<br />
• “Why is it bad to have dirty hands?”<br />
(When our hands are dirty and have germs on them, the germs can make us sick)
• “What is one way of knowing if our hands are clean or dirty?”<br />
(By looking at them)<br />
• “Do your hands look clean to you?”<br />
(Some will say yes and some will say no)<br />
• “Sometimes we can know if our hands are clean or dirty by looking at them,<br />
but sometimes, the dirt is so small that we cannot see it, so our hands look clean<br />
but actually they have dirt and germs on them.”<br />
Explain that you will do an activity that will help the children to understand how their<br />
hands can be dirty even when they look clean.<br />
Ask the children to stand up in the circle and hold their hands out, palms facing upwards.<br />
Go around the circle putting petroleum jelly (Vaseline) on their hands and then adding<br />
a different colored paint onto one of each child’s hands (for example, put red paint on<br />
one child’s hand, blue paint on another child’s hand, green paint on another etc). Ask each<br />
child to rub their hands together so that the color is on both of their hands.<br />
Throw the paper ball to one of the children and ask them to throw it to another child, who<br />
should catch it and throw it to another child, until every child has caught and thrown the<br />
ball (if the group is small go around twice).<br />
Ask the last child to catch the ball, to show it to the whole group. Ask the group what they<br />
see (many different colors on the ball). Explain that the paint is like dirt, but unlike dirt we<br />
can see how much it spreads and travels around. Dirt spreads and travels around just as<br />
much but we can’t always see it.<br />
Lead another discussion using the following questions and answers:<br />
• “Can you imagine how much dirt a ball must have on it after a game between lots<br />
of people or how many germs a cup will have on it if it is shared around and many<br />
people drink out of it?”<br />
• “Can you think of other examples of how dirt spreads?”<br />
(By sharing toothbrushes/combs/towels and not cleaning them, by touching dirty<br />
things and not washing our hands before touching ourselves or someone else etc)<br />
• “Our hands touch many things that are not clean, so we need to wash our hands<br />
often to stop ourselves from getting sick.”<br />
• “When should we wash our hands?”<br />
Whenever they are dirty; before and after eating; before and after touching babies<br />
and people who are old or sick; after coughing, sneezing or nose blowing; after going<br />
to the toilet; after touching garbage, animals or playing outside)<br />
GROUP LESSONS AND ACTIVITIES For Children Aged 6-12 Years<br />
93
GROUP LESSONS AND ACTIVITIES For Children Aged 6-12 Years<br />
94<br />
Use the buckets of water, soap, and clean krama or towel to show the children how to<br />
wash their hands correctly by following the fi ve simple steps (explain what you are doing<br />
at each step):<br />
1 WET hands<br />
2 LATHER hands with soap<br />
3 RUB hands together for 15 seconds (away from the water) – children can count<br />
slowly to 15, sing their favorite song or recite the Khmer alphabet<br />
4 RINSE hands with clean water<br />
5 DRY hands with a clean krama or towel<br />
When you have fi nished showing the children the fi ve steps, ask them to practice washing<br />
their hands in the same way. Help each child as they take their turn and praise and encourage<br />
them as they go. Remember to change the water in the two buckets, especially if it is a<br />
large group.<br />
End the activity by summarizing what the children have learned.<br />
Note: This activity can be done without paint. In this case, color the children’s hands with other<br />
things, such as pen ink, mangosteem skin, coal, ground dirt, or anything else that will show up<br />
and spread well.
1 2 3<br />
4<br />
5<br />
Duration: 15 - 20 minutes<br />
Aim: To develop counting skills and learn to read Khmer numbers<br />
7<br />
LEARNING<br />
NUMBERS<br />
Materials needed: Number cards from 1 – 10 written in Khmer; 1 sheet of<br />
fl ipchart paper with the Khmer numbers 1 – 10 written on it<br />
Instructions:<br />
Ask the children to sit in a circle. Choose one or two of the following activities depending<br />
on the age and ability of the children.<br />
1 Count out loud from 1 to 10, saying each number slowly and clearly and holding up<br />
the corresponding number card at the same time; the children repeat each number<br />
after you. When the children know the numbers and the cards well, you can make it<br />
more challenging by shuffl ing the cards and showing the cards in a different, random<br />
order. Don't say the numbers out loud, wait for the children to tell you.<br />
2 Shuffl e the number cards and give them out randomly to various children in the<br />
circle. As you count out loud slowly from 1 to 10 with the children, the child with<br />
the corresponding number card holds it up to show the others. After you have<br />
counted from 1 to 10, swap the cards around and start counting again so that all<br />
the children get the chance to hold a card up.<br />
GROUP LESSONS AND ACTIVITIES For Children Aged 6-12 Years<br />
95
GROUP LESSONS AND ACTIVITIES For Children Aged 6-12 Years<br />
96<br />
3 Display the fl ipchart paper. Give out the number cards randomly among the children.<br />
Count out loud from 1 to 10, saying each number slowly and clearly while pointing to<br />
the corresponding number on the fl ipchart paper; the child with the same number<br />
as the one you are pointing to stands up and shows his/her card to the rest of the<br />
group.<br />
Note:<br />
• Do not expect the children to be able to read numbers after only one session!<br />
• If available, you can use ready-made posters of Khmer numbers and laminate them, or just<br />
laminate the ones you have to make the number cards thick
Duration: 20 - 25 minutes<br />
Aim: To learn about the earth and the sun, and day and night<br />
Materials needed: 1 big ball; 1 small ball<br />
Instructions:<br />
Lead a discussion using the following questions and answers:<br />
THE EARTH<br />
• “What are we sitting on?” (The Earth)<br />
• “What is the Earth made of?” (Soil and rocks)<br />
• “Is the Earth solid?” (Yes, you can’t fall through the Earth)<br />
8<br />
EARTH AND<br />
SUN PLAY<br />
• “Can the Earth support us?” (Yes, we can pound the Earth with our fi sts, jump up and<br />
down on the Earth, push hard with our hands against the Earth. It is a strong Earth)<br />
• “What are some other things that we can do on the Earth?” (Spin around, roll on the<br />
ground, lie fl at on our back, run etc)<br />
• “Do you know that the Earth is round like a ball?” (Some will say yes and some will<br />
say no. Show them the small ball and pretend that this is the Earth).<br />
GROUP LESSONS AND ACTIVITIES For Children Aged 6-12 Years<br />
97
GROUP LESSONS AND ACTIVITIES For Children Aged 6-12 Years<br />
98<br />
THE SUN<br />
• “Look up in the sky, what do you see?” (The sky, the clouds, the Sun)<br />
• “Do you know what the Sun is?” (A huge ball of fi re) Show them the big ball and pretend<br />
that this is the Sun.<br />
• “Do you know what brings light to the Earth?” (the Sun) Hold up the earth and the Sun<br />
to show the Sun’s light shining on the earth.<br />
• “Do you know why it is dark at night?” (Because the earth is always moving and<br />
sometimes our side of the earth is facing away from the Sun, and so the Sun’s light is<br />
shining on the other side of the earth) Turn the earth around so that the side that was<br />
facing the Sun is now facing away from the Sun.<br />
Choose one child to be the earth and give him/her the small ball to hold, say “He/she<br />
is the Earth”. Hold the big ball in front of the child and say, “I am the Sun” (see picture<br />
below). Use the instructions below to explain the concept of day and night to the children:<br />
During the day, the earth is facing the Sun - Ask the child who is the Earth if they can<br />
see the Sun, when they say yes confi rm that then it is daytime.<br />
The Sun stays in one place while the Earth<br />
moves - Ask the child who is the Earth to slowly<br />
turn around in front of the Sun. Tell the children<br />
that the Sun looks like it is setting in the<br />
sky when the Earth turns away from it.<br />
During the night, the Earth is facing<br />
away from the Sun - Stop the child<br />
who is the Earth when his/her back is<br />
to the Sun. Ask the child if he/she can<br />
see the Sun now, when they say no<br />
confi rm that then it is nighttime.<br />
The Earth moves around like this constantly.<br />
When our side of the Earth is having nighttime,<br />
the other side of the Earth is having daytime. The<br />
Sun is still shining, but we can not see it - Ask the child who is the Sun to continue<br />
to slowly turn around in the same direction as before. As he/she starts to see the<br />
Sun again tell the children that the Sun looks like it is rising in the sky when the Earth<br />
turns back towards it.<br />
End the session by teaching the children to say, “When I can see the Sun, it is daytime.<br />
When I can’t see the Sun, it is night time!”
Duration: 20 - 25 minutes<br />
9<br />
NUMBER<br />
HIERARCHY<br />
Aim: To learn to break down a three-digit number into hundreds, tens and units<br />
Materials needed: 1 stick or piece of chalk (depending on whether the ground<br />
is dirt or concrete); 60 stones/pebbles/sticks (or anything that can be used as<br />
counters); at least 5 slips of paper with different three-digit numbers written on them<br />
Instructions:<br />
Divide the children into two teams and give each team 30 counters (stones/pebbles/sticks).<br />
On the ground in front of each team, draw a grid with three columns: hundreds, tens, and<br />
units (like the one below) using the stick or piece of chalk.<br />
HUNDREDS TENS UNITS<br />
Explain that the children can put a different number of counters in each column to make<br />
big numbers. Demonstrate how to do this (see example below) and allow the children to<br />
ask questions to help them to understand.<br />
GROUP LESSONS AND ACTIVITIES For Children Aged 6-12 Years<br />
99
GROUP LESSONS AND ACTIVITIES For Children Aged 6-12 Years<br />
100<br />
412<br />
HUNDREDS TENS UNITS<br />
**** *<br />
**<br />
Show one slip of paper with a three-digit number written on it to both teams. Each team<br />
must put down the right number of counters in each column in their grid to make that<br />
number. The fi rst team to fi nish wins a point if they are right. If they are wrong, the other<br />
team gets a chance to place their counters correctly and win a point.<br />
Repeat these steps with the other slips of paper and keep track of the score. At the end<br />
of the game (when there are no more slips of paper left), the team with the highest<br />
score wins.<br />
Note: Everyone in the team should get a chance to participate. They may not know hundreds,<br />
tens and units, but they probably all know how to count up to nine, so the older children can<br />
help the younger ones.
Duration: 15 - 20 minutes<br />
Aim: To learn about loving and caring behavior within a family or a community<br />
Materials needed: 1 doll<br />
Instructions:<br />
Lead a discussion using the following questions and answers (use the doll to act out what<br />
you are saying, encourage the children to use the doll to show what they mean too):<br />
• “Many people around you love you very much.<br />
Can you think of who these people are?”<br />
(Mother, father, sisters, brothers, grandparents, friends, teachers etc)<br />
• “Do you love them as well?” (Yes)<br />
10<br />
LOVING AND<br />
CARING FOR<br />
OTHERS<br />
• “What kinds of things do the people who love you do for you?”<br />
(Hug you, feed you, take care of you when you are sick, teach you new things etc)<br />
• “How do you show people that you love them?”<br />
(By behaving in a nice way, saying or doing nice things for them, hugging them, holding<br />
their hands etc)<br />
GROUP LESSONS AND ACTIVITIES For Children Aged 6-12 Years<br />
101
GROUP LESSONS AND ACTIVITIES For Children Aged 6-12 Years<br />
102<br />
• “What about pushing, hitting and hurting? Should you do that?"<br />
(No, of course not)<br />
“Should you do that to people you don’t like?”<br />
(No, you have to respect everyone’s body, even the people you don’t like, and even<br />
if you are angry with them)<br />
• “What does showing respect mean?"<br />
(Treating people nicely and valuing them)<br />
• “What kinds of things do you say to people you love?”<br />
(Nice and pleasant things)<br />
“What about the people you don’t like, should you say bad things to them?”<br />
(No, you have to respect everybody’s feelings, even those of the people you don’t<br />
like, even if you are angry with them)<br />
End the activity by summarizing what the children have learnt.
Duration: 20 - 25 minutes<br />
Aim: Learning how to deal with confl ict in a positive and peaceful manner<br />
Materials needed: None<br />
Instructions:<br />
Ask the children to sit in a circle and think about a confl ict that happened recently (it can be<br />
a confl ict that occurred amongst them, at home, or in the street). If they cannot think of one,<br />
ask them to make up an imaginary confl ict, or make one up for them.<br />
Take one of the suggested examples of a recent confl ict and lead a discussion using the<br />
following questions:<br />
• “Who was involved in the confl ict?”<br />
• “What was the confl ict about?”<br />
• “How was it solved?”<br />
• “Do you think that was the best solution?”<br />
• “Can you think of another solution?”<br />
Emphasize ways of dealing with confl icts that are positive and peaceful, for example:<br />
listening to what the other person has to say without interrupting; trying to see things from<br />
the other person’s point of view; if no solution can be found, asking a third person to mediate.<br />
End the activity by summarizing what the children have learnt.<br />
11<br />
CONFLICT<br />
RESOLUTION<br />
Note: Be careful not to intrude in the lives of the children. If it is better for the sake of the community,<br />
ask the children to use ‘pretend names’ instead of real ones when reporting a confl ict.<br />
GROUP LESSONS AND ACTIVITIES For Children Aged 6-12 Years<br />
103
GROUP LESSONS AND ACTIVITIES For Children Aged 6-12 Years<br />
104<br />
Duration: 20 - 25 minutes<br />
Aim: To learn about health and hygiene<br />
Materials needed: 1 plastic doll (with hair and wearing clothes that can be<br />
taken off and put back on); 2 buckets of clean water; 1 bar of soap; 1 clean krama or<br />
towel; 1 toothbrush; 1 tube of toothpaste; shampoo (if available); hairbrush<br />
Instructions:<br />
Ask the children to sit in a circle. Lead a discussion using the following questions and answers:<br />
General cleanliness<br />
12<br />
TAKE GOOD<br />
CARE OF YOUR<br />
BODY<br />
• “What should you do in order to keep clean?”<br />
(Wash your face and body with clean water and soap every day; change and wash<br />
your clothes daily; brush your teeth at least once a day; and wash and brush your<br />
hair regularly)<br />
• “What happens if you don’t wash your face and body with clean water and soap?”<br />
(You will be dirty and you may become ill)<br />
• “What happens if you wash yourself but don’t change and wash your clothes?”<br />
(You will become dirty again right away and your clothes will get dirty and smelly)
• “What happens if you don’t brush your teeth?”<br />
(They will rot and go black and hurt very much. The dentist will have to pull your<br />
rotten teeth out, and when you’re old, you might not have enough teeth to chew with)<br />
• “What happens if you don’t wash and brush your hair?”<br />
(It will be dirty, and tiny bugs called lice might live in it and make your head itchy)<br />
Handwashing<br />
• “When should you wash your hands?”<br />
Whenever they are dirty; before and after eating; before and after touching babies<br />
and people who are old or sick; after coughing, sneezing or nose blowing; after going<br />
to the toilet; after touching garbage, animals or playing outside)<br />
• “What happens if you don’t wash your hands before eating?”<br />
(Germs from your hands may get into your mouth and make you ill)<br />
• “What happens if you don’t wash your hands before holding a baby or hugging<br />
an old or sick person?”<br />
(Germs from your hands may make the baby or other person ill)<br />
• “What happens if you don’t wash your hands after sneezing or going to the toilet?”<br />
(Germs from your sneeze or from your poo may get on to your hands and then get into<br />
your mouth or eyes when you touch your face and make you ill)<br />
• What are germs?”<br />
(Tiny living things that you cannot see, that live in many things such as water, food, in<br />
people or animal’s hair/fur, coughs, sneezes, poo etc. Germs can get into your body<br />
if you touch them and attack your body from the inside, and make you ill).<br />
Demonstrate general cleanliness to the children using a plastic doll:<br />
Face and body<br />
• “This is how you wash your face and body. You pour clean water on your body,<br />
and you wash yourself with soap, starting with the cleanest parts (the face), and<br />
fi nishing with the dirtiest parts (the feet). Then you rinse well with<br />
clean water and dry yourself with a clean krama or towel.”<br />
• “What happens if you rinse with the same water you used<br />
before?” (You will pour all the dirt that came off your body,<br />
back onto yourself)<br />
GROUP LESSONS AND ACTIVITIES For Children Aged 6-12 Years<br />
105
GROUP LESSONS AND ACTIVITIES For Children Aged 6-12 Years<br />
106<br />
• “What happens if you dry yourself with a dirty krama or towel?” The dirt from<br />
the krama or towel will make your body dirty<br />
Clothes<br />
• “This is how you change and wash your clothes. You take off<br />
the dirty clothes and wash them in clean water with soap. Then<br />
you rinse the clothes well with clean water and hang them<br />
out in the hot sun to dry.”<br />
Teeth<br />
Hair<br />
• “This is how you brush your teeth. You pour a little bit of clean<br />
water on your toothbrush and put toothpaste on top. You brush<br />
all the teeth, top and bottom, inside and out side, vertically (up<br />
and down, not side-to-side) for a few minutes. Then you rinse<br />
your mouth with clean water and spit it out (don't swallow it<br />
as toothpaste is not good for your stomach) and rinse your<br />
toothbrush with clean water before putting it away"<br />
• “This is how you wash and brush your hair. You pour clean<br />
water all over your hair and you rub it with shampoo<br />
or soap until all the hair is covered in bubbles. Then you<br />
rinse your hair well with clean water and dry your hair<br />
with a clean krama or towel before brushing it."<br />
• “What happens if you rinse with the same water you<br />
used before? (You will pour all the dirt that came out of<br />
you hair, back onto it).<br />
• “What happens if you dry your hair with a dirty krama or towel?"<br />
(The dirt from the krama or towel will get onto your hair).<br />
End the activity by asking two or three children to summarize what they have learned.
Duration: 20 - 25 minutes<br />
13<br />
MY FAVORITE<br />
ANIMAL<br />
Aim: To learn about different animals and develop self-awareness and self-confi dence<br />
Materials needed: Sheets of paper (1 per child); colored crayons or pencils<br />
Instructions:<br />
Ask the children to sit in a circle and put the colored crayons or<br />
pencils in the middle of the circle.<br />
Give each child a sheet of paper and ask them to draw their<br />
favorite animal and color it in.<br />
When the children have fi nished, go around the circle asking them<br />
what they like about their animals. For example, “I like the lion because he is big and<br />
strong”, “I like the rabbit because he is soft and cute”. Congratulate the children on<br />
their work.<br />
Explain that all animals are special and have likeable things<br />
about them. Say that all people are also special, and have<br />
likeable things about them.<br />
Ask the children to think of one thing they like about themselves<br />
and one thing they like about one of their friends or family<br />
members. Give the children the opportunity to share their ideas<br />
with the group.<br />
GROUP LESSONS AND ACTIVITIES For Children Aged 6-12 Years<br />
107
GROUP LESSONS AND ACTIVITIES For Children Aged 6-12 Years<br />
108<br />
Duration: 15 - 20 minutes<br />
14<br />
WHERE DO<br />
ANIMALS LIVE?<br />
Aim: To learn about the different animals, where they live, and how they move<br />
Materials needed: None<br />
Instructions:<br />
Ask the children to sit in a circle. Choose one or two of the following activities depending<br />
on the age and ability of the children.<br />
1 Say the word “land”; the children say all the<br />
animals they can think of that live on land.<br />
After each animal is suggested ask<br />
“Do they walk, swim or fl y?” Repeat<br />
these questions for ‘water’ and ‘air’<br />
animals.<br />
2 Name an animal and ask the<br />
children where it lives (on the<br />
land/in the water/in the air), and<br />
how it moves about (walking/<br />
swimming/fl ying).
3 Divide the children into two groups. One group says an animal, and the other says<br />
where it lives and how it moves about. For example, group one says “dog”, and<br />
group two says “It lives on land” and “It moves by walking”. Group two then<br />
calls out an animal and group one gives the answers etc. Alternate the calling out of<br />
animals and answering between the two groups.<br />
4 Divide the children into two groups. When you say “water” or “land” or “air” -<br />
each group takes it in turns to call out an animal they can think of that lives in the<br />
water, on land or in the air. For example, when you say “water”, group one says<br />
“fi sh” while group two says “turtles”. Then group one says “frogs” while group two<br />
says “dolphins” and so on.<br />
Note: Make the last two activities competitive by giving points to the teams, one for each<br />
correct answer.<br />
GROUP LESSONS AND ACTIVITIES For Children Aged 6-12 Years<br />
109
GROUP LESSONS AND ACTIVITIES For Children Aged 6-12 Years<br />
110<br />
Duration: 15 - 20 minutes<br />
Aim: To learn about eating healthily<br />
Materials needed: None<br />
Instructions:<br />
15<br />
EATING<br />
HEALTHILY<br />
Ask the children to sit in a circle. Lead a discussion using the following questions and answers:<br />
• “Why do we eat food?”<br />
(To help us grow big and strong, to give us energy to do things, and to protect us<br />
from illness) Teach the children to do an action for each answer, for example, pump<br />
you muscles to show growing big and strong, run on the spot to show having energy<br />
to do things, and cross your arms in front of your chest to show being protected from<br />
illness.<br />
• “What are some foods we eat?”<br />
(Rice, noodles, chicken, beef, tomatoes, lettuce, bananas, oranges, cakes, candy etc)<br />
• “Do you know which foods help us to grow big and strong?”<br />
(Meat, fi sh, eggs, beans)<br />
• “Do you know which foods give us energy to do things?”<br />
(Rice, noodles, bread, sugar)
• “Do you know which foods protect us from illness?”<br />
(Fruits and vegetables, especially mango, pineapple, bananas, lemons, tomato,<br />
avocado, eggplant, carrots, onions, capsicum, and green leafy vegetables like<br />
spinach)<br />
• “We should eat all of these different kinds of foods and have a varied and colorful<br />
diet; it is not good to eat just one or two types of foods because this won’t give<br />
our bodies everything they need to grow, have energy and be protected from<br />
illness.”<br />
• “What will happen to our bodies if we don’t eat all of these different kinds of foods? ”<br />
(We will not grow big and strong, we will feel weak and tired and not have energy to<br />
go to school and play, we will get sick and feel ill)<br />
• “Which foods are not good for our bodies?”<br />
(Cakes, candy, fi zzy canned drinks etc – if we eat/drink too many of these our teeth<br />
will rot and go black and hurt very much. The dentist will have to pull the rotten teeth<br />
out, and when we are old we won’t have enough teeth to chew with)<br />
• “What other things aren’t good for our bodies?”<br />
(Cigarettes, alcohol, addictive drugs, motorbike/car fumes, chemicals, unclean water etc)<br />
End the activity by playing a short game.<br />
Explain that you will call out a food/drink<br />
or thing we put in/near our bodies and Some examples:<br />
the children must shout out “Good”<br />
• Candy - Bad • Mango - Good<br />
or “Bad” depending on whether<br />
the thing is good for our bodies or • Rice - Good • Chemicals - Bad<br />
bad for our bodies. For example, • Cigarettes - Bad • Soy bean milk - Good<br />
if you say, “Clean water”, all the • Bananas - Good • Tomatoes - Good<br />
children should shout out, “Good”,<br />
but if you say, “Candy”, all the children<br />
should shout out, “Bad”.<br />
GROUP LESSONS AND ACTIVITIES For Children Aged 6-12 Years<br />
111
GROUP LESSONS AND ACTIVITIES For Children Aged 6-12 Years<br />
112<br />
Duration: 20 - 25 minutes<br />
Aim: To learn about thunder, lightning, and safety during thunderstorms<br />
Materials needed: 1 sheet of cardboard cut into the shape of a lightning streak;<br />
1 pair of scissors; 1 spoon; 1 pot or pan; 1 chair<br />
Instructions:<br />
Ask the children to sit in a circle.<br />
16<br />
THUNDER RUN<br />
Explain to them what a thunderstorm is:<br />
“In a storm cloud, tiny droplets of water bump against each other and make electricity.<br />
The electricity makes a huge spark. This is called lightning. The lightning heats the air<br />
so fast that the hot air rushes out of the cloud with a bang. This bang is called thunder.<br />
When the air rushes out of a broken balloon, it makes a loud noise, like thunder.”<br />
Talk about safety during a thunderstorm:<br />
“Where is the safest place to be in a thunderstorm? (Tall things like trees and metal<br />
poles attract lightning, and so does water. So during a thunderstorm, stay away from<br />
water, trees, metal poles and other tall things).”
Role-play the story of thunder and lightning:<br />
Choose one child to be thunder and give him/her a spoon and a pan. Choose another<br />
child to be lightning, give him/her a cardboard lightning streak and ask him/her to stand<br />
on something that is slightly higher than the ground, such as a chair. Tell the other children<br />
that they are tiny droplets of water that make up a storm cloud so they must stand very<br />
close together.<br />
Explain that to start the role-play the droplets of water must bump into each other to<br />
make electricity. Then when you say, “lightning”, the child who is lightning has to jump<br />
from the platform waving his/her lightning streak, and when you say “thunder”, the<br />
child who is thunder must run forward banging the spoon against the pan. When the<br />
thunder and lightning starts, all the other children must run to a safe place - away from<br />
water, trees, metal poles and other tall things.<br />
If there is time to do the role-play again, try to give different children the opportunity to<br />
be the thunder and lightning.<br />
End the activity by summarizing what the children have learned.<br />
GROUP LESSONS AND ACTIVITIES For Children Aged 6-12 Years<br />
113
GROUP LESSONS AND ACTIVITIES For Children Aged 6-12 Years<br />
114<br />
Duration: 20 - 25 minutes<br />
Aim: To learn that littering is bad for our community<br />
Materials needed: None<br />
Instructions:<br />
Ask the children to sit in a circle. Lead a discussion using the following questions and answers:<br />
• “What is litter?” (Things that must be thrown away because they are not of use any<br />
more)<br />
• “What litter can you see around you?” (Plastic; paper; cardboard; cans; old batteries;<br />
fruit and vegetable peels; coconut shells; leftover food; leaves, sticks and branches<br />
that have fallen from the trees)<br />
• “Do you think litter looks nice in your village?” (No)<br />
17<br />
LITTER<br />
BELONGS IN<br />
TRASHCANS<br />
• “Do you think the village would look nicer if there was no litter lying around?”<br />
(Yes)<br />
• “Do you think the river is a good place to put your litter?” (No. Animals living in<br />
the sea will become sick and die from it, and people will not be able to wash or swim<br />
in the river if it’s too dirty. If they do, they will become sick as well)
• “What can we do to avoid getting sick?” (Avoid touching<br />
litter or dirty things, but if we do, always wash our hands<br />
afterwards; always put litter in a special place or get<br />
rid of it completely by burning it to make the village<br />
cleaner and stop ourselves and others from getting sick)<br />
• “Do you know that some litter is natural (made of living<br />
things), and some is not natural (made of non-living<br />
things)?” (Some will say yes and some will say no)<br />
• “What natural litter can you see around you?” (fruit<br />
and vegetable peels; coconut shells; leftover food;<br />
leaves, sticks and branches)<br />
• “What litter can you see around you that is not<br />
natural?” (plastic bags and bottles; paper; cardboard; cans; old batteries)<br />
• “The natural litter, like food and plants, will decompose. This means that it will<br />
break apart and become part of the soil if buried or burned. Some natural litter,<br />
like food scraps, can also be given to the animals to eat.”<br />
• “The litter that is not natural, like plastic and batteries, will not decompose in the<br />
soil, and cannot be eaten by animals (animals may become sick and die). So<br />
we have to dispose of the non-natural litter in a special place, where it will be<br />
collected.”<br />
• “In each house, there should be a special place to store litter, like a bag , box or<br />
container. When the place is full of litter, the litter should be taken to a special place<br />
in the village for appropriate disposal”.<br />
Note: If the village doesn’t have a special place for non-natural litter, encourage the<br />
children to think of where one could be and discuss this with their parents<br />
• “What can we say to people to prevent littering in our community?” (We can<br />
tell everyone to put their litter in a special place like we do and not throw it on the<br />
ground or in the rivers)<br />
End the activity by summarizing what the children have learned.<br />
GROUP LESSONS AND ACTIVITIES For Children Aged 6-12 Years<br />
115
GROUP LESSONS AND ACTIVITIES For Children Aged 6-12 Years<br />
116<br />
Duration: 20 - 25 minutes<br />
Aim: To learn what a shadow is and how shadows are made<br />
Materials needed: Sticks or pieces of chalks (depending on whether the ground<br />
is dirt or concrete - 1 per pair)<br />
Instructions:<br />
Ask the children to sit in a circle. Lead a discussion using the following questions and answers:<br />
• “Do you know what shadows are and how they are made?” (Shadows are<br />
dark shapes formed when light is blocked by an object. The shadow takes the form<br />
of the object that blocked the light)<br />
• “Are shadows the exact same shape and size as the object that blocked the light?”<br />
(No, shadows may be shorter, skinnier, taller, or fatter than the object that<br />
blocked the light)<br />
• “What can we tell by looking at shadows?” (We can tell what time of day it is<br />
because the length of the shadows are different depending on how high the Sun is in<br />
the sky)<br />
• “Without light, would we have shadows?” (No)<br />
18<br />
SHADOWS<br />
• “Where should we stand if we want to block light with our bodies and see our<br />
shadows?” (In the light - the sunlight or light from a bulb or candle)
Ask the children to observe their shadows as they move around in the sunlight. Let<br />
them describe their shadows. Do they look like them? Are they short or long, skinny<br />
or fat? Where is the light coming from? (The sun)<br />
Ask the children to fi nd a partner and in their pairs take it in turns to draw around each<br />
other’s shadows using the sticks or chalks. One child must stand still in a position which<br />
gives a nice shadow and the other child must draw around the outline of their partner's<br />
shadow with the chalk or the end of a stick.<br />
At the end of this activity, the children can admire all the shadow drawings and show<br />
them to the younger group.<br />
Note: If there is enough space outside, the children can play Shadow Tag – A game where<br />
one child is chosen to be ‘it’ and the rest of the children run around in the sunlight where they<br />
can see their shadows, trying to avoid the child who is ‘it’. The child who is ‘it’ tags a child by<br />
stepping on that child’s shadow. Then, the child whose shadow was stepped on becomes ‘it’<br />
and they have to tag someone else.<br />
GROUP LESSONS AND ACTIVITIES For Children Aged 6-12 Years<br />
117
GROUP LESSONS AND ACTIVITIES For Children Aged 6-12 Years<br />
118<br />
Duration: 25 - 30 minutes<br />
Aim: To learn the importance of keeping a promise<br />
Materials needed: Paper plates (1 per child - if paper plates are not available<br />
see Note on next page); colored crayons or pencils; bits of paper or other decorations<br />
(candy wrappers, straws, newspaper etc); scissors; glue; stapler or sticky tape; hole<br />
puncher (if available); ball of wool or string<br />
Instructions:<br />
Lead a discussion using the following questions and answers:<br />
19<br />
KEEPING<br />
MY PROMISE<br />
• “Has anyone made a promise to you that they didn’t keep? How did you feel?”<br />
Encourage children to share some of their feelings and experiences.<br />
• “We all feel disappointed and upset if someone doesn’t keep their promise to<br />
us, don’t we? What about you, have you ever made a promise to someone that you<br />
didn’t keep?”<br />
Encourage children to share some of their feelings and experiences.<br />
• “We need to be careful about what promises we make to other people and mean<br />
what we say, because when we break our promises, we can hurt people's feelings.<br />
So what should you do when you break a promise?”<br />
Encourage answers from children.<br />
• “When we break a promise to someone, we need to let that person know that we<br />
are sorry and try not to break a promise again.”
• “We’re now going to make some promise reminders –<br />
something that you can see everyday to remind you<br />
about a promise.”<br />
Ask the children to sit in a circle and put the colored<br />
crayons or pencils, bits of paper or other decorations,<br />
scissors, glue, stapler or sticky tape in the middle<br />
of the circle. Give each child a paper plate.<br />
Ask the children to think about a promise that they<br />
have made or would like to make. This promise can be<br />
a promise to themselves or to someone else, for example:<br />
"I promise to be nice to my brother/sister"; "I promise to do my<br />
homework/chores everyday"; "I promise to brush my teeth everyday"etc.<br />
Once they have thought about their promises, help the children to write these on their<br />
plate and ask them to decorate their plate using the colored crayons/pencils and bits of<br />
paper or other decorations. The children can write promises and decorate both sides of<br />
the plate if they like.<br />
If a hole puncher is available, show the children how to punch a hole on the bottom of their<br />
plate and tie a piece of string through the hole like the string on a balloon. If you don't<br />
have a hole puncher help the children to cut a very small hole with scissors.<br />
When the children have fi nished give them the opportunity to show their promise plates to<br />
the group if they want to. Congratulate the children on their work and encourage them to<br />
take their plates home and hang them somewhere where they will see them everyday.<br />
Note: Circles of paper can also be used instead of paper plates. Cut out circles the size of<br />
plates and give each child 2 circles. Once the circles have been decorated by the children,<br />
ask them to staple the 2 circles together around the edge, leaving a small gap at the top.<br />
Scrunch up some scrap paper and insert these into the stapled circles (like stuffi ng a pillow).<br />
Once done, staple shut the small gap at the top and attach a piece of string to their promise<br />
"plate".<br />
GROUP LESSONS AND ACTIVITIES For Children Aged 6-12 Years<br />
119
GROUP LESSONS AND ACTIVITIES For Children Aged 6-12 Years<br />
120<br />
Duration: 20 - 25 minutes<br />
Aim: To develop creative skills<br />
20<br />
DIFFERENT<br />
WAYS OF<br />
DRAWING<br />
Materials needed: Colored crayons or pencils; sheets of paper (at least 1 per child)<br />
Instructions:<br />
Ask the children to sit in a circle. Choose one or two of the following<br />
activities depending on the age and ability of the children.<br />
1 Like and dislike<br />
Each child draws something that they like and<br />
something that they dislike.<br />
2 Blind drawing<br />
In pairs each child must draw something<br />
behind their back, without looking at<br />
their sheet of paper. When they are<br />
fi nished, they show their partner their<br />
drawing and their partner must guess<br />
what they were trying to draw.
3 Group drawing<br />
Divide the children into small groups and whisper to each group the name of something<br />
specifi c to draw (for example, a car, a motorbike, a cat, a house, a palm tree, the<br />
Sun etc). The fi rst child in each group draws one line only, the next child draws one<br />
more line, the next child draws one more line, and so on until the group considers<br />
their drawing fi nished. Then, each group shows their drawing to the other groups,<br />
who try to guess what it is.<br />
4 Guess what?<br />
Divide the children into small groups and ask each group to choose one child to be<br />
the illustrator. Ask all the illustrators to come close to you and whisper to them the<br />
name of something specifi c to draw (for example, a car, a motorbike, a cat, a house,<br />
a palm tree, the Sun etc). The illustrators must go back to their groups and begin<br />
drawing the thing they have been told while their group tries to guess what<br />
they are drawing by watching the picture. The fi rst group to guess correctly wins.<br />
Repeat this game to give different children the chance to be the illustrator.<br />
Note: The last activity can also be played all together without splitting into groups. In this case,<br />
the child who guesses right becomes the illustrator.<br />
GROUP LESSONS AND ACTIVITIES For Children Aged 6-12 Years<br />
121
GROUP LESSONS AND ACTIVITIES For Children Aged 6-12 Years<br />
122<br />
Duration: 20 - 25 minutes<br />
Aim: To develop creative skills and encourage children to refl ect on their past and<br />
think about what they want for their future<br />
Materials needed: Sheets of A4 paper (1 per child); colored crayons or pencils<br />
Instructions:<br />
21<br />
MY STORY<br />
Ask the children to sit in a circle and put the colored crayons or pencils in the middle of<br />
the circle.<br />
Give each child a sheet of paper and show them how to fold it width-ways into three equal<br />
sections (see diagram below).<br />
Ask the children to draw what their life was like in the past<br />
(in the fi rst section), what their life is like now (in the middle<br />
section), and what they would like their life to be like in the future<br />
(in the last section).<br />
When the children have fi nished give them the opportunity to show<br />
their pictures to the group if they want to. Offer a lot of praise<br />
and encouragement and be sensitive to what the child is sharing as<br />
they may have some painful memories. Congratulate the children<br />
on their work.
Duration: 20 - 25 minutes<br />
Aim: To develop listening and role-play skills<br />
Materials needed: None<br />
Instructions:<br />
22<br />
SOKHA’S<br />
ANIMALS<br />
Divide the children into fi ve groups and give each group one of the following names:<br />
frog, chicken, duck, pig, cow.<br />
Ask the children to practice acting out their group’s animal, by moving in the right way<br />
and making the right noises, for example, frogs jump up and down and go ‘ribbit ribbit’<br />
and ducks waddle from side to side, fl ap their wings and go ‘quack quack’.<br />
Explain to the children that you will read them a story and that all of their animals will<br />
be mentioned so they must listen carefully and be ready to act out their group’s animal<br />
when they hear its name. When they hear the word ‘animal’ all the groups must act out<br />
their animal at the same time.<br />
Read the following story and pause briefl y after mentioning an animal name or the<br />
word ‘animal’ to give the different groups time to act it out.<br />
GROUP LESSONS AND ACTIVITIES For Children Aged 6-12 Years<br />
123
GROUP LESSONS AND ACTIVITIES For Children Aged 6-12 Years<br />
124<br />
Example Story:<br />
There once was a woman called Sokha who really loved animals. She loved the birds in<br />
the sky, the mammals on the land, the fi sh in the sea, and she even loved the tiny tiny<br />
insects. Sokha already had a pet frog and two chickens but she wanted to buy some<br />
ducks. After she had saved enough money selling vegetables in the market, she was<br />
able to buy three ducks. Then, after saving some more money she bought a little pig.<br />
As the pig grew up, Sokha fed it so well that it got very big and fat. The pig got so<br />
big it could no longer fi t in the little wooden shelter Sokha had built for it. Sokha<br />
decided that she would have to sell the pig because she didn’t have enough space for it. So<br />
one day Sokha, her pet frog, and her big pig went to the market. At the market there were<br />
all kinds of animals for sale, such as, pigs, goats, cows, and chickens. Because Sokha’s pig<br />
was so big and fat she sold it for a lot of money and was able to buy a small cow.<br />
Sokha’s pet frog really liked the new cow, and so did her chickens and ducks, in fact<br />
all Sokha’s animals got on so well that they lived together like one big family - even<br />
though they all looked so different! Whenever people went past Sokha’s house they<br />
were amazed to see a little frog relaxing on the back of a cow; a cow helping a<br />
chicken to clean its golden feathers; and a chicken sleeping curled up next to a duck.<br />
Sokha was very happy with her new animal family and said to herself, “This is just<br />
perfect, now all I need are a few dogs…”.<br />
Note: Try making the story as lively as possible. You can also make up your own story, using<br />
different animal names often and repeating some of them several times.
Duration: 20 - 25 minutes<br />
Aim: To learn about primary colors and how to mix paint<br />
Materials needed: Paint (blue, red and yellow color); paintbrushes (1 per pair);<br />
cups of clean water (2 per group); sheets of thick paper (2 per child)<br />
Instructions:<br />
Ask the children to sit in a circle. Lead a discussion using the following questions and answers:<br />
• “Can you tell me the names of some different colors?” (Red, green, blue, yellow,<br />
orange, brown, purple, gold, silver, black, pink etc)<br />
• “Do you know that most colors can be made by mixing together other colors?”<br />
(Some will say yes and some will say no) “For example, if I mix blue and<br />
yellow together it makes green, and if I mix blue and red together<br />
it makes purple.”<br />
• “Do you know that there are three special colors that cannot<br />
be made by mixing together other colors? These are called<br />
primary colors. Do you know what the three primary colors<br />
are?” (Blue, red and yellow)<br />
• Can you see anything around you that is blue, red or yellow?<br />
(Children point to blue, red or yellow things they can see)<br />
23<br />
PAINTING<br />
GROUP LESSONS AND ACTIVITIES For Children Aged 6-12 Years<br />
125
GROUP LESSONS AND ACTIVITIES For Children Aged 6-12 Years<br />
126<br />
Divide the children into groups of fi ve or six and ask them to sit in small circles in their<br />
groups. Put the paint, paintbrushes, water and cups in the middle of each small circle and<br />
give each child a sheet of paper.<br />
Ask the children to mix two colors at a time on their sheets of paper, and ask them what<br />
happens when the colors are mixed together. After the children have all experimented<br />
with two colors at a time, they can try mixing all three primary colors at the same time,<br />
and seeing what happens.<br />
When the children have fi nished experimenting, give them each a new sheet of paper<br />
and ask them to make a color wheel by painting three circles, one blue, one red, and one<br />
yellow, that all overlap (see diagram below).<br />
Explain that where the circles overlap, we can see what colors the primary colors make<br />
when mixed together. Blue and yellow mixed together creates green; blue and red<br />
mixed together creates purple; and red and yellow mixed together creates orange.<br />
When the paint is dry, the children can write the names of the colors in the different<br />
parts of the circles.
Duration: 20 - 25 minutes<br />
Aim: To develop role-play and improvisation skills<br />
Materials needed: None<br />
Instructions:<br />
24<br />
IMPROVISATION<br />
THEATER<br />
Divide the children into groups of three or four and ask them to sit in their groups<br />
facing you.<br />
Explain that you will be doing some drama and role-plays during this activity and that<br />
each group needs to choose a topic for a role play. Ask the children to brainstorm some<br />
ideas, such as being at school, in the hospital, at a wedding, at a party etc.<br />
Allow each group about fi ve minutes to discuss among themselves who their characters<br />
will be. For example, if the topic is school, the characters might be: teacher, student,<br />
parent, headmaster.<br />
While one group performs, the rest of the children are to be the audience. Each group<br />
will take it in turns to perform.<br />
After each group performs, the audience has to try and guess who all the different<br />
characters are in the role-play. Congratulate the group on their performance.<br />
GROUP LESSONS AND ACTIVITIES For Children Aged 6-12 Years<br />
127
GROUP LESSONS AND ACTIVITIES For Children Aged 6-12 Years<br />
128<br />
Duration: 20 - 25 minutes<br />
Aim: To encourage children to think about what they want for their future<br />
Materials needed: Sheets of colored A4 paper (1 per pair); template of a person;<br />
colored crayons or pencils; string; scissors; stapler<br />
Preparation: Cut all the sheets of colored A4 paper lengthways to make two<br />
long pieces out of each sheet.<br />
Instructions:<br />
19<br />
A LINE OF<br />
DREAMS<br />
Ask the children to sit in a circle. Lead a discussion using the following questions:<br />
• “What do you want to be when you grow up?”<br />
• “What would you like to study?”<br />
• “Where would you like to live?”<br />
• “Would you like to have a family, with a wife/husband and children?”<br />
Explain that you are going to make a line of dreamers (little people made out of paper)<br />
and that each dreamer will represent a different child and what their dreams are.<br />
Ask each child to choose a strip of paper, fold it in half width-ways and draw the outline of<br />
a person on it so that the head touches the fold in the paper (they can use the template or<br />
ask for help if they fi nd the drawing tricky). Ask the children to cut out the person (without
cutting through the fold line) and decorate it with colored crayons or pencils. Help the<br />
children to write their name and their dream(s) on the other side of the dreamer.<br />
When the children have fi nished, staple all the dreamers to a long piece of string or yarn,<br />
and display it where everyone can see it. Give the children the opportunity to talk about<br />
their dreams to the group if they want to. Congratulate the children on their work.<br />
GROUP LESSONS AND ACTIVITIES For Children Aged 6-12 Years<br />
129
FAMILY HEALTH INTERNATIONAL CAMBODIA<br />
#11, Street 302, Boeung Keng Kang I, Chamkarmon, Phnom Penh, Cambodia<br />
Tel: (855) 23-212-565/211-914 Fax: (855) 23-211-913 Email: info@fhi.org.kh<br />
Postal Address: P.O. Box 2586, Phnom Penh III (Post Boeung Pralit)