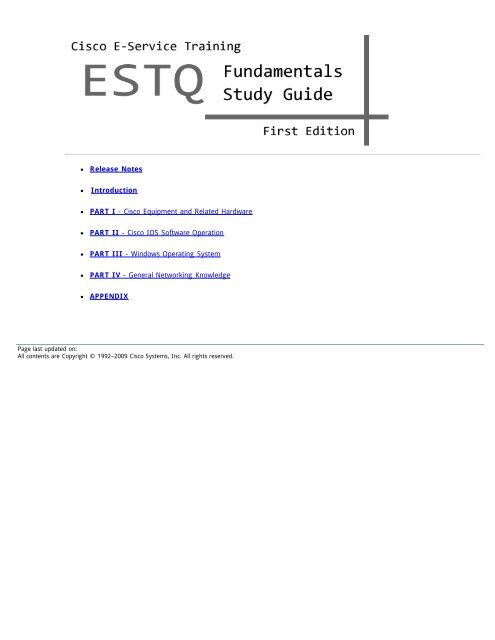
ESTQ Fundamentals Study Guide - Ranjeev: Cisco Team - Cisco
ESTQ Fundamentals Study Guide - Ranjeev: Cisco Team - Cisco
ESTQ Fundamentals Study Guide - Ranjeev: Cisco Team - Cisco
- No tags were found...

Create successful ePaper yourself
Turn your PDF publications into a flip-book with our unique Google optimized e-Paper software.
time.Use a stable computer to avoid system crash or freeze while taking the exam. Fresh reboot and shutdown of unusedprograms are recommendedTo make the most out of the exam time limit, answer all the questions that you know first, then go back and answerthe rest of the questionsCarefully read the question and ALL its answers before making your choiceFinally, if you have time left-over, review all the questions you can to ensure none were missedFeedback and CommentsField Engineers will be offered the opportunity to participate in a short survey after completing the exam, please take a minuteto fill the survey, there is a comment section in the survey, please tell us about your experience with the exam and thestudy guide.Accessing the new <strong>ESTQ</strong> <strong>Fundamentals</strong> ExamTo access the new <strong>ESTQ</strong> <strong>Fundamentals</strong> exam, login to the EST home page (www.cisco.com/go/eservice), click on theQualification menu button, scroll down to and click on "<strong>ESTQ</strong> <strong>Fundamentals</strong>" exam link. Follow the instructions to start theexam.Obtain the Exam ResultsUsers get their exam results through an automated email that includes a link to the exam result page.There are two methods to trigger the email to be sent to the user:1- The user click the Submit button before the exam timer expireIn the event the exam timer expires before the user click the Submit button, this is where the second method is needed2- The user come back to COLT (exam system) and login againNote: For the <strong>ESTQ</strong> <strong>Fundamentals</strong> exam a user can only access the exam once per day. For method 2 to happen, the userwill need to wait until next day, click on the exam link, and login to COLT to trigger the email (the user don't have to startthe exam to get the email, Just simply login and wait for the email).Page last updated on:All contents are Copyright © 1992–2009 <strong>Cisco</strong> Systems, Inc. All rights reserved.
When connecting Ethernet interfaces, it is important to know and understand what you are connecting from and to. Table 1-2 shows which type of Ethernet Cable should be used whenconnecting devices.Table 1-2: Ethernet Cable ConnectionsHub Switch Router LaptopHub Crossover Crossover Straight StraightSwitch Crossover Crossover Straight StraightRouter Straight Straight Crossover CrossoverLaptop Straight Straight Crossover CrossoverTip: It's important to understand that Table 1-2 indicatesthe Ethernet cable required to connect one network item toanother network item. To connect a Router to a Hub (orSwitch) use a Straight-Through cable. To connect yourLaptop's Ethernet port to a Router's Ethernet port, use aCrossover Ethernet cable.1.1.1.2 Ethernet Interface ConnectionsBelow is information on the following common Ethernet interface connections:AUI10BaseTFast Ethernet100Base-T Connections100Base-FXGigabit EthernetConnecting Gigabit Ethernet Network Modules to the NetworkIf an Ethernet port offers both an AUI connector and a 10BaseT connector, you can use either the AUI or 10BaseT connector, but not both at the same time.Use an Ethernet AUI (attachment unit interface) cable to connect an AUI port to an Ethernet transceiver. These ports are color-coded yellow. The female end of the AUI cable mates with theslide-latch connector of the transceiver cable. Figure 1-2 shows a thin Ethernet transceiver as an example, but you can use any type of Ethernet transceiver.If the transceiver cable has thumbscrew connectors, you can connect it directly to the AUI port by replacing the AUI port slide latch with a jackscrew (provided in a separate bag).Figure 1-2: Connecting an Ethernet AUI port to a Transceiver
10BaseTUse an Ethernet 10BaseT cable to connect a 10BASET port to a hub or other network device. These ports are color-coded yellow. Figure 1-3 shows the 10BaseT port on an Ethernet networkmodule connected to a hub.Figure 1-3: Connecting an Ethernet 10BaseT port to a HubFast EthernetUse the following sections for 100BASE-T or 100BASE-FX connections.100BASE-T ConnectionsUse a two-pair or unshielded twisted-pair (UTP) Category 5 straight-through RJ-45 cable to connect a Fast Ethernet RJ-45 port to a switch, hub, repeater, server, or other network device.Figure 1-4 shows an RJ-45 port connected to a hub.Figure 1-4: Connecting a Fast Ethernet RJ-45 port to a Hub
100BASE-FXAttach a multimode fiber-optic cable with SC-type connectors directly to the port on the Fast Ethernet network module (remove the protective plug from the port if it is present). Use either oneduplex SC connector (Figure 1-5 and Figure 1-6) or two simplex SC connectors (Figure 1-7 and Figure 1-8). Attach the other end of the cable to a repeater, hub, or wall outlet. Be sure toobserve the correct relationship between the receive (RX) and transmit (TX) ports on the network module and the cable.Figure 1-5: Duplex SC ConnectorFigure 1-6: Connecting a Fast Ethernet FX port to a Repeater or Hub (Duplex Connector)Figure 1-7: Simplex SC Connector
Figure 1-8: Connecting a Fast Ethernet FX port to a Repeater or Hub (Simplex Connectors)Gigabit EthernetUnlike most other LAN technologies, High Speed WAN Interface Cards (HWICs) provide expanded LAN and WAN capabilities, such as Gigabit Ethernet and Ethernet switching. <strong>Cisco</strong> GigabitEthernet high-speed WAN interface cards are designed for use in the following network design scenarios:In metropolitan-area network (MAN) backbones for low-cost, high-speed, and long-distance connectivityIn multiprotocol WAN gateway routers for LANsIn same-building or same-campus wiring closets to achieve high-speed connectivity for high-demand network segmentsConnecting Gigabit Ethernet Network Modules to the NetworkThe Gigabit Ethernet network module provides single-port Gigabit Ethernet connectivity through an installed Gigabit interface converter (GBIC). The GBIC determines the type of connectivityavailable to the network module. Figure 1-9 shows an example of a GBIC being installed in a port Adapter.Figure 1-9: Installing a GBIC into a Network ModuleThe Gigabit Connector that connects to SFP (Small Form-Factor Pluggable) GBIC Modules is either an RJ-45 or an LC connector (see Figure 1-10 and Figure 1-11 )Figure 1-10: Connecting a GBIC cable
Figure 1-11: LC connector to a GBIC or SFPA common item used to connect to Gigabit Ethernet networks is a SFP (Figure 1-12 and Figure 1-13 and).Figure 1-12: Connecting the <strong>Cisco</strong> Gigabit Ethernet High-Speed WIC (with SFP) to the Network
SFP modules have different types of latching devices used to detach the SFP module from a port. Figure 1-13 displays the following different types of SPF latching devices:Figure 1-13: SFP latching devices1. Mylar Tab Module2. Actuator/Button SFP Module3. Bale-Clasp SFP Module4. Plastic Collar ModuleTo remove an SFP module, perform the following steps:Warning: Because invisible laser radiation may be emittedfrom the aperture of the port when no cable is connected,avoid exposure to laser radiation and do not stare into openapertures.1. First remove attached cables2. Disconnect the SFP latch as shown in Figure 1-133. Grasp the SFP on both sides and remove it from the port.
1.1.2 SerialSerial signals can travel a limited distance at any given bit rate; generally, the slower the bit rate, the greater the distance. All serial signals are subject to distance limits beyond which a signaldegrades significantly or is completely lost.1.1.2.1 Connecting Serial PortsBefore 1992, Serial interfaces on <strong>Cisco</strong> Routers Required cables that had a specific network type on both ends of the cable (see Table 1-3). Because of this, a customer had to purchase a card orchassis that supported a specific Serial type. If the network was upgraded to another version (RS-232 to V.35), they would have to purchase new chassis or new interface cards with that typeserial interface.Table 1-3: Older Model Router Serial Cables and connections<strong>Cisco</strong>AGS+ImagesEIA/TIA-232DTECAB-R23=EIA/TIA-232DCECAB-R23=EIA/TIA-449DTECAB-R44=EIA/TIA-449DCEV.35 DTEV.35 DCECAB-R44=CAB-VTM(=)CAB-VTF(=)CAB-VCM(=)CAB-VCF(=)X.21 DTE -----X.21 DCECAB-X21CF=HSSICAB-HSI1=DTE is male and DCE is female, unless otherwise noted (M = male)(=) indicates spare product1.1.2.2 Smart Serial ConnectionIn the 1992, <strong>Cisco</strong> developed the "Smart Serial Connection" Figure 1-14a and and Figure 1-14b show the Router end of the Smart Serial Connector. This 26 pin Serial port supports five types ofserial interfaces. With the Smart Serial cable, the cable itself supports a DCE or DTE connection, and the interface type is controlled by the configuration, and the CSU/DSU attached to the otherend of the cable. These cables are used with the following interface cards:• 2-port serial and 2-port asynchronous or synchronous WICs• 4-port serial and 4-port asynchronous or synchronous high-speed WICs (HWICs)Figure 1-14a: Smart Serial Connections
Figure 1-14b: Smart Serial Connectors and Universal Serial Connectors1.1.2.3 Universal Serial connectorAs is displayed in In Figure 1-14b and Figure 1-15a , <strong>Cisco</strong> also has a Universal Serial interface. While the Smart Serial Connector is a 26 pin connection, the Universal Serial interface is a 60 pininterface. Like the Smart Serial Connector, the Universal Serial Connector also allows both DCE and DTE connections. The interface type (DCE/DTE) is determined through the configurationapplied to the Router's interface. One of the common issues with the Universal Serial interface is that it is possible to force the connector onto the interface upside down. The interface will notfunction if the connector is upside down, so if the interface connection seems somewhat difficult to make, this is something to be aware of.Figure 1-15a: Universal Serial Connector
With <strong>Cisco</strong> Serial cables, you can determine many things from the part number. Notice that CAB indicates it is a Cable. The next part (232, 449, V35) indicate what type of serial network thecable is used for. The next part (MT, FC) shows if the cable has a Male DTE (MT) for Female DCE (FC) connector. As you review the cables and connectors in Table 1-4, you can see themeaning of items in the part numbers (FC, FT and MT).Table 1-4: Universal Serial Cables and connectionsCX-FSIP8 ImagesEIA/TIA-232DTECAB-232MT=EIA/TIA-232DCECAB-232FC=EIA/TIA-449DTECAB-449MT=EIA/TIA-449DCECAB-449FC=V.35 DTECAB-V35MT=V.35 DTECAB-V35MC=V.35 DTECAB-V35FT=V.35 DCECAB-V35FC=X.21 DTECAB-X21MT=
X.21 DCECAB-X21FC=EIA/TIA-530DTECAB-530MT=DTE is male and DCE is female, unless otherwise noted (M = male)(=) indicates spare productMore recently, Routers use interface cards that support multiple interface types per card, such as Network Modules and port Adapters. Below are examples of WAN Interface Cards that supportSerial interfaces.1.1.2.4 Serial WICsThe 1-port serial WIC (Part #: WIC-1T), shown in Figure 1-15b has a Universal Serial interface that provides an EIA/TIA-232, EIA/TIA-449, V.35, X.21, data terminal equipment/datacommunications equipment (DTE/DCE), EIA-530 DTE serial interface connection to a network.Figure 1-15b: 1-port Serial WIC Front Panel (WIC-1T)1.1.2.5 Asynchronous/Synchronous Serial WICsThe asynchronous/synchronous (A/S) WIC (Part #: WIC-2A/S), shown in Figure 1-16 , provides an EIA/TIA-232, EIA/TIA-449, V.35, X.21, DTE/DCE, EIA-530, or EIA-530A serial interfaceconnection to a network.Figure 1-16: 2-port A/S Serial WIC Front Panel (WIC-2A/S)1.1.2.6 Types of Cables for Serial WICsFive serial cables (serial adapter cables or serial transition cables) are available serial WICs:dEIA/TIA-232 serial cable assemblyEIA/TIA-449 serial cable assemblyV.35 serial cable assembly
X.21 serial cable assemblyEIA/TIA-530 serial cable assemblySerial cables provide either a Universal Serial or Smart Serial connector at the interface card end. The network end of each cable provides other physical connectors for other network equipment.1.1.2.8 Serial High Speed WICs (HWICs)4-port Multiprotocol High Speed HWIC4-port Asynchronous/Synchronous HWIC8-port RS-232 Asynchronous/Synchronous HWIC8-port or 16-port Asynchronous HWICTypes of Cables for Serial HWICs1.1.2.9 Multiprotocol High Speed HWICsThe 4-port multiprotocol high speed HWIC (Part #: HWIC-4T) is illustrated in Figure 1-17 . The interface is the <strong>Cisco</strong> Universal Serial interface, so you can review the possible cables andconnectors in Table 1-4.Figure 1-17: 4-port Multiprotocol HWIC Front Panel (HWIC-4T)1.1.2.10 4-port Asynchronous/Synchronous HWICThe 4-port asynchronous/synchronous HWIC (Part #: HWIC-4A/S) is illustrated in Figure 1-18 . Protocols supported are Async (SLIP), Async (PPP), HDLC, Bisync, and transparent.Interfaces supported are as follows:In both DTE and DCE formats: V35, X21, RS-232, and RS-449In DTE format only: EIA-530 and EIA-530AThe maximum data rate supported is 256 Kbps per port (synchronous).Figure 1-18: 4-port Multiprotocol A/S HWIC Front Panel (HWIC-4A/S)1.1.2.11 8-port RS-232 Asynchronous/Synchronous HWICThe 8-port RS-232 asynchronous/synchronous HWIC (Part #: HWIC-8A-RS232), illustrated in Figure 1-19 , provides 8 asynchronous/synchronous RS-232 interfaces in both DCE and DTEformats. The cable used for an asynchronous/synchronous WAN Interface Card is displayed in Figure 1-21 .Figure 1-19: 8-port RS-232 Asynchronous/Synchronous HWIC Front Panel (HWIC-8A/S-RS232)
1.1.2.12 8-port Asynchronous HWICThe 8-port asynchronous HWIC (Part#: HWIC-8A) provides 8 asynchronous RS-232 interfaces in DTE format. Although not displayed, there is also a 16 port Asynchronous HWIC (HWIC-16A)with two interface connectors like Figure 1-20 below. Figure 1-22 displays the cable for 8 or 16 port Asynchronous HWIC.Figure 1-20: 8-port Asynchronous HWIC Front Panel (HWIC-8A)Types of Cables for Serial HWICs:The 4-port serial HWICs use a 26-pin <strong>Cisco</strong> smart serial ports (Figure 1-21 ), whereas the 8- and 16-port serial HWICs have 68-pin serial ports. Use the correct cable for your serial HWIC.1.1.2.13 Cables for 4-port Serial HWICsThe 4-port serial HWICs use <strong>Cisco</strong> smart serial cables. Five types of <strong>Cisco</strong> Universal Serial cables are available. (See Table 1-4 for more detail)EIA/TIA-232 serial cable assemblyEIA/TIA-449 serial cable assemblyV.35 serial cable assemblyX.21 serial cable assemblyEIA/TIA-530 serial cable assemblyAll of these serial cables provide a 26-pin plug at the interface card end. The network end of each cable provides the physical connectors most commonly used for the interface. For example, thenetwork end of the EIA/TIA-232 serial cable is a DB-25 connector, the most widely used EIA/TIA-232 connector.The EIA-530 and EIA-530A serial cables are available in DTE format only. All other cables are available in either DTE or DCE format.1.1.2.14 Cable for the RS-232 Asynchronous/Synchronous HWICsThe 8-port RS-232 asynchronous/synchronous HWIC uses a quad cable, consisting of a 68-pin connector on the interface card end and four DB25 connectors on the system end. (See Figure 1-22 ). This cable is available in either DCE or DTE format.Figure 1-21: Quad Serial Cable
1.1.2.15 Cable for the 8-port and 16-port Asynchronous HWICsThe 8-port and 16-port asynchronous HWICs (Figure 1-20 ) use an octal cable, consisting of a 68-pin connector on the interface card end and eight RJ45 connectors on the system end. SeeFigure 1-22 . This cable is available in DTE format only.Figure 1-22a: 8-Port RS-232 Cable ConnectorFigure 1-22b: 8-Port RS-232 Cable Connector, Network End
Network end - Octal Serial Cable1.1.2.16 Channelized T1 / E1There are various types of T1 cables. One version uses One version for a Channelized T1 (CT1/PRI) module includes a null modem and straight-through cable. The straight-through cableconnects the router to an external CSU. The Null modem cables are used for back-to-back operation and testing. Figure 1-23a shows this version of T1 interface cable, connectors, and pinouts.Figure 1-23a: T1 Interface CableFigure 1-23b shows an RJ-48 cable, which is now a more common connection for T1/E1 interfaces.Figure 1-23b: T1 Interface CableFigure 1-23C and Figure 1-23d show another connection for E1 serial interface ports:Figure 1-23c: FSIP (8 DB-60 E1 Interfaces)Figure 1-23d: FSIP Universal and E1-G.703/G.704 Port Adapters
Although Figure 1-23b and Figure 1-28 ) show that RJ-48 connections are the most common for t1/E1 connections, Figure 1-24 - Figure 1-27 show DB-15 convectors on the Router side for theChannelized E1 (CE1/PRI) modules.Figure 1-25: E1 Interface Cable for 120-Ohm, Balanced Connections with DB-15 ConnectorsFigure 1-26: E1 Interface Cable for 120-Ohm, Balanced Connections with Twinaxial ConnectorsT1 Interface CableFigure 1-27: E1 Interface Cable for 120-Ohm, Balanced Connections with an RJ-45 ConnectorFigure 1-28 shows the RJ-45 connector wiring for the T1/E1 trunk cable and the digital voice port cableFigure 1-28: E1 Interface Cable for 120-Ohm, Balanced Connections with an RJ-48 Connector1.1.3 ISDNISDN stands for Integrated Services Digital Network. The reason the name includes "Integrated" is because ISDN integrates circuit-switched voice and data services over a common accessfacility. The two types of ISDN lines are Basic Rate ISDN (BRI) - designed for residential customers/small businesses and Primary Rate ISDN (PRI) - designed for larger businesses.Before you begin, it's important to understand acronyms that relate to ISDN circuits. Table 1-5 contains important ISDN definitions.Table 1-5: ISDN Circuit DetailsAn ISDN communication channel that bears or carries voice, circuit, or packet data. TheB Channel Bearer channel is the fundamental component of ISDN interfaces. It carries 64,000 bits perseconds (64 Kbps) in either direction(Basic Rate Interface): A BRI contains 2 B channels, each with 64 kbps capacity, and aBRIsingle D channel (16 kbps) which is used for signaling and call progress messages. An ISDN
CPED-ChannelNT−1NT−2Point ofDemarcationPOTSPRISPIDS/T−interfaceSwitch−typeTE−1TE−2TAU−interface- BRI circuit is often referred to as 2B+D.Customer Provided Equipment, or Customer Premises Equipment. Originally, it refers toequipments on the customer's premises which has been bought from a vendor who wasnot the local phone company. In Europe, its now called CTE, which stands for ConnectedTelecommunications Equipment. It simply refers to telephone equipment that resides onthe customer's premises.Delta Channel - An ISDN communication channel used for sending information between theISDN equipment and the ISDN central office switch. It carries the signaling and callprogress messages. The D−channel can also carry "user" packet data. On PRI it will be onchannel 16 for E1 and on channel 24 for T1.(Network Termination (type) 1): A device that is required to connect ISDN terminalequipment (TE1 or TE2) to an ISDN line. The NT−1 connects to the two−wire line (twistedpair copper wiring) that the telephone company has assigned for ISDN service. ISDNservice (in North America) will not work if the NT−1 plug is not connected to a workingelectrical outlet. If the router has a U−interface, the NT−1 is built−in to the hardware.(Network Termination (type) 2): This is a more intelligent customer premise device whichcan perform switching and concentration, such as a digital PBX. It typically terminatesprimary rate access lines from the local ISDN switch.The physical point where the phone company ends its responsibility with wiring.(Plain Old Telephone Service): The basic telephone service − standard single linetelephones, telephone lines, and access to the public switched network.(Primary Rate Interface): A larger aggregate than a BRI, a PRI will consist of 24 B (Bearer)channels (T1) or 31 B channel's (E1). In either case one channel is reserved for callsignaling. For T1s, the D−channel is the 24th channel, while the E1s use the 16th channelfor signaling.(Service Profile Identifier): The ISDN switch needs to have a unique identification numberfor each ISDN set to which it sends calls and signals. SPIDs are particular to NorthAmerican BRI implementations. SPIDs allow multiple ISDN devices, such as voice and data,to share the local loop while supporting the multiple services simultaneously. SPIDs identifythe services that are ordered from the carrier.A four−wire ISDN circuit. The S/T interface is the part of an ISDN line that connects tothe terminal equipment. In North America, if a router has an S/T interface it requires anexternal NT−1, which connects to the telco network. In the rest of the world, a NT−1 isnot required in the customer premises.Q.931 comes in many local versions So it will specify the correct version of the protocolimplemented by specific organizations .US5ess: North America ( AT & T) dms100 : North America (Northern) NI : National ISDN(NI−1 and NI−2) are availableEuropeNET3: Euro−isdn (standard of ETSI based on the Germany DSS1 specification) 1tr6:German specification VN3: France specification.(Terminal Equipment (type) 1): This equipment uses an interface that complies with theISDN user−network interface recommendations. This device can connect to and work withISDN.(Terminal Equipment (type) 2): This equipment uses an interface that complies withinterface recommendations other than the ISDN interface recommendation. This devicerequires a terminal adapter to connect and work with ISDN.(Terminal Adapter): Adapter which allows a TE−2 terminal to be served by an ISDNuser−network interface. Reference: ISDN Functions and Reference Points drawing at theend of this document.A two−wire ISDN circuit − essentially today's standard one pair telephone company localloop made of twisted−wire. The U interface is the most common ISDN interface (in NorthAmerica) and extends from the central office. Reference: ISDN Functions and ReferencePoints drawing at the end of this document.As stated in the table above, Basic Rate ISDN (BRI) offers users high speed Internet access as compared to modems (64 to 128 Kbps). BRI consists of three channels. Two channels ("B" orBearer-channels) are used for voice or data traffic at a rate of 64 Kbps. The third channel is called the "D", or Delta-channel is used for call supervision (connecting, disconnecting, etc.). Thischannel operates at 16 Kbps. A ISDN - BRI interface is often referred to as a 2B+D.Figure 1-29 displays a standard ISDN circuit.Figure 1-29: ISDN Circuit common items
When reviewing the Figure 1-29 , it is important to first understand the reference to "demarcation". The point of demarcation (Demarc) is the physical point where the phone company ends itsresponsibility with the wiring. Also recognize that the letters R/S/T/U stand for locations in an ISDN circuit. Figure 1-29 shows that in the USA, a customer's is responsible for all ISDN equipmentup to the ISDN local exchange. In other countries, the phone company may be responsible for the NT1 or NT2..Table 1-6 contains information about detail about the standard ISDN Circuits.Table 1-6: ISDN Circuit DetailsBRI T1 PRI E1 PRIB-Channels 2x64 Kbps 23x64Kbps 30x64KbpsD-Channels 1x16Kbps 1x64Kbps 1x64KbpsSynchronization 16Kbps 8Kbps 64KbpsTotal Data Rate 160Kbps 1.544Mbps 2.048MbpsLine Coding 2B1Q AMI / B8ZS HDB31.1.3.1 Connecting ISDN PortsFigure 1-30 is the standard network setup of a simple ISDN Network. You can see that the Computer (Terminal Equipment-TE) connects to the Terminal Adapter (Router), which connects to theNetwork Terminator (NT1), which connects to the ISDN Cloud, or the Public Switched Telephone Network (PSTN).Figure 1-30: Simple ISDN NetworkBoth the ISDN BRI S/T and ISDN BRI U interface require an RJ-45 Straight-Through cable. RJ-45 Cable types can be determined by looking at the cable wiring as displayed in Figure 1-1.1.1.3.2 ISDN InterfacesSince there are different ISDN circuits, there are different ISDN interfaces. The images below show detail about some of the ISDN interfaces.Figure 1-31: ISDN BRI S/T Interface - Connects to an NT1
Figure 1-28: ISDN BRI U (NT1) Interface - Connects to an the ISDN CircuitChannelized ISDN PRI NPMsFor business customers, ISDN PRI (Primary Rate Interface) is available. PRI provides a backup solution for leased data lines networks. A Primary Rate ISDN circuit in North America operates at aT1 rate (1.544 Mbps) (see Figure 1-29a and Figure 1-29b). The Network Module in Figure 1-30 can support T1 or E1 ISDN connections. International ISDN PRI systems operate at the E1 rate(2.048Mbps). In North American T1 PRI lines, 23 B-channels are available for voice or data traffic. Just like a BRI circuit, each B-channel operates at a 64 KBPS rate. The additional D-channeloperates as a 64 KBPS channel and is used for call supervision. North American PRI lines are also called 23B+D lines. In International E1 PRI lines, 30 B channels are available for data and voice.Again, each B-channel operates at 64 KBPS and the single D-Channel again operates at 64 KBPS for call supervision. A PRI ISDN Circuit is also called a 30B+D.Figure 1-29a: NM-1CT1 Faceplate (Channelized T1/ISDN PRI Network Module)Figure 1-29b: Connecting a CT1/PRI Module to a T1 CSU
Figure 1-30 can shows the faceplates for the 1-port channelized T1/E1 PRI network modules. Just like the E1 ISDN circuits,Figure 1-30: NM-1CE1T1-PRI Faceplate (1-Port Channelized T1/E1 PRI Network Module)1.1.4 Fiber OpticCaution: When working with any Fiber Optic equipment,do not remove the dust plugs from the fiber-optic port orthe rubber caps from the fiber-optic cable until you areready to connect the cable. The plugs and caps protect theSFP ports and cables from contamination and protects youfrom possible damage to your eyes.Two laser standards are supported over fiber: 1000Base-SX (short wavelength laser) and 1000Base-LX (long wavelength laser). Long wavelength lasers are optimized for single-mode fiber
transmission. Short- and long-wavelength lasers can be over multimode fiber. The key difference between short and long wavelength laser technologies are cost and distance. Long wavelengthlasers take advantage of cable attenuation dips at longer wavelengths in the cable. The result is that although short wavelength lasers cost less, they operate over shorter distance. Longwavelength lasers are more expensive but they operate over longer distances.Short wavelength laser = Multi-Mode Fibber (MMF) = Less cost, less distanceLong wavelength laser = Single-Mode Fibber (SMF) = More cost, more distanceIn Single-Mode Fibers, one light signal travels in a fiber, which result in no modal dispersion. Single mode fibers are therefore better at retaining the fidelity of each light pulse over long distancesthan multi-mode fibers. By using optical amplifiers and dispersion-compensating devices, DWDM optical systems can span thousands of kilometers at 10 Gbps, and several hundred kilometers at40 Gbps.Multi-Mode Fiber (MMF) is mostly used for communication over shorter distances. Typical multimode links have data rates of 10 Mbps to 10 Gbps over link lengths of up to 600 meters, which issufficient for many applications.Since no single cable or connector is ideal for all situations, a wide variety of connector styles are available. Use Table 1-7 to determine what is needed to make the proper connection.Table 1-7: Common Fiber Optic Connector StylesSC ConnectorThe SC connector is a fiber optic connector with a push-pull latching mechanism whichprovides quick insertion and removal while also ensuring a secure connection. (Squareconnector)FC ConnectorThe FC connector is a fiber optic connector with a threaded body which was designed foruse in high-vibration environments. (Round connector)ST ConnectorThe ST connector is a fiber optic connector that uses a plug and socket which is locked inplace with a half-twist bayonet lock.MTRJ ConnectorThe MTRJ connector is a small form-factor fiber optic connector.
LC ConnectorThe LC connector is a small form-factor fiber optic connector.MU ConnectorMU connectors and adapters were developed by NTT, and have push-pull mechanism. Theyare called “mini SC” and are more popular in Japan. Applications include high-speed datacommunications, voice networks, telecommunications, and dense wavelength divisionmultiplexing (DWDM). MU connectors are also used in multiple optical connections and as aself-retentive mechanism in backplane applications.1.1.5 Console portThe purpose of a console port is to provide a terminal connection, where a network manager can either issue commands to view status or configure a <strong>Cisco</strong> router. Since a termial (Data TerminalEquipment) is a DTE device, it must connect to a DCE interface. That means that the console port is a DCE interface.Note: The Console port for newer model <strong>Cisco</strong> routerstypically have an RJ-45 console port, but older or larger<strong>Cisco</strong> Routers (<strong>Cisco</strong> 12000, <strong>Cisco</strong> 7000/7500, <strong>Cisco</strong>4000/4500, Catalyst 5000) Routers and Switches have DB-25 Console and AUX portsWhen attempting to connect to a Console port, you must first confirm that you have the proper cable. The way to confirm that you have an RJ-45 Rolled cable is hold the two ends of an RJ-45cable side by side (see Figure 1-31 ).
Figure 1-31: Hold RJ-45 Cables to determine cable typeIf the order of the colored pins is the same at each end, the cable is straight-through. If the order of the colors is reversed, the cable is rolled (rollover) - See Figure Figure 1-32 or Figure 1-33Figure 1-32: Rollover cableFigure 1-33:Because terminals or Laptops have various interfaces for their Serial port, you must determine what your Serial port interface is, then review use appropriate cables from your Verikit to make aconsole connection.In addition to making the proper cable connection, you must ensure your console has the proper settings to communicate with the Router's console port. By default, a Router's console port isset to operate at 9600, 8, N, 1. That is equivalent to the detail in Table 1-8:Table 1-8: Console port Default Settings:Console Communication SettingsSpeed9600bpsData Bits 8Parity/Flow Control NoneStop bit 1Complete the following to setup your laptop to communicate with the Console port using Hyperterminal:
Locate Hyperterminal - (For Windows) Click Start - All Programs - Accessories - Communications - HyperTerminal.The Connection Description box will appear.Enter the name of the new connection (i.e. Router Console), then click OK.In the Connect To window, ignore all fields except “Connect Using”. In this field, choose the COM port that is associated with your serial port, then click OK.At the COM1 Properties dialog box, set the following fields:Speed – 9600Data Bits – 8Parity – NoneStop Bits – 1Flow Control – NoneClick OK to accept settings, then Click OK at the Hyperterminal window, and you should see a response from the Router.1.1.6 Auxiliary (AUX) portSince the AUX port is a DTE interface. it easily connects to a modem (DCE device) to accomplish a common purposes, which is dial-up network management access. If a customer's networkbecomes unreachable, the network manager will use this dial-up link to connect to the Router/Switch, determine the problem (see Figure 1-34 ).Figure 1-34: dial back-up connectionIf you replace a customer's router that has a modem connected to the Aux port, the Aux port settings will move when you copy the configuration to the replacement router. Just reconnect themodem the same as it was connected to the previous router, and the customer can confirm that the modem connection is functional.Page last updated on:All contents are Copyright © 1992–2009 <strong>Cisco</strong> Systems, Inc. All rights reserved.
1.2 Identifying <strong>Cisco</strong> Product By Logo and Model NumbersThis document will outline how to identify <strong>Cisco</strong> products and where the <strong>Cisco</strong> logos and model numbers are located on <strong>Cisco</strong> chassis', line cards,network modules, etc.1.2.1 <strong>Cisco</strong> Logo'sThe <strong>Cisco</strong> Logo is applied to all <strong>Cisco</strong> branded products. This may include product developed and manufactured internally at <strong>Cisco</strong> Systems or productsthat are OEM' d (Original Equipment Manufacturer) from external vendors for <strong>Cisco</strong> Systems.The current logo for all <strong>Cisco</strong> branded products is seen in Figure 1-2a. The new logo went into effect on October 3rd, 2006. Prior to that date anddepending on the age of the equipment, the logo appears as in Figure 1-2b . The older logo's may still be visible at many customer locations due tothe age of the customers network and commitment with <strong>Cisco</strong> Systems networking equipment.Figure 1-2a: New (Latest) <strong>Cisco</strong> logo after October 3, 2006Figure 1-2b: <strong>Cisco</strong> logos prior to October 3, 2006The <strong>Cisco</strong> Logo, old or new, can be found on the front bezel (cover) of all <strong>Cisco</strong> rack mountable or desktop products.1.2.2 <strong>Cisco</strong> Model NumbersA model number is assigned to all cisco products. At the chassis level the model number depicts the chassis family and chassis member of a productfamily. For example, at the chassis level the <strong>Cisco</strong> 2800 series includes model numbers 2801, 2811, 2821 and 2851.Model numbers are also assigned to modular devices such as Line Cards, Network Modules, Power Supplies, etc. The model numbers on the modulardevices usually depict some aspect of the device itself. For instance, a WS-X4624-SFP-E line card for the Catalyst 4500 series Switches has 24ports of Line Rate SFP. A 7300-2OC3ATM-MM is a 2-port OC-3 ATM line card for <strong>Cisco</strong> 7300 Series Router.<strong>Cisco</strong> model numbers at the chassis level can be found on the front of <strong>Cisco</strong> products that have front covers and rear facing cable connections as wellas on the back (figure 1-2c and figure 1-2d ). For chassis' with front facing line cards and connectors, the logo will be located on the front as well ason the back.Model numbers at the module level are located on the face plate of each module whether it be a line card, network module, power supply, etc ( figure1-2e).Figure 1-2c: Logo and Model Number Locations example of front facing line cards/connections.
Figure 1-2d: Logo and Model Number Locations example of rear facing line cards/connections.Figure 1-2e: Model Number Location example of line card, Power Supply, WIC and NM.
1.3 Identify and Locate Serial Numbers on <strong>Cisco</strong> Products<strong>Cisco</strong> uses Serial Numbers for RMA tracking of field replaceable parts (FRU) and for service contract entitlement verification of devices.1.3.1 <strong>Cisco</strong> serial Number Syntax7 Numeric Digits - Legacy <strong>Cisco</strong> card hardware uses a standard serial number of 7 numeric digits. These serial numbers were unique within eachproduct family, but sometimes also used by different product families.8 Numeric Digits - Legacy <strong>Cisco</strong> chassis hardware uses a standard chassis serial number of 8 numeric digits. These serial numbers were uniquewithin each product family, but sometimes also used by different product families.9 Numeric Digits - Legacy <strong>Cisco</strong> 3620 and <strong>Cisco</strong> 3640 routers frequently used a 9 digit numeric chassis serial number which started with the digits3620 and 3640 respectively.11 Character Alpha-Numeric - Current <strong>Cisco</strong> chassis and card hardware utilizes an 11 character serial number. These serial numbers are designedto be globally unique across all <strong>Cisco</strong> hardware products.1.3.2 Physical Chassis Serial NumberThis is the "tag" affixed somewhere on the exterior surface of the chassis as in the example in figure 1-3a below.Figure 1-3a: Illustration of the serial number location on a CISCO7603
The serial number location on <strong>Cisco</strong> devices varies by model, but it can be typically be found using the 'show version' on a switch ( Figure 1-3b ) and a'show diag' on a router (Figure 1-3c ) and a 'show version' on a switch (Figure Y)Serial numbers are also attached by a label on all <strong>Cisco</strong> field replaceable parts (FRU).Example:Figure 1-3b: Show version on a catalyst 6506
Figure 1-3c: show diag on a <strong>Cisco</strong> 2801 router
Page last updated on:All contents are Copyright © 1992–2009 <strong>Cisco</strong> Systems, Inc. All rights reserved.
1.4 Identifying and Describing Commonly Used Components in <strong>Cisco</strong> ProductsIn this section we will identify the commonly used component s and interface on <strong>Cisco</strong> products to include:1.4.1 WAN Interface cards (WIC)1.4.2 Voice interface Cards (VIC)1.4.3 Voice/WAN Interface Cards (VWIC)1.4.4 PVDM Modules1.4.5 Network Modules for Routers (NM)1.4.6 Power Supplies1.4.7 Port Adapters1.4.8 LAN Switching Modules (i.e. linecards, Supervisors, etc.)1.4.9 Optical Interface cards1.4.10 SPA-interface processor/Shared port Adapter (SIPs/SPAs)1.4.11 Advanced Integration Module (AIM)1.4.12 <strong>Cisco</strong> Chassis Slot Numbering1.4.1 WAN Interface cards (WIC)A WAN Interface Card (WIC) is a type of Network Interface Card (NIC) that connects the system to the WAN link service provider. A WICallows a network administrator to maximize slot space in a chassis while providing additional connectivity options on the same carriermodule.The typical WIC is a single-wide circuit card that resides in a carrier module or network module designed to accept one or more single-wideWIC cards The carrier module fits into an expansion slot in the router. WIC cards can also be found in double-wide models. (See figure 1-4a and figure 1-4b ).Figure 1-4a: Double-wide and single-wide WIC cardsFigure 1-4b: Network Module designed to hold WIC cards also know as a Carrier Module.WICs are available for plain old telephone service (POTS), wireless networks, and proprietary wired networks and come in a variety ofelectrical interface to include RJ45, V.35, RS-232, RS-449, RS-530, RS-530A.A list of available WIC cards and platforms supported on by <strong>Cisco</strong> Systems Inc.can be viewed at: http://wwwtss.cisco.com/eservice/common/hardware/02cards_modules/router/NM_WIC_List.html1.4.2 Voice interface Cards (VIC)<strong>Cisco</strong> Voice Interface Cards (VICs) support voice technologies. VICs can be installed in interface card slots on supported <strong>Cisco</strong> access routersor in 1-or 2-slot voice network modules that are installed in network slots on supported <strong>Cisco</strong> access routers.
Typically, a VIC contains one or more RJ-11 or RJ-48 ports, allowing connections to basic telephone service (POTS), equipment, keysets,and PBXesIn telephony, a Foreign Exchange Service (FXS) is a telephone interface which supplies power, provides dialtone, and generates ringingvoltage. A device that connects to a VIC interface contains an Foreign Exchange Office (FXO) interface and could be a standard analogtelephone or a Private Branch Exchange (PBX) to receive telephone service.A <strong>Cisco</strong> Voice Interface Card (VIC) is a small interface that resides on a Network Module designed to accommodate these cards, theseinclude the NM-1V and NM-2V in standard density and a number of NMs in High Density or HD. The different types of Network Modulesthat accommodate VIC cards can be viewed in more detail at the <strong>Cisco</strong> Network Module and Interface Cards page.There are a number of different VIC interface types to accommodate any customer need. Each of these interface cards can be viewed inmore detail at the <strong>Cisco</strong> Network Module and Interface Cards page.In figure 1-4c is a stand alone example of a Voice Interface Card (VIC). In figure 1-4d is an example of a VIC in a NM carrier module.Figure 1-4c: Voice Interface Card (VIC)Figure 1-4d: VIC in a NM carrier module1.4.3 Voice/WAN Interface Cards (VWIC)Voice/WAN Interface Cards (VWICs) reside on High Density Voice Network Modules and combine WAN Interface Card (WIC) and VoiceInterface Card (VIC) functionality to provide flexibility and power. VWIC cards support generic 1- or 2-port T1 or E1 trunk interfaces forvoice, data, and integrated voice and data applications. Ports on a VWIC card are RJ48. VWIC cards reside on Network Modules or Carriercards. These cards provide basic structured and unstructured service for T1 or E1 networks.More information on individual VWIC cards can be found in the <strong>Cisco</strong> Wan Interface Cards introduction page.Figure 1-4e: Example of a VWIC on a carrier module and by itself
1.4.4 PVDM ModulesA digital signal processor (DSP) is a type of microprocessor - one that is incredibly fast and powerful. A DSP is unique because it processesdata in real time. This real-time capability makes a DSP perfect for applications where we won't tolerate any delays.A Packet Voice digital signal processor (DSP) Module (PVDM) enables <strong>Cisco</strong>'s Integrated Services Routers to provide high-density voiceconnectivity, conferencing, and transcoding capabilities in <strong>Cisco</strong> IP Communications solutions. The higher density PVDM is referred to as aPVDM2.PVDMs are DIMM type devices that reside on the processor board or carrier card in specific slots of the device they are installed (see figure1-4f and figure 1-4g ).Figure 1-4f: DIMMFigure 1-4g: PVDM1.4.5 Network Modules for Routers (NM)In <strong>Cisco</strong> a network module gives a router, interface expandability. It is both an OSI layer 1 (physical layer) and layer 2 (data link layer)device, as it provides physical access to a networking. It allows users to connect to each other either by using cables or wirelessly.<strong>Cisco</strong> deploys and array of different protocol network modules in their router line. Network Modules are used in almost all models of <strong>Cisco</strong>routers. They vary in size from Single wide (requires a carrier card such as the NM-2V)to double Wide and vary in the number and types ofports supported on each card such as serial and modular types. Some Network modules do not have external connectors at all. Thedifferent types of network modules offered by <strong>Cisco</strong> can be viewed at: http://wwwtss.cisco.com/eservice/common/hardware/02cards_modules/router/NM_WIC_List.html
<strong>Cisco</strong> network modules are available in the following four different form factors to provide greater modularity and functionality for users:•Single-wide network modules, also called NM or NME (see Figure 1_4h )•Extended single-wide network modules, also called NME-X (see Figure 1-4i )•Double-wide network modules, also called NMD (see Figure 1-4j)•Extended double-wide network modules, also called NME-XD (see Figure 1-4k)Note: To reduce extended single-wide and extendeddouble-wide network module slots in width to hold smallernetwork modules, or to cover unused slots, you may need acombination of blank faceplates, slot dividers, and slotadapters.Figure 1-4h: Sample Single-Wide Network ModuleFigure 1-4i: Sample Extended Single-Wide Network ModuleFigure 1-4j: Sample Double-Wide Network ModuleFigure 1-4k: Sample Extended Double-Wide Network Module1.4.6 Power SuppliesA power supply unit (PSU) is the component that supplies power to a network device. A power supply is typically designed to convert 100-120 V (North America and Japan) or 220-240 V (New Zealand, Europe, South America, Africa, Asia and Australia) AC power from the mainsto usable low-voltage DC power for the internal components of the networking device. Some power supplies are designed to take externalDC power rather than AC.On devices with multiple power supplies, the supplies can be configured for redundancy, load sharing or fail over. Depending on the device,power supplies are rated for different power levels by Watts. Each <strong>Cisco</strong> product line has a description of the available power supply units,or power modules (PM), for each of the available devices. See the specific product pages for details of that devices power requirements andoptions.
Examples of an AC power supply and a DC power supply ar shown in figure 1-4mFigure 1-4m: DC and AC power supply examples1.4.7 Port AdaptersPort adapters are modular devices designed to reconfigure a routing or switching platform device to a customers specific networking needs.The simple insertion or removal of a port adapter can transition a the customer device to meet ever changing networking demands withoutthe need to replace the entire chassis.Port Adapters support a wide range of LAN and WAN technologies that provide transport services for data and voice. The hallmark of theport adapter product line is the worldwide deployment of the vast array of technology interfaces such as ATM, SONET, T1/E1 and Voice.Interchangeable across <strong>Cisco</strong> platforms, the port adapter has enabled enterprise and service provider customers to protect networkinvestments while enabling platform transitioning and port adapter redeployment.Below in figure 1-4n is an example of three port adapters on a Communication Media Module (CMM). <strong>Cisco</strong> port adapters are identified withthe part number PA-XX-XXX.Figure 1-4n: Two T1 Interface Port Adapters and 1 FSX Interface Port Adapter mounted on a CMM blade1.4.8 LAN Switching Modules (i.e. linecards, Supervisors, etc.)LAN Switching in <strong>Cisco</strong> falls into the Catalyst Family of Switches along with some Small Business products in the Linksys family of products.LAN switching Modules are the components that make up the hardware configuration of the chassis. Lan Switching Modules , also known asLinecards, provide many different types of connectivity to the the switch. These include ATM Modules, Gig Ether Modules, WAN Modules,Voice Modules as well as Service Modules. The Supervisor Modules act as the processor of the switch, defining features and quality ofservice for that chassis.There are many different types of Supervisor modules available for different chassis depending on the customers networking needs.Depending on the model, not all supervisors are interchangeable. Supervisors have dedicated slots in the catalyst chassis. Each chassismodel has different slots dedicated to Supervisors and Linecards. All supervisors have a reset button that allow you to reset the system ifthe system is unresponsive to the command line. The Supervisor is where you make your console connection to the switch.
Below is an example of a linecard in figure 1_4o and supervisor engine in figure 1-4p .Figure 1-4o: WS-X4148-FX-MT 48-Port 100BASE-FX Fast Ethernet Switching ModuleFigure 1-4p: Supervisor Engine V-10GE (WS-X4516-10GE)1.4.9 Optical Interface cardsIn a fiber optic communications link, a optical interface card is the point at which an optical signal is passed from one device to anotherwithout conversion to an electrical signal. <strong>Cisco</strong> offers optical interface cards for methods of optical transport for data, video and voice for allhigh-end platforms in routing, switching and storage networking on several platforms<strong>Cisco</strong> offers an array of optical products from optical platforms that support optical networks, to Optical Interface cards (Figure 1-4r) thatenable <strong>Cisco</strong> routers and Switches to transport optical data.Optical connectors also vary in design and include interface types such as FC, LC, MT, SC and ST (See Figure 1-4q)Figure 1-4q: Optical Interface Connector typesFigure 1-4r: Example of Optical Interface cards
1.4.10 SPA-interface processor/Shared port Adapter/SPA Services Cards (SIPs/SPAs/SSCs)A SIP (SPA Interface Processor) is a carrier card that inserts into a switch slot like a line card. It provides no network connectivity on itsown. A SIP contains one or more subslots, which are used to contain one or more SPAs (Shared Port Adapter). The SPA provides interfaceports for network connectivity. During normal operation, the SIP should reside in a switch that is fully populated either with functional SPAsin all subslots or with a blank filler plate (SPA-BLANK=) inserted in all empty subslots.A SPA is a modular type of port adapter that inserts into a subslot of a compatible SIP carrier card to provide network connectivity andincreased interface port density. A SIP can hold one or more SPAs, depending on the SIP type. Some SPAs provide services rather thannetwork connectivity, and they insert into subslots of compatible SSCs (SPA Service Card). For example, the IPSec VPN SPA provides servicessuch as IP Security (IPSec) encryption and decryption, generic routing encapsulation (GRE), and Internet Key Exchange (IKE) keygeneration.An SSC is a carrier card that inserts into a switch slot like a line card. It provides no network connectivity. An SSC provides one or moresubslots, which are used to contain one or more SPAs. The supported SPAs do not provide interface ports for network connectivity, butprovide certain services. During normal operation, the SSC should reside in a switch that is fully populated either with functional SPAs in allsubslots or with a blank filler plate (SPA-BLANK=) inserted in all empty subslots.SPAs are available in the following sizes, as shown in Figure 1-4s and Figure 1-4t:–Single-height SPA—Inserts into one SIP subslot.–Double-height SPA—Inserts into two single, vertically aligned SIP subslots.Figure 1-4s: Single-Height and Double-Height SPA SizesFigure 1-4t: Horizontal and Vertical Chassis Slot Orientation for SPAs
1.4.11 Advanced Integration ModuleAIMs (figure 1-4u ) provide hardware-based support for various features, depending on the type of AIM installed. AIMs are installed byplugging into internal connectors in the router, and they require no additional external interfaces or connections (see figure 1-4v).Each AIM requires <strong>Cisco</strong> IOS software of a specified or later release, and AIMs typically require <strong>Cisco</strong> IOS software with a specified <strong>Cisco</strong>IOS feature set.The AIM-CUE is a 6-port module with 1 GB flash memory that stores a maximum of 50 voice mailboxes and 14 hours of voice messages.Compression AIM—(CAIM) Is a hardware AIM module containing a data compression coprocessor device that serves as a compactCompression Port Module similar to those used in larger routers, but is more compact, and does not require a Port Module slot.Figure 1-4u: Example of an AIM ModuleFigure 1-4v: Physical connection of an AIM module to a System Board or Motherboard
1.4.12 Chassis Slot Numbering<strong>Cisco</strong> deploys a number of different technologies and platforms. Slot numbering for Network Modules, interface Cards, Port Adaptors canvary from platform to platform. They can start a 0 or start at 1. They can go from top to bottom or bottom to top, in vertical designedchassis' they can run from left to right and right to left. They can even go horizontal and vertical in the same chassis.In almost all cases the hardware slot numbers are printed on the chassis adjacent to the physical slot. Performing a show config at theCLI prompt will also identify the slots and occupying cards and modules.Some slots are dedicated to specific card types and because of this, the slot numbering can vary greatly. In figure 1-4w below is anexample of multiple slot numbering directions in a single chassis. this is to illustrate the need to reference the slot numbering on thephysical chassis when servicing different chassis types.Figure 1-4w: Slot numbering example of a CRS-1 chassis
Page last updated on:All contents are Copyright © 1992–2009 <strong>Cisco</strong> Systems, Inc. All rights reserved.
1.5 Hardware memory common terms and how used in <strong>Cisco</strong> equipmentMost <strong>Cisco</strong> networking hardware, with the exception of the <strong>Cisco</strong> PIX firewall series, ships with the <strong>Cisco</strong> Inter-network Operating System, or IOS.IOS hardware includes network routers, switches, and other similar devices. The basic design of most of this hardware controls the types ofmemory a device is equipped with, and what functions the various types of <strong>Cisco</strong> memory serve. At the hardware level, there are four main typesof <strong>Cisco</strong> memory: DRAM, EPROM, NVRAM, and <strong>Cisco</strong> Flash Memory.Below are general definitions of the types of memory used in <strong>Cisco</strong> products. Further definition of the use of these memory devices in <strong>Cisco</strong>products is located in the following section, "Specific descriptions of the use of memory devices in <strong>Cisco</strong> products".General description of memory types used in <strong>Cisco</strong> productsWhat is DRAM - Dynamic Random Access Memory (DRAM). DRAM is the most common form of RAM. When someone says that a computer has"one gigabyte of RAM", what they really mean is that the computer has one gigabyte of DRAM. DRAM is called dynamic because it mustconstantly be refreshed or it will lose the data which it is supposed to be storing. Refreshing DRAM consists of reading the contents from theDRAM and immediately writing them back to the DRAM. DRAM will loose it's contents when the power to it is turned off.What is NVRAM - Non-volatile random access memory (NVRAM) is the general name used to describe any type of random access memory whichdoes not lose its information when power is turned off. This is in contrast to the most common forms of random access memory today, DRAM andSRAM, which both require continual power in order to maintain their data. NVRAM is a subgroup of the more general class of non-volatile memorytypes, the difference being that NVRAM devices offer random access, like hard disks.What is Flash - Flash memory is a non-volatile memory device that retains its data when the power is removed. The device is similar to EPROMwith the exception that it can be electrically erased, whereas an EPROM must be exposed to ultra-violet light to erase. Flash memory does notneed a constant power supply to retain its data and it offers extremely fast access times, low power consumption, and relative immunity to severeshock or vibration.http://www.tech-faq.com/dram.shtml(edited0Specific descriptions of the use of memory devices in <strong>Cisco</strong> products1.5.1 DRAM in <strong>Cisco</strong> ProductsDynamic random-access memory (DRAM) contains two types of memory:Primary, main, or processor memory, which is reserved for the CPU to execute <strong>Cisco</strong> IOS software and to hold the running configurationand routing tables.Shared, packet, or I/O memory, which buffers data transmitted or received by the router's network interfaces.DRAM often comes on dual in-line memory modules (DIMMs) or small outline dual in-line memory modules (SODIMMS). See figure1-5a and figure1_5bFigure 1-5a: DRAM DIMM with DIMM socket
Figure 1-5b: DRAM SODIMM with SODIMM socket1.5.2 NVRAM in <strong>Cisco</strong> ProductsNon-volatile random-access-memory (NVRAM) stores the following information:Startup configuration file for every platform except Class A Flash file system platforms (for Class A Flash file system platforms, the locationof the startup configuration depends on the CONFIG_FILE Environment Variable).The software configuration register, which is used to determine which image to use when booting the router.Depending on the <strong>Cisco</strong> device, the NVRAM can be in the form of a DIP (Dual Inline Package) integrated circuit chip, EPROM or Flash .1.5.3 Flash Memory in <strong>Cisco</strong> ProductsFlash memory stores the <strong>Cisco</strong> IOS software image. On most platforms, it can store boot-images and/or configuration files.Depending on the hardware platform, Flash memory might be available as EPROM, single in-line memory modules (SIMMs), dual in-line memorymodules (DIMMs), or Flash memory cards. Check the appropriate hardware installation and maintenance guide for information about types of Flashmemory available on a specific platform.Depending on the platform, Flash memory is available in the following formsFlash memory PC cards or PCMCIA cards (Figure 1-5d )USB flash memory module (figure 1-5e) - can be used to store an image or configuration file.Internal flash memory (figure 1-5f )Compact flash card (figure 1-5g )A Flash memory card that is inserted in to a Personal Computer Memory Card International Association (PCMCIA) slot. This card is used to storesystem images, boot images, and configuration files.Figure 1-5d: Flash Memory Card for PCMCIA slot
Figure 1-5e: Example of a USB flash memory moduleFigure 1-5f: Example of internal flash memoryFigure 1-5g: Compact flash cardPage last updated on:All contents are Copyright © 1992–2009 <strong>Cisco</strong> Systems, Inc. All rights reserved.
<strong>Cisco</strong> IOS Software Operation2.1 Understanding <strong>Cisco</strong> IOS Command Modes2.1.1 User EXEC Mode2.1.2 Privileged EXEC Mode2.1.3 Global Configuration Mode2.1.4 Interface Configuration Mode2.1.5 Subinterface Configuration Mode2.1.6 ROM Monitor Mode2.1.7 Summary of the Main <strong>Cisco</strong> IOS Command Modes2.2 Identify a configuration file from a router or switch2.2.1 Identify a router configuration2.2.2 Identify a switch configuration2.3 Copy and Save a Configuration File From a Router or Switch Using a Laptop2.3.1 Start a Hyper Terminal session and establish console connection to the router2.3.2 Capture Configuration from a Router or a Switch and Save the Configuration to a Laptop2.4 Modify a router or switch configuration file for reuse2.5 Enable required interfaces and remove statement from configuration files that enforce authentication such as AAAstatements2.5.1 Edit and remove statement from a router or a Native IOS switch configuration2.5.2 Edit and remove statement from a CatOS switch configuration2.6 Paste a configuration file to a router or switch using a laptop2.7 Basic IOS Commands2.7.1 show version2.7.2 show run2.7.3 show start2.7.4 show ip route2.7.5 show cdp neighbors2.7.6 show ip interface brief2.7.7 show controllers2.7.8 show interfaces2.7.9 show service-module serial 0/12.7.10 show frame-relay lmi2.7.11 show frame-relay pvc2.7.12 show isdn status2.7.13 show diag2.7.14 show environment2.7.15 enable2.7.16 ping2.7.17 write memory (copy run start)2.7.18 copy start run2.7.19 show flash, show disk, show bootflash2.7.20 show module2.8 Identify installed memory sizes with show commands (i.e., show version)2.9 Access the CLI help (?) menu and other CLI hints2.10 Describe where to find the <strong>Cisco</strong> configuration register parameter and how to change it2.10.1 What is the <strong>Cisco</strong> Configuration Register?2.10.2 How do I display the value of the <strong>Cisco</strong> configuration register?2.10.3 How do you change the <strong>Cisco</strong> Configuration Register value?2.11 Performing a software upgrade or downgrade using TFTP, xmodem or tftpdnld2.11.1 Recovering a System Image Using TFTP2.11.1.1 Overview2.11.1.2 Establish a Console Session with the Router2.11.1.3 Software Installation and Upgrade Procedures
2.11.2 Xmodem Console Download Procedure Using ROMmon2.11.2.1 Introduction2.11.2.2 Xmodem Procedure for Downloading a <strong>Cisco</strong> IOS Software Image onto a <strong>Cisco</strong> Router2.11.3 Recovering a System Image Using tftpdnld2.11.3.1 Overview2.11.3.2 Sample Output for the set ROM Monitor Command2.12 Password recovery on a typical router2.12.1 Introduction2.12.2 Step-by-Step Procedure2.12.3 Example of Password Recovery Procedure2.13 Setting an IP address on <strong>Cisco</strong> equipment2.13.1 Setting an IP Address on a Router2.13.2 IOS Switch Minimum Configuration Requirement for LAN Connectivity2.13.3 Standard Break Key Sequence Combinations During Password Recovery2.13.3.1 Introduction2.13.3.2 Components Used2.13.3.3 Standard Break Key CombinationsPage last updated on:All contents are Copyright © 1992–2009 <strong>Cisco</strong> Systems, Inc. All rights reserved.
2. <strong>Cisco</strong> IOS Software Operation2.1 Understanding <strong>Cisco</strong> IOS Command-Line Interface (CLI) Command ModesThe <strong>Cisco</strong> IOS command-line interface is divided into many different modes. The commands available to you at any given time depend on which mode you are currently in. Entering a question mark (?) at the system prompt allows you to obtain a list of commands available for each command mode.For security purposes, <strong>Cisco</strong> IOS-based products have two basic levels of access to commands: user EXEC mode and privileged EXEC mode. When you start a session on the IOS-based products,you begin in user EXEC mode. Only a limited subset of EXEC commands are available in user EXEC mode. This level of access is reserved for non-configuration tasks like checking the product status. Inorder to have access to all commands, you must enter privileged EXEC mode. Normally, you must enter a password to enter privileged EXEC mode. From privileged mode, you can enter any EXECcommand or enter global configuration mode. Most of the EXEC commands are one-time commands, such as show commands, which show the current configuration status, and clear commands, whichclear counters or interfaces. The EXEC commands are not saved across reboots of the IOS-based product.Configuration modes allow you to make changes to the running configuration. If the running configuration is saved, these commands are stored in the nvram (startup-config). In order to access thevarious configuration modes, you must start at global configuration mode. From global configuration mode, you can enter interface configuration mode, subinterface configuration mode, and a varietyof protocol-specific modes.ROM monitor mode is a separate mode used when the IOS-based product cannot boot properly. If your IOS-based product does not find a valid system image when it is booting, or if its IOS imagefile is corrupted at startup, the system might enter read-only memory (ROM) monitor mode.Base Command ModesBase command modes are used for navigating the CLI and performing basic IOS-based product startup, configuration, and monitoring tasks. The following sections describe how to access the basecommand modes:User EXEC ModePrivileged EXEC ModeGlobal Configuration ModeInterface Configuration ModeSubinterface Configuration ModeROM Monitor Mode2.1.1 User EXEC ModeAfter you log in to the IOS-based product, you are automatically in user EXEC command mode. The EXEC commands available at the user level are a subset of those available at the privileged level. Ingeneral, the user EXEC commands allow you to connect to remote devices, change terminal settings on a temporary basis, perform basic tests, and list system information.To list the user EXEC commands, use the following command:Command Purpose? Lists the user EXEC commands.The user-level prompt consists of the host name followed by the angle bracket (>):Router>The default host name is Router unless it has been changed during initial configuration using the setup command. You can also change the host name using the hostname global configurationcommand described in the "Global Configuration Modes" section.2.1.2 Privileged EXEC ModeBecause many of the privileged commands set operating parameters, privileged access should be password protected to prevent unauthorized use. The privileged command set includes thosecommands contained in user EXEC mode, as well as the configure command through which you can access the remaining command modes. Privileged EXEC mode also includes high-level testingcommands, such as debug.The privileged EXEC mode prompt consists of the devices's host name followed by the pound sign (#). (If the IOS-based product was named with the hostname command, that name would appear asthe prompt instead of "Router.")Router#To access and list the privileged EXEC commands, use the following commands:Step Command Purpose1 enable [password] Enters the privileged EXEC mode.2 ? Lists privileged EXEC commands.If the system administrator has set a password, you are prompted to enter it before being allowed access to privileged EXEC mode. The password is not displayed on the screen and is case sensitive.If an enable password has not been set, enable mode can be accessed only from the IOS-based product console. The system administrator uses the enable password global configuration command toset the password that restricts access to privileged mode.The following example shows how to access privileged EXEC mode:
Router> enablePassword: ciscoRouter#2.1.3 Global Configuration ModeGlobal configuration commands apply to features that affect the system as a whole, rather than just one protocol or interface. From global configuration mode you can also enter specific configurationmodes and submodes used to configure specific system features. Use the configure terminal privileged EXEC command to enter global configuration mode. To list the commands available in globalconfiguration mode, issue the ? command at the prompt.To access and list the global configuration commands, use the following commands:Step Command Purpose1 configure terminal At the terminal, from the privileged EXEC mode, enters global configuration mode.2 ? Lists the global configuration commands.The following example shows the process of entering global configuration mode from privileged EXEC mode:Router# configure terminalEnter configuration commands, one per line. End with CNTL/Z.Router(config)#Note that the system prompt changes to indicate that you are now in global configuration mode. The prompt for global configuration mode consists of the host-name of the device followed by (config)and the pound sign (#).Commands entered in global configuration mode update the running configuration file as soon as they are entered. In other words, changes to the configuration take effect each time you press theEnter or Return key at the end of a valid command. However, these changes are not saved into the startup configuration file until you issue the copy running-config startup-config EXEC modecommand. You can actually end your configuration session by entering the Ctrl-Z key combination, using the end command, using the Ctrl-C key combination. The end command is therecommended way to indicate to the system that you are done with the current configuration session.Note: If you use Ctrl-Z at the end of a command line in which a valid command has been typed, that command will be added to the running configuration file. In other words, using Ctrl-Z isequivalent to hitting the Enter (Carriage Return) key before exiting. For this reason, it is safer to end your configuration session using the end command. Alternatively, you can use the Ctrl-C keycombination to end your configuration session without sending a Carriage Return signal.You can also use the exit command to return from global configuration mode to EXEC mode, but this only works in global configuration mode. Pressing Ctrl-Z or entering the end command will alwaystake you back to EXEC mode regardless of which configuration mode or configuration submode you are in.To exit global configuration command mode and return to privileged EXEC mode, use one of the following commands:Command Purposeend or ^Z Ends the current configuration session and returns to privileged EXEC mode.exitExits the current command mode and returns to the preceding mode. For example, exits from global configuration mode to privileged EXEC mode.2.1.4 Interface Configuration ModeMany features are enabled on a per-interface basis. Interface configuration commands modify the operation of an interface such as an Ethernet, FDDI, or serial port. Interface configuration commandsalways follow an interface global configuration command, which defines the interface typeTo access and list the interface configuration commands, use the following commands:Step Command Purpose1 interface type number From global configuration mode, enters interface configuration mode.2 ? Lists the interface configuration commands.In the following example, serial interface 0 is about to be configured. The new prompt Router(config-if)# indicates interface configuration mode.Router(config)# interface serial 0Router(config-if)#To exit interface configuration mode and return to global configuration mode, enter the exit command. To exit interface configuration mode and return directly to privileged EXEC mode, use the endcommand or press Ctrl-Z.2.1.5 Subinterface Configuration ModeYou can configure multiple virtual interfaces (called subinterfaces) on a single physical interface. Subinterfaces appear to be distinct physical interfaces to the various protocols. For example, Frame Relaynetworks provide multiple point-to-point links called permanent virtual circuits (PVCs). PVCs can be grouped under separate subinterfaces that in turn are configured on a single physical interface.In the following example, a subinterface is configured for serial line 2, which is configured for Frame Relay encapsulation. The subinterface is called 2.1 to indicate that it is subinterface 1 of serialinterface 2. The new prompt Router(config-subif)# indicates that you are in subinterface configuration mode. The subinterface can be configured to support one or more Frame Relay PVCs.
Router(config)# interface serial 2Router(config-if)# encapsulation frame-relayRouter(config-if)# interface serial 2.1Router(config-subif)#To exit subinterface configuration mode and return to global configuration mode, enter the exit command. To exit subinterface configuration mode and return directly to privileged EXEC mode, use theend command or press Ctrl-Z.2.1.6 ROM Monitor ModeIf your IOS-based product does not find a valid system image, or if you interrupt the boot sequence, the system will enter read-only memory (ROM) monitor mode if the configuration register is set to0x0. From ROM monitor mode, you can boot the device or perform diagnostic tests.You can also enter ROM monitor mode by entering the reload EXEC command and then pressing the Break key during the first 60 seconds of startup. If you have changed the configuration, use thecopy running-config startup-config command and then issue the reload command to save your configuration changes.To access and list the ROM monitor configuration commands, use the following commands:Step Command Purpose1reloadEnters ROM monitor mode from privileged EXEC mode.Press the Break key during the first 60 seconds while the system is booting.2 ? Lists the ROM monitor commands.The following examples display some of the ROM Monitor commands:bootconfregcontdevdirhelphistoryresetsettftpdnldboot up an external processconfiguration register utilitycontinue executing a downloaded imagelist the device tablelist files in file systemmonitor builtin command helpmonitor command historysystem resetdisplay the monitor variablestftp image download (May not supported on all platforms.)To return to user EXEC mode, type continue. To boot the system image file, use the boot command.2.1.7 Summary of the Main <strong>Cisco</strong> IOS Command ModesSummarizes the main command modes of the <strong>Cisco</strong> IOS software.CommandModeAccess Method Prompt Exit MethodUser EXEC Log in. Router> Use the logout command.Privileged EXEC From user EXEC mode, use the enable EXEC command. Router#To exit back to user EXEC mode, use the disable command.To enter global configuration mode, use the configureterminal privileged EXEC command.GlobalconfigurationInterfaceconfigurationSubinterfaceconfigurationROM monitorFrom privileged EXEC mode, use the configure terminal privileged EXEC command.From global configuration mode, enter by specifying an interface with an interfacecommand.From interface configuration mode, specify a subinterface with an interface command.From privileged EXEC mode, use the reload EXEC command. Press the Break key duringthe first 60 seconds while the system is booting.Router(config)#Router(config-if)#Router(config-subif)#rommon1>To exit to privileged EXEC mode, use the exit or endcommand or press Ctrl-Z.To enter interface configuration mode, use the interfaceconfiguration command.To exit to global configuration mode, use the exit command.To exit to privileged EXEC mode, use the end command orpress Ctrl-Z.To enter subinterface configuration mode, specify asubinterface with the interface command.To exit to global configuration mode, use the exit command.To enter privileged EXEC mode, use the end command orpress Ctrl-Z.To exit to user EXEC mode, use the continue command.
Page last updated on:All contents are Copyright © 1992–2009 <strong>Cisco</strong> Systems, Inc. All rights reserved.
2.2 Identify a configuration file from a router or switch<strong>Cisco</strong> IOS routers and switches store their startup configuration in NVRAM (Non-volatile random access memory). This is the staticconfiguration file that IOS reads when the device boots up. IOS uses these startup configuration settings to initialize network interfaces onthe device and their software features. After the device boots up, a running copy of the configuration is stored in system RAM for run-timeaccess. The running configuration can be modified with various IOS commands during run-time. Run-time changes can be preserved acrossreboots provided the configuration change is saved to the startup configuration in the NVRAM.Configuring a router or switch is typically a time consuming and tedious task that can be prone to error, particularly for routers and switchesthat are used in complicate network environments with stringent policy. It is not uncommon to see a router or a switch with few hundredconfiguration entries. However, <strong>Cisco</strong> has made this task easier for the network engineers by making the router and switch configurationreusable and portable between same model of devices. The network administrator can copy the configuration file from the router or theswitch to an external device such as a computer or a TFTP server for archive purpose. The copied configuration file can be used for devicerestoration. This is a very important aspect of device management and is especially useful for the field support personnel when there is aneed to upload the saved configuration file from a replaced unit to a replacement unit.It is important to understand the format of the <strong>Cisco</strong> router and switch configuration and know how to differentiate between them. Be verycareful to ensure that the correct configuration file is used for the right device. Restoring the wrong configuration file (a router configurationto a switch, or vice versa) will not work and will create problems for other devices in the network.The following section includes examples of configuration files for a router and for a switch.2.2.1 Identify a router configurationFigure 2-2a shows a router configuration file. Typically, a router configuration file contains routing protocol configuration and lists interfacesconfigured with IP addresses to associate with routing protocol. See the router interfaces and routing configuration in the following example.Figure 2-2a: Router configuration examplemaui-rtr-03#show running-configBuilding configuration...Current configuration:!! Last configuration change at 09:19:35 CST Thu Apr 13 2000 by brownr! NVRAM config last updated at 09:14:55 CST Thu Apr 13 2000 by brownr!version 12.0service timestamps debug datetime msec localtime show-timezoneservice timestamps log datetime msec localtime show-timezoneservice password-encryption!hostname maui-rtr-03 --> user defined host name!no logging consoleaaa new-model --> enable AAA protocolaaa authentication login default local enableaaa authentication login NO_AUTHEN noneaaa authorization exec default localaaa authorization exec NO_AUTHOR noneaaa authorization commands 15 default localaaa authorization commands 15 NO_AUTHOR noneaaa accounting exec default start-stop group tacacs+aaa accounting commands 15 default stop-only group tacacs+enable secret 5 $1$Nj6J$WJFAGxQh6b3B0FgMq7gTP1 --> encrypted enable password!username admin privilege 15 password 7 $1$f/04$D1QUU.r2oJX/EBdHehZGo!!!clock timezone cst -6clock summer-time CST recurringip subnet-zeroip domain-name maui-onions.comip name-server 172.65.66.3ip name-server 172.99.125.36!interface Loopback0ip address 172.22.255.3 255.255.255.255no ip directed-broadcast
!interface ATM1/0 --> router interfacesno ip addressno ip directed-broadcastshutdownno atm ilmi-keepalive!interface Serial2/0ip address 10.10.10.1 255.255.255.0no ip directed-broadcast!interface Serial2/1no ip addressno ip directed-broadcastshutdown!interface Serial2/2no ip addressno ip directed-broadcastshutdown!interface Serial2/3no ip addressno ip directed-broadcastshutdown!interface Ethernet3/0ip address 172.22.241.3 255.255.255.0no ip directed-broadcastip summary-address eigrp 69 172.22.80.0 255.255.240.0 5 --> join eigrp routing!interface Ethernet3/1no ip addressno ip directed-broadcastshutdown!interface Ethernet3/2no ip addressno ip directed-broadcastshutdown!interface Ethernet3/3no ip addressno ip directed-broadcastshutdown!interface FastEthernet4/0ip address 172.22.80.1 255.255.255.0no ip directed-broadcastip summary-address eigrp 69 172.22.240.0 255.255.240.0 5half-duplex!router eigrp 69 --> routing configurationnetwork 172.22.0.0!ip default-gateway 172.22.53.1ip classlessip http serverip http authentication aaaip tacacs source-interface Loopback0!snmp-server engineID local 00000009020000D0BB7F5054snmp-server community cisco xxsnmp-server community rules xxsnmp-server trap-source Loopback0snmp-server contactsnmp-server enable traps isdn call-informationsnmp-server enable traps isdn layer2snmp-server enable traps config
snmp-server enable traps envmontacacs-server host 172.22.53.201 key bitemetacacs-server key ciscorules!line con 0 --> console port settingauthorization commands 15 NO_AUTHORauthorization exec NO_AUTHORaccounting commands 15 NO_ACCOUNTlogin authentication NO_AUTHENtransport input noneline aux 0line vty 0 4 --> telnet interfaces!!ntp clock-period 17179912ntp source Loopback0ntp update-calendarntp server 172.22.255.1end2.2.2 Identify a switch configurationFigure 2-2b shows a switch configuration. The switch configuration typically has layer 2 VLAN, VLAN trunking, Spanning Tree configurationand interfaces configured to join the VLAN. See the switch interfaces and Spanning Tree configuration in the following example.Figure 2-2b: Switch configuration exampleservice nagle --> reduce keystrokes overhead over TCPno service padservice tcp-keepalives-inservice timestamps debug datetime msec localtime show-timezoneservice timestamps log datetime msec localtime show-timezoneservice password-encryption!hostname NJHDEUA01E1 --> user defined host name!logging buffered 128000 debuggingno logging consoleaaa new-model --> enable AAA protocolaaa authentication login default group tacacs+ lineaaa authentication login no_tacacs lineaaa authentication enable default group tacacs+ enableaaa authorization commands 0 default group tacacs+ noneaaa authorization commands 1 default group tacacs+ noneaaa authorization commands 15 default group tacacs+ noneaaa accounting exec default start-stop group tacacs+aaa accounting commands 0 default stop-only group tacacs+aaa accounting commands 1 default stop-only group tacacs+aaa accounting commands 15 default stop-only group tacacs+aaa accounting system default stop-only group tacacs+enable secret 5 908A98QH45N99806ASFI!clock timezone GMT 0ip subnet-zerono ip source-route!no ip domain-lookup!!spanning-tree mode pvst --> Spanning Tree protocolspanning-tree portfast bpduguard defaultspanning-tree extend system-idspanning-tree vlan 1 priority 0spanning-tree vlan 99 priority 4096!!vlan 99 --> VLANname Customer VLAN!
VLAN 101name Customer VLAN2!!interface FastEthernet0/1 --> switch interfacesswitchport access vlan 101switchport mode accessduplex halfspeed 10no snmp trap link-statusspanning-tree portfast!interface FastEthernet0/2description Model Clientswitchport access vlan 99 --> join VLANswitchport mode accessno snmp trap link-statusspanning-tree portfast!interface FastEthernet0/3description Model Clientswitchport access vlan 99switchport mode accessno snmp trap link-statusspanning-tree portfast!interface FastEthernet0/4description Model Clientswitchport access vlan 99switchport mode accessno snmp trap link-statusspanning-tree portfast!interface FastEthernet0/5description Model Clientswitchport access vlan 99switchport mode accessno snmp trap link-statusspanning-tree portfast!interface FastEthernet0/6description Model Clientswitchport access vlan 99switchport mode accessno snmp trap link-statusspanning-tree portfast!interface FastEthernet0/7description Model Clientswitchport access vlan 99switchport mode accessno snmp trap link-statusspanning-tree portfast!interface FastEthernet0/8description Model Clientswitchport access vlan 99switchport mode accessno snmp trap link-statusspanning-tree portfast!interface FastEthernet0/9description Model Clientswitchport access vlan 99switchport mode accessno snmp trap link-statusspanning-tree portfast!
interface FastEthernet0/10description Model Clientswitchport access vlan 99switchport mode accessno snmp trap link-statusspanning-tree portfast!interface FastEthernet0/11description Model Clientswitchport access vlan 99switchport mode accessno snmp trap link-statusspanning-tree portfast!interface FastEthernet0/12description Model Clientswitchport access vlan 99switchport mode accessno snmp trap link-statusspanning-tree portfast!interface FastEthernet0/13description Model Clientswitchport access vlan 99switchport mode accessno snmp trap link-statusspanning-tree portfast!interface FastEthernet0/14description Model Clientswitchport access vlan 99switchport mode accessno snmp trap link-statusspanning-tree portfast!interface FastEthernet0/15description Model Clientswitchport access vlan 99switchport mode accessno snmp trap link-statusspanning-tree portfast!interface FastEthernet0/16description Model Clientswitchport access vlan 99switchport mode accessno snmp trap link-statusspanning-tree portfast!interface FastEthernet0/17description Model Clientswitchport access vlan 99switchport mode accessno snmp trap link-statusspanning-tree portfast!interface FastEthernet0/18description Model Clientswitchport access vlan 99switchport mode accessno snmp trap link-statusspanning-tree portfast!interface FastEthernet0/19description Model Clientswitchport access vlan 99switchport mode accessno snmp trap link-statusspanning-tree portfast
!interface FastEthernet0/20description Model Clientswitchport access vlan 99switchport mode accessno snmp trap link-statusspanning-tree portfast!interface FastEthernet0/21description Model Clientswitchport access vlan 99switchport mode accessno snmp trap link-statusspanning-tree portfast!interface FastEthernet0/22description Model Clientswitchport access vlan 99switchport mode accessno snmp trap link-statusspanning-tree portfast!interface FastEthernet0/23switchport trunk encapsulation isl --> VLAN trunkingswitchport trunk allowed vlan 99,101switchport mode trunkduplex fullspeed 100!interface FastEthernet0/24switchport mode dynamic desirableduplex fullspeed 100!interface GigabitEthernet0/1switchport mode dynamic desirableshutdown!interface GigabitEthernet0/2switchport mode dynamic desirableshutdown!interface Vlan1no ip addressno ip route-cacheshutdown!interface Vlan99ip address 10.10.10.2 255.255.255.0no ip route-cache!ip default-gateway 10.10.10.1ip classlessno ip http server!!logging 10.150.2.77logging 10.150.2.88logging 10.150.2.93logging 10.150.2.76access-list 33 permit 10.150.182.185access-list 33 permit 10.150.216.242access-list 33 permit 10.150.186.191access-list 33 permit 10.150.246.250access-list 33 permit 10.151.141.207access-list 33 permit 10.152.141.210access-list 33 permit 10.151.141.209
access-list 44 permit 10.151.182.185access-list 44 permit 10.151.186.191access-list 44 permit 10.151.246.250access-list 44 permit 10.151.141.207access-list 44 permit 10.151.141.210access-list 44 permit 10.152.141.209access-list 44 permit 10.152.141.208access-list 44 permit 10.152.47.121access-list 44 permit 10.152.47.122access-list 44 permit 10.152.48.28access-list 44 permit 10.153.2.81tacacs-server host 10.154.2.116tacacs-server host 10.154.2.116tacacs-server host 10.154.2.117tacacs-server timeout 3tacacs-server key customerkeybanner motd ^CPlease stay out of our switch^C!line con 0 --> console portsession-timeout 30exec-timeout 15 0password 7 09684F134A01361C0Flogin authentication no_tacacstransport preferred noneline vty 0 4exec-timeout 15 0password 7 06220E3B1F4A281701line vty 5 15!ntp clock-period 17180462ntp source Vlan99ntp server 10.153.4.138ntp server 10.153.3.251 preferendPage last updated on:All contents are Copyright © 1992–2009 <strong>Cisco</strong> Systems, Inc. All rights reserved.
2.3 Copy and Save a Configuration File From a Router or Switch Using a LaptopIn the following section, we will show an example how to copy and save a configuration file from a <strong>Cisco</strong> 7200 router and a Catalyst switch.<strong>Cisco</strong> Catalyst switch family supports two OS versions: the Cat OS and Native IOS. The differences between these two IOS versions are thatCatOS: is the image that runs on the Supervisor Switch Processor and handles all of the Layer 2 (L2) switch functions. It is alsoknown as the Hybrid image (Hybrid OS) when used in conjunction with IOS software image on the Multilayer Switch Feature Card(MSFC). We refer to the image running on the Supervisor Switch Processor as CatOS. CatOS is supported on the Catalyst 4000 and6000 product familiesNative IOS: is the single <strong>Cisco</strong> IOS image that runs on the Supervisor Switch Processor and the MSFC. In other words, theSupervisor and the MSFC both run a single bundled <strong>Cisco</strong> IOS Image. The Native IOS is also supported on the Catalyst 4000 and6000 products.Login credentials including user name, console password and enable password are required to access router or switch's configuration. If thelogin credentials are known, user can directly perform the copy and save device's configuration to a laptop as described in the Section2.3.2. If any of these credentials is not available, the password recovery procedure must be performed prior to log in the device. Section 12covers <strong>Cisco</strong> device password recovery procedure in detail. Please refer to Section 12 for password recovery procedure.2.3.1 Start a HyperTerminal session and establish console connection to a <strong>Cisco</strong> device (such as router and switch)This example shows how to copy the configuration from a router and a switch using the HyperTerminal tool on a Microsoft Windows laptopand save the configuration as a text file.Step 1 Connect a RJ-45 to DB-9 adapter into the PC/Laptop (Serial port) and connect the RJ-45 Roll-Over cable (black) into theRJ-45 to DB-9 adapter.Note: Use a USB to Serial port adapter for console portconnection if the PC does not have built-in serial port.Step 2 Connect the other end of the RJ-45 Roll-Over cable into the device Console port. Figure 2-3a shows one example on how to"Connect a Laptop to Router console port with a RJ-45 to DB-9 adapter" and Figure 2-3b show one example on how to "Connect a Laptopto Router console port with a USB to Serial port adapter".Figure 2-3a: Connecting Laptop to Router console portFigure 2-3b: Connecting Laptop to Router console port with USB to Serial adapter
Step 3 On the Windows Start menu, select Run. The Run dialog appears as shown in Figure 2-3c .Figure 2-3c: The Windows Run DialogStep 4 In the Open: field, type hypertrm.exe, and click OK. The HyperTerminal appears and open to the Connection Description dialogas shown in Figure 2-3d .Figure 2-3d: HyperTerminal Connection Description dialogStep 5 On the Connection Description screen, for Name type "<strong>Cisco</strong>" and select an icon for the definition, and click OK as shown inFigure 2-3d . The Connect To dialog appears as shown in Figure 2-3e.Figure 2-3e: HyperTerminal Connect To dialog
Step 6 On the Connect To dialog, select your primary COM port (COM2 in this example) for the Connect using: field, and click OK. (TheCountry/region:, Area code: and Phone number: fields are not used.) The COMn Properties dialog appears as shown in Figure 2-3f .Figure 2-3f: HyperTerminal COMn Properties dialogStep 7 On the COMn Properties dialog, make the following selections, then click OK:Bits per sec: 9600Data bits: 8Parity: noneStop bits: 1Flow control: noneStep 8 To prove you have a valid connection, hit the enter key and you should see the device prompt that indicates the PC is nowcommunicating with the device.Figure 2-3g shows an example of a <strong>Cisco</strong> 7206 router console prompt that requires user login.Figure 2-3h shows an example of a <strong>Cisco</strong> Catalyst Native IOS switch console prompt.
Figure 2-3i shows an example of a <strong>Cisco</strong> Catalyst CatOS (Hybrid OS) switch console prompt.Figure 2-3g: <strong>Cisco</strong> 7206 router console promptFigure 2-3h: Catalyst switch Native IOS console promptFigure 2-3i: Catalyst switch CATOS console prompt2.3.2 Capture Configuration from a Router or a Switch and Save the Configuration to a LaptopStep 1 At the device console prompt, type enable, and provide the password when prompted. Depending on the device being workedon, the enable mode prompt is changed to one of the following:For a router device: the prompt changes to Router#, indicating the router is now in privileged mode.For a Catalyst Native IOS switch: the prompt changes to Switch#, indicating the switch is now in privileged mode.For a Catalyst CatOS switch: the prompt changes to Console> (enable), indicating the switch is now in privileged mode.Step 2 At the device enable mode prompt, set terminal length to 0 to force the device to return the entire command output response atonce, rather than one screen at a time.
For a router or a Catalyst Native IOS switch: type terminal length 0 to set terminal length to 0. Figure 2-3j shows anexample for a 7200 router.For a Catalyst CatOS switch: type set length 0 to set terminal length to 0. Figure 2-3k shows an example for a CatOS switch.Note: This is crucial to capturing this file withoutextraneous --more-- prompts generated when the routerresponds a screen at a time.Figure 2-3j: Set terminal length to 0 on routerFigure 2-3k: Set terminal length to 0 on a CatOS switchStep 3 On the HyperTerminal menu, select Transfer > Capture Text.... The Capture Text window appears. See Figure 2-3l for anexample.Figure 2-3l: Capture Hyper Terminal Command output
Step 4 Name this file "config.txt". Optionally browse to an alternate directory in which to save the file (Figure 2-3m), or simply acceptthe default location. Click Start to dismiss the Capture Text window and then begin the capture.Figure 2-3m: Text Capture WindowStep 5 At the device enable mode prompt, type one of the following command options to start capturing the configuration, allow time forthe device to response.For a router or a Catalyst Native IOS switch: type show start to display the configuration. Figure 2-3n shows an example fora 7206 router.For a Catalyst CatOS switch: type show config to display the configuration. Figure 2-3o shows an example for a CatOS switch.Figure 2-3n: show start command
Figure 2-3o: show config commandStep 6 After the device completes displaying the configuration, on the HyperTerminal menu, select Transfer > Capture Text > Stop.See Figure 2-3p for an example.Figure 2-3p: Stop Text CaptureStep 7 Reset the device terminal display length to its default value (24 lines per screen).For a router or a Catalyst Native IOS switch: type terminal length 24 to set terminal length to 24. Figure 2-3q shows anexample for a 7206 router.For a Catalyst CatOS switch: type set length 24 to set terminal length to 24. Figure 2-3r shows an example for a CatOSswitch.
Figure 2-3q: Reset the Terminal Length to 24Figure 2-3r: Reset the CatOS Terminal Length to 24Step 8 Verify the saved config.txt file with Windows' Notepad. Figure 2-3s shows a 7206 router config.txt file just captured.Figure 2-3s: config.txt captured configuration file
Page last updated on:All contents are Copyright © 1992–2009 <strong>Cisco</strong> Systems, Inc. All rights reserved.
2.4 Modify a router or switch configuration file for reuseIn section 2.3, we illustrated how to copy and save a configuration file from a router or switch using a laptop. From the On-site servicesupport perspective, the field engineer needs to restore the original configuration to the new replacement unit and then log in the device toverify the device status. This is to ensure the customer device service is restored. The procedure for restoring the configuration will bedescribed in the section 2.6.Before restoring the configuration to the device, you need to make sure to add "no shutdown" command in the configuration file for allthe network interfaces that are not administratively shutdown. The "no shutdown" command is used to bring up the required networkinterfaces after the router or switch boots up. You also need to check whether there are security settings such as "aaa", "tacacs", "enablesecret password", and "access-list" in the configuration. These security settings control who is allowed to access the device and whatservices they are permitted to use once they have access. These security settings are additional items that <strong>Cisco</strong> support teammay ask you to delete from the device configuration file due to a specific service scenario. It is important to remove theseentries before restoring the configuration to the new device. If the security settings are not removed, you will not be able to log in thedevice unless you know the user name and password or perform password recovery in order to log in. After adding "no shutdown"command and removing the security settings, you need to enable vty lines for Telnet and enable console port for login in the Device.In a nutshell view, authentication, authorization, and accounting (AAA) network security services provide the method of identifying users,including login and password dialog, remote access control or authorization for each service, collecting and sending security serverinformation used for billing, auditing, and reporting. In many circumstances, AAA uses protocols such as RADIUS, TACACS+, or Kerberos toadminister its security functions. Please refer to <strong>Cisco</strong>.com if you want to learn more about the AAA protocol.2.5 Enable required interfaces and remove statement from configuration files that enforceauthentication such as AAA statementsIn this section, we will show an example how to add "no shutdown" for the required network interfaces; how to identify and remove "aaa","tacacs", "enable secret password" accordingly, and how to enable vty lines and console port in a configuration file for login. After themodified configuration is loaded to the device and device status is verified, the device can be turned to customer to add original securitysettings back to the device.2.5.1 Edit and remove statement from a router or a Native IOS switch configurationPerform the following procedure to ready a router or a native IOS switch configuration file for use in the replacement unit.Step 1 Open the configuration text file which was captured from a router (see 2.3.2 Capture Configuration from a Router or a Switch andSave the Configuration to a Laptop ) with any text editor, Microsoft Notepad for example.Step 2 Save the configuration file with a different name (e.g., edits_xxxx.txt) to have the original configuration file available for referenceif needed.Step 3 Identify the required network interfaces and add "no shutdown" for the required network interfaces.Router: for each interface that is followed by shutdown, leave it as is. Add the no shutdown command under all otherinterfaces. See Figure 2-5a for an example.Native IOS switch: For each VLAN interface that is followed by shutdown, leave it as is. Add the no shutdown command underall other VLAN interfaces. See Figure 2-5b for an example.Figure 2-5a: add no shutdown to the router interfaces
Figure 2-5b: add no shutdown to the native IOS switch VLAN interfacesStep 4 Search for any line that starts with "aaa". Highlight the lines and click Edit -> Delete to remove all the "aaa" lines. See Figure 2-5c for an example.Figure 2-5c: Search and remove aaa lines
Step 5 Search for any line that starts with "tacacs". Highlight the lines and click Edit -> Delete to remove all the "tacacs" lines. SeeFigure 2-5d for an example.Figure 2-5d: Search and remove tacacs linesStep 6 Search for any line that starts with "access-list". Highlight the lines and click Edit -> Delete to remove all the "access-list" lines.See Figure 2-5e for an example.
Figure 2-5e: Search and remove access-list linesStep 7 Add or change the enable secret ... to enable secret cisco. This changes enable password to "cisco" to allow Telnet. SeeFigure 2-5f for an example.Figure 2-5f: Change enable secret passwordStep 8 Delete all the authorization, accounting, password, and login authentication commands, if any, from the line con 0 to removeconsole port login restriction. See Figure 2-5g for an example.Figure 2-5g: Remove console port login restriction
Step 9 Make sure the following configuration lines for the vty lines are present. If not, add the lines to the configuration to enable vty lineTelnet access.line vty 0 4password ciscologin!endStep 10 Save the file.2.5.2 Edit and remove statement from a CatOS switch configurationPerform the following procedure to ready the native IOS switch configuration file for use in the replacement unit.Step 1 Open the configuration text file which was captured from a CatOS switch (see 2.3.2 Capture Configuration from a Router or aSwitch and Save the Configuration to a Laptop ) with any text editor, Microsoft Notepad for example.Step 2 Save the configuration file with a different name (e.g., edits_xxxx.txt) to have the original configuration file available for reference ifneeded.Step 3 Make sure to add "set interface sc0 up" command to bring up CatOS switch sc0 access interface. See Figure 2-5h for anexample.Figure 2-5h: Set interface sc0 upStep 4 Search for any line that starts with "set tacacs". Highlight the lines and click Edit -> Delete to remove all the "set tacacs"lines. See Figure 2-5i for an example.Figure 2-5i: Search and remove set tacacs lines
Step 5 Search for any line that starts with "set radius". Highlight the lines and click Edit -> Delete to remove all the "set radius" lines.See Figure 2-5j for an example.Figure 2-5j: Search and remove set radius linesStep 6 Search for any line that starts with "set authentication". Highlight the lines and click Edit -> Delete to remove all the "setauthentication" lines. See Figure 2-5k for an example.Figure 2-5k: Search and remove set authentication linesStep 7 Search for any line that starts with "set authorization". Highlight the lines and click Edit -> Delete to remove all the "setauthorization" lines. See Figure 2-5l for an example.Figure 2-5l: Search and remove set authorization linesStep 8 Add or change the "set password ..." to set password cisco and "set enablepass ..." to set enablepass cisco. This changesenable password to "cisco" to allow Telnet. See Figure 2-5m for an example.Figure 2-5m: Change enable secret password
Step 9 Save the file.Page last updated on:All contents are Copyright © 1992–2009 <strong>Cisco</strong> Systems, Inc. All rights reserved.
2.6 Paste a configuration file to a router or switch using a laptopIn section 2.5, you learned how to edit the router and switch configuration files for preparing a replacement unit. This section illustrateshow to upload the configuration to the device using the copy and paste method with a laptop. The example uses a Native IOS switch.Uploading a configuration to a router and CatOS switch uses a similar procedure.To upload the configuration to the device using the copy and paste, perform the following steps:Step 1 Establish Console connection to the router or the switch. Refer to Section 2-3-1 for the instruction on how to establish consoleconnection using HyperTerminal.Step 2 Type the necessary password to gain access to user privileges mode (Switch>) then to exec privileges mode (Switch#), Figure 2-6a.Figure 2-6a: Accessing EXEC Privileges ModeStep 3 Open the modified configuration text file you will use to upload the configuration to the switch.Step 4 Highlight several lines (one or two sections) of the configuration lines.Caution: Do not attempt to copy the entire configurationlines, doing so will lead to problems when you paste theconfiguration into the command prompt.Step 5 Copy the selected text to the Windows clipboard.Copying can be performed either by selecting Edit > Copy from the text editor's menu, or by holding down the CTRL keyand simultaneously pressing the letter C ( Ctrl + c ).Step 6 Switch to the HyperTerminal window, and type config t at the Switch# prompt and press Enter, Figure 2-6b .Figure 2-6b: Accessing Configuration Mode using config t command
Step 7 Paste the configuration file into the Switch by selecting Edit > Paste to Host on the HyperTerminal menu, Figure 2-6c .Figure 2-6c: Accessing Configuration Mode using config t commandStep 8 For the remaining configuration, repeat steps 4, 5 and 7 until you have pasted the entire contents of the configuration file into theswitch.Note: At this point if you are not at the Switch's enablemode prompt (Switch#) type Ctrl+z to go to enablemode.Step 9 After the configuration has finished pasting and the Switch brings you back to the config prompt, type copy run start on theIOS device to write the configuration into NVRAM. See following example.Note: For CatOS switch, the configuration is saved as it isentered, no need for any commands to save it specifically.
For router and Native IOS switch:router#copy run startBuilding configuration...[OK]router#Switch#copy run startBuilding configuration...[OK]Switch#Step 10 Type show start (or show config for CatOS switch) to compare the output with the modified configuration file or the originalconfiguration text file you have on your laptop. They should be identical. If they are not, contact VISE (if you are a Field Engineer) or checksoftware compatibility/support for the missing commands.Example of the show start output:Switch#show startservice nagleno service padservice tcp-keepalives-inservice timestamps debug datetime msec localtime show-timezoneservice timestamps log datetime msec localtime show-timezoneservice password-encryption!..................line con 0transport preferred noneline aux 0line vty 0 4loginpassword ciscontp clock-period 17179912ntp source Loopback0ntp update-calendarntp server 172.22.255.1endPage last updated on:All contents are Copyright © 1992–2009 <strong>Cisco</strong> Systems, Inc. All rights reserved.
2.7 Basic IOS CommandsCommand outputs and descriptions to help you learn and identify key information when interpreting an IOS or CATOS command line interface (CLI).2.7.1 show version2.7.2 show run2.7.3 show start2.7.4 show ip route2.7.5 show cdp neighbors2.7.6 show ip interface brief2.7.7 show controllers2.7.8 show interfaces2.7.9 show service-module serial x/x2.7.10 show frame-relay lmi2.7.11 show frame-relay pvc2.7.12 show isdn status2.7.13 show diag2.7.14 show environment2.7.15 enable2.7.16 ping2.7.17 copy run start (write memory)2.7.18 copy start run2.7.19 show flash, show disk, show bootflash2.7.20 show moduleThe following are the IOS commands with description and key information to assist you in interpreting the output.2.7.1 show versionThis command displays information about the <strong>Cisco</strong> IOS software version currently running on a routing device, the ROM Monitor and Bootflash software versions, and information about the hardwareconfiguration, including the amount of system memory. Because this command displays both software and hardware information, the output of this command is the same as the output of the show hardwarecommand.The following example shows the configuration for <strong>Cisco</strong> 7206VXR:
2.7.2 show running-config (show run)To display the contents of the current running configuration file, use the show running-config command in user EXEC or privileged EXEC mode.The following example shows the configuration for <strong>Cisco</strong> 7206VXR:
2.7.3 show startup-config (show start)
Displays the contents of NVRAM (if present and valid) or displays the configuration file pointed to by the CONFIG_FILE environment variable. Use the show startup-config command in user EXEC or privilegedEXEC mode.Note: If you compare the output from the show runningconfig,the line "Current configuration : 1325 bytes" is notpresent on the show startup-config.The following example shows the configuration for <strong>Cisco</strong> 7206VXR:
2.7.4 show ip routeTo display the current state of the routing table, use the show ip route command in user EXEC or privileged EXEC mode.The show ip route command is a powerful tool to use at this point in your search. You can directly examine the routing table to determine if an entry for the host exists.
The output of show ip route displays the entries in the routing table, as well as the means by which they were determined (directly connected network, static route, or which routing protocol was used toselect the route).It also displays the Gateway of last resort, sometimes called the default Gateway, if one is configured. This is a static route configured by the user that routes IP address 0.0.0.0. (all destinations) througha single host (the Gateway). The effect of setting a gateway is that if no routing table entry exists for a destination address, packets destined for that address will be forwarded to the Gateway router.In the current network testing example, if you found a point in the network where the path to the host breaks down, you would want to Telnet to the last reachable device. There you could check its routingtable and see if a route to the destination is present.Table 1-1: show ip route Field DescriptionsField DescriptionCol.AIndicates the protocol that derived the route. It can be one of the following values:R—Routing Information Protocol (RIP) derivedO—Open Shortest Path First (OSPF) derivedC—connectedS—staticB—Border Gateway Protocol (BGP) derivedD—Enhanced Interior Gateway Routing Protocol (EIGRP)EX—EIGRP externali—IS-IS derivedia—IS-ISM—mobileP—periodic downloaded static routeU—per-user static routeo—on-demand routingCol.BType of route. It can be one of the following values:*—Indicates the last path used when a packet was forwarded. It pertains only to the nonfast-switched packets. However, it does not indicate which path will be used next whenforwarding a non fast-switched packet, except when the paths are equal cost.IA—OSPF interarea route
E1—OSPF external type 1 routeE2—OSPF external type 2 routeL1—IS-IS Level 1 routeL2—IS-IS Level 2 routeN1—OSPF not-so-stubby area (NSSA) external type 1 routeN2—OSPF NSSA external type 2 routeCol.CCol.DCol.ECol.FCol.GIndicates the address of the remote network.The first number in the brackets is the administrative distance of the information source; the secondnumber is the metric for the route.Specifies the address of the next router to the remote network.Specifies the last time the route was updated (in hours:minutes:seconds).Specifies the interface through which the specified network can be reached.2.7.5 show cdp neighborsTo display detailed information about neighboring devices discovered using <strong>Cisco</strong> Discovery Protocol (cdp), use the show cdp neighbors command in privileged EXEC mode.Please review the Table 1-2 below for field definitions. This provides more information of what that particular field is about and the different possible types available.Table 1-2: show cdp neighbors Field DescriptionsFieldDefinitionCapabilityCodesDevice IDLocal IntrfceHoldtmeCapabilityThe type of device that can be discovered.The name of the neighbor device and either the MAC address or the serial number of this device.The local interface through which this neighbor is connected.The remaining amount of time (in seconds) the current device will hold the <strong>Cisco</strong> Discovery Protocol advertisement from a sending router beforediscarding it.The type of the device listed in the CDP Neighbors table. Possible values are as follows:R—RouterT—Transparent bridgeB—Source-routing bridgeS—SwitchH—HostI—IGMP devicer—RepeaterPlatformPort IDThe product number of the device.The interface and port number of the neighboring device.2.7.6 show ip interface briefTo Displays a summary of the usability status information for each interface, use the show ip interface brief command in privileged EXEC mode.
Please review the Table 1-3 below for field definitions. This provides more information of what that particular field is about and the different possible types available.The following example shows the configuration for <strong>Cisco</strong> 7206VXR:The area in yellow indicates the status of interface.up and up means interface is up and active and line protocol is working (keepalives are successful)administratively down and down means interface is currently shutdown by the administrator and line protocol is not working.up and down means the following: No keepalives between router and switch, local router or switch misconfigured, leased-line or other carrier service problem, timing problem on facility, routerhardware failure, or problem on local or remote dsu/csu, wrong LMI type, wrong DLCIdown and down means one of the following: disconnected, faulty, or incorrect cable. It could also mean Service provider problem – hardware failure at the local loop.Table 1-3: show ip interface brief Field DescriptionsFieldInterfaceIP-AddressOK?MethodDescriptionType of interface.IP address assigned to the interface."Yes" means that the IP Address is currently valid. "No" means that the IP Address is not currently valid.The method field has the following possible values:RARP or SLARP—Reverse Address Resolution Protocol (RARP) or Serial Line Address Resolution Protocol (SLARP) requestBOOTP—Bootstrap protocolTFTP—Configuration file obtained from TFTP servermanual—Manually changed by CLI commandNVRAM—Configuration file in NVRAMIPCP—ip address negotiated commandDHCP—ip address dhcp commandunassigned—No IP addressunset—Unsetother—UnknownStatusIndicates the status of interface. Valid values and their meanings are:up—Interface is administratively up.down—Interface is administratively down.administratively down—Interface is administratively down.ProtocolIndicates the operational status of the routing protocol on this interface.2.7.7 show controllersThe show controllers command is used to display controller information (primarily diagnostic, driver level details) for an interface. The information displayed varies widely by interface type and is extremelyhardware specific.Many of the fields displayed (e.g. CSRn, etc) are driver control and status registers. .For a serial interface, the output of this command will show you whether a DTE (Data Terminal Equipment) or a DCE (Data Communication Equipment) cable is connected to the interface. In a productionenvironment, the router is typically the DTE and the modem or CSU/DSU (channel service unit/data service unit) is the DCE. The DCE end always provides the clocking for a synchronous serial link.For additional show controllers syntax, type in show controllers ?. This will provide available syntax.Example of the show controllers on <strong>Cisco</strong> 7206VXR:
2.7.8 show interfacesTo display statistics for all interfaces configured on the router, use the show interfaces command in privileged EXEC mode.
The resulting output varies, depending on the network for which an interface has been configured.Use "show interfaces ?" command to see all available types.Please review the Table 1-4 for some of the field descriptions for the show interface output. This will be helpful in debugging connectivity issue.The following is sample output from the show interfaces command. Because your display will depend on the type and number of interface cards in your router, only a portion of the display is shown.Table 1-4: Some of the show interface field descriptionsFieldDescriptionEthernet ... is {up | down |administratively down}line protocol is{up | down}HardwareInternet addressMTUBWEncapsulationARP typeloopbackkeepaliveIndicates whether the interface hardware is currently active and if it has been taken down by an administrator. "Disabled"indicates the router has received over 5000 errors in a Keepalive interval, which is 10 seconds by default.Indicates whether the software processes that handle the line protocol believe the interface is usable (that is, whether Keepalivesare successful) or if it has been taken down by an administrator.Hardware type (for example, MCI Ethernet, SCI, cBus Ethernet) and address.Internet address followed by subnet mask.Maximum Transmission Unit of the interface.Bandwidth of the interface in kilobits per second.Encapsulation method assigned to interface.Type of Address Resolution Protocol assigned.Indicates whether loopback is set or not.Indicates whether keepalives are set or not.2.7.9 show service-module serial x/xTo display the performance report for an integrated CSU/DSU, as an example use the show service-module serial 0/1 command in privileged EXEC mode.Please review the Table 1-5 below for field definitions. This provides more information of what that particular field is about and the different possible types available.The following is sample output from the show service-module serial 0/1 command for a fractional T1 line:
Table 1-5: Some show service-module serial Field DescriptionsFieldModule typeReceiver has no alarmsDescriptionCSU/DSU module installed in the router. The possible modules are T1/fractional, 2-wire switched 56-kbps, and 4-wire 56/64-kbps.Alarms detected by the FT1/T1 CSU/DSU module or 2- and 4-wire 56/64-kbps CSU/DSU modules.Possible T1 alarms are as follows:Transmitter is sending remote alarm.Transmitter is sending AIS.Receiver has loss of signal.Receiver has loss of frame.Receiver has remote alarm.Receiver has no alarms.Possible switched 56k alarms are as follows:Receiver has loss of signal.Receiver has loss of sealing current.Receiver has loss of frame.Receiver has rate adaptation attempts.Last module self-test (done atstartup): PassedStatus of the last self-test performed on an integrated CSU/DSU module.2.7.10 show frame-relay lmiTo display statistics about the Local Management Interface (LMI), use the show frame-relay lmi command in user EXEC or privileged EXEC mode.The Local Management Interface (LMI) is a set of enhancements to the basic Frame Relay specification. It offers a number of features (called extensions) for managing complex internetworks. Key FrameRelay LMI extensions include global addressing, virtual circuit status messages, and multicasting.Network-to-Network Interface (NNI). The standard interface between two Frame Relay switches that are both located in a private network or are both located in a public network. The interface between apublic switch and a private one is defined by the UNI standard.The following is sample output from the show frame-relay lmi command when the interface is a Network-to-Network Interface (NNI):
2.7.11 show frame-relay pvcTo display statistics about Frame Relay permanent virtual circuits (PVCs), use the show frame-relay pvc command in privileged EXEC mode.Permanent virtual circuits (PVCs) are permanently established connections that are used for frequent and consistent data transfers between DTE devices across the Frame Relay network.The following is sample output from the show frame-relay pvc command for a switched Frame Relay PVC. This output displays detailed information about Network-to-Network Interface (NNI) status andwhy packets were dropped from switched PVCs.Table 1-6: Some show frame-relay pvc Field DescriptionsFieldDescriptionDLCIOne of the DLCI numbers for the PVC.DLCI USAGE Lists SWITCHED when the router or access server is used as a switch, or LOCAL when the router or access server is used as a DTE device.INTERFACE Specific subinterface associated with this DLCI.PVC STATUS Status of the PVC. The DCE device reports the status, and the DTE device receives the status. The PVC status is exchanged using the LMI protocol:ACTIVE— The PVC is operational and can transmit packets.INACTIVE—The PVC is configured, but down.DELETED—The PVC is not present (DTE device only), which means that no status is received from the LMI protocol.If the frame-relay end-to-end keepalive command is used, the end-to-end keepalive (EEK) status is reported in addition to the LMI status. For example:ACTIVE (EEK UP) —The PVC is operational according to LMI and end-to-end keepalives.ACTIVE (EEK DOWN)—The PVC is operational according to LMI, but end-to-end keepalive has failed.LOCAL PVC STATUS1NNI PVC STATUS1Status of PVC locally configured on the NNI interface.Status of PVC learned over the NNI link.1 The LOCAL PVC STATUS and NNI PVC STATUS fields are displayed only for PVCs configured on Frame Relay NNI interface types. These fields are not displayed if the PVC is configured on DCE or DTE interface types.2.7.12 show isdn statusTo display the information about memory, Layer 2 and Layer 3 timers, and the status of PRI channels, use the show isdn command in user EXEC or privileged EXEC mode.Please review the Table 1-7 below about field definitions. This will provide you with more information of what that particular field is about and help you debug isdn issues.
The following sample output from the show isdn status command shows a report about D-channel and Redundant Link Manager (RLM) group status for RLM configuration.Table 1-7: show isdn status Field DescriptionsFieldISDN Dchannel0 interface rlm-group = 1Transport Link StatusDescriptionStatus of D-channel interface and RLM group for RLM configurations and SS7 applications in integrated SLTconfigurations.Displays ACTIVE or INACTIVE.Layer 1 Status:ACTIVE, DEACTIVATED, ACTIVATING Status of ISDN Layer 1.Layer 2 Status:TEI = n,Status of ISDN Layer 2. Terminal endpoint identifier (TEI) number and multiframe structure state.State = MULTIPLE_FRAME_ESTABLISHEDNote The value (n) of the TEI will always be 0 for a D-channel interface.SPID Status:TEI 65, ces = 1, state = 5(init)Terminal endpoint identifier number and state.spid1 configured, no LDN, spid1 sent, spid1 valid Service profile identifier (SPID) configuration information. For example, local directory number is defined.Note There is no SPID report for a D-channel interface.Endpoint ID Info: epsf = 0, usid = 3, tid = 7FEndpoint identifier information.
Layer 3 Status:1 Active Layer 3 Call(s) Number of active calls.Activated dsl 0 CCBs =CCB:callid=8003, callref=0, sapi=0, ces=1, B-chan=1Number of active calls =Number of available B-channels =Total Allocated ISDN CCBs =7.2.13 show diagNumber of the DSL activated. Number of call control blocks in use.Information about the active call.Number of active calls.Number of B channels that are not being used.Number of ISDN call control blocks that are allocated.To display hardware and diagnostic information for a networking device, a line card, a processor, a jacket card, a chassis, or a network module, use the show diag command in privileged EXEC configurationmode.The following is sample output from the show diag command for a <strong>Cisco</strong> 7206VXR router.
2.7.14 show environmentTo display temperature, voltage, fan, and power supply information, use the show environment command in user EXEC or privileged EXEC mode.The following outputs are from <strong>Cisco</strong> 7206VXR.To display all available syntax, use the show environment ? (as shown in the below output from <strong>Cisco</strong> 7206VXR). This will provide you with all the available syntax on that particular platform. The syntaxmay vary slightly depending on the platform you use.In the following example, the typical show environment display is shown when no warning conditions are in the system for the <strong>Cisco</strong> 7206VXR router. This shows the the current condition is within specs ornormal.In the following example, the show environment all displays a detailed listing of all environmental monitor parameters (for example, the power supplies, temperature readings, voltage readings).In the following example, the show environment last displays information on the last measurement made.2.7.15 enableTo change the privilege level for a CLI session or to use a CLI view for a CLI session, use the enable command in either user EXEC, privileged EXEC, or diagnostic mode.By default, using the enable command without the privilege-level argument in user EXEC mode causes the router to enter privileged EXEC mode (privilege-level 15).Entering privileged EXEC mode enables the use of privileged commands. The password is case sensitive.If an enable password has not been set, only enable mode can be accessed through the console connection.To configure and access CLI views, users must first enter into root view, which is accomplished via the enable view command (without the view-name argument). Thereafter, users are prompted for apassword, which is the same password as the privilege level 15 password.Examples
In the following example, the user enters privileged EXEC mode (changes to privilege-level 15) by using the enable command without a privilege-level argument. The system prompts the user for a passwordbefore allowing access to the privileged EXEC mode. The password is not printed to the screen. The user then exits back to user EXEC mode using the disable command. Note that the prompt for user EXECmode is the greater than symbol (>), and the prompt for privileged EXEC mode is the number sign (#).2.7.16 pingTo diagnose basic network connectivity, ping is typically used in IP networks. For <strong>Cisco</strong> products, based on features and protocols installed, pings using other protocols (AppleTalk, ATM, ConnectionlessNetwork Service (CLNS), DECnet, IP, Novell IPX, or source-route bridging (SRB) networks) may also work between <strong>Cisco</strong> products, use the ping command in user EXEC or privileged EXEC mode.The ping command sends an echo request packet to an address then waits for a reply. Ping output can help you evaluate path-to-host reliability, delays over the path, and whether the host can be reached oris functioning.To exit the interactive ping dialog before responding to all the prompts, type the escape sequence. The default escape sequence is simultaneously press and release the Ctrl, Shift, and 6 keys and then pressthe X key.Below is a sample output of a typical ping command:Below is sample output of an extended ping command:Please review the Table 1-8 below for extended ping field definitions. This provides more information about the available fields.Table 1-8: extended ping Field Descriptions for IPFieldDescriptionProtocol [ip]: Prompt for a supported protocol. Default: ip.Target IPaddress:Repeat count[5]:Datagram size[100]:Timeout inseconds [2]:Extendedcommands [n]:Sweep range ofsizes [n]:Prompt for the IP address or hostname of the destination node you plan to ping. If you have specified a supported protocol other than IP, enter anappropriate address for that protocol here. Default: none.Number of ping packets that will be sent to the destination address. Default: 5.Size of the ping packet (in bytes). Default: 100 bytes.Timeout interval. Default: 2 (seconds).Specifies whether a series of additional commands appears.Allows you to vary the sizes of the echo packets being sent. This capability is useful for determining the minimum sizes of the maximum transmissionunits (MTUs) configured on the nodes along the path to the destination address. Packet fragmentation contributing to performance problems can then bereduced.!!!!! Each exclamation point (!) indicates receipt of a reply. A period (.) indicates that the network server timed out while waiting for a reply. Other characters
Success rate is100 percentround-tripmin/avg/max =1/2/4 msmay appear in the ping output display, depending on the protocol type.Percentage of packets successfully echoed back to the router. Anything less than 80 percent is usually considered problematic.Round-trip travel time intervals for the protocol echo packets, including minimum/average/maximum (in milliseconds).2.7.17 copy run start (wr memory)To save your configuration you must write them out to the startup-configuration in NVRAM. Saving your changes typically means writing your current configuration to your startup configuration. The commandto do this is copy running-config startup-config, typically typed as copy run start, another option (alternative) command is write memory, typically typed as wr me, which this section covers. Thesevariations perform the same function, which is to save the current configuration to the startup configuration in NVRAM. A list of other such command variations is shown on the next page.This will overwrite the existing startup configuration, so it is a good idea to save your startup configuration either to Flash or to a network server, before overwriting it with your current configuration.The following example shows the configuration for <strong>Cisco</strong> 7206VXR:2.7.18 copy start runTo add saved configuration (startup-config) to running-config, the command is copy startup-config running-config, typically typed as copy start run.This will revert from your current configuration to your saved (startup) configuration - this is useful if you have configured several items and don't like the way your system is performing.The following example shows the configuration for <strong>Cisco</strong> 7206VXR:2.7.19 show flash, show disk0, show bootflashTo display the contents of internal Flash memory on Class A or B file systems, use the show flash command in user EXEC or priviledge EXEC mode.To display flash or file system information for a disk located in slot 0, use the show disk0 command in user EXEC or privileged EXEC mode.To display information about the bootflash: file system, use the show bootflash command in user EXEC or privileged EXEC mode.
2.7.20 show moduleTo display the module status and information, use the show module command in user EXEC or privileged EXEC mode.This example shows how to display information for all modules on a Catalyst 6500 series switch that is configured with a Supervisor Engine 720:2.8 Identify installed memory sizes with show commands (i.e., show version)This command displays information about the <strong>Cisco</strong> IOS software version currently running on a routing device, the ROM Monitor and Bootflash software versions, and information about the hardwareconfiguration, including the amount of system memory. Because this command displays both software and hardware information, the output of this command is the same as the output of the show hardwarecommand.Please pay attention to the Note box below as they explain how to calculate the installed memory:The following example shows the configuration for <strong>Cisco</strong> 7206VXR:
Note: calculating the total amount of the DRAM:The 1600, 2500, 2600, 3600, and 7200 series routers use a fraction of DRAMas Packet memory, so you need to add both numbers to find out the realamount of DRAM. In the <strong>Cisco</strong> 7206 example output above "cisco 7206VXR(NPE400) processor (revision A) with 114688K/16384K bytes ofmemory", the router has 114688 kilobytes (KB) of free DRAM and 16384 KBdedicated to Packet memory. Adding the two numbers together gives you114688K + 16384K = 131072K, or 130 megabytes (MB) of DRAM.2.9 Access the CLI help (?) menu and other CLI hintsTyping "?" at the device prompt will present a list of all available commands.The following example help (?) is from <strong>Cisco</strong> 7206VXR:
If you type an incorrect command, the parser will flag an error.The following example is from <strong>Cisco</strong> 7206VXR:If you type an incomplete command and [?], the CLI will present you with all commands that match the string you type.The following example is from <strong>Cisco</strong> 7206VXR:If a string is unambiguous, typing [tab] will complete the commandThe following example is from <strong>Cisco</strong> 7206VXR:
If you type an unambiguous or complete command, typing [?] will list arguments to the command as typed. This functionality extends down for as many arguments asare possible for the command.The following example is from <strong>Cisco</strong> 7206VXR:If you don't type enough characters to uniquely identify a command or option, <strong>Cisco</strong> IOS will tell you that it is ambiguous.The following example is from <strong>Cisco</strong> 7206VXR:Page last updated on:All contents are Copyright © 1992–2009 <strong>Cisco</strong> Systems, Inc. All rights reserved.
2.10 Describe where to find the <strong>Cisco</strong> configuration register parameter and how to change it2.10.1 What is the <strong>Cisco</strong> Configuration Register?When a router is booting up, it searches its configuration register to determine where to find the <strong>Cisco</strong> IOS Software. After the <strong>Cisco</strong> IOSSoftware has been loaded, the router attempts to load the configuration file, if one exists. This file contains all the user-specifiedconfiguration information for the router.In <strong>Cisco</strong> routers, it is a 16-bit user-configurable value, written into the NVRAM, that determines how the router functions during startup.The configuration register can be used to change router behavior in several ways, such as:How the router boots (into ROMmon, NetBoot)Options while booting (ignore configuration, disable boot messages)Console speed (baud rate for a terminal emulation session)2.10.2 How do I display the value of the <strong>Cisco</strong> configuration register?You use the show version command to determine the existing configuration register value of the router.Router#sh version<strong>Cisco</strong> IOS Software, 2801 Software (C2801-ADVENTERPRISEK9-M), Version 12.4(20)T, RELEASE SOFTWARE (fc3)Technical Support: http://www.cisco.com/techsupportCopyright (c) 1986-2008 by <strong>Cisco</strong> Systems, Inc.Compiled Thu 10-Jul-08 22:47 by prod_rel_teamROM: System Bootstrap, Version 12.3(8r)T9, RELEASE SOFTWARE (fc1)Router uptime is 52 minutesSystem returned to ROM by reload at 17:00:09 UTC Thu Jun 11 2009System image file is "flash:c2801-adventerprisek9-mz.124-20.T"<strong>Cisco</strong> 2801 (revision 6.0) with 238592K/23552K bytes of memory.Processor board ID FHK1044F10W2 FastEthernet interfaces1 terminal line2 Channelized/Clear T1/PRI ports1 Virtual Private Network (VPN) Module8 DSPs, 128 Voice resources1 cisco Transport-Opt Service Engine(s)DRAM configuration is 64 bits wide with parity disabled.191K bytes of NVRAM.250368K bytes of ATA CompactFlash (Read/Write)Configuration register is 0x2102Router#The factory−default setting for the configuration register is 0x2102. This indicates that the router should attempt to load a <strong>Cisco</strong> IOSsoftware image from Flash memory and load the startup configuration file with a console speed of 9600 baud.2.10.3 How do you change the <strong>Cisco</strong> Configuration Register value?Modifying the Configuration Register Boot Field ExampleIn the following example, the show version command indicates that the current configuration register is set so that the router does notautomatically load an operating system image. Instead, it enters ROM monitor mode and waits for user-entered ROM monitor commands.The new setting instructs the router to a load a system image from commands in the startup configuration file or from a default systemimage stored on a network server.Note: The information shown in the command output is toshow you an example of what to expect when you enter acommand.Step 1 The show version command displays the current configuration register setting. The configuration register is listed as a
hexadecimal value.Router#sh version<strong>Cisco</strong> IOS Software, 2801 Software (C2801-ADVENTERPRISEK9-M), Version 12.4(20)T, RELEASE SOFTWARE (fc3)Technical Support: http://www.cisco.com/techsupportCopyright (c) 1986-2008 by <strong>Cisco</strong> Systems, Inc.Compiled Thu 10-Jul-08 22:47 by prod_rel_teamROM: System Bootstrap, Version 12.3(8r)T9, RELEASE SOFTWARE (fc1)Router uptime is 52 minutesSystem returned to ROM by reload at 17:00:09 UTC Thu Jun 11 2009System image file is "flash:c2801-adventerprisek9-mz.124-20.T"<strong>Cisco</strong> 2801 (revision 6.0) with 238592K/23552K bytes of memory.Processor board ID FHK1044F10W2 FastEthernet interfaces1 terminal line2 Channelized/Clear T1/PRI ports1 Virtual Private Network (VPN) Module8 DSPs, 128 Voice resources1 cisco Transport-Opt Service Engine(s)DRAM configuration is 64 bits wide with parity disabled.191K bytes of NVRAM.250368K bytes of ATA CompactFlash (Read/Write)Configuration register is 0x2142Router#The configuration register can be set from configuration mode using the config−register command.Step 2 The configure terminal command Enters configuration mode, selecting the terminal option.Step 3 The config-register value Modifies the existing configuration register setting to reflect the way in which you want to load asystem image.The configuration register value is in hexadecimal form with a leading “0x.”Step 4 end Exits configuration mode.Note: You must reset or power−cycle for the newconfiguration register to take effect.Step 5 The reload command Reboots the router to make your changes take effect.Page last updated on:All contents are Copyright © 1992–2009 <strong>Cisco</strong> Systems, Inc. All rights reserved.
2.11 Performing a software upgrade or downgrade using TFTP, xmodem or tftpdnld2.11.1 Recovering a System Image Using TFTP2.11.1.1 Overview2.11.1.2 Establish a Console Session with the Router2.11.1.3 Software Installation and Upgrade Procedures2.11.2 Xmodem Console Download Procedure Using ROMmon2.11.2.1 Introduction2.11.2.2 Xmodem Procedure for Downloading a <strong>Cisco</strong> IOS Software Image onto a <strong>Cisco</strong> Router2.11.3 Recovering a System Image Using tftpdnld2.11.3.1 Overview2.11.3.2 Sample Output for the set ROM Monitor Command2.11.1 Recovering a System Image Using TFTP2.11.1.1 OverviewThis section explains how to install <strong>Cisco</strong> IOS® software onto <strong>Cisco</strong> routers using a Trivial File Transfer Protocol (TFTP) server.Note: The following examples are ONLY for your reference use.2.11.1.2 Establish a Console Session with the RouterEven if it is possible to connect to the router through a Telnet session, <strong>Cisco</strong> recommends that you connect directly to the router throughthe console port because, if something goes wrong during the upgrade, you might need to be physically present next to the router topower−cycle it. Moreover, the Telnet connection is lost while the router reboots during the upgrade procedure.A rolled cable, usually a flat black cable, connects the console port of the router to one of the COM ports of the PC.Figure 2.11e: Connecting Laptop to Router console portWhen the PC is connected to the console port of the router, open HyperTerminal on the PC, and use these settings:9600 bits per second8 databits0 parity bits1 stop bitNo Flow Control2.11.1.3 Copying the IOS from a laptop to a router using a TFTP serverTo Copy the IOS from a laptop to a router using a tftp server do the following:Note: The following procedure is used to transfer the IOSfrom a laptop using a tftp server to a router. This is usedwhere the router does not have a removable flash or an IOS
upgrade is required.Step 1 : Configure the Ethernet Interface of the laptop with an IP Address and Subnet Mask following the instructions in "Configure theLaptop’s Ethernet Interface".Step 2 : Start a TFTP Server.Note: In this example, Tftpd32 will be used for the TFTPserver. Click here for instructions on using the Tftpd32 TFTPserver.Step 3 : On the router, configure an ip address on the Ethernet port in the same network that will be used for the file transfer.Router(config)#int gig0/0Router(config-if)#ip address 192.168.1.2 255.255.255.0Router(config-if)#no shutStep 4 : Connect a cross-over Ethernet cable between the router’s ethernet port and the laptop’s ethernet port.Step 5 : Ping the laptop’s interface to test connectivity.Router#ping 192.168.1.1Type escape sequence to abort.Sending 5, 100-byte ICMP Echos to 192.168.1.1, timeout is 2 seconds:!!!!!Step 6 : Check the tftp server’s directory to verify the name of the IOS file for the transfer as shown in Figure 1.Caution: Depending on the IOS version, the router mayask to erase the flash before copying. Make the appropriatechoice for the situation.Figure 2.11a: Checking the tftp server’s directoryStep 7 : Use the copy tftp flash: command to transfer the file from the tftp server to the router’s flash.Router#copy tftp flash:Address or name of remote host []? 192.168.1.1Source filename []? c2800nm-ipvoicek9-mz.124-21.binDestination filename [c2800nm-ipvoicek9-mz.124-21.bin]?Accessing tftp://192.168.1.1/c2800nm-ipvoicek9-mz.124-21.bin...Loading c2800nm-ipvoicek9-mz.124-21.bin .from 192.168.1.1 (via GigabitEthernet0/0):!!!!!!!!!!!!!!!!!!!!!!!!!!!!!!!!!!!!!!!!!!!!!!!!!!!!!!!!!!!!!!!!!!!!!!!!!!!!!!!!!!!!!!!!!!!!!!!!!!!!!!!!!!!!!!!!!!!!!!!!!!!!![OK - 31795716 bytes]31795716 bytes copied in 72.060 secs (441239 bytes/sec)Router#On the laptop, the tftp server shows it is sending the file as shown in Figure 2.
Figure 2.11b: Tftp server sending the fileStep 8 : Use the show flash: command to verify the IOS is in the router’s flash memory.Router#show flash:-#- --length-- -----date/time------ path1 28952260 Apr 23 2008 19:29:56 +00:00 c2800nm-spservicesk9-mz.124-7e2 31795716 Jul 30 2008 18:50:30 +00:00 c2800nm-ipvoicek9-mz.124-21.bin3129344 bytes available (60751872 bytes used)This completes Copying the IOS from a laptop to a router using a tftp server.2.11.2 Xmodem Console Download Procedure Using ROMmon2.11.2.1 Introduction2.11.2.2 Xmodem Procedure for Downloading a <strong>Cisco</strong> IOS Software Image onto a <strong>Cisco</strong> Router2.11.2.1 IntroductionThis document explains how to use the xmodem command at the console to download <strong>Cisco</strong> IOS® Software using the ROM monitor(ROMmon).Note: Xmodem can also be used on certain Catalystswitches to recover the IOS. See examples here.The information presented in this document was created from devices in a specific lab environment. All of the devices used in this documentstarted with a cleared (default) configuration. If you are working in a live network, ensure that you understand the potential impact of anycommand before using it.
OverviewXmodem can be used on routers and is used in disaster recovery situations where the router has no valid <strong>Cisco</strong> IOS software or bootflashimage to boot from and hence, only boots up in ROMmon. This procedure can also be used where there are no Trivial File Transfer Protocol(TFTP) servers or network connections, and a direct PC connection to the router's console is the only viable option.UsageHere is the command syntax for xmodem.xmodem [-c] [-y] [-r] [-x]The following table describes the command syntax for the xmodem command.syntax-cDescription(Optional) CRC-16 checksumming, which is more sophisticated and thoroughthan standard checksumming.-y (Optional) Uses the Ymodem protocol for higher throughput.-r (Optional) Downloads the file to DRAM. The default is Flash memory.-xfilename(Optional) Does not execute the <strong>Cisco</strong> IOS software image on completion ofthe download.(Optional) Filename to copy. This argument is ignored when the -r keywordis specified since only one file can be copied to DRAM.Here's an example of the xmodem command issued on a <strong>Cisco</strong> router:Examplerommon 1 >xmodem -?xmodem: illegal option -- ?usage: xmodem [-cyrx] -c CRC-16-y ymodem-batch protocol-r copy image to dram for launch-x do not launch on download completionrommon 2 > xmodem -c c2600-is-mz.122-10a.binNote: The xmodem transfer only works on the consoleport. You can only download files to the router. You cannotuse xmodem to get files from the router.2.11.2.2 Xmodem Procedure for Downloading a <strong>Cisco</strong> IOS Software Image onto a <strong>Cisco</strong> RouterUse the following xmodem procedure to download a <strong>Cisco</strong> IOS software image onto a <strong>Cisco</strong> router.Step 1 From ROMmon, change the console baud rate from 9600 bps to 115200 bps to speed up the download time. Use the confregcommand and follow the instructions presented on the screen.Note: Changing the baud rate to 115200 decreases the filetransfer time.rommon 1 >confregConfiguration Summaryenabled are:break/abort has effect
console baud: 9600boot: the ROM Monitordo you wish to change the configuration? y/n [n]: yenable "diagnostic mode"? y/n [n]:enable "use net in IP bcast address"? y/n [n]:enable "load rom after netboot fails"? y/n [n]:enable "use all zero broadcast"? y/n [n]:disable "break/abort has effect"? y/n [n]:enable "ignore system config info"? y/n [n]:change console baud rate? y/n [n]: yenter rate: 0 = 9600, 1 = 4800, 2 = 1200, 3 = 24004 = 19200, 5 = 38400, 6 = 57600, 7 = 115200 [0]: 7change the boot characteristics? y/n [n]:Configuration Summaryenabled are:break/abort has effectconsole baud: 115200boot: the ROM Monitordo you wish to change the configuration? y/n [n]:You must reset or power cycle for new config to take effect.rommon 2 >Step 2 Once the router boots up in ROMmon, the HyperTerminal sessions start to display illegible characters. You need to exit thecurrent terminal session and start a new one at a data rate of 115200 bps to match the console rate as in step 2 above.Step 3 You are now ready to issue the xmodem command. However, before issuing the xmodem command, ensure that you have the new<strong>Cisco</strong> IOS software image on your PC.rommon 1 >rommon 1 >xmodem -?xmodem: illegal option -- ?usage: xmodem [-cyrx] -c CRC-16-y ymodem-batch protocol-r copy image to dram for launch-x do not launch on download completionrommon 2 >rommon 2 >rommon 2 > xmodem -c c2600-is-mz.122-10a.bin!--- Note that [-s datarate] is not available here since you are set for 115200 bps.Do not start the sending program yet...File size Checksum File name9939820 bytes (0x97ab6c) 0x4991 c2600-is-mz.122-7a.binWarning: All existing data in bootflash will be lost!Invoke this application only for disaster recovery.Do you wish to continue? y/n [n]: yReady to receive file c2600-is-mz.122-10a.bin ...Step 5 From the HyperTerminal menu bar select Transfer > Send File... and specify the image name/location and xmodem protocol asin steps 3 and 4 above and start the transfer.Figure 2.11c: File Progress Dialog
Step 6 Once the transfer is complete, the following messages appears:Erasing flash at 0x60fc0000program flash location 0x60990000Download Complete!rommon 12 > confreg 0x2102You must reset or power cycle for new config to take effectrommon 2 >resetSystem Bootstrap, Version 11.3(2)XA4, RELEASE SOFTWARE (fc1)Copyright (c) 1999 by cisco Systems, Inc.TAC:Home:SW:IOS:Specials for infoC2600 platform with 65536 Kbytes of main memoryprogram load complete, entry point: 0x80008000, size: 0x995ec8Self decompressing the image : ############################################################################################################################################################################################ [OK]............................<strong>Cisco</strong> Internetwork Operating System SoftwareIOS (tm) C2600 Software (C2600-IS-M), Version 12.2(10a), RELEASE SOFTWARE (fc1)Copyright (c) 1986-2002 by cisco Systems, Inc.Compiled Tue 21-May-02 14:16 by pwade Image text-base: 0x80008088, data-base: 0x810ABB08cisco 2620 (MPC860) processor (revision 0x100) with 61440K/4096K bytes of memory.Processor board ID JAB03110MUB (3691217154)
M860 processor: part number 0, mask 49Bridging software.X.25 software, Version 3.0.0.1 FastEthernet/IEEE 802.3 interface(s)2 Voice FXS interface(s)32K bytes of non-volatile configuration memory.16384K bytes of processor board System flash (Read/Write)Press RETURN to get started!.........................2.11.3 Recovering a System Image Using tftpdnld2.11.3.1 Overview2.11.3.2 Sample Output for the set ROM Monitor Command2.11.3.1 OverviewThis section describes how to download a <strong>Cisco</strong> IOS software image from a remote TFTP server to the router flash memory by using thetftpdnld command in ROM monitor mode.Caution: Use the tftpdnld command only for disasterrecovery because it can erase all existing data in flashmemory before it downloads a new software image to therouter.Using tftpdnld Command to Recover IOS on a RouterTo find out if the router platform you are working on supports the tftpdnld command, enter a ‘?’ at the rommon prompt and look fortftpdnld in the command list.rommon 1 > ?aliassysrettftpdnldunaliasunsetxmodemset and display aliases commandprint out info from last system returntftp image downloadunset an aliasunset a monitor variablex/ymodem image downloadrommon 2 >Type tftpdnld at the rommon prompt to see all the information about the command.rommon 1 > tftpdnldMissing or illegal ip address for variable IP_ADDRESSIllegal IP address.usage: tftpdnld [-r]Use this command for disaster recovery only to recover an image via TFTP.Monitor variables are used to set up parameters for the transfer.(Syntax: "VARIABLE_NAME=value" and use "set" to show current variables.)"ctrl-c" or "break" stops the transfer before flash erase begins.The following variables are REQUIRED to be set for tftpdnld:IP_ADDRESS: The IP address for this unitIP_SUBNET_MASK: The subnet mask for this unitDEFAULT_GATEWAY: The default gateway for this unitTFTP_SERVER: The IP address of the server to fetch fromTFTP_FILE: The filename to fetchThe following variables are OPTIONAL to be set for tftpdnld:TFTP_VERBOSE: Print setting. 0=quiet, 1=progress(default), 2=verboseTFTP_RETRY_COUNT: Retry count for ARP and TFTP (default=7)
TFTP_TIMEOUT: Overall timeout of operation in seconds (default=7200)TFTP_CHECKSUM: Perform checksum test on image, 0=no, 1=yes (default=1)FE_SPEED_MODE: 0=10/hdx, 1=10/fdx, 2=100/hdx, 3=100/fdx, 4=Auto(deflt)Command Line Options:-r: do not write flash, load to DRAM only and launch image2.11.3.2 Sample Output for the set ROM Monitor CommandIn this example, we will only focus on the required parameters. Enter the correct information for each parameter.rommon 3 > IP_ADDRESS=192.168.1.2rommon 4 > IP_SUBNET_MASK=255.255.255.0rommon 5 > DEFAULT_GATEWAY=192.168.1.1rommon 6 > TFTP_SERVER=192.168.1.1rommon 7 > TFTP_FILE=c2600-ik9s-mz.122-6c.binTo start the process, type tftpdnld at the rommon prompt.Note: The default gateway and tftp server will be thesame if you are using a directly connected tftp server. If thetftp server is on another network, use the appropriatedefault gateway.rommon 8 > tftpdnldIP_ADDRESS: 192.168.1.2IP_SUBNET_MASK: 255.255.255.0DEFAULT_GATEWAY: 192.168.1.1TFTP_SERVER: 192.168.1.1TFTP_FILE: c2600-ik9s-mz.122-6c.binIP_ADDRESS: 192.168.1.2IP_SUBNET_MASK: 255.255.255.0DEFAULT_GATEWAY: 192.168.1.1TFTP_SERVER: 192.168.1.1TFTP_FILE: c2600-ik9s-mz.122-6c.binInvoke this command for disaster recovery only.WARNING: all existing data in all partitions on flash will be lost!Do you wish to continue? y/n: [n]: yReceiving c2600-ik9s-mz.122-6c.bin from 192.168.1.1 !!!!!!!!!!!!!!!!!!!!!!!!!!!!!!!!!!!!!!!!!!!!!!!!!!!!!!!!!!!!!!!!!!!File reception completed.Copying file c2600-ik9s-mz.122-6c.bin to flash.Erasing flash at 0x60fc0000program flash location 0x60a30000rommon 11 >After file transfer is complete, use the ‘dir flash:’ command to check the flash memory to ensure the image transferred successfully.rommon 11 > dir flash:File size Checksum File name10687692 bytes (0xa314cc) 0xecf8 c2600-ik9s-mz.122-6c.binReboot the router by either power cycling or typing ‘reset’ from the rommon prompt.The Router is now booted to the IOS from the tftp server.This completes Performing a software upgrade or downgrade using TFTP, xmodem or tftpdnld.Page last updated on:All contents are Copyright © 1992–2009 <strong>Cisco</strong> Systems, Inc. All rights reserved.
2.12 Password recovery on a typical router2.12.1 Introduction2.12.2 Step-by-Step Procedure2.12.3 Example of Password Recovery Procedure2.12.1 IntroductionThis section describes how to recover the enable password and the enable secret passwords. These passwords protect access toprivileged EXEC and configuration modes. The enable password password can be recovered, but the enable secret password isencrypted and must be replaced with a new password. Use the procedure described in this document in order to replace the enable secretpassword.Note: Please refer to the following link on <strong>Cisco</strong>.com forcomprehensive password recovery procedures for various<strong>Cisco</strong> devices including <strong>Cisco</strong> switches.2.12.2 Step-by-Step ProcedureStep 1: Attach a terminal or PC with terminal emulation to the console port of the router. See Establish a Console Session with the Routerfor details.Step 2: If you still have access to the router, type the show version command and record the setting of the configuration register; it isusually 0x2102 or 0x102.If you don't have access to the router (because of a lost login or tacacs password), you can safely consider that your configuration registeris set to 0x2102.Step 3 : Using the power switch, turn off the router and then turn it back on.Step 4 : Press Break on the terminal keyboard within 60 seconds of the power-up to put the router into ROMMON.If the break sequence doesn't work, see Possible Key Combinations for Break Sequence During Password Recovery for other keycombinations.Step 5 : Type confreg 0x2142 at the rommon 1> prompt to boot from Flash without loading the configuration.Step 6 : Type reset at the rommon 2> prompt.The router reboots but ignores its saved configuration.Step 7 : Type no after each setup question or press Ctrl-C to skip the initial setup procedure.Step 8 : Type enable at the Router> prompt.You'll be in enable mode and see the Router# prompt.Step 9 : Typer copy startup-config running-config to copy the nonvolatile RAM (NVRAM) into memory.Step 10 : Type show running-config.The show running-config command shows the configuration of the router. In this configuration you see under all the interfaces theshutdown command, which means all interfaces are currently shutdown. Also, you can see the passwords (enable password, enable secret,vty, console passwords, and so on) either in encrypted or unencrypted format. The unencrypted passwords can be re-used, the encryptedones will have to be changed with a new one.Step 11 : Type configure terminal and make the changes.The prompt is now hostname(config)#.Step 12 : Type enable secret to change the enable secret password, for example.Step 13 : Issue the no shutdown command on every interface that is used. If you issue a show ip interface brief command, everyinterface that you want to use should be "up up".Step 14 : Type config-register 0x2102, or the value you recorded in Step 2.Step 15 : Press Ctrl-z or end to leave the configuration mode.The prompt is now hostname#.Step 16 : Typer copy running-config startup-config to commit the changes.
2.12.3 Example of Password Recovery ProcedureThe example below presents an actual password recovery procedure on a typical <strong>Cisco</strong> router. Output may slightly vary based on the modelof the router.Router>enablePassword:Password:Password:% Bad secretsRouter>show version<strong>Cisco</strong> Internetwork Operating System SoftwareIOS (tm) C2600 Software (C2600-IS-M), Version 12.0(7)T, RELEASE SOFTWARE (fc2)Copyright (c) 1986-1999 by cisco Systems, Inc.Compiled Tue 07-Dec-99 02:21 by phanguyeImage text-base: 0x80008088, data-base: 0x80C524F8ROM: System Bootstrap, Version 11.3(2)XA4, RELEASE SOFTWARE (fc1)Router uptime is 3 minutesSystem returned to ROM by abort at PC 0x802D0B60System image file is "flash:c2600-is-mz.120-7.T"cisco 2611 (MPC860) processor (revision 0x202) with 26624K/6144K bytes of memory.Processor board ID JAB031202NK (3878188963)M860 processor: part number 0, mask 49Bridging software.X.25 software, Version 3.0.0.Basic Rate ISDN software, Version 1.1.2 Ethernet/IEEE 802.3 interface(s)2 Serial(sync/async) network interface(s)1 ISDN Basic Rate interface(s)32K bytes of non-volatile configuration memory.8192K bytes of processor board System flash partition 1 (Read/Write)8192K bytes of processor board System flash partition 2 (Read/Write)Configuration register is 0x2102Router>!--- The router was just power cycled and during bootup a!--- break sequence was sent to the router.!*** System received an abort due to Break Key ***signal= 0x3, code= 0x500, context= 0x813ac158PC = 0x802d0b60, Vector = 0x500, SP = 0x80006030rommon 1 > confreg 0x2142You must reset or power cycle for new config to take effectrommon 2 > resetSystem Bootstrap, Version 11.3(2)XA4, RELEASE SOFTWARE (fc1)Copyright (c) 1999 by cisco Systems, Inc.TAC:Home:SW:IOS:Specials for infoC2600 platform with 32768 Kbytes of main memoryprogram load complete, entry point: 0x80008000, size: 0x6fdb4cSelf decompressing the image : ######################################################################################################################################################################################################################################################## [OK]Restricted Rights LegendUse, duplication, or disclosure by the Government issubject to restrictions as set forth in subparagraph(c) of the Commercial Computer Software - RestrictedRights clause at FAR sec. 52.227-19 and subparagraph(c) (1) (ii) of the Rights in Technical Data and ComputerSoftware clause at DFARS sec. 252.227-7013.
cisco Systems, Inc.170 West Tasman DriveSan Jose, California 95134-1706<strong>Cisco</strong> Internetwork Operating System SoftwareIOS (tm) C2600 Software (C2600-IS-M), Version 12.0(7)T, RELEASE SOFTWARE (fc2)Copyright (c) 1986-1999 by cisco Systems, Inc.Compiled Tue 07-Dec-99 02:21 by phanguyeImage text-base: 0x80008088, data-base: 0x80C524F8cisco 2611 (MPC860) processor (revision 0x202) with 26624K/6144K bytes of memory.Processor board ID JAB031202NK (3878188963)M860 processor: part number 0, mask 49Bridging software.X.25 software, Version 3.0.0.Basic Rate ISDN software, Version 1.1.2 Ethernet/IEEE 802.3 interface(s)2 Serial(sync/async) network interface(s)1 ISDN Basic Rate interface(s)32K bytes of non-volatile configuration memory.8192K bytes of processor board System flash partition 1 (Read/Write)8192K bytes of processor board System flash partition 2 (Read/Write)--- System Configuration Dialog ---Would you like to enter the initial configuration dialog? [yes/no]: nPress RETURN to get started!Router>Router>enableRouter#copy startup-config running-configDestination filename [running-config]?1324 bytes copied in 2.35 secs (662 bytes/sec)Router#00:01:24: %LINEPROTO-5-UPDOWN: Line protocol on Interface BRI0/0:1, changed state to down00:01:24: %LINEPROTO-5-UPDOWN: Line protocol on Interface BRI0/0:2, changed state to downRouter#configure terminalEnter configuration commands, one per line. End with CNTL/Z.Router(config)#enable secret ciscoRouter(config)#^Z00:01:54: %SYS-5-CONFIG_I: Configured from console by consoleRouter#show ip interface briefInterface IP-Address OK? Method Status ProtocolEthernet0/0 10.200.40.37 YES TFTP administratively down downSerial0/0 unassigned YES TFTP administratively down downBRI0/0 193.251.121.157 YES unset administratively down downBRI0/0:1 unassigned YES unset administratively down downBRI0/0:2 unassigned YES unset administratively down downEthernet0/1 unassigned YES TFTP administratively down downSerial0/1 unassigned YES TFTP administratively down downLoopback0 193.251.121.157 YES TFTP up upRouter#configure terminalEnter configuration commands, one per line. End with CNTL/Z.Router(config)#interface Ethernet0/0Router(config-if)#no shutdownRouter(config-if)#00:02:14: %LINK-3-UPDOWN: Interface Ethernet0/0, changed state to up00:02:15: %LINEPROTO-5-UPDOWN: Line protocol on Interface Ethernet0/0, changed state to upRouter(config-if)#interface BRI0/0Router(config-if)#no shutdownRouter(config-if)#00:02:26: %LINK-3-UPDOWN: Interface BRI0/0:1, changed state to down00:02:26: %LINK-3-UPDOWN: Interface BRI0/0:2, changed state to down00:02:26: %LINK-3-UPDOWN: Interface BRI0/0, changed state to up00:02:115964116991: %ISDN-6-LAYER2UP: Layer 2 for Interface BR0/0, TEI 68 changed to upRouter(config-if)#^ZRouter#00:02:35: %SYS-5-CONFIG_I: Configured from console by consoleRouter#copy running-config startup-configDestination filename [startup-config]?Building configuration...
[OK]Router#show version<strong>Cisco</strong> Internetwork Operating System SoftwareIOS (tm) C2600 Software (C2600-IS-M), Version 12.0(7)T, RELEASE SOFTWARE (fc2)--- output truncated ---2 Ethernet/IEEE 802.3 interface(s)2 Serial(sync/async) network interface(s)1 ISDN Basic Rate interface(s)32K bytes of non-volatile configuration memory.8192K bytes of processor board System flash partition 1 (Read/Write)8192K bytes of processor board System flash partition 2 (Read/Write)Configuration register is 0x2142Router#configure terminalEnter configuration commands, one per line. End with CNTL/Z.Router(config)#config-register 0x2102Router(config)#^Z00:03:20: %SYS-5-CONFIG_I: Configured from console by consoleRouter#show version<strong>Cisco</strong> Internetwork Operating System SoftwareIOS (tm) C2600 Software (C2600-IS-M), Version 12.0(7)T, RELEASE SOFTWARE (fc2)--- output truncated ---2 Ethernet/IEEE 802.3 interface(s)2 Serial(sync/async) network interface(s)1 ISDN Basic Rate interface(s)32K bytes of non-volatile configuration memory.8192K bytes of processor board System flash partition 1 (Read/Write)8192K bytes of processor board System flash partition 2 (Read/Write)Configuration register is 0x2142 (will be 0x2102 at next reload)Router#2.13 Setting an ip address on <strong>Cisco</strong> equipment2.13.1 Setting an IP Address on a Router2.13.2 IOS Switch Minimum Configuration Requirement for LAN Connectivity2.13.1 Setting an IP Address on a RouterTo set a primary or secondary IP address for an interface, use the ip address command in interface configuration mode. To remove an IPaddress or disable IP processing, use the no form of this command.ip address ip-address mask [secondary [vrf vrf-name]]noip address ip-address mask [secondary [vrf vrf-name]]Syntax DescriptionipaddressIP address.mask Mask for the associated IP subnet.secondary (Optional) Specifies that the configured address is a secondary IP address. If this keyword is omitted, the configured addressis the primary IP address.Note: If the secondary address is used for a VRF table configuration with the vrf keyword, the vrf keyword must bespecified also.vrf (Optional) Name of the VRF table. The vrf-name argument specifies the VRF name of the ingress interface.Command DefaultNo IP address is defined for the interface.Command ModesInterface configuration mode, router(config-if)#Router Command Example
Interface ethernet 0router(config-if)# Ip address 192.168.1.2 255.255.255.02.13.2 IOS Switch Minimum Configuration Requirement for LAN ConnectivityUse this procedure to put a basic configuration on a switch running <strong>Cisco</strong> IOS using vlan1 as the access vlan.Note: The ip address, subnet mask and default gatewaymust be provided by the customer.switch> enableType the password when prompted.swtich# config tswitch(config)# enable secret ciscoswitch(config)# interface vlan1switch(config-if)# ip address switch(config-if)# no shutswitch(config)# ip default-gateway switch(config)# line vty 0 4switch(config-line)# password ciscoswitch(config-line)# loginswitch(config-line)#endswitch# wr memThe switch should now be accessible on the network using vlan 1.If vlan1 isn’t the access vlan, configure the appropriate access vlan and add it to the vlan database in the switch. In the example below,vlan 120 is the access vlan:switch(config)# enable secret ciscoswitch(config)# interface vlan120switch(config-if)# ip address switch(config-if)# no shutswitch(config)# ip default-gateway switch(config)# line vty 0 4switch(config-line)# password ciscoswitch(config-line)# loginswitch(config-line)#endswitch# wr memswitch#vlan databaseswitch (vlan)#vlan 120VLAN 120 added:Name: VLAN0120switch (vlan)#exitAPPLY completed.Exiting....The switch should now be accessible on the network using vlan 120.Note: There may be situations where more config isnecessary for network access. For example, the customermay be using fa0/24 with a specific speed and/or duplex orgig0/1 is configured for trunking. This will have toconfigured as well from the customer’s configuration.2.13.3 Standard Break Key Sequence Combinations During Password Recovery2.13.3.1 Introduction2.13.3.2 Components Used2.13.3.3 Standard Break Key Combinations
2.13.3.1 IntroductionThis document provides standard break key sequence combinations for the most common operating systems, and some troubleshooting tips.2.13.3.2 Components UsedThis document is not restricted to specific software and hardware versions.Note: The information presented in this document wascreated from devices in a specific lab environment. All of thedevices used in this document started with a cleared(default) configuration. If you are working in a live network,ensure that you understand the potential impact of anycommand before using it.2.13.3.3 Standard Break Key CombinationsSoftwareHyperterminalHyperterminalProComm PlusSecureCRTPlatformIBMCompatibleIBMCompatibleIBMCompatibleIBMCompatibleOperatingSystemWindows XPWindows 2000WindowsWindowsTry ThisCtrl-BreakCtrl-BreakAlt-bCtrl-BreakTelnet N/A N/A Ctrl-], then type send brkTelnet to <strong>Cisco</strong>TerminalVT 100EmulationWindows NTIBMCompatibleIBMCompatibleN/AWindowsCtrl-]Data General N/A F16IBMCompatibleWindowsBreakCtrl-BreakBreak-F5Shift-F5Shift-6 Shift-4 Shift-b(^$B)Z-TERMINAL Mac Apple Command-bPage last updated on:All contents are Copyright © 1992–2009 <strong>Cisco</strong> Systems, Inc. All rights reserved.
Windows Operating System3.1 Locate and Use Windows Hyper Terminal3.2 Configure Laptop to Communicate3.3 Capture Text Output from Terminal Sessions3.4 Locate and Use Windows Text Editor3.5 Locate and Use the MS-DOS Command Prompt3.6 Understand the ‘ipconfig’ Command from MS-DOS Prompt3.7 Configure Network Settings on Laptop (IP Address and Default Gateway)3.8 Establish A Connection with Ethernet Ports on <strong>Cisco</strong> Equipment3.9 Disable Windows FirewallPage last updated on:All contents are Copyright © 1992–2009 <strong>Cisco</strong> Systems, Inc. All rights reserved.
3 Windows Operating System3.1 Locate and Use Windows HyperTerminalMost <strong>Cisco</strong> devices do not have a graphical Web-based interface by default. You must configure them from the command line using theserial-based console port on the switch or router. While there are a variety of serial terminal emulation programs available, most people useWindows HyperTerminal.HyperTerminal comes with Windows95, 98, Me, NT, 2000, and XP. Windows Vista, however, does not include HyperTerminal. For WindowVista users you can still use XP HyperTerminal. Just extract two files hypertrm.dll and hypertrm.exe. You can put them anywhere on thedisk, no installation required. Of course, for that you need to have Windows XP to extract files from.HyperTerminal is a terminal emulator program that runs in Windows. It offers a text-based command prompt on a remote device. Thatdevice could be either a serial device, like a <strong>Cisco</strong> router, connected directly to your PC’s serial port, or a network device. HyperTerminal caneither use the local serial interface for communications or the network. In the case of the network, HyperTerminal is simply using the telnetprotocol.Start HyperTerminal in Windows by going to Start > Programs > Accessories > Communications > HyperTerminal. WhenHyperTerminal starts you should see this dialog.Figure 3-1a: HyperTerminal Startup DialogType in the word of your choice for the connection name and click OK.Connect your <strong>Cisco</strong> device to your PC’s COM port but don’t turn it on yet. On the next window that appears, make sure that the “ConnectUsing” field says COM1 or COM2 (the port your cable in connected to) and click OK.Figure 3-1b: HyperTerminal Connection Option
3.2 Configure Laptop to CommunicateOn the next window, change the Baud rate to 9600 and check the Date bits is 8, Parity is set to None, Stop bits is 1, and Flow control isNone, then click OK.Figure 3-2a: HyperTerminal ConfigurationNow, turn on your <strong>Cisco</strong> device. In the HyperTerminal window, you should see the boot up process for your device.3.3 Capture Text Output from Terminal SessionsIn order to capture the output of long show commands (for example, from the show tech-support command) or router debugs, you cannotsimply use copy and paste. Instead, use the Capture Text option from your Hyperterminal as explained here:1. Select Transfer from the menu bar on your Hyperterminal program, and choose the Capture Text option from the pulldownmenu:
Figure 3-3a: Capture Text Option2. In dialog box that is displayed, create the name of the file. Then click Start.Figure 3-3b: Create File Name for Captured Text3. Enter the terminal length 0 command at the router# prompt.The terminal length command allows the console to scroll, even if you do not press the space bar after everyscreen.Note: For the show tech-support command, "terminal length 0" is on by default.4. Issue the commands you want to capture its output, such as the show interfaces command.
5. When the command is completed, select the Stop option from the Capture Text sub menu.Figure 3-3c: Stop Capturing Text6. Repeat steps 1 through 5 for as many text captures as you need.Note: It is not necessary to set the terminal length to zero each time. The terminal length setting stays at zero untilanother value is set manually.7. Enter the terminal length 24 command at the router# prompt. This causes the console to pause after each fullscreen, and allows you to read the output.3.4 Locate and Use Windows Text EditorThe text output you capture from from the terminal can be saved to the Windows Notepad. To locate the Notepad:Click Start > Programs > Accessories > Notepad.3.5 Locate and Use the MS-DOS Command PromptTo access the command prompt - simply click the Start button in the lower left hand corner of the screen followed by clicking on theRun... option. When you do this, a small box will appear in the lower left hand corner of the screen. To access the command promptsimply type cmd or command.Figure 3-5a: MS-DOS Command Prompt Window
3.6 Understand the ‘ipconfig’ Command from MS-DOS PromptYou can use MS-DOS network command "ipconfig" to view the network adapter settings and assigned values of your laptop.3.7 Configure Network Settings on Laptop (IP Address and Default Gateway)Here are few options can be used for you to see what IP address a network connection has, and you can also renew and release addresses.That is useful for troubleshooting connections or getting a different IP address from a DHCP server.Type 'ipconfig /all' to view all IP settings for all network connections including IP address and default gateway address onthe computer.Figure 3-7a: Display IP Address
Type 'ipconfig /release' to release a DHCP (automatically) assigned IP address.Figure 3-7b: Release A IP AddressType 'ipconfig /renew' to get a new IP address from a DHCP server.Figure 3-7c: Renew A IP Address
3.8 Establish A Connection with Ethernet Ports on <strong>Cisco</strong> EquipmentIn general, connecting PC to the Ethernet port on <strong>Cisco</strong> equipment, you require a crossover cable. Connections between two routers/hubstypically are crossover cables. Connections between non-similar devices use straight-through cables. Connections on the RS232 interfaceappear to use straight cables for most parts.3.9 Disable Windows FirewallYou might want to disable the firewall if you connect to a <strong>Cisco</strong> device's Web User Interface that do not function as expected behind afirewall. The following steps are only for Windows built-in firewall shown as an example.To disable Windows Firewall, you can do either method of the following:A. This method is for user with administrative access to unmanaged systems:1. From the Start menu, select Control Panel, then select Windows Firewall.2. Select Off, then click Ok.Figure 3-9a: Windows Firewall
B. These steps are only for Windows XP SP2 and Windows SP3.1. Click Start, click Run, type Firewall.cpl, and then click OK.2. On the General tab, click Off (not recommended).3. Click OK.Page last updated on:All contents are Copyright © 1992–2009 <strong>Cisco</strong> Systems, Inc. All rights reserved.
General Networking Knowledge4.1 Describe the differences in general terms the following hardware4.1.1 Switches4.1.1.1 Unmanaged switch4.1.1.2 Managed switch4.1.2 Routers4.1.3 Switch Versus Router4.1.4 Modem4.1.5 Wireless Access Point4.1.6 Wireless Access Bridge4.1.7 Wireless Access Point Versus Wireless Access Bridge4.2 IP Addressing and Subnetting4.2.1 IP Addressing4.2.2 IP Subnet Addressing4.2.3 IP Subnet Mask4.4 Describe what a CSU/DSU does (i.e., loopback processes, etc)4.4.1 Perform Loopback Tests at the CSU/DSU4.4.2 CSU/DSU Software Loopback4.4.3 CSU/DSU Hardware Loopback4.4.4 Loopback Plugs4.4.5 Telco-Assisted Loopback Tests4.5 Describe/identify telco termination points (i.e., demarc, extended demarc, smartjack, etc)4.6 Telnet Protocol4.7 Ping Command4.7.1 Extended pingPage last updated on:All contents are Copyright © 1992–2009 <strong>Cisco</strong> Systems, Inc. All rights reserved.
4.1 Describe the differences in general terms the following hardware4.1.1 SwitchesA switch serves as a controller, enabling networked devices to talk to each other efficiently. Most business networks today use switches toconnect computers, printers, and servers within a building or campus. Through information sharing and resource allocation, switches savebusinesses money and increase employee productivity.4.1.1.1 Unmanaged switchAn unmanaged switch works right out of the box. It's not designed to be configured, so you don't have to worry about installing or setting itup correctly. Unmanaged switches have less network capacity than managed switches. You'll usually find unmanaged switches in homenetworking equipment.4.1.1.2 Managed switch (managed network switch)A managed network switch is configurable, offering greater flexibility and capacity than an unmanaged switch. You can monitor and adjust amanaged switch locally or remotely, to give you greater network control4.1.2 RoutersRouters tie multiple networks together. For example, you would use a router to connect your networked computers to the Internet andthereby share an Internet connection among many users. The router will act as a dispatcher, choosing the best route for your information.Routers analyze the data being sent over a network, change how it is packaged, and send it to another network, or over a different type ofnetwork. They connect your business to the outside world, protect your information from security threats, and can even decide which computersget priority over others.4.1.3 Switch Versus RouterSwitches create a network.Routers connect networks.4.1.4 ModemModem, short for modulator-demodulator, is an electronic device that converts a computer’s digital signals into specific frequencies to travel overtelephone or cable television lines. At the destination, the receiving modem demodulates the frequencies back into digital data. Computers usemodems to communicate with one another over a telecom network.4.1.5 Wireless Access PointWireless Access Points (APs or WAPs) are specially configured nodes on wireless local area networks (WLANs). Access points act as a centraltransmitter and receiver of WLAN radio signals. Access points used in home or small business networks are generally small, dedicated hardwaredevices featuring a built-in network adapter, antenna, and radio transmitter. Access points support Wi-Fi wireless communication standards.Access points connect multiple users on a wireless LAN to each other and to a wired network. For example, 20 users equipped with 802.11network interface cards (NICs) may associate with a single access point that connects to an Ethernet network. Each of these users has accessto the Ethernet network and to each other.4.1.6 Wireless Access BridgeAccess Bridges connect networks wirelessly. This may be necessary if you have a few devices, possibly in a far reaching part of the facility, thatare interconnected via Ethernet. A wireless LAN bridge plugs into this Ethernet network and uses the 802.11 protocol to communicate with anaccess point that's within range. In this manner, a bridge enables you to wirelessly connect a network to an access point.4.1.7 Wireless Access Point Versus Wireless Access BridgeAccess Point interfaces a network to multiple users, not other networks. Access Bridges connect a network to an Access Point (see Figure 1-1).Figure 1-1: Wireless Access Point vs Wireless Access Bridge
Page last updated on:All contents are Copyright © 1992–2009 <strong>Cisco</strong> Systems, Inc. All rights reserved.
4.2 IP Addressing and SubnettingEach host on a TCP/IP network is assigned a unique 32-bit logical address that is divided into two main parts: the network address and the host address. The network addressidentifies a network and must be assigned by the Internet Network Information Center (InterNIC) if the network is to be part of the Internet. An Internet Service Provider(ISP) can obtain blocks of network addresses from the InterNIC and can itself assign address space as necessary. The host address identifies a host on a network and is assignedby the local network administrator.Binary Versus Decimal NumbersWhereas the base 10 number system uses 10 digits to represent different values (9 through 0), the base 2 number system uses only two valid digits: 0 and 1. Their positiondetermines the value that they signify. The rightmost position, in binary terms, is equal to 1. The next position to the left is equal to 2. The next position, 4, then 8, and so on.Each position to the left is two times the value of the position to the right. The decimal value of a binary number is calculated by summing the decimal values of the number'sdigits that are populated with 1s. A binary number equal to 255 consists of 8 bits with all 1s. Table 4-2a demonstrates binary versus decimal values of an octet.Table 4-2a: Binary versus Decimal Values of an OctetDigit 8 7 6 5 4 3 2 1Binary 1 1 1 1 1 1 1 1Decimal Value of Digit 128 64 32 16 8 4 2 14.2.1 IP AddressingIP Address FormatsThe 32-bit IPv4 address is grouped eight bits at a time, separated by dots, and represented in decimal format (known as dotted decimal notation). Each bit in the octet has abinary weight (128, 64, 32, 16, 8, 4, 2, 1). The minimum value for an octet is 0, and the maximum value for an octet is 255. Each of the four octets in the IP address isrepresented by a decimal number, from 0 to 255, and separated by dots (.). This is known as a dotted-decimal format. Therefore the lowest possible value that can berepresented within the framework of an IPv4 address is 0.0.0.0, and the highest possible value is 255.255.255.255. Both of these values, however, are reserved and cannot beassigned to individual end systems.Note: A new version of IP, IPv6, will feature radically different address architectures. The IPv6 address will be 128 bits long and will use entirely new classifications designed tomaximize their efficiency of use.IP Address ClassesIP addressing supports five different address classes: A, B,C, D, and E. Only classes A, B, and C are available for commercial use. The left-most (high-order) bits indicate thenetwork class.The differences between the classes were the number of bits allocated to network versus host addresses.Class A AddressesA Class A IP address uses the first octet for the network addressing and the remaining three octets for the host addressing. The first bit of a Class A address is always a 0 asindicated in Figure 4-2a. This limits the possible Class A IP networks to 127, due to the leftmost bit's decimal value of 128 is zero. The last 24 bits of a Class A address representpossible host addresses. The range of possible Class A network addresses is from 1.0.0.0 to 126.0.0.0. Each Class A network can support up to 16,777,214 host addresses. Thisvalue is calculated by multiplying 2 to the 24th power and then subtracting 2. The reason for subtracting 2 is because the all 0s address is reserved for identifying the network andthe all 1s address is reserved for broadcasting within that network.Figure 4-2a: Class A address architectureNote: Technically, 127.0.0.0 is also a Class A network address. However, it is reserved for loop-back testing and cannot be assigned to a network.Class B AddressesA Class B IP address uses the first two octets for the network addressing and the last two octets for the host addressing. The range of possible Class B network addresses is from
128.1.0.0 to 191.254.0.0. The first 2 bits of the first octet of a Class B address are 10. The remaining 6 bits may be populated with either 1s or 0s. The last 16 bits (twooctets) identify potential host addresses. Each Class B address can support up to 65,534 unique host addresses. This value is calculated by multiplying two to the 16th power andsubtracting two (values reserved by IP). Figure 4-2b presents the Class B address architecture.Figure 4-2b: Class B address architectureClass C AddressesA Class C IP address uses the first three octets for networking addressing and the last one octet for host addressing. The first 3 bits of the first octet of a Class C address are 110.The minimum decimal value of this octet is 192 (128 + 64) and the maximum value of this octet is 223 (255 – 32). Therefore, the range of possible Class C network addresses isfrom 192.0.1.0 to 223.255.254.0. The last octet is used for host addressing. Each Class C network can support a maximum of 256 unique host addresses (0 through 255), butonly 254 are usable because 0 and 255 are not valid host addresses. There can be 2,097,150 different Class C network numbers. Figure 4-2c presents the Class C addressarchitecture.Figure 4-2c: Class C address architectureNote: In the world of IP addressing, 0 and 255 are reserved host address values. IP addresses that have all their host address bits set equal to 0 identify the local network.Similarly, IP addresses that have all their host address bits set equal to 255 are used to broadcast to all end systems within that network number.4.2.2 IP Subnet AddressingIP networks can be divided into smaller networks called subnetworks (or subnets). Subnetting provides the network administrator with several benefits, including extra flexibility,more efficient use of network addresses, and the capability to contain broadcast traffic (a broadcast will not cross a router). Subnets are under local administration. As such, theoutside world sees an organization as a single network and has no detailed knowledge of the organization's internal structure.A given network address can be broken up into many subnetworks. A subnetted IP address actually consists of three parts: network address, subnetwork address and hostaddress.The subnetwork and host addresses are carved from the original IP address's host address portion. For example, 172.16.1.0, 172.16.2.0, 172.16.3.0, and 172.16.4.0 are all subnetswithin network 171.16.0.0. (All 0s in the host portion of an address specifies the entire network.) In effect, bits are taken away from the host address to identify subnetworknumbers. The more host bits there are in the IP address, the more subnets and hosts you can create. However, these subnets decrease the number of hosts that can beaddressed.4.2.3 IP Subnet MaskA subnet address is created by "borrowing" bits from the host field and designating them as the subnet field. The number of borrowed bits varies and is specified by the subnetmask. Figure 4-2d shows how bits are borrowed from the host address field to create the subnet address field.Figure 4-2d: Bits are borrowed from the host address field to create the subnet address field.
Subnet masks use the same format and representation technique as IP addresses. The subnet mask, however, has binary 1s in all bits specifying the network and subnetworkfields, and binary 0s in all bits specifying the host field. Figure 4-2e illustrates a sample subnet mask.Figure 4-2e: Bits are borrowed from the host address field to create the subnet address field.For example: 172.16.12.160/24 - 172.16.12.160 is a host IP address and 24 is subnet mask which represent the number of bits in the subnet mask that are set to one.172.16.12.160 10101100 00010000 00001100 10100000 Host255.255.255.0 11111111 11111111 11111111 00000000 Subnet MaskFor example, a mask of 11111111.11111111.11111111.00000000 (255.255.255.0 in dotted-decimal notation) would have 256 possible host addresses per subnet. Only 254 of theseaddresses, however, are actually usable. The other two host addresses are reserved. The first host number in a subnet is always reserved for identifying the subnet itself. The lasthost number is also reserved but is used for IP broadcasts within the subnet. Therefore, you must always subtract two from the maximum number of hosts in a subnet to get themaximum number of usable host addresses per subnet.172.16.12.160 10101100 00010000 00001100 00000000 Subnet172.16.12.160 10101100 00010000 00001100 11111111 Broadcast172.16.12.160 10101100 00010000 00001100 00000001 First host172.16.12.160 10101100 00010000 00001100 11111110 Last hostTable 4-2b demonstrates the number of subnets and the number of hosts per subnet that can be carved from a Class B IP address. A Class B address uses 16 bits for networknumber and 16 for host addresses. From Table 4-2b , you will notice that the fewest number of bits you can allocate to the network prefix is 2, and the most is 14. The reason forthis is a network prefix of 1 bit will only allow you to define 2 subnet numbers: 0 and 1. The rules for subnetting prevent you from using a subnet address that consists of all 0s orall 1s. Such addresses are reserved! Therefore, a network prefix of 1 bit yields no usable subnets addresses.Table 4-2b: Subnetting a Class B Address SpaceNumber of Bits in Network Prefix Subnet Mask Number of Usable Subnet Addresses Number of Usable Host Addresses, Per Subnet
2 (11111111.11111111.11000000.00000000) 255.255.192.0 2 163823 (11111111.11111111.11100000.00000000) 255.255.224.0 6 81904 (11111111.11111111.11110000.00000000) 255.255.240.0 14 40945 (11111111.11111111.11111000.00000000) 255.255.248.0 30 20466 (11111111.11111111.11111100.00000000) 255.255.252.0 62 10227 (11111111.11111111.11111110.00000000) 255.255.254.0 126 5108 (11111111.11111111.11111111.00000000) 255.255.255.0 254 2549 (11111111.11111111.11111111.10000000) 255.255.255.128 510 12610 (11111111.11111111.11111111.11000000) 255.255.255.192 1022 6211 (11111111.11111111.11111111.11100000) 255.255.255.224 2046 3012 (11111111.11111111.11111111.11110000) 255.255.255.240 4094 1413 (11111111.11111111.11111111.11111000) 255.255.255.248 8190 614 (11111111.11111111.11111111.11111100) 255.255.255.252 16382 2Page last updated on:All contents are Copyright © 1992–2009 <strong>Cisco</strong> Systems, Inc. All rights reserved.
4.4 Describe what a CSU/DSU does (i.e., loopback processes, etc)A CSU/DSU (Channel Service Unit/Data Service Unit) is a digital-interface device used to connect a Data Terminal Equipment device or DTE, such as arouter, to a digital circuit, for example a T1 or T3 line.A CSU/DSU operates at the physical layer (layer 1) of the OSI model. CSU/DSU are also made as separate physical products; CSUs and DSUs. The DSUor both functions may be included as part of an interface card inserted into a DTE. If the CSU/DSU is external, the DTE interface is usually compatiblewith the V.xx or RS-232C or similar serial interface.Digital lines require both a channel service unit (CSU) and a data service unit (DSU). The CSU provides termination for the digital signal and ensuresconnection integrity through error correction and line monitoring. The DSU converts the data encoded in the digital circuit into synchronous serial data forconnection to a DTE device. In reality, you can think of a CSU/DSU as a digital modem; but unlike a normal modem, which changes the signal fromdigital to analog, a CSU/DSU changes the signal from one digital format to another. Figure 4-4a shows how a CSU/DSU might fit into a network.Figure 4-4a: How a CSU/DSU is used in a network<strong>Cisco</strong> routers primarily use serial interfaces when connecting to a WAN. The <strong>Cisco</strong> interfaces come in two types: DB-60 serial interfaces and SmartSerial interfaces.Typically, older routers use the DB-60 style interfaces, whereas newer routers use the Smart Serial interfaces. The DB-60 interface received its namebecause of the 60 pins in the interface. Smart Serial interfaces are much more space efficient, and can squeeze two interfaces into the same WANInterface Card (WIC) that the DB-60 interface used. These WIC interfaces can be installed into any of <strong>Cisco</strong>'s mainline routers (1700 series, 2600/2800series, 3600/3800 series).After you have installed the interface, you must then purchase the cable that connects your router to the CSU/DSU. This cable converts from one of<strong>Cisco</strong>'s two proprietary interface types (DB-60 or Smart Serial) to a standards-based CSU/DSU connector. Five primary standard connectors have beencreated for the CSU/DSU units: V.35, X.21, EIA/TIA-232, EIA/TIA-449, and EIA/TIA-530. The most common connector in North America is V.35.Notice how these cables convert from the <strong>Cisco</strong> proprietary Smart Serial or V.35 connector to the industry standard V.35 connector, which would connectto the CSU/DSU device.T1 interfaces use an RJ-48 connector. These interface types usually come with a built-in CSU/DSU, which eliminates the need to purchase an externalCSU/DSU and thereby eliminates another point of potential failure in your network. Upon initial inspection, the RJ-48 connector looks exactly like the RJ-45 connector used for ethernet technology. But the RJ-48 connector is very different from RJ-45 connector. First off, it is fastened to Shielded TwistedPair cabling (STP) instead of the standard Unshielded Twisted Pair (UTP) of ethernet. This reduces line noise on these connections. This isimportant because WAN connectivity is much more susceptible to interference than LAN cabling. In addition, the voltage sent across these wires, the pinoutarrangement, and the line capacitance is different on the RJ-48 connection than RJ-45.4.4.1 Perform Loopback Tests at the CSU/DSUTwo kinds of loopback tests can be used to isolate problems on the serial link: software loopbacks and hardware plug loopbacks. Whether it is aninternal or external CSU/DSU, you can do both software and hardware loopbacks back towards the router.Software local loopbacks are usually implemented with a <strong>Cisco</strong> IOS configuration command, or with a loopback button for some CSU/DSUs.A loopback plug or cable inserted into the CSU/DSU can be used for hardware loopbacks.Although you can do both software and hardware loopback tests on a CSU/DSU, a loopback plug is more effective to isolate problems. A softwareloopback towards the router usually only loops the DSU functionality of a CSU/DSU. A hardware loopback is able to prove that the entire CSU/DSU is notat fault.Figure 4-4b describes the various loopback tests you can do to isolate your serial line issue accurately.Figure 4-4b: CSU/DSU loopback test
4.4.2 CSU/DSU Software LoopbackFor an internal CSU/DSU, the software loopback is implemented with a <strong>Cisco</strong> IOS configuration command. For most platforms, the command takes theform loopback, loopback dte or loopback local. This loops the circuit from inside the CSU/DSU back towards the router, and therefore isolates thatsection of the circuit.In order to run the loopback test on channelized T1s using Primary Rate Interface (PRI), you need to use the channel-group T1 controller command.Use this command to create one or more serial interfaces mapped to a set of timeslots in the channelized T1.Note: If the T1 is configured as a PRI, you need to remove the pri-group before you use the channel-group command.If you wish to run a software loopback at the local CSU, configure loopback local in the controller. Here is an example that uses these commands:Router#configure terminal Enter configuration commands, one per line. End with CNTL/Z.Router(config)#controller t1 0Router(config-controller)#no pri-group timeslots 1-24Router(config-controller)#channel-group 0 timeslots 1-24 speed 64 !--- This automatically creates a single Serial0:0interface.Router(config-controller)#loopback local !--- The loopback local command above is only necessary for softwareloopbacks.Router(config-controller)#exitRouter(config)#interface serial 0:0Router(config-if)#encapsulation hdlc !--- Note: All loopback testing is done with hdlc encapsulation.Note: This example creates a single Serial0:0 interface (where the first 0 stands for the controller and the second 0 represents the channel-groupnumber), and uses all 24 timeslots for a total of 1.536Mbps bandwidth.4.4.3 CSU/DSU Hardware LoopbackThe hardware loopback plug test is used to see if the router and the entire CSU/DSU has any faults. If a router passes a hardware loopback plug test,then the problem exists elsewhere on the line.For the hardware loopback test, first perform the steps described in the software loopback section, except for configuring loopback local on the controller.If you have configured loopback local on the controller, undo it through the no loopback local command before you proceed. After the configurationsteps completed, plug in the loopback plug on the serial interface to get the CSU/DSU to start looping.4.4.4 Loopback PlugsNote: The pins on an RJ-45 cable plug are numbered from 1 through 8. With the metal pins of the plug facing toward you, pin 1 is the leftmost pin. SeeFigure 4-4c .Figure 4-4c: RJ-45 Jack Plug
The T1 CSU/DSU has a pinout different from the four-wire 56K CSU/DSU. The connector for the T1 CSU/DSU is an RJ-48C. The connector for the fourwire56k CSU/DSU is an RJ-48S. Both connectors are compatible with RJ-45 plugs.Complete these steps to create a loopback plug for a T1 CSU/DSU:1. Use wire cutters to create a working RJ-45 cable that is 5 inches long with an attached connector.2. Strip the wires.3. Twist the wires from pins 1 and 4 together.4. Twist the wires from pins 2 and 5 together.5. Leave the rest of the wires alone.Complete these steps to create a loopback plug for a 56K CSU/DSU:1. Use wire cutters to create a working RJ-45 cable that is 5 inches long with an attached connector.2. Strip the wires.3. Twist the wires from pins 1 and 7 together.4. Twist the wires from pins 2 and 8 together.5. Leave the rest of the wires alone.4.4.5 Telco-Assisted Loopback TestsFor these loopback tests, you must involve the telco since you ask them to provide loopbacks towards your premises from the telco switches. Monitor thelooped circuit from the router. In order to do this, you need to have the telco "split the circuit" at the telco switch closest to your router. For example,the telco must supply a loopback at the first telco switch that your circuit passes through, and loop that circuit back towards your router. In this way youcan isolate the telco cloud of switches. You can then test only the portion of the circuit between the first telco switch and your CSU/DSU, SmartJack, androuter as shown in figure 4-4b . If "First Switch" tests indicate a problem in the circuit between the first telco switch and your router, the telco can helptest that circuit portion. The telco can loop various equipment for diagnostic tests between the SmartJack that you connect your CSU/DSU to and the firsttelco switch.Page last updated on:All contents are Copyright © 1992–2009 <strong>Cisco</strong> Systems, Inc. All rights reserved.
4.5 Describe/identify telco termination points (i.e., demarc, extended demarc, smart jack, etc)Demarc is the connection between a private telephone system and the PSTN. It is the physical point at which the telephone company'sresponsibility ends, and the customer's begins.A smart jack (as shown in Figure 4-5a) is a device that serves as the demarcation point between the carrier's local loop and thecustomer's network. It performs interface functions, such as code conversion, protocol conversion, and buffering, required forcommunications to and from a network.Figure 4-5a: Three smart jacks for T-1 circuits are pictured here in two shelves to the right of a 66 blockA smart jack must have these functions:Conversion: Convert protocols and codes such as framing types to information usable by the channel service unit (CSU).Logical Loop back: Allow a logical loop to be placed in the front of the jack, to allow for remote testing. This allows for the line to betested without an on site tech being required to put up a hard loop at the back of the jack.Signal Regeneration: The device will amplify the incoming signal as a repeater does. The regeneration must take place in front ofthe loop back according to this standard, because the loopback causes the non-repeated distance to effectively double, and willcause a loss of signal that would not be there when the device is in normal operation.Alarm indication signal (AIS): All smart jacks need to have an AIS generator inside the device. This allows the local exchange carrier(LEC) to know that the jack is still functioning properly, and that the consumer just removed his CSU from the line.DC Isolation of the LEC and the end-user. The smart jacks is a powered device, and requires two surge protectors: one on the sendpairs, and one on the receive pairs. From there, the wire pairs enter the DC isolators.Page last updated on:All contents are Copyright © 1992–2009 <strong>Cisco</strong> Systems, Inc. All rights reserved.
4.6 Telnet ProtocolTelnet is a set of components that provide terminal-like access to a remote computer.A Telnet session requires:a Telnet client, that serves as the remote terminal, anda Telnet server, that receives the connection request and allows the connection.This relationship is depicted in Figure 4-6a.Figure 4-6a: A Telnet server and clientTelnet is also a protocol—a system of rules defining the interactions between Telnet servers and clients. The Telnet protocol is defined in aseries of RFCs. Because Telnet is based on a well-defined open protocol, it can be and has been implemented on a wide range of hardwareand software systems. The basic purpose of Telnet is to provide a means by which keyboard commands typed by a remote user can crossthe network and become input for a different computer. Screen output related to the session then crosses the network from that differentcomputer (the server) to the client system (see Figure 4-6b ). The effect is that the remote user can interact with the server as if he werelogged in locally.Figure 4-6b: Network input and output with TelnetOn Unix systems, the telnet command is entered at the command prompt, as follows:telnet hostname/IP addresswhere hostname is the name of the computer to which you'd like to connect. You can also enter an IP address instead of a hostname. Thepreceding command launches the Telnet application. When Telnet is running, the commands you enter are executed on the remotecomputer. Telnet also provides some special commands that you can use during a Telnet session, as follows:close — Use this command to close the connection.
display — Use this command to display connection settings, such as the port or terminal emulation.environ — Use this command to set environment variables. Environment variables are used by the operating system to providemachine-specific or user-specific information.logout — Use this command to log out the remote user and close the connection.mode — Use this command to toggle between ASCII or binary file transfer mode. ASCII mode is designed for efficient transfer oftext files. Binary mode is for other types of files, such as executable files and graphic images.open — Use this command to connect to a remote computer.quit — Use this command to exit Telnet.send — Use this command to send special Telnet protocol sequences to the remote computer, such as an abort sequence, a breaksequence, or an end-of-file sequence.set — Use this command to set connection settings.unset — Use this command to unset connection parameters.? — Use this command to print Help information.Telnet was once an extremely useful tool, however, in recent years it has been replaced by more secure options such as SSH. One problemis that Telnet gives network intruders what they want more than anything—direct access to a terminal session on a remote server, and,although the Telnet standard supports password authentication, passwords typically are transported as clear text.4.7 Ping CommandPing tests network connectivity by sending an ICMP echo-request message to the remote machine. The remote machine must respond withan ICMP reply message. The ping command takes a single argument: the address or hostname of the remote system. It prints variousstatistics about the responses it receives:Router>ping 10.10.1.2Type escape sequence to abortSending 5, 100-byte ICMP Echos to 10.10.1.2, timeout is 2 seconds:!!!!!Success rate is 100 percent (5/5), round-trip min/avg/max = 1/2/4 msRouter>Each exclamation point indicates that the router has successfully received a response from the remote host. On a local network, you wouldexpect a success rate very close to 100%. Across the Internet, you would tolerate some failures, but they should still be relatively rare.Many sites configure their routers to block ICMP traffic because it has been used in a number of denial-of-service attacks. Therefore, youcan't count on the ability to ping an arbitrary host on the Internet.If you don't give the hostname on the command line, the router prompts you for it, and for other information. You can specify the numberof packets to send, the number of seconds to wait for a response before assuming that the ping has failed, the amount of data to includein the packet, and more:Router> pingProtocol [ip]: ip (We are doing IP only)Target IP address: 10.10.1.2 (The host we want to ping)Repeat count [5]: 10 (Number of pings to be sent to the destination)Datagram size [100]: (The actual size of the packet in bytes)Timeout in seconds [2]: (Timeout value)Extended commands [n]: (See the Privileged Ping Commands)Sweep range of sizes [n]: (Changes the packet size as it pings)Type escape sequence to abort.Sending 10, 100-byte ICMP Echos to 10.10.1.2, timeout is 2 seconds:!!!!!!!!!!Success rate is 100 percent (10/10), round-trip min/avg/max = 1/3/4 ms4.7.1 Extended pingExtended ping provides more options than the basic ping command. These options can be used to better diagnose a network connectivityproblem. To enter the extended ping mode, type the ping command, then type y at the "Extended commands" prompt:Extended commands [n]: ySource address or interface: 192.168.1.1Type of service [0]:Set DF bit in IP header? [no]:Validate reply data? [no]:Data pattern [0xABCD]:Loose, Strict, Record, Timestamp, Verbose[none]:
Sweep range of sizes [n]:Type escape sequence to abort.Sending 5, 100-byte ICMP Echos to 192.168.1.1, timeout is 2 seconds:!!!!!Success rate is 100 percent (5/5), round-trip min/avg/max = 4/4/4 msThe most useful of the extended commands is Source address or interface. This command lets you specify the source address that will beused in constructing the packet; you can specify either the IP address or the name of the interface from which the IP address will be taken.Normally, the router sets the packet's source IP address to the interface that was used to send the ICMP packet, based on the routingtable.Page last updated on:All contents are Copyright © 1992–2009 <strong>Cisco</strong> Systems, Inc. All rights reserved.
Configure the Laptop’s Ethernet InterfacePage last updated on:All contents are Copyright © 1992–2009 <strong>Cisco</strong> Systems, Inc. All rights reserved.
Configure the Laptop’s Ethernet InterfaceTo configure the laptop’s Ethernet interface with an IP address and subnet mask, follow these steps:Step 1 Open the properties of the Ethernet port that will be used for the tftp transfer.Figure 1: Open the properties of the Ethernet portStep 2 Open the TCP/IP properties of the Ethernet port.Figure 2: Open the TCP/IP properties of the Ethernet port
Step 3 Set an IP address and subnet mask.Figure 3: Set an IP address and subnet maskNote: The default gateway is not required since the laptopand switch are being connected back-to-back.Step 4 Click ‘OK’ to close Internet Protocol (TCP/IP) Properties box.Step 5 Click ‘OK’ to close the Local Area Connection Properties box to apply the configuration.Page last updated on:All contents are Copyright © 1992–2009 <strong>Cisco</strong> Systems, Inc. All rights reserved.