MANUAL ARTIK 3.indd - Niviuk
MANUAL ARTIK 3.indd - Niviuk
MANUAL ARTIK 3.indd - Niviuk
- No tags were found...
Create successful ePaper yourself
Turn your PDF publications into a flip-book with our unique Google optimized e-Paper software.
WELCOMEPerformance and securityWELCOMEWe wish to welcome you to our team and thank you for the confidencethat you have placed in a NIVIUK Glider.New terminology to describe the perfect combination of technology,performance, safety and pleasure in the EN C class has been introducedto the free flight thesaurus and that is <strong>ARTIK</strong> 3. Applying the <strong>Niviuk</strong>philosophy “give importance to small details” has ensured a wing withsuperior performance, a wing ahead of the rest the Artik 3 the EN C wingof the future.This is the user manual, which we recommend you take time to read indetail.USER’S <strong>MANUAL</strong>NIVIUK Gliders <strong>ARTIK</strong> 3This manual offers all the necessary information that will familiarize youwith the main characteristics of your new paraglider. Although this manualinforms you about your glider, it does not offer the instruction requirementsnecessary for you to be able to pilot this type of wing. Flying instructioncan only be taught at a paragliding school recognised by the FlyingFederation of your country.Nevertheless we remind you that it is important that you carefully read allthe contents of the manual for your new <strong>ARTIK</strong> 3 glider.Severe injuries to the pilot can be the consequence of the misuse of thisequipment.NIVIUK Gliders.<strong>Niviuk</strong> Gliders & Air Games sl C/ Del Ter 6, nave D 17165 La Cellera de Ter - Girona - SpainTel. +34 972 42 28 78 Fax +34 972 42 00 86info@niviuk.com www.niviuk.com2
process from Olivier’s computer to the cutting of the fabric. The cuttingis done section by section in an extremely meticulous manner. Thenumbering and marking of the guideline marks is also done in the samemeticulous way so avoiding errors in this critical process.The lines are semi-automatically manufactured and all the sewing isfinished under the supervision of our specialists.The jigsaw puzzle of the assembly process is made easier using thismethod.We economize on resources while making the quality control moreefficient.All the different parts of the canopy are cut and assembled under thestrict conditions induced by the automation of the whole process.All NIVIUK Gliders go through an extremely thorough and efficient finalinspection. Every single line of each glider is measured individually oncethe final assembly has concluded.Each wing is thoroughly inspected at the end of it assembly. Each glideris packaged following the maintenance and conservation instructionsrecommended for the advanced materials. NIVIUK Gliders are made offirst class materials as demanded by the performance, durability, andhomologation requirements of the present-day market.Information about construction materials is given on the last pages of thismanual.1.5 ELEMENTS, COMPONENTSThe <strong>ARTIK</strong> 3 is delivered to its owner together with a series ofcomponents that, although not fundamental, do take an important partin the use, transport and storage of the paraglider. The glider is deliveredtogether with a rucksack, large enough for all of the equipment to fitinside (195 litres), once appropriately packed. The rucksack is designedto make transport on foot as pleasant as possible. The internal bag,intended to protect the <strong>ARTIK</strong> 3 from possible damage, during storage isalso supplied.The compression strap allows you to keep the glider as good as possiblein the rucksack. Furthermore you will find the accelerator bar thatcompletes the acceleration gear of the wing, a small fabric repair kitmade of autoadhesive ripstop and a user’s manual with the answers allour questions about our new <strong>ARTIK</strong> 3.2. UNPACKING AND ASSEMBLY2.1 CHOOSE THE RIGHT PLACEWe recommend that you unpack and assemble your wing on a schoolingslope or a flat clear area without too much wind and free of obstacles.These conditions will allow you to carry out all the steps required for youto check and inflate the NIVIUK <strong>ARTIK</strong> 3.We recommend that an instructor or a retailer supervise the entireprocedure, as only they are competent to resolve any doubt in a safe andprofessional way.2.2 PROCEDURETake the paraglider out of the rucksack, open it and spread it open withthe lines on top of the underside, position the wing as if you were toinflate it.Check the condition of the fabric and the lines, making sure there are noabnormalities. Check the maillons, which attach the lines to the risers,are properly closed. Identify and if necessary disentangle the lines fromA, B, and C risers, the brake lines and the corresponding risers. Makesure that there are no ties or knots.2.3 ASSEMBLY OF THE HARNESCorrectly place the risers on the harness karabiners. The risers and linesshould not have any twists and they should be in the right order. Checkthat the harness buckles are correctly locked.
2.4 TYPE OF HARNESThe <strong>ARTIK</strong> 3 has passed the EN C certification using an ABS typeharness. This certification allows it to be flown with most of theharnesses on the market. We strongly recommend that you adjust thedistance of the chest strap according the values used during certification.This varies according to the size of the chosen harness.Sizes 23 and 25 = 42 cmSizes 27 and 29 = 46 cmAny changes made to these specifications may affect the wing’sperformance and reactions. This would therefore effect the glider’sconfiguration and would not conform to the certification.2.5 ASSEMBLY OF THE ACCELERATORThe acceleration mechanism of the <strong>ARTIK</strong> 3 works when you push withyour feet on the accelerator bar, this is supplied with the equipment.On delivery the accelerator bar has not yet been installed and it isrecommended that it is fit by yourself before flight. Most harnessesare equipped with a preinstalled acceleration system. When fitting anyaccelerator system ensure that all preinstalled items within the harness,such as roller pulleys are used correctly. After fitting, take into accountthat you will have to adjust the length of the accelerator lines for correctuse. This will vary according to the length of the pilot’s legs!We recommend that you try the correct fitting of the acceleration systemon equipment designed to do this, most paragliding schools have thissort of equipment.2.6 INSPECTION AND WING INFLATION ON THE GROUNDOnce you have checked all the equipment and made sure that thewind conditions are favourable, inflate your <strong>ARTIK</strong> 3 as many times asnecessary in order to become acquainted with the wing’s behaviour.The <strong>ARTIK</strong> 3 inflates easily and smoothly. An excess of energy is notnecessary and the wing will inflate with minimum pressure on the harnesswhen you move forward. This may be assisted by using the A lines. Donot pull on them; just accompany the natural rising movement of thewing. Once the wing is in the 12 o’clock position, simply apply correctpressure on the brake lines and the <strong>ARTIK</strong> 3 will sit over your head.2.7 ADJUSTING THE BRAKESThe length of the main brake lines is adjusted at the factory to the lengthestablished during certification. However, the length can be changed toadapt to the pilot’s flying style. Nevertheless, we recommend that youfly for a while with these, set at the original length. This will allow you tobecome accustomed to the <strong>ARTIK</strong> 3 and it’s unique flying behaviour. Ifyou then decide to change the length of the brake lines, untie the knot,slide the line through the brake link to the desired length, and stronglyre-tie the knot.Qualified personnel should carry out this adjustment. You must ensurethat this adjustment does not slow down the glider without any pilot input.Both brake lines should be symmetrical and measure the same length.The most recommended knots are the clove hitch knot or bowline knot.3. THE FIRST FLIGHT3.1 CHOOSE THE RIGHT PLACEWe recommend that the first flight with your <strong>ARTIK</strong> 3 is made on asmooth slope (a school slope) or in your usual flying area.3.2 PREPARATIONRepeat the procedures detailed in chapter 2 (UNPACKING ANDASEMBLY) in order to prepare your <strong>ARTIK</strong> 3.6
3.3 FLIGHT PLANDraw out a flight plan before take-off in order to avoid possible flighterrors.3.4 PRE-FLIGHT CHECK LISTOnce you are ready, but before you take-off, carry out another equipmentinspection. Ensure correct installation of all equipment and that all linesare free of hindrances or knots. Check that the weather conditions aresuited for your flying skills.3.5 WING INFLATION, CONTROL, AND TAKE-OFFSmoothly and progressively inflate the wing (chapter 2.6 INSPECTIONAND WING INFLATION ON THE GROUND). The <strong>ARTIK</strong> 3 inflates easilyand does not require excessive energy. It does not tend to over-take you,so the wing inflation phase is carried out without anguish. These take offcharacteristics provide a perfect control phase and enough time for thepilot to decide whether to accelerate and take off.Whenever the wind speed allows it, we recommend a reverse launchtechnique, this type of launch allows you to carry out a better visualcheck of the wing. The <strong>ARTIK</strong> 3 is especially easy to control in thisposition in strong winds. However, wind speeds up to 25 to 30 km/hare considered strong and extra consideration should be given to anythought of flight.Preparation and positioning of the wing on the take off is especiallyimportant.Choose a location, which is appropriate for the direction of the wind.Position the paraglider as if it were part of a large circle, taking intoaccount the shape of the canopy in flight. All this will assist in a troublefree take-off.3.6 LANDINGThe <strong>ARTIK</strong> 3 lands excellently, it transforms the wing speed into lift onthe pilot’s demand, allowing an enormous margin of error. You will nothave to wrap the brake lines around your hand to get greater brakingefficiency.3.7 FOLDING INSTRUCTIONSHistorically packing a paraglider used to be a case of simply folding thewing in the easiest and most convenient way possible and then placingit into the backpack. However modern design and the introduction oftechnically advanced materials dictate that the folding of wings nowrequires more care and attention.When the correct technique is applied to the folding process it will ensurethat the wing maintains its high performance, safety and durability.The <strong>ARTIK</strong> 3 features both the SLE (Structured Leading Edge) and theSTE (Structured Trailing Edge) and so to preserve the integrity of thosestructures a degree of care should be taken when folding.Folding should be carried out cell to cell (accordion style) with theSLE ribs remaining parallel to the leading edge at all times. The sametechnique should then be applied to STE ribs on the trailing edge andwhen complete the cell structures along the entire chord of the wingshould lay parallel and neatly alongside each other.The wing should then be folded into three sections of equal width witheach section stacked upon the other. In order to avoid placing unduestress on the internal structures when packed, it is important that eachsection is folded to the same length as the internal structure of the SLE.Several smaller folds should be avoided.To assist in this folding process <strong>Niviuk</strong> has designed the NKare foldingbag (supplied as an option). The NKare Bag will help to ensure thecorrect folding process is carried out, maintaining the profile and integrityof the internal STE and SLE structures as described above.
4. IN FLIGHTWe recommend that you read very carefully the certification test resultspublished by the Certification Test Laboratory.(see <strong>Niviuk</strong>.com downloadsection)In the Certification report we can find all the necessary informationin order to anticipate how the <strong>ARTIK</strong> 3 will react to each of the 24 testedmanoeuvres. It is important to stress that the reaction to the manoeuvresis different in each wing size, and even the reactions and solutions to eachmanoeuvre are different on the same size wing when the overall loading(i.e. Pilot/harness Weight) differs. It is essential to know the results of theCertification report in order to know how to deal possible situations.We recommend that training to master these manoeuvres be carried outunder the supervision of a competent school.4.1 FLYING IN TURBULENCEThe <strong>ARTIK</strong> 3 has an excellent profile to withstand the very differentaerological conditions so allowing the best possible piloting and stability.It reacts admirably in passive flight, thus offering a high level of safety inturbulent conditions. Nonetheless, the pilot always has to pilot accordingto the prevailing weather conditions, the pilot is the ultimate safety factor.We recommend active piloting, making the necessary fine adjustmentsto keep the wing in control. He/she should stop braking to allow it to flyat the required wing speed after a correction is made. Do not maintainany correction for longer than necessary (braked) this would cause thewing to enter into critical flying situation. Whenever necessary, control asituation, react to it and then re-establish the required speed.4.2 POSSIBLE CONFIGURATIONSWe recommend that training to master these maneuvers be carried outunder the supervision of a competent school.Asymmetric collapseIn spite of the great stability of the profile of the <strong>ARTIK</strong> 3, heavy turbulentconditions may cause part of the wing to collapse asymmetrically. Thisusually happens when the pilot has not foreseen this possible reactionof the wing. When the wing is about to experience an asymmetriccollapse the brake lines and the harness will transmit a loss of pressureto the pilot. To prevent the collapse from happening, pull the brake linecorresponding to the compromised side of the wing, this will increase theangle of incidence. If the collapse does happen the <strong>ARTIK</strong> 3 will not reactviolently, the turn tendency is very gradual and it is easily controlled.Lean your body towards the side that is still flying in order to counteractthe turn and to maintain a straight course, if necessary slightly slow downthe same side. The collapse will normally open by itself but if that doesnot happen, pull completely on the brake line on the side, which hascollapsed (100%). Do this with a firm movement. You may have to repeatthis operation to provoke the re-opening. Take care not to overbrake onthe side that is still flying (turn control) and when the collapse has beensolved; remember to let the wing recover its flying speed.Symmetric collapseIn normal flying conditions the design of the <strong>ARTIK</strong> 3 ensures that asymmetric collapse is quite improbable. The profile of the wing has beendesigned to widely tolerate extreme changes in the angle of incidence.A symmetric collapse may occur in heavy turbulent conditions, on entryor exit of strong thermals or lack of adapting the use of the acceleratorto the prevailing air conditions. Symmetrical collapses usually re-inflatewithout the glider turning but you can symmetrically apply the brake lineswith a quick deep pump to quicken the re-inflation. Release the brakelines immediately to recover optimum flight speed.Negative spinThis configuration is out of the normal flight behaviour of the <strong>ARTIK</strong> 3.Certain circumstances however, may provoke this configuration suchas trying to turn when the wing is flying at very low speed (while heavilybraking). It is not easy to give any recommendations about this situationsince it varies depending on the circumstances. Remember that youshould restore the relative air speed over the wing. To achieve this,8
progressively reduce the pressure on the brake lines and let the wing gainspeed. The normal reaction would be a lateral surge with a turn tendencyno greater than 360º before restoring to normal flight conditions.Parachutal stallIf it does happen, the feeling would be that the wing would not beadvancing; you would feel a kind of instability and a lack of pressureon the brake lines, although the canopy would appear to be correctlyinflated. The correct reaction would be to release the pressure on thebrake lines and push the A lines forward or rather lean your body to anyside WITHOUT PULLING ON THE BRAKE LINES.Deep stallThe possibility of the <strong>ARTIK</strong> 3 falling into this configuration duringnormal flight is very unlikely. This could happen if you are flying at avery low speed, whilst over steering in a number of manoeuvres and inturbulent conditions. To provoke a deep stall you have to take the wingto minimum flight speed by symmetrically pulling the brake lines, whenyou reach this point, continue pulling until you reach 100% and thenhold. The glider will first fall behind you and then situate itself above you,rocking slightly, depending on how the manoeuvre was carried out. Whenyou start to provoke a stall, be positive and do not doubt an instant.Do not release the brake lines when half way through the manoeuvre.This would cause the glider to surge violently forward with great energyand may result in the wing below the pilot. It is very important thatthe pressure on the brake lines is maintained until the wing is wellestablished vertical above.Wing tangleA wing tangle may happen after an asymmetric collapse, the end of thewing is trapped between the lines (Cravat). This situation could rapidlycause the wing to turn, although it depends on the nature of the tangle.The correction manoeuvres are the same as those applied in the caseof an asymmetrical collapse, control the turn tendency by applying theopposite brake and lean your body against the turn. Then locate the linethat reaches the stabilizer that is trapped between the other lines. Thisline has a different colour and belongs to the external lines of the B riser.Pull on this line until it is tense, this should help to undo the wing tangle.If you cannot undo the tangle, fly to the nearest possible landing spot,control the flying course with your body movements and a little pressureon the opposite brake. Be careful when attempting to undo a tangle ifyou are flying near a mountainside or near to other paragliders, you maylose control of the flying course and a collision may occur.Over handlingMost flying incidents are caused by incorrect actions of the pilot, whichchained one after another creates abnormal flying configurations (acascade of incidents). You must to remember that over handling the wingwill lead to critical levels of functioning. The <strong>ARTIK</strong> 3 is designed alwaysto try to recover normal flight by itself, do not try to over handle it.Generally speaking, the reactions of the wing, which follow over handling,are neither due to the input made or the intensity, but the length of timethe pilot continues to over handle. You have to allow the profile tore-establish normal flight speed after any type of handling.4.3 USING THE ACCELERATORThe profile of the <strong>ARTIK</strong> 3 has been designed to fly stable throughits entire speed range. It is useful to accelerate when flying in strongwinds or in extreme descending air. When you accelerate the wing, theprofile becomes more sensitive to possible turbulence and closer to apossible frontal collapse. If you feel a pressure loss, you should releasethe pressure on the accelerator and pull slightly on the brake lines toincrease the angle of incidence. Remember that you have to re-establishthe flight speed after correcting the incidence.It is NOT recommended to accelerate near to the mountainside or in veryturbulent conditions. If necessary you will have to constantly adjust themovements and pressure on the accelerator whilst constantly adjustingthe pressure applied to the brake lines. This balance is considered to be“active piloting.”
4.4 FLYING WITHOUT BRAKE LINESIf, for any reason at all, you cannot use the brake lines of your ARTik 3you will have to pilot the wing using the C-risers and your body weightto fly towards the nearest landing. The C-lines steer easily becausethey are not under pressure, you have to be careful not to over handlethem causing a stall or negative turn. To land you have to let the wingfly at full speed and before reaching the ground you will have to pullsymmetrically on both the C-risers. This braking method is not aseffective as using the brake lines so you will land at a higher speed.4.5 KNOTS IN FliGHTThe best way to avoid these knots and tangles is to inspect the linesbefore you inflate the wing for take-off. If you notice a knot before takeoff, immediately stop running and do not take-off. If you have taken-offwith a knot you will have to correct the drift by leaning on the oppositeside of the knot and apply the brake line on that side too. You cangently try to pull on the brake line to see if the knot becomesunfastened or try to identify the line with the knot in it. Try to pull theidentified line to see if the knot undoes. Be very careful when tryingto remove a knot. When there are knots in the lines or when they aretangled, do not pull too hard on the brake lines because there is anincreased risk of the wing to stalling or negative turn being initiated.Before trying to remove a knot, make sure there are no pilots flyingnearby and never try these manoeuvres near the mountainside. If theknot is too tight and you cannot remove it, carefully and safely fly to thenearest landing place.5. LOSING HEIGHTThe knowledge of the different descent techniques is an importantresource to use in certain situations. The most adequate descentmethod will depend on the particular situation.We recommend that you learn to use these manoeuvres under thetuition of a competent school.5.1 EARSBig ears is a moderate descent technique, achieving about –3 or –4 m/sand a reduction in ground speed of between 3 and 5 km/h. Effectivepiloting then becomes limited. During Big Ears the angle of incidenceand the wing loading increases, however application of the acceleratorwill restore the wing’s horizontal speed and the angle of incidence. Toapply big ears select the outermost A-line from each stabilizer as highup as possible and pull them outward and downward in a smooth andsymmetrical motion. The wingtips will then fold inwards. Releasing thelines will see the wingtips re-inflate automatically. If they do not re-inflate,gently pull on one of the brake lines and then on the opposite side. Werecommend that you re-inflate asymmetrically, this will reduce the risk ofaltering the angle of incidence which should be avoided, more so if youare flying near the ground or flying in turbulence. On the new generationparagliders the application of big ears can create a high degree of trailingturbulence which in turn creates a significant loss of airspeed. When bigears are applied to high aspect ratio wings the ears tend to “flap” whichalso adds to the amount of unwanted turbulence.5.2 B3 TechniqueThis new rapid descent technique was first discovered by our <strong>Niviuk</strong> teamPilots in 2009 while flying a competition prototype wing, which because ofits line plan and high aspect ratio would not allow big ears to be applied. Infact big ears on wings with a profile of 3 lines can often prove difficult. Forall these reasons, we advise the use of the new B3 line descent technique.This technique ensures a rapid descent is achieved whilst forward wingspeed is maintained and so the risk of a deep stall is eliminated.How?Locate the B3 on your risers and as you would when applying big earssimply pull down firmly and smoothly until you see both wingtips drop10
ack slightly. The forward speed of the glider speed will then reduceslightly, quickly stabilize and then increase. You will then experiencea fall rate of around 5-6 m/s. Controlled turning of the wing can easilybe maintained by weight shifting the harness, exactly the same as youwould with big ears. We recommend the application of the speed barwhilst using this technique. To exit the maneuver release the lines as youwould with big ears, control the pitch and the wing will quickly adoptnormal flight.This new technique allows a comfortable and controllablerapid descent without the risk of experiencing a “cravat” or “deep stall”.We advise you to first try this technique in smooth conditions withsufficient altitude above appropriate terrain.5.3 B-LINE STALLWhen you carry out this manoeuvre, the wing stops flying, it loses allhorizontal speed and you are not in control of the paraglider. The aircirculation over the profile is interrupted and the wing enters into asituation similar to parachuting.To carry out this manoeuvre you have to take the B-risers below themaillons and symmetrically pull both of them down (approx. 20-30 cms)and then hold this position. The initial phase is quite physical (hardresistance) which means that you will have to pull strongly until the profileof the wing is deformed, when this happens the required force will thensignificantly reduce. To maintain this manoeuvre you must continue tohold the B Lines in the pulled down position. The wing will then becomedeformed, horizontal speed drops to 0 km/h and vertical speed increasesto -6 to -8 m/s depending on the conditions and how the manoeuvre hasbeen performed.To exit the manoeuvre, simultaneously release both risers, the wing willthen slightly surge forward and then automatically return to normal flight.It is better to let go of the lines quickly rather than slowly. This is an easymanoeuvre but you must remember that the wing stops flying, it losesall horizontal movement and its reactions are very different compared tonormal flight.5.4 SPIRAL DIVEThis is a more effective way for rapidly losing height. You have to knowthat, the wing can gain a lot of speed and the increase in G’s will besubstantial. This can cause a loss of orientation and consciousness(blackouts). These are the reasons why it is best to carry out thismanoeuvre gradually so your capacity to resist the G forces increasesand you will learn to fully appreciate and understand the manoeuvre.Always practice this manoeuvre when flying at high altitude.To start the manoeuvre, first lean your bodyweight and pull the brake lineto the side to which you are leaning. You can regulate the intensity of theturn by applying a little outside brake.A paraglider flying at its maximum turn speed can reach –20 m/s,equivalent 70 km/h vertical speed and stabilize in a spiral dive from 15m/s onwards. These are the reasons why you should be familiar with themanoeuvre and know how to carry out the exit methods.To exit this manoeuvre you must progressively release the inside brakeand also momentarily apply outside brake. Whilst doing this you mustalso lean your bodyweight towards the outside. This exit manoeuvre hasto be carried out gradually and with smooth movements so you can feelthe pressure and speed changes at the same time.The after effect of the exit manoeuvre is that the glider will rock briefly withlateral surge, depending on how the manoeuvre has been carried out.Practice these movements at sufficient altitude and with moderation.6. SPECIAL METHods6.1 TOWINGThe <strong>ARTIK</strong> 3 does not experience any problem whilst being towed.Only qualified personnel should handle the qualified equipment tocarry out this operation. The wing has to be inflated in the same wayas in normal flight.
6.2 ACROBATIC FLIGHTAlthough the <strong>ARTIK</strong> 3 has been tested by expert acrobatic pilots inextreme situations, it HAS NOT been designed for acrobatic flight andwe DO NOT RECOMMEND THE USE OF THIS GLIDER for that use.We consider acrobatic flight to be any form of piloting that is differentto normal flight. To learn safely how to master acrobatic manoeuvresyou should attend lessons, which are carried out and supervised by aqualified instructor over water.Extreme manoeuvres take you and your wing to centrifugal forces thatcan reach 4 to 5 g. Materials will wear more quickly than in normal flight.7. CARE AND MAINTENANCE7.1 MAINTENANCECareful maintenance of your equipment will ensure continuedperformance.The fabric and the lines do not need to be washed, if they become dirty,clean them gently with a soft damp cloth.If your wing becomes wet with salty water, immerse it in fresh water anddry it away from direct sunlight.The sunlight may damage the materials of your wing and causepremature aging. Once you have landed, do not leave the wing in thesun, store it properly.If you use your wing in a sandy area, try to avoid the sand from enteringthe cell openings of the leading edge. If sand is inside the wing, remove itbefore folding.Competition lines, which were used in the past, were more vulnerableto premature wear and ageing but the new line materials used on the<strong>ARTIK</strong> 3 now ensure a much longer working life. However they stilldemand regular checks with careful attention to wear and tear. Weadvise a full inspection of the lines every 100 hours or every six monthsat a specialised paragliding repair centre. Rocks and hard ground areobviously far more abrasive than grassed areas, that’s why we do notadvise the <strong>ARTIK</strong> 3 for ground handling practice.7.2 STORAGEIt is important that the wing is correctly folded when stored. Store yourflying equipment in a cool, dry place away from solvents, fuels or oils. Itis not advisable to store your flying equipment in the trunk of your car.Temperatures inside a car parked in the sunlight, can be very high. Insidea rucksack and in the sunlight temperatures can reach 60ºC. Weightshould not be laid on top of the equipment.7.3 CHECKS AND CONTROLSYou should ensure that your <strong>ARTIK</strong> 3 is periodically serviced andchecked at your local repair centre every 100 hours of use or every 12months (whichever happens first). This will guarantee that your <strong>ARTIK</strong>3 will continue to function properly and therefore continue fulfilling thehomologation certificate results.As previously mentioned, you should systematically check your linesvisually before each take-off. We strongly advise a complete line checkevery 6 months.7.4 REPAIRSIf the wing is damaged, you can temporarily repair it by using the rip stopfound in the repair kit, so long as no stitches are involved in the tear. Anyother type of tear must be repaired in a specialized repair shop or byqualified personnel. Do not accept a home repair.8. SAFETY AND RESPONSIBILITYIt is well known that paragliding is considered a high-risk sport, wheresafety depends on the person who is practising it.12
Wrong use of this equipment may cause severe injuries to the pilot, evendeath. Manufacturers and dealers are not responsible for any act oraccident that may be the result of practicing this sport.You must not use this equipment if you are not trained. Do not takeadvice or accept any informal training from anyone who is not properlyqualified as a flight instructor.9. GUARANTEEThe entire equipment and components are covered by a 2-yearguarantee against any manufacture fault.The guarantee does not cover misuse or abnormal use of the materials.
10. TECHNICAL DATA10.1 TECHNICAL DATAartik 3 21 23 25 27 29CELLS NUMBer 62 62 62 62 62Closed 8 8 8 8 8Box 21 21 21 21 21FLAT AREA m2 21 23 24,5 26,5 29spAN M 11,13 11,65 12,02 12,5 13,08ASPECT RATIO 5,9 5,9 5,9 5,9 5,9PROJECTED AREA M2 17,82 19,51 20,78 22,48 24,6spAN 8,76 9,17 9,46 9,84 10,29ASPECT RATIO 4,3 4,3 4,3 4,3 4,3FLATTENING % 15 15 15 15 15CORD MAximum 2,37 2,48 2,56 2,66 2,79miNimum 0,52 0,54 0,56 0,58 0,61AVERAGe 1,88 1,97 2,03 2,12 2,21LINES TOTAL METers m 243 254 263 274 287HEIGHT M 6,68 6,99 7,21 7,5 7,85NUMBer 134 134 134 134 134mAIN 3/4/2 3/4/2 3/4/2 3/4/2 3/4/2RISERS NUMBER 3 A/B/C A/B/C A/B/C A/B/C A/B/CTRIMS m/m NO NO No NO NOACCELERATOR m/m 130 130 160 160 160TOTAL WEIGHT MINIMUM KG 59 60 75 90 105IN FLIGHT MAXIMUM KG 70 80 95 110 130GLIDER WEIGHT kG 5,2 5,4 5,7 5,9 6,3CERTIFICATION eN C C C C C14
10.2 MATERIALS DESCRIPTIONCANOPY FABRIC CODE supplierUPPER SURFACe skYTEX 40 9017 E77 PORCHER IND (France)BOTTOM SURFACE N 20D MF domiNICO TEX CO (Korea)RIBS WITHOUT LINES 30D FM domiNICO TEX CO (Korea)RIBS WITh LINes skYTEX 40 9017 E29 PORCHER IND (France)DIAGONALS 30D Fm domiNICO TEX CO (Korea)loops lki - 10 koloN IND. (Korea)REIFORCEMENT LOOPS W-420 d-P (Germany)TRAILING EDGE REIFORCEMENT MYLArd-P (Germany)RIBS REIFORCEMENT NYLON STICk r.P.CHINATHREAd serAFIL 60 AMAN (Germany)SUSPENSION LINES FABRIC CODE supplierUPPER CASCAdes dC-040 liros GMHB (Germany)UPPER CASCADES A-8000-045 edelrid (Germany)UPPER CASCADES A-8000-060 edelrid (Germany)UPPER CASCADES A-8000-080 edelrid (Germany)MIDDLE CASCAdes dC-060 liros GMHB (Germany)MIDDLE CASCADES A-8000-060 edelrid (Germany)MIDDLE CASCADES TNL - 140 TEIJIM LIMITED (JAPAN)MAIN TNL - 080 TEIJIM LIMITED (JAPAN)MAIN TNL - 140 TEIJIM LIMITED (JAPAN)MAIN TNL - 220 TEIJIM LIMITED (JAPAN)MAIN TNL - 280 TEIJIM LIMITED (JAPAN)MAIN BREAK TNL - 400 TEIJIM LIMITED (JAPAN)THREAd serafil 60 AMAN (Germany)SUSPENSION LINES RACE FABRIC Code supplierUPPER CASCAdes dC-040 liros GMHB (Germany)UPPER CASCADES A-8000-045 edelrid (Germany)UPPER CASCADES A-8000-060 edelrid (Germany)UPPER CASCADES A-8000-080 edelrid (Germany)MIDDLE CASCAdes dC-060 liros GMHB (Germany)MIDDLE CASCADES A-8000-060 edelrid (Germany)MIDDLE CASCADES A-8000-135 edelrid (Germany)MAIN A-8000-060 edelrid (Germany)MAIN A-8000-135 edelrid (Germany)MAIN A-8000-200 edelrid (Germany)MAIN A-8000-240 edelrid (Germany)MAIN BREAK TNL - 400 TEIJIM LIMITED (JAPAN)RISERS FABRIC Code supplierMATERIAL 3455 COUSIN (FRANCE)COLOR INDICATor pAD TECNI SANGLES (FRANCE)THREAd v138 COATS (ENGLAND)MAILLONs mrdi03.5 S12 peGUET (FRANCE)PULLEYS 224 HARKEN (USA)
1610.3 RISER ARRANGEMENT <strong>ARTIK</strong> 3
10.5 LENGTHS <strong>ARTIK</strong> 3 2110.6 LENGTHS <strong>ARTIK</strong> 3 23<strong>Niviuk</strong> <strong>ARTIK</strong> 3 21Lines height m/mA B C br1 6191 6114 6231 68442 6089 6013 6080 66863 6081 6007 6106 65564 6009 5940 6083 65685 5916 5855 5920 63406 5913 5860 5921 62247 5776 5740 5828 61918 5650 5631 5784 62519 5584 5575 5840 614710 5419 5388 5418 603511 5286 5295 5321 603612 598813 5967<strong>Niviuk</strong> <strong>ARTIK</strong> 3 23Lines height m/mA B C br1 6506 6416 6543 71702 6402 6311 6386 70053 6395 6307 6416 68704 6315 6244 6393 68835 6219 6156 6224 66466 6217 6162 6226 65257 6074 6036 6129 64918 5942 5922 6083 65549 5873 5864 6141 644610 5701 5669 5700 632911 5562 5571 5598 633112 628113 6260Risers lengths m/mA B C470 470 470 Standard340 380 470 AcceleratedRisers lengths m/mA B C470 470 470 Standard340 380 470 Accelerated18
10.7 LENGTHS <strong>ARTIK</strong> 3 2510.8 LENGTHS <strong>ARTIK</strong> 3 27<strong>Niviuk</strong> <strong>ARTIK</strong> 3 25Lines height m/mA B C br1 6725 6632 6768 73692 6618 6525 6608 71983 6612 6522 6639 70604 6537 6463 6627 70735 6438 6373 6453 68296 6437 6380 6457 67057 6289 6250 6356 66708 6153 6133 6309 67369 6082 6072 6368 662510 5920 5887 5920 650511 5760 5770 5798 650712 645613 6435<strong>Niviuk</strong> <strong>ARTIK</strong> 3 27Lines height m/mA B C br1 7018 6920 7058 77082 6908 6810 6892 75323 6904 6808 6926 73884 6822 6745 6916 74025 6720 6652 6736 71506 6719 6660 6740 70217 6566 6525 6636 69858 6425 6403 6586 70559 6350 6340 6648 694010 6182 6148 6181 681611 6016 6027 6062 681912 676513 6744Risers lengths m/mA B C470 470 470 sTANdard310 377 470 AcceleratedRisers lengths m/mA B C470 470 470 Standard310 377 470 Accelerated
10.9 LENGTHS <strong>ARTIK</strong> 3 29<strong>Niviuk</strong> <strong>ARTIK</strong> 3 29Lines height m/mA B C br1 7364 7261 7410 80882 7251 7148 7238 79043 7247 7147 7276 77544 7163 7083 7251 77705 7057 6986 7064 75076 7057 6995 7069 73737 6898 6855 6961 73368 6750 6728 6909 74099 6672 6662 6973 729010 6482 6446 6480 716011 6323 6334 6364 716412 710913 7087Risers lengths m/mA B C470 470 470 Standard310 377 470 Accelerated20
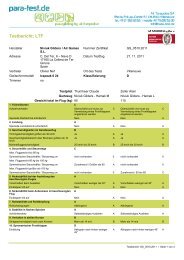
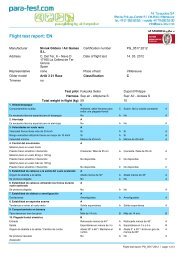
10.10 CERTIFICATION SPECIMEN TESTCClass:In accordance with EN standards 926-2:2005 & 926-1:2006: PG_0614.2012Date of issue (DMY): 20. 07. 2012Manufacturer: <strong>Niviuk</strong> Gliders / Air Games S.L.Model: Artik 3 21Serial number:Configuration during flight testsParaglider AccessoriesMaximum weight in flight (kg) 90 Range of speed system (cm) 16Minimum weight in flight (kg) 59 Speed range using brakes (km/h) 14Glider's weight (kg) 5.3 Range of trimmers (cm) 0Number of risers 3 Total speed range with accessories (km/h) 30Projected area (m2) 17.82CClass:In accordance with EN standards 926-2:2005 & 926-1:2006: PG_0508.2011Date of issue (DMY): 15. 02. 2012Manufacturer: <strong>Niviuk</strong> Gliders / Air Games S.L.Model: Artik 3 23Serial number:Configuration during flight testsParaglider AccessoriesMaximum weight in flight (kg) 80 Range of speed system (cm) 13Minimum weight in flight (kg) 60 Speed range using brakes (km/h) 17Glider's weight (kg) 5.4 Range of trimmers (cm) 0Number of risers 3 Total speed range with accessories (km/h) 32Projected area (m2) 19.51Harness used for testing (max weight) Inspections (whichever happens first)Harness type ABS every 24 months or every 100 flying hoursHarness brand Sup'Air Warning! Before use refer to user's manualHarness model Access S Person or company having presented theglider for testing: NoneHarness to risers distance (cm) 49Distance between risers (cm) 42Harness used for testing (max weight) Inspections (whichever happens first)Harness typeABS every 24 months or every 100 flying hoursStandardHarness brand Sup' Air Warning! Before use refer to user's manualHarness modelAltiplumeMPerson or company having presented theglider for testing: NoneHarness to risers distance (cm) 49Distance between risers (cm) 421C2A3A4A5A6A7A8A9B10B11A12A13A14C15A16A17A18A19A20A21B22A23A2401A2A3A4A5A6A7A8A9B10B11A12A13A14C15A16A17A18A19A20A21A22A23A240
CClass:In accordance with EN standards 926-2:2005 & 926-1:2006: PG_0463.2011Date of issue (DMY): 12. 10. 2011Manufacturer: <strong>Niviuk</strong> Gliders / Air Games S.L.Model: Artik 3 25Serial number:Configuration during flight testsParaglider AccessoriesMaximum weight in flight (kg) 95 Range of speed system (cm) 16Minimum weight in flight (kg) 75 Speed range using brakes (km/h) 14Glider's weight (kg) 5.7 Range of trimmers (cm) 0Number of risers 3 Total speed range with accessories (km/h) 30Projected area (m2) 20.78CClass:In accordance with EN standards 926-2:2005 & 926-1:2006: PG_0464.2011Date of issue (DMY): 12. 10. 2011Manufacturer: <strong>Niviuk</strong> Gliders / Air Games S.L.Model: Artik 3 27Serial number:Configuration during flight testsParaglider AccessoriesMaximum weight in flight (kg) 110 Range of speed system (cm) 16Minimum weight in flight (kg) 90 Speed range using brakes (km/h) 14Glider's weight (kg) 5.9 Range of trimmers (cm) 0Number of risers 3 Total speed range with accessories (km/h) 30Projected area (m2) 22.48Harness used for testing (max weight) Inspections (whichever happens first)Harness type ABS every 12 months or every 100 flying hoursHarness brand<strong>Niviuk</strong> Warning! Before use refer to user's manualGlidersHarness model Hamak M Person or company having presented theglider for testing: NoneHarness to risers distance (cm) 49Distance between risers (cm) 46Harness used for testing (max weight) Inspections (whichever happens first)Harness type ABS every 12 months or every 100 flying hoursHarness brand <strong>Niviuk</strong> Warning! Before use refer to user's manualHarness model Hamak L Person or company having presented theglider for testing: NoneHarness to risers distance (cm) 49Distance between risers (cm) 461A2A3A4A5A6A7A8A9B10B11A12A13A14C15A16A17A18A19C20B21B22A23A24A1A2A3A4A5A6A7A8A9B10B11A12A13B14C15A16A17A18A19C20A21A22A23A24A22
CClass:In accordance with EN standards 926-2:2005 & 926-1:2006: PG_0514.2011Date of issue (DMY): 15. 02. 2012Manufacturer: <strong>Niviuk</strong> Gliders / Air Games S.L.Model: Artik 3 29Serial number:Configuration during flight testsParaglider AccessoriesMaximum weight in flight (kg) 130 Range of speed system (cm) 18Minimum weight in flight (kg) 105 Speed range using brakes (km/h) 17Glider's weight (kg) 6.3 Range of trimmers (cm) 0Number of risers 3 Total speed range with accessories (km/h) 32Projected area (m2) 24.6Harness used for testing (max weight) Inspections (whichever happens first)Harness type ABS every 24 months or every 100 flying hoursHarness brand Gin Gliders Warning! Before use refer to user's manualHarness model Gingo 2 L Person or company having presented theglider for testing: Olivier NefHarness to risers distance (cm) 49Distance between risers (cm) 46123456789101112131415161718192021222324AAACAAAABBAAACAAAAAAAAA 0
The importance of small detailsniviuk.com


