OIT FootPrints Incident and Request User Guide.pdf - Office of ...
OIT FootPrints Incident and Request User Guide.pdf - Office of ...
OIT FootPrints Incident and Request User Guide.pdf - Office of ...

Create successful ePaper yourself
Turn your PDF publications into a flip-book with our unique Google optimized e-Paper software.
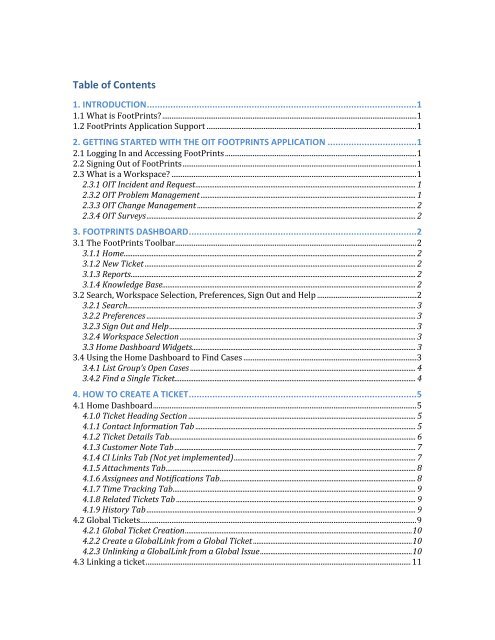
Table <strong>of</strong> Contents1. INTRODUCTION ....................................................................................................... 11.1 What is <strong>FootPrints</strong>? .......................................................................................................................................... 11.2 <strong>FootPrints</strong> Application Support .................................................................................................................. 12. GETTING STARTED WITH THE <strong>OIT</strong> FOOTPRINTS APPLICATION .................................. 12.1 Logging In <strong>and</strong> Accessing <strong>FootPrints</strong> ........................................................................................................ 12.2 Signing Out <strong>of</strong> <strong>FootPrints</strong> ............................................................................................................................... 12.3 What is a Workspace? ..................................................................................................................................... 12.3.1 <strong>OIT</strong> <strong>Incident</strong> <strong>and</strong> <strong>Request</strong> .............................................................................................................................. 12.3.2 <strong>OIT</strong> Problem Management ........................................................................................................................... 12.3.3 <strong>OIT</strong> Change Management ............................................................................................................................. 22.3.4 <strong>OIT</strong> Surveys .......................................................................................................................................................... 23. FOOTPRINTS DASHBOARD ....................................................................................... 23.1 The <strong>FootPrints</strong> Toolbar................................................................................................................................... 23.1.1 Home ....................................................................................................................................................................... 23.1.2 New Ticket ........................................................................................................................................................... 23.1.3 Reports ................................................................................................................................................................... 23.1.4 Knowledge Base................................................................................................................................................. 23.2 Search, Workspace Selection, Preferences, Sign Out <strong>and</strong> Help ...................................................... 23.2.1 Search ..................................................................................................................................................................... 33.2.2 Preferences .......................................................................................................................................................... 33.2.3 Sign Out <strong>and</strong> Help ............................................................................................................................................. 33.2.4 Workspace Selection ....................................................................................................................................... 33.3 Home Dashboard Widgets ................................................................................................................................ 33.4 Using the Home Dashboard to Find Cases .............................................................................................. 33.4.1 List Group’s Open Cases ................................................................................................................................. 43.4.2 Find a Single Ticket.......................................................................................................................................... 44. HOW TO CREATE A TICKET ....................................................................................... 54.1 Home Dashboard ............................................................................................................................................... 54.1.0 Ticket Heading Section .................................................................................................................................. 54.1.1 Contact Information Tab .............................................................................................................................. 54.1.2 Ticket Details Tab ............................................................................................................................................. 64.1.3 Customer Note Tab .......................................................................................................................................... 74.1.4 CI Links Tab (Not yet implemented) ........................................................................................................ 74.1.5 Attachments Tab ............................................................................................................................................... 84.1.6 Assignees <strong>and</strong> Notifications Tab ................................................................................................................ 84.1.7 Time Tracking Tab ........................................................................................................................................... 94.1.8 Related Tickets Tab ......................................................................................................................................... 94.1.9 History Tab .......................................................................................................................................................... 94.2 Global Tickets...................................................................................................................................................... 94.2.1 Global Ticket Creation .................................................................................................................................. 104.2.2 Create a GlobalLink from a Global Ticket ........................................................................................... 104.2.3 Unlinking a GlobalLink from a Global Issue ....................................................................................... 104.3 Linking a ticket ................................................................................................................................................ 11
5. ADVANCED SEARCH .............................................................................................. 115.1 Ticket Criteria .................................................................................................................................................. 115.2 Contact Criteria ............................................................................................................................................... 125.3 Advanced Criteria........................................................................................................................................... 125.4 Save/Run ........................................................................................................................................................... 126. USER PREFERENCES ............................................................................................... 126.1 Personal Info .................................................................................................................................................... 126.2 Issue Page .......................................................................................................................................................... 136.3 Home Page......................................................................................................................................................... 146.3.1 Dashboard .......................................................................................................................................................... 156.3.2 Add a Dashboard Component ............................................................................................................... 166.3.3 Edit a Dashboard Component ................................................................................................................... 166.4 Executive Dashboard .................................................................................................................................... 167. INCIDENT MANAGEMENT ...................................................................................... 177.1 Choosing the Type <strong>of</strong> <strong>Request</strong> ................................................................................................................... 177.2 Determining Priority for <strong>Incident</strong>s <strong>and</strong> Problems ............................................................................ 177.2.1 Assigning Urgency .......................................................................................................................................... 177.2.2 Assigning Impact............................................................................................................................................. 187.2.3 Assigning Priority ........................................................................................................................................... 187.3 Setting Priority for Service <strong>Request</strong>s ..................................................................................................... 208. OTHER TOPICS ....................................................................................................... 208.1 Emailing a Case ............................................................................................................................................... 208.2 Printing a Single Ticket ................................................................................................................................ 208.3 Reporting ........................................................................................................................................................... 202
1. INTRODUCTION1.1 What is <strong>FootPrints</strong>?<strong>FootPrints</strong> is the tracking system used by <strong>OIT</strong> to track incidents, problems, <strong>and</strong> servicerequests that come through the department from customers <strong>and</strong> end-users.1.2 <strong>FootPrints</strong> Application SupportThe HelpDesk will support the <strong>FootPrints</strong> application. To report problems with thesystem, add/delete users, or request changes, please submit a <strong>FootPrints</strong> ticket orcontact the <strong>OIT</strong> HelpDesk at 865-974-9900.2. GETTING STARTED WITH THE FOOTPRINTS APPLICATION2.1 Logging In <strong>and</strong> Accessing <strong>FootPrints</strong>This document will detail the <strong>FootPrints</strong> application. To access <strong>FootPrints</strong>, navigate tohttps://fpweb.utk.edu. You will log in using your NetID <strong>and</strong> password. IE, Firefox,Chrome <strong>and</strong> Safari are all supported for the use <strong>of</strong> <strong>FootPrints</strong>, though your mileage mayvary based on each browser’s own quirks.2.2 Signing Out <strong>of</strong> <strong>FootPrints</strong>Click on the Sign-Out button in the upper-right-h<strong>and</strong> corner. Note: Signing in to<strong>FootPrints</strong> from another location or browser will end your previous session, losing anyunsaved work.2.3 What is a Workspace?In <strong>FootPrints</strong>, a workspace is a collection <strong>of</strong> tickets for a unit, department, or servicearea. It is identified by a unique name <strong>and</strong> number, <strong>and</strong> allows for custom fields,options, <strong>and</strong> users specific to that workspace. Each workspace remains separate fromother workspaces, which allows for customizations specific to departmental workflows.<strong>OIT</strong> has 5 workspaces: <strong>OIT</strong> <strong>Incident</strong> <strong>and</strong> <strong>Request</strong>, <strong>OIT</strong> Problem Management, <strong>OIT</strong> ChangeManagement <strong>and</strong> <strong>OIT</strong> Surveys.2.3.1 <strong>OIT</strong> <strong>Incident</strong> <strong>and</strong> <strong>Request</strong><strong>OIT</strong> <strong>Incident</strong> <strong>and</strong> <strong>Request</strong> is the main <strong>OIT</strong> workspace where all <strong>Incident</strong>s <strong>and</strong> Service<strong>Request</strong>s are tracked.2.3.2 <strong>OIT</strong> Problem Management<strong>OIT</strong> Problem Management is a customized workspace used to track problems that canbe linked to Globals (more information in section 4), <strong>Incident</strong>s <strong>and</strong> Changes.1
2.3.3 <strong>OIT</strong> Change Management<strong>OIT</strong> Change Management is used to track all changes to <strong>OIT</strong> applications <strong>and</strong> hardware.These changes may also be linked to Problems, Globals <strong>and</strong> <strong>Incident</strong>s.2.3.4 <strong>OIT</strong> Surveys<strong>OIT</strong> Surveys is used to track all customer survey responses. Service Owners <strong>and</strong>Managers have access to all available surveys.3. FOOTPRINTS DASHBOARDAfter logging into <strong>FootPrints</strong>, you may perform various functions via the Dashboard,which are detailed below. You may access the Dashboard at any time by clicking theHome button.3.1 The <strong>FootPrints</strong> ToolbarThe Toolbar <strong>of</strong>fers shortcuts to Home, New Ticket, Reports <strong>and</strong> Knowledge Base.3.1.1 HomeTakes you back to the <strong>FootPrints</strong> Dashboard.3.1.2 New TicketThe New Ticket button creates a new blank ticket. If you hover over the new ticketbutton, options to create a new Global or KB article will appear.3.1.3 ReportsThe Reports button gives you access to the reporting tool in <strong>FootPrints</strong>. There areseveral predefined reports, or you can create a new report. These reports may also beused as components on the dashboard.3.1.4 Knowledge BaseThe Knowledge Base button opens the <strong>FootPrints</strong> Knowledge Base.3.2 Search, Workspace Selection, Preferences, Sign Out <strong>and</strong> Help2
In the center <strong>and</strong> right-h<strong>and</strong>-corner <strong>of</strong> the application, there are options for Searching,<strong>User</strong> Preferences, Sign-Out, Help <strong>and</strong> workspace selection.3.2.1 SearchThe search box allows you to perform a quick search <strong>of</strong> all tickets by Keyword or ShortDescription. The keyword search will search the <strong>User</strong> Contact <strong>and</strong> Ticket Details fields.Advanced search can also be selected (explained in greater detail in section 5).3.2.2 PreferencesThe Preferences option allows users to customize their Personal Info, Ticket Page,Homepage, Executive Dashboard <strong>and</strong> Miscellaneous user options. (More information insection 6.)3.2.3 Sign Out <strong>and</strong> HelpSign-Out ends the <strong>FootPrints</strong> Session. Help opens the <strong>FootPrints</strong> help supplied by BMC.3.2.4 Workspace SelectionClicking on a Workspace name will show you the workspaces available to you; select theworkspace from the pop-up to change workspaces.3.3 Home Dashboard Components<strong>FootPrints</strong> allow users to specify the dashboard components displayed at the top <strong>of</strong> theDashboard Home page. <strong>User</strong>s can specify different sets <strong>of</strong> dashboard components foreach <strong>of</strong> their Workspaces. This is covered more thoroughly in section 6.43.4 Using the Home Dashboard to Show TicketsFrom the Home Dashboard, a dropdown list is provided that includes pre-populatedsearches.These searches include:• My Assignments – The most recent active Tickets assigned to you.• Individual Team Assignments – Active Tickets for the current user’s team.• My Assignments <strong>and</strong> <strong>Request</strong>s – Active Tickets assigned to the current user ANDunassigned <strong>Request</strong>s from customers.• My Assignments in All Workspaces – Active Tickets assigned to the current user inall Workspaces.3
• All Tickets – All Tickets in the Workspace database.• Global Tickets – All active Global Tickets.• <strong>Request</strong>s – <strong>Request</strong>s submitted by customers.• Internal Solutions – All internal Solutions.• Solutions – All public Solutions.• Solutions in All Workspaces – All public Solutions in all accessible Workspaces.• Pending Internal Solutions – Solutions created for the internal Knowledge Basepending approval.• Pending Solutions – Solutions created for the Public Knowledge Base pendingapproval.• Personally saved searches.3.4.1 Creating Searches to Show Active Status TicketsBy default, the Dashboard Search Lists show tickets in all statuses except Closed.To create a saved search for your team that only includes Assigned, Work in Progress,Pending, Pending <strong>User</strong>, <strong>User</strong> Responded, <strong>and</strong> <strong>Request</strong> (from the web or contact form):1. Below the Search box button, select Advanced Search.2. On the Ticket Criteria tab, select the team or teams that you would like toinclude in the search from the “Assigned To” field on the left. You maycontrol/comm<strong>and</strong>+click to select more than one team.3. Again on the Ticket Criteria tab, select the following statuses in the “Status” fieldto the right: Assigned, Work in Progress, Pending, Pending <strong>User</strong>, <strong>User</strong>Responded, <strong>and</strong> <strong>Request</strong>. You may control/comm<strong>and</strong>+click to select more thanone Status.4. Select the Save/Run tab, name your search <strong>and</strong> click Go.You may repeat this process for tickets assigned directly to you by choosing your namefrom the “Assigned To” field in Step 2.You will now see this saved search under the Personal Saved Searches heading in theDashboard Search List.To set this search as your default search when you log into <strong>FootPrints</strong>:1. Select Preferences in the upper-right-h<strong>and</strong> corner.2. Select the Home Page tab <strong>and</strong> scroll down to the option for Default List.3. From the drop down, scroll to the bottom <strong>of</strong> the list <strong>and</strong> you will see yourpersonal saved searches listed at the bottom. Select the appropriate search.4. Enter your password into the Password field at the top <strong>of</strong> the page <strong>and</strong> clickSave.3.4.2 Find a Single TicketThe search box at the top <strong>of</strong> the screen can be used to search for a specific ticketnumber.4
4. HOW TO CREATE A TICKET4.1 Home DashboardFrom the dashboard, click New Ticket.4.1.0 Ticket Heading SectionEach ticket has a static heading at the top that includes the fields for:• Short Description – A concise description <strong>of</strong> the issue• Status – New, <strong>Request</strong>, Assigned, Work In Progress, Pending, Pending <strong>User</strong>, <strong>User</strong>Responded, Resolved, Referred, Declined <strong>and</strong> Duplicate• Pending Status (Not shown) – Parts, In Queue, Response, <strong>Request</strong>er Information,Scheduled, At Third Party, Approval, Investigation, Infected, 2BDisabled, Disabled,2BEnabled, 2BUnregistered, Unregistered <strong>and</strong> Security Scan• <strong>Request</strong> Type – <strong>Request</strong>, <strong>Incident</strong>• Urgency – Urgent, High, Medium, Normal• Impact – High, Medium, Low• Priority (this is set automatically after the ticket is saved) – Critical, High, Medium<strong>and</strong> NormalTemplates can also be created for commonly created tickets, such as a password reset.Select the template from the drop down <strong>and</strong> click Use selected template.*Note: Templates are user-role-wide, <strong>and</strong> not personal, like the Remedy macros were.4.1.1 Contact Information TabOn the Contact Information tab, you can record the contact information for the PrimaryPOC <strong>and</strong> Secondary POC (if necessary). When the NetID is entered with a return, theremaining data elements <strong>of</strong> the pr<strong>of</strong>ile are retrieved from the LDAP server. The onlyexceptions to this are in the case <strong>of</strong> suppressed entries, which will only return the Email5
address or for persons without a NetID, which will return nothing. If the customer doesnot have a NetID, use the NetID <strong>of</strong> guest (Case does matter); you will need to manuallyenter the customer’s name <strong>and</strong> additional information. If there is a Secondary POC for aticket, choose Yes from the drop down <strong>and</strong> fill out the Secondary POC information byh<strong>and</strong>.Fields in red require an entry. On this tab the required fields are NetID <strong>and</strong> DisplayName. To see the all <strong>of</strong> the requests for the Primary Contact, enter the POC NetID <strong>and</strong>click History.4.1.2 Ticket Details TabThis tab is used to record detailed information about the case. Fields heading with redtext are required. The information entered in the Work Log field cannot be altered oncethe Case is saved, but additions can be made. The Work Log field must be updated witheach ticket save. Support personnel can view previous entries within the Work Log atany time by clicking on the View Complete Field Data button.6
The Category/Type/Item/Sub-item (CTI’s) have been revamped to easier categorize theissue. The CTI’s are used as a classification <strong>and</strong> reporting tool.4.1.3 Customer Note TabThe Customer Note tab is used to send/track correspondence with the primary point <strong>of</strong>contact in a case. The tab has fields for sending new messages, a history <strong>of</strong> all emailcorrespondence in the ticket, <strong>and</strong> a canned response option for solutions for commoncases, known as Quick Descriptions. The customer note tab sends as rich text <strong>and</strong> hasthe ability to also include images.4.1.4 CI Links Tab (Not yet implemented)(Not yet implemented) The CI Links tab displays a list <strong>of</strong> assets in the CMDB that arelinked to this issue or customer.7
4.1.5 Attachments TabAttach files to the ticket (25 MB file size limit). Any screen shots or attachments sent viaemail from the customer to <strong>FootPrints</strong> will also appear here.4.1.6 Assignees <strong>and</strong> Notifications TabThe Case Assignment tab is used to record both group <strong>and</strong> individual assignmentinformation.To assign a case directly to a group, first select the group that the person is a part <strong>of</strong> inthe Workspace Members field, then double-click the Assign Team option or select theAssign Team option <strong>and</strong> click the right arrow.To assign a case directly to a person, first select the group that the person is a part <strong>of</strong> inthe Workspace Members field, then double-click the person’s name or click the rightarrow.When a request is assigned to a group, all members <strong>of</strong> the group are notified. If a case isassigned directly to an individual, then only that member <strong>of</strong> the group is notified. Forthis reason, typically assignments should be made to groups, in case an individualassignee is out <strong>of</strong> the <strong>of</strong>fice or unable to complete a request quickly.To remove an assignment from the Assignees box, double-click the team name or selectthe team name <strong>and</strong> click the left arrow.After assigning the case to a team or individual, you may also choose who is emailed onthe request: customer, assignee, or a CC: email address. Email notifications are sent tothe customer for all tickets that are in the following statuses: New (ticket creation),Pending <strong>User</strong> <strong>and</strong> Resolved. Email notifications are sent to the assignee for all ticketswhen they are Assigned or a user has responded to the ticket.8
4.1.7 Time Tracking TabTime tracking in <strong>FootPrints</strong> can be entered as Hours <strong>and</strong> Minutes or as a Start <strong>and</strong> EndDate <strong>and</strong> Time. Multiple time entries can be added using the Add Another button.4.1.8 Related Tickets TabAny tickets that have been linked to another ticket, Global, Problem, Change or Surveywill appear in this tab. This tab will only appear once one <strong>of</strong> the above tickets has beenlinked. See more about linking tickets in sections 4.2 <strong>and</strong> 4.3.4.1.9 History TabThe ticket History provides access to an audit trail <strong>of</strong> all actions performed on an Issue incolumn format. This section is only available when editing Tickets. This tab will notappear until the ticket is saved.The links at the top <strong>of</strong> the window include:• Complete History: All activity for an Issue.• Issue History Only: Actions performed on an Issue by all users <strong>and</strong> thoseautomatically performed by the system.• Email History: All email activity for an Issue.4.2 Global TicketsGlobal Tickets differ from Tickets in that they may be linked to many common orduplicate Tickets. This makes them a single entity. At any given time, there may be threeor four Global Tickets or none at all. Global Tickets should be reserved for important, allencompassingtickets that affect many users, such as system outages. Global tickets canbe dynamically linked so that they automatically update the linked tickets, such asupdating a ticket <strong>and</strong> notifying the customer when the ticket has been resolved.Circumstances that may merit a Global Issue:• Several customers report similar tickets; such as “I cannot send email.”• To track Tickets generated from planned outages or upgrades.• To introduce new support for an application likely to cause increased Ticket<strong>Request</strong>s.A Global Ticket is essentially the same as a regular Ticket. The distinctions include:9
• An option to allow Broadcast to Agents. This will pop up for anyone logged into<strong>FootPrints</strong>.• Global Tickets do not have a customer contact or Primary POC.• Global Tickets display a special icon when viewed from the Home Page.4.2.1 Global Ticket CreationWhen an Agent or Administrator is aware <strong>of</strong> an issue, such as a server crash, a GlobalTicket can be created from scratch to proactively address the issue. Position the mouseover the New Ticket button on the toolbar <strong>and</strong> select New Global. A new Global Ticketcan also be created from the Details view <strong>of</strong> an existing Ticket. From the Global button,you can create a new Global Ticket with the information in the existing <strong>Incident</strong> Ticketor Link that <strong>Incident</strong> ticket to an already created Global Ticket.4.2.2 Create a GlobalLink from a Global TicketThere are two methods to create a GlobalLink from a Global Ticket. Once a Global Ticketis created, it is listed in the Global Tickets component <strong>of</strong> the Dashboard.1. Click the Create a GlobalLink for this Global Ticket button from the GlobalTicket dashboard widget <strong>and</strong> complete the Ticket as usual.2. The Details view <strong>of</strong> a Global Ticket will give you the option <strong>of</strong> clicking the NewGlobalLink buttonon the toolbar <strong>and</strong> completing the Ticketas usual.a. From the Home Dashboard, open the Ticket in the Details view.b. Click the Global button to access the Global toolbar.c. Click the Link to Global button.d. Select an open Global Ticket from the menu.e. Click the Go button to return to the Home Page.4.2.3 Unlinking a GlobalLink from a Global IssueOnce a Global Ticket is closed, the GlobalLinks automatically close. However, there canbe situations when a customer calls the service desk to communicate that the problemstill exists. For example, Exchange server tickets may be the reason all but one customercouldn’t receive email. Footprints has the ability to unlink a GlobalLink from a GlobalIssue.1. From the Home Page, open the Global Issue in Details view.2. Click the Related Tickets tab.3. Click the Unlink link.10
4.3 Linking a ticket<strong>FootPrints</strong> has the ability to link related cases together. The most common use <strong>of</strong> this isto link an <strong>Incident</strong> ticket to a Global ticket (as discussed above), which is then linked to aticket in the Problem Management workspace. The Problem ticket can then be linked toany necessary Change ticket(s) in the Change Workspace.Linking Tickets is accomplished by copying a Ticket, creating a Master Issue/Subtaskrelationship, or through GlobalLinks. Tickets can also be linked directly to one another. Astatic link that changes in one Ticket does not affect the data within the other Ticket.Dynamic links can also be used. Dynamic links reflect changes from one Issue in another.Issue workflow guidelines suggest fields utilize dynamic links.1. Before creating a link, obtain the Issue number <strong>of</strong> the Issue to link to.2. From the Home Page, open the Issue to link from in Details view.3. Click the Link button.4. Select the Workspace that contains the Issue to be linked.5. Enter the Issue Number.6. Click the View Details button to verify the correct Issue number is entered.7. Specify a Link Type (dynamic or static).8. Click the Go button.9. To view the linked Issue, or to unlink, click the Related Tickets tab.5. ADVANCED SEARCHThe Advanced Search feature allows searching the Workspace database with anycombination <strong>of</strong> fields <strong>and</strong> advanced criteria. Service Core automatically generates theAdvanced Search form for each Workspace; with all <strong>of</strong> the custom <strong>and</strong> built-in fields forthat Workspace included. For example, if the Workspace Administrator adds a new field,the field is included automatically on the Advanced Search form. In the same way, if afield is deleted from the Workspace, it is removed from the Advanced Search form.To perform an advanced search, click the Advanced link located under the Quick Searchbutton. The Advanced Search form contains three panes where search criteria aredefined. Those windows are Ticket Criteria, Contact Criteria, <strong>and</strong> Advanced Criteria.5.1 Ticket CriteriaThe Ticket criteria tab lists all <strong>of</strong> the available fields within <strong>FootPrints</strong>. You can use any <strong>of</strong>these fields as criteria for your search. As you select criteria, each field becomes an“AND” statement. For example, if you select a field from Assigned to as well as a fieldfrom <strong>Request</strong> Type, your search will look for tickets with the Assigned to selection AND<strong>Request</strong> Type selection. Any field that is not selected is not searched on.11
5.2 Contact CriteriaThe contact criteria tab allows you to restrict you search based on the customer’scontact information.5.3 Advanced CriteriaThe Advanced Criteria window allows searches to be based on:• The type <strong>of</strong> Issue to include.• The date <strong>and</strong>/or age <strong>of</strong> the Issue.• More than one criterion.This window is also used to determine the order results are sorted. The searches aresorted <strong>and</strong> re-sorted by up to three different criteria types.5.4 Save/RunThe Save/Run window allows for immediately running a report <strong>and</strong> viewing the results.You can also save the search so it can be quickly run at a later date without recreatingthe criteria. Searches may be saved as:• Personal – Search only accessible to user.• Shared (Internal) – Search accessible to all Agents.After a search is saved, it is accessible in the Display drop-down field on the HomeDashboard under either Personal Saved Searches or Shared Saved Searches.6. USER PREFERENCES6.1 Personal InfoChanges to general preferences affect all Workspaces. The Personal Info Tab providesthe following options:• Name: The Agent name when specifying an assignee. (If using an ACD phone <strong>and</strong>ACD stats are being collected, this should match your entry in ACD/LDAP <strong>and</strong>should not be changed.)• Primary Email Address: Email address notifications are sent to the address inth isfie ld.• Pager Email Address: Pager address notifications are sent to the address enteredin this field sent.• Wireless Email Address: Wireless address notifications are sent to the addressentered in this field.• Change Password: Unavailable. <strong>FootPrints</strong> authenticates <strong>of</strong>f <strong>of</strong> LDAP.12
• Default Workspace: Provides the ability to choose the Workspace that isdisplayed at log on by default.• Your Local Time Zone: By default, Footprints Service Core displays all dates <strong>and</strong>time in the time zone <strong>of</strong> the Footprints server. In the event a different time zoneis selected, all dates <strong>and</strong> times are adjusted to reflect the time zone.• Date Format: This option specifies the format <strong>of</strong> date display.• Preferred Language: This option allows for changing the language usedthroughout the application.• U.S. Government Section 508 Compliance/Visually Impaired Enhancement: Thisfeature provides the visually impaired with a user interface that is easier to read.If enabled, Footprints Service Core is optimized for use on "JAWS" <strong>and</strong> similarbrowsers.• Footprints Service Core Serial Number: Only needed by System/WorkspaceAdministrators for BMC Support.6.2 Issue PageIssue preferences are options to specify how Tickets are displayed. Each user canconfigure the various options for preferences which allows for custom workflowanalysis. These options bring the work directly to the user, providing an efficientworkflow.• Interface Style: <strong>User</strong>s can choose between tabs <strong>and</strong> an exp<strong>and</strong>/collapse interface.When Tabs are selected, the sequence for display <strong>of</strong> the first three tabs is displayed.When Exp<strong>and</strong>/Collapse is selected, users can specify the sections displayed inexp<strong>and</strong>ed mode for each <strong>of</strong> the three page types. Enabled check boxes indicate that asection displays in exp<strong>and</strong>ed form.• Automatic Spell Check: Enables automatic spell checking. The spelling verificationoccurs after submission or update. (Not recommended)• HTML Customer Note Editor: The Description field can include controls forformatting text such as font type, size, color, bulleted lists, numbered lists, <strong>and</strong>tables. Internet Explorer v5.5 or greater is required for this feature. If disabled, aplain text box is displayed instead.• Flip-Thru Customer Note Viewer: If enabled, only one description is displayed inthe Issue Description field. Arrow buttons allow for advancing through multipledescriptions. An additional control above the Description field provides the abilityto display all descriptions at once in a new window.• Display Complete Customer Note on Edit: If enabled, a non-editable display fieldis included before the description field. This allows the Agent to scroll throughpreviously used descriptions without opening a separate View Current Descriptionwindow.• Edit Most Recent Customer Note: If enabled, the last description <strong>of</strong> an issueappears on the edit page in a separate box for editing.13
• Pre-fill New Tickets with My Contact Information: If enabled, the contactinformation section <strong>of</strong> the Issue is pre–populated with the address book record <strong>of</strong>the Agent entering Issue data. The Agent must have a corresponding record in theaddress book or the fields remain empty.• Open Attachments from a New Window: If enabled, a new window is openedwhen file attachments are included to download.• Behavior After Issue Create/Edit: When modifying a record the system can: Closewindow <strong>and</strong>/or Refresh Home Page, Display Issue Details, or Display ConfirmationPage Only.• Quick Customer Notes/Signatures: This option is used to provide quick access tocommon answers, or to create a personal signature. To use a Quick Customer Notewith a Ticket open, select the name for the Quick Customer Note the same way asthose created by the Workspace Administrator. Quick Customer Notes created by anAgent are listed under “Personal.” To create a Quick Customer Note entry, click the Configure Quick Customer Note/Signatures button, enter a name for the Quick Customer Note, enter yourPassword <strong>and</strong> click the Go button.To edit, re-order or delete a Quick Customer Note, click the Configure QuickCustomer Note /Signatures button, select the task to perform. When finished,enter the Password <strong>and</strong> click the Go button.• Require Password for Tickets: The security option allows for restricting othersfrom updating assigned Tickets (for example, if an Agent is away from their desk) byrequiring a password. The password is the same as a user’s login password. If thisfeature is enabled, a Password field is displayed next to the Save button. (This isnot enabled)6.3 Home PageThis section specifies the list <strong>of</strong> Tickets included on the Home Page. By default, MyAssignments is selected. It is recommended to set up a saved search <strong>of</strong> your personallyor team assigned tickets in an open status (described in 3.4.1). A different list can beselected to display any other built-in or custom list. Selections made in this section areWorkspace-specific.The Home Page tab provides the following options:• The lists available on the Home Page.• The list displayed by default.• How <strong>of</strong>ten the list is to be refreshed. By default the list refreshes each time theWorkspace Home is clicked on the toolbar, or any action that brings you back tothe Home Page is performed.• The maximum number <strong>of</strong> Tickets displayed in each window.14
• The field to sort the list by; determine if it should display in ascending ordescending order.• A secondary sorting field; determine if a secondary sort should be ascending ordescending order.• The option to create a customized list <strong>of</strong> columns <strong>and</strong> sort orders.• The option to control column format <strong>and</strong> when Quick Links should appear.6.3.1 DashboardThe <strong>FootPrints</strong> Dashboard preferences allow users to specify the dashboardcomponents displayed at the top <strong>of</strong> the Home Page. Agents can specify different sets <strong>of</strong>dashboard components for each <strong>of</strong> their Workspaces. By default, Global Tickets aredisplayed. Dashboard components can be displayed in as many as four columns. <strong>User</strong>scan also build custom components for display on the Home Page.The top right-h<strong>and</strong> corner <strong>of</strong> the Service Core Dashboard title bar includes shortcuts tocollapse <strong>and</strong> exp<strong>and</strong> all components. Individual components can be exp<strong>and</strong>ed,collapsed, or closed by clicking the appropriate button on the component title bar.The available components <strong>and</strong> a brief description are listed below:• Chart: When this component is selected, the chart to display is also selectedfrom a menu. Options are Received vs. Closed <strong>and</strong> Active Tickets. If Received vs.Closed is selected the time period must also be selected, as well as if only theAgent’s tickets or the entire Workspace's Tickets are to be displayed. Ticketsreceived <strong>and</strong> Tickets closed during the selected period for the designatedAgent(s).• Currently Logged In <strong>User</strong>s: Lists the number <strong>and</strong> IDs <strong>of</strong> users logged into thecurrent Workspace. When specifying this component, the number <strong>of</strong> records todisplay on the first page <strong>of</strong> the list is specified.• Custom Defined: Custom code to display other information in the dashboardcomponent is entered here. This can be HTML, JavaScript, etc.• Global Tickets: Displays Global Tickets. When specifying this component, thenumber <strong>of</strong> records to display must also be specified.• Most Recent Solutions: Displays recent Solutions from the Knowledge Base. Thenumber <strong>of</strong> characters to display for the Solution title field must be specified.• My Assignments: Lists the Issue number <strong>and</strong> title <strong>of</strong> active Tickets. The listentries are linked to Tickets. Clicking a list entry opens the Issue. Whenspecifying this component, the number <strong>of</strong> records to display on the first page <strong>of</strong>the list must be specified.• Pending Approvals (for Change Management approvers): Lists changemanagement Tickets when the current Agent is included as an approver <strong>and</strong> stillrequires a vote. When specifying this component, the number <strong>of</strong> recordsdisplayed for the first results page must be specified.• Pending KB Approvals (for Knowledge Base approvers): Includes submittedKnowledge Base Solutions that the current Agent is tasked to approve. When15
specifying this component, the number <strong>of</strong> records to display on the first page <strong>of</strong>the list must be specified.• RSS Feed: Includes entries from selected RSS feeds. When specifying thiscomponent the number <strong>of</strong> records to display on the first page <strong>of</strong> the list must bespecified as well as the URL for the RSS feed.• <strong>Request</strong>s: Includes the Issue number <strong>and</strong> title <strong>of</strong> tickets in the request status.The list entries are linked to the Tickets. Clicking on a list entry opens the Issue.When specifying this component, the number <strong>of</strong> records to display on the firstpage <strong>of</strong> the list must be specified.• Saved Search: Lists searches saved for quick access.• Today's Appointments: Lists appointments for the day.• Workspace Totals: Lists the number <strong>of</strong> Tickets categorized by status. The statuscan be clicked to quickly display the Tickets in the main frame.6.3.2 Add a Dashboard Component 1. In the Available Components field, select a dashboard component to add.2. Fields are automatically displayed based on the component type selected. Enteradditional information as needed. 3. Click the Add Component button.The dashboard component is displayed as an icon in the Dashboard area. Positionthe mouse over dashboard components to see contents <strong>of</strong> the current dashboard.6.3.3 Edit a Dashboard Component1. In the Current Dashboard section, click the dashboard component to bemodified.2. Change settings as needed.3. Click the Complete Edit button. Alternately, to remove a component, click theDelete Component button.6.4 Executive DashboardThis tool provides business intelligence concerning the performance <strong>of</strong> the service desk.Agents <strong>and</strong> management with access to the Executive Dashboard can specify the types<strong>of</strong> information to display. The refresh rate can be specified as well providing the abilityto see changes taking place in real-time as the service desk progresses through thesupport period. More information regarding the Executive Dashboard will be availableat a later date.16
7. INCIDENT MANAGEMENT<strong>Incident</strong> management allows us to track cases reported by users <strong>and</strong> monitor therequests to ensure that cases are addressed appropriately, according to the impact <strong>and</strong>urgency <strong>of</strong> the tickets.7.1 Choosing the Type <strong>of</strong> <strong>Request</strong><strong>Request</strong> Type – There are 3 total types <strong>of</strong> requests: <strong>Incident</strong>s, Service <strong>Request</strong>s, (createdin the <strong>Incident</strong> <strong>and</strong> <strong>Request</strong> Workspace) <strong>and</strong> Problems (created in the ProblemManagement Workspace). When you create a ticket, you will need to determinewhether the case is an incident, service request or problem based on the guidelinesbelow. In general, the HelpDesk will create most Problem tickets for majorevents/outages <strong>and</strong> link it to a Global Ticket.Problem - The unknown root cause <strong>of</strong> one or more incidents.<strong>Incident</strong> – An incident is defined as an unplanned interruption to an IT service orreduction in the quality <strong>of</strong> an IT service. Failure <strong>of</strong> a Configuration Item that hasnot yet impacted Service is also an <strong>Incident</strong>. For example, failure <strong>of</strong> one diskfrom a mirror set.Basically, if something was working properly but now it is broken, we willconsider it an incident.Other Examples: Service (Email, Banner, Online@UT) not available, applicationbug, system down, printer not printingService <strong>Request</strong> – A request from an end-user for: information, advice, a routineservice request (install s<strong>of</strong>tware, reset password, etc.), access to an IT Service.7.2 Determining Priority for <strong>Incident</strong>s <strong>and</strong> ProblemsPriority will be based on the Urgency <strong>and</strong> Impact <strong>of</strong> the incident.• Urgency is the acceptable delay in resolving the incident• The number <strong>of</strong> users or business processes affected will determine impact.7.2.1 Assigning UrgencyThere are four urgency rankings: Urgent, High, MediumAnd NormalRank Impact CriteriaUrgent • Impacts Enterprise• Impacts multiple business units17
High • Process stopped; user cannot work• System <strong>and</strong>/or service unavailable• No work around availableMedium • Process affected; certain functions are unavailable to user• System <strong>and</strong>/or service is degraded• May or may not have workaround availableNormal • Process affected; certain functions are unavailable to user• System <strong>and</strong>/or service inconvenienced but still available• Workaround available7.2.2 Assigning ImpactThere are three impact rankings: High, Medium, or LowRank Impact CriteriaHigh • Entire department, floor, or group• Greater than 100 people affectedMedium • Between 21-99 people affectedLow • Less than 20 people affected7.2.3 Assigning PriorityOnce you choose the Impact & Urgency in <strong>FootPrints</strong>, then the Priority will beautomatically assigned based on the following chart once the ticket has been saved.<strong>Incident</strong> priority may be adjusted when incidents are escalated to Level 2 or Level 3support staff based on further analysis <strong>of</strong> the issue. The priority may also change overthe life <strong>of</strong> the incident.URGENCYIMPACT18
High Medium LowUrgent Critical Critical HighHigh Critical High MediumMedium High Medium NormalNormal Medium Normal NormalThe <strong>Incident</strong> Priority <strong>of</strong> a case will determine the target resolution time. Critical caseswill have a shorter target resolution time than Normal cases.Priority Definition Response Time TargetResolutionCritical Major incident that • Acknowledgement <strong>of</strong>isaffecting a largegroupthe issue will takeplace within 30minutes< 4 hours<strong>of</strong> users or criticalbusiness processes• Communication to allusers affected (ITTraffic Center) willtake place within 2hours <strong>of</strong> the firstreported incident• Updates to the ITTraffic Center will bemade every 4 hoursuntil the incident isresolvedHighSignificant incidentthatis causing work toslowor stop• Acknowledgement <strong>of</strong>the issue will takeplace within 30minutes.• Communication to allusers affected (ITTraffic Center) willtake place within 2hours <strong>of</strong> the firstreported incident• Updates to the ITTraffic Center will bemade every 4 hoursuntil the incident isresolved
Medium <strong>Incident</strong>s that maybe impacting workbut for which thereis a workaround• Acknowledgement <strong>of</strong>the issue will takeplace within onebusiness day.< 5 business daysNormal<strong>Incident</strong>s with lowimpact or where aworkaround iseasily followed• Acknowledgement <strong>of</strong>the issue will takeplace within onebusiness day.Planned7.3 Setting Priority for Service <strong>Request</strong>sThe HelpDesk will always set the Priority for a service request to Normal. These requestsinclude information, routine requests, advice, access to IT services, etc. Should an SLArequire a higher priority, the priority may be adjusted once the case has been assignedto the appropriate group. When you create a ticket for a service request, you will needto set the Priority. If you have an SLA in place that requires a higher priority, then youcan choose the appropriate one.8. OTHER TOPICS8.1 Emailing a CaseYou can email a ticket’s information to anyone using the CC: function in the Assignments<strong>and</strong> Notifications tab. It is recommended to uncheck the Customer <strong>and</strong> Assignee fieldsas to not copy the customer or assignee on the ticket.8.2 Printing a Single TicketOpen the Ticket to be printed in the Details View <strong>and</strong> select Report from the toolbar atthe top for a print view.8.3 ReportingMore information to come on Reporting.20