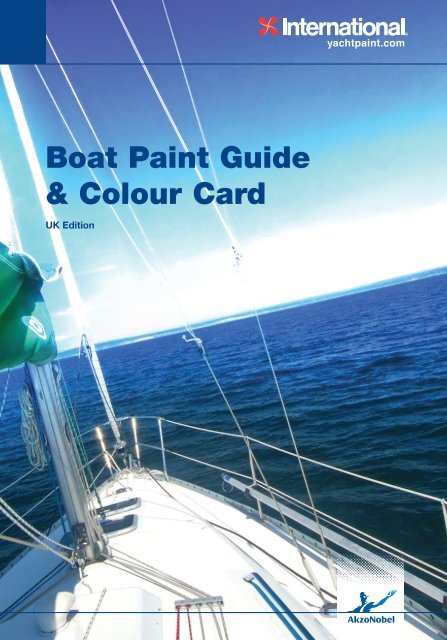
International Boat Paint Guide & Colour Card - Boatpaint.co.uk
International Boat Paint Guide & Colour Card - Boatpaint.co.uk
International Boat Paint Guide & Colour Card - Boatpaint.co.uk

Create successful ePaper yourself
Turn your PDF publications into a flip-book with our unique Google optimized e-Paper software.
<strong>Boat</strong> <strong>Paint</strong> <strong>Guide</strong>& <strong>Colour</strong> <strong>Card</strong>UK Edition
Quick Reference <strong>Guide</strong><strong>Boat</strong> <strong>Paint</strong> <strong>Guide</strong>Contentsn AntifoulingsUse this guide to our antifouling productsto help you choose the perfect product foryour project.NEWNEWQuickReference <strong>Guide</strong>Micron ® OptimaMicron ® ExtraPolishingCruiser ® UNOBottom<strong>co</strong>atSlow PolishingTrilux ® 33Interspeed ® UltraHardThin Film Special PurposeNavigator ® VC ® Offshore VC ® 17m Extra Trilux ® Prop-O-DrevBeforeYou StartKey attributesThinnersn For the absolute cleanest hullsn Minimum build-up – reducedpreparation timen Activated Biolux ® technology forsustained antifouling protectionn Water based – low odour,easy clean upWatern Premium, multi-season<strong>co</strong>polymer antifouling forharshest fouling areasn 24 months protection fromone applicationn Minimum paint build up,washes away with usen Biolux ® technology forsustained antifouling protectionNo. 3n One season’s protectionin all but harshest fouling<strong>co</strong>nditionsn One <strong>co</strong>at to save timen For power (up to 25 knots)and sail boatsn Can be re-immersedwithin 24 hoursn Cruising antifoulingoffering good level ofprotectionn Contains organic boosterto improve performancen Suitable for applicationseveral weeks prior toimmersionn Season-long performancen Slow polishing, avoidsseasonal paint build upn For all substrates includingaluminium; re<strong>co</strong>mmendedfor propellers and boottopsn Bright <strong>co</strong>lours, includingbright whiten Effective fouling protectionfor up to 18 monthsn Ultra strong formulafor high fouling areasn Hard, durable finishn Biolux ® technology forsustained antifoulingprotectionNo. 3 No. 3 No. 3No. 3n Formulated specificallyfor use in fresh andbrackish watersn Provides a hardscrubbable finishn Can be applied up to3 months before launchNo. 3n Suitable for salt andfreshwatern Hard, smooth finishcan be burnished toa very low profilen For racing sailing andpower boatsVC ® GeneralThinnern Extra strong thin filmantifouling for racingsailboats and powerboatsn With fluoro microadditivefor a low friction surfacen Hard, smooth surfacen Quick drying for fastre-launchVC ® GeneralThinnern Aerosol application fordifficult to reach areasn For propellers, outboardsand sterngearn For aluminium, stainlesssteel and alloyn Biolux ® technology forsustained antifoulingprotectionVC ® General ThinnerFOR CLEAN UP‘Step-by-Step’Project <strong>Guide</strong>sThe CompleteAntifouling <strong>Guide</strong>Practical <strong>co</strong>verage (m 2 per litre) 8.3 9.0Number of <strong>co</strong>ats 2-3 2-3 (1 season) / 3-4 (2 seasons)8.5 9.0 8.3 9.41-2 2-3 2-3 (1 season) / 3-4 (18 months) 2-38.2 9.9 11.71 can permedium-sized outdrive2-3 2-3 2-3 3 minimumThe CompleteTopsides <strong>Guide</strong>SubstratesSuitable for high speed craft✗✗✓Up to 25 knots✗✓✓✓Up to 25 knots✓ ✓ ✓Blister Repairand PreventionApplication methodSuitable for high fouling areasUse antifouling paints safely. Always read the label and product information before use.CONTINUES OVER ‘Troubleshooting<strong>Guide</strong>GRP WOOD STEEL ALUMINIUMBRONZESTAINLESS STEELBRUSH ROLLER AEROSOL GOOD EXCELLENT OUTSTANDINGLEAD<strong>International</strong> and the environment: We have products and systems designed to help you reduce yourboating environmental footprint. Call us or see the appropriate sections on yachtpaint.<strong>co</strong>m for more information.For <strong>co</strong>mprehensive application and scheme information, always read the product data sheet before you start.Richard Jerram, Technical Helpline“Need to know how to remove old antifouling?”The answer is only a click away at yachtpaint.<strong>co</strong>m<strong>Colour</strong><strong>Card</strong>04 Helpline: +44 (0) 1489 77 50 50 Open 8:15am – 4:30pm, Monday – Friday0506
Quick Reference <strong>Guide</strong><strong>Boat</strong> <strong>Paint</strong> <strong>Guide</strong>Contentsn VarnishesUse this guide to our varnish products tohelp you choose the perfect product foryour project.NEWGloss retentionoutperforms otherleading varnishproducts*NEWNEWQuickReference <strong>Guide</strong>Key attributesPerfection Plusn Ultimate performance, clear,two-part polyurethane varnishn Chemical cure for the hardestfinish & highest abrasion resistancen Superior gloss lasts four timeslonger than <strong>co</strong>nventional one-partvarnishesn Professional-quality resultsmade easyn 2:1 mix ratio: Easy to measureand mixThinners No. 9Schooner ® Goldn Advanced UV technology in ourlongest-lasting one-part varnishn Exceptional deep gloss and<strong>co</strong>lour are retained over thelifetime of the <strong>co</strong>atingn Sand between every other <strong>co</strong>atn Traditional amber <strong>co</strong>lourn Use without thinning in warm/higher temperature climatesNo. 1No. 3Compass ®n Fast-dry, high durability,polyurethane high gloss varnishn Excellent resistance toabrasion, oils and chemicalsn Fast-drying, apply 2 <strong>co</strong>ats perday, sand only after 2-3 <strong>co</strong>atsn Light amber <strong>co</strong>lourn Contains HALS andUV absorbers (find moreinformation at yachtpaint.<strong>co</strong>m)No. 1Goldspar ® Satinn A satin finish polyurethanevarnish for interior usen Resistant to hot water,mild acids and alkalisn Fast-dry formulation minimisesdust <strong>co</strong>ntaminationOriginaln Traditional, general purposegloss varnishn Good flow, flexibility andgloss retentionn High clarity finish for light<strong>co</strong>lour woodsn Interior, exterior and overexisting varnishNo. 3 No. 1 No. 3 No. 1 No. 3BeforeYou Start‘Step-by-Step’Project <strong>Guide</strong>sThe CompleteAntifouling <strong>Guide</strong>Practical <strong>co</strong>verage (m 2 per litre) 12.0 12.9Number of <strong>co</strong>atsWill vary depending on usage.Please check product label/data sheet.Suitable for use direct tooily timber (e.g. teak or iroko)Application methodUV protection/Gloss retention2-5 2-612.9 10.3 11.73-6 3 3✓ ✓ ✓ ✓ ✓For interior use onlyThe CompleteTopsides <strong>Guide</strong>Blister Repairand PreventionAdditiveFor a satin finish add:PolyurethaneMatting Additive“Ever wondered how the professionals achieve aglass-like appearance to their varnished surfaces?”When working with varnishes the final finish can be affected by the profile of the wood grain itself.A smoother finish will be achieved by increasing sanding preparation and the number of <strong>co</strong>ats youapply. But, did you know that by using <strong>International</strong> Clear Wood Sealer Fast Dry under your varnish,this fast-drying, clear primer and surface sealer will fill and seal the wood grain, to provide anexceptionally smooth, crystal clear finish over which you can apply any of our high quality varnishes?MattingAdditiveMattingAdditiveBRUSHROLLERSPRAYGOODFor a non-slip finish, use Non-Slip Additive with your chosen varnish.–* Based on the results of our trials <strong>co</strong>nducted in Florida.Find more information on achieving professional results at yachtpaint.<strong>co</strong>m‘MattingAdditiveOUTSTANDINGTroubleshooting<strong>Guide</strong><strong>Colour</strong><strong>Card</strong>10 Helpline: +44 (0) 1489 77 50 50 Open 8:15am – 4:30pm, Monday – Friday 11
Quick Reference <strong>Guide</strong><strong>Boat</strong> <strong>Paint</strong> <strong>Guide</strong>Contentsn Primers & Under<strong>co</strong>atsUse this guide to our primers andunder<strong>co</strong>ats to help you choose theperfect product for your project.QuickReference <strong>Guide</strong>Yacht Primer Primo<strong>co</strong>n ®PrimerInterprotect ® VC ® Tar2 Gelshield ® 200Under<strong>co</strong>atGelshield ® Plus Perfection Under<strong>co</strong>at Pre-KoteBeforeYou StartKey attributesTypically usedThinnersn Conventional one-part primerfor use above the watern Quick drying, with anti<strong>co</strong>rrosivepropertiesn Pigments <strong>co</strong>ntain aluminiumflake to provide an anti-<strong>co</strong>rrosiveprotective barrierAbove water, under one-partunder<strong>co</strong>atsDo not over<strong>co</strong>at with two-partproductsNo. 1n Conventional one-part primerfor use below watern Quick drying, with anti<strong>co</strong>rrosivepropertiesn Can be used under all majorantifoulings* or as a <strong>co</strong>nversion<strong>co</strong>at over in<strong>co</strong>mpatible orunknown antifoulingsBelow water, under antifoulingsor to seal unknown antifoulingsDo not use with VC ® 17m systemsNo. 3n Quick drying, easy to apply,two-part epoxy primern Offers excellent anti<strong>co</strong>rrosiveprotectionn Can be used as an antifoulingtie-<strong>co</strong>at over existing epoxy primersWhere a high-performance anti-<strong>co</strong>rrosivesystem is requiredDo not use over one-part productsor antifoulingsNo. 7n Osmosis defence for GRP andanti<strong>co</strong>rrosion barrier for metaln Advanced self-levelling formulationrequires no sanding between <strong>co</strong>atsn Smooth surface – ideal primer basefor antifoulingsUnder VC ® antifoulings, due toexceptionally smooth surface profileVC ® GeneralThinnern Quick drying, easy to apply,epoxy primer for protectionof GRP against osmosisn Provides protection againstosmosis in five <strong>co</strong>ats (250 µm)n Useable down to 5°Cn Fast drying allows multiple <strong>co</strong>atapplication in a single dayTo prevent osmotic blistering onfibreglass hulls and bilgesNo. 7n A high build, solventlessepoxy primern Available in two <strong>co</strong>lours toaid self-on-self applicationn Contains no harmful solventsto migrate into the hull andcause reblisteringTo treat osmotic blisteringon fibreglass hullsDo not thin under any circumstancesn High performance two-partpolyurethane under<strong>co</strong>atn Provides an excellent basefor a long-lasting gloss finishn Easy application, fast dryingand easy sandingn Semi-gloss appearanceUnder Perfection finishDo not use overone-part productsNo. 9n Under<strong>co</strong>at for one-part finishesn Excellent opacity allowsfor easy <strong>co</strong>lour changingn Long-lasting, easy to applyand rub downn Long over<strong>co</strong>ating times allow<strong>co</strong>at-on-<strong>co</strong>at applicationUnder <strong>International</strong>one-part finishesDo not use undertwo-part productsNo. 1‘Step-by-Step’Project <strong>Guide</strong>sThe CompleteAntifouling <strong>Guide</strong>The CompleteTopsides <strong>Guide</strong>Practical <strong>co</strong>verage (m 2 per litre) 12.0 7.4Number of <strong>co</strong>ats 4 1-58.1 11.3 8.12-5 3-7 5-66.0 12.0 12.04 1-2 1-2Blister Repairand PreventionSubstratesApplication methodSuitable for above waterline✓✗✓✗✗Apply to hull after removing gel<strong>co</strong>atRefer to product data sheet* * * * * *✓✓Troubleshooting<strong>Guide</strong>Suitable for below waterline✗✓✓ ✓ ✓✓ ✗ ✗* Over suitable primerGRP WOOD STEEL ALUMINIUM LEAD ZINCBRUSH ROLLER SPRAYFor <strong>co</strong>mprehensive application and scheme information, always read the product data sheet before you start.<strong>Colour</strong><strong>Card</strong>12 Helpline: +44 (0) 1489 77 50 50 Open 8:15am – 4:30pm, Monday – Friday1314
Before You Start<strong>Boat</strong> <strong>Paint</strong> <strong>Guide</strong>Contentsn Health & SafetyProviding health and safety precautions for paintproducts is a legal requirement and forms a specificsection on our labels. However, the wording is laiddown by law and is often difficult to understand.This section is intended to help you interpret andunderstand the symbols and phrases you will find inour literature and on our product labels. We’ve alsoincluded some further information to make applyingpaint a safer job.Before starting work always read the label. Eachtin will display a number of warning symbols andwritten warning phrases which will quickly indicatethose areas where particular care should be taken.Other general safety precautions are detailed belowand will help should any problem occur whilst usingour paints.Personal healthAvoid ingestionFood and drink should not be prepared or <strong>co</strong>nsumedin areas where paint is stored or is being used. Incases of accidental paint ingestion seek immediatemedical attention. Keep the patient at rest, do NOTinduce vomiting.Avoid inhalationThe inhalation of solvent vapour from paint, or dustfrom sanding, can be reduced by the provision ofadequate ventilation or extraction. If this is notsufficient, or if specifically stated on the label,suitable respiratory protection should be used.Wear a cartridge type respirator when abrading oldantifoulings – never burn off or dry-sand antifoulingsas this may create harmful fumes or dust.In badly ventilated areas wear an air-fed hoodor cartridge respirator with an organic vapourfilter. Solvent fumes are heavier than air. Breathingthese fumes can make you dizzy, feel drunk andheadachy and <strong>co</strong>uld even result in <strong>co</strong>llapse.Read the label carefully and ensure that there<strong>co</strong>mmended protection is worn.Spray painting creates additional health hazards.Spray mists should not, under any circumstances,be inhaled. Read the label carefully and ensurere<strong>co</strong>mmended protection is worn; generally anair-fed hood is the best protection as it providesa fresh air feed to the user.Avoid eye <strong>co</strong>ntactEye protection should be used during paintapplication and when there is any risk of paintsplashing on the face. Safety glasses or goggles areinexpensive, available from many DIY stores, andare well worth wearing. Use eyewear that <strong>co</strong>mplieswith EN 166. If material does <strong>co</strong>ntaminate the eye,it is re<strong>co</strong>mmended that the eye is flushed withclean fresh water for at least 15 minutes, holdingthe eyelids apart, and medical attention sought.Avoid skin <strong>co</strong>ntactSkin irritation can occur from <strong>co</strong>ntact with paintproducts. You should, therefore, always wearprotective gloves and protective clothing whenapplying or mixing any paint products. Overalls,which <strong>co</strong>ver the body, arms and legs, should beworn. Skin cream, of a non-greasy barrier type, maybe used on the face. Do NOT use petroleum jelly asthis can help the absorption of paint into the body.Remove rings and watch straps before <strong>co</strong>mmencingwork, as these can trap paint particles next to theskin. Remove any paint that does get onto the skinby washing with warm water and soap or anapproved skin cleanser. After washing, apply a skin<strong>co</strong>nditioner. Never use solvent or thinners to cleanthe skin.Risk of fire or explosionMost paints <strong>co</strong>ntain organic solvents – some of whichevaporate into the air upon opening the <strong>co</strong>ntainer.Any dangers can be reduced if a few simpleprecautions are taken:n Avoid naked flames where paint is being stored,opened or appliedn Do not smoken Store paint in a well-ventilated, dry place awayfrom sources of heat and direct sunlightn Keep the tin tightly closedn Avoid sparks from metals, electrical appliances beingswitched on and off, or faulty electrical <strong>co</strong>nnectionsn Do not leave paint soaked rags lying around,in the pockets of overalls or in waste bins.Some types of paint can dry out and auto-ignite.Personal Protective Equipment (PPE)Before undertaking any work always <strong>co</strong>nsider the personal protective equipment that you will need; this willchange based on the job in hand and the product being used. Some of the most <strong>co</strong>mmon items are listedbelow together with guidelines on when they should be used. However, for further information, <strong>co</strong>nsult your<strong>International</strong> Help Desk.For your <strong>co</strong>nvenience, your local helpline number is shown on the inside front <strong>co</strong>ver of this booklet and at thefoot of each page spread.BeforeYou Start‘Step-by-Step’Project <strong>Guide</strong>sThe CompleteAntifouling <strong>Guide</strong>The CompleteTopsides <strong>Guide</strong>Blister Repairand PreventionWarning symbolsCorrosiveThis material will attack the eyes and skinand can give you burns.Highly FlammableA spark or cigarette end will start a fire,more easily than with petrol. <strong>Paint</strong> orthinners in tins, or vapours in the air,can catch fire or explode.Harmful/IrritantThis material may harm you from skin<strong>co</strong>ntact, from breathing in or ingesting.The wording will indicate which.Harmful to the EnvironmentThis material is toxic to aquatic organismsand may cause long-term adverse effectsin the aquatic environment.Face MasksThe type of mask that should be worn depends on the hazard of thepaint, length of time of the job, amount of paint used and where thejob is being carried out. Spray application will require the use of fullface masks and respiratory protection and as such it is re<strong>co</strong>mmendedthat it is only carried out by professionals with specialist equipment.Hard HatA hard hat should be worn toprotect the head if painting inareas where there is a risk fromfalling objects or debris.Troubleshooting<strong>Guide</strong><strong>Colour</strong><strong>Card</strong>15 Helpline: +44 (0) 1489 77 50 50 Open 8:15am – 4:30pm, Monday – Friday16
Before You Start<strong>Boat</strong> <strong>Paint</strong> <strong>Guide</strong>Contentsn Equipment guidelinesThe type of equipment you choose can make a difference to the success of your project. <strong>Guide</strong>lines for thebest equipment to use are always detailed on the paint can and if a particular type of brush or roller is required,it will be specified. Further details are available at yachtpaint.<strong>co</strong>m, however, this section should provide you withthe basics.BeforeYou StartSafety Glasses and GogglesEye protection should always be worn when using paint. The type ofprotection required depends on the job to be carried out. Safety glasseswill avoid minor splashes, whereas goggles offer more protection.Safety BootsSteel toecap, anti-static bootsare advisable when paintingyour boat. These should provideankle protection, as a minimum.BrushIt is always important to choosea good quality brush, which isas large as you can <strong>co</strong>mfortablyuse. A good brush is a goodinvestment and should becleaned properly after use.RollerGenerally, a medium pile rolleris re<strong>co</strong>mmended for antifoulingapplication, and a small cellfoam roller for gloss finishes.SprayAlthough our products aredesigned for easy applicationby brush or roller, many can alsobe spray applied but will requirespecialist equipment. Consultproduct data sheets for sprayequipment re<strong>co</strong>mmendations.‘Step-by-Step’Project <strong>Guide</strong>sThe CompleteTopsides <strong>Guide</strong>The CompleteAntifouling <strong>Guide</strong>GlovesWhen painting, chemicalresistant gloves, that are ingood <strong>co</strong>ndition, should be worn.The gloves should be replacedfrequently and always as soonas the inside looks dirty.OverallsA <strong>co</strong>tton overall (minimum 60%<strong>co</strong>tton) with full length sleevesand legs should be used in allsituations where exposure tothe paint is potentially high.Alternatively, if the risk topaint exposure is low, suitabledisposable overalls can be worn.Barrier CreamBarrier cream should be usedon exposed skin that cannot be<strong>co</strong>vered by protective equipment.However, it must not be usedinstead of or in lieu of it.Do not use petroleum jellybased products as this willaid penetration of the productinto the skin.Stirring StickA suitable stirrer will be neededto stir the paint prior to use; anold screwdriver is not suitablefor this job. A pallet knife orstirring stick is best. Removesurface dust with a dust wipe.Mixing CupMixing cups with graduatedmixing ratio indicators aredesigned to ensure the <strong>co</strong>rrectand precise measuring andmixing proportions of paints,activators and thinners.MaskingPrior to painting, the target areashould be masked off using ahigh quality clean-edged tape.There are two types available;paper masking tape which issuitable for antifouling, and highperformance tapes whichare suitable for topsides finishesand will prevent creep.Blister Repairand PreventionTroubleshooting<strong>Guide</strong><strong>Colour</strong><strong>Card</strong>17Helpline: +44 (0) 1489 77 50 50 Open 8:15am – 4:30pm, Monday – Friday18
Before You Start‘Step-by-Step’ Project <strong>Guide</strong>sContentsTop tips from the experts...Commencing with some basic advice on substrates and preparation, thissection provides a series of useful step-by-step guides to <strong>co</strong>mmon boatpainting projects, along with all those useful bits of extra information andadvice that can really <strong>co</strong>ntribute to making your project an outstandingsuccess. Written by experts in a series of easy-to-follow steps, <strong>co</strong>mplementedwith simple illustrations, these guides provide the ultimate quick referencetool to the discerning DIY boat owner.ScraperUse a scraper to remove oldpaint. Ensure you keep the toolsharp; it's a good idea to roundoff the <strong>co</strong>rners to minimise therisk of gouging. A ‘dragging’ typeis usually more <strong>co</strong>ntrollable thana ‘pushing’ type.Choosing the right sandpaperGrinderAngle grinders are used forgrinding, polishing and cutting.With a wide variety to choosefrom, the most important factorsto <strong>co</strong>nsider are the disc size andhow powerful the motor is. Thetype of disc required will dependon the job being carried out.SandpaperWhen sanding, the amount ofpaper you will use will varyenormously. A very approximateguide would be one sheet persquare metre of bare substrate,such as wood or glass fibre.It is always better to use asanding block to achieve asmoother surface. For previouslypainted surfaces, half a sheetper square metre is a roughguide and rubbing downbetween <strong>co</strong>ats will use a similaramount. Antifouling must onlybe wet sanded.The possible uses of the various grades of sandpaper can be summarised as follows:60-120 To remove old paint or promote mechanical adhesion. This grade will leave the surface scratchedtherefore a finer grade of paper should subsequently be used.180-200 On new wood, these grades are too <strong>co</strong>arse for rubbing down wood which is to be varnished.220 For rubbing down finishes prior to the application of an under<strong>co</strong>at or primer.280-320 To sand bare wood and fibreglass or under<strong>co</strong>ats prior to the application of a finish.320 To rub down varnishes or a mixture of finish/under<strong>co</strong>at.400 For sanding freshly applied finishes.400 and above For taking out any blemishes in a paint film.n Getting to know your substratesWorking with fibreglassFibreglass, or GRP as it is often known, is madefrom polyester resin reinforced with chopped orwoven glass fibres. Once the resin sets to a hardmatrix the resulting laminate is strong and rigid.The smooth external appearance is due to aprotective gel<strong>co</strong>at, made from polyester resin.Despite its obvious advantages, experience hasshown that glass fibre is susceptible to the effectsof sunlight and the marine environment.There are two problems to be aware of:Fibreglass is prone to osmosis!For detailed information see Pages 66-69.Gel<strong>co</strong>ats fade!Eventually the gel<strong>co</strong>at will begin to fade as a resultof exposure to UV (Ultra Violet) light in sunlight.Fred ColeUK Sales ManagerPolishing with wax may delay this, but eventuallya <strong>co</strong>at of paint will be needed to restore <strong>co</strong>lour andprotect the surface.See The Complete Topsides <strong>Guide</strong> on Page 58.Working with aluminiumAluminium is an excellent material for boats.However, aluminium alloys are prone to <strong>co</strong>rrosionif untreated or damaged. When new alloys areexposed, an oxide layer forms on their surface.The oxide layer does not protect the alloy in the longterm when exposed to damp marine environments.Attention to the preparation of a new hull and themaintenance of an existing hull can save you<strong>co</strong>nsiderable difficulties and <strong>co</strong>stly repairs inthe future.Aluminium inspectionPeriodically the paint system will need to beremoved in areas of stress and any <strong>co</strong>rrosiontreated. Careful inspection on an annual basisof all weld seams will allow for early identificationof the occurrence of this problem.Aluminium <strong>co</strong>mpatibilityAluminium reacts with some <strong>co</strong>pper-basedantifouling paints causing serious <strong>co</strong>rrosion.Therefore antifoulings <strong>co</strong>ntaining metallic <strong>co</strong>pper orcuprous oxide should never be used on aluminium.Only use <strong>co</strong>pper thiocyanate based antifouling onaluminium, firstly ensuring it is primed properly.‘Step-by-Step’Project <strong>Guide</strong>sThe CompleteAntifouling <strong>Guide</strong>The CompleteTopsides <strong>Guide</strong>Blister Repairand Prevention<strong>Colour</strong><strong>Card</strong>Troubleshooting<strong>Guide</strong>19Helpline: +44 (0) 1489 77 50 50 Open 8:15am – 4:30pm, Monday – Friday20
‘Step-by-Step’ Project <strong>Guide</strong>s<strong>Boat</strong> <strong>Paint</strong> <strong>Guide</strong>ContentsWorking with woodsWood is the only natural boat building materialused today, and although it generally requiresmore maintenance than the more <strong>co</strong>mmon glassfibre vessels, a well cared for boat, built of wood,will always attract admiring glances when shesails into view.The fibrous nature of timber means that it has atendency to absorb moisture from the atmosphere,and swell and <strong>co</strong>ntract to varying degreesdepending on the type of <strong>co</strong>nstruction. For a varnishor paint <strong>co</strong>ating to stay intact it will need to be quiteflexible in nature. The moisture <strong>co</strong>ntent in wood canallow the growth of fungal spores, which leadsto rotting and decay. Wood can also be subject toattack by marine borers, which eat the wood fibres.Wood therefore needs to be protected by goodquality preservatives and <strong>co</strong>atings. Many differentwoods can be used, which can differ immensely.HardwoodsHardwood <strong>co</strong>mes from slow growing deciduoustrees. They have a tighter grain than soft woods.This tight grain has good strength characteristicsacross the timber as well as along its length,making it particularly suitable for de<strong>co</strong>rativeapplication, as well as boat building.Mahogany: Mahogany will last for many yearsin a marine environment with little protection as theseawater has an antiseptic quality. The same is nottrue with regard to fresh water, which will lead torot and decay if allowed to permeate the woodfibres. Mahogany should, therefore, be protectedfrom freshwater at all times and wherever possiblewashed down with seawater.Teak and Iroko: Teak and iroko are particularlyoily timbers with a natural resistance to rot anddecay. Additionally they <strong>co</strong>ntain silica, which givesthem hard-wearing characteristics.Oak: Ferrous metals, such as steel and iron, reactbadly with oak, due to the tannin in the fibres. Thiswill cause dark staining and even chemical attackon the metal by the tannic acid, which is formed.SoftwoodsThe grain in these woods is long, straight andgenerally wider spaced than hardwoods as thesetrees grow faster. This means that their strength ismostly along their length so they are used in suchapplications as masts and spars, tillers, rubbingstrakes, oars and planked hulls.Working with steelSteel is a heat-treated alloy based on iron with alower carbon <strong>co</strong>ntent and small quantities of otherelements. The high strength of steel in relation tothe plate thickness and the ability to cut and bendit into many different shapes makes it suitablematerial for building hulls and superstructures.Fastenings such as bolts and rivets are often adifferent alloy for added strength, while fittings<strong>co</strong>ntain added chromium, to make the steel‘stainless’ and resistant to rust. Having statedthat steel is a good material for building boats,it is important to be aware of some of thecharacteristics of the material in order toensure good results.Steel <strong>co</strong>rrodes!The most <strong>co</strong>mmon form of <strong>co</strong>rrosion in steel is rust.For the reaction to take place, water must also bepresent. The marine environment is therefore anideal place for rust to occur.Steel stretches!Due to the high flexibility and strength of steelit is hard to break, but impact damage may wellresult in a dent owing to the metal stretching anddeforming locally. This can present problems for aprotective <strong>co</strong>ating, which may not be so flexible.How to prepare bare substratesAll surfaces should be thoroughly degreased andfree from any sanding debris prior to the applicationof any paint to the surface.AluminiumDegrease with solvent or Super Cleaner. Sand wellusing 60-120 grade (aluminium <strong>co</strong>mpatible) paper.Clean thoroughly and allow to dry. Prime using an<strong>International</strong> primer as soon as possible (within8 hours) following the product re<strong>co</strong>mmendationsprovided in the paint systems guides.LeadDegrease with solvent or Super Cleaner. Sandwell using 120 grade paper or power wire brush.Clean thoroughly and allow to dry. Prime usingan <strong>International</strong> or VC primer following the productre<strong>co</strong>mmendations provided in the paint systemsguides.Zinc/Galvanised SteelDegrease with solvent or Super Cleaner. Sand wellusing 60-120 grade paper. Clean thoroughly andallow to dry <strong>co</strong>mpletely. Prime using an <strong>International</strong>or VC primer following the product re<strong>co</strong>mmendationsprovided in the paint systems guides.SteelDegrease with solvent or Super Cleaner. Grit blastto Sa 2.5 – near white metal surface. If grit blastingis not possible, grind the metal surface with24-36 grade abrasive discs to a uniform, clean,bright metal surface with a 50-75 micron anchorpattern. Use angle grinder on small areas. Cleanthoroughly and allow to dry <strong>co</strong>mpletely. Primeusing an <strong>International</strong> or VC primer following theproduct re<strong>co</strong>mmendations provided in the paintsystems guides.Stainless SteelLight grit blast to produce a profile of 50 microns,clean thoroughly and allow to dry <strong>co</strong>mpletely priorto application of an <strong>International</strong> primer followingthe product re<strong>co</strong>mmendations provided in the paintsystems guides.BronzeClean thoroughly and abrade to bright metal using80 grade paper. Take care when abrading bronzepropellers, as excessive abrading can alter theprofile of the propeller causing it to be out of balance.Clean thoroughly and allow to dry <strong>co</strong>mpletely beforeapplying products re<strong>co</strong>mmended for applicationdirect to bronze (see paint systems guides).Cast IronDegrease with solvent or Super Cleaner. Grit blast toSa 2.5. If grit blasting is not possible, grind the metalsurface with 24-36 grade abrasive discs to a uniformclean surface with a 50-75 micron anchor pattern.Use an angle grinder on small areas or a wire brush,prepare to a minimum St.3 ac<strong>co</strong>rding to ISO8501-1.Clean thoroughly with solvent and allow to dry<strong>co</strong>mpletely. Ensure that all evidence of <strong>co</strong>rrosion (e.g.iron oxide and iron sulphide) is removed prior to theapplication of an <strong>International</strong> or VC primer, followingthe product re<strong>co</strong>mmendations provided in the paintsystems guides.FibreglassDegrease with solvent or Super Cleaner. Sand wellusing 180-220 grade paper. Clean thoroughly andallow to dry <strong>co</strong>mpletely. Prime using an <strong>International</strong>or VC primer following the product re<strong>co</strong>mmendationsprovided in the paint systems guides.Bare Wood/PlywoodSand smooth with 80-180 grade paper and then280 grade paper. Remove sanding dust by brushingor dusting. Wipe down thoroughly with solvent andallow to dry <strong>co</strong>mpletely, to ensure any residualsanding dust is removed, before applying productsre<strong>co</strong>mmended for application direct to wood(see paint systems guides).Oily woods e.g. teakEnsure that the surface is thoroughly degreasedusing a re<strong>co</strong>mmended solvent to ensure all oils areremoved. Sand smooth with 80-180 grade paperand then 280 grade paper. Remove sanding dustby wiping with solvent, to ensure any residualdust is removed. Ensure the surface is <strong>co</strong>mpletelydry before applying products re<strong>co</strong>mmended forapplication direct to wood (see paint systems guides).‘Step-by-Step’Project <strong>Guide</strong>sThe CompleteAntifouling <strong>Guide</strong>The CompleteTopsides <strong>Guide</strong>Blister Repairand PreventionTroubleshooting<strong>Guide</strong><strong>Colour</strong><strong>Card</strong>21Helpline: +44 (0) 1489 77 50 50 Open 8:15am – 4:30pm, Monday – Friday22
‘Step-by-Step’ Project <strong>Guide</strong>s<strong>Boat</strong> <strong>Paint</strong> <strong>Guide</strong>Contentsn Always check the weather!When painting outside, always check what weather <strong>co</strong>nditions are anticipated duringthe preparation, application and drying phases of any project. Should fair weatherprevail, whether or not to <strong>co</strong>mmence painting will then depend on the air and surfacetemperatures, humidity and dew point.You may find the following hints and tips helpful when planning your project – further,product-specific guidelines can be found on individual product labels and data sheets.General Guidance Notes:n Dew point is important when applying paint toa surface, as the evaporation of the solvent fromthe paint draws heat and/or energy from thatsurface, <strong>co</strong>oling it down. If <strong>co</strong>nditions are right<strong>co</strong>ndensation may form on the surface of thepaint resulting in various problems.n Relative humidity is important as air can onlyhold so much water or solvent vapour at any onetime. So, as the relative humidity increases, thelevel of solvent vapour the air can hold reduces,meaning paint will effectively dry more slowly.Richard JerramTechnical Helplinen Air and substrate temperature will affect thedrying properties of any paint. Failing to observethe re<strong>co</strong>mmended drying times can result in<strong>co</strong>ating failure, including improper drying,wrinkling and loss of adhesion.n Always avoid extreme air or temperature<strong>co</strong>nditions; <strong>International</strong> products are testedacross a range of temperatures, to ascertainthe drying times and application characteristicsof each product. Drying time re<strong>co</strong>mmendationsare provided on our products labels; furtherinformation relating to weather <strong>co</strong>nsiderationscan be found on our product data sheets,available on our web site.“What is ‘Relative Humidity’?”Relative Humidity, or ‘RH’, measures the amount of water in the air in vapour form, <strong>co</strong>mparing it to themaximum amount of water that can be held at a given temperature. For example, if the RH is quoted asbeing 50% at 23°C, this would imply that the air <strong>co</strong>ntains 50% of the maximum level of water vapour it<strong>co</strong>uld hold at 23°C. 100% RH indicates that the air is at maximum saturation.When humid air <strong>co</strong>mes into <strong>co</strong>ntact with <strong>co</strong>oler air, or a <strong>co</strong>oler surface, the water vapour will turn intowater droplets. When this occurs on a surface it is referred to as the ‘Dew Point’.Never apply paint above a maximum relative humidity of around 85% as at that level you will reach thedew point regardless of surrounding temperatures.Relative Humidity can be measured using a hygrometer; a hygro thermometer will measure bothtemperature and humidity.“What is ‘Dew Point’?”We have all experienced ‘Dew Point’ at some stage. Condensation on windows is an obvious example.Dew Point is the temperature at which the air can no longer hold its water vapour and starts to form waterdroplets i.e. <strong>co</strong>ndensation. Condensation forms when air temperature lowers, reducing the amount of energyavailable to keep the water in vapour format. For example, a window forms <strong>co</strong>ndensation when the <strong>co</strong>olnight air hits the outside surface of the glass, lowering the surface temperature and the humidity in thehouse is high enough to cause <strong>co</strong>ndensation on the inside of the glass surface.When painting, it is essential that you are able to paint a surface and avoid <strong>co</strong>ndensation forming during theapplication and drying stages. The optimum surface temperature for paint application is normally around6°C above the Dew Point; however some products may be more or less tolerant. When working with<strong>International</strong> products, if in doubt, it’s always worth checking the relevant technical data sheet – availableon our website – for further advice.Dew Point can be calculated using the relative humidity and the air temperature; however, Dew Point ‘lookup’tables are widely available via the internet.n Low temperatures will increase drying times;always check the ‘through-dry’ of each interim<strong>co</strong>at, before sanding or over<strong>co</strong>ating.n Sanding too early can cause the paint towrinkle under the sand paper, in some caseseven tearing or gouging into the paint filmmaking refurbishment difficult. Sanding beforethe paint film is ‘through-dry’ can also block thesand paper, meaning more sheets are needed to<strong>co</strong>mplete the task.n Over<strong>co</strong>ating too early can cause wrinkling,blistering and loss of gloss in the finishedpaint job.n High temperatures will reduce drying times,but can make application more difficult, asproduct flow and levelling can be <strong>co</strong>mpromised –particularly when applying finishes or varnishes.Where appropriate, thinning re<strong>co</strong>mmendationsto help with higher temperature application areprovided on labels and data sheet.When applying two-part products in highertemperatures the pot life of the product will alsobe affected, reducing your work time window.n Do not paint in direct sunlight, or when thesubstrate itself is excessively warm, as theresidual heat of the substrate can adverselyaffect the application and drying properties ofany paint product; this can result in poor flowand levelling, rapid drying, cracking and loss ofgloss. Surface temperature can be measuredusing a surface thermometer.Remember that surfaces heat up and <strong>co</strong>ol down ata different rate to the surrounding air temperature,meaning even though the ambient temperaturemight seem warm, the temperature of the surfacebeing worked on may still be quite <strong>co</strong>ld. Very oftenone side of a boat will be in the shade and theother in bright sunlight meaning the application<strong>co</strong>nditions will differ. Additionally, in the morningthe surface temperature of the sunny side willgenerally be lower than the ambient temperature,whereas in the afternoon it may be higher.Key points to note when applyingfinishes and varnishes:n Dry, well ventilated <strong>co</strong>nditions are preferablewhen applying finishes or varnishes. Whilst gentleair movement will assist the drying process,a dust-free environment is critical to achievinga good quality gloss finish; always avoid paintingin windy <strong>co</strong>nditions.Choosing a faster drying product or scheme,where available, will help to minimise the windowfor dust <strong>co</strong>ntamination.n The effects of dust <strong>co</strong>ntamination may be furtherreduced by sanding lightly between each <strong>co</strong>at,removing residual dust by wiping down with asuitable solvent and allowing to dry beforeapplying the next <strong>co</strong>at. This will also help improvethe initial aesthetics.n Avoid applying two-part finishes or varnisheslate in the afternoon or when relative humidityexceeds 80% as these products are particularlysensitive to moisture. Condensation duringapplication or due to overnight ambienttemperature changes can affect the chemicalcure of these products resulting in loss of gloss.n When painting or varnishing timber avoid applyingif the ambient temperature is increasing (orpredicted to increase) significantly. This is becauserising temperatures cause timber to expand, whichcan lead to blisters forming in the paint or varnishfilm. A good tip is to apply when the temperatureis falling, as the timber will better absorb the paintor varnish, giving better overall results.Key points to note when applyingepoxies (e.g. Watertite, Interprotect ® ,Gelshield ® Plus)n Whilst curing in high humidity <strong>co</strong>nditions,particularly at lower temperatures, epoxiescan develop an ‘amine bloom’ on the surface.This slightly sticky substance must be removedand can normally be washed off with a milddetergent. If it is not removed it can lead to thede-lamination of subsequent <strong>co</strong>ats. Failure toremove the bloom will also make sanding moredifficult.Bloomingn High humidity <strong>co</strong>nditions can reduce the amountof solvent evaporation during the drying/curingstages; with epoxies this can lead to a ‘softcure’. As epoxy-based materials are generallyapplied at a higher film thickness, solvent canremain trapped in the film for many days leadingto slow or poor final cure.n Although epoxies generally cure well in most<strong>co</strong>nditions, when the temperature falls to 7°C orbelow, curing can slow or even stop. Rememberto check both day and overnight temperatureswhether working outdoors or in a shed.n Epoxy products usually respond well to a littleheat; on <strong>co</strong>ld days introducing a safe form ofheating into the application area is well worth<strong>co</strong>nsidering.‘Step-by-Step’Project <strong>Guide</strong>sThe CompleteAntifouling <strong>Guide</strong>The CompleteTopsides <strong>Guide</strong>Blister Repairand PreventionTroubleshooting<strong>Guide</strong>Blistering<strong>Colour</strong><strong>Card</strong>23Helpline: +44 (0) 1489 77 50 50 Open 8:15am – 4:30pm, Monday – Friday2425
‘Step-by-Step’ Project <strong>Guide</strong>s<strong>Boat</strong> <strong>Paint</strong> <strong>Guide</strong>Contentsn Making small repairs to GRP surfacesWhen working with fillers it’s important to remember that epoxy fillers arere<strong>co</strong>mmended for both above and below the water areas; polyester fillers are suitablefor use above the water only. <strong>International</strong> Watertite is a two-part epoxy filler, suited tomost DIY repairs above and below water.Stuart JordanSpecialist in Epoxies/Fillers Development4Applying the fillerMask off the damaged area and apply Watertiteusing a palette knife or spatula. Allow to cure,following the re<strong>co</strong>mmendations provided onthe product label.1Health and SafetyBefore <strong>co</strong>mmencing preparatory work, ensurethe area you are working in is adequatelyventilated. Ensure you are wearing the <strong>co</strong>rrectPPE; we re<strong>co</strong>mmend safety spectacles, gogglesor visors, nitrile rubber gloves, overalls (ensuringskin is not exposed) and a face mask.Once cured, sand with 80-220 grade paper.The finished repair should be smooth and levelwith the surface. If required a se<strong>co</strong>nd layer offiller may be applied, repeating the sameprocess. The repaired area can then beprimed, ready for painting.‘Step-by-Step’Project <strong>Guide</strong>s23Before starting your project, always check the weather <strong>co</strong>nditions! See Pages 23-25.InspectionInspect for damage. Small repairs can be tackled easily, but any damageaffecting a large area, or affecting the structure or hull integrity, should bereferred to a professional for proper assessment.Preparation and PrimingRemove any loose filler or gel<strong>co</strong>at and abradeedges to remove loose material. Remove alldebris and prime with an <strong>International</strong> orVC primer, ac<strong>co</strong>rding to the schemere<strong>co</strong>mmendations provided elsewherein this guide. For an osmosis protectionscheme use Gelshield 200 or VC Tar 2.See Pages 66-69 for information on osmosis treatment and prevention.See Page 19 for sandpaper guidelines.Richard Jerram, Technical Helpline“Working with epoxy fillers?”n Two-part epoxy fillers are the most widely used fillers in the yachting industry. They are invariably solventfree. A benefit of being solvent free is that they do not attack the underlying primer.n Epoxies must be mixed in the proper ratio. Too much curing agent and they will leave a sticky film on thesurface that is not suitable for over<strong>co</strong>ating. Too little curing agent will weaken the filler and cause it tocrumble later on.n Below the waterline, epoxy fillers must be used. Polyester fillers should not be used as they have agreater propensity to absorb water.Click or call and ask the experts!The CompleteAntifouling <strong>Guide</strong>The CompleteTopsides <strong>Guide</strong>Blister Repairand PreventionTroubleshooting<strong>Guide</strong><strong>Colour</strong><strong>Card</strong>26Helpline: +44 (0) 1489 77 50 50 Open 8:15am – 4:30pm, Monday – Friday27
‘Step-by-Step’ Project <strong>Guide</strong>s<strong>Boat</strong> <strong>Paint</strong> <strong>Guide</strong>Contentsn Removing aged finishes or varnishesWhen preparing a surface previously painted with a finish or varnish scheme it may benecessary to remove the aged product, back to bare substrate. This will be required ifthe existing <strong>co</strong>ating is in poor <strong>co</strong>ndition or if you’re intending to apply a two-part productonto a surface previously painted with a one-part finish or varnish.Louise BebbingtonSenior Product Manager, Finishes and Varnishes4Abrade using 60-120 grade paper, removing as much of the paint or varnishas possible.See Page 19 for sandpaper guidelines.12Health and SafetyBefore <strong>co</strong>mmencing work ensure the areayou are working in is adequately ventilated.Ensure you are wearing the <strong>co</strong>rrect PPE; were<strong>co</strong>mmend safety spectacles, goggles orvisors, nitrile rubber gloves, overalls (ensuringskin is not exposed) and a dust mask.Before starting your project, always check the weather <strong>co</strong>nditions! See Pages 23-25.Remove any sections of the aged finish or varnish that are already loose,flaking or detached using a scraper – rounding the ends of the scraperbefore <strong>co</strong>mmencing will avoid gouging the surface, resulting in unnecessaryrepairs.5Prepare ac<strong>co</strong>rding to substrate, following bare substrate preparationguidelines.See Page 22 for bare substrate preparation guidelines.Richard Jerram, Technical Helpline“Hints to help you achieve a perfect finish.”‘Step-by-Step’Project <strong>Guide</strong>sThe CompleteAntifouling <strong>Guide</strong>The CompleteTopsides <strong>Guide</strong>3Clean the surface with Super Cleaner and rinsewith fresh water to remove any polish, wax or<strong>co</strong>ntaminants.n We do not re<strong>co</strong>mmend using a chemical paint stripper when working with fibreglass as this may causedamage to the substrate.n When working with wood, always work in the direction of the grain, whether sanding or applying varnish.This will avoid scratches that can still show through, even after many <strong>co</strong>ats of paint or varnish.Click or call and ask the experts!<strong>Colour</strong><strong>Card</strong>Blister Repairand PreventionTroubleshooting<strong>Guide</strong>28Helpline: +44 (0) 1489 77 50 50 Open 8:15am – 4:30pm, Monday – Friday29
‘Step-by-Step’ Project <strong>Guide</strong>s<strong>Boat</strong> <strong>Paint</strong> <strong>Guide</strong>Contentsn Removing antifoulingIf your existing antifouling is in poor <strong>co</strong>ndition, we re<strong>co</strong>mmend removing it <strong>co</strong>mpletelybefore repainting. Interstrip AF has been formulated for removing antifouling from allsubstrates and is safe to use on glass fibre without harming the gel<strong>co</strong>at.Leave on the surface. The product needs time to work; the time needed willvary depending on the temperature and the amount of old antifouling on thehull.Kate MossSpecialist in Antifoulings DevelopmentFor best results, work on a small area at a time – do not allow the product to dry out.See product label for more information.1Health and SafetyBefore <strong>co</strong>mmencing preparatory work, ensurethe area you are working in is adequatelyventilated. Ensure you are wearing the <strong>co</strong>rrectPPE; we re<strong>co</strong>mmend safety spectacles, gogglesor visors, nitrile rubber gloves, overalls(ensuring skin is not exposed) and a solventmask or a respirator (if working on larger areasor in <strong>co</strong>nfined spaces).Before starting your project, always check the weather <strong>co</strong>nditions! See Pages 23-25.4Removing old antifoulingRemove while still soft with a blunt scraper. Interstrip AF can remove several<strong>co</strong>ats at a time, but heavy build up may require more than one application.Residue should be disposed of ac<strong>co</strong>rding to local legislation. Reapply freshantifouling after sanding and priming the hull.See Page 43 for antifouling application advice.‘Step-by-Step’Project <strong>Guide</strong>sThe CompleteAntifouling <strong>Guide</strong>2PreparationHigh pressure fresh water wash, to removeloose antifouling; ensuring all residue andwash water is <strong>co</strong>ntained and disposed of,ac<strong>co</strong>rding to local legislation. Mask off areasto be stripped.Richard Jerram, Technical HelplineThe CompleteTopsides <strong>Guide</strong>3Applying InterstripApply Interstrip AF liberally, using an old brush,following the application guidelines provided onthe product label.“Is your existing antifouling in good <strong>co</strong>ndition?”If your existing antifouling is in good <strong>co</strong>ndition, it may not need removing and can simply be over<strong>co</strong>ated,following a high pressure fresh water wash. Always ensure you check for <strong>co</strong>mpatibility before applying newantifouling; in<strong>co</strong>mpatible or unknown antifouling should be sealed with Primo<strong>co</strong>n. See Page 52 for moreinformation on antifouling <strong>co</strong>mpatibility.Click or call and ask the experts!<strong>Colour</strong><strong>Card</strong>Blister Repairand PreventionTroubleshooting<strong>Guide</strong>30Helpline: +44 (0) 1489 77 50 50 Open 8:15am – 4:30pm, Monday – Friday31
‘Step-by-Step’ Project <strong>Guide</strong>s<strong>Boat</strong> <strong>Paint</strong> <strong>Guide</strong>Contentsn Applying finishesBefore starting any painting project <strong>co</strong>nsider the 3 most critical questions:1) What preparation is necessary 2) Does the substrate matter and3) What repair and upkeep is needed. Page 58 of this guide will providethis information and help you choose the best product for your project.Neil Ni<strong>co</strong>lsonSpecialist in Finishes DevelopmentPreparation – in poor <strong>co</strong>nditionIf previous finish is cracking, peeling or showing signs of separation from the substrate this should betotally removed.See Page 29 for advice on removing existing finishes.7 ApplicationSand the under<strong>co</strong>at smooth with 320-400grade paper and remove dust with a wipeor tack rag.1Health and SafetyBefore <strong>co</strong>mmencing preparatory work, ensurethe area you are working in is adequatelyventilated. Ensure you are wearing the <strong>co</strong>rrectPPE; we re<strong>co</strong>mmend safety spectacles, gogglesor visors, nitrile rubber gloves, overalls (ensuringskin is not exposed) and a solvent mask.4 MaskingBefore priming/under<strong>co</strong>ating, mask off the area to be painted.Apply the finish, ac<strong>co</strong>rding to labelre<strong>co</strong>mmendations.See Page 59 of this guide for information onfinish application techniques.‘Step-by-Step’Project <strong>Guide</strong>s3Before starting your project, always check the weather <strong>co</strong>nditions! See Pages 23-25.For health and safety reasons, two-part polyurethane products should only be spray applied by a professional applicator.Previously painted surfaces:2 InspectionCheck for areas of damage, separation or peeling, or any other indicationsthat the existing <strong>co</strong>ating is not firmly adhered to the substrate.Using a two-part finish? Ensure your existing <strong>co</strong>ating is <strong>co</strong>mpatible.See Page 59 for <strong>co</strong>mpatibility testing guidance.Preparation – in good <strong>co</strong>nditionClean with Super Cleaner to ensure anyresidual polish, wax or surface <strong>co</strong>ntaminantsare removed. Rinse with fresh water and allowto dry. Sand smooth with 280-320 grade paper.Clean thoroughly and allow to dry <strong>co</strong>mpletely.Continue at Step 6.Bare substrate:5 PrimingBare substrates should be primed to promotegood adhesion and provide a smooth evensurface, prior to under<strong>co</strong>ating. Your choiceof primer will be dictated by the substrate;product re<strong>co</strong>mmendations are provided onlabels and data sheets. Remember to payparticular attention to drying times andover<strong>co</strong>ating intervals.6Due to the porous nature of aged gel<strong>co</strong>ats, the risk of moisture or solvent entrapment – leading to blisters –is increased; applying Interprotect followed by Perfection Under<strong>co</strong>at can reduce this risk and seal the gel<strong>co</strong>at,prior to applying the finish.Under<strong>co</strong>atingPrimed or previously painted surfaces should be under<strong>co</strong>ated.An under<strong>co</strong>at will provide additional depth of <strong>co</strong>lour and improvethe durability and film build of the overall paint system. <strong>International</strong>offers two under<strong>co</strong>ats for use with its finishes range.See Pages 60-61 for under<strong>co</strong>at re<strong>co</strong>mmendations.Richard Jerram, Technical Helpline“Achieve a perfect result every time!”n Ensure an even spread by holding the brush at 45° – this minimises brush marks.n The best finish is achieved on large areas by two people, one to apply the paint, the other followingimmediately behind to ‘tip off’ the finish.n Clean or change brushes every 20 minutes or so. Always use lint-free cleaning cloths.n Stir the can occasionally during the work.n Dampen the ground with water before <strong>co</strong>mmencing painting to avoid any dust rising.n Use a worn brush for the final <strong>co</strong>at, this will ensure less brush marks.n <strong>Paint</strong>ing is best achieved on warm, dry mornings – <strong>co</strong>ld weather retards drying and damp will spoil thegloss.n Never apply direct from the can as this will introduce <strong>co</strong>ntamination.n Always pour the amount of paint that you expect to use into a separate <strong>co</strong>ntainer.Click or call and ask the experts!The CompleteAntifouling <strong>Guide</strong>The CompleteTopsides <strong>Guide</strong>Blister Repairand PreventionTroubleshooting<strong>Guide</strong>Mixing the se<strong>co</strong>nd <strong>co</strong>at of under<strong>co</strong>at 50:50 with the top<strong>co</strong>at will produce a satin effect, which will highlight anyimperfections (to be sanded smooth) as well as improving the gloss and depth of <strong>co</strong>lour of the finish.<strong>Colour</strong><strong>Card</strong>32Helpline: +44 (0) 1489 77 50 50 Open 8:15am – 4:30pm, Monday – Friday3334
‘Step-by-Step’ Project <strong>Guide</strong>s<strong>Boat</strong> <strong>Paint</strong> <strong>Guide</strong>Contentsn <strong>Paint</strong>ing your bilgeA freshly painted bilge is much easier to wipe down and keep clean, reducing the riskof odours that may result from unwanted residue. A clean bilge will also make it easierto find small parts or fastenings, which may have been dropped whilst working on yourengine or other equipment.Boris WebberTechnical HelplinePreparation – in poor <strong>co</strong>nditionIf previous finish is cracking, peeling or showing signs of separation from the substrate this should betotally removed.See Page 28 for advice on removing existing finishes.Bare substrate:1Health and SafetyBefore <strong>co</strong>mmencing preparatory work, ensurethe area you are working in is adequatelyventilated. Ensure you are wearing the <strong>co</strong>rrectPPE; we re<strong>co</strong>mmend safety spectacles, gogglesor visors, nitrile rubber gloves, overalls (ensuringskin is not exposed) and a solvent mask or arespirator (if working in <strong>co</strong>nfined spaces).Before starting your project, always check the weather <strong>co</strong>nditions! See Pages 23-25.4PrimingBare substrates should be primed to promotegood adhesion and provide a smooth evensurface, prior to applying Danboline. Yourchoice of primer will be dictated by thesubstrate; product re<strong>co</strong>mmendations areprovided on labels and data sheets. Rememberto pay particular attention to drying times andover<strong>co</strong>ating intervals.Pay particular attention if the substrate is the reverse side of moulded GRP – this does not need to be primed.‘Step-by-Step’Project <strong>Guide</strong>sThe CompleteAntifouling <strong>Guide</strong>Previously painted surfaces:2 InspectionCheck for areas of damage, separation or peeling, or any other indicationsthat the existing <strong>co</strong>ating is not firmly adhered to the substrate.5ApplicationSand the primer smooth with 180-280 gradepaper and remove dust with a wipe or tack rag.The CompleteTopsides <strong>Guide</strong>3Preparation – in good <strong>co</strong>nditionClean with Super Cleaner and rinse with freshwater. Allow to dry. Sand smooth with 280-320grade paper. Clean thoroughly and allow to dry<strong>co</strong>mpletely. Continue at Step 5.Apply 1-2 <strong>co</strong>ats of Danboline.For added protection against moisture absorption and osmosis in bilge areas,use <strong>International</strong> Gelshield products – prior to applying Danboline – always followthe label instructions.Blister Repairand PreventionTroubleshooting<strong>Guide</strong><strong>Colour</strong><strong>Card</strong>35Helpline: +44 (0) 1489 77 50 50 Open 8:15am – 4:30pm, Monday – Friday36
‘Step-by-Step’ Project <strong>Guide</strong>s<strong>Boat</strong> <strong>Paint</strong> <strong>Guide</strong>Contentsn Preparing a non-slip deckA deck demands a tough <strong>co</strong>ating to protect it from everyday wear and tear.Where a non-slip surface is required <strong>International</strong> offers 3 alternative solutions.4 MaskingBefore priming or applying a deck finish, mask off the area to be painted.Using Non-Slip Additive with <strong>International</strong> ® Toplac ® or Perfection(hand-mixed method):Heather MortonSpecialist in Retail Finishes Development7ApplicationChoose your paint system – see Pages 60-61of this guide. Apply primer (if required) andunder<strong>co</strong>at following label re<strong>co</strong>mmendations.Add the <strong>co</strong>ntents of the Non-Slip Additivesachet to <strong>International</strong> Perfection or Toplac.1Health and SafetyBefore <strong>co</strong>mmencing preparatory work, ensurethe area you are working in is adequatelyventilated. Ensure you are wearing the <strong>co</strong>rrectPPE; we re<strong>co</strong>mmend safety spectacles, gogglesor visors, nitrile rubber gloves, overalls (ensuringskin is not exposed) and a solvent mask.Before starting your project, always check the weather <strong>co</strong>nditions! See Pages 23-25.Previously painted surfaces:Bare substrate:5 PrimingYour choice of primer will be determined bythe substrate and the choice of deck finishproduct. Priming re<strong>co</strong>mmendations areprovided on labels and data sheets. Rememberto pay particular attention to drying times andover<strong>co</strong>ating intervals.Due to the porous nature of aged gel<strong>co</strong>ats, the risk of moisture or solvent entrapment – leading to blisters –is increased; applying Interprotect followed by Perfection Under<strong>co</strong>at can reduce this risk and seal the gel<strong>co</strong>at,prior to applying the finish.Using a two-part finish? Ensure your existing <strong>co</strong>ating is <strong>co</strong>mpatible. See Page 59 for <strong>co</strong>mpatibility testing guidance.Mix thoroughly. Apply 1-2 <strong>co</strong>ats to deck area,using a brush or roller. For best results eitherstipple by brush or use a mohair roller.‘Step-by-Step’Project <strong>Guide</strong>sThe CompleteAntifouling <strong>Guide</strong>2 InspectionCheck for areas of damage, separation or peeling, or any other indicationsthat the existing <strong>co</strong>ating is not firmly adhered to the substrate.3Preparation – in good <strong>co</strong>nditionClean with Super Cleaner, rinse with freshwater and allow to dry. Sand smooth with280-320 grade paper. Clean thoroughly andallow to dry <strong>co</strong>mpletely. Continue at Step 6.Preparation – in poor <strong>co</strong>nditionIf previous finish is cracking, peeling or showing signs of separation from the substrate this should betotally removed.Using Interdeck(ready-mixed formula):6ApplicationSand the primer (if used) with 180-220 gradewet or dry paper. Remove dust with a dustwipe or tack rag, ac<strong>co</strong>rding to labelre<strong>co</strong>mmendations.Mix Interdeck thoroughly; apply 1-2 <strong>co</strong>ats.For best results either stipple by brush oruse a mohair roller.Using Non-Slip Additive with <strong>International</strong> ® Toplac ® or Perfection(broadcast method):8ApplicationChoose your paint system – see Pages 60-61of this guide. Apply primer (if required) andunder<strong>co</strong>at following label re<strong>co</strong>mmendations.Apply one <strong>co</strong>at of top<strong>co</strong>at. While the paint isstill wet, sprinkle Non-Slip Additive over thesurface. Allow to dry thoroughly following there<strong>co</strong>mmendations provided on the finish label.Remove excess grit. Apply se<strong>co</strong>nd <strong>co</strong>at offinish.The CompleteTopsides <strong>Guide</strong>Blister Repairand PreventionTroubleshooting<strong>Guide</strong>See Page 28 for advice on removing existing finishes.<strong>Colour</strong><strong>Card</strong>37 Helpline: +44 (0) 1489 77 50 50 Open 8:15am – 4:30pm, Monday – Friday3839
‘Step-by-Step’ Project <strong>Guide</strong>s<strong>Boat</strong> <strong>Paint</strong> <strong>Guide</strong>Contentsn Applying varnishesTo achieve a professional result from any varnish project, thorough preparation iscritical. If applying on to a previously varnished surface, the <strong>co</strong>ndition of the existing<strong>co</strong>ating and its <strong>co</strong>mpatibility with the new varnish product should thoroughly checkedbefore <strong>co</strong>mmencing any preparatory or application work.Sam BruceSpecialist in Varnishes DevelopmentPreparation – in poor <strong>co</strong>nditionIf previous varnish is cracking, peeling or showing signs of separation from the substrate this shouldbe totally removed.See Page 28 for advice on removing existing varnishes.Continue at Step 5.6ApplicationApplying varnish with a brush is usually thebest method, although roller application canbe effective on large, flat surfaces.Brush out, using firm strokes along and thenacross the grain, holding the brush at 90º tothe surface.Finally, ‘tip off’ by gently stroking surface withthe brush at a 45º angle, following the grain.The brush you use should be used only forvarnishing.1Health and SafetyBefore <strong>co</strong>mmencing preparatory work, ensurethe area you are working in is adequatelyventilated. Ensure you are wearing the <strong>co</strong>rrectPPE; we re<strong>co</strong>mmend safety spectacles, gogglesor visors, nitrile rubber gloves, overalls (ensuringskin is not exposed) and a solvent mask.Bare wood:4PreparationBare wood should be prepared following the appropriate bare substrate preparation guidelines.See Page 22 for substrate preparation guidelines.Continue at Step 5.Richard Jerram, Technical Helpline‘Step-by-Step’Project <strong>Guide</strong>s3Before starting your project, always check the weather <strong>co</strong>nditions! See Pages 23-25.Previously varnished surfaces:2 InspectionCheck for areas of damage, separation or peeling, or any other indicationsthat the existing <strong>co</strong>ating is not firmly adhered to the substrate.Preparation – in good <strong>co</strong>nditionClean with thinners. Sand smooth with280-320 grade paper. Remove sanding dustby brushing or dusting. Wipe down thoroughlywith solvent and allow to dry <strong>co</strong>mpletely, toensure any residual sanding dust is removed.(Note: Small imperfections may be spot primedand sanded down prior to full varnishapplication.) Continue at Step 6.Using a two-part varnish? Ensure your existing <strong>co</strong>ating is <strong>co</strong>mpatible.See Page 59 for <strong>co</strong>mpatibility testing guidance.5It is important to ensure all sanding residue is removed prior to varnishing, as this will impair adhesion and give a‘bitty’ finish. Before <strong>co</strong>mmencing any varnish work, decant the amount of varnish you expect to use into a separate<strong>co</strong>ntainer, to avoid introducing <strong>co</strong>ntamination into the tin.PrimingTo promote penetration of the surface and theadhesion of subsequent <strong>co</strong>ats; we re<strong>co</strong>mmendthinning the first <strong>co</strong>at of varnish. Decant theamount of varnish you expect to use into aseparate <strong>co</strong>ntainer. Thin for priming ac<strong>co</strong>rdingto label re<strong>co</strong>mmendations.Apply 1-2 thinned <strong>co</strong>ats of varnish followinglabel re<strong>co</strong>mmendations.Alternatively, prime using Clear Wood SealerFast Dry; a clear polyurethane primer withexcellent grain filling properties that willimprove overall scheme durability andaesthetics.“Achieve a perfect result every time!”Always follow the scheme re<strong>co</strong>mmendations as specified on the label; this will indicate the minimumnumber of <strong>co</strong>ats required and the sanding re<strong>co</strong>mmendations between <strong>co</strong>ats. This information will varydepending on the product. To achieve long-lasting protection, you should plan to apply up to ten <strong>co</strong>ats(depending on the system). As the number of <strong>co</strong>ats increases, sanding between <strong>co</strong>ats with a fine gradepaper will increase the level of gloss and depth of lustre.Hints and tipsn Keep the sandpaper clean and change it frequently.n Sand by numbers, finishing the surface with aprogressively finer grade of paper.n Varnishing is best achieved on warm, dry mornings –<strong>co</strong>ld weather slows drying and damp spoils the gloss.n Always use a clean brush, previously used only forvarnish.n Always buy the highest quality varnish and brushavailable. This will ensure you achieve the mostattractive finish.n Clean new brushes before use.n Test the finish on a spare piece of wood beforeapplying to the boat.n On large areas use a foam roller to apply the initial <strong>co</strong>at,followed immediately behind with a wide brush for thefinishing strokes – this is best done by two people.Click or call and ask the experts!n After cleaning with the <strong>co</strong>rrect thinners, wash thebrush in detergent and warm water, dry and wrapin greaseproof paper in a fine chisel shape.n Alternatively, having cleaned and washed the brush,suspend by its handle to avoid any ‘fishtailing’ of thebristle.n As the varnish ages in the tin you may find thereare lumps or <strong>co</strong>ntamination. Sieving the varnish intoa separate <strong>co</strong>ntainer through cheesecloth, a paintfilter or an old stocking is a good solution to thisproblem.n Don’t use varnish which has been open for a longperiod as it will have picked up dust.n Do not varnish wood when exposed to direct sunlight.n Never leave bare wood exposed too long as it willabsorb moisture from the atmosphere.The CompleteAntifouling <strong>Guide</strong>The CompleteTopsides <strong>Guide</strong>Blister Repairand PreventionTroubleshooting<strong>Guide</strong><strong>Colour</strong><strong>Card</strong>40Helpline: +44 (0) 1489 77 50 50 Open 8:15am – 4:30pm, Monday – Friday4142
‘Step-by-Step’ Project <strong>Guide</strong>s<strong>Boat</strong> <strong>Paint</strong> <strong>Guide</strong>Contentsn Applying antifoulingAntifouling can be applied using a brush or roller. Using a small roller is less work onthe arm but takes longer to <strong>co</strong>ver the surface area. If a brush is preferred, choose alarge width brush; the finish will not be as smooth as a topside paint so the type ofbrush used is not critical.Colin AndersonSpecialist in Antifoulings DevelopmentPreparation – in poor <strong>co</strong>nditionIf existing antifouling is cracking, peeling or showing signs of detachment from the substrate this shouldbe totally removed.See Page 30 for advice on removing existing antifoulings.6ApplicationMix paint thoroughly with a stirring stick,ensuring that any settlement is mixed in.Apply ac<strong>co</strong>rding to label re<strong>co</strong>mmendations,using a brush or roller.1Health and SafetyBefore <strong>co</strong>mmencing preparatory work, ensurethe area you are working in is adequatelyventilated. Ensure you are wearing the <strong>co</strong>rrectPPE; we re<strong>co</strong>mmend safety spectacles, gogglesor visors, nitrile rubber gloves, overalls (ensuringskin is not exposed) and a solvent mask.4MaskingBefore priming or applying antifouling, mask off the area to be painted.Apply the antifouling at the <strong>co</strong>rrect thickness; this may mean an extra <strong>co</strong>at isneeded, depending on application methods and <strong>co</strong>nditions.‘Step-by-Step’Project <strong>Guide</strong>s3Before starting your project, always check the weather <strong>co</strong>nditions! See Pages 23-25.Previously painted surfaces:2 InspectionCheck for areas of damage, separation or peeling, or any other indicationsthat the existing <strong>co</strong>ating is not firmly adhered to the substrate.Preparation – in good <strong>co</strong>nditionHigh pressure fresh water wash, to removeloose antifouling; ensuring all residue andwash water is <strong>co</strong>ntained and disposed of,ac<strong>co</strong>rding to local legislation. Allow to dry.Check for <strong>co</strong>mpatibility. Continue at Step 5.5Repair/PrimingRepair damage with Watertite Epoxy Fillerwhere necessary. Inspect GRP for gel<strong>co</strong>atdamage and signs of osmosis – treatac<strong>co</strong>rdingly.Seal in<strong>co</strong>mpatible or unknown antifoulingswith Primo<strong>co</strong>n. Bare substrates should beprimed, ac<strong>co</strong>rding to substrate. Productre<strong>co</strong>mmendations are provided on labelsand data sheets. Remember to pay particularattention to drying times and over<strong>co</strong>atingintervals.See Page 69 for advice on osmosis treatment. See Page 26 for advice on repairing GRP.Apply an extra <strong>co</strong>at to leading and trailingedges; e.g. waterline, trim tabs, outdrives,keels and rudders. These areas experiencemore water turbulence and so more wear onthe paint surface.Follow over<strong>co</strong>ating times and immersiontimes carefully. Failure to do this <strong>co</strong>uld resultin detachment, blistering or cracking of theantifouling. The marine environment is harshfor paint so it must be allowed to drythoroughly before immersion.Richard Jerram, Technical Helpline“Remember your PPE!”Most antifoulings <strong>co</strong>ntain biocides so should be handled with care; ensure the <strong>co</strong>rrect personal protectiveequipment (PPE) is worn at all times.Click or call and ask the experts!The CompleteAntifouling <strong>Guide</strong>The CompleteTopsides <strong>Guide</strong>Blister Repairand PreventionTroubleshooting<strong>Guide</strong>See Page 52 to check antifouling <strong>co</strong>mpatibility.<strong>Colour</strong><strong>Card</strong>43Helpline: +44 (0) 1489 77 50 50 Open 8:15am – 4:30pm, Monday – Friday4445
‘Step-by-Step’ Project <strong>Guide</strong>s<strong>Boat</strong> <strong>Paint</strong> <strong>Guide</strong>Contentsn <strong>Paint</strong>ing outdrives, stern gear,propellers and keelsOutdrives and stern gear are usually <strong>co</strong>nstructed from aluminium. Propellers areusually bronze or aluminium. Keels are typically cast iron or lead. It’s important tochoose an antifouling that is hard, durable and suitable for these high wear areasand also one that is <strong>co</strong>mpatible with the substrate you are painting.Roger BoltonUK Sales and Marketing Team3PrimingApply a primer re<strong>co</strong>mmended for the selectedantifouling and substrate; always followthe re<strong>co</strong>mmendations given on the productlabel.See Pages 54-57 for primer re<strong>co</strong>mmendations.1Health and SafetyBefore <strong>co</strong>mmencing preparatory work, ensurethe area you are working in is adequatelyventilated. Ensure you are wearing the <strong>co</strong>rrectPPE; we re<strong>co</strong>mmend safety spectacles,goggles or visors, nitrile rubber gloves, overalls(ensuring skin is not exposed) and a solventmask.Before starting your project, always check the weather <strong>co</strong>nditions! See Pages 23-25.4Applying antifoulingApply the selected antifouling, following thelabel re<strong>co</strong>mmendations on film thickness,over<strong>co</strong>ating and immersions times carefully.Not all antifoulings are suitable for application to bronze and aluminium, so it’s important to check <strong>co</strong>mpatibility whenselecting which antifouling product to use. See Pages 04-06 for antifouling product information.‘Step-by-Step’Project <strong>Guide</strong>sThe CompleteAntifouling <strong>Guide</strong>2 PreparationThe key to protecting your underwater metals from <strong>co</strong>rrosion is <strong>co</strong>rrectpreparation of the substrate and choosing the best priming solution foryour project. Before <strong>co</strong>mmencing any preparation, it is important to establishthe type of metal you are working with.The CompleteTopsides <strong>Guide</strong>Once you’ve <strong>co</strong>nfirmed your substrate see Page 22 for substrate preparation information and follow this advicecarefully.Richard Jerram, Technical Helpline“Take care with zinc anodes!”Care should be taken not to paint zinc anodes, which are often located next to the prop shafts, as thiswill seriously reduce their effectiveness. When painting your outdrives, underwater metals and keels,the longevity of any antifouling is difficult to predict as <strong>co</strong>ating adhesion can be an issue, particularly onpropellers. Thorough surface preparation is critical to promote good adhesion between the substrate andthe <strong>co</strong>ating.Click or call and ask the experts!<strong>Colour</strong><strong>Card</strong>Blister Repairand PreventionTroubleshooting<strong>Guide</strong>46Helpline: +44 (0) 1489 77 50 50 Open 8:15am – 4:30pm, Monday – Friday47
The Complete Antifouling <strong>Guide</strong><strong>Boat</strong> <strong>Paint</strong> <strong>Guide</strong>Contentsn What is antifouling?Antifouling is the most <strong>co</strong>mmon (and arguably themost important) painting job carried out by boatowners. It is vital to protect your boat throughantifouling, as once fouling has a hold on yourhull it will rapidly <strong>co</strong>lonise the surface, makingit difficult to remove.Applying an antifouling paint will prevent theattachment of fouling organisms, such as barnacles,weeds and slime, to the hull of your boat – a fouledhull can cause serious problems, thereforeprevention is much better than cure.How do antifoulings work?Antifouling paints work by delivering a <strong>co</strong>ntrolled,steady release of biocide (such as <strong>co</strong>pper) from thepaint surface into the micros<strong>co</strong>pic layer of waternext to the hull. It is this layer of biocide that stopsthe fouling from settling. Modern antifouling paintsare specifically formulated to release just the rightamount of biocide to keep the surface cleanthroughout the season, without the need to scrubyour boat.How do we do this?It’s simple to <strong>co</strong>ntrol fouling, yet the process isa <strong>co</strong>mplex one! The paint must be formulatedto release just enough biocide to stop fouling –but no more.Why use an antifouling?As active boaters, we are all <strong>co</strong>ncerned about howour activities may impact on the environment. Fuel<strong>co</strong>nsumption and engine efficiency can <strong>co</strong>ntribute tosmog: waste tank discharge can pollute waters andboating in sensitive areas can affect the balance ofaquatic life. Fortunately, these effects can be<strong>co</strong>ntrolled and minimised, ensuring a clean, safeenvironment for all of us to enjoy our boatingpassion. By taking steps to minimise your potentialimpact on the marine environment, you can<strong>co</strong>ntribute towards keeping it clean and safefor all of us to enjoy.There are THREE key reasonsfouling growth should beprevented:SafetyHeavy fouling growth will reduce the responsivenessof your boat as well as making it sit lower in thewater, due to the extra weight. Fouling can alsogrow unevenly across the bottom, throwing yourboat off balance, potentially making it dangerouslyun<strong>co</strong>ntrollable. This can have serious implicationsin challenging weather <strong>co</strong>nditions.To prevent hull damageFouling can burrow into hull <strong>co</strong>atings, opening upthe surface and allowing water to <strong>co</strong>me in <strong>co</strong>ntactwith unprotected metals and fibreglass. This cancause <strong>co</strong>rrosion to metals and blisters in fibreglassthrough osmosis. These problems are expensiveand time <strong>co</strong>nsuming to repair.Speed & EfficiencyFouling causes drag – drag reduces speed.Therefore, more fuel or energy is needed to drivethe boat through the water to maintain the samespeed. For racing boats this can make a bigdifference when <strong>co</strong>mpeting. However, an increasein fuel <strong>co</strong>nsumption will not only <strong>co</strong>st more, but willalso have an environmental impact due to increasedair pollution.Choosing an antifoulingYou can very easily do a professional quality jobyourself, but you must bear in mind a few importantpoints. The type of antifouling you choose should betailored both to your boating style and to the foulingchallenges in your area. Different water qualitiesand temperatures produce different types andbreeds of fouling. Even in a small area thedifferences can be quite dramatic; affected byoutfalls, pollution, inflows from rivers and streams,the speed of flow of the water, tidal exchange,salinity and even shading from cliffs, trees andbuildings.The <strong>International</strong> antifoulingrange provides protectionfrom the THREE key foulingchallenges:AnimalTwo types of animal fouling <strong>co</strong>mmonly attach toboat hulls. Hard-bodied animal fouling organisms,such as Barnacles and Tubeworms, have a hardouter shell, can grow to a <strong>co</strong>nsiderable size,and exert a strong negative impact on boatperformance.Soft-bodied animal fouling, such as Hydroidsand Ascidians, lack a shell but are still difficultto remove and significantly increase drag.WeedWeed requires light to grow and is normally<strong>co</strong>nfined to the sides of vessels, being particularlyprevalent at the waterline. The three types of weedfouling are characterised by their <strong>co</strong>lour, Green,Brown or Red. All types can be responsible forincreases in drag and loss of performance.SlimeSlime <strong>co</strong>nsists of a <strong>co</strong>llection of many differentspecies of single celled organisms that produce asyrupy medium in which to settle. It is present insome form on virtually every surface immersed inmarine and fresh water environments. Slime canvary in appearance from clear to dark brown orgreen depending on the species present and may,depending on <strong>co</strong>mposition, reduce the efficacy ofunderlying antifouling <strong>co</strong>atings. Slime is often noteasily removed by the motion of a hull throughthe water.The CompleteAntifouling <strong>Guide</strong>The CompleteTopsides <strong>Guide</strong>Blister Repairand PreventionTroubleshooting<strong>Guide</strong><strong>Colour</strong><strong>Card</strong>48Helpline: +44 (0) 1489 77 50 50 Open 8:15am – 4:30pm, Monday – Friday49
The Complete Antifouling <strong>Guide</strong><strong>Boat</strong> <strong>Paint</strong> <strong>Guide</strong>Contentsn Antifouling typesWe, at <strong>International</strong>, manufacture a wide variety of antifoulings to meet all sorts of fouling challenges andoften, more importantly, different boating styles. The following information will help you identify which ‘type’of antifouling is most suited to your needs.SUBSTRATEPRIMERBiolux ® Technology‘Biolux Technology’ isa unique antifoulingtechnology developed by <strong>International</strong>.It <strong>co</strong>nsists of a system of organic boostingbiocides in<strong>co</strong>rporated in a highly effective<strong>co</strong>ntrolled release film.Polishingn Polishing action provides <strong>co</strong>ntrolled biocide release forlong-term performancen Wears away with usen Reduced maintenance – minimal build-up reduces preparationtimen Haul and relaunch without repaintingHardn Hard, durable, season-long finishn Resistant to abrasion and rubbingn Suitable for fast craft and craft on dry mooringsn Scrubbable finish (see Page 51)Thin Filmn Fluoro microadditive for super speedn Ultra smooth, low-friction surface for performance boat owners,that:– Increases speed – Improves fuel efficiency– Reduces fuel <strong>co</strong>nsumption – Extends engine life– Minimises paint build-upANTIFOULINGPAINT FILMANTIFOULINGPAINT FLAKECOPPERFLAKECOPPEROXIDECAVITIES INLEACHED LAYERDid you know...Copper as an antifouling biocide: Copper is an element.It is present throughout the natural world and it is an essentialmicronutrient that all living organisms need in order to survive.Indeed it is even present in small amounts in our drinking water,which occurs due to erosion of <strong>co</strong>pper plumbing. All this isnormal. Copper can also be used to inhibit marine foulinggrowth. That is why it’s currently used in antifouling paint.In fact, <strong>co</strong>pper has been used as an antifouling biocide forhundreds of years.n Responsible use of antifoulings<strong>International</strong> ® leads the way in innovativetechnology, providing effective long-lastingantifouling paints that minimise potential impactsto the environment.The use of antifoulings in many <strong>co</strong>untries is highlyregulated and all <strong>International</strong> antifoulings areregistered and approved by the relevant authorities.For more information on our products includingtechnical data, application information, featuresand benefits see the appropriate sections onyachtpaint.<strong>co</strong>m.The following table is a quick checklist summaryfor the responsible use of antifoulings.Antifouling Checklist✓ Consult your local boatyard for advice onmaintaining your boat.✓ Choose an antifouling appropriate for your boatingneeds (lifetime, performance etc) that requires littleor no in-season maintenance.✓ Avoid unnecessary frequent scrubbing of yourantifouling.✓ Read the product label and follow H&S guidelines forpersonal protective equipment when applyingantifoulings.✓ Use a registered antifouling paint.✓ Apply the right amount of paint for the re<strong>co</strong>mmendedlifetime, even if this means putting on an extra <strong>co</strong>ator re-applying after 1-2 years.✓ Follow the <strong>co</strong>rrect over<strong>co</strong>ating and immersion timesof the antifouling.✓ Collect and dispose of wash down water and paintscrapings as required by law. Contact your localauthority for advice on disposal methods.✗ Do not discard tins or pour paint into water<strong>co</strong>urses, use the facilities provided. It is best toallow paints to harden before disposal.Scrubbing your antifouling –the factsA <strong>co</strong>mmon mis<strong>co</strong>nception is that scrubbing thepaint surface to reveal a fresh layer of biocide willenhance the long term performance of the paint.This is not the case. Excessive or too frequentscrubbing can, in fact, dramatically shorten thelifetime of the paint.<strong>International</strong> antifouling paints are designed toperform with little or no maintenance. If the surfaceis rubbed away by regular cleaning, then a large<strong>co</strong>ncentration of biocide is released when some ofthe top layer is removed. The more you scrub, themore you can remove the paint film and the quickerthe paint can fail. This will be<strong>co</strong>me a <strong>co</strong>nstantsource of maintenance, as the more you scrub,the quicker the paint will fail, meaning you needto scrub again and more frequently and so on,and so on.Constant scrubbing creates further issues.First, it releases more biocide into the waterthan the paint was designed to release. Se<strong>co</strong>nd,underwater scrubbing also releases paint flakesand debris into the marine environment.Talk to your local boatyardYour local boatyard uses professional paintapplicators to apply antifouling paints. Theseapplicators are trained in the safe application andremoval of antifoulings. Your local boatyard can givegood advice on which antifoulings to choose for yourtype of boat (hard, polishing) and the performancestrength required for your boating environment.Did you know...Most antifoulings never release all the biocide inthe paint film. They are designed to release justthe right amount of biocide during the useful lifeof the paint to <strong>co</strong>ntrol fouling. At the end of thistime a proportion of the biocide is still lockedaway in the paint that is still left on the boat.This biocide was never designed to be released.Scrubbing the paint liberates this biocide,flushing the water with much more biocidethan is necessary.The CompleteAntifouling <strong>Guide</strong>The CompleteTopsides <strong>Guide</strong>Blister Repairand PreventionTroubleshooting<strong>Guide</strong><strong>Colour</strong><strong>Card</strong>50Helpline: +44 (0) 1489 77 50 50 Open 8:15am – 4:30pm, Monday – Friday51
The Complete Antifouling <strong>Guide</strong><strong>Boat</strong> <strong>Paint</strong> <strong>Guide</strong>Contentsn Is my new antifouling <strong>co</strong>mpatible?Once you’ve identified the <strong>International</strong> antifouling that’s most suitable, if you have an existing <strong>co</strong>ating on yourhull you will need to establish the <strong>co</strong>mpatibility of the two products. Use this simple table to check <strong>co</strong>mpatibilitybetween <strong>International</strong> ® antifoulings and also with <strong>co</strong>mpetitor products.Micron ® OptimaMicron ® ExtraCruiser ® UnoBottom<strong>co</strong>atNew AntifoulingInterspeed UltraTrilux ® 33NavigatorVC ® OffshoreVC ® 17m ExtraTrilux ®Prop-O-Drevn How much antifouling paint do I need?Use these following quick steps to calculate the amount of paint you need:1. Work out the area to be painted using the appropriate formulation (below).2. Divide the area by the <strong>co</strong>verage of the paint you’ve chosen to determine how many litres per <strong>co</strong>at you will need.3. Multiply the litres per <strong>co</strong>at by the number of <strong>co</strong>ats to give your total paint requirement.LOAFImportant: If you own an aluminium boat,only apply antifouling paints specificallyre<strong>co</strong>mmended for aluminium to prevent<strong>co</strong>rrosion. Never apply products <strong>co</strong>ntainingCuprous Oxide to aluminium.Existing Antifouling (in Good Condition)Micron ® Optima ● ● ● ● ● ● ● ● ● ●Micron ® ExtraCruiser ® UnoWaterways PlusNavigatorTrilux ®Trilux ® 33VC ® OffshoreInterspeed Ultra● ● ● ● ● ● ● ● ● ●● ● ● ● ● ● ● ● ● ●VC ® 17m Extra ● ● ● ● ● ● ● ● ● ●Unknown product ● ● ● ● ● ● ● ● ● ●Previousantifouling inpoor <strong>co</strong>ndition● ● ● ● ● ● ● ● ● ●Blakes Tiger ● ● ● ● ● ● ● ● ● ●BlakesHard RacingAwlgrip ® Awl ® starGold LabelJotun Non Stop● ● ● ● ● ● ● ● ● ●● ● ● ● ● ● ● ● ● ●● ● ● ● ● ● ● ● ● ●BUnderwater area formulations1 Full bodied craftDLWLLWL x (B + D) = Underwater Area (m 2 )2 Fin keeled racing craftDLWL0.50 x LWL x (B + D) = Underwater Area (m 2 )Top TipApply an extra <strong>co</strong>at to all leading and trailing edges,water-line, trim-tabs, outdrives, keel and rudder. Highturbulence in these areas tends to wear the antifoulingfaster.InformationAbbreviationsLOA = Length OverallLWL = Length WaterlineB = BeamD = DraftF = FreeboardConversion Table1 foot = 0.3 metres1 metre = 3.281 feet1 square foot = 0.093 square metres1 square metre = 10.764 square feet1 gallon = 4.546 litres1 litre = 0.219 gallonThe CompleteAntifouling <strong>Guide</strong>The CompleteTopsides <strong>Guide</strong>Blister Repairand PreventionJotun Racing●● ● ● ● ● ● ● ● ● ●Apply after a light wet sand. Wash with fresh water and allow to dry.● Remove the antifouling using Interstrip AF. See Removing antifouling on Page 30.● Apply a barrier <strong>co</strong>at of Primo<strong>co</strong>n ® before applying antifouling. See Applying antifouling on Page 43.Interstrip AF3Medium draft racing craftLWL0.75 x LWL x (B + D) = Underwater Area (m 2 )DTop TipAlways use the specified amount of antifouling. Underapplicationcan result in premature fouling and <strong>co</strong>stlymid-season haul out.Troubleshooting<strong>Guide</strong>A paint stripper specially formulated for removing old or unknown antifoulings without damaging the underlyingsubstrate (including gel<strong>co</strong>at).For more information see the Antifouling quick reference guide on Page 04.<strong>Colour</strong><strong>Card</strong>52Helpline: +44 (0) 1489 77 50 50 Open 8:15am – 4:30pm, Monday – Friday53
The Complete Antifouling <strong>Guide</strong><strong>Boat</strong> <strong>Paint</strong> <strong>Guide</strong>Contentsn Below water schemes: two-part productsThese schemes provide the maximum level of protection.n Below water schemes: one-part productsThese schemes provide a good level of protection.GRPAluminiumGRPAluminiumPrimer(4 <strong>co</strong>ats min.)Gelshield ® 200Primer (5 <strong>co</strong>ats)Interprotect ®Primer (1 <strong>co</strong>at)Primo<strong>co</strong>nSurface Primer (1 <strong>co</strong>at)Primo<strong>co</strong>n(1 <strong>co</strong>at thinned 10-15%with Thinner No.3)Tie Coat (1 <strong>co</strong>at)Gelshield ® 200Antifouling(2-3 <strong>co</strong>ats)<strong>International</strong> AntifoulingAntifouling (2-3 <strong>co</strong>ats)<strong>International</strong> AntifoulingPrimer (5 <strong>co</strong>ats)Primo<strong>co</strong>nAntifouling (2-3 <strong>co</strong>ats)<strong>International</strong> AntifoulingAntifouling (2-3 <strong>co</strong>ats)<strong>International</strong> AntifoulingWoodSurface Primer (1 <strong>co</strong>at)Interprotect ®(1 <strong>co</strong>at thinned 10-15%with Thinner No.7)Iron/SteelPrimer (5 <strong>co</strong>ats)Interprotect ®WoodSurface Primer (1 <strong>co</strong>at)Primo<strong>co</strong>n(1 <strong>co</strong>at thinned 10-15%with Thinner No.3;15-20% on oily woods)Iron/SteelSurface Primer (1 <strong>co</strong>at)Primo<strong>co</strong>n(1 <strong>co</strong>at thinned 10-15%with Thinner No.3)The CompleteAntifouling <strong>Guide</strong>Primer (3 <strong>co</strong>ats)Interprotect ®Antifouling(2-3 <strong>co</strong>ats)<strong>International</strong> AntifoulingPrimer (3 <strong>co</strong>ats)Primo<strong>co</strong>nPrimer (5 <strong>co</strong>ats)Primo<strong>co</strong>nThe CompleteTopsides <strong>Guide</strong>LeadAntifouling (2-3 <strong>co</strong>ats)<strong>International</strong> AntifoulingSurface Primer (1 <strong>co</strong>at)Interprotect ®(1 <strong>co</strong>at thinned 10-15%with Thinner No.7)Primer (5 <strong>co</strong>ats)Interprotect ®FillerIf required for small areas, Watertite Fillershould be applied after the first <strong>co</strong>at ofGelshield 200 or Interprotect.LeadAntifouling (2-3 <strong>co</strong>ats)<strong>International</strong> AntifoulingSurface Primer (1 <strong>co</strong>at)Primo<strong>co</strong>n(1 <strong>co</strong>at thinned 10-15%with Thinner No.3)FillerIf required for small areas, Watertite Fillershould be applied between the first andse<strong>co</strong>nd <strong>co</strong>ats of Primer.Antifouling (2-3 <strong>co</strong>ats)<strong>International</strong> AntifoulingSee substrate preparation on Page 22.Primer (5 <strong>co</strong>ats)See substrate preparation on Page 22.Primo<strong>co</strong>nBlister Repairand PreventionTroubleshooting<strong>Guide</strong>Antifouling (2-3 <strong>co</strong>ats)<strong>International</strong> AntifoulingImportant: If you own an aluminium boat,only apply antifouling paints specificallyre<strong>co</strong>mmended for aluminium to prevent<strong>co</strong>rrosion. Never apply products <strong>co</strong>ntainingCuprous Oxide to aluminium.Antifouling (2-3 <strong>co</strong>ats)<strong>International</strong> AntifoulingImportant: If you own an aluminium boat,only apply antifouling paints specificallyre<strong>co</strong>mmended for aluminium to prevent<strong>co</strong>rrosion. Never apply products <strong>co</strong>ntainingCuprous Oxide to aluminium.<strong>Colour</strong><strong>Card</strong>54 Helpline: +44 (0) 1489 77 50 50 Open 8:15am – 4:30pm, Monday – Friday55
The Complete Antifouling <strong>Guide</strong><strong>Boat</strong> <strong>Paint</strong> <strong>Guide</strong>Contentsn Below water schemes: VC ® productsUse these schemes when using VC antifoulings.GRPPrimer(3-5 <strong>co</strong>ats)VC ® Tar2Antifouling(2-3 <strong>co</strong>ats)<strong>International</strong> VC ® AntifoulingIron/SteelPrimer(4 <strong>co</strong>ats min.)VC ® Tar2Antifouling(2-3 <strong>co</strong>ats)<strong>International</strong> VC ® Antifoulingn Propellers, outdrives and sterngearOutdrives are built out of aluminium. This presents <strong>co</strong>mpatibility issues with cuprous-oxide <strong>co</strong>ntainingantifoulings. Propellers are typically made with aluminium, bronze or stainless steel.AluminiumSurface Primer (1 <strong>co</strong>at)Interprotect ®(1 <strong>co</strong>at thinned 10-15%with Thinner No.7)Primer (5 <strong>co</strong>ats)Interprotect ®(or VC ® Prop-O-Drev Primer– no Surface Primer required)BronzeLeadSee osmosis protection schemes on Page 68.FillerIf required for small areas, Watertite Fillershould be applied after the first <strong>co</strong>at ofVC Tar2.SteelAntifouling(3 <strong>co</strong>ats)Trilux ® 33(or Trilux ® Prop-O-Drev)Antifouling(3 <strong>co</strong>ats)Trilux ® 33(or Trilux ® Prop-O-Drev)The CompleteAntifouling <strong>Guide</strong>Surface Primer (1 <strong>co</strong>at)VC ® Tar2(1 <strong>co</strong>at thinned 10-15%with VC General Thinner)Primer (3 <strong>co</strong>ats min.)VC ® Tar2Antifouling (2-3 <strong>co</strong>ats)<strong>International</strong> VC ® AntifoulingSurface Primer (1 <strong>co</strong>at)Interprotect ®(1 <strong>co</strong>at thinned 10-15%with Thinner No.7)Primer (5 <strong>co</strong>ats)Interprotect ®(or VC ® Prop-O-Drev Primer– no Surface Primer required)Antifouling(3 <strong>co</strong>ats min.)Trilux ® 33(or Trilux ® Prop-O-Drev)The CompleteTopsides <strong>Guide</strong>Blister Repairand PreventionSee substrate preparation on Page 22.See <strong>Paint</strong>ing outdrives, stern gear, propellers and keels on Page 46.<strong>Colour</strong><strong>Card</strong>Troubleshooting<strong>Guide</strong>56 Helpline: +44 (0) 1489 77 50 50 Open 8:15am – 4:30pm, Monday – Friday57
The Complete Topsides <strong>Guide</strong><strong>Boat</strong> <strong>Paint</strong> <strong>Guide</strong>Contentsn Working with finishesn Testing for <strong>co</strong>mpatibilityApart from providing an enhanced <strong>co</strong>smetic finishto your boat, paints provide a protective barrieragainst the elements that will attack the surfaceduring the season: sea, rain, wind and sun.Whilst a two-part system, such as Perfection, offersexcellent resistance to abrasion, even this can stillwear through in excessive circumstances. Using aone-part system, such as Toplac, on these areas willmake it easier to touch up any areas of damage,should this be required outside of standardmaintenance intervals.To test if an existing topside paint product, or a varnish, is <strong>co</strong>mpatiblewith our two-part polyurethane products; tape a cloth soaked in ThinnersNo.9 to the previously painted substrate for 24 hours. If the surface issoftened, it is probably not <strong>co</strong>mpatible. In this instance, unless strippingdown to the bare substrate is an option, a one-part product should beapplied.What preparation is necessary?The most critical aspect of any painting job ispreparation. Poor surface preparation will alwaysshow through the final <strong>co</strong>at; this will reduce theeffectiveness of the <strong>co</strong>ating system and canpotentially lead to the premature failure andseparation of the <strong>co</strong>ating from the substrate.As a guide, you should be aware that you willneed to spend up to 80% of your time onpreparation and priming, in order to achievea first class finish of which you can be proud.Does the substrate determineproduct choice?Modern <strong>co</strong>nstruction methods using fibreglass,steel and aluminium provide a stable, rigid surface<strong>co</strong>mpatible with all types of finish products. However,if your boat is made of wood, the characteristics ofthe substrate and the <strong>co</strong>nstruction method used willhave a bearing on the product you choose.Carvel and clinker (or lapstrake) <strong>co</strong>nstructions areflexible in nature; the wood tends to move as themoisture <strong>co</strong>ntent varies. Hard systems, such astwo-part polyurethanes, cannot sufficiently flex toac<strong>co</strong>mmodate this movement making them likelyto crack – therefore, these should be avoided, infavour of a one-part system, as these are suitablefor all wood <strong>co</strong>nstructions.Two-part systems, such as Perfection, are moresuited to the highly stable <strong>co</strong>nstructions of doublediagonal planking, <strong>co</strong>ld or hot moulded veneers andstrip planking where epoxy or Resorcinol typeadhesives have been used.What about areas of high wearand tear?Areas where there is <strong>co</strong>nsiderable foot traffic orharsh abrasion, such as gunwale rails and <strong>co</strong>amingsides, will need frequent repair to keep them inpristine <strong>co</strong>ndition.Clinker or carvel <strong>co</strong>nstruction?Carvel built wooden boats and tall ships aremade by fixing planks to a frame so the planksbutt up against one another. In Clinker building(or lapstrake) hulls the planks overlap alongtheir edges. In a Carvel <strong>co</strong>nstruction a smoothhull is created, that is stronger than a clinkerbuilt hull. However more caulking is requiredbetween the joints in carvel than in a clinker<strong>co</strong>nstruction.The framing gives a carvel <strong>co</strong>nstruction astronger hull, meaning it can carry a full sailplan, and can have a longer and broader hull.Clinker built vessels are lighter because theyhave less internal framing, meaning theymove faster because they displace less water.Clinker vessels are less rigid then carvel<strong>co</strong>nstructions; this limits the type of sailingrigs the vessel can take.Clinker<strong>co</strong>nstructionCarvel<strong>co</strong>nstructionn Application techniques1 2 3Applying by brushUse the largest brush possible. Long flexible bristles are best for gloss paints. When applying by brush a goodtechnique is the ‘Union Jack’ method. <strong>Paint</strong> is applied to the surface with a diagonal brushing action from theleft and right (1). This is then spread further with horizontal strokes (2) before finally ‘tipping off’ with lightvertical strokes (3). This results in any brush marks being able to flow out to give the best possible finish.Applying with roller and brushOur products are formulated so that a great gloss finish can also beobtained through application with a solvent resistant, high-density smallcell size foam roller. This will minimise the formation of bubbles in thesurface that can occur with mohair and large cell foam rollers. The paintapplied will be thinner and so more <strong>co</strong>ats may be required.The roller is used to apply paint to the surface and the pad or brush isused to create a smooth surface by ‘tipping off.’ This works particularlywell when two painters work side by side.Always test your choice of application method first, to establish if itprovides the finish you require.The CompleteTopsides <strong>Guide</strong>Blister Repairand PreventionTroubleshooting<strong>Guide</strong>See Page 32 for advice on Applying finishes.<strong>Colour</strong><strong>Card</strong>58 Helpline: +44 (0) 1489 77 50 50 Open 8:15am – 4:30pm, Monday – Friday59
The Complete Topsides <strong>Guide</strong><strong>Boat</strong> <strong>Paint</strong> <strong>Guide</strong>Contentsn Two-part premium paint systemsThese schemes provide the maximum level of protection available.n One-part <strong>co</strong>nventional paint systemsThese schemes provide a good level of protection.GRPAluminiumGRPAluminiumUnder<strong>co</strong>at (1-2 <strong>co</strong>ats)Perfection ® Under<strong>co</strong>atPrimer (4 <strong>co</strong>ats)Interprotect ®Under<strong>co</strong>at (1-2 <strong>co</strong>ats)Pre-KotePrimer (4 <strong>co</strong>ats)Yacht PrimerUnder<strong>co</strong>at (2 <strong>co</strong>ats)Perfection ® Under<strong>co</strong>atUnder<strong>co</strong>at (1-2 <strong>co</strong>ats)Pre-KoteTop<strong>co</strong>at (2-3 <strong>co</strong>ats)Perfection ®Top<strong>co</strong>at (2-3 <strong>co</strong>ats)Perfection ®Top<strong>co</strong>at (2-3 <strong>co</strong>ats)Toplac ®Top<strong>co</strong>at (2-3 <strong>co</strong>ats)Toplac ®WoodSteelWoodSteelPrimer (3 <strong>co</strong>ats)Interprotect ® *Under<strong>co</strong>at (1-2 <strong>co</strong>ats)Perfection ® Under<strong>co</strong>atTop<strong>co</strong>at (2-3 <strong>co</strong>ats)Perfection ®Primer (4 <strong>co</strong>ats)Interprotect ®Under<strong>co</strong>at (1-2 <strong>co</strong>ats)Perfection ® Under<strong>co</strong>atTop<strong>co</strong>at (2-3 <strong>co</strong>ats)Perfection ®Primer(1 thinned + 4 full <strong>co</strong>ats)Yacht Primer*Under<strong>co</strong>at (1-2 <strong>co</strong>ats)Pre-KoteTop<strong>co</strong>at (2-3 <strong>co</strong>ats)Toplac ®Primer (4 <strong>co</strong>ats)Yacht PrimerUnder<strong>co</strong>at (1-2 <strong>co</strong>ats)Pre-KoteTop<strong>co</strong>at (2-3 <strong>co</strong>ats)Toplac ®The CompleteTopsides <strong>Guide</strong>* or Clear Wood Sealer Fast Dry; 1 thinned + 3 full <strong>co</strong>ats* or Clear Wood Sealer Fast Dry; 1 thinned + 3 full <strong>co</strong>atsBlister Repairand PreventionFillerIf required for small areas, Watertite Fillershould be applied after the first <strong>co</strong>at ofPrimer.<strong>Colour</strong><strong>Card</strong>Troubleshooting<strong>Guide</strong>60 Helpline: +44 (0) 1489 77 50 50 Open 8:15am – 4:30pm, Monday – Friday61
The Complete Topsides <strong>Guide</strong><strong>Boat</strong> <strong>Paint</strong> <strong>Guide</strong>Contentsn VarnishesWood has a beauty of its own that a good varnishshould enhance, as well as protect. Most varnishesare designed to protect against man-made damageincluding oil, detergent and al<strong>co</strong>hol spills. However,yacht varnishes also need to provide a protectivebarrier against the natural elements: Sea, wind, rainand UV radiation from the sun will attack exposedsurfaces. In paint products, some protection isoffered from the <strong>co</strong>lour pigments used in the paintformulation. However, in clear varnishes no pigmentexists.What’s in a varnish?Varnishes have always been <strong>co</strong>nsidered amysterious blend of black art and science, but inreality there are only five main ingredients in a topquality marine varnish – oil, resin, solvent, driersand additives. The trend in modern varnishtechnology, that most affects the long-termdurability of a varnish, is the inclusion of additivesspecifically designed to <strong>co</strong>mbat the harmful effectsof UV energy, i.e. sunlight.High performance varnishes from <strong>International</strong> –Perfection Plus, Schooner Gold and Compass –<strong>co</strong>ntain a blend of premium quality UV absorbersand Hindered Amine Light Stabilisers (HALS), as wellWhat are UV Absorbers and HALS?as UV protectors, to extend the lifespan of the varnish<strong>co</strong>ating beyond that of <strong>co</strong>nventional products.UV protectionIn addition to UV absorbers and HALS, <strong>International</strong>uses two additional additives to help protect thesurface from UV damage – Surface Stabilisers andAntioxidants. Surface Stabilisers repair damagefrom UV light by pulling together the polymer (orresin) segments at the <strong>co</strong>ating’s surface, keepingthe surface layer stabilised, meaning <strong>co</strong>lour andgloss are maintained.Antioxidants are used to <strong>co</strong>mbat photo-degradationand oxidisation. This also helps with <strong>co</strong>lour stability,by keeping the varnish from fading or be<strong>co</strong>mingcloudy.Which varnish should I choose?The substrate and <strong>co</strong>nstruction method of the areayou’re varnishing will affect your choice of <strong>co</strong>ating.Two-part systems – such as Perfection Plus – arenot suitable for application to flexible <strong>co</strong>nstructions.See page 58 for more information on selectingproducts ac<strong>co</strong>rding to substrate.Areas where there is <strong>co</strong>nsiderable foot traffi<strong>co</strong>r harsh abrasion, such as gunwale rails andUV Absorbers soak up detrimental UV rays from sunlight, <strong>co</strong>nverting them into heat, which is thendissipated through the surface of the <strong>co</strong>ating (1).Hindered Amine Light Stabilisers (HALS) do not absorb radiation; instead they protect the <strong>co</strong>ating resinfrom the harmful effect of photochemically-produced ‘free radicals’ by neutralising them, hindering chemicaldegradation. HALS regenerate themselves during the neutralisation process, so go on providing protectionthroughout the lifetime of the <strong>co</strong>ating (2-4).1 2 3 4UV absorbers <strong>co</strong>nvert UVenergy into heat energyThe sun’s rays produce harmfulfree radicals (red)The HALS (white) attachthemselves to the free radicals,neutralising themThe HALS regenerate as theneutralised free radicals arereleased<strong>co</strong>aming sides, will need frequent repair tokeep them in pristine <strong>co</strong>ndition. While the two-part,Perfection Plus systems offer excellent resistance toabrasion they can still wear through in excessivecircumstances. As <strong>co</strong>nventional and premium onepartsystems are <strong>co</strong>nsiderably easier to touch in andmake good than the harder two-part systems, theyare more suitable for these areas.What preparation is needed?If you’re applying over an existing varnish, ensurethe surface is sound, if not the <strong>co</strong>ating should beremoved. Test for <strong>co</strong>mpatibility – see page 59.For bare wood, unless you’re using a clear surfaceprimer, such as <strong>International</strong> Clear Wood Sealer FastDry, we re<strong>co</strong>mmend thinning the first <strong>co</strong>at of all ourvarnishes. This promotes good penetration of thesurface and adhesion of subsequent <strong>co</strong>ats. Afterthis first <strong>co</strong>at, the surface will appear rough – asthe exposed ends of the wood absorb the varnishand lift – sand this smooth with a medium gradesandpaper.How do I get the best results?Applying varnish with a brush is usually the bestmethod, although roller application can be effectiveon large, flat surfaces. Brush out the varnish withfirm strokes, along the grain, holding the brush at90° to the surface. Then ‘tip-off’ by gently strokingthe surface with the brush at 45°, following thegrain. Always follow the minimum <strong>co</strong>atre<strong>co</strong>mmendations – however for long-lastingprotection you can apply additional <strong>co</strong>ats,depending on the system. As the number of <strong>co</strong>atsincreases, sanding in between each <strong>co</strong>at willincrease the level of gloss and depth of lustre.Hints and tipsSee Page 40 for advice on Applying varnishes and Test for <strong>co</strong>mpatibility on Page 59.n Round the edges of any scrapers with a file to avoidgouging.n Keep the sandpaper clean and change it frequently.n Sand by numbers, finishing the surface with aprogressively finer grade of paper.n Varnishing is best achieved on warm, dry mornings –<strong>co</strong>ld weather slows drying and damp spoils the gloss.n Always use a clean brush, previously used only forvarnish.n Always buy the highest quality varnish and brushavailable. This will ensure you achieve the mostattractive finish.n Clean new brushes before use.n Test the finish on a spare piece of wood beforeapplying to the boat.n On large areas use a foam roller to apply the initial<strong>co</strong>at, followed immediately behind with a wide brushfor the finishing strokes – this is best done by twopeople.n After cleaning with the <strong>co</strong>rrect thinners, wash thebrush in detergent and warm water, dry and wrapin greaseproof paper in a fine chisel shape.n Alternatively, having cleaned and washed the brush,suspend by its handle to avoid any ‘fishtailing’ of thebristle.n As the varnish ages in the tin you may find there arelumps or <strong>co</strong>ntamination. Sieving the varnish into aseparate <strong>co</strong>ntainer through cheesecloth, a paint filteror an old stocking is a good solution to this problem.n Never apply direct from the can, as this willintroduce <strong>co</strong>ntamination.n Always pour the amount of varnish that you expectto use at any one time, into a separate <strong>co</strong>ntainer.n Don’t use varnish which has been open for a longperiod as it will have picked up dust.n Do not varnish wood when exposed to direct sunlight.n Never leave bare wood exposed too long as it willabsorb moisture from the atmosphere.The CompleteTopsides <strong>Guide</strong>Blister Repairand PreventionTroubleshooting<strong>Guide</strong><strong>Colour</strong><strong>Card</strong>62 Helpline: +44 (0) 1489 77 50 50 Open 8:15am – 4:30pm, Monday – Friday63
The Complete Topsides <strong>Guide</strong><strong>Boat</strong> <strong>Paint</strong> <strong>Guide</strong>Contentsn Two-part premium varnish systemsTraditional bare wood systemReduced work time bare wood systemn Complete boatcareThe <strong>International</strong> <strong>Boat</strong>care range is designed to <strong>co</strong>mplement our boat painting and maintenance product rangeand is specially formulated with ease of use in mind.Primer(1 thinned <strong>co</strong>at)Perfection ® PlusVarnish (4 <strong>co</strong>ats min.)Perfection ® PlusPrimer(1 thinned + 3 full <strong>co</strong>ats)Clear Wood Sealer Fast DryVarnish (2 <strong>co</strong>ats min.)Perfection ® PlusSuper Cleanern High strength formula removeswax, dirt, oil and greasen Does not damage acrylic glassDirections for use:– Rinse surface, choose <strong>co</strong>ncentration(fresh or seawater), wash with sponge, rinse– Repeat as requiredSuitable for:GRP✓<strong>Paint</strong>work✓n One part <strong>co</strong>nventional varnish systemsTraditional bare wood systemPrimer(2 thinned <strong>co</strong>ats)Schooner ® Gold(Compass, Original, Goldspar Satin;1 thinned <strong>co</strong>at)Varnish (4-6 <strong>co</strong>ats)Schooner ® Gold(Compass; 3-5 <strong>co</strong>atsOriginal, Goldspar Satin;3 <strong>co</strong>ats min.)Alternative bare wood systemPrimer(1 thinned + 3 full <strong>co</strong>ats)Clear Wood Sealer Fast DryVarnish (4 <strong>co</strong>ats min.)Schooner ® Gold(Compass, Original,Goldspar Satin; 3 <strong>co</strong>ats min.)Polwaxn Clean, polish and wax all in onen Simple solution to save you timeand effortDirections for use:– Apply with clean dry cloth, polishoff in circular movementsSuitable for:GRP <strong>Paint</strong>work✓✓2 step woodcareEnjoy the beauty of natural teak and hardwoods with this simple 2-step woodcaresystem. Clean, restore and protect your deck,hand and toe rails, wooden furniture, <strong>co</strong>ckpitand gratings with minimum effort.Teak Restorern Cleans and restores teak andhard wood surfaces back to newn Does not bleach or damage thesurrounding surfacesDirections for use:– Soak the wood (fresh or seawater)apply generously and leave for 5 minutes– Scrub across the grain and rinse withfresh waterThe CompleteTopsides <strong>Guide</strong>Blister Repairand PreventionOily woodsHard woods such as Teak and Iroko, that are oily bynature, must be degreased adequately with the <strong>co</strong>rrectsolvent prior to the application of a first thinned <strong>co</strong>at ofvarnish.Premium Teak Oiln Penetrates even damp wood,to protect and enhancen Contains rust protection waxfor screws, nails and fixingsTroubleshooting<strong>Guide</strong>Did you know...All <strong>International</strong> <strong>Boat</strong>care productsare safe for painted, GRP, woodand metal surfaces.Directions for use:– Apply 1-2 <strong>co</strong>ats with a cloth or brush,allow to dry<strong>Colour</strong><strong>Card</strong>64 Helpline: +44 (0) 1489 77 50 50 Open 8:15am – 4:30pm, Monday – Friday65
Blister Repair and Prevention<strong>Boat</strong> <strong>Paint</strong> <strong>Guide</strong>Contentsn What is osmosis?Osmosis is a process of degeneration withina glass fibre laminate. It is caused by a chemicalreaction between water and unreacted substancesremaining in the substrate, post manufacture.Typically, water enters the hull substrate throughthe gel<strong>co</strong>at and, once inside, reacts with thechemical <strong>co</strong>mponents to form acidic substances.These substances create pressure behind thegel<strong>co</strong>at, which causes blisters and eventuallycracking. Once the gel<strong>co</strong>at is breached in thismanner, the underlying laminate is capable ofabsorbing water like a sponge.Osmosis is not only caused by water on the outsideof the hull – bilge water from the inside can alsocause a problem. It is therefore worth makingefforts to keep your bilges dry.When might osmosis occur?Any unprotected hull is likely to show signs ofosmosis eventually, rather like rust on a car.The exact length of time before osmosis occursdepends on many factors, including: the type ofwater in which the hull is moored, the temperatureof the water and most importantly, the quality of theoriginal hull <strong>co</strong>nstruction.In some cases, reactive impurities in the gel<strong>co</strong>at andlaminate will cause osmosis in the early life of aboat. This is a structural problem and should bereferred back to the boat manufacturer. However,even well-built, fibreglass hulls will eventuallyexperience osmosis and blistering. This is whywe re<strong>co</strong>mmend applying an epoxy protection layer,even to new boats.123Health and SafetyBefore <strong>co</strong>mmencing preparatory work, ensurethe area you are working in is adequatelyventilated. Ensure you are wearing the <strong>co</strong>rrectPPE; we re<strong>co</strong>mmend safety spectacles, gogglesor visors, nitrile rubber gloves, overalls (ensuringskin is not exposed) and a solvent mask.PreparationDegrease with solvent or Super Cleaner.Sand well using 180-220 grade paper.Clean thoroughly and allow to dry <strong>co</strong>mpletely.If your hull is new, proceed to Step 4.InspectionInspect the gel<strong>co</strong>at for signs of damage orcracking. Small defects can be repaired withWatertite Epoxy Filler following the instructionson the product label.n How to protect against osmosisProtection is always better than cure and it reallydoes make sense to protect a new boat as wellas an older craft. To achieve this protection it isnecessary to create a water barrier to seal thesurface. This is done over the existing gel<strong>co</strong>at.There is no better time to apply an anti-osmosissystem than when the boat has not yet beenlaunched. Some boat builders now offer Gelshield ®treatment from <strong>International</strong> as part of theirproduction process, so it is worth finding outif this is the case. However, it must be stressedthat protective systems cannot stop osmosis onceit has started, or prevent it from occurring in poorly<strong>co</strong>nstructed hulls. Therefore, it is important that afull check is undertaken before starting.Important: The application of an osmosisprotection system <strong>co</strong>uld protect against seriousand <strong>co</strong>stly structural problems in the later lifeof your hull.4Look out for any warning signs that may suggest that water has entered the laminate or that osmosismay have occurred.For further information on osmosis and other warning signs, see Pages 68-69.If more extensive damage is found or suspected we re<strong>co</strong>mmend that you seek the advice of aprofessional surveyor before <strong>co</strong>ntinuing.ApplicationApply Gelshield 200, building up to minimumdry film thickness of 250 microns (this willtypically take around 5 <strong>co</strong>ats) using a brush orroller. For ease, alternate between the grey andgreen shades, beginning and ending with grey.Blister Repairand PreventionTroubleshooting<strong>Guide</strong><strong>Colour</strong><strong>Card</strong>66 Helpline: +44 (0) 1489 77 50 50 Open 8:15am – 4:30pm, Monday – Friday67
Blister Repair and Prevention<strong>Boat</strong> <strong>Paint</strong> <strong>Guide</strong>Contentsn Osmosis protection schemesOther warning signs to look forProminent fibresSeen protruding beneath or through the gel<strong>co</strong>atand can cause ‘wicking’ where water is drawninto the hull by capillary action.Star crazingThis effect can occur where the gel<strong>co</strong>at is brittle.Fine cracks usually form due to severe flexingor impact damage, allowing water to seep intothe laminate.PinholesTiny bubbles present in the gel<strong>co</strong>at reduce itseffectiveness and promote rapid water absorption.GRP: <strong>International</strong> GRP: VC ®Primer (4-5 <strong>co</strong>ats)Primer (4 <strong>co</strong>ats min.)Gelshield ® 200VC ® Tar 2Tie-Coat (1 <strong>co</strong>at)Gelshield ® 200AntifoulingAntifouling(2-3 <strong>co</strong>ats)(2-3 <strong>co</strong>ats)<strong>International</strong> AntifoulingVC ® Antifouling® Proper preparation of the gel<strong>co</strong>atn How to re<strong>co</strong>gnise osmosisThe main symptom – blistersBlisters are the most <strong>co</strong>mmon warning sign andif identified should be followed up with immediateprofessional examination. Blisters can vary fromsmall pinhead blisters, to areas as large as the palmof a hand. The presence of any fluid behind a blisterindicates a potential problem. If the fluid has apungent, vinegary odour or feels greasy or stickywhen rubbed between the thumb and forefinger,there is a high probability of osmosis. Before anytreatment is carried out, you need to establish whathas caused the problem. We re<strong>co</strong>mmend that youseek the advice of a professional surveyor.Some blisters occur for reasons other than osmosis.They are often evident as a rash of small pinheadblisters or swellings, either locally (often aroundthe water-line) or over the entire underwater area.These blisters are hard and difficult to break andwhen broken open will be dry, with no odourevident. The likely cause is air voids. This is not aserious problem, but hull moisture levels should bechecked before <strong>co</strong>mmencement of any remedialtreatment.n How to treat osmosis1This includes getting all of the antifoulingpaint and primers off and removal of as muchgel<strong>co</strong>at as necessary to get the hull dry (i.e. theentire gel<strong>co</strong>at or just small areas). A professional,who has looked at your boat, should make thisdetermination.2 Drying of the hullThis is the most critical step in the process.If you do not get the hull dry it will re-blister.We re<strong>co</strong>mmend a <strong>co</strong>mprehensive washing anddrying procedure.3 Application of Gelshield ® PlusThis solventless epoxy seals up the laminateand fills any cloth that has been voided of resin.It provides a water barrier to minimise thepossibility of reoccurrence of damage. Contactour Technical Help Desk to obtain a <strong>co</strong>py of theGelshield Plus booklet.4Application of Gelshield ® 200This will act as a tie-<strong>co</strong>at to the antifouling.Undercuring of the gel<strong>co</strong>atIn<strong>co</strong>rrect mixing or application in unsuitable<strong>co</strong>nditions can cause failure to cure properly.This results in porosity and may lead to wateringress.Gelshield ® PlusHigh build solventless epoxyfor osmosis treatmentn A high build, solventless epoxyprimern Available in two <strong>co</strong>lours toaid self-on-self applicationn Contains no harmful solventsto migrate into the hull and causereblisteringGelshield ® 200Epoxy primer for osmosis protectionn Quick drying, easy to apply,epoxy primer for protectionof GRP against osmosisn Provides protection againstosmosis in five <strong>co</strong>ats (250 µm)n Useable down to 5°Cn Fast drying allows multiple <strong>co</strong>at applicationin a single dayBlister Repairand PreventionTroubleshooting<strong>Guide</strong><strong>Colour</strong><strong>Card</strong>68 Helpline: +44 (0) 1489 77 50 50 Open 8:15am – 4:30pm, Monday – Friday69
Troubleshooting <strong>Guide</strong>Contentsn Common problems and how to avoid themThe following troubleshooting guide is aimed at helping you identify some of the <strong>co</strong>mmon problems associatedwith boat painting and providing you with information to avoid these occurring. This guide is by no meansexhaustive – should you en<strong>co</strong>unter a problem that you cannot diagnose, please <strong>co</strong>ntact the Helpline for furtherassistance.12Adhesion Failure(also referred to as Flaking of <strong>Paint</strong>/Delamination)Avoid this by: Ensuring that the surface is clean,dry and free from <strong>co</strong>ntamination and has beensuitably prepared ac<strong>co</strong>rding to the paint specification.Oily woods, such as teak and iroko, should bedegreased with a solvent prior to varnishing.Do not exceed the over<strong>co</strong>ating intervals between<strong>co</strong>ats of paint.BittinessAvoid this by: The <strong>co</strong>rrect preparation of thesurface. Always rub down and remove sandingdebris from the surface before applying the first<strong>co</strong>at of paint and ensure that the surface is not<strong>co</strong>ntaminated during the curing phase.45BloomingAvoid this by: Ensuring that the painted surfacehas not been exposed to moisture or <strong>co</strong>ndensationduring the latter stages of drying and that thesolvent blend is <strong>co</strong>rrect. This phenomenon is oftenseen with amine cured epoxies.Brush MarksAvoid this by: Thinning your paint to the <strong>co</strong>rrectvis<strong>co</strong>sity and ensuring that it is adequately mixedbefore applying. For two-part paints use the mixedproduct within the pot life stated on the productdatasheet.6Fouling3BlisteringAvoid this by: Ensuring that <strong>co</strong>rrect over<strong>co</strong>atinginterval is followed to avoid solvent entrapment andother <strong>co</strong>ntamination. In immersed <strong>co</strong>nditions theblistering <strong>co</strong>uld be osmosis.Avoid this by: Ensuring that you have appliedthe <strong>co</strong>rrect amount of antifouling, as indicated onthe product datasheet. Ensure that the antifoulingstrength of the product used is suitable forthe waters in which the boat is moored andnavigates.Troubleshooting<strong>Guide</strong>See Blister Prevention on Page 66.<strong>Colour</strong><strong>Card</strong>70 Helpline: +44 (0) 1489 77 50 50 Open 8:15am – 4:30pm, Monday – Friday71
Troubleshooting <strong>Guide</strong><strong>Boat</strong> <strong>Paint</strong> <strong>Guide</strong>Contents7CrazingAvoid this by: Refraining from using strongsolvents on <strong>co</strong>nventional <strong>co</strong>atings, as they willpenetrate and soften the surface causing crazingto occur.n <strong>Paint</strong>ing & project diaryUse this space to keep a re<strong>co</strong>rd of any projects undertaken, so you have your product information to hand,when you need to touch-up or reapply.Project 1Preparation workDateWeather (<strong>co</strong>nditions, temperature, humidity)Products used<strong>Colour</strong>QuantityNo of <strong>co</strong>ats8Darkening of TimberAvoid this by: Ensuring that the end grain ofyour timber is sealed to avoid water penetrationunder the varnish layer. This will cause theunderlying wood to darken.Other remarks:Project 2DatePreparation workWeather (<strong>co</strong>nditions, temperature, humidity)Products used<strong>Colour</strong>QuantityNo of <strong>co</strong>atsOther remarks:9CissingAvoid this by: Thoroughly cleaning the surfaceand ensuring that is clear of wax, grease andperspiration (from your hands) prior to theapplication of the first <strong>co</strong>at of paint.Project 3DateProducts usedPreparation workWeather (<strong>co</strong>nditions, temperature, humidity)<strong>Colour</strong>QuantityNo of <strong>co</strong>atsTroubleshooting<strong>Guide</strong>Other remarks:<strong>Colour</strong><strong>Card</strong>72 Helpline: +44 (0) 1489 77 50 50 Open 8:15am – 4:30pm, Monday – Friday73
Topside Finishes<strong>Colour</strong> <strong>Card</strong>ContentsPerfectionUltimate Performance, Two-Part Polyurethane FinishToplac ®Premium Quality High-Gloss Durable Yacht EnamelInterdeck ®Slip Resistant Polyurethane Deck <strong>Paint</strong>Snow WhiteB8000 cMediterranean WhiteA184 cOff WhiteA192 cSnow White001 ●Mediterranean White545 ●White905* ●White001Grey289Cream027PlatinumA183 cCreamS070 cFighting Lady YellowS056 cRochelle RedS299 cIvory812 ●Atlantic Grey289 ●Cream027 ●NEWYellow101 ●Beige090Squall Blue923Pale Blue339Chilli RedE294 cJade Mist GreenB663 cMauritius BlueF991 cFlag BlueK990 cRescue Orange265NEWFire Red504 ●NEWRochelle Red011 ●Rustic Red501 ●Heather Morton, Specialist in Retail Finishes Development“Can’t find the deck finish you want?”Why not create your own custom-finish deck using our non-slip additive and your favourite <strong>co</strong>lour fromour finishes ranges? Non-Slip Additive can be mixed in before painting or applied to the wet paint surface.Create matt or satin effects using a matting additive. Mix or match your deck and topsides – it’s yourproject, you choose!Royal BlueA216 cLauderdale BlueS936 cJet BlackY999 cBounty350 ●Norfolk Green241NEWDonegal Green077 ●Squall Blue923 ●NEWFind out ‘How To’ create a custom finish deck at yachtpaint.<strong>co</strong>mRe<strong>co</strong>mmended under<strong>co</strong>at for two-part finishesgc WHITE PERFECTION UNDERCOATMatting AdditivesFor One and Two-Part FinishesssBondi Blue016 ●Baltic Blue163 ●Lauderdale Blue936 ●Danube Blue104 ●DanbolineHard Wearing Coating for Bilges, Lockers and BulkheadssOxford Blue105 ●Mauritius Blue018 ●Jet Black051 ●* <strong>Colour</strong> not available in the UKGrey100Red102White001BeforeAfters FOR USE WITH TOPLAC (One-Part Finish)ss FOR USE WITH PERFECTION (Two-Part Finish)Re<strong>co</strong>mmended under<strong>co</strong>at for one-part finishes● WHITE PRE-KOTE ● BLUE/GREY PRE-KOTE ● RED PRE-KOTE ● DARK BLUE PRE-KOTEBLEND(50% White Pre-Kote/50% finish <strong>co</strong>lour)Whilst every care is taken to match <strong>co</strong>lours on this card, the manufacturers cannot be responsible for slight variations.Products mentioned in this document are trademarks of, or licensed to, AkzoNobel. © Akzo Nobel N.V. 2009.<strong>Colour</strong><strong>Card</strong>74 Helpline: +44 (0) 1489 77 50 50 Open 8:15am – 4:30pm, Monday – Friday 7576
Antifoulings<strong>Colour</strong> <strong>Card</strong>ContentsMicron ® OptimaUltimate PerformancePCruiser ® UNOOne SeasonPNavigator ®Fresh WaterHNEWBottom<strong>co</strong>atCruisingPBlackLight BlueBlackNavyBlackBlueBlackNavyRedDover WhiteBlueRedShell WhiteRedBlueRedMicron ® ExtraMulti-Season ProtectionPInterspeed ® UltraUltimate StrengthHVC ® 17m ExtraThin FilmTFVC ® OffshorePerformanceHGraphiteBlackBlueBlackNavyBlackNavyTrilux ® 33SPBright <strong>Colour</strong>sNEWRedShell WhiteBlueRedGreenBlueLight BlueRedBlackNavyTrilux ® Prop-O-DrevAerosol ApplicationSGreyDover WhiteGreenPrincess GreyGreyBlueScarletGreenBlackGreyPPOLISHINGSPSLOW POLISHINGHHARDTFDover WhiteTHIN FILM S SPECIAL PURPOSEPRE-IMMERSIONPOST-IMMERSIONGreyWhiteWhilst every care is taken to match <strong>co</strong>lours on this card,the manufacturers cannot be responsible for slight variations.<strong>Colour</strong><strong>Card</strong>77 Helpline: +44 (0) 1489 77 50 50 Open 8:15am – 4:30pm, Monday – Friday78
Roger Bolton, UK Sales Team“Visit our website for even more expert advice.”Our new look <strong>Boat</strong> <strong>Paint</strong> <strong>Guide</strong> & <strong>Colour</strong> <strong>Card</strong> has been designed with you – the customer – in mind, tomake it as easy as possible to choose the right product for your project. If you’d like more information onour products, schemes, surface preparation or simply need some expert advice on painting and maintainingyour boat, please visit our website. Check out our ‘How To’ guides for simple step-by-step information andhandy hints and tips to ensure you achieve professional results, every time!The answers are only a click away at yachtpaint.<strong>co</strong>mOur World is Water<strong>International</strong> <strong>Paint</strong> Ltd.1 Wellington Park, Hedge EndSouthampton, Hampshire SO30 2QUTel: +44 (0) 1489 77 50 50Fax: +44 (0) 1489 78 58 67Statements made in this brochure are advisory only and are not intended to be specific re<strong>co</strong>mmendations or warranties of any product, <strong>co</strong>mbination of products orfitness for any particular purpose. Please <strong>co</strong>nsult our product labels, product data sheets and/or material safety data sheets directly for <strong>co</strong>mplete technical information.®, <strong>International</strong> ® , the AkzoNobel logo and all product names mentionedin this publication are trademarks of, or licensed to, AkzoNobel.UK Edition © Akzo Nobel N.V. 2009