Modular rockeTs Building Baffles - National Association of Rocketry
Modular rockeTs Building Baffles - National Association of Rocketry
Modular rockeTs Building Baffles - National Association of Rocketry

You also want an ePaper? Increase the reach of your titles
YUMPU automatically turns print PDFs into web optimized ePapers that Google loves.
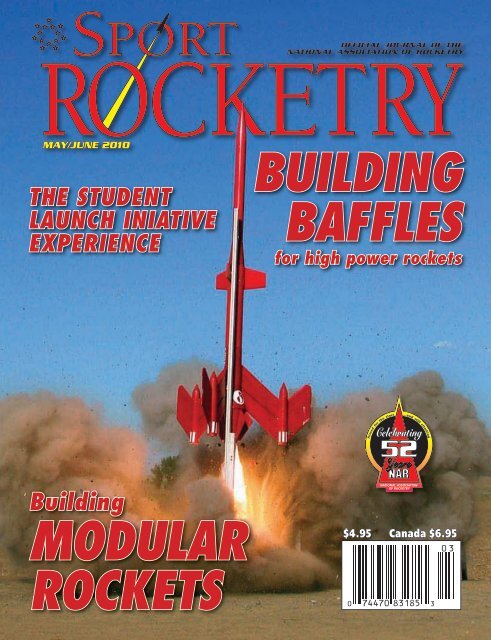
MAY/JUNE 2010The studentlaunch iniativeexperience<strong>Building</strong><strong>Baffles</strong>for high power rockets464552<strong>Building</strong><strong>Modular</strong>Rockets$4.95 Canada $6.95
MAY/JUNE 2010 Volume 52, Number 3Feature Articles4 Editor’s Spaceby Tom Beach5 A Different Kind <strong>of</strong>Sport <strong>Rocketry</strong> Contestby Sather M. RanumPut some fun into your monthly rocket launches bycreating some unique and interesting contests.511 An Amazing Program: The StudentLaunch Initiative Experienceby Jeff LaneJeff takes us throught the Student LaunchInitiative experience16 Product Review: Quest Aerospaceby Bob SanfordLearn a few building tips and trickswhile building the MLAS.20 <strong>Building</strong> a <strong>Modular</strong> Rocketby Caleb BoeInstead <strong>of</strong> rebuilding a broken rocket, replace thebroken part. Caleb shows how to build a rocket withreplaceable parts.26 Incorporate Your Clubby Rick BoyetteLearn the in’s and out’s <strong>of</strong> incorporatingyour rocket club.28 <strong>Baffles</strong> & More, Part IIby Rick BoyetteGo beyond 4" diameter rockets with part II inKen’s series on building rocket baffles.36 The Cato Chroniclesby Leslie HoukThe great TARC migration has started.37 Flying FAIby Pat Butler42 A Message fromthe President44 Manufacts20On The CoverJohn Hawkinssuccessfully flewhis 6x upscale MarsSnooper II on a K100and four J350 motorsto an altitude <strong>of</strong>1831 feet.Photo by Rick Clapp
EDITOR’SDeath <strong>of</strong> the DreamWhen I was a kid, I had great hopes forspace exploration. Our manned space program,especially the Apollo Moon landings,made me so proud <strong>of</strong> America. It was a wayto fulfill the urge to explore, advance scientificdiscovery and technology, and demonstratethe greatness <strong>of</strong> the American systemin a peaceful endeavor. I remember a rocketcompany ad that said something to the effect,“The first people to walk on Mars arealive today, and they’re flying model rockets.”The future seemed so bright.After Apollo, the emphasis was to makespaceflight cheaper with reusable vehicles.We got a partially reusable Shuttle systemthat proved to be too fragile to live up to itspromises. For decades our astronauts neverventured beyond low Earth orbit.SPORT ROCKETRY(ISSN 08-83-0991, USPS 961-660) is published bi-monthly by the <strong>National</strong> <strong>Association</strong> <strong>of</strong> <strong>Rocketry</strong>,2275 Geode Street, Marion, Iowa 52302, 1-800-262-4872; a non-pr<strong>of</strong>it organization dedicatedto the growth <strong>of</strong> hobby rocketry.Email: nar-hq@nar.org World Wide Web: http://www.nar.orgPeriodicals postage paid at Marion, Iowa and at additional mailing <strong>of</strong>fices.POSTMASTER:Send Address Changes to:Sport <strong>Rocketry</strong>P.O. Box 407Marion, Iowa, 52302ADDRESS CHANGES: Direct all address changes and requests for missing or damaged issuereplacements to: NAR, Box 407, Marion, Iowa 52302, Email: nar-hq@nar.org. Please make addresschanges at least six weeks prior to change to avoid missing issues. The Post Office will notforward unless postage is guaranteed by the subscriber.SUBMISSIONS AND CONTENT: We cannot assume responsibility for unsolicited materials.All submissions become the property <strong>of</strong> the <strong>National</strong> <strong>Association</strong> <strong>of</strong> <strong>Rocketry</strong>. Opinions expressedin articles and commentaries are those <strong>of</strong> the author(s) and do not necessarily reflect the views <strong>of</strong>the NAR or its <strong>of</strong>ficers. Designs presented are believed to be reliable, but Sport <strong>Rocketry</strong> assumesNO liability for unsafe use. Always check models for stability in accordance with accepted practiceand follow the NAR Safety Code at all times.PERMISSIONS AND COPYRIGHTS: ©2010, <strong>National</strong> <strong>Association</strong> <strong>of</strong> <strong>Rocketry</strong>. All rightsreserved. No part <strong>of</strong> this publication may be reproduced or copied in any form or by any means,graphic, electronic or mechanical, including photocopying, recording, taping or via informationstorage and retrieval systems without prior written permission <strong>of</strong> Sport <strong>Rocketry</strong>.Advertisements appearing in Sport <strong>Rocketry</strong> magazine are <strong>of</strong>fered for the convenience <strong>of</strong> our readers.The NAR has no direct knowledge <strong>of</strong> the materials or services <strong>of</strong>fered by advertisers, providesno guarantees as to the quality <strong>of</strong> the items listed for sale or the accuracy <strong>of</strong> the informationprovided about the sale items, and does not provide any endorsement <strong>of</strong> any advertiser, product,or service.SPORT ROCKETRY DISTRIBUTORS:Ingram Periodicals, 615-213-3610Media Solutions, 615-836-0058Kalmbach Publishing, 21027 Crossroads Circle, P.O. Box 1612, Waukesha, WI 53187-1612Ubiquity Distributors, 607 Degraw St., Brooklyn, NY 11217PRINTED IN U.S.A.4 MAY/JUNE 2010 Sport <strong>Rocketry</strong>This situation finally turned around withthe Constellation program and the plans to sendAmericans back to the Moon and on to Mars.The dream was alive again.Now it appears that our leaders are going tokill my hopes. With the cancellation <strong>of</strong> Orionand its Ares booster, we are not only limitedto low Earth orbit, we’ll have to hitch rides onRussian rockets to get there. The chance <strong>of</strong> anyonewalking on Mars during my lifetime nowlooks bleak. The likelihood that Congress isgoing to pass out the necessary billions <strong>of</strong> dollarsto private companies when no governmentagency is in control seems unlikely to me. Explorationdoes not turn an immediate pr<strong>of</strong>it, sothis sort <strong>of</strong> enterprise is best suited to whole nationsto finance. But it appears that our countryis no longer up to the challenge. I am heartbroken,and I mourn for the greatness that was theAmerican space program.Submission GuidelinesDeadlines for submission <strong>of</strong> material to Sport<strong>Rocketry</strong> magazine are as follows:Issue Cover Mailed DeadlineJan/Feb., 10 Jan. 4 Nov. 14, 2009March/April March 1 Jan. 15, 2010May/June May 3 March 12July/Aug. July 5 May 17Sept./Oct. Sept. 6 July 12Nov./Dec. Nov. 1 Sept. 13Submissions should be sent by mail to:Thomas BeachEditor, Sport <strong>Rocketry</strong>432 Pruitt AvenueLos Alamos, NM 87544Phone: (505) 672-0249 eveningsOr, sent via electronic mail to:thomasbeach@mindspring.comor, SReditor@nar.orgAlways include your name, address,phone number, and e-mail address with allsubmissions (and not just on the envelope). Includingan email address allows us to acknowledgereceipt <strong>of</strong> your submission and conductcorrespondence faster. If you have questionsabout the current disposition <strong>of</strong> a submission,contact the editor via email, phone, or mail.Content: We prefer articles that have at leastone photo or diagram for every 720 words <strong>of</strong> text.Any type <strong>of</strong> rocketry related submission will beconsidered, including: plans, photos, launch reports,product reviews, articles, tips, techniques,historical, and club activities. Both model rocketand high-power rocket articles are accepted.Articles may be submitted by email, oncomputer disk, or as hardcopy (even handwritten).Be aware that publication <strong>of</strong> hardcopy submissionsmay be delayed until it can be keyed in.Computer files may be submitted on 3.5" floppydisks, Zip disks, or CDs, in either Macintosh orPC formats; always enclose a hardcopy printoutas well. Save the article as a plain ASCIItext-only file. You may also save it as a wordprocessor file to preserve formatting (save usingan older file format to make file conversion easierfor us).Photographs can be submitted as prints or35 mm slides. Prints should be glossy, color orblack & white, no larger than 8x10 and no smallerthan 3x5. Always affix your name and a captionto the back <strong>of</strong> the photo. Do not write directlyonto photos; use tape or post-notes. Shipphotos with the faces protected.Digital Images require at least 150 ppi atthe final size and cropping used in the magazine.Higher resolutions are preferred. Minimal imagecompression is preferred.Graphics may be submitted in computerform on disk, or as camera-ready hardcopy.Hand drawn sketches are accepted. Be awarethat publication may be delayed if we must preparepublication quality drawings from hardcopy.Computer generated graphics are preferredin vector formats, such as EPS (encapsulatedPostscript), rather than bitmapped formats. Contactthe editor about file formats to use. Alwayssubmit hardcopy along with computer files.Material submitted to Sport <strong>Rocketry</strong> mustnot be submitted to another publication, otherthan NAR section newsletters. You retain thecopyright to your material. You grant the NARthe right to use your submission in Sport <strong>Rocketry</strong>magazine and in other NAR and NAR Sectionpublications, unless you specify other restrictions.The physical media submitted becomesthe property <strong>of</strong> the NAR and cannot be returnedunless pre-arranged with the editor.
A DifferentKind <strong>of</strong> Sport<strong>Rocketry</strong> ContestCompetition in various forms has always been a part<strong>of</strong> life, from natural selection to childhood games to pr<strong>of</strong>essionalsports. Naturally, it spills over into rocketry.Rocketeers are by their very nature open to a little goodnaturedfraternal competition—drag racing, comparingbuilds, etc. Rocket jousting is one <strong>of</strong> the ties that bindus together in our hobby. Many competition events areclearly defined in the NAR’s United States Model RocketSporting Code, or “Pink Book.” Others are spontaneousand materialize on the day <strong>of</strong> the launch. In between aresome unique competitions that start small and grow intotheme launches. This is the story <strong>of</strong> one such event.Searching the Internet for pointers while goingthrough the NAR high power certification process, I cameacross John Coker’s excellent website, which among otherthings, documents his build <strong>of</strong> an entire box <strong>of</strong> crayonrockets (http://www.jcrocket.com/crayons.shtml). I havealways wanted to build a crayon rocket, not just as 3FNC,but as something unique, perhaps as an AQM-37C Jay-Hawk. I am a big fan <strong>of</strong> the JayHawk missile. In my idletime, I have made JayHawk rockets from a variety <strong>of</strong> objects,to include a giant bottle <strong>of</strong> Hershey’s Syrup and agiant Corona beer bottle, both <strong>of</strong> which started out as bigplastic coin banks. I used to joke that I misunderstoodthe NAR “Plastic Model Conversion” contest and thoughtit was “Plastic Bottle Conversion.”I searched local stores but could not find a suitablestarting point for what I envisioned. I didn’t want a stanbySather M. Ranum, NAR 87637Photos by Patricia Kelly RanumDiane Dorn’s purple crayon withCesaroni Skidmark motor.Sport <strong>Rocketry</strong> MAY/JUNE 2010 5
Far Right: Crayon bankswere distributed in February.(This is the same location as inthe above photograph,only slightly less green.)Above: Crayon rockets readyto fly in August. Left to right:Walt Evans, Jeff Zimber,Diane Dorn, Scott Goebel,Sather Ranum, Kelly Ranum,Marc Stevens, Logan Stevens,Jay Rietz, Tim Lehr.dard crayon rocket or a scale Jay-Hawk, I wanted a “caricature <strong>of</strong>a crayon” JayHawk. Then I cameacross an auction on ebay a fewyear’s ago for a collection <strong>of</strong> giantcrayons. They were short anddisproportionately fat, (large coinbanks intended to be props forchildren photos at a studio), andthey would be perfect for convertinginto rockets. When they arrived,I got first choice (orange),and Kelly, my 7-year-old daughter,chose pink for hers. But what to dowith the remaining crayons? Kellysuggested giving them to otherclub members so everybody couldhave one, and the Kelly CrayonChallenge was born.I mentioned it briefly in ane-mail to the WOOSH (WisconsinOrganization <strong>of</strong> SpacemodelingHobbyists, NAR section 558)Scott Goebel’s yellowcrayon. The air-startedBlue Thunder motor flamesare clearly visible alongsidethe Mojave Green coremotor flame.First place trophy on thewing <strong>of</strong> the Craymarc.6 MAY/JUNE 2010 Sport <strong>Rocketry</strong>
entry for Innovationin Design (5 points),Quality <strong>of</strong> Build (5points), Quality <strong>of</strong>Flight (10 points),and Quality <strong>of</strong> Recovery(10 points). Thegroup photo was at10:00 AM, and preflightjudging tookplace from 10:00 to11:00 AM. Qualifyingflights took place overthe two-day event,with awards presentedafter the last rocketSport <strong>Rocketry</strong> AwardCertificate <strong>of</strong> AchievementWisconsin Organization <strong>of</strong> Spacemodeling HobbyistsNAR #558Eat Cheese or Fly 2009From this day forward, be it forever known, that in the quest <strong>of</strong> knowledge and the yearning to explore the great unknown,your name heredid artfully construct and successfully l<strong>of</strong>t a giant crayon rocket into the peaceful skies <strong>of</strong> Southeastern Wisconsin, virtually ensuringworld peace and the future <strong>of</strong> mankind, and is thereby given this Certificate <strong>of</strong> Achievement as pro<strong>of</strong> there<strong>of</strong>.Saturday, the Twenty Ninth <strong>of</strong> August, Two Thousand and Nine___________________________________Scott Goebel, WOOSH President___________________________________Kelly Ranum, Event Sponsorhad flown. Overall, we all had an awesome time, and thanks to allwho participated. There were eight crayon rockets, and all flewsuccessfully. For those that missed the awards ceremony, the judgingresults were:1st place - Scott Goebel, yellow crayon, Craymarc missile.2nd place - Jay Rietz, red crayon, withthree functional strap-on crayon boosters.3rd place - Marc Stevens, yellow crayon,FAO Schwartz crayon.Honorable mention - Tim Lehr - green crayon.Scott also won the club Model <strong>of</strong> the Month contest with hisCrayMarc, the Grand Slam <strong>of</strong> the crayon contest. We were all extremelyimpressed by Jay’s parallel staged crayon, and it has servedas inspiration for the upcoming 2nd annual Kelly EngineeringChallenge. We will be hosting the “Strap-on Booster” competitionat the Eat Cheese or Fly in 2010, (and a “Legged Lander” competitionat ECOF 2011.) This is looking to be a fun event, as wehave a lot <strong>of</strong> creative rocketeers. I think 2009 only scratched thesurface! The last few Eat Cheese or Fly launches have had reallygood turnouts, and we at WOOSH are promoting it in this andsubsequent years as a regional launch. Join us at the Richard BongState Recreation Area in southeastern Wisconsin the weekend<strong>of</strong> August 28-29, 2010. See the WOOSH website at http://www.wooshrocketry.org for updates. A great time will be had by all!Jay Rietz’s red crayon with a central AP motor and sixblack powder motors in the booster, all lit on ground.Sport <strong>Rocketry</strong> MAY/JUNE 2010 9
BUILD & FLY YOUR OWNMODEL ROCKETS!Over 90 exciting kits includingsomething for every flier.When you are ready to tackle your own designs,Semroc is here to provide you with the widestselection <strong>of</strong> parts ever available, including:· Balsa Nose Cones (more than 400!)· Balsa Reducers (more than 90)· Couplers (more than 60)· Body Tubes (more than 400 sizes!)· Rings, chutes, launch lugs, and· Much more!10 Semroc MAY/JUNE Astronautics 2010 Sport <strong>Rocketry</strong> Corporation Box 1271 Knightdale, NC 27545www.semroc.com
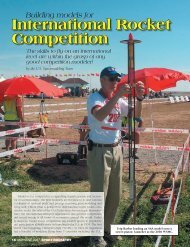
An Amazing Program:The Student LaunchInitiative ExperienceCheyenne Mountain Charter Academy(CMCA) has a group <strong>of</strong> middle school andhigh school students who returned fromthe most incredible experience <strong>of</strong> theirlives. NASA’s Student Launch Initiative isone <strong>of</strong> the rewards <strong>of</strong>fered to teams whoplace among the top 20 at Team America<strong>Rocketry</strong> Challenge (TARC) national finals.The CMCA students placed fifth at TARC2008, so they submitted a proposal thatwas accepted by NASA. Nine months andhundreds <strong>of</strong> hours later, they launched ascience experiment nearly a mile into theclear blue Alabama sky on top <strong>of</strong> a beautiful,nine foot tall, 14 pound rocket usinga huge motor that is powered by thesame propellant NASA used in the AresI-X rocket. At Marshall Space Flight Centerin Huntsville (home <strong>of</strong> Space Camp),the CMCA students had tours <strong>of</strong> some <strong>of</strong>NASA’s leading edge research facilities.They got to watch as propulsion engineerstested a rocket motor in which plasma (thestuff <strong>of</strong> the sun) is contained and shapedby an electromagnetic field. They were ableto hold parts <strong>of</strong> the alloy shell <strong>of</strong> the Aresvehicle and examine the revolutionary “stirwelding” process that would make the vehicle’sskin incredibly strong. Among manyother things in their packed schedule, theyalso got to speak with a Russian scientistabout a mockup <strong>of</strong> the space station designedto help ground-based techniciansprovide accurate maintenance instructionsto those in space, and they got to spenda significant amount <strong>of</strong> time inside themockup.The project made CMCA an <strong>of</strong>ficialvendor for NASA, and the school was one<strong>of</strong> only 11 in the entire nation to gain entryinto the program. You can visit the team’sweb pages at http://www.cosrocs.org/htmlpages/sli.html.Kenneth was the SLI team captain andan 8th grader at CMCA; his eyes blazed ashe talked about the trip, saying, “It’s hardto pick, but I thought the coolest thing wasthe test stand tour. A few years ago, theyactually lit up Saturn V motors mounted tothese things. The stands are so huge they’rehard to comprehend. When they lit thefirst Saturn V motors, they shattered windowsup to 20 miles away. Please, I wannapush that red button.”by Jeff LaneAt the Student Launch Initiative inAlabama, the CMCA team pausesjust before launching their projectfor a photo with Homer Hickam.Left-to-right: Sara Volz, AdelaideReddish, David Flack, Jacob Pfund,Tyler Chumbley, Homer Hickam,Trenton Tulloss, mentor Jeff Lane,Kenneth Conner, mentor LloydChumbley, Nate Lane, and mentorErnie Puckett.Photo by Ann ConnerSport <strong>Rocketry</strong> MAY/JUNE 2010 11
a full-sized rocket in RockSim (an engineeringand simulation program) and builta scaled-down prototype vehicle to teststability and performance before buildingtheir final rocket.Tyler Chumbley, mentor Ernie Puckett, Kenneth Conner, and Jacob Pfundload up a scaled-down version <strong>of</strong> the SLI project rocket at the highpower Hudson Ranch/SCORE (Southern Colorado Rocketeers) sitenear Pueblo, Colorado. This flight was to prove the stability <strong>of</strong> the design,and it carried one altimeter and a transmitting video camera.Photo by Lloyd Chumbley.If You Build It…SLI teaches middle and high schoolstudents to design, build, and test reusablerockets with scientific payloads. Thisunique hands-on experience allows studentsto demonstrate pro<strong>of</strong>-<strong>of</strong>-concept fortheir designs and gives previously abstractconcepts tangibility. It’s like putting wheelson a car and really energetic gas in the tankand setting teens free.The CMCA experiment was an instrumentationtest: the altimeters used inTARC and SLI give variable readings fromone unit to the next, and the students werecurious about the accuracy <strong>of</strong> the altime-ters. An HD video recorder and a GPS unitwere onboard with the two altimeters. Acomparison between the different instrumentsallowed the team to determine theaccuracy <strong>of</strong> the altimeters. The team putthe science and math they’d been learningin class to practical use building and flyingthe rocket and analyzing the data fromtheir experiment. They designed and flewA SuccessfulFlightAn extremely promising aspect <strong>of</strong> thefinal flight was that the rocket did not progressany further than ten feet away from thepad horizontally in any direction. As a result,the data was easier to interpret. Nate,the team’s data analyst, explained, “We expectedto have to do precise static tests todetermine the effects <strong>of</strong> perspective, andwe also expected to have to apply the PythagoreanTheorem to triangulate the actualaltitude, but that won’t be necessary. Itcertainly makes my job a lot more fun.”CMCA’s final flight on 4-14-09 wassuccessful. The rocket flew straight up asplanned, and excellent footage was taken.The rocket did a tailslide. In a tailslide, therocket does not arc over; it actually comesto a complete stop while still pointing up,and then starts back down tail first. Whilethe team hoped for such a result, they didnot expect it, because the odds against a tailslide are 300 to 1, even with careful preparationto precisely fly the rocket straightup. One thing that went wrong was thatthe rocket spun 4.5 times, which was unexpectedas that had never happened before.A bigger problem was that the engine wasmissing an O-ring. Thankfully, Ernie Puckett(one <strong>of</strong> the mentors) rebuilt it correctly,which saved the team from a cato. Whenthe engine lit, though, it became immediatelyobvious that the grain was a GreenThis beautiful, nine foot tall,14 pound rocket is ready for itsfinal flight to nearly a mile highon a Green Gorilla K motor. Theamazing paint job was donated byB&W Auto Body & Paint.Left-to-right: Tyler Chumbley,mentor Jeff Lane, Nate Lane,Trenton Tulloss, David Flack,Jacob Pfund, mentor LloydChumbley, Adelaide Reddish,mentor Ernie Puckett, Sara Volz,and Kenneth Conner.Photo by Ann Conner.12 MAY/JUNE 2010 Sport <strong>Rocketry</strong>
Gorilla instead <strong>of</strong> theordered White Wolf,an error that, combinedwith a nozzle that wastoo small, caused therocket to end up 1000feet short <strong>of</strong> the milemark.TheResultsThe original hypothesiswas as follows:If a digital camera andGPS were in the rocket,and a known-length objectwas visible on theground, then the exactlevel <strong>of</strong> accuracy <strong>of</strong> thealtimeter could be determinedthrough comparison <strong>of</strong> GPS data,pixel analysis <strong>of</strong> the video, and altimeterdata. The team realized in the end that thiswas not a hypothesis, but an experiment.The statement was based on absolute fact,and did not reflect any opinion <strong>of</strong> how theresults would turn out.Intimidation time in Huntsville, Alabama. NASAengineers Vince Huegle and Chuck Pierce do a safetycheck on CMCA’s rocket the night before the launch.Photo by Jeff Lane/Brandango.us.The Pico altimeter read apogee at 4017feet, the PerfectFlite 3976 feet, and theGPS 4207 feet; however, the video analysisshowed the actual apogee occurred at3859.77 feet. The edited form <strong>of</strong> the video(at lower resolution) may be seen on theteam’s website at http://www.cosrocs.org/sli/onboardfinal.mov.Sport <strong>Rocketry</strong> MAY/JUNE 2010 13
The Big PictureAdelaide, who was on the recovery,outreach, and sponsorship teams, said, “Ihad no idea how cool the Marshall SpaceFlight Center would be. There is an incrediblywide range <strong>of</strong> ongoing work,from metallurgy to waste recovery, robots,botany, and propellant dynamics.”NASA provided considerable fundingto get CMCA’s ambitious project <strong>of</strong>f theground (ATK, a large aerospace companyprovided this year’s primary national supportto NASA), but the team had to do a lot<strong>of</strong> fundraising such as popsicle sales, a specialbasketball game, a night at Mr. Biggs,and pet photos with Santa.The CMCA SLI team has received enthusiasticadditional support locally fromJacob Pfund preps the final rocketwith a J motor as Adelaide Reddishlooks on. This test flight at the highpower SCORE site near Pueblo,Colorado, was to prove stabilityand scientific experiment viability.SLI rockets must be flown at leastonce before their final flight inAlabama to prove flight readiness.There were two GPS units in the rocket,and one provided good data. However,the information from the backup GPS waslost. It had been left on for the entire triphome, and replacing the battery deletedthe data.The results showed that, in the end,the PerfectFlite altimeter was closest to theactual altitude, the Pico altimeter second,and the GPS in last place.Above: The beautiful bulkheadsand electronics bay componentswere fabricated from carbon fiberby Jacob Pfund. The electronics bayis encased in resin-impregnatedKevlar. The fins are a G-10 fiberglassand Nomex honeycomb sandwichwith hardwood edges. These aretruly impressive fabrication skillsfor a high school student.Photo by Jeff Lane/Brandango.us.Left: Mentor Ernie Puckettand recovery specialist AdelaideReddish prepare the mainparachute for its first flight atthe SCORE site near Pueblo.Photo by Jeff Lane/Brandango.us14 MAY/JUNE 2010 Sport <strong>Rocketry</strong>
the Colorado Springs Rocket Society (COS-ROCS) and from many local businesses andindividuals, including Thad Zylka, ITT,Cheyenne Mountain Charter Adademy/PTO, Boeing Colorado Springs EmployeeCommunity Fund, Brandango.us, LockheedMartin, ASMDA, Alpha Hybrids, DryCleaning Equipment Services, Dr. BranonJohnson, GPS Flight, Inc., Black & WhiteAuto, Print Net, and Colorado AerospaceEducation Foundation. Two major contributorswished to remain anonymous.The program wasn’t all sweetness andlight. “We lost one team member to theSimpsons and gained two (one <strong>of</strong> themvery late in the program), and we had someheated disagreements, especially with parentsover how to raise and distributefunds. The only time we could all scheduleto meet regularly was on Sunday evenings.Sometimes it was nearly impossibleto get the students to commit, and gettingthem to understand and follow through ontime was especially tough. We actually hadto create an attendance policy,” said teammentor Jeff Lane.The student who commuted the farthestto participate in SLI was Tyler, whosaid, “I attend The Classical Academy inNorth Colorado Springs, but I don’t mindthe trip South. I love building and flyinghigh power rockets, and was in hog heavenwatching and participating in 34 bigmulti-deployment launches a mile high.”His eyes got really big when he said, “Therange <strong>of</strong> experiments covered by the otherhigh school and university teams wasamazing. I learned a lot.”Ex-NASA engineer and COSROCS educationdirector Warren Layfield also gotto go at the last minute. “In order to maximizeour efficiency, we had four parentsand mentors transport the SLI rocket toAlabama in a minivan. Wow, what a trip;20 hours non-stop. I’m happy to endurea little discomfort, though, because thesestudents are our future. Especially in a recession,we need to generously supportthese teens with our time, expertise, andfinancial support,” said Warren.Team members pose by theSaturn 1B rocket at the HuntsvilleUS Space and Rocket Center.The two main goals <strong>of</strong> NASA’s educationprogram are to “inspire and motivatestudents to pursue careers in science, technology,engineering, and mathematics”by supporting education in the nation’sschools, and to “engage the public in shapingand sharing the experience <strong>of</strong> explorationand discovery” by supporting informaleducation and public outreach efforts.NASA’s commitment to education placesspecial emphasis on these goals by increasingelementary and secondary educationparticipation in NASA projects; enhancinghigher education capability in science,technology, engineering, and mathematics,or STEM, disciplines; increasing participationby underrepresented and underservedcommunities; expanding e-Education; andexpanding NASA’s participation with theinformal education community. The Office<strong>of</strong> Education will continue to supportNASA’s strong historical role in educationat all levels, with linkages to NASA researchas a central focus.These efforts will help create and sustainthe scientific and engineering workforce<strong>of</strong> the future. In addition, the Office<strong>of</strong> Education will continue to emphasizesharing the results <strong>of</strong> NASA missions andresearch programs with wider audiencesby using science discoveries and researchapplications as vehicles to improve teachingand learning at all levels.Jacob, a COVA student, related, “Myhero is Homer Hickam, who is the maincharacter in the movie October Sky. He alsowrote the best selling book Rocket Boys, aswell as many others. At the SLI launch, Igot to shake hands with and talk to Mr.Hickam, and he was the nicest person youcould imagine. I expected rocket scientiststo be alo<strong>of</strong> and maybe even pretentious,but I found out they’re just like me.My dream <strong>of</strong> becoming a NASA engineeror private contractor fabrication specialistjust got wings.”Sport <strong>Rocketry</strong> MAY/JUNE 2010 15
Product ReviewQuest AerospaceMLASby Bob SanfordThe completed Quest MLAS model.Manned spaceflight is an inherentlyrisky business. One <strong>of</strong> themost dangerous moments <strong>of</strong> anyspaceflight is the period from ignitionand launch <strong>of</strong> the spacecraft and untilit has reached orbit. Early mannedspacecraft were launched by modifiedmilitary missiles, and theirreliability could not always be100% guaranteed. Boosterssuch as the Saturnseries were so largeand carried somuch propellantthat if somethingshould go wrong the explosion would bedevastating.What was needed was a way to removethe capsule and its crew from a problembooster quickly and in a way that the crewcould survive. Both the United States andSoviet Union space programs used ejectionseats (Vostok, Gemini) or rocket propelledescape towers (Mercury, Soyuz, Apollo).An escape tower was a powerful, solidpropellant rocket motor positioned abovethe space capsule which would ignitequickly in an emergency and pull the capsuleaway from the booster. In the UnitedStates, capsules and escape towers weretested under the Little Joe (Mercury) andLittle Joe II (Apollo) programs.NASA’s Aries 1 rocket and Orion spacecapsule, planned to carry astronauts intoorbit and beyond, also envisioned the use<strong>of</strong> an escape tower. However, another ideafor an escape system for the Orion capsulewas also proposed. NASA’s Engineeringand Safety Center came up with an alternativeescape method utilizing four solidrocket motors affixed around the outside<strong>of</strong> a aerodynamic fairing which would cover/enclosethe Orion capsule. In an emergency,the four solid rocket motors on thefairing would fire to launch the Orion capsuleaway from the Aries rocket.NASA decided to test parts <strong>of</strong> thisconcept under the project name <strong>of</strong> MaxLaunch Abort System (MLAS). Accordingto information on the NASA website,“A Primary objective <strong>of</strong> the MLAS test isto provide the NASA workforce with additionaldirect implementation experiencein flight testing a spacecraft concept usefulin the Agency’s future efforts to design,optimize, and test spacecraft.” The actualtests would begin after motor burnout.“The test is primarily a demonstration <strong>of</strong>unpowered flight along a stable trajectory,MLAS vehicle reorientation and stabilization,followed by crew module simulatorseparation from the MLAS fairing, stabilizationand the parachute recovery <strong>of</strong> thecrew module simulator.”I think some folks at NASA just wantedto fly a really cool rocket.The actual MLAS rocket stood just over33 feet high, weighed 45,000 pounds andwas successfully flown in the early morning<strong>of</strong> July 8, 2009, from NASA’s WallopsFlight Facility, Wallops Island, Virginia.In a display <strong>of</strong> rapid prototyping andproduction, a representative <strong>of</strong> QuestAerospace announced on a web forum thatthe company was working on a sport-scalemodel <strong>of</strong> the MLAS only two days after theflight <strong>of</strong> the actual MLAS. Less than a monthlater at NARAM-51, Quest displayed a finishedMLAS prototype at the Manufacturers’Forum and began shipping their MLASmodel in early November, 2009.The Quest MLAS is a sport-scale model,which means some concessions weremade for flight stability and production issues.Even so, this model has a great deal<strong>of</strong> appeal to rocketeers. The MLAS modelhas several unique features and will requirethe modeler to work with different materials,which explains why this kit is rated asa Skill Level 3. Thanks to the well-writteninstructions a modeler with several SkillLevel 1 and 2 kits to their credit will beable to assemble and fly this model.The Quest MLAS comes packaged in asturdy white-colored box with a full colorwrap-around label. Pictures <strong>of</strong> the actual16 MAY/JUNE 2010 Sport <strong>Rocketry</strong>
MLAS vehicle and artwork <strong>of</strong> the model along with informationabout both the actual and kit versions <strong>of</strong> the MLAS are presented.Upon opening the box, the modeler will discover a sheet <strong>of</strong>laser-cut balsa fins, lightweight body tube, water-slide decals, foamcapsule, several zip-lock bags <strong>of</strong> parts, andthree parachutes adding up to twenty-threecomponents. A sheet <strong>of</strong> tissue paper keeps thecontents inside the box from moving duringshipment. This is especially important for thefoam nose cone and main body tube. All theparts in my kit were in perfect condition.The ten-page instruction manual was wellillustrated and the assembly steps were in alogical sequence. The instructions contain ameasuring guide and an alignment drawingfor the multiple fins. The instructions containguidance tips and warnings about handlingthe foam parts.When building the Quest MLAS kit, is importantto always keep in mind that weightand stability are crucial factors with this kitand there is no need to ‘overbuild’ it.The first five instruction steps concern theconstruction <strong>of</strong> the motor mount and anchorfor the booster recovery system. Rememberthat the centering ring with the cutouts is theAFT ring for the motor mount. Quest spent quite a bit <strong>of</strong> time andeffort to make parts that help the stability <strong>of</strong> this model by lighteningthe weight in aft end <strong>of</strong> the model.The sixth step has the modeler installing the motor mount intothe body tube. Since the motor mount is recessed into the backend <strong>of</strong> the body tube, I tack glued the motor mount in place witha few drops <strong>of</strong> medium cyanoacrylate (CA) adhesive. After the CAhad dried, I used a thin bead <strong>of</strong> aliphatic resin (wood) glue to theThe Quest MLAS underthrust on a B6-2.forward and aft centering rings where they meet the body tube tosecure the motor mount.The final construction steps on the body tube consist <strong>of</strong> markingand attaching the fins and launch lug. Use the alignment guideon the instruction to verify that the fins aremounted correctly. Using sandpaper I roundedthe leading and trailing edges on all the finsbefore attaching them. I also soaked some thinCA adhesive into the trailing edge <strong>of</strong> the lowerfins to give them some additional strength asthe model lands on its fins.Step 13 on the instructions begins the nosecone assembly. This is one <strong>of</strong> the trickier stepsas the modeler must glue the nose cone to theorange colored capsule base shoulder ring. Itis important to get the foam capsule alignedcorrectly on to the shoulder ring. While workingwith the foam nose cone, it is pointed outseveral times in the instructions that the foamnose cone can be dented easily and should behandled carefully. The instructions call for installingthe lag bolt nose weight at this pointbut I left it <strong>of</strong>f to make the painting easier. Thecapsule is then fitted to the body tube <strong>of</strong> themodel and four <strong>of</strong> the fin alignment lines areextended on to the nose cone. The two smallMMX foam nose cones are cut in half and attached to the nose conealong the four alignment lines using wood glue. These simulate therocket motors on the real MLAS rocket.While waiting for the MMX cones to dry, I assembled the threeparachutes included with the kit. Once this was done, I moved intothe finishing stages for the kit.The instructions for the Quest MLAS kit discuss using Elmer’sCarpenters Wood Filler (ECWF) to seal the foam capsule. I’ve beenSport <strong>Rocketry</strong> MAY/JUNE 2010 17
using Elmer’s for years to seal body tubeseams and balsa fins so I already had thisproduct among my finishing supplies. Itcan be thinned with water and has littleodor.I began by finishing the main bodyfirst. I sealed the body tube and fins withAbove: MLAS motor mountand shock cord assembly.Right: The parts <strong>of</strong> the kit.Below, right: Filler used for theStyr<strong>of</strong>oam parts.WWW.BALSAMACHINING.COMtwo coats <strong>of</strong> thinned Elmer’s Wood Filler,sanding after each coat11995 Hillcrest Drivehad dried. Phone: Then 630-257-5420 I primedLemont, IL 60439<strong>Rocketry</strong> is our business! sales@balsamachining.comthe body tube with Plasti-Kote gray spray primer #466 and sandedNOW A HIGHafter the primerPOWERwas dry. For the white color,I used Krylon glossy white applied inseveral light coats.The instructions describe a way tomask and paint the fins using a plasticMOTOR DEALER!bag. I would not be using spray paint so Ijust masked around the fins using ¼" PactraMasking Tape. I had to make sure toburnish the tape down on the body tubeso no paint would leak under it. I wentand purchased a bottle <strong>of</strong> Tamiya acrylicBlack X-1 brush paint to use for detailingthe capsule, so I used this same paint forthe fins. The Tamiya paint dried quickly soI was able to mask and paint the upper andlower fins on the body tube in an hour.I applied two thinned coats <strong>of</strong> Elmer’sCarpenters Wood Filler to the foamnose cone, sanding it after each coat haddried. While researching foam-safe paint,I discovered that Krylon produced a spraypaint called Krylon H2O Latex that statedit was safe for use on Styr<strong>of</strong>oam. I found alocal store that sold the H2O paint, whichwas fortunate as my brush painting skillsare not very good.I put down a coat <strong>of</strong> H2O gray paintto act as a base coat/primer on the nosecone, sanded, then applied another coat. Isanded the second coat <strong>of</strong> gray and endedup with a smooth surface on the capsule. Itis important to remember not to sand tooharshly as that can create indentations inthe Styr<strong>of</strong>oam.Now I used the Krylon white H2OLatex paint on the prepared capsule. TheH2O paint is very thin and will run if ap-18 MAY/JUNE 2010 Sport <strong>Rocketry</strong>
plied too heavily. It does dry quickly so Iwas able to apply five coats <strong>of</strong> paint to thecapsule, which created an uniform appearance.I then masked the capsule with thePactra Masking Tape and applied the blackmarkings using the Tamiya black acrylicpaint.I took the lag bolt nose weight andprimed it followed by a base coat <strong>of</strong> glosswhite and then gloss black spray paint.After removing the masking tape andletting the paint dry overnight, it was timeto apply the decals. The kit includes an excellentset <strong>of</strong> water-slide decals that reallyadd to the appearance <strong>of</strong> the model. Thatsaid, there are many decals to apply (thefins have sixteen decals by themselves).Fortunately, the instructions give goodguidance on where each decal is to be positioned.I applied the decals in two sessions.To preserve the decals and finish onthe model, I applied Future floor polishto the model with a foam brush. Future iswater soluble and cleans up easily. Be sureto separate the nose cone and body tubesections from each other before applyingthe Future as the floor polish can causethe two parts to permanently bond to eachother like glue.After waiting a few hours to make surethe Future had died, I installed the paintedlag bolt nose weight, leaving a gap soI could tie the parachute anchor line tothe bolt. I then attached two parachutes tothe nose cone anchor line and one parachuteto the body tube’s elastic shock cord.The finished weight <strong>of</strong> my model came inat 3.5 ounces without motor or recoverywadding.For my flight <strong>of</strong> the Quest MLAS kit,I paid particular attention to the instructions.Only B6-2 and B6-4 motors are recommendedfor the kit. With such a lightyet draggy model where stability is veryimportant, I wanted to fly it only whenconditions where optimal. I installed aB6-2 motor, placing wadding in the forwardend <strong>of</strong> the motor per the kit instructions.I placed several sheets <strong>of</strong> wadding ontop <strong>of</strong> the centering ring then inserted thethree parachutes. It was a bit tricky to getall three parachutes to ‘sit’ while installingthem. Once the capsule was seated, it wastime to go fly!I used a four foot long launch rod andaimed it for a straight-up flight. While therewas no wind, the MLAS was launched. Itlifted-<strong>of</strong>f quickly on a perfectly vertical trajectory.When the motor burned out, themodel decelerated quickly. The ejectioncharge went <strong>of</strong>f and the parachutes wereejected. The model was recovered withonly some scrapes and dirt on the model.While the model didn’t fly very high or fastit was fun to watch.The Quest MLAS kit is a unique model<strong>of</strong> an unique subject. For rocketeers wholike short, squat models, this kit is a mustown. The fact that it is a model <strong>of</strong> actualrocket just makes it that more desirable.While some modelers may be concernedabout building a model that contains unusualmaterials, the well-thought-out instructionsmake construction straightforwardto anyone who has already builtseveral model rockets.An unusual subject rendered in a funscalemodel, the Quest MLAS would makea fine addition to any rocketeer’s collection.I look forward to further interestingmodels from Quest.Sport <strong>Rocketry</strong> MAY/JUNE 2010 19
ocketIn 2007 I built a modular rocket(inspired by the article in the Sept/Oct2006 Sport <strong>Rocketry</strong>) for a 4-H aerospaceproject. A modular rocket is notconstructed in the same way as a regularrocket. A modular rocket is assembledwith nuts, bolts, and screws, rather thanglue. This allows the rocket to be disassembledfor maintenance and repair. Inaddition, a modular rocket can be reconfiguredto accomplish other missions and can be upgraded with new technology at anytime. This article will describe how I constructed this rocket and provide information foranyone else interested in building such a rocket.I will discuss two different types <strong>of</strong> modular rockets: fully modular and semi-modular.A fully modular rocket can be completely disassembled. A semi-modular rocket allowscertain parts to be removed such as the fins or motor mount. This concept is useful forrockets that need to be easily transported or repaired, but do not need the versatility <strong>of</strong> afully modular rocket.I will start by discussing the modular rocket that I built for my 4-H project in 2007.The first step was the design phase. I designed the rocket with RockSim and made handdrawings <strong>of</strong> the internal components. Keep in mind that almost any rocket can be mademodular as long as the body diameter is large enough to house all <strong>of</strong> the internal components.I designed this rocket with two main goals in mind: make the entire rocket modular(i.e., no parts would be glued together), and build the entire rocket from scratch.The tail section internal assembly is the most complicated part <strong>of</strong> this rocket. Thisincludes removable fins, removable motor mount, removable centering rings, an ejectionbaffle, and an inverted coupler. Figure 1 shows the internal assembly <strong>of</strong> the tail section. Irolled the motor mount tube with five wraps <strong>of</strong> two-ounce fiberglass. The fins and centermodularby Caleb Boe NAR 83769Caleb Boe and his completedmodular rocket.20 MAY/JUNE 2010 Sport <strong>Rocketry</strong>
Figure 1. The tail section internalassembly <strong>of</strong> the modular rocket.ing rings were made from fiberglass reinforcedcardboard backing from a notebook.I should note that I had to replace thesefins later because they did not hold up wellafter several flights. This time I used fiberglassreinforced basswood, which is muchmore durable. The centering rings haveheld up well. I bent the fin attachmentsout <strong>of</strong> sheet metal. These work reasonablywell but did take some time to make andit was difficult to align them properly. Thebetter option would be carbon fiber fin attachments,which I used on a later rocket.I will discuss construction <strong>of</strong> carbon fiberfin attachments later.The rocket’s body tubes are made out<strong>of</strong> fiberglass. I made a mandrel out <strong>of</strong> 2.5"PVC pipe and wrapped tape around it till Iachieved the desired diameter <strong>of</strong> 2.6". Beforewrapping the fiberglass I covered themandrel with wax paper and petroleumjelly so the tube will side <strong>of</strong>f easily. Thesetubes are strong, light, and waterpro<strong>of</strong>.This rocket has three separate tubes: thetail tube, parachute tube, and the payloadtube. I also made tube couplers to join thetubes with a slightly smaller mandrel. Figure2 shows how the tail section internalassembly slides up into slots in the tailtube. Figure 3 shows the top <strong>of</strong> the tailsection with its coupler and bulkhead inplace. The holes in the bulkhead allow theejection gasses to pass through. The parachutecompartment tube slides onto thiscoupler.One <strong>of</strong> the challenges was making thenose cone (Figure 4) from scratch. I beganby drawing up a template on cardstock andcutting it out. I formed this into a cone andglued the seam together. After it was dry,I applied two layers <strong>of</strong> two-ounce fiberglassand allowed it to dry. After the epoxycured, the nose was quite strong. I attacheda section <strong>of</strong> fiberglass tube couplerto act as a shoulder.Figure 5 shows all the parts <strong>of</strong> the disassembledmodular rocket. After the rocketwas complete, I painted it (Figure 6).Because <strong>of</strong> its modularity, no masking wasrequired; I simply took the rocket apartand painted each section the desired color.Of course, if multiple colors on the samepart <strong>of</strong> the rocket were desired, then maskingwould be required.I have flown this rocket many times,with success each flight. It flies great on Gmotors. One <strong>of</strong> the advantages <strong>of</strong> modularconstruction is being able to adapt it forSport <strong>Rocketry</strong> MAY/JUNE 2010 21
Figure 2.specific flight missions. In 2008 I adaptedthis rocket to test a compressed air ejectionsystem that I built.The next type <strong>of</strong> modular rocket thatI will discuss is the semi-modular. Thistype <strong>of</strong> rocket cannot be completely disassembled,but the major components canbe removed, including the fins and motormount. My TARC team used this conceptin our rocket design. In the past when afin would break, we were done flying forthe day. Then we had to go home, dig outall the fin material stuck between the bodytube and motor mount, and glue in a newfin. The semi-modular rocket allowed us tochange a fin within a few minutes right onthe field with nothing but a screwdriver.A semi-modular rocket is a better optionfor a rocket designed for a specific purposewhere full modularity would be unnecessary.The rocket my TARC team used in the2009 competition featured a removableFigure 3.Figure 2. How the tail sectioninternal assembly slides into thetail section tube.Figure 3. The inverted coupler atthe top <strong>of</strong> the tail section. The holesin the bulkhead allow ejectiongases to pass through.Figure 4. The nose cone wasscratch-built from cardstockand fiberglass.Figure 4.motor mount assembly, removable fins,carbon fiber fin attachments, and an ejectionbaffle (Figure 7). For the 2008 competitionwe used a similar design, but thefin attachments were metal. The metal wasvery hard to bend properly and ended upadding unnecessary weight to the rocket.For the 2009 model we improved our designwith carbon fiber fin attachments.These fin attachments are glued onto thefiberglass motor mount. There is a slot inthe rear <strong>of</strong> the fin and a hole in the front.This way, only the front screw needs tobe removed in order to remove the fin.Three screws attach the motor mount assemblyto the body tube. Nuts are gluedonto the backside <strong>of</strong> the tube coupler for22 MAY/JUNE 2010 Sport <strong>Rocketry</strong>
althe boattail to accommodate thesescrews. A length <strong>of</strong> aluminum tubingis placed between the nuts andthe motor mount to prevent themfrom falling <strong>of</strong>f. My team has beenvery happy with this design. Therocket has flown well and has beeneasy to operate.The carbon fiber fin attachmentsare very strong and light.Although more work and expenseare involved in constructing them,I feel that the advantages make upfor it. Actually, once the materialsare obtained, I think they are easierto make than metal fin attachmentsbecause they require no bending.The first step is to make a mandrel(Figure 8). The mandrel will haveto be properly shaped dependingon the diameter <strong>of</strong> the motormount, the number <strong>of</strong> fins, andthe thickness <strong>of</strong> the fins. Although thereare several ways to make such a mandrel,I made mine out <strong>of</strong> a length <strong>of</strong> fiberglassmotor mount the same diameter as the motormount on the rocket and some strips<strong>of</strong> 1/4-inch hobby plywood. It is very importantto accurately position the pieces <strong>of</strong>plywood. I accomplished this by making atemplate in PowerPoint, and then printingit out, attaching it to a piece <strong>of</strong> foam board,and cutting it out. Next I epoxied the pieces<strong>of</strong> plywood to the fiberglass tube usingthe foam board templates to align the plywoodstrips. After the epoxy cured, I varnishedthe plywood to protect it.Once a mandrel is made, the next stepis to cut out the carbon fiber. I used threeFigure 5.Figure 5. The parts <strong>of</strong>the modular rocket.layers <strong>of</strong> 5.7-ounce plain weave carbon fiberfrom CST composites. To add additionalstrength, I cut the middle layer such thatthe weave was at a 45˚ angle to the otherlayers. Before laying up the carbon fiber, themandrel needs to be sprayed with a releaseRInc.Because we understand rocketryWe understand rocketeersAim for the sky, and try not to miss! TMContact FlisKits for your catalog today! Sales@fliskits.com - http://fliskits.com/Sport <strong>Rocketry</strong> MAY/JUNE 2010 23
Figure 6.agent. I used Aervoe Crown 3470. It is importantto use a high quality epoxy for thelayup such as West Systems or Aeropoxy. Iused Aeropoxy. Lay up each layer <strong>of</strong> carbonfiber separately making sure that each layerreceives plenty <strong>of</strong> epoxy.As soon as the layup is complete, itis necessary to vacuum bag it to ensurethat the carbon fiber forms properly andto squeeze out the excess epoxy. I used avacuum bag from ACP composites and mydad’s refrigeration vacuum pump. Beforeplacing the mandrel with the carbon fiberon it into the vacuum bag, cover the carbonfiber with either peel ply or a release film.Ripstop nylon works well as an inexpensiveform <strong>of</strong> peel ply. Cover the mandrelpop the fin attachments <strong>of</strong>f the mandrel. Itmay be necessary to put it in the freezer tocontract it slightly. After removal, cut andsand the edges <strong>of</strong> the fin attachments.A modular rocket can become a disasterif not designed properly. When designinga modular rocket it is importantto carefully consider all <strong>of</strong> the forces thatwill be applied to the rocket during flight.Thrust transfer from the motor to the rest<strong>of</strong> the rocket is very important. If designedimproperly, part <strong>of</strong> the motor mount assemblymay take <strong>of</strong>f up inside the rocket.Another very important factor to take intoaccount when designing is motor and motormount retention. Although the rocketmay contain a motor retention device, theFigure 6. The rocket wasdisassembled and the individualparts were painted separately.Figure 7. The tail sectioninternal assembly <strong>of</strong> thesemi-modular TARC 2009 rocketfeatured a removable motor mountassembly, removable fins, carbonfiber fin attachments, andan ejection baffle.Figure 8. The mandrel for makingthe carbon fiber fin attachments.Figure 8.Figure 7.with several layers <strong>of</strong> paper towels to soakup the excess epoxy, place it in the vacuumbag, seal it, and pull a vacuum on it. Afterthe epoxy has cured, use a screwdriver toentire motor mount assembly could kickout the back if not properly retained.It is important to consider the complexity<strong>of</strong> the rocket. A very complicatedrocket with many parts is hard to operate.Aim to keep the rocket as simple as possible.Some <strong>of</strong> these things are discoveredwith experience. For example, in my firstmodular rocket I have nine metal fin attachments.These are fairly hard to workwith. In the future I plan to replace thesewith carbon fiber fin attachments, whichwould be much easier to use. There areseveral other improvements that I plan tomake as well. A modular rocket may takeseveral years <strong>of</strong> trial and error to perfect.Although a modular rocket requires moretime and effort in designing and building,in my opinion, the final product is wellworth the work.24 MAY/JUNE 2010 Sport <strong>Rocketry</strong>
The <strong>National</strong> <strong>Association</strong> <strong>of</strong> <strong>Rocketry</strong>’sMembership Drive5,200 Members by NARAM 52!We want to bring our membership MORE <strong>of</strong> the NAR! The NAR <strong>of</strong>fersits membership great services like Sport <strong>Rocketry</strong>, the Member Guidebook,hundreds <strong>of</strong> dollars worth <strong>of</strong> discount coupons, great insurance formembers and clubs, but we want to bring you MORE! How about greatservices like increased club grants, scholarships, more magazine pages, aninternational competition program, plus much, much more!The NAR is holding a special membership drive called “52 by 52” thatwill benefit you AND the members you recuit. Our goal is to increase theNAR membership to 5,200 members by the beginning <strong>of</strong> NARAM 52 inJuly 2010.drive perks!• Existing NAR members will receive $5.00 for each andevery qualified new NAR member that they recruit during thismembership drive!• New NAR members who are recruited by an existing NAR memberand join during this membership drive will receive all the benefits <strong>of</strong>being a NAR member in addition to exciting prizes fromparticipating vendors! Examples include free hats andfree kits, etc.how does it work?Look for the special “Get MORE from <strong>Rocketry</strong>” banner on participatingvendors’ web sites, and follow that link to the registration form, or lookfor the “52 by 52” link on the NAR web site (www.nar.org).The existing NAR member’s membership number will be required at the time that the newmember’s registration is submitted. New member eligibility: People who have never been a NARmember, or past NAR members whose past membership has expired BEFORE January 1, 2007.For more details visit www.nar.org52 525,200 Members by NARAM 52byGet MOREfrom <strong>Rocketry</strong>!MORE ROCKETS, MORE MEMBERS, MORE FUN,the NATIONAL ASSOCIATION OF ROCKETRY!Sport <strong>Rocketry</strong> Sport <strong>Rocketry</strong> NOVEMBER/DECEMBER MAY/JUNE 2010 2009 25
So You WantIncorporate Your Club?by Rick Boyette NAR 31375For the “non-business-minded” folks,the idea <strong>of</strong> incorporating a club can seemintimidating. It all sounds so Pompous andOfficial, totally opposed to what a hobbyclub is all about. But it’s really a simple,straightforward process that just about anysanctioned club can easily follow.Typically it costs about $100 to $200to incorporate, and annual fees are in the$50 to $100 range. Some states may havehigher fees, so you really have to look intoyour own state’s particular filing fees.Our club (Florida Spacemodeling <strong>Association</strong>/TripoliWest Palm, Inc.) incorporatedmainly as a way to insulate individualmembers from personal liability (insurancenotwithstanding, one can never be too safethese days). Each state will have certainprocedures to follow so it’s best to contacta legal/accounting firm that specializes inincorporation. Such firms <strong>of</strong>fer a completeHHHHHHHHHHHHHHHHHHHHHHHH CUSTOM, ESTES, HHHHFLISKITS,HHQUASAR ONE,HHHH and QUEST HH • Rockets • Engines • Bulk Packs HH • Accessories • Parts HHatHHHH 40% OFF HHHSuggested Retail PriceHHHSend for yourHHfree catalog or visit us at:HHBelleville Wholesale Hobby Inc.HH1944 Llewellyn RoadHHBelleville, IL 62223-7904Hwww.bellevillehobby.comHHwww.estesrocketswholesale.comHHCall Toll Free: 1-866-250-5949HHor 1-618-398-3972HHHHHHHHHHHHHHHHHHHHH26 MAY/JUNE 2010 Sport <strong>Rocketry</strong>package that includes the corporate bylaws,seals, articles <strong>of</strong> incorporation, etc.,that’s pretty much boilerplate stuff, usuallyfor a flat fee.To locate a company in your state, doa web search for “(State Name) Non-Pr<strong>of</strong>itIncorporation” and you should get a list <strong>of</strong>firms that specialize in this type <strong>of</strong> incorporationfor your state.Each state will typically have an annualtax and/or fees and paperwork that mustbe submitted on a yearly basis. This is usuallyvery straightforward. The package youreceive from the accountant/lawyer will includethe required paperwork for the initialsubmittal. For subsequent years, thestate sends the paperwork to the corporate<strong>of</strong>ficer listed in the incorporation documents.There are different types <strong>of</strong> corporations,including S corporations and LLC’s.It’s really a simple,straightforwardprocess that justabout anysanctioned clubcan easily follow.The company chosen to perform the incorporationwill advise as to which type <strong>of</strong>corporation best fits the club’s needs.A virtual necessity is opening a corporatechecking account. An option with thisis a corporate credit card, and also the abilityto accept credit card transactions. Mostbanks will allow you to open such an ac-
count for a minimal expense if you alreadyhave a personal account there. Monthlyfees can add up, so I recommend shoppingaround for the best account that suityour club’s own needs. For example, if theclub writes only a few checks per month,it’s usually cheaper to have an account thatdoesn’t charge a monthly fee but insteadcharges a per-check fee (usually over a certainnumber <strong>of</strong> checks).The tax ramifications are minor. There’sa corporate tax return that must be doneeach year, but usually it’s a simple form.For a non-pr<strong>of</strong>it club with no employees,it usually all zeroes out and little if any taxmust be paid. The company chosen to dothe incorporation should provide guidancefor completing state and federal taxreturns. The feds will issue a corporate taxID number which, under certain circumstances,can be used to purchase certainitems that are exempted from sales tax.The advantages <strong>of</strong> incorporation includepersonal liability protection, tax exemptions,financial considerations (e.g.having a corporate checking account andcredit card), and pr<strong>of</strong>essional appearance(it makes the club “<strong>of</strong>ficial” with letterhead,logos, etc.) for marketing and advertisingfunctions. It also helps accounting,since club expenses are easily kept separatefrom personal expenses. Also, “ownership”is easily transferred in the event an <strong>of</strong>ficerleaves.The disadvantages include the initialand annual expenses (the club needs tobe financially solvent) and finding at leasttwo responsible adults who are willing toserve as corporate <strong>of</strong>ficers. The club needsto have a steady, dependable core membership,with all the duties that entails. Usuallyit’s just a matter <strong>of</strong> filling out the stateand federal forms and keeping the books,so the club treasurer should be one <strong>of</strong> thecorporate <strong>of</strong>ficers as well as one <strong>of</strong> the authorizedaccount holders. The club mayneed to assess their dues structure so as tobe able to cover all the initial and ongoingexpenses.Clubs considering incorporatingshould first contact an appropriate firm. Ido not recommend doing it on your ownunless someone in the club is, or does personalbusiness with, a certified accountant.There’s plenty <strong>of</strong> information on the Webabout incorporation (http://www.amerilawyer.com/was very useful for me).Sport <strong>Rocketry</strong> MAY/JUNE 2010 27
y Kenneth B. JaroschNAR 56442, TRA 10290&<strong>Baffles</strong>Mo r epart II28 MAY/JUNE 2010 Sport <strong>Rocketry</strong>In Part 1 <strong>of</strong> this article, found on page 20 <strong>of</strong> the March/April 2010 Sport <strong>Rocketry</strong>, I discussedbaffles for mid-power rockets up to 4 inches in diameter. In this part <strong>of</strong> the article,I will discuss my efforts to build ejection baffles for high power rockets with diameters <strong>of</strong>5.5 and 7.6 inches.Medi/Maxi-Magg, My First 5.5" RocketNow the fun begins: To use the design principles from Part 1 <strong>of</strong> this article to build amodular labyrinth baffle/bulkhead design in a real High Power Rocket. Not just a modelrocket or Large Model Rocket stuffed with a H motor, but a regulation High Power rocket—meaninga rocket over the 53-ounce limit <strong>of</strong> Large Model Rockets and one that requiresyou to be certified to fly HPR.For the Spirit <strong>of</strong> America 2008 (4" x 70") rocket in Part 1, I used a “cut down” planto construct the baffle/bulkhead fin can unit (by which I mean that the airframe tubing <strong>of</strong>the original kit was too long, and needed to be cut down to a shorter length to accommodatemy baffle design). This same scheme could be used with several kits in the 5.5" classserving as the basis for the build, such as the LOC I-Roc, Big Nuke, or Magnum. But fordemo purposes I decided to do the flip side and use the “build up” plan to show how theparts from a really short rocket kit could be used as the basis for a rocket using my baffle/bulkhead design. In the 5.5" class such a starting model is the LOC Minie-Magg, while inthe 7.6" range you could use the LOC Warlock or possibly the Door Knob as your startingpoint.So I started with the parts from the 5.5"-diameter LOC Minie-Magg kit as the basisfor my rocket. But first, a little back ground on the Minie-Magg. LOC calls this rocket thelargest G-motor rocket (5.5" x 37") available. That’s true, but the minimum motor is theG80-4T. Even then they used some weight reduction techniques to get the rocket flyableon a G80. First they used a short nose cone <strong>of</strong> 13" versus the 21" unit they use for their
other 5.5" rockets. The body length is only24" and the wall thickness appears to bethinner than the normal 20" payload sections.I found that out to my surprise whilesizing up the parts. The kit only uses twocentering rings on a short (10") 38mm motortube. The fins tabs are only just 1/16"through the wall, and do not extend downto the motor tube. The recovery systemuses an elastic shock cord with an epoxiedloop for the shock cord mount. All these issuesand more would have to be addressedto make this into a more advanced rocket.I bought the Magg and a 34" 38mmmotor tube at HUB Hobby. I wanted toget started and see what I needed to do.Many hobby stores ceased carrying highpower rocket parts many years ago because<strong>of</strong> the federal regulations on highpower motors. So I had to order two payloadextensions (PL-5.38), a Stiffy tubecoupler (STC-5.38), and an extra 5.38"centering ring from LOC/Precision. One <strong>of</strong>the payload kits would provide parts forthe outer chamber <strong>of</strong> the baffle/bulkheadand the 5.5" x 20" body tubing for the recoverysection. The 37" basic kit plus the20" recovery section would bring my “Medi-Magg”design to a length <strong>of</strong> 57". Withthe addition <strong>of</strong> a 20" payload extension, itwould become my full up “Maxi-Magg” at5.5" x 77".The TC-5.38 coupler from the payloadunit is 11" long. That’s quite a big jumpup from the 4" x 6" couplers used in theSpirit <strong>of</strong> America 2008 from Part 1. Still,with that huge coupler diameter, the wallthickness appears to be the same as in thesmaller units. This allowed the tube to easilydeform under a little pressure. For myfirst upgrade, I ordered the Stiffy tubecoupler stiffener (STC-5.38) from LOC toreinforce that 11" regular coupler to increasethe lateral support. After all, thatunit was going to have the leverage andweight <strong>of</strong> 40" <strong>of</strong> heavy body tube (0.080"thickness), bulkhead unit, and the noseconeto support. The STC-5.38 stiffeningcoupler is 5.25" diameter, 10-7/16" long,and has a wall thickness <strong>of</strong> 1/8". This isquite a significant reinforcement, as thisstiffener alone weighs 8 ounces. It is 9/16"shorter than the regular coupler, which allowsfor a 1/4" bulkhead at each end witha 1/16" recess at the head for epoxy fillets.Because <strong>of</strong> the 5.25" diameter, the stiffenerfits loosely into the regular coupler makingit easier to epoxy in place. The stiffener hasdeep spiral grooves in the sides to accommodatethe extra epoxy needed for maximumadhesion. More on that later.The bulkhead is 1/4" thick plywoodand came with the standard 2.0"-long1/4" eye bolt. This eye bolt looked reallypuny compared with that large bulkhead/coupler unit. So my second upgrade wasto replace the standard eye bolt. That eyebolt has a Safe Working Load (S.W.L.) <strong>of</strong>80 pounds. Going to the next size <strong>of</strong> 5/16"with a length <strong>of</strong> 3.25" only increased theS.W.L. to 90 pounds. But I noticed on thehardware store’schart that a stainlesssteel 5/16" eye bolthad a S.W.L. <strong>of</strong> 130pounds, so I wentwith the 3.25"-long5/16" stainless steeleye bolt for my upgrade,along withtwo large fenderwashers.The 11"-long5.38 coupler (withthe stiffener inside)forms theouter chamber <strong>of</strong>the labyrinth baffle/bulkhead.The38mm motor tubeand third centeringring <strong>of</strong> the motormount forms theinner chamber. Themiddle tube is epoxiedto the bulkheadand formsthe middle concentricchamber.This middle chamberis designed tobe 10" long, or 1"shorter than theoutside coupler chamber. The body tubesize choices for this middle chamber were2.56", 3.00", or a 4.0" body section 10"long. I wanted the volume change throughthe chambers to be as linear as possible.I did the volume change math from the38mm inner chamber (motor tube) to themiddle chamber and then out into the largechamber (the large coupler). The smoothestand most balanced increase occurredwith the use <strong>of</strong> the 3.00" body tube forthe middle chamber. It just so happened Ihad a PL-3.00 payload extension on handthat comes with a 10" section <strong>of</strong> BT-3.00.A perfect fit. I did a lot <strong>of</strong> test fitting alongthe way in this project. Photo 1 shows theparts <strong>of</strong> the baffle.Since this was a “build up” plan, I usedthe kit’s 5.5" x 24" body tube and addedthe extended motor tube to that length.With the outer chamber (5.38 coupler) <strong>of</strong>Above: The Medi-Maggconfiguration <strong>of</strong> Ken’s 5.5"high power rocket withzipperless/baffle.Left: The Maxi-Maggconfiguration.the ejection baffle at 11" long, themotor tube (part <strong>of</strong> which formsthe baffle’s inner chamber) had toextend into the baffle 1" less thanthe length <strong>of</strong> the baffle, or 10" <strong>of</strong>length into the baffle. Also, half<strong>of</strong> the coupler would be insidethe body tube <strong>of</strong> the fin can (thatmeans 5.5" inside the body tube). The thirdcentering ring would be placed at that locationto form the base <strong>of</strong> the baffle. The10" length <strong>of</strong> motor tube extending forwardfrom that point places the top end <strong>of</strong>the motor tube 4.5" beyond the top <strong>of</strong> thebody tube. That would suggest a requiredmotor tube length <strong>of</strong> 28.5" if the motortube were flush with aft end <strong>of</strong> the fin canbody tube. Using the three centering ringsystem, the rear and middle centering ringsare used to form a fin tab cage inside thebody (even though the fin tabs are only1/16" long in this model). But when I sizedup the screw length on the Public MissilesMotor Retainer that I planned to use, Irealized that in order for the rear centeringring to be up against the base <strong>of</strong> thefin tabs, the aft section <strong>of</strong> the motor tubewould have to be limited to 5/16" exposurebelow the 3/16"-thick rear centeringSport <strong>Rocketry</strong> May/june 2010 29
Photo 1. The basic parts for themiddle and outer chambers <strong>of</strong>the baffle, along with the bulkheadparts. From left to the right: thehuge 5.38" x 11" standard coupler;the heavy and rigid 5.25" x 10-7/16"x 1/8" thick coupler stiffener; andthe 10" BT-3.00 tube used as themiddle chamber <strong>of</strong> the labyrinth.Down in front is the 1/4" bulkheadwith the standard 1/4" eye bolt andthe 5/16" eye bolt upgrade.ring. That centering ring would be 1" insidethe rear body tube. That puts the end<strong>of</strong> the motor tube inside the body tube by0.5" (instead <strong>of</strong> flush with the aft end <strong>of</strong> thebody tube). Therefore, the overall length<strong>of</strong> the motor tube required would be 28".The forward (third) centering ring wouldbe epoxied in place 10" back from the forwardend <strong>of</strong> the motor tube. This centeringring would be 5.5" inside the fin can withthe motor tube exposed 4.5" above the fincan (or 1" shorter than the baffle length).See Photo 2.I had the motor tube with the twoworking upper centering rings epoxied inplace (the aft centering ring is not epoxiedin place yet). The part <strong>of</strong> the motor tubethat extended beyond the upper centeringring would form the inner chamber <strong>of</strong> thebaffle. I again dry-fitted the middle andouter tubes <strong>of</strong> the baffle in place to be surePhoto 2. This clearly shows howthe motor tube is designed andplaced in the 24" Minie-Maggbody tube. Note that the 28"38mm motor tube has the uppercentering ring epoxied 10" fromthe end. The upper centering ringis placed 5.5" into the body tube(half the length <strong>of</strong> the 11" coupler).The two lower centering ringswill form the fin tab cage.The aft centering ring is NOTepoxied in place at this time.The motor tube is recessed 0.5"inside the aft end <strong>of</strong> the body tube.all lengths were correct (see photo 3).The next step was to epoxy the motortube into the fin can body tube. I used30-minute epoxy for this assembly. FirstI placed the motor tube in its exact position.I marked the locations <strong>of</strong> the centeringrings from the both the aft and forwardbody tube openings. I wanted to epoxy thearea between the correct positions <strong>of</strong> thecentering rings. I pulled the motor tubepartly out to do the upper centering ringarea first. Then with the tube still partiallyout the back I swabbed the area just abovethe fin tab slot. I pushed the motor mountback in and rocked it in and out to smearthe epoxy in place. I finally placed the motormount in its correct position and leftthe assembly to harden. The reason for allthis jockeying was that I did not want afillet above the upper centering ring thatmight prevent the baffle from seating correctly,yet I wanted a full body/centeringring bond. Photo 4 shows the motormount expoxied in place (the aft centeringring is still not in place at this time).Photo 3. Dry-fit test <strong>of</strong> the baffleparts against the upper centering ring.Looks good at this point.With the motor tube secure in thebody tube I returned to the assembly <strong>of</strong>the baffle itself. I mixed up a large batch <strong>of</strong>30-minute epoxy and quickly swabbed theinside <strong>of</strong> the 5.38 coupler. I finished just asthe mixing dish was getting warm due tothe epoxy begging to set. I set the couplerover the 1/4" bulkhead (as a spacer) andproceeded to push the 8-ounce stiffenertube into its place. It went in stiffly due toPhoto 4. Bottom view <strong>of</strong> the assemblies.At the left is the inner chamber/centering ring assembly. On the rightis the middle and outer chamberstest-fitted together. Note the epoxylayer on inside <strong>of</strong> middle tubechamber to protect the tube.30 MAY/JUNE 2010 Sport <strong>Rocketry</strong>
face <strong>of</strong> the bulkhead a coat <strong>of</strong> 30-minuteepoxy, but I did leave the area clear where Itraced the BT-3.00 tube location because Iwanted that level. I epoxied the inside end<strong>of</strong> the BT-3.00 tube and the center <strong>of</strong> thebulkhead again to just overlap the tracing<strong>of</strong> the tube. I propped up the bulkhead andplaced the middle chamber (BT-3.00) inplace to set. I later went back and epoxiedthe outside <strong>of</strong> this tube and bulkhead joint.I also went over the drill hole area again. Atthis point I had the three major baffle partscompleted: the fin can with the extendedmotor tube; the coupler with the stiffenerreinforcement; and the bulkhead/middlechamber unit. See Photos 4 and 5.With the major parts <strong>of</strong> the baffle doneit was time to test fit the parts. Photo 6shows the outer chamber (coupler) inplace in the forward end <strong>of</strong> the fin can, andthe middle chamber/bulkhead aligned forinsertion. Photo 7 shows all parts <strong>of</strong> thebaffle assembly put together. The partswere sanded as needed to ensure smoothassembly in the next steps.The final assembly <strong>of</strong> the baffle beganAbove: Photo 4. Left to right: Thefin can with the motor mount epoxiedin place with the motor mount tube(inner baffle chamber) extendingout the top; the main bafflechamber (coupler plus stiffener);and the middle baffle tube plusforward baffle bulkhead.Below: Photo 5. Close up <strong>of</strong> the3 baffle parts. Note the couplerstiffener recessed 5/16" into coupler,and the heavy eye bolt with epoxycoverings in bulkhead.Safe HPR motor storage.Shop online at www.usexplosive.comor call us today!866-352-0467Keep it safe by storing yourHPR motors in one <strong>of</strong> ourATF approved explosivestorage magazines. Handbuilt in America to thehighest quality standards.We <strong>of</strong>fer several sizes andtypes at competitive prices.the setting epoxy, but I got it in place andthen removed the bulkhead. I had to wipea little excess epoxy <strong>of</strong>f the bottom end,but most <strong>of</strong> the epoxy stayed inside dueto the loose fit between the coupler andstiffener.Before I put the heavy hardware intothe bulkhead, I traced the position <strong>of</strong> theinner circumference <strong>of</strong> the coupler stiffeneronto the bulkhead. I did the same withthe outer circumference <strong>of</strong> the BT-3.00tube centered on the bulkhead. With thesetwo circles traced on the blank bulkhead,I marked <strong>of</strong>f 12 spots midway between thetwo circles on a 30 degree angle <strong>of</strong> rotation.There I drilled the 12 vent holes forthe gas. I inserted the 5/16" stainless steeleye bolt with a large fender washer on bothsides <strong>of</strong> the bulkhead. I really tighteneddown on the nut to set the unit in place.I gave both sides three coats <strong>of</strong> epoxy. Onthe top side I covered the washer right upto the base <strong>of</strong> the eye. On the underside Icompletely covered the bolt and nut. Whenthis epoxy cured I gave the entire inside®Sport <strong>Rocketry</strong> MAY/JUNE 2010 31
Above: Photo 6. Dry-fit test. The outerchamber is in place in the fin can,and the middle chamber/bulkheadis lined up for insertion.Right: Photo 7. All three pieces dryfitted into the fin can. Parts aresanded as needed to ensure a cleanfit before assembly.by applying a generous amount <strong>of</strong> epoxyaround inside <strong>of</strong> the coupler/stiffener recessededge and about 2" inside the stiffeneritself. I also double coated the previouslytraced face <strong>of</strong> the bulkhead and its circularedge. The bulkhead/middle chamber wasthen placed into the coupler with ease andthe epoxy was allowed to set (see Photo 8).With the upper chambers finished, I wasready to epoxy the whole coupler assemblyinto the fin can. I mixed a large batch <strong>of</strong>30-minute epoxy and filleted the inside <strong>of</strong>fin can and upper centering ring. Workingfast I brushed on the remainder <strong>of</strong> the epoxyall around the inside <strong>of</strong> the body tube.I saved just a little for the recessed area <strong>of</strong>the coupler bottom. With the 30-minuteepoxy starting to stiffen I pushed the baffleinto the fin can down to the centering ring.The baffle was seated to the halfway markthat I had previous marked on it, so I knewit was home against the centering ring bafflebase—and none too soon, as it was immovableat that point. See Photo 9.Photo 9 also shows the last thing I didto the baffle/bulkhead. I filled the 1/16"recessed area in with 30-minute epoxy tostrengthen and protect the forward face <strong>of</strong>the wood bulkhead.It’s interesting to note that the completedbaffle/bulkhead unit (if you includethe 10" <strong>of</strong> extended 38mm motor tube andthe upper (third) centering ring <strong>of</strong> the finPhoto 8. A close uplooking into the upperchambers <strong>of</strong> the baffle.Note the epoxy fillets onthe bulkhead/stiffenerwalls and on the inside/outside walls <strong>of</strong> the middlechamber tube. Note thestiffener recessed a 1/4"into the bottom end <strong>of</strong> thecoupler. The stiffenerwalls are 1/8" thick.can) has a total weight <strong>of</strong> over 24 ounces.This is a dramatic increase over the baffleweights in my earlier 2.56" and 4" models.Of course, the coupler stiffener weighs inat 8 ounces by itself, and the area <strong>of</strong> theparts goes up geometrically. Still, that’s a lot<strong>of</strong> weight—but I did say I wanted a large,heavy model.Before attaching the fins I measured betweenthe fin slots and marked a spot halfway between each fin pair to have a referencefor alignment <strong>of</strong> the adjacent fin. I testfitted each fin and marked the outline <strong>of</strong> itsroot edge on the body. I mixed a very smallamount <strong>of</strong> 5-minute epoxy for each fin andcoated the bottom <strong>of</strong> the fin root and side<strong>of</strong> the tabs. I also placed a small amount onthe body in the fin outline. Working the findown into the slot I aligned the fin with themark across from two opposite fin splits.Before the epoxy set I wiped the joint toremove any fillet material. The fin tabs protrudedinto the body by only 1/16" or so.Another upgrade was to reinforce thefins. After all three fins were set in place Icut six 3/16" dowels for fairings at the fin/body joint. These were cut and shaped tomatch the lengths <strong>of</strong> the root edges <strong>of</strong> thefins. I placed a very large epoxy fillet alongeach fin joint and pushed a dowel into thatepoxy to form a double joint. This reallystiffened up those fins. Later I went backto re-fillet those double joints and laminatethe exposed sides <strong>of</strong> the dowels. See Photo10.One <strong>of</strong> the reasons for the three centeringring system is to be able to epoxyand support the fin tabs behind the rearcentering ring. However, with the Minie-Magg fins, they only go through the body1/16". So to upgrade that I made three32 MAY/JUNE 2010 Sport <strong>Rocketry</strong>
Photo 9. The finished baffle/couplerin the top <strong>of</strong> the fin can. A finallayer <strong>of</strong> epoxy protects the top <strong>of</strong>the baffle bulkhead. Note the largeeye bolt, and the 12 drill holes topass the ejection gas into therecovery section.Photo 10. The fin joints arereinforced with 3/16" wood dowelsas fairings, resulting in a double fillet<strong>of</strong> greater area and increased strength.fender washers, and extra nuts.I put a nut on the 3/8" eye boltand tightened it up to the end<strong>of</strong> threads followed by the regularwasher. This would be theoutside support while the largerfender washer and another nutwould be the inside support.Staying away from the nosecone base and rounded part <strong>of</strong>the shoulder, I cut out a section<strong>of</strong> the side <strong>of</strong> the shoulder <strong>of</strong> thenose cone. This allowed me toplace the washer and nut on theend <strong>of</strong> the bolt inside the nosecone. I tightened down enoughto see the base molding piecejust start to compress. I followedPhoto 11. Close up <strong>of</strong> the aftend <strong>of</strong> the fin can showing thereinforcing details. Notice theends <strong>of</strong> the six dowels along thefin roots. Notice the 4-5/8" x 1-1/4"fin bases over each short 1/16" fintab. There is a generous amount<strong>of</strong> epoxy along the body joints <strong>of</strong>the fins tabs, centering ring, andthe fin tab bases. All joints willbe given another coat <strong>of</strong> epoxyjust prior to the placement <strong>of</strong> therear centering ring.fin tab bases out <strong>of</strong> 1/8" basswood. Thesebases are the full length <strong>of</strong> the fin tabs (4-5/8" long). They are epoxied to the tworear centering rings and the body wall. Iwanted these bases to rest on the fin tabsand the wall <strong>of</strong> the body as a chord <strong>of</strong> thatarc. I used a tooth pick to measure the approximatewidth I would need. The chordacross the fin tab was about 1-1/4" wide. Icut the wood planks at 1-5/16" wide andjust walked each piece in by light sanding<strong>of</strong> two long edges against the body area.Before I epoxied the bases in I marked thecenter length <strong>of</strong> each base. When I test fittedeach base I also marked the body tubeand middle centering ring to see the position.Again with a batch <strong>of</strong> 30-minute epoxyI double sided the fin base plank andthe fin tab area including the centeringring. See Photo 11.To upgrade the nose cone, I epoxied alarge eye bolt in the end molding. The 1/4"eye bolts that came with the Payload kitswere great in the 2.56" and 4" nose cones,but they were lost in the large opening <strong>of</strong>the end molding in the PNC-5.38. So I triedthe extra 5/16" eye bolt that was to be usedon the payload section, but even it was nottight enough. Back to the hardware storefor something larger. I got a 4"-long 3/8"eye bolt with several regular washers, largeGet rocketry sales moving withsportrocketryModel, Mid and High Power <strong>Rocketry</strong>the largest circulating rocketrypublication available!To begin advertising in Sport <strong>Rocketry</strong>, contact:Todd Schweimphone: 715.488.2512e-mail: Sport<strong>Rocketry</strong>@grantsburgtelcom.netSport <strong>Rocketry</strong> MAY/JUNE 2010 33
Medi/Maxi-Magg Concentric 3-Chamber Baffle/Zipperless Bulkhead1/4" Bulkheadrecessed 1/16"GAS28" MMT-1.52 (38mm) 10" inside baffleForwardCenteringRing10" BT-3.00 Body Tube (Middle Chamber)11" TC-5.38 Coupler + STC-5.38 Stiffener (Outer Chamber)Body Tube (24" from Minie-Magg)5.5" (1/2 length) <strong>of</strong> Coupler exposed5/16" Eye Bolt,Nut, 2 FenderWashers12 DrillHoles5/16" dia.this with three coats <strong>of</strong> 30-minute epoxyon the inside <strong>of</strong> the cone. See Photo 12.The three sections <strong>of</strong> the Maxi-Maggare shown in Photo 13. The nose cone isattached to the 20" recovery section withsix screws (you can see the small holes forthe screws in Photo 13). With this recoverysection/nose cone slipped onto the baffle/BORN AGAIN ROCKETSFOR BORN AGAIN ROCKETEERSMEGA-Sized Replicas <strong>of</strong> Many Original <strong>Rocketry</strong> ClassicsUp-Scaled 1.7 to 4.8 the Original Size (Kit dependent)A Set <strong>of</strong> Original Up-Scaled Water Slide DecalsUses 24mm Single and Reloadable EnginesEasy to Follow Step-by-Step InstructionsAuthentic Landing Gear & Nose ConesPrecision Laser Cut Fins & PartsBULLPUPVIPERMore Models onour WebsiteVEGAPhoto 12. The short 5.38" nosecone with a 3/8" x 4.0" eye boltepoxied into the base molding end.Outside are a regular washer and nut,and inside is a large fender washerand nut heavily epoxied in place.Not the opening cut in the shoulderto allow working on the internal parts.coupler <strong>of</strong> the rocket, it is the Medi-Maggconfiguration with a length <strong>of</strong> 57". The additional20" payload section (with its bulkheadin place with another 5/16" stainlesssteel eye bolt) can be added to lengthen therocket into the 77" Maxi-Magg configuration.The payload section also needed sixmatching holes in its coupler for the reten-tion screws to attach it to the top <strong>of</strong> the recoverysection, and six more holes for thescrews that attach the nose cone to the top<strong>of</strong> the payload section.To finish <strong>of</strong>f the rocket, I first re-filletedthe fin/dowel/body joint, put motor retaininghardware on the rear centering ring,epoxied all joints inside the rear fin cage,epoxied the rear centering ring in place,and placed three rail buttons on the fincan and a fourth rail button on the payloadsection. And, <strong>of</strong> course, I still need to finishpainting the Medi/Maxi-Magg.The recovery system consists <strong>of</strong> 25 feet<strong>of</strong> 9/16" tubular nylon, two 1/4" quicklinks, a 9.0 HPR swivel at the point onethird <strong>of</strong> the length from the fin can, and aTop Flight nylon parachute in the range <strong>of</strong>50" to 58". Note that steel 1/4" links havea S.W.L. <strong>of</strong> 880 pounds, whereas the stainlesssteel versions <strong>of</strong> the links are rated at1760 pounds.My calculations indicate that the Medi-Magg requires an ejection charge <strong>of</strong> 3 to 4NIKE-XSNOOPERSTILETTOLaser Cut Tube NotchesRobust Interlocking Engine MountPremium Recovery System IncludedAssembly & Sanding Jigs (Some kits)Industry’s Best Customer ServiceANDROMEDA(518) 827-3107info@qmodeling.comQMODELINGwww.qmodeling.com34 MAY/JUNE 2010 Sport <strong>Rocketry</strong>
Photo 13. The three sub-units <strong>of</strong>the Medi/Maxi-Magg. From leftto right: the fin can with baffle/bulkhead unit; the optional 20"payload section for the Maxiconfiguration (shown upside-down);and the nose cone in the 20"recovery section.grams <strong>of</strong> black powder to ensure reliableseparation <strong>of</strong> the recovery section fromthe fin can. It is necessary to include theconsiderable volume <strong>of</strong> the baffle alongwith the volume <strong>of</strong> the recovery section itselfwhen calculating how much charge isneeded. While I was trying to figure out away <strong>of</strong> using this much black powder witha standard reloadable motor (which onlyholds about 2 grams in its ejection chargewell), AeroTech solved my problem withtheir new 38mm Reload Adapter System(P/N 38RAS) and its deeper ejection chargewell. I’m told that the ejection well <strong>of</strong> the38RAS can hold up to 4 grams <strong>of</strong> blackpowder, so it would be perfect for the 3-4grams needed for my Medi/Maxi-Magg.Along these lines the final rocket in thisseries was to be the Warlock outfitted withthe baffle/bulkhead and the 30" recoverysection for a total length <strong>of</strong> 82". Almost allthe design would be the same as the aboveMagg combo. It probably would need a6-grain motor, maybe the I600R or a J motorfor Level 2.The FullBoost Handheld LaunchSystem gives you a palm-sized12 volt ignition system that will fireany igniter. 8 AA alkaline batteriescome with the system, and areeasily replaced on the field withno tools. The 25-foot cable usesaudio jacks, so extension cordsare easy to make or buy. Thetransistorized continuity circuitsounds a buzzer when the circuitis complete, and is safe with anylow-current igniter.www.pratthobbies.comSport <strong>Rocketry</strong> MAY/JUNE 2010 35
The Cato ChroniclesThe Great TARCMigrationThere are many examples <strong>of</strong> migrationin nature. Moose migrate across the Arcticin search <strong>of</strong> food and mates. Salmon spendtheir lives in the Atlantic or Pacific Oceans,only to return to the rivers where they werespawned to lay eggs and die. Swallows returnto the Capistrano Mission in San Juan,California, on or around March 19 <strong>of</strong> everyyear. And model rocketry has its own migrations,with one <strong>of</strong> the largest being theGreat TARC Migration every spring.In the fall and winter <strong>of</strong> the year, it’s notunusual to see the odd teenager or two atlaunches (and let’s face it, most teenagersare odd), but they’re almost never seen inlarger numbers. However, with the lengtheningdays <strong>of</strong> spring come the TARC teams.At first only one or two teams show up, ledby adults who struggle valiantly to keepsome semblance <strong>of</strong> order in the group. Butas the deadline for qualified flights drawsnear, more and more teams arrive, until theflying field is overrun by these newcomers.You see strange hats worn at all sorts<strong>of</strong> odd angles, colorful but mismatchedclothing, and baggy pants that are hangingso low that several inches <strong>of</strong> underwearcan be seen. But the TARC teams seemnot to mind the way that the older rocketeersare dressed. They just chatter amongthemselves, wandering around the flightline,and occasionally manage to launch arocket.Almost every TARC team has certainindividuals in it. First is the adult super-by Leslie Houk NAR 58525visor or mentor, who is easily recognizedby his constant nervous twitches, strainedvoice, and wild staring eyes. In all honesty,dealing with the average group <strong>of</strong> teenagersis stressful enough to begin with,and adding flammablemodel rockets to the mix has causedthe most hardened <strong>of</strong> individuals to have anervous breakdown.Second are the nerds, who probablygot their school interested in the TARCprogram to begin with. They will be wearingT-shirts with pictures <strong>of</strong> Japanese cartooncharacters, quotes from little-knowncult motion pictures, or obscure technical“jokes” that only make sense to computerprogrammers. Sometimes they are modelrocketeers, but sometimes they are computernerds who don’t know which end<strong>of</strong> a motor the igniter goes in. They willbe the ones doing all the actual work <strong>of</strong>launching the rocket.Next are the kids who were ordered toattend by their teachers, guidance counselors,or parole <strong>of</strong>ficers. They will be wearinghoodies in 90+ degree weather, willhave multiple piercings, and their shirtswill <strong>of</strong>ten have language printed on themthat can’t be repeated in a family magazine.They don’t want to be there, they’re certainthat they are much cooler than anyoneelse there, and they’re useless at getting anywork done for the team. They usually windup later in life becoming politicians.Incidentally, you can always tell a newteam that has never actually launched amodel rocket before. They’re the ones thatbelieve the computer simulations they’verun are infallible, and don’t understandthat “marginally stable” means that youcan’t fly your rocket in a 40 mph wind.Their rockets tend to have little stubs forfins, and they’re always surprised whentheir rockets cartwheel across the sky inthe slightest breeze.But all migrations eventually come toan end, and the TARC migrations are nodifferent. After the TARC cut<strong>of</strong>f date, allthe teens mysteriously disappear. Wherethey go, no one can say. Some say they flysouth for the winter, while others claimthey ride the Gulf Stream currents to theirsummer mating grounds, but both <strong>of</strong> theseare only likely for those whose parents arewealthy enough to send them. All the restdisappear to realms unknown when theshortening days signal the beginning <strong>of</strong>autumn. The launch ranges are left to theadults, who return to their timeless routines<strong>of</strong> prepping, launching, and retrievingrockets. They wait patiently for the seasonsto turn, and for the spring to heraldthe upcoming return <strong>of</strong> the young in nature’seternal dance <strong>of</strong> life.But there are always a few teams whosemembers absorb the knowledge and havethe skills to make a serious bid for the prize.Their model flies well, and they develop anenthusiasm for model rocketry that carriesover after TARC is done. They become regularsat launches, and start winning competitions.It’s very annoying.This column is based on an idea byAndy Eng.36 MAY/JUNE 2010 Sport <strong>Rocketry</strong>Sport <strong>Rocketry</strong> MAY/JUNE 2010 36
F L Y I N GFAIby Pat ButlerThis article discusses how you can enjoyflying FAI-style rockets in the easiest way possiblewithout having to be a hard core FAI flieror having a license from the FAI organization.Recent changes to the NAR Sporting Code(aka Pink Book) allow for NAR contest eventsto be held using FAI-style rockets withouthaving to be sanctioned by the FAI (FederationAeronautique International).FAI-style rockets are built using constructionmethods and materials that are generallydifferent from what you would use for a typicalNAR contest rocket. <strong>Building</strong> FAI-style rocketsallows you to learn new skills that are verymuch transferable to building regular contestrockets. You can have the flexibility <strong>of</strong> competingin new types <strong>of</strong> contest events alongwith learning new skills, and that’s a big part<strong>of</strong> what makes rocketry fun and interesting.Ease Your Way intoFAI-Class FlyingCompeting in actual FAI-sanctionedevents, as opposed to NAR-sanctioned events,requires that the participant obtain an FAISporting License. Getting a license is actuallyan easy and inexpensive process. But let’ssay that you are interested in flying these neatlooking rockets and learning new skills buthave no desire to compete in actual FAI-sanctionedevents. That’s what the changes to thePink Book allow you to do.In 2008 the Pink Book was changed in orderto add an FAI motor class to the followingevents: altitude competition, parachute dura-James Duffy’s Little Joe I blasts<strong>of</strong>f at the U.S. team tryouts.Sport <strong>Rocketry</strong> MAY/JUNE 2010 37
FAI Sporting Code, Section 4, VolumeSM Space Models for that event. First,the minimum length <strong>of</strong> the enclosed airframe<strong>of</strong> the model must be 500 millimetersand at least 50 percent <strong>of</strong> thisairframe length must have a minimumdiameter <strong>of</strong> 40 millimeters in the launchconfiguration. Second, in events wheremulti-staging is allowed the boosterstage must deploy a recovery device, theupper stage must be at least 18 millimetersdiameter over at least 75 percent <strong>of</strong>Two Japanese S9 gyrocopter modelsat the 2008 World SpacemodelingChampionships.Photo by George Gassaway.The main intent <strong>of</strong> the aforementionedrequirements is that is forces the airframeto be quite large in diameter (40mm) forthe majority <strong>of</strong> its length. This helps keepsthe performance level <strong>of</strong> these lightweightrockets in a range that allows for easiertracking and recovery. Conforming tothese guidelines needn’t be a complicatedprocess. You only need to obtain a mandrelthat is machined to these specifications,and then you can forget about the math.Other than that, the streamer requirementsare just a little different. One <strong>of</strong>the sections <strong>of</strong> the Pink Book is titled“Summary <strong>of</strong> Changes.” You can checkout this section to see where it referencesthe FAI changes to the SportingCode from the 2006-2007 RCP cycle.Kevin Kuczek readies his rocketglider at the 2008 WSMC.Photo by George Gassaway.tion, streamer duration, helicopter duration,and boost glider duration. Nowsections can host NAR contests withthese FAI class events.What is DifferentAbout FAI Flying?One <strong>of</strong> the more notable differencesbetween regular NAR contest eventsand those NAR events in the FAI classis the design <strong>of</strong> the rocket’s airframe.The requirements for the design <strong>of</strong> theairframe are covered in Part 1.13 <strong>of</strong> theNAR Sporting Code states. The relevantsection states, in part:“Models flown in the FAI class <strong>of</strong> an event,except for Boost Glider (*), must comply withthe following construction requirements <strong>of</strong> thethe upper stage length, andany boat tails on that stagemust be at least 18 millimetersin diameter.”Esther Clark ready to fly S6Astreamer duration.NAR Sanctioned Regional CompetitionThis is a dual competition with both NAR and FAI sanctioned events.S1B- B altitude- flown using NAR approved electronics altimeters.S3A- A parachute duration- multi-round with unscheduled rounds.S4A- A boost glider duration- multi-round with scheduled roundsS6A- A streamer duration- multi-round with scheduled rounds.S9A- A helicopter duration- multi-round with scheduled rounds.Contest Director Tony Reynoldstonyr@spacemodeling.orgwww.spacemodeling.org/GreatLakesCupOn-Site Coordinator is Pat Butlerpat@appraisalservices.comwww.isar-rocketry.comWhat’s the Easiest Wayto Compete for theFirst Time?Many first time competitors in the FAIclass <strong>of</strong> events actually end up buying prebuiltairframes. One source for these airframesis Venus <strong>Rocketry</strong>. Mark Petrovich,owner <strong>of</strong> Venus <strong>Rocketry</strong>, takes pride inproviding a low cost kit for building yourfirst FAI-style rocket. His kits include a premadeairframe along with all <strong>of</strong> the neededparts and detailed instructions to complete38 MAY/JUNE 2010 Sport <strong>Rocketry</strong>
JULY/AUGUST 2009your first rocket. See the information sectionat the end <strong>of</strong> this article.The other obvious way is to actuallybuild the airframe from scratch. Detailedinstructions for doing so were included inan excellent article by Trip Barber in theMay/June 2007 issue <strong>of</strong> Sport <strong>Rocketry</strong>. Youcan use tracing paper in lieu <strong>of</strong> fancy fiberglasstechniques if you want a very simple,inexpensive, and fast way to construct anairframe.One common difficulty with makingyour own airframes is in initially obtaininga mandrel to form your airframes around.Trip’s article shows the dimensions <strong>of</strong> thevarious mandrels that you may need andit’s pretty easy to find a machine shop toturn a mandrel for you. The cost is typicallyaround $100 or so. Another optionis finding another NAR member who hasa mandrel that you can borrow. A number<strong>of</strong> NAR members have done bulk orders<strong>of</strong> mandrels over the years and quite a fewpeople have them. Every so <strong>of</strong>ten the opportunityto buy a mandrel as part <strong>of</strong> abulk order comes up. If you start to becomeactive in some Internet forums you’lllikely find a source for a mandrel withoutmuch difficulty.Pat Butler prepares his S6 streamermodel at the 2008 WorldSpacemodeling Championships.Photo by George Gassaway.What Can I Learn?<strong>Building</strong> FAI-style rockets allows youto become pr<strong>of</strong>icient in fiberglassing techniques.Having fiberglass layup skills allowsyou to create virtually any sort <strong>of</strong>shape for other rockets, especially scalerockets. You’ll also learn to push the limitson how light you can go with some materialsand this skill will assist you with buildinglighter weight rockets for the more typicalNAR contest events.Some FAI fliers end up getting intovacuum-bagging and vacuum-formingtechniques. You can use vacuum-baggingtechniques to apply thin layers <strong>of</strong> compositematerials such as fiberglass and Japanesetissue. Vacuum-forming techniquescan be used for forming nose cones andother small parts for scale rockets.It’s important to note that these advancedtechniques are not required skillsthat you need in order to get started flyingFAI-style rockets.What is the Effect <strong>of</strong>These Changes?The recent Pink Book changes allowfor a contest format that includes NARsanctionedevents that are held simultaneouslywith FAI-sanctioned events.One such competition was the CapitolCup Competition that was held in ThePlains, Virginia, during each <strong>of</strong> the lastTransition Seriesinterrogator GStep itup aLevelThe Sirius <strong>Rocketry</strong> Interrogator Gflies comfortably on F and G motorsand it’s ready with all the extraswhen you want to step it up a levelto Level 1 H-motor flights!Visit our website for more details onthese and other exciting rocket kits totake your fun to the next level. Also findan ever-expanding line <strong>of</strong> rocket motors,chutes, adhesives, parts, accessories,space-related plastic models, and more atour web store to order direct online! It’stime to get serious about rocketry!Since 1998, it’s been Sirius <strong>Rocketry</strong>-For the Serious Rocketeer!www.siriusrocketry.com35 1Build AHigh PoweredRocket GPSRecovery SystemNARCON 2009Coverage<strong>Building</strong> thePhantom 2008$4.95 Canada $6.95Photos by Steve JurvetsonGreat reasonsto join the NAR!EXciting Local Clubs■ Proven <strong>Rocketry</strong> Experts■ 100’s <strong>of</strong> Launches Nationwide.■ Wonderful FriendsSport <strong>Rocketry</strong>■ Unique “How To” Articles■ Electrifying Launch Coverage■ Stunning Rocket Plans■ Six Great Issues AnnuallyHigh PowerCertification■ Monster Rocket Motors■ Superior Vehicles■ Awesome AchievementVisit www.nar.org to become a member today!Sport <strong>Rocketry</strong> MAY/JUNE 2010 39
My First Capitol Cupby Caleb Boe NAR 83769Capitol Cup was a great event. This was my first time,and I had a lot <strong>of</strong> fun. I flew in three events: streamer, boostglide, and gyrocopter. Boost glide and gyrocopter are mychosen events for the World Championships, but I flewstreamer to try for some extra points.This was my first experienceflying to a rocket eventand taking everything withme on the plane. This wasalso my first time flying somewherealone. I flew to Chicagomyself and met Pat Butlerfor the flight to Virginia. Afterarriving in Virginia on Fridayafternoon, we spent the rest<strong>of</strong> the day purchasing itemsthat we could not take on theplane, assembling rockets,and getting things ready forSaturday.Despite the not so perfect weather on Saturday, I managedto get two streamer flights in. My first streamer flight<strong>of</strong> the day, landed in a cow pasture with “No Trespassing”signs, a barbed wire fence, and mean-looking cows.I decided to try to get the second flight back instead <strong>of</strong>this one. In an attempt to return the rocket, I attached theshock cord such that the model will descend vertically instead<strong>of</strong> horizontally. But to my surprise, it caught a thermaland drifted away.Sunday was a beautiful day for flying rockets. Boostglide was originally scheduled for Saturday, but waspushed to Sunday because <strong>of</strong> the weather. Boost glide andgyrocopter were now scheduled with one-hour overlappingrounds for Sunday morning. I was constantly busytrying to get a flight up every half hour. I barely had timeto watch my models descend. Both <strong>of</strong> my boost glidersdrifted away. Even if I could see where they landed, therewasn’t time to recover them. This seemed to be the casewith most fliers, since it was fairly breezy. In gyrocopter,my first flight drifted a little ways, but I didn’t have time torecover it since I had to prep my next boost glider. As I wasprepping my boost glider, Mrs. Berk found my gyrocopterwhile looking for her son Matthew’s rockets. I was verygrateful to have this model back so I could make a thirdflight in gyrocopter.It was a busy morning, but it was good practice workingunder pressure. After the flying was over, the medal ceremonystarted. There were medals handed out for both theNAR competition and the FAI competition. I was shockedto learn that I had three golds in the NAR competition, onebronze in FAI, and one gold in FAI. I was speechless whenI received the gold FAI Junior Champion medal.I enjoyed the competition experience. The experiences<strong>of</strong> competing under the pressure <strong>of</strong> time and taking all <strong>of</strong>my equipment will benefit me in Serbia next year. I had agreat time at Capitol Cup and am looking forward to theWorld Championships next summer.three years. It was a dual contestwith NAR members flying sideby-sidewith other NAR memberswho held an FAI license. Awardswere given out in each category.This sort <strong>of</strong> setup allows you toenjoy FAI type <strong>of</strong> events withouthaving to be a hard-core FAI com-Above: Steve Foster makingadjustments to his RC gliderat the 2008 Capitol Cup.Left: Alyssa Stenbergat the 2009 tryouts.Ryan Woebkenberglanded his S8 RCglider very closeto the target spot.40 MAY/JUNE 2010 Sport <strong>Rocketry</strong>
petitor and it affords you the opportunityto compete against the U.S. SpacemodelingTeam members and others who are enteringthe contest with an FAI license.Where Can I Get MoreInformation?There are a variety <strong>of</strong> informationalsources pertaining to FAI-style rockets.The first step is to join the NAR_FAI_Spacemodelinggroup on Yahoo Groups. This isa group open to anyone and is comprised<strong>of</strong> many experienced FAI fliers who cananswer your questions.I had previously mentioned Trip Barber’sarticle in Sport <strong>Rocketry</strong> as the bestsource for detailed construction techniques.Trip has also conducted variouseducational sessions at NARCON for anumber <strong>of</strong> years. Check out the schedulefor future NARCONs for more details.Venus Model <strong>Rocketry</strong>’s website is atwww.venusrocketry.com. The best way toget started is to buy one <strong>of</strong> Mark’s 40mmSpacemodeling kits with a pre-made airframeso that you can start flying rightaway.The U.S. Spacemodeling Team fly<strong>of</strong>fsDon’t Let YourInvestmentHit The Ground!Let Us Supply YourRecovery ParachutesThese government surplus flareparachutes are made <strong>of</strong> ultrareinforced, white rip-stop nylonwith flat-braided shroud lines.Reasonably Priced!Easy To Dye!• 60” Diameter• 4” Center Hole• 12 Panels/Shroud LinesSupplies Are Limited.Contact Us At:H & H EnterprisesP.O. Box 924 Atlanta, TX 75551www.h-h-enterprises.comMoney orders, Credit Cards, and PayPalaccepted.2142010are held every other year at NARAM andwill be held the next time in 2011. That isa great place to actually see FAI-style rocketsup close and to get your questions answeredby experienced fliers.2NARAMNSL 2010 –<strong>National</strong> Sport Lauchgreat <strong>National</strong>rocket launchesevery year!■ Rockets, Rockets, Rockets -From A to M Powered!■ 100's <strong>of</strong> Flights Every Day WithFliers From Around the Country.Greg Stewart examines aBritish flop-rotor gyrocopterat the 2008 WSMC.Photo by George Gassaway.Finally, consider attending the GreatLakes Cup in Oswego, Illinois, as either acompetitor or spectator. Actually watchinga contest using FAI-style rockets is one <strong>of</strong>the best ways to learn something.2010 –national association<strong>of</strong> rocketry annual Meet■ Competition/Sport Flying All Week.■ Mind-Blowing Models and Flights.Photos by Steve JurvetsonVisit www.nar.org to become a member today!Sport <strong>Rocketry</strong> MAY/JUNE 2010 41
A Message from theNAR Presidentby Trip Barber, NAR 4322,NAR PresidentReaching OutThe key to the long-term survival <strong>of</strong>any activity or organization is to have atleast as many people joining it each yearas are departing. This is true <strong>of</strong> our hobbyand <strong>of</strong> our NAR. <strong>Rocketry</strong> is a hobby,something that people pursue if theyenjoy doing it and if they enjoy beingaround the other people who do it withthem. In order for our hobby and ourNAR to thrive, we need to convince a lot<strong>of</strong> people each year that rocketry is a funactivity that they can do safely, and thatthose <strong>of</strong> us who do it are good people tobe around. This convincing is called “outreach.”There are many ways to do it, andall <strong>of</strong> them are good.The most serious form <strong>of</strong> outreach iscalled “paying forward,” organized programsdesigned to convince young peoplethat aerospace is a rewarding career fieldand that a serious pursuit <strong>of</strong> sport rocketryis a great way to get into that field.This form <strong>of</strong> outreach is a valuable contributionto maintaining America’s globalleadership in aerospace. The NAR doesthis well, with our Team America <strong>Rocketry</strong>Challenge program being the bestexample. There are a number <strong>of</strong> othersignificant, well-organized student rocketryprograms in operation across the U.S.ranging from the “Rockets for Schools”program by Bob and Carol Lutz in Wisconsin;to the “SystemsGo” program createdby Brett Williams in Texas; to IvanGalysh’s national CANSAT competition;to the U.S. Air Force Civil Air Patrol rocketryprogram. Behind each <strong>of</strong> these programsis a team <strong>of</strong> dedicated volunteersdetermined to reach out to teenage studentsand inspire their career choices withthe fun and thrill <strong>of</strong> rocketry. The paybackhere is clear and measurable; the studentsthat this outreach influences move on tocollege and major in aerospace-relatedfields.At younger grade levels, outreach programstake on a more informal and localtone. Here volunteers, youth group leaders,and pr<strong>of</strong>essional educators use rocketswith smaller groups <strong>of</strong> young peopleas a tool to illustrate basic principles <strong>of</strong>physics with a light touch <strong>of</strong> science, alittle craftsmanship practice, and a heavydose <strong>of</strong> “whoosh” for fun. Rockets areused in thousands <strong>of</strong> classrooms acrossthe U.S., in the Boy Scout Space Explorationmerit badge program, and in clubsand State Fair projects and competitionsby our national partners in 4-H. ManyNAR sections and individual volunteersrun “build and fly it” sessions with groups<strong>of</strong> grade school students or Scouts. Thisform <strong>of</strong> outreach exposes young peopleto our hobby, and hopefully this exposurewill entice them to either pursue it moreseriously in later grade levels or returnto it as youth group leaders or teacherswhen they grow up. It is hard to measurethe payback here, but for many <strong>of</strong> us thathave stayed with the hobby for a lifetimethe engagement started through an informalactivity such as this. SMASH sectionin Michigan won NAR national recognitionfor “Best Section Outreach” for 2009with an amazing variety and quantity <strong>of</strong>this type <strong>of</strong> outreach program.A third form <strong>of</strong> outreach is publicdemonstrations and displays. These rangefrom rocketry flight demonstrations atmajor public events such as air shows orcommemorations <strong>of</strong> historical aerospaceevents, to display booths at State Fairs ormajor museums, to simple public demonstrationlaunches run by local NAR sectionsin cooperation with hobby stores orsimply on their own as a public serviceto their communities. Our biggest NARsections almost all have some significantinvolvement in activities like this, rangingfrom FLARE section in New Mexico’sApollo Commemoration launches at theAlamogordo Museum <strong>of</strong> Space History toNOVAAR’s annual Space Day booth insidethe <strong>National</strong> Air and Space Museum. Thistype <strong>of</strong> outreach is particularly effective inreaching adult audiences.Outreach activities alone do not automaticallylead to good things for thehobby, for your section, or for the NAR.Obviously they have to be done well anddone safely, and if so then they will leavea good impression. But good impressionsdon’t necessarily lead to people makingthe decision to try the hobby out or joinyour section or the NAR; it takes somesalesmanship to close the deal. Here aresome guidelines on what “salesmanship”is all about when you are doing one <strong>of</strong>these outreach events.• Don’t be shy about saying what sectionyou are from, or about the fact thatyou are a member <strong>of</strong> the NAR. Say iton the public address system if you areusing one.• Have simple, inexpensive paper handoutslisting your section’s next event,contact information, and website.Make sure everyone who seems even alittle interested gets one.• Have some color NAR brochures (availablefree from NAR headquarters)to give those who seem to be reallyinterested.• Focus on the parents <strong>of</strong> the youngpeople who seem interested, to convincethe parents that this is a safe andeducational activity that is not difficultor expensive to get into and is fun forthe whole family.• Emphasize the fun and challenge <strong>of</strong> thehobby to adults, and show them some<strong>of</strong> the more complex or larger rocketsthat they might build and fly.• Make newcomers to your next activitywho are there as a result <strong>of</strong> your outreachfeel welcome; talk to them, andhelp them fly if it is a launch. Peoplewho do not have a personal interactionat their first rocketry event are unlikelyto try it again.Outreach is what will keep our hobbyand our NAR alive. Craftsmanshiphobbies are not as popular today as theywere in years past, but our hobby <strong>of</strong>fersthe thrill <strong>of</strong> flight and the excitement <strong>of</strong>the “whoosh” and still ignites dreams andimaginations. We have a great story to tellabout what we do and who we are, soreach out and tell it!42 MAY/JUNE 2010 Sport <strong>Rocketry</strong>
NARTSNewsNew shirt color,new pins,new book!In stock for summer! The newestcolor <strong>of</strong> the famous NAR polo/golf shirt! Now available in sizes frommedium to 3XL, these handsome steelgrey quality polo shirts with the redNAR logo and the wording “<strong>National</strong><strong>Association</strong> <strong>of</strong> <strong>Rocketry</strong>” spelled outnext to it are in stock now!Also ready for summer are our NARsunblock hats with the NAR logo onthe front. These Adams Extreme hatshave everything from a sweatband to ahidden pocket in the flap. You can onlyfind these great summer time productsat NARTS, your source for all NAR logowear! Log on today to see what we’vegot in stock, at nar.org. Click on “NARProducts.”I’ve heard the requests from HighPower <strong>Rocketry</strong> fliers too! HPR LevelCertification pins for all three levelsare back! These pins were sold outover 2 years ago, but we’ve been ableto make a re-design and produce more<strong>of</strong> them! Show your pride in the NAR!We have c<strong>of</strong>fee cups, member pins,patches, shirts, logo pins, hats, andmuch more.NARTS remains your best placefor books! The latest book regardingrocketry, Seize the Sky, by Mario Purdue,is in stock and ready to ship. Alsoin inventory are the hardback Rockets<strong>of</strong> the World and all <strong>of</strong> the ROTWSupplements. We are your source forthe Peter Alway publications <strong>of</strong> 14 U.S.Army Missiles <strong>of</strong> the Cold War and 12Soviet Missiles <strong>of</strong> the Cold War. Doyou have model rocketry mastered?Get your start in the upper end <strong>of</strong> themotor spectrum with Modern HighPower <strong>Rocketry</strong>, Second Edition. Goto our web site to order these booksand see everything we have to <strong>of</strong>fer!Do something for summer withNARTS! At nar.org, click on the link toNAR Products.NAR MemberServicesAccess to NAR programs and materials isas close as your computer! Any time youneed information on launches, clubs,certification, or any other NAR memberprogram, simply visit the NAR website athttp://www.nar.org. And we’ve includeda brief list <strong>of</strong> the most popular NAR serviceprograms for you here!Need to find your next NARsponsored sport or contest launch?Visit “Launch Windows” at:http://www.nar.org/NARcalend.shtmlWant to get connected to a localNAR club? Use our “Club Locator”by selecting your state at:http://www.nar.org/NARseclist.phpNeed to find the procedures andforms for NAR High PowerCertification? Visit:http://www.nar.org/hpcert/index.htmlLooking for the <strong>of</strong>ficial NARContest Rule Book? Try:http://www.nar.org/pinkbook/Did you experience an EngineMalfunction? Help us catalog andprevent those by going to:http://www.nar.org/NARmessform.htmlNeed to get some “EducationResources” for your school or youthgroup? There’s a library <strong>of</strong> those at:http://www.nar.org/teacher.htmlNeed an NAR Form orInformational Resource?They’re in our Filing Cabinet at:http://www.nar.org/cabinet/index.shtmlDo you want to contact anNAR Committee or volunteer?Try the Contacts Directory:http://www.nar.org/NARadmin.htmlStill Stumped? Contact NAR HQ!by phone: 800-262-4872email: nar-hq@nar.org.Join the largestModel rocketryorganization1in America today!<strong>National</strong> <strong>Association</strong> <strong>of</strong> <strong>Rocketry</strong>by Steve Jurvetson■ 1,000's <strong>of</strong> rocketry enthusiastsacross the country that will helpyoU become a better flier.■ Electrifying Clubs—rocketrytaught as a educational, safe, hobby.■ Every member receives the NARMember Guidebook—a greatway to get started in rocketry.■ Save hundreds <strong>of</strong> dollars byusing the Vendor Couponseach NAR member receives.Visit www.nar.org to become a member today!Sport <strong>Rocketry</strong> MAY/JUNE 2010 43
Rocket News & New ProductsFlisKitsFlisKits is proud to announce our twonewest scale kits, both released to commemoraterocketry pioneer Robert H.Goddard and the 2010 <strong>National</strong> <strong>Association</strong><strong>of</strong> <strong>Rocketry</strong> Convention (NARCON)!Our first new kit is the “Nell,” a 1/2.5 sportscale replica <strong>of</strong> Goddard’s first liquid fueledrocket! Never before <strong>of</strong>fered in kit form, theNell is among the most significant rocketsto have ever flown! Standing over 50" talland powered by an 18mm motor, this isa must have for any serious scale or historybuff! Also available is the L-13, a 1/5.5sport scale model <strong>of</strong> Goddard’s highest flyingrocket, launched in 1937. This BT-60based, 18mm model is a simple build anda simply beautiful model <strong>of</strong> this very historicvehicle. Both the Nell and L-13 kitsare available for purchase now! For moreinformation, contact: FlisKits, 6 JenniferDrive, Merrimack, NH 03054. Web: http://fliskits.com.AeroTechThe Tripoli Motor Testing Committee(TMT) <strong>of</strong> the Tripoli <strong>Rocketry</strong> <strong>Association</strong>(TRA) has certified one new single-usehigh-power motor and three newhigh-power reload kits using AeroTech’sunique and exciting new “sparky” propellant,dubbed Metalstorm. The new motorsinclude the 29 x 124mm single-useHP-G75M, which will be sold in 4, 7, and10 second delay times, and three RMSreload kits, the 38/360 H170M-14A, the38/720 J340M-14A and the 54/1706K540M-14A. The reload kits fit AeroTech,Rouse-Tech, and Dr. Rocket RMShardware, and the single-use HP-G75Mwill power most popular 29mm-capablekits and all <strong>of</strong> AeroTech’s mid-power kits.The G75M designation includes the “HP-”prefix in anticipation <strong>of</strong> proposed <strong>National</strong>Fire Protection <strong>Association</strong> (NFPA) codelanguage which will classify all sparkymotors, including G class and smaller, as“high-power”, requiring NAR or Tripoliuser certification for purchase and use.Metalstorm is AeroTech’s latest propellantdesigned for its single-use and RMSreloadable motors. It has completely differentvisual, audible, and performancecharacteristics than the other sparky pro-Please send your news to: James Duffy116 Rosebud Lane, Georgetown, TX 78628Phone: 512.930.0708 E-mail: jduffy@mac.compellants currently on the market. Metalstormignites easily and produces a large,brilliant white exhaust plume, a much longeryellow-orange dense spark tail, plentifulwhite sparks that fan out in flight andan ample volume <strong>of</strong> white smoke. As withall rocket motors using spark-generatingpropellants, special precautions must betaken to avoid fires around the launchpad by clearing the immediate area <strong>of</strong> allcombustible materials in accordance withapplicable fire and safety codes. For moreinformation, contact: AeroTech ConsumerAerospace Division, RCS Rocket MotorComponents, Inc., 2113 W. 850 N. Street,Cedar City, UT 84721. Web: www.aerotech-rocketry.com.EstesIndustriesNARAM-52 Event Director Mike Konshakhas announced the availability <strong>of</strong>a commemorative edition <strong>of</strong> the famousEstes Satellite Interceptor, complete withNARAM-52 markings! These sealed andnumbered kits will be distributed free toevery competitor or sport flier that registersfor NARAM in advance <strong>of</strong> May 31,2010, and will be assigned matching numbersin the order that payment is received.The earlier you register and pay, the loweryour kit number will be!NARAM-52 pre-registrants will pickthese up at the registration table at theNow Available!Rockets <strong>of</strong> the World, Volume 4 is available through NARTS!44 MAY/JUNE 2010 Sport <strong>Rocketry</strong>Rockets <strong>of</strong> the World is the definitive work for all scale modelers. It is packedwith over 125 rockets from around the world. Rockets such as Gemini-Titan II,Terrapin, Mercury-Redstone, Atlas-Centaur, Block 2 Saturn 1 are included. Eachrocket is complete with its history, scale drawings, and rare photographs.Rockets <strong>of</strong> the World is hard bound, 384 pages.ONLY $30 00PLUS $9.00 SHIPPINGAND HANDLING.FOR MORE INFORMATION, GO TO: https://blastzone.com/nar/narts/
Rocket News & New ProductsPlease send your news to: James Duffy116 Rosebud Lane, Georgetown, TX 78628Phone: 512.930.0708 E-mail: jduffy@mac.comhost hotel or on the field. Each registrationpacket will be marked with the number (ora coupon provided), which they will useto get their kit from an on-site Estes representative.There will be a limited quantity<strong>of</strong> kits that will be produced by Estes,and extra kits not assigned to the contestantsmay be purchased later at the Estespavilion. For more information, visit theNARAM-52 website at www.naram.org.Essence’s ModelRocket ReviewsEssence’s Model <strong>Rocketry</strong> Reviews ispleased to announce their sixth annualEMRR Challenge. Towards the end <strong>of</strong>2009 EMRR was so busy it seemed likethey needed to split themselves in two.The 2010 EMRR Challenge will help youappreciate that feeling and have twice thefun! Milestones such as “Two at Once” and“Two on One” are just two <strong>of</strong> steps to reachfor the gold! The Challenge is designed toprovide rocketeers with some milestones toachieve throughout the year with the opportunityto win some fantastic prizes. Butwait, there’s more! Additional bonus prizesare available for those that participate in the2010 “Spaceship Design Contest.” The primarysponsorship comes from ARA Press.The top three winners will receive a selection<strong>of</strong> their choice from ARA’s line <strong>of</strong> excitingrocketry related books. Other prizesinclude rockets from Art Applewhite Rockets,Sirius <strong>Rocketry</strong>, Fliskits, and SpaceCAD. EMRR has focused this spaceshipchallenge on the “Future <strong>of</strong> Space Travel.”For more information, visit the Essencewebsite at www.rocketreviews.com.Mad Cow<strong>Rocketry</strong>Laguna Woods, California, USA – Madcow<strong>Rocketry</strong> is proud to announce twonew additions to its Lightweight FiberglassRocket Kit Series. The new releases includea scale 2.6" Patriot and a 2.6" HawkMIM-23B.These kits feature lightweight fiberglassnose cones, fiberglass tail cone (Hawkonly), G10 airframes, motor tubes, fins,and centering rings, and a cut vinyl decal.The recovery system, which includes arip-stop nylon chute and flamepro<strong>of</strong> chuteprotector, is optional for fliers who alreadyown these items and want to save somemoney.All Madcow <strong>Rocketry</strong> kits are highquality, easy to build and fun to fly. Formore information, concact: http://www.madcowrocketry.com.launch!your PASSION FOR<strong>Rocketry</strong> today!NameAddressCity State ZipApplication DateDate <strong>of</strong> BirthCharge to: Mastercard VISACard Number:Expiration Date: New Membership Renewal Member # Teacher Section # HP Certification #Membership Category - check one only: JUNIOR (ages 15 and under) .................................... $25.00 LEADER (ages 16-20) ........................................... $25.00 SENIOR (ages 21 and older) ..................................... $62.00These prices include $2,000,000 liability insurance.MEMBERSHIP OPTIONS FIRST-CLASS POSTAGE for Sport <strong>Rocketry</strong> (US only) .................. $17.00 FOREIGN MAIL for Sport <strong>Rocketry</strong> (Canada/Mexico) .................. $ 15.00 FOREIGN MAIL for Sport <strong>Rocketry</strong> (Foreign/Overseas) ................. $ 30.00Total:CUV2/CLC2 code: I pledge to conduct all my model and high powerrocketry activities in compliance with the applicableNAR Safety Codes: Model Rocket Safety Code, HighPower Safety Code and Radio Control Rocket GliderSafety Code.XYour signature is required for processing <strong>of</strong> application.Family Membership: One family member joins at full price; others deduct $12 (one magazineper family). Rights, privileges, and responsibilities <strong>of</strong> membership begin upon acceptance<strong>of</strong> this application by the NAR. Prices and services subject to change without notice.Visit www.nar.org to become a member today!Sport <strong>Rocketry</strong> MAY/JUNE 2010 45
SR Marketplaceto find a rocketlaunch in your area,Go to:www.nar.orgclick on:“Find a launch”Mail Submissions to:Ex e c u t i v e Ed i t o rThomas Beach432 Pruitt AvenueLos Alamos, NM 87544505.672.0249thomasbeach@mindspring.comMa n u fa c t s Ed i t o rJames Duffy116 RosebudGeorgetown, TX 78628jduffy@mac.comSc a l e Ed i t o rPeter Alway2830 PittsfieldAnn Arbor, MI 48104Co n t r i b u t i n g Wr i t e r sSather M. Ranum, Jeff Lane,Bob Sanford, Caleb Boe,Rick Boyette, Kenneth Jarosch,Leslie Hauk, Pat Butler,Trip BarberAd Sa l e s/Pr o d u c t i o nTodd SchweimTD Type & Design, Inc.2860 275th StreetSt. Croix Falls, WI 54024715.488.2512sportrocketry@grantsburgtelcom.netR-DAS by AEDFlight Computers Telemetry GPSRATTWorksNitrous Hybrids/TribridsCD3 by Rouse-TechCO2 Deployment DevicesGwiz AvionicsLC, MC, DCSRadioFireR/C DeploymentAEROCON<strong>Rocketry</strong> Supplies forInventors and ExperimentersRocket Motors & Supplies, Aerospace Hardware,Books, Graphite, Test Stands, and more!Great resources for rocketry and physicsprograms at all academic levels.Web's largest assortment <strong>of</strong> military andsurplus parachutes!www.aeroconsystems.com (408) 272-7001Sp o r tNon-PathsRo c k e t r y Ad v e rt i s e r sAero Pack ..................... 30Al’s Hobby Shop ................. 8Apogee Components ............. 7ARA Press. ..................... 13ARG Rockets ................... 36Aerospace Speciality Products ..... 21Balsa Machining ................ 18Belleville ...................... 26Custom Rockets ................ 45Estes .......................... 2Fliskits ........................ 23H&H Enterprises ................ 41JonRocket.com ................. 27Leading Edge .................. 19LOC/Precision .................. 47Mad Cow <strong>Rocketry</strong> .............. 15Mercury Engineering ............ 19Missile Works .................. 13Modern HPR ................... 27NY Power ..................... 21PerfectFlite ................. 18, 32Pratt Hobby ................... 35QModeling .................... 34Quest ......................... 17RCS/AeroTech .................. 48Red River <strong>Rocketry</strong> .............. 27Rogers Rocketships .............. 26Rocketarium.com ............... 35SEMROC ...................... 10Sirius <strong>Rocketry</strong> ................. 39Tango Papa .................... 13Top Flight ..................... 26US Explosive Storage ............ 31walston PathsretrievalsystemsTired <strong>of</strong> losing rocketsStill Wandering . . . Trudging . . .Trekking . . .Looking . . . Looking . . . Looking?Being distressed, dismayed and distraught need notbe part <strong>of</strong> rocketry. Put pleasure back into your flying.A WALSTON retrieval system comes ready togo and easy to use.Walston Retrieval Systems725 Cooper Lake Road, S.E.Smyrna, GA 30082770.434.4905www.walstonretrieval.comto find rocketeersnear you, Go to:www.nar.orgclick on:“Find a local club”46 MAY/JUNE 2010 Sport <strong>Rocketry</strong>
Made in the U.S.A.Andy Tryon’s scale Army Hawk Missileon an M2000R Redline motor.Dan Michael’s 3/4 scale Patriot missile on a cluster <strong>of</strong>4 x M1315W and 1 x N2000W White Lightning motors.Gates Brothers’ Porthos on a cluster <strong>of</strong>6 x K1100T and 1 x M2500T Blue Thunder motors(photo by Nadine Kinney)RMS … Real. Reloadable. Motors.RMS 20 Year Anniversary 1990-2010©2009 RCS Rocket Motor Components, Inc.2113 W. 850 N. Street, Cedar City, UT 84721• www.aerotech-rocketry.comThe Leader inHigh Performance<strong>Rocketry</strong>