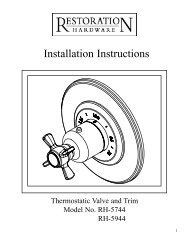
Installation Instructions - Restoration Hardware
Installation Instructions - Restoration Hardware
Installation Instructions - Restoration Hardware

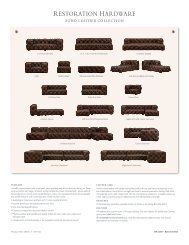
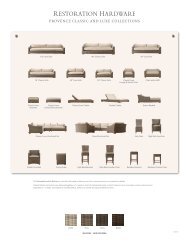
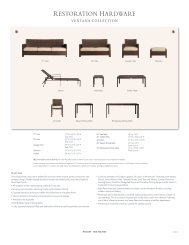
Create successful ePaper yourself
Turn your PDF publications into a flip-book with our unique Google optimized e-Paper software.
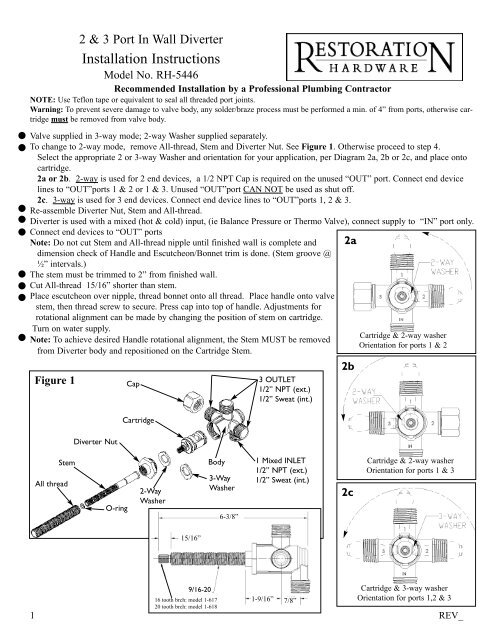
••••2 & 3 Port In Wall Diverter<strong>Installation</strong> <strong>Instructions</strong>Model No. RH-5446Recommended <strong>Installation</strong> by a Professional Plumbing ContractorNOTE: Use Teflon tape or equivalent to seal all threaded port joints.Warning: To prevent severe damage to valve body, any solder/braze process must be performed a min. of 4” from ports, otherwise cartridgemust be removed from valve body.Valve supplied in 3-way mode; 2-way Washer supplied separately.To change to 2-way mode, remove All-thread, Stem and Diverter Nut. See Figure 1. Otherwise proceed to step 4.Select the appropriate 2 or 3-way Washer and orientation for your application, per Diagram 2a, 2b or 2c, and place ontocartridge.2a or 2b. 2-way is used for 2 end devices, a 1/2 NPT Cap is required on the unused “OUT” port. Connect end devicelines to “OUT”ports 1 & 2 or 1 & 3. Unused “OUT”port CAN NOT be used as shut off.2c. 3-way is used for 3 end devices. Connect end device lines to “OUT”ports 1, 2 & 3.Re-assemble Diverter Nut, Stem and All-thread.Diverter is used with a mixed (hot & cold) input, (ie Balance Pressure or Thermo Valve), connect supply to “IN” port only.Connect end devices to “OUT” portsNote: Do not cut Stem and All-thread nipple until finished wall is complete anddimension check of Handle and Escutcheon/Bonnet trim is done. (Stem groove @½” intervals.)The stem must be trimmed to 2” from finished wall.Cut All-thread 15/16” shorter than stem.Place escutcheon over nipple, thread bonnet onto all thread. Place handle onto valvestem, then thread screw to secure. Press cap into top of handle. Adjustments forrotational alignment can be made by changing the position of stem on cartridge.Turn on water supply.Note: To achieve desired Handle rotational alignment, the Stem MUST be removedfrom Diverter body and repositioned on the Cartridge Stem.Figure 1Diverter NutCapCartridge3 OUTLET1/2” NPT (ext.)1/2” Sweat (int.)2a2bCartridge & 2-way washerOrientation for ports 1 & 2StemAll threadO-ring2-WayWasherBody3-WayWasher6-3/8”1 Mixed INLET1/2” NPT (ext.)1/2” Sweat (int.)2cCartridge & 2-way washerOrientation for ports 1 & 315/16”19/16-2016 tooth brch: model 1-61720 tooth brch: model 1-6181-9/16” 7/8”Cartridge & 3-way washerOrientation for ports 1,2 & 3REV_
Care and CleaningThe lustrous finish on your <strong>Restoration</strong> <strong>Hardware</strong> Bathware fixture shouldbe treated with care. Improper handling or cleaning can damage the surfaceof any metal finish. Use a soft cloth to wipe clean. Avoid harsh abrasivecleaner. Water contains lime and other mineral deposits that will be left onthe surface after the water has evaporated. You can prevent these depositsfrom forming by always wiping the fixture dry immediately after use.Technical Support and Customer ServiceFor technical support in the installation of your <strong>Restoration</strong> <strong>Hardware</strong>Bathware fixture, please call 1-866-417-5207 weekdays between the hoursof 7:00am and 4:00pm PST.For other questions regarding your order, to order additional components ofthe <strong>Restoration</strong> <strong>Hardware</strong> Bathware Collection, to order replacement parts,or to address warranty issues, please contact <strong>Restoration</strong> <strong>Hardware</strong>Customer Service at 1-877-747-4671.2EN-1741RH-5446 REV_