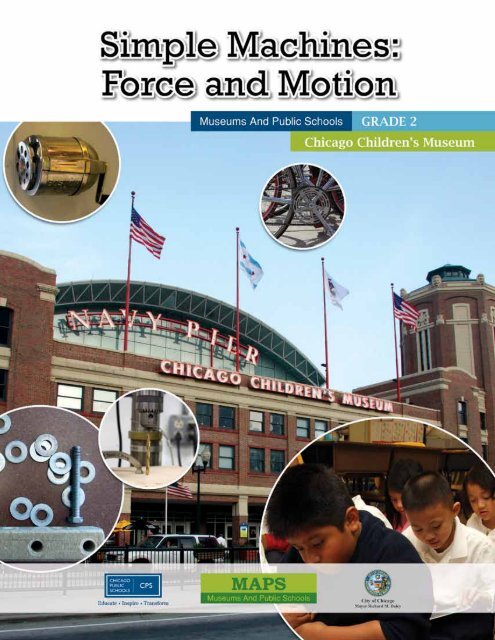
Simple Machines Curriculum Guide - Chicago Children's Museum
Simple Machines Curriculum Guide - Chicago Children's Museum
Simple Machines Curriculum Guide - Chicago Children's Museum

You also want an ePaper? Increase the reach of your titles
YUMPU automatically turns print PDFs into web optimized ePapers that Google loves.
6 • <strong>Simple</strong> <strong>Machines</strong>: Force and Motion
Table of Contents09 Lesson 1 Introducing Force and Motion15 Lesson 2 <strong>Machines</strong> and <strong>Simple</strong> <strong>Machines</strong>19 Lesson 3 Inclined Planes27 Lesson 4 Wedges35 Lesson 5 Screws41 Lesson 6 Levers49 Lesson 7 Pulleys57 Lesson 8 Wheel and Axles65 Lesson 9 <strong>Simple</strong> <strong>Machines</strong> Save the Day!73 Appendix<strong>Chicago</strong> Children’s <strong>Museum</strong> • 7
8 • <strong>Simple</strong> <strong>Machines</strong>: Force and Motion
Lesson 1Introducing Force and Motion
Lesson 1Introducing Force and MotionLesson SummaryThis is a three day lesson that introduces the big ideas of force and motion through interaction withmaterials and physical experiments.Day 1: Penny Toss, Parachute PlayDay 2: Marble PaintingDay 3: Create Science JournalsIllinois Goals and StandardsSCieNCe:11.A.1.c: Collect data for investigations using measuring instruments11.A.1f: Compare observations of individual and group results12.D: Know and apply the concepts that describe force and motion and the principles thatexplain themMATH:7.A.1a:Measure length, volume and width/mass using rulers, scales and other appropriatemeasuring instruments in the customary and metric systemsPhysiCaL DEvELOPmEnt:19.A.1: Demonstrate control when performing fundamental locomotor, non-locomotor andmanipulative skillsFiNe ARTS:26. A.1e: identify media and tools and how to use them in a safe and responsible manner whenpainting, drawing and constructingLesson Objectives• identify forces in action• identify examples of motion• Explain how force can cause motion• Use force to create motion in a variety of ways• Recognize how force and motion are used in the creation of art10 • Lesson 1: Introducing Force and Motion
Day One● Time Allotment50 minutes● MaterialsPenniesPlay ParachuteSoft ballsMeasurement tool● VocabularyForceMotionGravity● Background InformationA force is a push or a pull that causes an object to start moving, stop moving or change direction.People use force whenever they move something, like picking up a book, throwing a ball, orpushing off the ground to move their own bodies.Some forces happen naturally. Gravity is the force that pulls things down to the ground—towardsthe center of the Earth.Often, applying force to an object causes motion. A soccer player applies force to a ball by kickingit towards the goal. The resulting motion is the movement of the ball towards the goal.Moving heavy things takes more force than moving light things. Moving an object a large distancetakes more force than moving the same object a short distance.● Procedure1. In a class discussion, introduce force. Demonstrate force in action by picking something up orby throwing something.2. As a class, make a list of the different ways students use forces. Ask for examples of what theypush or pull daily. Highlight examples that used just a little force and those that needed a lot.3. Clear a large area to experiment with throwing pennies. Explain that one student can throwwith lots of force and one with just a little force. Have students predict which will move apenny further.4. Have one volunteer throw a penny. Measure how far the penny traveled using a toolcomfortable for the students, like links or a tape measure. On the board, record the distancethe penny travelled.5. Have another student throw a penny with less force by only moving his/her hand and keepinghis/her arms still. Record that distance. Compare. Repeat with several students. Always havethem aim away from the class and towards a wall.6. After several rounds, draw a conclusion about the relationship between force and motion.Using just your hands to throw only uses a small amount of force. This throw will result in a<strong>Chicago</strong> Children’s <strong>Museum</strong> • 11
small amount of motion as seen when the penny does not travel very far. In comparisonthrowing with a lot of force by using your whole arm, will result in more motion. When youthrow with your whole arm the penny will travel further.7. Set out a play parachute and a few soft balls. Have everyone gather around. Introduce gravity.8. Try moving just the parachute with a little force and then with a lot of force. Discuss how yousee the resulting motion as the parachute moves a little or a lot.9. Add a few balls to the center of the parachute. Ask students how they could use force to movethe balls. Try making the balls jump, making them roll in a circle or making them fall off theparachute altogether.10. Conclude by discussing how gravity and the force of the moving parachute made the ballsmove. Gravity pulled the balls down from the air. Force from the moving parachute made theballs fly up and down. The harder you flapped the parachute, i.e. the more force you applied,the farther the balls jumped into the air.● VariationHave students work in small groups to think of ways they use force while playing outside.● Homework/ Home ConnectionHave students make a list of three times they used force to push or pull something at home.Day 2● Time Allotment50 minutes● MaterialsMove It by Adrienne MasonShirt boxes or other shallow boxesWhite paper to fit in the bottom of boxesTempera PaintMarbles● Advance PreparationCut white paper to ensure it fits in the available boxes● Background InformationArt is a wonderful way to visually investigate force and motion. Painting requires using force tomove paint around a surface.We can see motion as an object moves from one spot to another. However, we don’t always have arecord of those motions. Painting not only uses forces, but also keeps a record of the paint’smovement across the surface of the paper.12 • Lesson 1: Introducing Force and Motion
● Procedure1. Review the definitions of force and motion by reading from the book Move It by AdrienneMason. Skip the activity pages and only read from the story section. Ask students to identifyforces in the illustrations.2. Have students sit in groups either at their desks or on the floor. Give each group a box andpaper. Put dabs of colored tempera paint on the corners of the paper.3. Explain that instead of brushes, students will use marbles to paint. Ask the students how theycould use force and motion to make paintings with the marbles.4. Give each group a few marbles and have students take turns tipping and moving the boxaround. Highlight how if the box is slanted, gravity will pull the marble down.5. As the papers get full of paint, take them out and leave them to dry. Replace paper and repeat.Have groups make one painting for each group member.6. Ask students to draw conclusions about how force (moving the box, gravity pulling themarbles) changed the motion—as evidenced by the lines on the paintings.7. Save paintings for covers of science journals (see day 3.)Day 3● Time Allotment30 minutes● MaterialsThree-hole punchMarkers● Materials Per StudentMarble Painting (see day 2)Construction Paper10 -15 sheets of lined paper3 pieces of yarn, long enough to knot● Advance PreparationCut marble paintings to roughly the size of the lined paper. Three-hole punch the marble paintingsand the construction paper. Precut pieces of yarn. Make an example of a journal by stacking linedpaper between a piece of construction paper and marble paper and knotting yarn through each ofthe three holes.● Background InformationScience journals are helpful tools for teaching students to record and organize questions, data,observations and ideas. They are also beneficial for reinforcing language arts concepts in context.Journals are also useful for assessment, giving you, the teacher, a chance to see a student’s progressas a unit progresses.<strong>Chicago</strong> Children’s <strong>Museum</strong> • 13
In this lesson, students will make science journals to use for recording the simple machines theyfind as they continue studying force and motion. In addition to the times identified in thefollowing lessons, please use the journals whenever you think it would be beneficial to your class.● Procedure1. Set out marble paints, lined paper, construction paper and yarn on an empty table or counter.2. Show students the example. Explain that everyone will make a science journal to use as theclass continues to study force, motion and simple machines. As a class, brainstorm the kind ofthings that could be recorded in the journal.3. Write a list of the materials they need on the board.4. Have students pick out their materials and return to their seats to bind their books. Assist intying the yarn if needed.5. Ask students to write their names on the front cover.6. On the first page of the journal, ask students to write two sentences explaining how the marblepainted covers were created.● VariationMake an oversized journal to record findings for the whole class in addition to individual journals.● AssessmentWatch for students to:• Respond to directions to use a small or large amount of force• Give an example of force causing motion, i.e. I push on the door and it opens.• Identify an object falling downwards as being affected by gravity• Use force and motion concepts in journal writing14 • Lesson 1: Introducing Force and Motion
Lesson 2<strong>Machines</strong> and <strong>Simple</strong> <strong>Machines</strong>
Lesson 2<strong>Machines</strong> and <strong>Simple</strong> <strong>Machines</strong>Lesson SummaryThis is a one day lesson to introduce both machines and simple machines using a movement activity.Illinois Goals and StandardsSCieNCe:12. D.1a: identify examples of motion12. D.1b: identify observable forces in naturePhysiCaL DEvELOPmEnt:19.A: Demonstrate physical competency in individual and team sports, creative movementand leisure and work-related activitiesLesson Objectives• identify various machines and draw conclusions about how they make work easier• Participate in hands-on exploration of simple machinesDay One●●●●Time Allotment50 minutesMaterialsOne example of each simple machine6 pieces of posterboard or other large paperLabeled simple machine pictures (included)Advance PreparationGather one example of each simple machineLabel each posterboard with the name of a different simple machine. these will be usedthroughout the remaining lessons.VocabularyMachine16 • Lesson 2: <strong>Machines</strong> and <strong>Simple</strong> <strong>Machines</strong>y
<strong>Simple</strong> machineWork● Background InformationA machine, also called a complex machine, is a tool that makes work easier. People have inventedmachines that can do all sorts of different things. A lawn mower is a machine that trims grass.A stereo is a machine that reads and reproduces sounds. <strong>Machines</strong> are everywhere!A simple machine is one of six basic tools for making work easier from which no part can be takenaway. The six simple machines are the inclined plane, the wedge, the screw, the wheel and axle,the pulley and the lever. Some simple machines, like the lever, are comprised of just one element.Others, like the wheel and axle, have two elements that always work together; if you take anelement away, you no longer have a machine that helps to make work easier.<strong>Simple</strong> machines are the building blocks for all other machines and mechanisms. If you takecomplex machinery apart, you will see simple machines, in some form, at work.The phrase “making work easier” is commonly used to describe what simple machines do.Scientifically, “work” refers to the amount of force used to move an object for a distance.Conversationally, and more appropriate for young students, work refers to any task being done.Either way, the phrase holds true. A simple machine makes work easier by enabling a small amountof force to move something a big distance, thus making “work” easier according to the laws ofphysical science—something that can be shown with numbers and scientific formulas.● Procedure1. Review the concepts of force and motion. Introduce (complex) machines. Ask students to nameexamples of different machines. Remember a machine doesn’t need to be electric!2. Go through examples of machines and identify how they make work easier. Highlight anyexamples where you can clearly understand how a machine helps to utilize less force. Forexample, it takes less force to make cookie dough using a mixer than if you used only armstrength and a spoon to mix.3. Explain that complex machines are made of simple machines.4. Have everyone sit in a circle. One by one, show a simple machine, and hold up the matchinglabeled picture. Ask if students recognize any of the pictures and all a few students to shareanswers.5. As a class, decide on a motion to represent each simple machine. For example, to indicate apulley, act out pulling down on a rope. Repeat this for all six simple machines.6. Make a game, like Simon Says, of holding up labeled pictures and having students make thecorresponding motion.7. Have six students volunteer to stand in a line at the front of the class. Assign each to be asimple machine. “Turn on” the machine by tapping the first student. One after the other, havethe six students make their assigned movements. Switch the order of machines and repeat witha new group of volunteers.8. Emphasize that when the six simple machines work together, they make a big, complexmachine.9. Tell the students that the class will be learning more about each of the simple machines in the<strong>Chicago</strong> Children’s <strong>Museum</strong> • 17
days to come. Introduce the Spotting <strong>Simple</strong> <strong>Machines</strong> poster as a way the class will keep trackof what they learn.● ExtensionUse the Simon Says <strong>Simple</strong> <strong>Machines</strong> game through out the unit for an active review of simplemachines.● Home ConnectionHave students find and list three machines found at home and record them in their journals.● AssessmentWatch for students to:• Name an example of (complex) machines• Identify how a specific machine makes work easier• During the movement activity, mimic motions and repeat simple machine names.18 • Lesson 2: <strong>Machines</strong> and <strong>Simple</strong> <strong>Machines</strong>y
Lesson 3Inclined PlanesLesson SummaryThis is a two day lesson to introduce and explore inclined planes.Day 1: Bean bag experimentDay 2: inclined plane hunt and block explorationIllinois Goals and StandardsSCieNCe:11.A.1f:11.A.1e:12.D:MATH:10.a.1a:Compare observations of individual and group resultsArrange data into logical patters and describe patternsKnow and apply the concepts that describe force and motion and the principles thatexplain themOrganize and display data using pictures, tallies, tables, charts or bar graphsLanGUaGE aRts:3.C.1a:Write for a variety of purposesLesson Objectives• identify and describe inclined planes• Recognize inclined planes in students’ surroundings• Explain how inclined planes make work easier20 • Lesson 3: Inclined Planesty
Day One● Time Allotment50 minutes● MaterialsLarge beanbag chair or large trash bag filled with coats or pillowsStairwellData sheets (included)● Advance PreparationChose a stairwell to use for this experiment.Make copies of the data sheet.● VocabularyInclined planeDistance● Background InformationAn inclined plane is one of the six simple machines. It sounds like it could be describing anairplane “taking off,” but it’s something quite different!An inclined plane is a surface that is slanted and connects a low level to a higher level. Inclinedplanes are used to gradually move a load or object from high to low or from low to high. Stairs,for example, help us to move from one floor to another in a building, and a ramp attached to amoving truck help us to move furniture from the ground up into the truck bed.The slant of the inclined plane allows an object to be moved from one level to another more easilybecause it changes levels gradually instead of moving straight up or straight down. When using aninclined plane, you will need to move an object a longer distance, but it will require less force.We often wonder how the Egyptians were able to transport the large stones used to buildpyramids without the use of modern technology. It is believed that the huge stones used toconstruct the pyramids in Egypt were pushed up inclined planes, and so contributed to thesemagnificent structures. It is easier to push the stones up a gradual slant than to attempt to movethem straight up!● Procedure1. Ask students to define the word “inclined.” Physically demonstrate that if something is at anincline, it is slanted. Have students try being vertical by standing straight up, being horizontalby lying on the ground and finally being inclined by leaning against a desk, holding on withtwo hands and walking their feet backwards.2. Explain that the class is going to experiment with inclined planes—specifically stairs—to seeif they really do make work easier (This activity will require the use of a stairwell.) Bring data<strong>Chicago</strong> Children’s <strong>Museum</strong> • 21
strollers to roll easily from sidewalk to street, are great examples of inclined planes. Playgrounds—with slides and stairs—are full of inclined planes.● VocabularyStairsRamp● Procedure1. Review inclined planes. Have students share the examples they found at home (see Day1).Write these examples on your inclined plane poster.2. Take the class on an inclined plane hunt. Walk through the halls, around the grounds and ontothe playground (as weather permits.) Look for inclined planes, like stairs and ramps, as youwalk. Assign students to record the examples you find.3. Return to the classroom and list all the inclined planes you found on the board. Add any newideas to your poster. Discuss what it would be like to not have any. It would be difficult tomaneuver at times!4. Explain that the class is going to try making their own inclined planes by building littleworlds—rooms, towns, etc.—that feature inclined planes using blocks, rulers and craft sticks.Additionally, each student should receive one packet of quick drying dough, like Model Magic,to use in their “world”; it could become a person, a ball or another object.5. Have students sit in small groups or desk pods. Hand out materials. Remind students of theirlist of inclined planes for inspiration. Allow students to work together or alone.● VariationsSubstitute paper for blocks to make a little world that can be glued together and displayed.● AssessmentWatch for students to:• Identify a concrete example of an inclined plane• Name a time an inclined plane would make work easier• During block building, create inclined planes by connecting high and low points• During block building, indicate understanding of the purpose of an inclined plane by movingan object from level to levelOptional: complete Inclined Planes worksheet<strong>Chicago</strong> Children’s <strong>Museum</strong> • 23
Lesson 3Data Sheet: Move It!Tally the number of students it took to move the beanbag with and without the help of the stairs.GROUPNUMBERTrial 1: No StairsTrial 2: With Stairs123424 • Lesson 3: Inclined Planesty
Lesson 3 Inclined Plane Worksheet (1/2)Write the name of each inclined plane on the line below the picture.<strong>Chicago</strong> Children’s <strong>Museum</strong> • 25
Lesson 3 Inclined Plane Worksheet (2/2)Study the picture below. Why do you think the building owners may have added this inclinedplane to the side of their building? Write your answer on the line below.
Lesson 4Wedges
Lesson 4WedgesLesson SummaryThis is a two day lesson to introduce and explore wedgesDay 1: Paper Airplane RacesDay 2: Soap CarvingIllinois Goals and StandardsSCieNCe:11.A.1f:12.D.1a:MATH:7.A.1b:10.a.1a:Compare observations of individual and group resultsidentify examples of motionMeasure units of time using appropriate instrumentsOrganize and display data using pictures, tallies, tables, charts or bar graphsLanGUaGE aRts:3.C.1a:Write for a variety of purposesFiNe ARTS:26.A.1e:identify media and tools and how to use them in a safe and responsible manner whenpainting, drawing and constructingLesson Objectives• identify examples of wedges• identify situations where a wedge helps make work easier• Explain how a wedge makes work easier• identify how force is applied to a wedge to cause motion• Understand how wedges can help artists make works of art28 • Lesson 4: Wedges
Day One: Aztec Artifacts● Time Allotment50 minutes● MaterialsCut, Chop and Stop by Michael DahlDrawing of a wedgePaperPaperclipsMeasuring tools● Advance Preparation (need diagram)Fold a paper airplane that has a wedge nose:• Fold a piece of paper in half lengthwise, making a strong center crease• Take one corner and fold diagonally toward center crease so that a triangle is folded down.This is half the nose of the plane.• Repeat this on the opposite side.• Take the top edges of the paper and fold in half, away from each other.• Firm the creases.• Add a paperclip (for weight) to the noseFold a paper airplane with a blunt nose• Make a crease one third down the length of the page• Fold each corner diagonally in towards the crease, making on triangle• Fold and crease this triangle down. This is the blunt nose of the plane.• Fold a crease into the body of the plane.• Add a paperclip (for weight) to the nose● VocabularyWedgeResistance● Background InformationA wedge is a simple machine that has one or two slanted sides that come together in a point orsharp edge. Therefore, all wedges have one pointy or sharp side and one wider, blunter side.The shape of the pointy side is good for pushing through things, breaking things apart or fitting ina tight space. Examples of wedges include axes, door stops, chisels and incisor teeth.The pointy or sharp side of the wedge encounters less resistance than the wide side would as itpushes through something. For example, airplane use wedge shaped noses to cut through airresistance more easily than if it had a blunted nose. Similarly, boats use a wedge-shaped bow topush through water.<strong>Chicago</strong> Children’s <strong>Museum</strong> • 29
Wedges do double duty. Even though you may be pushing in just one direction—like pushing achisel down into a rock—the wedge takes that one force and makes it into two forces by pushingthe rock apart on both sides of itself.The force applied to a wedge comes from an outside source. For example, the force to chop a treewith an axe comes from the person swinging the axe.● Procedure1. In a class discussion, revisit the concepts studied, including simple machines, force and what itmeans to make work easier.2. Hold up the drawing of a wedge. Ask them to think about what kind of work a wedge could door if they have seen other tools that look similar. Record ideas on the board.3. Read from the book, Cut, Chop and Stop by Michael Dahl. At the end, add to your initialbrainstorm list, with new ideas gathered from the book.4. Tell students that it’s time to conduct an experiment to see if wedges really are good at cuttingthings. In this case, you’re going to test if wedges are good at cutting through air.5. Hold up the two different air planes and ask students to predict which one will be able to flyfurther.6. Draw a chart on the board to record the distances the planes fly on multiple trials.7. Line a “flight path” on the floor with meter sticks, links or other measuring tool.8. Alternate flying the different planes. Have students volunteer to measure and record the flightdistances.9. After several trials, discuss the recorded data. You should find that the wedge-nosed airplaneflew further.10. Discuss how, in comparison to a blunt object, the point of a wedge encounters less resistance,meaning there is less air pushing back against the plane. The pointy wedge flies through the airwith ease, cutting the air and pushing it away. The blunt-nosed plane meets a large amount ofair resistance that stops it from flying very far.● Extension: Wheel of WedgesTry playing the “Wheel of Wedges” game. To play, have everyone stand in a circle and link arms.Chose two students to be “wedges” and have those students stand outside the circle and make awedge with their arms by putting their arms straight out and hands together.With this set-up explain that students in the circle will walk in a circle as music plays. When themusic stops, the wedges shout “Out of my way!” and cut through the circle at that point,breaking the link, and causing the students to drop hands. Continue spinning the circle by tuningmusic on and off. If a student has both links broken, they sit down outside the circle, and so thecircle shrinks. Continue spinning the circle until wedges have broken all the links. See who will bethe last one standing.Students could make up additional rules using simple machines. For example, they could replaceone wedge with a pulley that would pull someone out of the circle in one swoop. As a class youcould brainstorm rules that would make the circle stay in tact the longest or break it up thequickest, using wedges or additional simple machines.30 • Lesson 4: Wedges
● Home ConnectionHave students find an example of a wedge at home. Students should draw and label it in theirscience journals.Day Two● Time Allotment50 minutes● MaterialsHand wipesPictures of sculptures or carvingsPer StudentArt Label Worksheets (included)Bar of Ivory® soapClay carving toolPaper towelArt label worksheet● Advance PreparationUnwrapping the soapFind and print pictures of sculptures and carvings online or from a bookCopy the art label worksheets.● VocabularyCarvingCarveSculptureTools● Background InformationWhen thinking about how simple machines make work easier, we often think of moving heavythings, transporting big loads or lifting gigantic rocks. But, simple machines also help us make art.Wedges are helpful for making sculptures and carvings. Woodworkers use gouges, a wedge with acurved edge, to make statues. Sculptors use chisels, sharpened steel blocks with handles attached,to carve into blocks of stone. Clay modeling tools use wedge shapes to help artists cut into clay orother malleable materials.Soap carving is a simple way to try using wedges and visually see how a wedge cuts and shapes anobject. Completing an object label will help students think of themselves as artists and help themto articulate how a wedge helps make art.<strong>Chicago</strong> Children’s <strong>Museum</strong> • 31
● Procedure1. Review wedges. Have students share the examples they found at home (see Day1). Write theseexamples on your wedge poster.2. List words that describe the kind of work wedges do, like “chop” or “cut” on the board.3. To introduce the soap carving, explain how we don’t always think of it, but simple machinescan help us make art—especially by helping us to carve. Hold up pictures of carvings andstone sculptures. Talk about what kind of tools would help make those works of art.4. Explain that students will get to try using wedges to make carvings using bars of soap and claytools. Pass out one clay tool to everyone. Ask students to find the wedge portion of the tool,hold it up and point to it. Discuss how having a wedge-shaped tool will help them make soapcarvings.5. Pass out soap and paper towels to work on. Explain that they can carve whatever they wish—a tree, a boat, an interesting shape—anything! They can either carve all the way through thesoap, thus cutting pieces off, or they can carve a design into the surface of the soap. Which everway students choose will still use the cutting force of wedges.6. As students work, ask them where they feel force and motion when they carve. There is forcewhen pushing the wedge and there is motion as the wedge moves through the soap and splits itapart.7. When students finish their carvings, have them fill out an Art Label (provided) for theirsculpture or carving. Students may want to use a baby wipe to clean their hands before writing.8. Place the finished carvings and labels along a shelf or ledge. Then have students take time tolook and admire the different sculptures and carvings.9. Discuss how wedges helped to make the carvings.● AssessmentWatch for students to:• Identify a concrete example of a wedge• Name a time they would use a wedge• Use new vocabulary correctly• Use words that describe the work of a wedge, like cut, carve or splitOptional: complete Wedges worksheet32 • Lesson 4: Wedges
Lesson 4Soap Carving LabelFill in this label and display with your work of art.Artist NameObject NameIn the words of the artist:“One of my tools was a wedge. I used a wedge to help me<strong>Chicago</strong> Children’s <strong>Museum</strong> • 33
34 • Lesson 4: Wedges
Lesson 5Screws<strong>Chicago</strong> Children’s <strong>Museum</strong> • 35
Lesson 5ScrewsLesson SummaryThis is a two day lesson to introduce and explore screwsDay 1: Observe different kinds of screws and create an example of a screwDay 2: Water relay raceIllinois Goals and StandardsSCieNCe:11.A.1f Compare observations of individual and group results11.B.1a Given a simple design problem, formulate possible solutions12.D Know and apply the concepts that describe force and motion and the principles thatexplain themSocial Studies:15.A.1a identify advantages and disadvantages of different ways to distribute goods andservicesLanGUaGE aRts:4.A.1b Ask questions and respond to questions from the group members to improvecomprehensionLesson Objectives• identify examples of screws• identify components of screws• identify situations where a screw helps make work easier• Explain how a screw makes work easier• identify how force is applied to a screw to cause motion36 • Lesson 5: Screws
Day One● Time Allotment50 minutes● MaterialsTwist, Dig, and Drill by Michael DahlPencilsPipe Cleaners● VocabularyScrewHelixThread● Background InformationA screw is a type of simple machine. It has a central core with an inclined plane wrapped around itto form a helix, the shape of a spring. A screw makes work easier. Screws are useful atsecuring things tightly together and at lifting and lowering things. Because a screw utilizes aninclined plane, the same principals that make inclined planes useful apply to screws as well.The helix of a screw is called the thread. A screw’s thread can be made to fit a matching bolt’sthread, creating a secure, interlocking fit.Screws can also be used to move things from low to high. For example, the Archimedes Screwis used to move water from lows spots or holes to ground level. This type of screw is often fixedinside a tube and operated by an attached handle. As the screw turns, water moves upwards alongthe flat surface of the screw.The force applied to a screw comes from an outside source. For example, the force to screw in alight bulb into a socket requires a human to twist it.● Procedure1. In a class discussion, revisit the concepts studied, including simple machines, force and what itmeans to make work easier.2. Pass out different versions of screws, some with pointed ends and some with blunt ends.instruct students to handle pointed screws safely. Have the students describe the screws andalso brainstorm the many ways screws are used. Record the classes’ answers.3. Read Twist, Dig, and Drill4. Tell students that it’s time to explore the shape of screws by making their own.5. Each student will receive a pencil and a pipe cleaner.6. Explain that the students will be making a screw by wrapping the pipe cleaner loosely aroundthe pencil in a helix (spiral) shape. Make sure that the students wrap the pipe cleaner all theway to the point of the pencil.<strong>Chicago</strong> Children’s <strong>Museum</strong> • 37
7. Compare their product to the hardware screw and the screws in the books. Identify the parts ofthe pipe cleaner screw.● Home ConnectionHave students find an example of a screw at home. Students should draw and label it in theirscience journals.Day Two● Time Allotment50 minutes● MaterialsPipe CleanersPencilsWaterTowelsContainer with a screw top lidContainer with no lidContainer with plastic wrap● Advance PreparationFill buckets with water and get lots of towels.Select groups before hand.● VocabularyEfficientPreserve● Background InformationWhen thinking about how simple machines make work easier, we often think of moving heavythings, transporting big loads or lifting gigantic rocks. But, simple machines also help us topreserve vital resources such as food and water. If something is preserved, it is kept safely intact.If you look in your kitchen pantry and refrigerator you see screws everywhere in the form of lids.Screw-top lids help preserve food by sealing containers tightly which keeps air from getting in andkeeps the contents from spilling, evaporating or getting dirty. Food containers with tightly sealedlids can be saved, shipped, stacked and sometimes even dropped without damaging the contents.In this lesson the students will learn how the screw helps in the preserving of a basic element:water. The students will be hauling water using various types of containers. They will compareand contrast the containers and determine which vessel is the safest and most efficient way totransport and store water.The three types of containers should include one with a screw top lid, one with no lid and one with38 • Lesson 5: Screws
just plastic wrap for a lid.● Procedure1. Review screws. Have students share the examples they found at home (see Day1). Write theseexamples on your screw poster.2. To introduce the activity. Ask the students to think about the statement “Screws help feed theworld.” Ask the students to do a brief brainstorm how screws might do this. Then show thestudents the jar and ask them to find the screw on the jar.3. Discuss how a screw works on a jar. Go back to the previous pipe cleaner activity. Using 2helixed pipe cleaners (which were loosely wrapped around a pencil) take them off the penciland then screw them together to show how the threads of a screw can be intertwined and heldtightly together. Or, have the students work in small groups to complete this activity using thepipe cleaners from the day before.4. Have the students examine a bottle and lid/cap and identify the similarities with the helixedpipe cleaners. Explain how the intertwined threads help form a seal which helps preserve food.5. Tell the students they are going to test the theory that screws can be helpful by collecting animportant nutritional resource: water.6. Ask the students to imagine that they are in a remote area with no running water in their home.The closest water source is a well about a mile away. Everyday they have to haul water fromthe well to their homes.7. Show students the three different containers and discuss which container might be best attransporting water. Record student hypotheses on the board. Assign three student volunteersa container to haul the water. Each of these students will fill the container to the top and thenattempt to walk across the classroom without spilling the water.8. Once the students are at the other side of the classroom they should set their containers down.Discuss why one container was better than another. Besides keeping the water in the container,what other advantages does the screw top container have? (i.e. more than one container can becarried at the same time, the containers are reusable, etc.)9. Continue the discussion by talking about water storage/conservation. Which container wouldbe the best at keeping the water safe? Could you store more water using one container over theother?10. Discuss other foods that can be contained/preserves with screw top container. Have thestudents list those items.● ExtensionMake an advertisement for screws. Using grocery store ads have the students find and cut outpictures of items that use screw tops. Then paste them onto blank paper and create an ad thatexplains how a screw top helps preserve food and keep us healthy.● AssessmentWatch for students to:• Use new vocabulary correctly• Name a time they would use a screw• Identify a concrete example of a screw• Explain how a screw holds things tightly togetherOptional: complete Screws worksheet<strong>Chicago</strong> Children’s <strong>Museum</strong> • 39
Lesson 5Screw WorksheetFind and circle the screw in each picture. Remember to look for the thread to help you.40 • Lesson 5: Screws
Lesson 6Levers
Lesson 6LeversLesson SummaryThis is a two day lesson to introduce and explore leversDay 1: Class demonstration and lever experimentation in pairsDay 2: Lever guessing gameIllinois Goals and StandardsSCieNCe:11.A.1f Compare observations of individual and group results12.D Know and apply the concepts that describe force and motion and the principles thatexplain themLanGUaGE aRts:1.B.1a establish purposes for reading, make predictions, connect important ideas, and link textwith previous experiences and knowledge4.A.1b Ask questions and respond to questions from the group members to improvecomprehensionLesson Objectives• identify examples of levels• identify situations where a level helps make work easier• identify how force is applied to a lever to cause motion• identify fulcrum, effort and load42 • Lesson 6: Levers
Day One● Time Allotment50 minutes● MaterialsHow do You Lift a Lion?, by Robert WellsMasking TapeLarge Bean BagBroomstick or other long rodPer Pair2 Rulers (See Advanced Prep)2 PencilsCan of soup● Advance PreparationLabel all the rulers with an E for effort on one end and an L for load on the other. On half of therulers, tape a pencil perpendicular to the ruler at the halfway point. On the other half of the rulers,tape the pencil perpendicular to the ruler a few inches from the load side.● VocabularyLeverFulcrumLoad● Background InformationA lever is a rigid bar that pivots on a fulcrum. Levers are ideal for moving heavy objects, foropening cans and jars and for cracking or cutting things with amplified force.The simplest example of a lever is a plank balanced on a block of wood. The plank is the lever.The block of wood is the fulcrum, the point at which the lever is supported and on which it pivots.A lever makes work easier by allowing someone to move a large load with a small amount ofeffort. Whatever is being moved is called the load. Effort is another word for force when it isapplied to a machine.When the fulcrum is mid way between the effort and the load, it can be used as a balance scale.As the fulcrum moves closer to the load, less weight is needed on the other side to balance thelever. In the same way, if the fulcrum is moved closer to the load, less effort will be needed tomake the load move.There are three different classes of levers. In each class the fulcrum, the load and the effort arearranged in different orders. For young students, it is more important to identify a leversuccessfully by finding all three components than to further categorize them into classes.<strong>Chicago</strong> Children’s <strong>Museum</strong> • 43
● Procedure1. In a class discussion, revisit the concepts studied, including simple machines, force, and what itmeans to make work easier.2. Introduce levers. Read the beginning story in How do You Lift a Lion? Pause on the page thatasks how to lift ten lions. Ask students for predictions. Finish the story.3. Draw and label a simple lever on the board. Brainstorm ideas of what it could be used for andwhat it resembles.4. Show the two prepared levers and have students identify the main difference (where the pencilis taped, i.e., the fulcrum point.)5. Have students sit in a pairs. Give each pair one of each kind of lever and a can of soup. Askstudents to identify the effort side, load side and fulcrum of both levers.6. Ask students to identify the main difference (where the pencil is taped, i.e., the fulcrum point.)7. Have them experiment with the levers to see which one more easily lifts the can of soup. If it iseasier to lift, that means you can use less force.8. As a class discuss what their findings might mean if they were going to move the giant beanbag. Do you need a long lever or a short one? (A long one) Do you need to put the fulcrum nearor away from the bean bag? (Near)9. Demonstrate trying to lift the bean bag with one foot without a lever. Using a broomstick oranother long, rigid rod, set up a lever. Demonstrate how the lever allows you to move the bigbean bag with one foot! Allow students to come up and try pushing down on the large lever.● ExtensionHave a crunchy snack! We naturally chew celery, carrots and other crunchy vegetables with ourback teeth because this is chewing near to where our jaw hinges—a natural fulcrum. It takes moreeffort to bite a carrot in half with front teeth than with back teeth.● Homework/ Home ConnectionHave students find an example of a lever at home. Students should draw and label it in theirscience journals.Day Two● Time Allotment50 minutes● MaterialsExamples of levers including: nail clippers, stapler, hole punch, scissors, etc.Pictures of levers like a toilet flush handle, teeter-totter, bascule bridge, fishing rod, wheel barrel,etc. (found online)Brown paper lunch bagspaper● Advance Preparation• Print pictures of levers.44 • Lesson 6: Levers
• Gather examples of levers.• Place a lever or picture of a lever in each brown bag. Make enough for each student.● Background InformationIn the last activity, rulers were used as levers. But, it’s important for students to understand that aruler just being used to measure is not a lever. A lever must have a load side, an effort side and apoint at which it pivots. If you can not find those three things, you don’t have a lever.Even with those restrictions, levers are found in every room in the house and all over theclassroom. Kitchens are full of levers for opening cans and jars and preparing food. Bathroomshave levers for flushing the toilet. Even some door handles are levers.Sometimes two levers are put together to make a new machine. Scissors, nail clippers and singlehole punches are all made of two levers put together.● Procedure1. Review levers. Have students share the examples they found at home (see Day1). Write theseexamples on your lever poster.2. Explain that there are many more levers than what you have listed so far. Lots of those leversare hidden in the lunch bags.3. Demonstrate how to play the guessing game. Look into the bag, but don’t show the class theobject. Without naming the object, give clues. For example, if you have a stapler in your bag,say, “This is a lever you push down on. The fulcrum is on the opposite side of where you push.When you push, a little piece of metal comes out. It connects papers together.”4. Divide the class into four groups. Give each student a bag with a mystery lever inside. Havestudents take turns describing their object to the rest of the group.5. After students have finished looking at all the levers, have each group present what they foundto the class.6. Continue playing with the levers by giving out scrap paper to each group. Have themexperiment with the different ways a lever can change or move paper. Levers can cut paper,launch paper balls or lift loads of paper.7. Next, challenge each group to present their best lever for a series of categories, like best to splitsomething apart, best to lift something, best to open something. As students suggest ideas,have them point out where the fulcrum, effort or load is.● AssessmentWatch for students to:• Describe a lever by labeling or naming the fulcrum, effort and load• Use new vocabulary correctly• Name a time they would use a lever• Identify a concrete example of a lever• Identify how force is applied to a lever to cause motionOptional: complete Levers worksheet<strong>Chicago</strong> Children’s <strong>Museum</strong> • 45
Lesson 6 Levers Worksheet (1/2)Write the name of each lever on the line below the picture.46 • Lesson 6: Levers
Lesson 6 Levers Worksheet (2/2)Study the picture below. What do you think this lever is used for? Write your answer on the linebelow.<strong>Chicago</strong> Children’s <strong>Museum</strong> • 47
48 • Lesson 6: Levers
Lesson 7Pulleys
Lesson 7PulleysLesson SummaryThis is a two day lesson to introduce and explore pulleys.Day 1: Building PulleysDay 2: Language Connection: retelling the story of The Frogs in the WellIllinois Goals and StandardsSCieNCe:12.D Know and apply the concepts that describe force and motion and the principles thatexplain them11.B.1a Given a simple design problem, formulate possible solutionsLanGUaGE aRts:1.B.1a establish purposes for reading, make predictions, connect important ideas, and link textwith previous experiences and knowledge4.B.1a Present brief oral reports, using language and vocabulary appropriate to the messageand audienceLesson Objectives• identify examples of pulleys• identify situations where pulleys make work easier• Explain how a pulley makes work easier• identify force being applied to a pulley to cause motion50 • Lesson 7: Pulleys
Day One● Time Allotment50 minutes● MaterialsTwo cans of paintRopeHook or rodPull, Lift, Lower by Michael DahlPer Pair of StudentsRulerScissorsPulley and cordEraser or other small item● Advance PreparationBorrow two cans of paint from the school engineerSet up a pulling station by tying rope to the handle of a paint can and looping the rope over apulley hung from a hook or rod. The book, How Do You Lift a Lion, has a helpful diagram ofa simple pulley set up.● VocabularyPulleyGrooveWheel● Background InformationA pulley is a simple machine that has a grooved wheel on which a rope can move. Pulleys makelifting objects easier.When you need to move a heavy weight, it is naturally easier to pull down than to pick up. Pullingdown uses your body weight and so requires less physical force. A pulley allows a load to moveupwards even though the force is downwards.The groove on the wheel reduces the amount of friction a rope encounters. A rope run through apulley will be moved more easily and last longer than a rope slung over a tree branch or a door.Pulleys help people move objects to high places while they stay standing on the ground. A flagpole is an example of this. With a pulley attached to the top of the flagpole, the flag can be raised tothe top by someone standing at the base.Sometimes people don’t do the pulling. <strong>Machines</strong>, like cranes, use mechanical force to pull but stillrely on pulleys to make work easier.<strong>Chicago</strong> Children’s <strong>Museum</strong> • 51
● Procedure1. Ask students which they think is easier: picking something up or pulling it down.2. Experiment to find the answer. Using the pulley setup, have students try picking up a paint canand pulling down on the rope attached to a paint can and looped over the hook ( see AdvancedPreparation). Discuss which is easier. Explain how a pulley helps people to pull down insteadof pick up.3. Group students together in pairs. Give each group a pulley, cord, scissors and a ruler. Challengethem to create a pulley that can move an eraser (or other item handy item) from the ground tothe top of their desk. Books are helpful as weight to secure the ruler.4. Once everyone has made a pulley system have students brainstorm ways a pulley might behelpful or where they might be found.5. Read Pull, Lift and Lower. Look for examples from the class brainstorm in the book.6. Conclude by reviewing places to find pulleys that students might encounter.● Extension: Friction DemonstrationBecause the wheel turns as the rope is pulled, there is only a small amount of friction between apulley and a rope.To demonstrate this have a pair of students pull yarn back and forth through a pulley and a pair ofstudents pull yarn back and forth over the top of a door.The friction made by the edges of the door will cause the yarn to break very quickly. The yarn overthe pulley will stay in tact.● Home ConnectionHave students find an example of a pulley at home.Students should draw and label it in their science journals.Day Two● Time Allotment50 minutes● MaterialsAesop’s The Frogs and the WellPer Small GroupTwo plastic bucketsTwo pulleys and cordTwo plastic frogsRulers52 • Lesson 7: Pulleys
● Advance PreparationPrint a copy of The Frog and the Well or locate an Aesop’s Fable anthology that contains it.● Background InformationBecause simple machines make work easier, they can help us solve problems. Pulleys can helpsomeone move something to a very high or low place that they can’t reach.The Aesop’s Fable The Frogs and the Well is a story of two frogs that consider living in a well, butdecide not to because they wouldn’t be able to get out. A pulley is tool often used to retrieve waterfrom the bottom of wells.Using their knowledge of pulleys, students can retell this story to have a different ending for the frogs.● Procedure1. Review pulleys. Have students share the examples they found at home (see Day1). Write theseexamples on your pulley poster.2. Read the fable The Frogs and the Well aloud.3. Ask for volunteers to explain why it would not be wise for frogs to live in the well.4. As a class, discuss what the frogs could build that would allow them to come and go from thewell as they please.5. Have students work in small groups to invent a new ending to the story. Give each grouppulleys, cord, buckets, rulers and toy frogs. Allow students to also use items from around theroom as appropriate.6. Have each group retell aloud the story with a new ending using their props.● Extension: Class FlagpolePermanently mount a pulley in the room on which a paper flag can be raised. As a class, decidewhat the flag should represent, like perfect attendance or birthdays.● AssessmentWatch for students to:• Identify concrete examples of pulleys• Correctly set up a pulley by running thread or yarn through a suspended grooved wheel• Operate a pulley by using force to move an object attached to a rope• Use new vocabulary correctlyOptional: Complete the Pulley Worksheet<strong>Chicago</strong> Children’s <strong>Museum</strong> • 53
Lesson 7 Pulleys worksheet (1/2)Pulleys can be hard to spot! Each of these pictures has a pulley, although it may be hard to see.Circle the pulley as best you can, and write what you think it is used for on the line next to thepicture54 • Lesson 7: Pulleys
Lesson 7 Pulleys worksheet (2/2)Pulleys can be hard to spot! Each of these pictures has a pulley, although it may be hard to see.Circle the pulley as best you can, and write what you think it is used for on the line next to thepicture<strong>Chicago</strong> Children’s <strong>Museum</strong> • 55
56 • Lesson 7: Pulleys
Lesson 8Wheel and Axles
Lesson 8Wheel and AxlesLesson SummaryThis is a two day lesson to introduce and explore wheel and axles.Day 1: experiment with scootersDay 2: Build a skateboardIllinois Goals and StandardsSCieNCe:11.B.1a: Given a simple design problem, formulate possible solutions11.A.1f: Compare observations of individual and group results12.D.1a: identify examples of motion12.D.1b: identify observable forces in natureLanGUaGE aRts:1.B.1a: establish purposes for reading, make predictions, connect important ideas, and link textwith previous experiences and knowledge3.C.1a:Write for a variety of purposesLesson Objectives• identify examples of wheel and axles• identify situations where a wheel and axle makes work easier• Explain how a wheel and axle makes work easier• Understand how the form of a wheel and axle can affect its function• Create a working wheel and axle58 • Lesson 8: Wheel and Axles
Day One● Time Allotment50 minutes● Materials2 scooters2 empty rubber storage binsWheels, Spokes and Sprockets by Micheal Dahl● VocabularyWheelAxleFriction● Background InformationA wheel and axle is a simple machine made of a round part and a straight part that are joinedtogether. Without each other, the wheel or the axle is not a simple machine. The wheel is easilyrecognized as a round object that helps things to roll—like a car or a bike. The axle is often a fixedrod that the wheel rotates around. Turning the wheel turns the axle and turning the axle, turns thewheel.It is important to have an axle and not just a wheel. How would you carry a load if you only hada rotating wheel? You couldn’t! You need something fixed, the axle, to stay put. Bike Seats andvehicle bodies attach to the axle at some point.The wheel and axle makes work easier by reducing friction. The difference can be readily seenwhen comparing pulling a sled against pulling a wagon. When pulling a sled, the entire length ofsled is in contact with the ground. All that surface area makes for lots of friction, rubbing betweenthe sled and the ground. In contrast, a wagon only touches the ground a little bit—just at the pointwhere part of the tire, a small part, touches the ground. That is a lot less friction!The wheel and axle is helpful in ways besides rolling. Screwdrivers, egg beaters, and crank pencilsharpeners are also wheel and axles. These make work easy in different ways, though. Instead ofreducing friction, they take an applied force and multiply it. For example, when you turn ascrewdriver, the force of turning a large handle is applied to turning the small head. While thisabsolutely makes work easier, it is much more difficult to visualize than a wheel and axle rollingalong the ground.● Procedure1. In a class discussion, revisit the concepts studied, including simple machines, force and what itmeans to make work easier.2. Explain that you’re going to learn about another simple machine that makes work easier bydoing an experiment. Don’t tell them what the simple machine is yet.<strong>Chicago</strong> Children’s <strong>Museum</strong> • 59
3. Create a large open space so that everyone can sit in a circle around a two empty storage bins.Pick two volunteers to pretend that they are exhausted. In fact, they are too tired to walk to theother side of the room. How could the bin help? Discuss ideas.4. Explain that you’re going to try pushing your tired friend. Have the volunteers kneel in thebins and have other students volunteer push the bin across the classroom. Ask the volunteers todescribe if it was light or heavy to push. Could they push with just a few fingers or did it needboth hands?5. Brainstorm what could make the bin easier to push. Hopefully a student will suggest wheels.If not, ask if wheels would help. Put bins on scooters and try pushing them again. Again, havethem describe if it was light or heavy to push. Ask if they could push with just a few fingersinstead of both hands. It will be much easier with the wheels underneath reducing the friction.6. Let everyone take a turn pushing both.7. Regroup and ask why the scooter helped make work easier. Explain that there is a lot lessfriction. Have students rub their hands together quickly to feel friction. Why is there lessfriction? Show the students how only a little bit of wheel is rubbing instead of the entirebottom of the bin. That is a big difference!8. Explain that it’s not just the wheel—there is an axle too. Hold up a scooter and point to thedifferent parts. Discuss the different jobs of the wheel and the axle.9. Because the next day will entail building wheels and axles, solidify how the different partswork together by having students sit around propped up scooters and sketch the parts.● ExtensionRead Wheels, Spokes and Sprockets by Micheal Dahl● Home ConnectionHave students find an example of a wheel and axle at home. Students should draw and label it intheir science journals.Day Two● Time Allotment50 minutes● Materials“Skateboard” with round wheels“Skateboard” with square wheelsRampsYardstickWooden beadsMarkersScooter Sketches from Day 160 • Lesson 8: Wheel and Axles
Per student2 pieces of masking tape1 Rectangular foam core, about 6’’ by 2’’4 foam beads (hubs)2 blunt skewers● Advance PreparationCut off the sharp end of the skewersBuild two skateboards, one with round wheels and one with square, using the following instructionsSet up ramps● VocabularyWheelAxleHubFormFunction● Background InformationUnlike wedges and inclined planes, the wheel and axle is not naturally found in nature. It had to beinvented. Primitive wheel and axles consisted of a round disk cut to allow a rod to go through themiddle. In that example, the wheel merely rotates around the axle.Through human learning and experimentation, the wheel and axle became more complex. Thereare many examples of this simple machine where the wheel turns the axle or the axle turns thewheel. When it comes to an automobile, for example, the engine turns the axles which turn thewheels.On a car or bicycle, a hub is a needed addition to a wheel and axle. The hub is the central shaftinside the wheel which allows the wheel and axle to be mounted to the vehicle frame. While thehub is not easily visible on a car, the decorative hubcap is.While the machinery can become complex, the basic fact that it is easier to roll something than topush it along the ground or carry it in our arms is readily seen. Indeed the round form, or design,of the wheel is what allows it to have this function. Square wheels would not roll so well.● Procedure1. Review wheels and axles. Have students share the examples they found at home (see Day1).Write these examples on your wheel and axle poster.2. Explain that the shape of the wheel, its form, affects how it rolls, its function. Hold up askateboard with round wheels (wooden beads) and a skateboard with square wheels. Predicthow they might move differently.3. Introduce the ideas of form and function. Try rolling each down a ramp. Discuss observationsand talk about how the shape, or form, of the wheel allows it to roll. Have students speculateabout how different sizes, shapes and pairing of tires might affect how they function.<strong>Chicago</strong> Children’s <strong>Museum</strong> • 61
4. Tell the students that they’ll be making working wheel and axles. There will be lots ofdifferent “wheels” to work with, so their thoughts on form and function can help them decideon a design.5. Show them the materials and brainstorm how they could use them to make a skateboard orsomething else with wheels. Introduce that a hub (foam bead) will help the wheel stay on theaxle. Pass out their scooter sketches for reference as well.6. Pass out two axles, one piece of foam core, four hubcaps, two pieces of masking tape andmarkers (for decorating) to each student. Pass around a bowl of different shaped beads. Eachstudent should pick four beads to be their wheels.7. As students finish their skateboards, let them try rolling them down ramps. If you want, useyard sticks to record and compare distances.8. When everyone has finished constructing and testing their skateboards, discuss which wheelsrolled better, if any.9. As a class, write instructions for how to build a skateboard on the board. Review the conceptsof form and function as you talk about the different parts of the skateboard.● AssessmentWatch for students to:• Identify a concrete example of a wheel and axle• Use new vocabulary correctly• Identify the wheel and the axle on familiar objects• Construct a wheel and axle systemOptional: complete Wheel and Axle worksheet62 • Lesson 8: Wheel and Axles
Lesson 8 Wheel and Axle Worksheet (1/2)Write the name of each wheel and axle on the line below the picture.<strong>Chicago</strong> Children’s <strong>Museum</strong> • 63
Lesson 8 Wheel and Axle Worksheet (2/2)Study the picture below. What do you think this wheel and axle is used for? Write your answeron the line below.64 • Lesson 8: Wheel and Axles
Lesson 9<strong>Simple</strong> <strong>Machines</strong> Save the Day!<strong>Chicago</strong> Children’s <strong>Museum</strong> • 65
Lesson 9<strong>Simple</strong> <strong>Machines</strong> Save the Day!Lesson SummaryThis is a four day culminating lesson.Day 1: Students will indentify and label simple machines around school.Day 2: Students will create simple machine superheroes.Day 3: Field trip to <strong>Chicago</strong> Children’s <strong>Museum</strong>Day 4: students will complete field trip reflectionsIllinois Goals and StandardsSCieNCe:12.D Know and apply the concepts that describe force and motion and the principles thatexplain them.LanGUaGE aRts:3.C.1aWrite for a variety of purposes4.B.1a Present brief oral reports, using language and vocabulary appropriate to the messageand audiencevisUaL aRts:26.A.1e identify media and tools and how to use them in a safe and responsible manner whenpainting, drawing and constructing.27.B.1 Know how images, sounds and movement convey stories about people, placesand times.Lesson Objectives• Review the six simple machines• identify and label simple machines around the school• identify problems solved by simple machines• showcase new knowledge through a collaborative project66 • Lesson 9: <strong>Simple</strong> <strong>Machines</strong> Save the Day!
Day One● Time Allotment50 minutes● MaterialsMarkers or crayonsPainter’s tape, or other removable adhesiveMaterials Per StudentIndex card● Background InformationIdentifying simple machines in a familiar setting helps students to master differentiating betweensimilarly shaped machines by how they are used. For example, an inclined plane and a wedgehave similar shapes, but, when seen in context, can be identified by the work they make easier.In addition to mastering the different simple machines, this lesson is a chance for students to“show off” their new knowledge to the school as a whole.● Procedure1. Congratulate the class on learning about all six simple machines. As a class, list the names ofthe simple machines.2. Using their simple machine journals for a reference, discuss which machines were easily foundand which were more difficult.3. Explain that they will be labeling simple machines around the school. As a class discuss theprevalence of the different machines. Decide how many of each to make.4. Quickly label index cards to reflect the class’ decision.5. Give each student one index card to hold.6. As a class walk through the hallways looking for simple machines to label. Help students todifferentiate between similar machines, like wedges and inclined planes, by identifying thework it is helping with. When one is spotted, use tape to attach the label securely. Visit the officeor other classrooms if possible. Continue until all the labels have been hung.7. Discuss if their predictions about the number of different machines was accurate.● VariationDecorate the labels prior to hanging them.<strong>Chicago</strong> Children’s <strong>Museum</strong> • 67
Day Two● Time Allotment50 minutes● MaterialsButcher paperCrayons or markersScissorsScrap paperGlue● Advance PreparationCut five pieces of butcher paper large enough to trace a student’s outline.● VocabularySuperhero● Background InformationSuperheroes have special powers at their disposal to magically solve problems. They can stoptrains with bare hands, jump over buildings and stretch their arms to pick up something far away.If a person had the ability to conjure up a simple machine at a moment’s notice, they might be ableto solve some problems too. Imagine if feet could become wheels and axles—maybe you couldroll at the speed of light!● Procedure1. Discuss superheroes. Name some special abilities they can have.2. Brainstorm how each simple machine could be made into a super power. Have students nameeach simple machine. They now know all six.3. Explain that they will imagine and create a superhero that uses the power of simple machines.4. Split students into five groups. Give each group a piece of butcher paper, crayons and collagematerials. Have students draw an outline of one of them onto the paper5. Hold up an outline. Referring to ideas from the brainstorm in step 2, explain how to draw andlabel an idea on the paper. For example, if the superhero is to have wheel and axle feet, studentsshould decorate the feet with a wheel and axle and then label them.6. Have students work in their groups to color, collage and label different simple machines ontothe paper. Encourage them to find a way to use all six.7. When students are finished, have each group present their superheroes to the class.● ExtensionHave students create nametags to wear during their field trip that identify themselves as a force,motion or simple machine expert.68 • Lesson 9: <strong>Simple</strong> <strong>Machines</strong> Save the Day!
Day Three● Time AllotmentEntire Morning● MaterialsCamera● Advance PreparationSecure enough chaperones so that you are free to float between groups.Divide the class into 5 groups, assigning one chaperone to each group● Background InformationParticipating in the <strong>Simple</strong> <strong>Machines</strong> workshop at <strong>Chicago</strong> Children’s <strong>Museum</strong> allows students tomanipulate simple machines in interesting, full-scale and memorable ways.While playing in the Waterways exhibit, students will use pulleys, screws, levers and more tomove water.In a private workshop room a facilitator will lead the Golf Ball Challenge—an activity that willgive students a chance to build a Rube Goldberg-style contraption using simple machines.Please refer to your registration confirmation for additional details regarding your field trip.● ProcedureSet behavior expectation appropriate for a field trip.1. Explain appropriate field trip behavior before leaving school. Remind students how importantit is to stay in groups, to listen to instructions, and to touch, try and enjoy the new things at themuseum. Remind adults to help students make the most out of the trip by not rushing, makingdecisions as a group and explaining or modeling activities where helpful.2. A CCM facilitator will lead the students through the workshop and the Waterways exhibit.When helpful to the task at hand, remind students of things learned in class.3. As students build golf ball machines, take pictures. Take pictures of the final machines beforeleaving the workshop room. These will be used later.4. When you return to school, have students draw a place in the museum where they used force,motion or simple machines.<strong>Chicago</strong> Children’s <strong>Museum</strong> • 69
Day Four● Time Allotment30 minutes● MaterialsPictures from field tripPaper● Advance PreparationPrint color pictures of each group’s golf ball machineTape or glue pictures to a larger piece of blank paper● Procedure1. As a class discuss what students enjoyed during the field trip. List times they used force, mademotion or manipulated a simple machine.2. Give each student a picture of the golf ball machine they helped to build. Have them label thedifferent simple machines in the picture.3. On the back, have students write out, in steps, path the ball took as it traveled through the machine.Additionally, have them write what they like best about the machine.4. Display pictures of the golf ball machines around the classroom.● AssessmentWatch for students to:• Identify all six simple machines• Match simple machines to related tasks or problems• Verbally explain how a specific simple machine could be used• Recognize simple machines in familiar and unfamiliar settings70 • Lesson 9: <strong>Simple</strong> <strong>Machines</strong> Save the Day!
Lesson 9<strong>Simple</strong> <strong>Machines</strong> Save the Day!<strong>Chicago</strong> Children’s <strong>Museum</strong> • 71
72 • <strong>Simple</strong> <strong>Machines</strong>: Force and Motion
Appendix<strong>Chicago</strong> Children’s <strong>Museum</strong> • 73
Cart Appendix 0174 • <strong>Simple</strong> <strong>Machines</strong>: Force and Motion
Fishing Rod Appendix 02<strong>Chicago</strong> Children’s <strong>Museum</strong> • 75
Pulley on a Flag Pole Appendix 0376 • <strong>Simple</strong> <strong>Machines</strong>: Force and Motion
Lever Appendix 04<strong>Chicago</strong> Children’s <strong>Museum</strong> • 77
Wheel and Axle Appendix 0578 • <strong>Simple</strong> <strong>Machines</strong>: Force and Motion
Screw on a Lid Jar Appendix 06<strong>Chicago</strong> Children’s <strong>Museum</strong> • 79
Ramp with a Moving Truck Appendix 0780 • <strong>Simple</strong> <strong>Machines</strong>: Force and Motion
Nail Appendix 08<strong>Chicago</strong> Children’s <strong>Museum</strong> • 81
Pulley Appendix 0982 • <strong>Simple</strong> <strong>Machines</strong>: Force and Motion
Ramp Appendix 10<strong>Chicago</strong> Children’s <strong>Museum</strong> • 83
Screw Appendix 1184 • <strong>Simple</strong> <strong>Machines</strong>: Force and Motion
Wedge (Front of a Boat) Appendix 12<strong>Chicago</strong> Children’s <strong>Museum</strong> • 85
Wedge Appendix 1386 • <strong>Simple</strong> <strong>Machines</strong>: Force and Motion