
You also want an ePaper? Increase the reach of your titles
YUMPU automatically turns print PDFs into web optimized ePapers that Google loves.
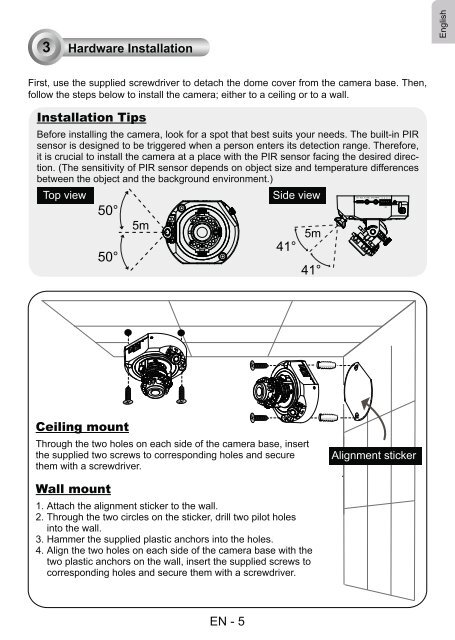
I/O1 2 3 4Audio Out Mic. In Ext. Int.3Hardware InstallationEnglishFirst, use the supplied screwdriver to detach the dome cover from the camera base. Then,follow the steps below to install the camera; either to a ceiling or to a wall.Installation TipsBefore installing the camera, look for a spot that best suits your needs. The built-in PIRsensor is designed to be triggered when a person enters its detection range. Therefore,it is crucial to install the camera at a place with the PIR sensor facing the desired direction.(The sensitivity of PIR sensor depends on object size and temperature differencesbetween the object and the background environment.)Top viewSide viewCeiling mountThrough the two holes on each side of the camera base, insertthe supplied two screws to corresponding holes and securethem with a screwdriver.Alignment stickerWall mount1. Attach the alignment sticker to the wall.2. Through the two circles on the sticker, drill two pilot holesinto the wall.3. Hammer the supplied plastic anchors into the holes.4. Align the two holes on each side of the camera base with thetwo plastic anchors on the wall, insert the supplied screws tocorresponding holes and secure them with a screwdriver.EN - 5