Select Series - Clear Creek Spas
Select Series - Clear Creek Spas
Select Series - Clear Creek Spas

You also want an ePaper? Increase the reach of your titles
YUMPU automatically turns print PDFs into web optimized ePapers that Google loves.
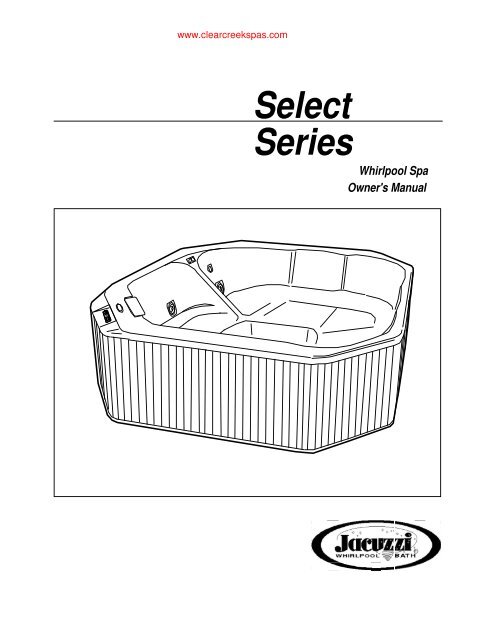
www.clearcreekspas.com<strong>Select</strong><strong>Series</strong>Whirlpool SpaOwner's Manual
www.clearcreekspas.comIMPORTANT SAFETY INFORMATIONREAD AND FOLLOW ALL INSTRUCTIONSWarning — Risk of injury: Children, the elderly, and theinfirm should not use the spa unless they are supervised at alltimes. Infants should not be permitted in the spa at watertemperatures over 100° F (38°C).Spa water temperatures in excess of 104° F are notrecommended. High water temperatures in excess of 104° F(40° C) and prolonged periods of use can raise internal humanbody temperature excessively and impair the body’s ability toregulate its internal temperature.Pregnant women and people with heart circulatory conditions,or diabetes, should consult their physicians before usingthe spa at water temperatures over 100° F (38° C).Limit your initial use of the spa to 10 - 15 minutes. Highbody temperatures affect people differently; consult your physicianabout your safety and comfort before using the spa.Extra care should be taken when using the spa andconsuming alcoholic beverages. Alcohol, drugs, or certainmedications, such as tranquilizers, affect a person’s ability towithstand high temperatures and may produce dangerouseffects, including drowning. Persons using medication shouldconsult with a physician before using a spa.Danger — Risk of injury: Do not remove the suction grille! It isa safety device and must always be in place on the suctionfitting to minimize the potential hazard of hair entanglement orbody entrapment.Keep body, hair, and clothing a minimum of 12 inchesaway from suction fitting and skimmers at all times when thespa is operating. Hair longer than shoulder length should besecured close to the head, or a bathing cap should be worn.Do not operate the spa if the suction cover is broken ormissing. Contact your Dealer for replacement cover if brokenor missing.The wet surface of the spa is slippery. Use care whenentering and exiting.DANGER — Risk of child drowning: Do not permit childrento use this product unless they are closely supervised. The use ofa locked cover is highly recommended to prevent unattendedaccess.DANGER — RISK OF ELECTRICAL SHOCK: When installingand operating this electrical equipment, basic safety precautionsshould always be adhered to including the following.Warning: A wire connector is provided at the electrical cabineton this spa to connect a minimum No. 8 AWG (8.4 MM 2 ) solidcopper conductor between this spa and any metal equipment,metal enclosures of electrical equipment, metal water pipe, orconduit within 5 feet (1.5 m) of the spa.Do not use electrically connected devices such as television,radio, or stereo speakers, lights, cooking devices, ortelephones within 5 feet (1.5 m) of the spa while the spa is beingused. Lighting fixtures must not be located directly above orwithin 5 feet (1.5 m) of the spa. If located within 10 feet (3.0 m)of the spa, they must be on a circuit protected by a GFCI(Ground Fault Interrupter Circuit).All fixed metal objects located within 5 feet of the spa, suchas fence posts, railings, door frames, greenhouse structures,gutters, etc., must be attached to the bonding bar on theoutside of the spa electrical cabinet using #8 solid copper wire.With #8 solid copper wire, bond the spa to the houseelectrical panel or approved local bond.The spa must be installed with adequate access andwater drainage system, refer to Installation Instructions, todrain water away from electrical components.CAUTION: Do not turn power ON to the spa unless it is filledwith water to the normal water level, which is to the water levelindicator mark on the skimmer frame. Activating the spa whenthere is an insufficient amount of water can damage thecirculation pump and may cause a fire.If your spa is installed in a 230VAC circuit:DANGER — RISK OF ELECTRICAL SHOCKYour spa must be equipped with a GFCI at the MainElectrical Panel. At initial startup and before each usethereafter with power ON, push the GFCI test button. Thereset button should pop out. Push this button in to reset. If theinterrupter fails to operate in this manner, there is a groundcurrent flowing or a device malfunctioning, indicating thepossibility of electrical shock. Turn off power and do not usethe spa until the source of the problem has been identifiedand corrected.20 AMP RECEPTACLEGFCIIf your spa is installed in a 115VAC, 20 AMP circuit:1. The spa is supplied with a 15 foot line cord whichterminates with an integral GFCI plug. Locate the spa nearenough to a weather protected outlet, but no closer than 10feet. DO NOT USE AN EXTENSION CORD! Using anextension cord is hazardous and will decrease the amount ofpower to the unit, causing slow heating, poor whirlpool performance,or system malfunction.2. Replace damaged line cord immediately. Do not buryline cord. Connect to a grounded, grounding type receptacleonly.3. Bring the line cord out from under the skirt. Removeskirt screws as required to gain access. Make sure the linecord does not lie across a walkway or in a heavily traveled areawhere it may be a safety hazard or become damaged.4. At initial startup and before each use thereafter withpower ON, push the GFCI test button. The reset button shouldpop out. Push this button in to reset. If the interrupter fails tooperate in this manner, there is a ground current flowing or adevice malfunctioning, indicating the possibility of electricalshock. Turn off power and do not use the spa until thesource of the breakdown has been identified and corrected.
www.clearcreekspas.comRead manufacturer’s safety information provided with all optional equipment.
www.clearcreekspas.com<strong>Select</strong> <strong>Series</strong> Whirlpool SpaOWNER’S MANUALContentsInstallation ............................................................................................................. 2Inspection and Shipping Claim................................................................................2Positioning Your Spa ..............................................................................................2Electrical Requirements ..........................................................................................2Electrical Precautions .............................................................................................3Outdoor Installation .................................................................................................3Drainage..................................................................................................................3Indoor Installations ..................................................................................................3Equipment Set-Up...................................................................................................4Operation ............................................................................................................... 5Operating Instructions .............................................................................................5Control Panel ..........................................................................................................6Display Messages ...................................................................................................7Normal Operation/Whirlpool System.......................................................................8Silent Air Induction ..................................................................................................8Water Rainbow ® ......................................................................................................8Maintenance .......................................................................................................... 9Water Quality and Water Chemistry........................................................................9Filtration ..................................................................................................................9Water Chemistry .....................................................................................................9Disinfecting..............................................................................................................10Balancing pH...........................................................................................................10Balancing Total Alkalinity ........................................................................................10Water Quality Definitions.........................................................................................10Water Level/Drain ...................................................................................................11Skimmer Basket Maintenance ................................................................................11Filter Maintenance...................................................................................................11Automatic Filtration/Maintenance............................................................................12Winterizing ..............................................................................................................12Factory Installed Redwood Skirt .............................................................................12Spa Light .................................................................................................................13Cleaning Your Spa ..................................................................................................13Covering Your Spa..................................................................................................13Repairs to the Acrylic ..............................................................................................13Troubleshooting Guide ......................................................................................... 14Alternate Use for Water Rainbow ® ....................................................................... 16Owner's RecordDate Purchased ________________________________________________________Purchased From ________________________________________________________Installed By ____________________________________________________________Spa Serial Number __________________________ Model # ____________________1
www.clearcreekspas.comINSTALLATIONInspection and Shipping ClaimCheck for shipping damage upon receipt of the spa. Jacuzzi Whirlpool Bath is not responsible for damage to thespa sustained during shipment. If damage is evident before unpacking, refer to instructions regarding shipping claimson the outside of the carton and immediately file a claim with the carrier.Once the spa has been removed from the carton and before it is permanently installed , check the spa completelyfor damage. Fill the shell with water and operate the system (refer to Operating Instructions) to check for leaks whichmay have resulted from improper shipping or handling. All Jacuzzi Whirlpool Bath spas are factory tested for properoperation and water tight connections prior to shipment. If leaks or other problems are detected, immediately notifyyour Jacuzzi Whirlpool Bath dealer, Authorized Service Agent, or call Jacuzzi Whirlpool Bath, (510) 938-7070, or (510)938-7411 for Warranty Service.NOTE: Damage or defects which could have been discovered and repaired prior to installation and which areclaimed after final installation of the spa, are excluded from our warranty.Positioning Your SpaBecause your spa is portable, you can locate it just about anywhere you wish—on a deck, patio, or even indoors.Just be sure to position it above ground in an area with good drainage and on a level, continuous surface which cansupport the weight of the spa when filled with water and people. You must also provide access to the spa's equipmentfor service and general maintenance. See specifications sheet for minimum service access requirements.Electrical RequirementsYour spa requires a 230 VAC, 50 AMP, 4-wire, grounded type GFCI protected electrical service with copperconductors, and must be in a separate circuit having no other appliance connected in that circuit. If you do not havethis kind of circuit, a qualified electrician should install the necessary wiring. Inadequately sized wiring may cause theunit to malfunction and bring about permanent damage to the spa’s electrical system. The circuit must also have aground wire in order to take advantage of the designed-in safety features of the spa. A bond wire must also be used.Bond according to procedure described on the next page.Danger: Without proper grounding and bonding, a system malfunction may cause fatal shock.
www.clearcreekspas.com2
www.clearcreekspas.comINSTALLATIONElectrical PrecautionsCAUTION: Do NOT apply electrical power to the spaunless it is filled with water to the normal water level,which is approximately 7" below the spa rim (refer tolocation of water level indicator on face of skimmer). Ifthe spa’s motor/pumps are actuated when there is notsufficient water in the unit, the circulation pump could beirreparably damaged. Not heeding this caution willnullify the warranty. In addition to damaging the unit,operating the unit with insufficient water could cause afire.Do NOT locate lighting fixtures directly above thespa; lighting and electrical receptacles must be locatedat least 5 feet from the spa. Lighting located between 5and 10 feet from the spa must be on a circuit protectedby a GFCI. (Refer to National Electrical Code, 680-6.)Do NOT use electrically connected devices, such astelevision, radio, telephones, stereo speakers, light orcooking devices within 5 feet of the spa when the spa isbeing used.All fixed metal objects located within 5 feet of thespa, such as fence posts, railings, door frames, greenhousestructures, gutters, etc., must be attached to thebonding bar on the outside of the spa electrical cabinetusing #8 solid copper wire. With #8 solid copper wire,bond the spa to the house electrical panel or approvedlocal bond.An approved ground may be an 8 foot long groundrod, a plate electrode, or a buried metal water pipe withat least 10 feet of buried pipe. Check your local buildingcode for requirements. Bonding lugs are available atyour local electrical supply store. (Bond bar location isshown below.)Outdoor InstallationIf you install the spa outdoors, we recommend thatyou provide a concrete pad for it to rest on. To do this,construct forms for a 4" thick level pad. Install a #10gauge wire mesh 6" x 6" steel reinforced grid. Attach a#8 solid copper wire to the grid with a ground clamp.This wire should be long enough to reach the bond baron the spa electrical cabinet (minimum 36"), but shouldNOT be located under the base of the spa. Then pourthe concrete pad.DrainageWhether you install your spa indoors or outdoors,you can drain it completely by attaching a garden hoseto the hose bibb (drain valve) located on the suctionplumbing of the spa. Simply run the hose to the housesewer line or drain field and open the hose bibb. Forconvenient draining, feed hose bibb through the 2-1/8"hole in the pan to position it just outside the spa. (Cliptie wraps that secure hose bibb line during shipment.)Make sure the area surrounding the spa has gooddrainage to keep water from collecting at the base of thespa—especially near the equipment area. If drainage ispoor, install a drain line and/or gravel drain field. (Referto illustration below.)Indoor InstallationWater that splashes on the floor during spa use maycause a walking hazard and/or structural damage. Gooddrainage must be provided and proper waterproof buildingmaterials must be used in the area surrounding andbeneath the spa. Take into consideration that high roomhumidity will exist due to high spa water temperatures.Providing natural or forced ventilation of the room willhelp maintain comfort and minimize moisture damageto the building. Jacuzzi Whirlpool Bath is not responsiblefor damages resulting from excess moisture orwater spillage. Consult an architect or engineer for aidin designing your indoor installation.SUPPORT, DRAINAGE AND BONDINGBOND BAR(SKIRTSREMOVED)#8 BOND WIRE(TO LOCAL BOND)WIREMESHGRIDELECTRICALCABINETGRAVEL DRAIN FIELD4" THICK CONCRETE PAD
www.clearcreekspas.com3
www.clearcreekspas.comEquipment Set-Up1. Remove the plastic sheet covering the spa.NOTE: Stepping into the spa with shoes will scratchthe acrylic surface.2. Remove any packing materials from the spa.3. Remove the filter cartridge from its plastic bag.4. Pull open the skimmer/filter door by the handle locatedin the middle of the door and remove theskimmer basket. Then insert the filter cartridge intothe filter housing and reinsert the basket so that it fitsin place over the filter cartridge and close the skimmer/filterdoor.5. Clean the interior of the spa of any remaining constructiondebris. Remove stubborn stains, paint, ortar with turpentine, isopropyl alcohol or paint thinner.A mild liquid dishwashing detergent on a damp clothis fine for cleaning off other dirt. Plaster can beremoved by scraping with a soft plastic or woodenedge. DO not use a metal scraper, wire brush, orother metal tools, as they will damage the spa’ssurface.6. Install the skirt panels which were not installed on thespa at the factory. Use the screws provided in yourspa accessory package and follow instructions providedwith the panels.7. On initial start-up, it is necessary to purge and sanitizethe system as stated below.• Remove the spa cover completely.• Close the drain valve on the suction plumbing.• Open the adjustable jets.• Fill the spa with water to its normal operatinglevel, which is to the water level indicator mark onthe skimmer/filter frame.INSTALLATIONWATER TEMPERATURE READOUT<strong>Select</strong>SERIES••••••Status/HeatTEMPERATURE JETS LIGHTS
www.clearcreekspas.com4
www.clearcreekspas.comOPERATIONOperating InstructionsNow that your spa is in place, you are probably eager to take advantage of its unique designed-in features—especially the famous Jacuzzi ® hydromassage performance. Besides being a beautiful addition to your indoor decoror outdoor landscaping, your Jacuzzi Whirlpool Bath spa will provide you with the ultimate in spa pleasure. Familiarizeyourself with the operation of the electronic control panel, as described on page 6 of this manual.WARNING: Do not turn ON power to the spa unless it is filled with water to the normal water level. Refer to waterline indicator mark on skimmer frame. Whenever the power is ON, the system may activate even though nocontrols are operated. If the spa’s motor/pump is actuated when there is not sufficient water in the unit, thecirculation pump and heater could be irreparably damaged. Not heeding this caution will nullify the warranty. Inaddition to damaging the unit, operating the spa with insufficient water could cause a fire.Initial Instructions• Using a garden hose, fill the spa with water to thewater line indicator mark on the skimmer frame. (Referto information on using the Water Rainbow spout ifdesired.)• At the house service panel, turn ON the circuit breakeror switch that controls the electrical service to yourspa. Make sure there is no other appliance on thatcircuit.
www.clearcreekspas.com5
www.clearcreekspas.comOPERATIONThe spa will automatically begin to operate when electrical power is applied. There is no ON/OFF switch for thespa system.The control system has been designed so that by connecting the spa to its properly grounded power source, thespa's set temperature is preset to 100°F. Your spa's readout will display the water temperature, and the spa will heat tothe set temperature. The first filter cycle will begin one minute after the spa is energized.Control PanelThe control panel is easy to use with fingertip control of all the spa's functions. Control of temperature, jets andspa light is readily accessible from within the spa.WATER TEMPERATURE READOUT<strong>Select</strong>SERIESStatus/Heat••••••TEMPERATURE JETS LIGHTSTemperature ControlsThe current temperature is constantly shown on thedisplay. After pressing the button once, the display willshow the set temperature. Pressing the button a secondtime will cause the set temperature to increase ordecrease depending on what direction was last chosen.Each successive press will change the set temperaturein the same direction.If the opposite direction is desired, release thebutton and let the display revert to the actual watertemperature. Press the pad to display the set temperatureand again to make the temperature change in thedesired direction.Temperatures from 80° to 104°F can be set.Jets ControlPress the button once to activate the lowspeedjet operation. Press the button again for the highspeedjet operation, and again to deactivate the jets.The low-speed jet operation will start automaticallywhen the heater is turned on or when a filter cycle isactivated. When a freeze condition is detected, highspeed jets are automatically activated.Whenever the low-speed is energized with thisbutton, it will automatically turn off after 4 hours ofoperation. The high-speed automatically turns OFFafter 30 minutes.LightThelight.button activates and deactivates the spaThe spa light will automatically turn OFF after 4hours of operation.
www.clearcreekspas.com6
www.clearcreekspas.comOPERATIONAutomatic Filter CyclesYour spa will automatically filter itself for 2 hours twice each day. The first filter cycle will begin 1 minute after thespa is energized. The second filter cycle will begin twelve hours after the start of the first cycle. The low-speed jetswill constantly run during the filter times (unless the high-speed jets are on) and the heater will be enabled.Display MessagesThese are some of the messages you will see on the center display.Message MeaningOverheat Protection: Spa is deactivated. If a malfunction occurs and the spa water reaches 112°F, thesystem will completely shut down.Danger: DO NOT ENTER THE WATER. Turn off all power to the spa and contact your dealer orservice organization. Press any panel button to reset.Flow Switch: A pressure switch has malfunctioned. Contact your dealer or service organization.Open Sensor: Spa is deactivated. Either the high limit or the water temperature sensor is nonfunctional.Contact your dealer or service organization.
www.clearcreekspas.com7
www.clearcreekspas.comOPERATIONNormal Operation/Whirlpool SystemYou can enjoy the spa with or without activating the whirlpool. Either way, bathing in your spa can be pleasurable,as well as therapeutic. After a busy, stressful day, you can look forward to soaking in your spa in still water with noturbulence—only the gentle warmth of the soothing and relaxing water.For a more invigorating spa experience, you can take advantage of the built-in whirlpool system. To do this, pressthe JETS button for low or high speed JETS. Sit or recline in the spa so you are comfortable. Since all the jets aredirectionally adjustable, you can direct a jet toward an area where muscles feels tense or stiff. The warmth of the waterand the stimulating water flow from the jets will pleasantly increase circulation.For the total whirlpool effect and all over feeling of well being, you can adjust all jets so they point in a clockwise orcounterclockwise direction to circulate the air and water mixture in a circular motion all about the spa.DIRECTIONALLY ADJUSTABLEWHIRLPOOL JETSFULLY ADJUSTABLEWHIRLPOOL JETSSilent Air InductionThe intensity of the whirlpool action is determined byhow much air is induced into the water. You control thisby adjusting the air induction control knobs located onspa rim. For maximum air induction, rotate each controlknob fully counter clockwise to the largest circle. Forfewer air bubbles, decrease the amount of air inductionby rotating the control knobs clockwise. When the knobsare turned to the smallest circles, only water is beingcirculated. (Refer to illustration below.)AIR INDUCTION CONTROLSINCREASE AIR FLOW(COUNTERCLOCKWISE)Water Rainbow The Water Rainbow will add the soothing sound of awaterfall to your bathing pleasure as well as provide abeautiful cascade of shimmering water for an excitingvisual effect.WATER RAINBOWDECREASE AIR FLOW(CLOCKWISE)Activate the waterfall feature by rotating downwardthe flow control lever located on the left side of the spout.Use this lever to adjust the amount of water flowingthrough the Water Rainbow. The waterfall effect will begreatest in the high-speed JETS mode. Turning OFF theflow at the fully adjustable jets will dramatically increaseflow through the Water Rainbow.CAUTION: The water circulating through the WaterRainbow spout is not fresh water and therefore isNOT suitable for drinking.
www.clearcreekspas.com8
www.clearcreekspas.comMAINTENANCEWater Quality and Water ChemistryMaintaining water quality and water chemistry in your spa is extremely important and should be a regular part ofyour spa maintenance program, as a neglected spa can be a breeding place for dangerous bacteria.The water quality of your spa is maintained by a combination of filtration and chemistry. The spa’s integral filtersystem helps maintain the water cleanliness and clarity by trapping most solid materials such as hair, and other debrisresulting from normal use. However, the most important part of maintaining water chemistry is keeping the proper level ofdisinfectant in the water at all times. This is accomplished by adding chlorine or bromine to the water, which willcontrol particles too small to be trapped by the filter, such as bacteria and algae, and will oxidize any organic materials.Follow instructions provided here and with water quality products for the health and safety of spa users, as well as tomake your spa bathing as enjoyable as possible.FiltrationThe filtration system of your spa will keep your waterclear and clean if used properly. The filter cartridgeelements will trap most solid materials and debris in thewater. However, the presence of materials such as bodyoils or other particles which are too small to be captured inthe filters may bring about various undesirable waterquality conditions. These conditions can be correctedwith the use of spa treatment chemicals which areavailable from your Jacuzzi Whirlpool Bath dealer. Suchconditions include the following:Foaming: A defoamer is available to minimize foamingof the water. This condition is usually caused by theaddition of soaps or oils, or other fatty substances to thespa water. The interaction of these with hot water,especially at high pH (more alkaline), will cause thewater to foam. (Refer to Water Quality Definitions.) OilFilm or Cloudy Water: Add clarifier to congeal oil filmon the water surface into globules sufficiently large tobe trapped by the system’s filter. Cloudiness iscaused by particles that are too small to be trapped in thefilter, and is also due to the presence of human body oils,lotions, and cosmetics. During normal use, these materialscan accumulate on the filter element and clog itspores. The addition of clarifier will make the waterclearer, but clogged filters must be cleaned as prescribedunder the section entitled Filter Maintenance inthis manual.Hard Water: Add a demineralizer to break down ordeionize mineral particles present in the spa water.Follow the Filter Maintenance procedure describedin this manual to ensure optimum performance of yourspa’s filtration system.Water ChemistryYou can ensure better water chemistry by testingyour spa water every day and adjusting the chemicalbalance frequently. Obtain a water quality test kit,designed especially for spas, from your Jacuzzi WhirlpoolBath dealer. The test kit must be of the type whichallows you to test for the disinfectant (chlorine) level, pH,and total alkalinity. Ensure that the chemicals used inyour spa are especially for spa use, and not for swimmingpools, as water quality maintenance of spas and ofswimming pools is very different.Set up a daily program at first to check the disinfectantlevel, pH, and total alkalinity of the water. Familiarizeyourself with the amount of chemicals to add and todetermine how often to make chemical adjustmentsduring normal use. Remember that the more heavily thespa is used, the more often you should check the waterchemistry.When adding any chemicals, always run the filtersystem to ensure complete dilution with the water.Do NOT add chemicals directly into the skimmer.
www.clearcreekspas.com9
www.clearcreekspas.comWater Chemistry (Continued)DisinfectingWhen filling the spa for the first time, follow thepurge/sanitizing instructions in the Equipment Set-Upprocedure of the Installation Instructions.Add a disinfectant to the water on a regular basis tohelp control the amount of bacteria, algae and organicmaterials. Such bacterial contaminants, if not controlled,could cause skin rashes or other physical problems.To disinfect the spa for normal use, first establishthe amount of chlorine or bromine to add and determinehow often you need to add it.We recommend that you maintain a free chlorinelevel of 2.0-5.0 ppm at all times except when you mustexceed that during the initial purge/sanitizing procedureor during superchlorination (refer to Water Quality Definitionsbelow). Superchlorinate your spa every twoweeks with heavy use. If using sodium dichlor, add oneheaping tablespoon for each 150 gallons of spa water.Scrub the spa surfaces with this solution to remove anyoily deposits. This will ensure that any bacteria or algaewhich are resistant to the normal disinfectant level arekilled. After adding the disinfectant, run the filter systemand allow the free chlorine level to return to the 2.0 to 5.0ppm range before using the spa again.Do not install a cover until the disinfectant levelis back to normal. High concentrations of chlorineor bromine will damage metallic plated finishes ifthe cover is in place.MAINTENANCEWATER QUALITY DEFINITIONSpH: A chemical term used in expressing relative acidity oralkalinity in numeric values with 7.0 usually regarded asneutral, and for purposes of this manual, indicating purewater. From 7 to 0 indicates increasing acidity, and 7 to 14indicates alkalinity.PPM: Parts per million.Free Chlorine: Chlorine that has not combined with otherchemicals and that is available to destroy bacteria in the spawater.Trichlor: A form of chlorine used in pool or spa watertreatment; usually supplied in tablet form. Not recommendedbecause of its higher acidic nature and slowdissolving action. Prolonged contact with the spa shell maybleach or permanently mark the shell.Sodium dichlor: The type of chlorine that is recommended forspa use, as it is available in fast dissolving granular form. It isneither excessively acid nor alkaline in character and doesnot readily dissipate in higher water temperatures.Calcium Hypochlorite: A granular chlorine product that isinexpensive and effective but not recommended because itoften tends to form calcium deposits on heater parts andplumbing fittings and leaves an unattractive film on the spaat the water line.Sodium Hypochlorite: A liquid chlorine product that isinexpensive and effective but not recommended becausethe liquid is readily spilled onto the spa or a surroundingarea, causing permanent damage.Total Alkalinity: The measure of the amount of alkalinematerials (such as carbonates, bicarbonates and hydroxides)in the water. High alkalinity inhibits the effectivenessof chemicals to change the pH. If the alkalinity of your spawater is high (above 150 ppm), it is advisable to drain thewater from the spa and begin the balancing process overagain. Low total alkalinity (below 60 ppm) could be corrosiveand damage your spa system.Superchlorination: (Also referred to as shock treatment.)The addition of an above-normal level of disinfectant to killany bacteria or algae that might have become resistant tonormal levels of disinfectant.
www.clearcreekspas.com10
www.clearcreekspas.comMAINTENANCEWater Level/DrainThe water level in the spa must be maintained at itsnormal level. Evaporation and splashing will cause thewater level to drop.When concentrations of impurities from evaporation,water quality chemicals, body oils, perfumes, dirtyfeet, and winds, etc., accumulate in the spa and cannotbe filtered out, it is necessary to drain your spa and refill itwith fresh water. This should be done every 2 months ormore often depending on the amount of use.To drain the spa, first turn OFF circuit breakers at themain electrical panel. Connect a garden hose to thedrain valve in the suction plumbing, via access hole inthe pan. Turn the handle and drain the spa.After draining the spa, clean the spa shell, suctioncover, skimmer, and filter, then close the drain valve andrefill the spa with fresh water. Check the pH level andmaintain water quality.NORMAL WATER LEVELWATER LEVELMARKERSkimmer Basket MaintenanceThe basket located in the skimmer of the spa shouldbe checked at least once a week for collection of debris,such as leaves, hair, etc., and cleaned as necessary. Toclean the basket, remove it from the skimmer by pullingit out, then backflush it with a garden hose and reinstall.FRONT ACCESSSKIMMER/FILTERSKIMMER BASKETROPE LOOPDOORWEIRFILTER CARTRIDGEThe suction cover located in the foot well areashould be checked at least once a week for collecteddebris, such as leaves, hair, etc., and cleaned asnecessary. It may not be necessary to remove thesuction cover to clean it, but if you need to, remove thecenter screw with a Phillips screwdriver and clean thecover by flushing with water from a hose.CAUTION: Ensure replacement of the suction coverimmediately after cleaning. It is a safety device andmust be in place over the suction fitting to minimizepotential hazard of hair and body entrapment.If heavy rains raise the spa water level, drain the spa toits normal level.A spa cover (available as an option), when in placeover the spa, will help reduce evaporation and controlthe amount of debris entering the spa when the spa is notoccupied. In addition, its use will reduce energy consumption.Filter MaintenanceThe filter should be checked periodically. In normaluse, check the filter at least once a month. Keep the filterclean. An obstructed filter reduces water quality andinhibits proper system performance.A removable filter cartridge is located inside theskimmer. To remove it, pull open the skimmer door bythe handle located in the middle of the door. Slide thebasket out, then pull the filter cartridge upward and outof the housing by the loop at the top of the filter. Cleanthe filter by separating the folds of the filter and sprayingwith fresh water from a garden hose. Then reinstall thecartridge in the housing and replace the basket, reversingthe above procedure.Oils will coat the filter, resulting in a reduced flow. Toremove such materials, soak the cartridge in a plasticpail containing a commercial filter cleaning solution(available from your Jacuzzi Whirlpool Bath dealer ormost pool supply stores). Follow the manufacturer’sinstructions for use. Another method is to soak the filtercartridge in a plastic pail containing a mild solution oftrisodium phosphate (TSP) and water. An hour ofsoaking time is usually required to break down oilcoatings from the cartridge. Use a stronger solution ofTSP and water to remove algae. Most hardware or paintstores stock TSP. Use the same method of cleaningwhen the cartridge becomes plugged with clay or vegetation.Replacement cartridges are available throughyour Jacuzzi Whirlpool Bath dealer.
www.clearcreekspas.com11
www.clearcreekspas.comMAINTENANCEAutomatic Filtration/MaintenanceIf you plan to be away, minimum water quality will be maintained by running the filter system.If you will be away for an extended period, however, we recommend that you drain the spa (following the proceduredescribed under Winterizing on this page), as long periods without maintenance of water quality could be detrimentalto the spa.Another means of maintaining minimum water quality while away for less than two weeks is to follow the procedureoutlined for winterizing your spa in a warm climate. (Refer to Winterizing.)NOTE: We do not recommend using this procedure if you are absent during the summer, when algae buildupis most likely.Always keep your spa covered when not in use to reduce heat loss and evaporation and to prevent debris fromfalling in.WinterizingIn a climate where winter temperatures are belowfreezing, follow this procedure when the spa willNOT be used:1. Turn OFF power to the unit at the main electric panel.2. Drain the spa completely by attaching a garden hoseto the drain valve on the suction plumbing. Thenremove the hose and leave the drain valve open tocompletely drain the spa.3. Remove, clean and store the filter cartridges, in a drylocation.4. Keep water and debris out by covering with a spacover.Before using the spa again, review the OperatingInstructions.NOTE: In a warm climate where there are occasionalfreezing temperatures, your spa is automaticallyprotected against freezing.To maintain water quality adjust temperature setpointto the minimum setting (80°F).PHILIPSSCREWSSKIRT
www.clearcreekspas.com12
www.clearcreekspas.comSpa LightTwo filters , one blue and one red, are provided withyour spa. To change the filter, simply snap the coloredfilters in place on top of the normal lens. Two replacementbulbs (GE#912, 12W, 12V) are also included. Putthem in a safe place for future use. When a bulb burnsout, replace it from the back of the light fitting on theoutside of the shell by pulling out the bulb receptacle.LIGHT BULB REPLACEMENTMAINTENANCELIGHT BULBLOCKINGNUTNORMALLENSCOLOREDFILTERpreserve the life of your cover, you must not sit,stand, or lie on it; nor should you place objects ofany kind on top of it.NOTE: Jacuzzi Whirlpool Bath does not guaranteeor warrant this cover. Refer to spa covermanufacturer's information provided with the cover.BULBRECEPTACLECleaning Your SpaSHELLLIGHTBEZELSPA SHOWN WITHINSULATINGCOVERYour spa shell consists of two layers of plasticmaterials. Its smooth top surface of acrylic is tough anddurable and contains concentrated color. This is supportedby a substantial thickness of fiberglass-reinforcedpolyester resin. A catalyst causes a chemicalreaction during manufacture that bonds these layerspermanently into a hard, strong material. With a minimumamount of care and cleaning, your whirlpool spawill look new for years.To clean your spa, simply use a mild, nonabrasiveliquid detergent, isopropyl alcohol, or commercially preparedspa cleaner. Do not use abrasive cleaners. Youcan protect and restore the gloss to a dulled surface byapplying Meguiar’s #10 Mirror Glaze, which is a productspecifically designed for use on acrylic finishes. IfMeguiar’s is not available, an acrylic polish of equalquality or automotive paste wax will do.Use a spa cleaner for residue buildup at the waterlevel of the spa surface. This may be applied to theacrylic surface with a soft cloth and wiped clean. Usesparingly in small amounts to avoid contaminating thespa water. If the water line is heavily soiled, it may beadvisable to lower the water level 2-3 inches beforecleaning; then refill to normal level.Repairs to the AcrylicMinor scratches which do not penetrate the colorfinish (acrylic) can be removed with 600-grit wet/drysandpaper. Restore the glossy finish with Meguiar’s #10Mirror Glaze or comparable automotive paste wax.Major scratches or gouges which penetrate theacrylic surface will require refinishing. Ask your JacuzziWhirlpool Bath dealer for special instructions.Headrest PillowsClean the pillows regularly with soap and water anda clean cloth. Position the headrest pillow at least 3"above the spa water level. Remove the pillow from thespa if chlorine shock treatment is used.
www.clearcreekspas.com13
www.clearcreekspas.comTROUBLESHOOTING GUIDE*NOTE: See also DISPLAY MESSAGES on page 7.PROBLEM1. Water not clean.2. Abnormal water usage.3. Low water flow from jets.4. No water flow from jets.PROBABLE CAUSEA. Clogged or blocked suctionstrainer or skimmer basket.B. Filter clogged (dirty).C. Poor water chemistry.D. Improper maintenance.E. High content of solids in water.F. Filter motor plug not connectedto the electrical cabinet.A. Leak in suction line, dischargeline, or connections.B. Excessive evaporation and/orsplashing.A. Normal operation in low speedjets, filter mode.B. Low water level.C. Clogged or blocked suctionstrainer or skimmer basket.D. Dirty filter.E. Adjustable jet partially closed.F. Suction or discharge linepartially plugged.G. Pump running at subnormalspeed.H. Worn or damaged pump seal.I. Subnormal voltage.A. Power turned OFF.B. Pump OFF.C. Motor(s) not connected.D. House circuit breaker tripped;no power to system.E. GFCI tripped.F. Faulty pump or motor.REMEDYA. Clean strainer/skimmer.B. Clean or replace filter.C. See Chemistry section.D. See Maintenance section.E. Use clarifier or drain and refillspa.F. Check filter motor connectionon the electrical cabinet.A. Repair leak.B. Use rigid spa cover; lowerthermostat setting.A. <strong>Select</strong> high speed jets modefor maximum flow.B. Fill to water level indicator markon skimmer/filter frame.C. Clean strainers or skimmerbaskets.D. Clean or replace filter.E. Open jet.F. *G. *H. *I. Call an electrician or your powercompany.A. Turn ON power at servicepanel. B. <strong>Select</strong> jets function.C. Check motor plug connectionson electrical cabinet.D. Reset circuit breaker.E. Reset GFCI.F. **NOTE: The skills and tools necessary for the safe repair of this spa require the services of qualified servicepersonnel. Contact your Jacuzzi Whirlpool Bath dealer.
www.clearcreekspas.com14
www.clearcreekspas.comTROUBLESHOOTING GUIDEPROBLEM5. Noisy pump and motor.6. Water leakage at pump shaft(rotating connection betweenpump and motor).7. Motor will not start.8. Motor stops.PROBABLE CAUSEA. Clogged strainer(s).B. Leakage of air into suction line.C. Vibrating parts attached tomotor or support brackets.D. Low water level.E. Damaged or worn motor bearings.F. Impeller rubbing inside case.G. Debris inside pump.A. Worn or damaged pump seal.A. Power OFF.B. House circuit breaker tripped orin OFF position.C. GFCI tripped.D. Subnormal voltage.E. Improper or defective wiring.F. Locked shaft or impeller.G. Motor windings burned out.H. Defective starting switch insidemotor.A. Motor overload condition.B. Inadequate supply wiring.REMEDYA. Clean strainersB. Locate and repair leaks.C. Tighten fasteners.D. Add water to normal level.E *F. *G. *A. *A. Turn ON power at service panel.B. Reset circuit breaker.C. Reset GFCI.D. Call an electrician or your powercompany.E. *F. *G. *H. *A. Let cool for one hour. Motoroverload will reset; if problempersists, see *Note.B. Consult electrician to correctwiring to unit.*NOTE: The skills and tools necessary for the safe repair of this spa require the services of qualified servicepersonnel. Contact your Jacuzzi Whirlpool Bath dealer.
www.clearcreekspas.com15
www.clearcreekspas.comAlternate Use of Water Rainbow ® as Fill SpoutYou can use your Water Rainbow as a fill spout by permanently plumbing it to a fresh water supply if local codespermit. Local plumbing codes may require the use of an anti-siphon valve for such a connection. Do not interconnectwater supply with recirculating system of the spa.To make the connections necessary to use the Water Rainbow as a fill spout, follow this procedure:• Make sure spa is unplugged and completely drained.• Unscrew the spout from the 3/4" pipe.• Cut the 3/4" piping as shown in the illustration below.• Cap the piping by cementing a 3/4" PVC cap where cut has been made.• Connect permanent plumbing line to the spout.WATER RAINBOW SPOUTSPA SHELLSAVE FOR LATER(IF DESIRED)1-1/2" to 2"INSTALL AND CEMENT3/4" PVC CAP HERECUT PIPE HERETEE LOCATED ONDISCHARGEPIPINGSUGGESTED MODIFICATION(REFER TO LOCAL CODESFOR REQUIREMENTS)
www.clearcreekspas.com15
www.clearcreekspas.comPRODUCT SPECIFICATIONS ARE SUBJECT TO CHANGE WITHOUT NOTICE.USE INSTALLATION INSTRUCTIONS SUPPLIED WITH PRODUCT.Jacuzzi Whirlpool Bath has obtained applicable code (standards) listings generally available on a national basis for products of this type.It is the responsibility of the installer/owner to determine specific local code compliance prior to installation of this product. Jacuzzi WhirlpoolBath makes no representation or warranty regarding, and will not be responsible for any code compliance.Jacuzzi Whirlpool Bath National HeadquartersP.O. Drawer J, Walnut <strong>Creek</strong>, CA 94596 (510) 938-7070Service Support: (800) 288-4002©1994 Jacuzzi Whirlpool Bath H892000 3/96Printed on Recycled PaperPrinted in the U.S.A.