
Create successful ePaper yourself
Turn your PDF publications into a flip-book with our unique Google optimized e-Paper software.
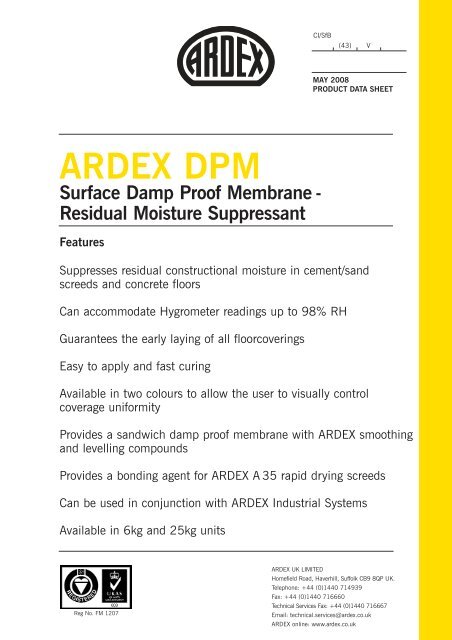
CI/SfB(43) VMAY 2008PRODUCT DATA SHEET<strong>ARDEX</strong> <strong>DPM</strong>Surface Damp Proof Membrane -Residual Moisture SuppressantFeaturesSuppresses residual constructional moisture in cement/sandscreeds and concrete floorsCan accommodate Hygrometer readings up to 98% RHGuarantees the early laying of all floorcoveringsEasy to apply and fast curingAvailable in two colours to allow the user to visually controlcoverage uniformityProvides a sandwich damp proof membrane with <strong>ARDEX</strong> smoothingand levelling compoundsProvides a bonding agent for <strong>ARDEX</strong> A 35 rapid drying screedsCan be used in conjunction with <strong>ARDEX</strong> Industrial SystemsAvailable in 6kg and 25kg unitsReg No. FM 1207<strong>ARDEX</strong> <strong>UK</strong> LIMITEDHomefield Road, Haverhill, Suffolk CB9 8QP <strong>UK</strong>.Telephone: +44 (0)1440 714939Fax: +44 (0)1440 716660Technical Services Fax: +44 (0)1440 716667Email: technical.services@ardex.co.uk<strong>ARDEX</strong> online: www.ardex.co.uk
<strong>ARDEX</strong> <strong>DPM</strong>Surface Damp Proof Membrane -Residual Moisture SuppressantDESCRIPTION<strong>ARDEX</strong> <strong>DPM</strong> is a solvent free, low viscosity, twocomponent epoxy resin. After hardening the <strong>ARDEX</strong> <strong>DPM</strong>produces a membrane with high inherent strength andexcellent bond strength to appropriate substratesincluding very damp concrete and screeds. <strong>ARDEX</strong> <strong>DPM</strong>accommodates hygrometer readings up to 98% RH.<strong>ARDEX</strong> <strong>DPM</strong> has excellent resistance to water, grease,oil, aqueous salt solution, dilute mineral and organic acidsand organic liquids and solutions.<strong>ARDEX</strong> <strong>DPM</strong> is supplied in two colours, red for the firstcoat and green for the second coat, as a visual aid toapplication, thickness and coverage.USE<strong>ARDEX</strong> <strong>DPM</strong> has been specifically developed to suppressresidual moisture in concrete and cement/sand screededsub-floors and provides a surface damp proof membranewhere a <strong>DPM</strong> is not present in the floor or it is not effective.<strong>ARDEX</strong> <strong>DPM</strong> allows for the early installation of moisturesensitive floorcoverings/coatings in fast track buildingoperations.MOISTURE TESTINGThis should be undertaken in accordance with BS 8203.SUBSTRATE PREPARATIONThe surface to be coated must be hard, sound and freeof dust, laitance, dirt and other barrier materials suchas paint, lime coatings, plaster and adhesive residues.Any existing screeds or levelling/smoothing compoundsnot resistant to moisture must also be removed.Use <strong>ARDEX</strong> DGR degreaser to remove polish, wax, grease,oil and similar contaminating substances, followed bythorough mechanical preparation.Concrete curing agents, admixtures and surfacehardeners and the residues of these products canimpair adhesion. Where doubt exists or the compatibilityis unknown a trial adhesion test with the <strong>ARDEX</strong> <strong>DPM</strong>should be carried out before work commences.Please consult our Technical Services Department.Any incompatible curing agents, admixtures, surfacehardeners or other surface contamination should beremoved by scabbling, grinding, shot blasting or hotcompressed air, as appropriate.NOTE: <strong>ARDEX</strong> <strong>DPM</strong> must not be used over a sub-floorcontaining underfloor heating.MOVEMENT JOINTSAny joints or cracks in the floor subject to movement,such as structural movement joints, must not be bridgedwith the <strong>ARDEX</strong> <strong>DPM</strong> System. These joints must betreated with a flexible impervious jointing system andbe carried through to the floor finish.MIXINGThe individual components of the <strong>ARDEX</strong> <strong>DPM</strong> should bethoroughly stirred before being mixed together. The entirecontents of the hardener container (component B) shouldbe poured into the resin container (component A) andthe two materials mixed thoroughly for at least 3 minutesusing a heavy duty slow speed drill and spiral paddle.Some of the mixed components should be reintroducedback into the hardener container in order to activate anyresidue and then poured back into the larger mixingvessel and re-mixed for 30 seconds. Mixing in this waywill ensure product consistency and that any resin thatremains in the containers after application will cure toprovide for easier waste disposal.NOTE: Once mixed, the <strong>ARDEX</strong> <strong>DPM</strong> will generate heatand lose working time if it is left in the mixing containeror otherwise kept in bulk, therefore the <strong>ARDEX</strong> <strong>DPM</strong>should be poured directly onto the floor and distributedwithout delay to the prepared surface using a brush orshort/medium pile roller. Ensure that the entire surface iscoated and that ‘ponding’ of the material does not occur.NOTE: For the mixing instructions for the 25kg <strong>ARDEX</strong> <strong>DPM</strong>,please consult the packaging.APPLICATIONApply an even coat of the mixed <strong>ARDEX</strong> <strong>DPM</strong> bymeans of an appropriate notch trowel such as a 1.5mmx 5mm V shaped notched trowel. Whilst the <strong>ARDEX</strong> <strong>DPM</strong>is still wet, the serration ridges should be flattenedout with a long handled short pile paint roller, initiallypre-wetted with the mixed <strong>ARDEX</strong> <strong>DPM</strong>.The thickness of application should not be less than200 microns per coat, this can be checked using the<strong>ARDEX</strong> wet film thickness gauge.Coverage of 4m 2 /kg should not be exceeded.NOTE: Coverage rates will be reduced by rough, poroussubstrates; pre-smoothing with ARDITEX, ARDITEX NA,<strong>ARDEX</strong> K 301 or <strong>ARDEX</strong> S 21 is recommended to aidapplication and improve yield.NOTE: For applications on either calcium sulphate orHeated Screed Systems, consult the <strong>ARDEX</strong> TechnicalServices.It is essential that the applied <strong>ARDEX</strong> <strong>DPM</strong> iscontinuous and free from pinholes or cavities, otherwisean additional application will be necessary. Allow to curebetween coats. The second coat can usually be appliedapproximately 8 hours after the first one.Latex Underlayment (ARDITEX / ARDITEX NA)1 Apply an even continuous coat of mixed<strong>ARDEX</strong> <strong>DPM</strong> as per application instructionsand allow to cure, usually 8 hours at 20°C.2 Apply a second coat of <strong>ARDEX</strong> <strong>DPM</strong> asabove, but at right angles to the first coatand allow to cure, usually 8 hours at 20°C.3 Apply ARDITEX, ARDITEX NA or ARDITEX RS PLUSsmoothing compound to a minimum depth of3mm, maximum 6mm to the cured <strong>ARDEX</strong> <strong>DPM</strong>and allow to dry. Ensure if using ARDITEX RS PLUS,it is applied within 48 hours, otherwise, apply<strong>ARDEX</strong> P 82 primer to the <strong>DPM</strong>.ARDITEX Latex Based Smoothing CompoundsNOTE: If the existing sub-floor is not sufficiently smooth,pre-levelling can be undertaken with an <strong>ARDEX</strong> latexbased smoothing compound.Self-levelling Underlayment (<strong>ARDEX</strong> Underlayments)1 Apply an even continuous coat of mixed<strong>ARDEX</strong> <strong>DPM</strong> as per application instructionsand allow to cure, usually 8 hours at 20°C.2 Apply a second coat of <strong>ARDEX</strong> <strong>DPM</strong> asabove, but at right angles to the first coat andallow to cure, usually 8 hours at 20°C.3 Prime the cured <strong>ARDEX</strong> <strong>DPM</strong> with<strong>ARDEX</strong> P 82 primer (consult Priming andPreparation data sheet) and allow to dry.4 Apply the required <strong>ARDEX</strong> levelling/smoothingcompound to a minimum depth of 3mm, maximum6mm and allow to dry.NOTE: If the sub-floor is not sufficiently smooth,pre-levelling can be undertaken with either<strong>ARDEX</strong> S 21 or <strong>ARDEX</strong> K 301.Installing a Bonded Rapid Dry Screed when a DampProof Membrane is missing or ineffective1 Mechanically prepare the concrete slab toexpose a clean, sound surface.2 Apply an even continuous coat of mixed<strong>ARDEX</strong> <strong>DPM</strong> as per application instructionsand allow to cure, usually 8 hours at 20°C.3 Apply a second coat of <strong>ARDEX</strong> <strong>DPM</strong> or as above,but at right angles to the first coat and allow to cure.4 Apply a third coat of <strong>ARDEX</strong> <strong>DPM</strong> or <strong>ARDEX</strong> R 3 Eand whilst still tacky, blind with 600 micron drysilica sand or <strong>ARDEX</strong> Fine Aggregate andallow to cure.NOTE: Apply sufficient sand to give a key free from resin.Remove excess sand by vacuum cleaner when cured.5 Apply a bonded <strong>ARDEX</strong> A 35 rapid setting,hardening and drying screed (consult the productdata sheet).COVERAGEApproximately 4m 2 /kg e.g. one 6kg unit will coverapproximately 24m 2 per coat at 200 microns.PACKAGING<strong>ARDEX</strong> <strong>DPM</strong> is supplied in pre-gauged metal duocontainers. The hardener (component B) is in the smallcontainer and the resin (component A) is in the largecontainer with room to mix in the hardener(component B) - net weight 6kg.25kg units of <strong>ARDEX</strong> <strong>DPM</strong> are supplied in pre-gaugedplastic containers packed in a larger plastic mixing vessel.STORAGE AND SHELF LIFEStore in dry conditions. <strong>ARDEX</strong> <strong>DPM</strong> has a storagelife of not less than 12 months in the originalunopened containers.CLEANING TOOLSAll tools should be cleaned before the <strong>ARDEX</strong> <strong>DPM</strong> cures.TECHNICAL DATAMixing ratio:Density at 20°C: 1.18Component A: Component B2:1 by weight.Working Time: 20 minutes at 20°COver Coating: 8 hours at 20°CWalkability at 20°Cafter 6-8 hoursPRECAUTIONSThe hardener which contains 4,4’ -isopropylidenediphenol and amines classified ascorrosive and the epoxy resin which contains bisphenolA/F–epichlorhydrin, can be irritating to the eyes andskin, and may cause sensitisation by contact.They are considered harmful in contact with the skinand if swallowed. During mixing and application thefollowing precautions should be observed: ensureadequate ventilation and avoid contact of thematerial with the eyes, nasal passages, mouthand unprotected skin.Avoid contact with the hands by wearing protectivegloves and by using a suitable barrier cream.In case of contact with the eyes, rinse immediatelywith plenty of water and seek medical advice andafter contact with the skin wash immediately withplenty of soap and water (do not use solvents).Prolonged contact with the skin should be avoided,especially where the user has an allergic reaction toepoxide materials. Always wear gloves and eye/faceprotection as necessary. Observe personal hygiene,particularly washing the hands after work has beencompleted or at any interruption whilst work is inprogress. Care should be taken when removinggloves to avoid contaminating the insides.In case of accidents seek medical advice.Consult the relevant health and safety data sheets forfull information.NOTE: The information supplied in our literature or givenby our employees is based upon extensive experience and,together with that supplied by our agents or distributors,is given in good faith in order to help you. Our Companypolicy is one of continuous Research and Development; wetherefore reserve the right to update this information at anytime without prior notice. We also guarantee the consistenthigh quality of our products; however, as we have no controlover site conditions or the execution of the work, we acceptno liability for any loss or damage which may arise as aresult thereof.Country specific recommendations, depending on local standards,codes of practice, building regulations or industry guidelines,may affect specific installation recommendations.