Guidelines For Completing Form TM27A/B Electronically
Guidelines For Completing Form TM27A/B Electronically
Guidelines For Completing Form TM27A/B Electronically

You also want an ePaper? Increase the reach of your titles
YUMPU automatically turns print PDFs into web optimized ePapers that Google loves.
05/28/09rare books, maps, prints & autographsRare Books,Maps, Prints& AutographsSamuel T Freeman & Co. 1808 Chestnut Street Philadelphia Pennsylvania 19103Tel-215.563.9275 Fax-215.563.8236 e-mail: info@freemansauction.comwww.freemansauction.com05/28/09
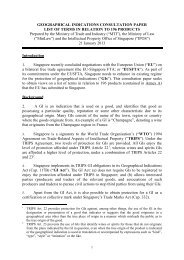
User Guide(eTrademarks Service)Figure 9.1 V4.7Select one of the options.Click on [Next] button. If “ GIRO” is chosen, go to Figure 9.2If “Credit / Debit Card or Internet Banking” ischosen, go to Figure 9.5 v1.15- I2 -
User Guide(eTrademarks Service)Figure 9.2Authentication is required for payment through GIRO. Please select “SingPass”.Click on [next] button. Proceed to Figure 9.3- I3 -
User Guide(eTrademarks Service)Figure 9.3Enter the SingPass ID and SingPass in the fields provided.Click on [Submit] button. Proceed to Figure 9.4Click on [cancel] button. Go back to Figure 9.2- I4 -
User Guide(eTrademarks Service)Figure 9.4Enter the agent code of the representing law firm.Click on [Next] button. Proceed to Figure 9.5- I5 -
User Guide(eTrademarks Service)Figure 9.5If you wish to proceed with new Efiling, select the option ‘Proceed with New Efiling’.If you have saved your application earlier, choose the option ‘Retrieve Application Details’ and enter the‘Save Ref No’ provided earlier in the text field provided.Click on [Next] button. Proceed to Figure 9.6If ‘Retrieve Application Details, please enter SaveRef No’ is selected, the form details saved earlierwill be auto-populated. v4.0- I6 -
User Guide(eTrademarks Service)Figure 9.6Select the relevant form.Click on [Next] button.If ‘<strong>TM27A</strong> – Application to Amend theSpecification, Class Number or the Priority Claimof Trade Mark Application or Registration’ optionis chosen, proceed to Figure 9.7Click on [Reset] buttonClear the selected value.Click on [Previous] button. Go back to Figure 9.5If ‘TM27B – Application to Amend a Trade MarkApplication or Registration (Excluding Change ofName/Address/Address for Service andAmendments Pertaining to the Specification, ClassNumber or the Priority Claim)’ option is chosen,proceed to Figure 9.8 V4.0- I7 -
User Guide(eTrademarks Service)Figure 9.7If you have a Reference Number, please enter in the text field provided. Otherwise, you may leave thisfield blank.Click on [Next] button. Proceed to Figure 9.9 V4.0Click on [Reset] button.Reset field to default values.- I8 -
User Guide(eTrademarks Service)Figure 9.8If you have a Reference Number, please enter in the text field provided. Otherwise, you may leave thisfield blank.Click on [Next] button. Proceed to Figure 9.10 V4.0Click on [Reset] button.Reset field to default values.- I9 -
User Guide(eTrademarks Service)Figure 9.9Read the general instructions before proceeding with the application. V4.0Click on [Next] button. Proceed to Figure 9.11Click on [Previous] button. Go back to Figure 9.7- I10 -
User Guide(eTrademarks Service)Figure 9.10Read the general instructions before proceeding with the application. V4.0Click on [Next] button. Proceed to Figure 9.12Click on [Previous] button. Go back to Figure 9.8- I11 -
User Guide(eTrademarks Service)Figure 9.11Please enter the relevant Trade Mark numbers. .Select “Add Trade Mark Number” to enter the trade mark numbers.If you wish to delete trade mark numbers entered earlier, select “Delete Trade Mark Number, please enterS/No” and enter the S/No. The S/No number can be found under “List of Trade Mark Number(s)”The [Done] button will appear once you have added at least one trade mark number. You may click on the[Done] button after you are entered all the trade mark numbers. The trade mark numbers entered will belisted under “List of Trade Mark Number(s)” for you to verify before proceeding to click on [Done].Click on [Next] button.If “Add Trade Mark Number” is selected, proceedto Figure 9.13If “Delete Trade Mark Number, please enter S/NO”is selected, enter the S/NO in the text field. Proceedto Figure 9.19Click on [Reset] button. Clear the selected or input value V4.0- I12 -
User Guide(eTrademarks Service)Figure 9.12Please enter the relevant Trade Mark numbers. .Select “Add Trade Mark Number” to enter the trade mark numbers.If you wish to delete trade mark numbers entered earlier, select “Delete Trade Mark Number, please enterS/No” and enter the S/No. The S/No number can be found under “List of Trade Mark Number(s)”The [Done] button will appear once you have added at least one trade mark number. You may click on the[Done] button after you are entered all the trade mark numbers. The trade mark numbers entered will belisted under “List of Trade Mark Number(s)” for you to verify before proceeding to click on [Done].Click on [Next] button.If “Add Trade Mark Number” is selected, proceedto Figure 9.14If “Delete Trade Mark Number, please enter S/NO”is selected, enter the S/NO in the text field. Proceedto Figure 9.20Click on [Reset] button. Clear the selected or input value V4.0- I13 -
User Guide(eTrademarks Service)Figure 9.13Enter the Trade Mark Number.If you have a Registrar’s Reference Number, please enter the number in the text field provided.Click on [Next] button.Return toFigure 9.17 to enter more Trade Mark Numbers.Click on [Reset] button.Reset fields to default values.Click on [Cancel] button. Go back to Figure 9.11 v4.0- I14 -
User Guide(eTrademarks Service)Figure 9.14Enter the Trade Mark Number.If you have a Registrar’s Reference Number, please enter the number in the text field provided.Click on [Next] button.Return to Figure 9.16 to enter more Trade MarkNumbers.Click on [Reset] button.Reset fields to default values.Click on [Cancel] button. Go back to Figure 9.12 v4.0- I15 -
User Guide(eTrademarks Service)Figure 9.15If you wish to delete trade mark numbers entered earlier, select “Delete Trade Mark Number, please enterS/No” and enter the S/No. The S/No number can be found under “List of Trade Mark Number(s)”Click on [Next] button. Proceed to Figure 9.19Click on [Reset] button.Clear the selected or input value.Click on [Done] button.If the Trade Mark Numbers in the list does notbelong to the same Registered Proprietor/Applicantfor Registration or company details does not exist,go to Figure 9.21. Otherwise, go to Figure 9.23 v4.0- I16 -
User Guide(eTrademarks Service)Figure 9.16If you wish to delete trade mark numbers entered earlier, select “Delete Trade Mark Number, please enterS/No” and enter the S/No. The S/No number can be found under “List of Trade Mark Number(s)”Click on [Next] button. Proceed to Figure 9.20Click on [Reset] button.Clear the selected or input value.Click on [Done] button.If the Trade Mark Number in the list does notbelong to the same Registered Proprietor/Applicantfor Registration or company details does not exist,go to Figure 9.22. Otherwise, go to next pageFigure 9.24 v4.0- I17 -
User Guide(eTrademarks Service)Figure 9.17The entered Trade Mark Number will be displayed.Click on [Next] button.Click on [Reset] button.Click on [Done] button.Proceed to add (Figure 9.13) or delete (Figure9.19) Trade Mark Number.Clear the selected or input value.If the Trade Mark Number in the list does notbelong to the same Registered Proprietor/Applicantfor Registration or company details does not exist,go to Figure 9.21. Otherwise go to Figure 9.23 v4.0- I18 -
User Guide(eTrademarks Service)Figure 9.18The entered Trade Mark Number will be displayed.Click on [Next] button.Click on [Reset] button.Click on [Done] button.Proceed to add (Figure 9.14) or delete (Figure9.20) Trade Mark Number.Clear the selected or input value.If the Trade Mark Number in the list does notbelong to the same Registered Proprietor/Applicantfor Registration or company details does not exist,go to Figure 9.22. Otherwise, go to Figure 9.24 v4.0- I19 -
User Guide(eTrademarks Service)Figure 9.19To confirm the deletion of a Trade Mark number from the list.Click on [Next] button.Click on [Cancel] button.Trade Mark number will be deleted. Return toFigure 9.11 to enter more Trade Mark Numbers.Cancel deletion, go back toFigure 9.17 v4.0- I20 -
User Guide(eTrademarks Service)Figure 9.20To confirm the deletion of a Trade Mark from the list.Click on [Next] button.Click on [Cancel] button.Trade Mark number will be deleted. Return toFigure 9.12 to enter more Trade Mark Number.Cancel the deletion, go back toFigure 9.18 v4.0- I21 -
User Guide(eTrademarks Service)Figure 9.21Click Next to go to next page to input Particulars of Applicant/Registered Proprietor.Click on [Next] button.Proceed to Figure 9.25 to input Particulars ofApplicant/ Registered Proprietor. v4.0- I22 -
User Guide(eTrademarks Service)Figure 9.22Click Next to go to next page to input Particulars of Applicant/Registered Proprietor.Click on [Next] button.Proceed to Figure 9.26 to input Particulars ofApplicant/Registered Proprietor. v4.0- I23 -
User Guide(eTrademarks Service)Figure 9.23Particulars of Applicant/Registered Proprietor will be auto-populated.Click Next to go to next page to select the relevant Class Numbers. V4.9Click on [Next] button.Click on [Previous] buttonProceed to Figure 9.27 to Add Class Number forAmendment.Go back toFigure 9.17 v4.0- I24 -
User Guide(eTrademarks Service)Figure 9.24Particulars of Applicant/Registered Proprietor will be auto-populated.Click on [Next] button.Click on [Previous] buttonProceed to Figure 9.28 to select Types ofAmendment.Go back to- I25 -
User Guide(eTrademarks Service)Figure 9.18 v4.0- I26 -
User Guide(eTrademarks Service)Figure 9.25Enter Particulars of Applicant/Registered Proprietor.Note: Continue Figure 9.25 on the next page.- I27 -
User Guide(eTrademarks Service)Figure 9.25 (Continued)Click on [Next] button. If no error in input, go to Figure 9.27If error in input, error message will be displayed.Click on [Reset] buttonClear the selected or input values.Click on [Previous] buttonGo back toFigure 9.17 v4.0- I28 -
User Guide(eTrademarks Service)Figure 9.26Enter Particulars of Applicant/Registered Proprietor.Note: Continue Figure 9.26 on the next page.- I29 -
User Guide(eTrademarks Service)Figure 9.26 (Continued)Click on [Next] button. If no error in input, go to page Figure 9.28If error in input, error message will be displayed.Click on [Reset] buttonClear the selected or input values.Click on [Previous] buttonGo back toFigure 9.18 v4.0- I30 -
User Guide(eTrademarks Service)Figure 9.27Select the Class Number(s) for Amendment.Click on [Next] button. If Class Number selected, go to Figure 9.29If error in input, error message will be displayed.Click on [Reset] buttonClear the selected or input values.Click on [Previous] button Go back to Figure 9.23 or Figure 9.25 v4.0- I31 -
User Guide(eTrademarks Service)Figure 9.28Select the Types for Amendment.Click on [Next] button.Type of Amendments selected will lead to itsrespective pages.• “3-Dimensional Shape, Aspect of Packaging,Color(s) as a Trade Mark and/or Descriptionsof the claim to any of the above”, go to Figure9.31• “Number of Series Mark”, go to Figure 9.32• “Amendment of Mark”, go to Figure 9.34• “Others”, go to Figure 9.39If multiple selection, go to all the pages selected.- I32 -
User Guide(eTrademarks Service)Example: if selected “3-Dimensional Shape, Aspectof Packaging, Color(s) as a Trade Mark and/orDescriptions of the claim to any of the above” and“Number of Series Mark”, first go to Figure 9.31followed by Figure 9.32Click on [Reset] buttonClear the selected or input values.Click on [Previous] button Go back to Figure 9.24 or Figure 9.26 v4.0- I33 -
User Guide(eTrademarks Service)Figure 9.29 v4.1Select the Types of Amendment required.The [Done] button will appear after all the amendments are made. Click on the [Done] button after all therequired amendments are made.- I34 -
User Guide(eTrademarks Service)Click on [Next] button.Type of Amendment selected will lead to itsrespective pages:• “Specification of Goods/Services”, go toFigure 9.30• “Class”, go to Figure 9.30• “Priority Claims”, go to Figure 9.343• “Other Amendments”, go to Figure 9.36If multiple selection, go to all the pages selected.Example: if selected “Specification ofGoods/Services” and “Class”, first go to page(Figure 9.35) followed by the next page (Figure9.40)Click on [Reset] buttonClear the selected or input values.Click on [Previous] button Go back to Figure 9.27Click on [Done] button Go to Figure 9.44 v4.0- I35 -
User Guide(eTrademarks Service)Figure 9.30Select Class Number for AmendmentClick on [Next] button.Proceed to the next page based on the selectionyou’ve ticked in Figure 9.29• “Specification of Goods/Services”, go to- I36 -
User Guide(eTrademarks Service)Figure 9.35• “Class”, go to Figure 9.40Click on [Reset] buttonClear the selected or input values.Click on [Cancel] button Go back to Figure 9.29 v4.0- I37 -
User Guide(eTrademarks Service)Figure 9.31Amend as required.Click on [Next] button.Proceed to the next page based on the selectionyou’ve ticked in Figure 9.28• Number of Series Mark – go to Figure 9.32• Amendment of Mark – go to Figure 9.34• Others – go to Figure 9.39Click on [Reset] buttonClear the selected or input values.Click on [Previous] button Go back to Figure 9.28Click on [Clear All]Clear all data.- I38 -
User Guide(eTrademarks Service)Figure 9.32Enter Number of Series Mark Claim.Click on [Next] button.Proceed to the next page based on the selectionyou’ve ticked in Figure 9.28• Amendment of Mark – go to Figure 9.34• Others – go to Figure 9.39Click on [Reset] buttonClear the selected or input values.Click on [Previous] button Go back to Figure 9.28 v4.0- I39 -
User Guide(eTrademarks Service)Figure 9.33Amend as required. (Note: [Done] button will appear only after indicating at least one amendment.)Click on [Next] button. If “Amend” selected, go to Figure 9.42If “Delete” selected, go to Figure 9.43If error in input, error message will be displayedClick on [Reset] buttonClear the selected or input values.Click on [Previous] button Go back to Figure 9.29Click on [Done] button Amendments are captured. Return to Figure 9.29v4.0- I40 -
User Guide(eTrademarks Service)Figure 9.34Preview Mark Image. v4.6Click on [Next] button.Click on [Browse..]Click on [Attach Image To <strong>For</strong>m] buttonProceed to the next page based on the selectionyou’ve ticked in Figure 9.28Others – go to Figure 9.39If there are no other amendments to be made,proceed to Figure 9.41 to preview image.If error in input, error message will be displayed.Select Image file from file browser.Attach image to form, Mark Image attached forPreview text field will be updated with the imagefile name and path.Click on [Previous] button Go back to Figure 9.28 v4.0- I41 -
User Guide(eTrademarks Service)Figure 9.35Enter Specification of Goods/Services to be amended.Click on [Next] button.Go back to Figure 9.29. Column “Goods/Services?”will be updated to “Yes”Click on [Reset] buttonClear the selected or input values.Click on [Previous] button Go back to Figure 9.30 v4.0- I42 -
User Guide(eTrademarks Service)Figure 9.36 v4.1Other Amendments which otherwise require <strong>For</strong>m TM27B.Click on [Next] button.Go back to Figure 9.29. Column “OtherAmendments?” will be updated to “Yes”Click on [Reset] buttonClear the selected or input values.Click on [Cancel] button Go back to Figure 9.30 v4.0Click on [Attach Mark] button Go to “Attach Mark Image” on Figure 9.37- I43 -
User Guide(eTrademarks Service)Figure 9.37 v4.1Attach Mark Image v4.6Click on [Next] button. Proceed to Figure 9.38Click on [Browse.]Select Image file from file browser.Click on [Attach Image To <strong>For</strong>m] buttonAttach image to form, Mark Image attached forPreview text field will be updated with the imagefile name and path.Click on [Previous] button Go back to Figure 9.36- I44 -
User Guide(eTrademarks Service)Figure 9.38 v4.1The attached mark image will be displayed.Click on [Next] button. Proceed to Figure 9.29Click on [Previous] button Go back to Figure 9.37- I45 -
User Guide(eTrademarks Service)Figure 9.39Other amendments.Click on [Next] button.Amendments will be updated. Proceed to Figure9.28If error in input, error message will be displayed.Click on [Rest] buttonClear the selected or input values.Click on [Previous] button Go back to Figure 9.28 v4.0- I46 -
User Guide(eTrademarks Service)Figure 9.40Enter Class to be amended.Click on [Next] button.Go to Figure 9.29. Column “Class Number?” willbe updated to “Yes”Click on [Reset] buttonClear the selected or input values.Click on [Previous] button Go back to Figure 9.30 v4.0- I47 -
User Guide(eTrademarks Service)Figure 9.41The image selected will be displayed.Click on [Next] button. Proceed to Figure 9.28Click on [Previous] button Go back to Figure 9.34 v4.0- I48 -
User Guide(eTrademarks Service)Figure 9.42Enter information for Priority Claims to be amended.Click on [Next] button.Proceed to Figure 9.33. Column “Status” will beupdated to “Amended” for the row(s) that had beenselected for amendment.Click on [Reset] buttonClear the selected or input values.Click on [Cancel] button Go back to Figure 9.33 v4.0- I49 -
User Guide(eTrademarks Service)Figure 9.43Confirmation for deletion of Priority Details.Click on [Next] button.Proceed to Figure 9.33. Column “Status” will beupdated to “Deleted” for the row(s) that had beenselected for amendment.Click on [Cancel] button Go back to Figure 9.33 v4.0- I50 -
User Guide(eTrademarks Service)Figure 9.44If you have an Agent Code, select “Existing Agent” option. If payment is by GIRO, this field will beautomatically selected.<strong>For</strong> law firms without an Agent Code, select “New Agent” option and enter the Agent details on the nextpage.<strong>For</strong> the public users, select “Address for Service” option.<strong>For</strong> agents paying through GIRO, the “Existing Agent” option and agent code is auto-populated. <strong>For</strong> thiscase, you may not edit the option or agent code.Click on [Next] button. If “Existing Agent” is chosen, go to Figure 9.46If “New Agent” is chosen, go to Figure 9.48If “Address for Service” is chosen, go to Figure9.50Click on [Reset] button.Reset fields to default values.Click on [Previous] button. Go back to Figure 9.29 v4.0- I51 -
User Guide(eTrademarks Service)Figure 9.45If you have an Agent Code, select “Existing Agent” option. If payment is by GIRO, this field will beautomatically selected.<strong>For</strong> law firms without an Agent Code, select “New Agent” option and enter the Agent details on the nextpage.<strong>For</strong> the public users, select “Address for Service” option.<strong>For</strong> agents paying through GIRO, the “Existing Agent” option and agent code is auto-populated. <strong>For</strong> thiscase, you may not edit the option or agent code.Click on [Next] button. If “Existing Agent” is chosen, go to Figure 9.47If “New Agent” is chosen, go to Figure 9.49If “Address for Service” is chosen, go to Figure9.51Click on [Reset] button.Reset fields to default values.Click on [Previous] button. Go back to Figure 9.28 v4.0- I52 -
User Guide(eTrademarks Service)Figure 9.46Agent’s details are displayed.Click on [Next] button. Proceed to Figure 9.52Click on [Previous] button. Go back to Figure 9.44 v4.0- I53 -
User Guide(eTrademarks Service)Figure 9.47Agent’s details are displayed.Click on [Next] button. Proceed to Figure 9.53Click on [Previous] button. Go back to Figure 9.45 v4.0- I54 -
User Guide(eTrademarks Service)Figure 9.48Enter law firm details.Click on [Next] button. Proceed to Figure 9.52Click on [Reset] button.Reset fields to default values.Click on [Previous] button. Go back to Figure 9.44 v4.0- I55 -
User Guide(eTrademarks Service)Figure 9.49Enter law firm details.Click on [Next] button. Proceed to Figure 9.53Click on [Reset] button.Reset fields to default values.Click on [Previous] button. Go back to Figure 9.45 v4.0- I56 -
User Guide(eTrademarks Service)Figure 9.50Enter Address for Service.Click on [Next] button. Proceed to Figure 9.52Click on [Reset] button.Reset fields to default values.Click on [Previous] button. Go back to Figure 9.44 v4.0- I57 -
User Guide(eTrademarks Service)Figure 9.51Enter Address for Service.Click on [Next] button. Proceed to Figure 9.53Click on [Reset] button.Reset fields to default values.Click on [Previous] button. Go back to Figure 9.45 v4.0- I58 -
User Guide(eTrademarks Service)Figure 9.52Enter the name and direct telephone number.Click on [Next] button. Proceed to Figure 9.54Click on [Reset] button.Reset fields to default values.Click on [Previous] button. Go back to Figure 9.44 v4.0- I59 -
User Guide(eTrademarks Service)Figure 9.53Enter the name and direct telephone number.Click on [Next] button. Proceed to Figure 9.55Click on [Reset] button.Reset fields to default values.Click on [Previous] button. Go back to Figure 9.45 v4.0- I60 -
User Guide(eTrademarks Service)Figure 9.54If you wish to save the application and submit later, choose the option ‘Save & Revisit Later’. This step isrecommended because if you encounter problems while making payment, you do not have to fill up thewhole application again. Please take note of the Save Reference Number in the last page of the e<strong>For</strong>m.If you want to make use of the same details for another action involving the same trade mark numbers,choose the option ‘Save As New Copy/Application’.If you wish to submit the application, select the option ‘Submit Application’.Click on [Next] button.If ‘Save & Revisit Later’ or ‘Save As NewCopy/Application’ option is chosen, go to Figure9.56If ‘Submit Application’ option is chosen, go to nextpage Figure 9.63Click on [Reset] button.Reset fields to default values.Click on [Previous] button. Go back to Figure 9.52 v4.0Figure 9.55- I61 -
User Guide(eTrademarks Service)If you wish to save the application and submit later, choose the option ‘Save & Revisit Later’. This step isrecommended because if you encounter problems while making payment, you do not have to fill up thewhole application again. Please take note of the Save Reference Number in the last page of the e<strong>For</strong>m.If you want to make use of the same details for another action involving the same trade mark numbers,choose the option ‘Save As New Copy/Application’.If you wish to submit the application, select the option ‘Submit Application’.Click on [Next] button.If ‘Save & Revisit Later’ or ‘Save As NewCopy/Application’ option is chosen, go to Figure9.57If ‘Submit Application’ option is chosen, go to nextpage Figure 9.64Click on [Reset] button.Reset fields to default values.Click on [Previous] button. Go back to Figure 9.53 v4.0- I62 -
User Guide(eTrademarks Service)Figure 9.56Confirm the form details entered in the confirmation page and click on the [Save] button to save thedetails. If there is amendment of mark, you can click on the mark image URL to preview the attachedmark image. v4.1Note: Continue Figure 9.56 on the next page.- I63 -
User Guide(eTrademarks Service)Figure 9.56 (Continued)Click on Attached Mark Image URL Proceed to Figure 9.58Click on [Save] button. Proceed to Figure 9.60Click on [Amend Details] button. Go back to Figure 9.7 to amend details. v4.0- I64 -
User Guide(eTrademarks Service)Figure 9.57Confirm the form details entered in the confirmation page and click on the [Save] button to save thedetails. If there is amendment of mark, you can click on the mark image URL to preview the attachedv4.1 v4.9mark image.Note: Continue Figure 9.57 on the next page.- I65 -
User Guide(eTrademarks Service)Figure 9.57 (Continued)Click on Attached Mark Image URL Go to Figure 9.58Click on [Save] button. Go to Figure 9.60Click on [Amend Details] button. Go back to Figure 9.8 to amend details. v4.0- I66 -
User Guide(eTrademarks Service)Figure 9.58 v4.1Previewing mark image in a new pop-up window.- I67 -
User Guide(eTrademarks Service)Figure 9.59A message will be displayed to indicate the result of the saved application.Click on [Next] button. Proceed to Figure 9.61 v4.0- I68 -
User Guide(eTrademarks Service)Figure 9.60A message will be displayed to indicate the result of the saved application.Click on [Next] button. Proceed to Figure 9.62 v4.0- I69 -
User Guide(eTrademarks Service)Figure 9.61The details you have just saved will be displayed on the Reference Page. You may want to print a copy ofthe Reference Page for your own reference by clicking on the “Print” icon on your Web Browser. Youhave to use the same ‘Save Ref No’ to retrieve this application again. The ‘Save Ref No’ can be foundunder the section Filing particulars.If there is amendment of mark, you can click on the mark image URL to preview the attached mark image.v4.1Note: Continue Figure 9.61 on the next page.- I70 -
User Guide(eTrademarks Service)Figure 9.61 (Continued)Click on Attached Mark Image URL Go to Figure 9.58Click on [Continue with Current eService] button. Figure 9.5 will be displayed for you to continue tofile another TM 27A or TM27B from there.v1.15 v4.0Click on [Logout and Return to eTrademarks Return to eTrademarks Service webpage.Service] link.- I71 -
User Guide(eTrademarks Service)Figure 9.62The details you have just saved will be displayed on the Reference Page. You may want to print a copy ofthe Reference Page for your own reference by clicking on the “Print” icon on your Web Browser. Youhave to use the same ‘Save Ref No’ to retrieve this application again. The ‘Save Ref No’ can be foundunder the section Filing particulars.If there is amendment of mark, you can click on the mark image URL to preview the attached markimage. v4.1Note: Continue Figure 9.62 on the next page.- I72 -
User Guide(eTrademarks Service)Figure 9.62 (Continued)Click on Attached Mark Image URL Go to Figure 9.58.Click on [Continue with Current eService] button. Figure 9.5 will be displayed for you to continue tofile another TM 27A or TM27B from there.v1.15 v4.0Click on [Logout and Return to eTrademarks Return to eTrademarks Service webpage.Service] link.- I73 -
User Guide(eTrademarks Service)Figure 9.63Confirm the form details entered in the confirmation page before clicking on the “Make Paymentr” button.To attach a covering letter (in Microsoft word 97 or plain text format or pdf format), click on the“Browse” button located at the bottom of the page. If there is amendment of mark, you can click on themark image URL to preview the attached mark image. v4.1Note: Continue Figure 9.63 on the next page.- I74 -
User Guide(eTrademarks Service)Figure 9.63 (Continued) V4.7Click on Attached Mark Image URL Go to Figure 9.58Click on [Submit] button.If payment is by GIRO, Figure 9.65 v4.2 will bedisplayed.If payment is by Credit/Debit Card or InternetBanking, Figure 9.7269 will be displayed.Click on [Amend Details] button. Go back to Figure 9.7 to amend details. v1.0- I75 -
User Guide(eTrademarks Service)Figure 9.64Confirm the form details in the confirmation page before clicking on the “Make Payment” v4.5 button. Toattach a covering letter (in Microsoft word 97 or plain text format or pdf format), click on the “Browse”button located at the bottom of the page. If there is amendment of mark, you can click on the mark imageURL to preview the attached mark image. v4.1Note: Continue Figure 9.64 on the next page.- I76 -
User Guide(eTrademarks Service)Figure 9.64 (Continued) V4.7Click on Attached Mark Image URL Go to Figure 9.58Click on [Make Payment] button. v4.5If payment is by GIRO, Figure 9.658 will bedisplayed. v4.5If payment is by Credit/Debit Card or InternetBanking, Figure 9.7269 will be displayed. v4.5Click on [Amend Details] button.Go back to Figure 9.8 to amend details.- I77 -
User Guide(eTrademarks Service)Figure 9.65You may want to print a copy of the GIRO Acknowledgement Slip for your own reference by clicking onthe “Print” icon on your web browser.Click on [Next] button. Proceed to Figure 9.74- I78 -
User Guide(eTrademarks Service)Figure 9.68 v4.2You may want to print a copy of the GIRO Acknowledgement Slip for your own reference by clicking onthe “Print” icon on your web browser.Click on [Next] button. Proceed to Figure 9.75- I79 -
User Guide(eTrademarks Service)Figure 9.69Click on [Submit] button. Proceed to Figure 9.73 v4.0- I80 -
User Guide(eTrademarks Service)Receipt is generated.You may want to print a copy of the receipt for your own reference by clicking on the “Print” icon on yourWeb Browser.Important: It is mandatory to close the window by clicking on the button [Click to complete thistransaction]’.- I81 -
User Guide(eTrademarks Service)Figure 9.72 v1.18Click on the Payment Mode.If payment is via Credit/Debit card, you` will bedirected to a page to enter your card details.If payment is via Internet Banking, you will bedirected to a page to select bank and enter yourInternet Banking account details.. V4.9Receipt will be generated (Figure 9.69).- I82 -
User Guide(eTrademarks Service)v1.18 v4.9Figure 9.73Receipt is generated.You may want to print a copy of the receipt for your own reference by clicking on the “Print” icon on yourWeb Browser.Important: It is mandatory to close the window by clicking on the button [Click to complete thistransaction]’.Click on the [Click to complete this transaction]. <strong>For</strong> <strong>For</strong>m <strong>TM27A</strong>, proceed to Figure 9.74<strong>For</strong> <strong>For</strong>m TM27B, proceed to Figure 9.75 v4.0- I83 -
User Guide(eTrademarks Service)Figure 9.74A message will be displayed to indicate the result of the submitted application.Click on [Next] button. Proceed to Figure 9.76 v4.0- I84 -
User Guide(eTrademarks Service)Figure 9.75A message will be displayed to indicate the result of the submitted application.Click on [Next] button. Proceed to Figure 9.77 v4.0- I85 -
User Guide(eTrademarks Service)Figure 9.76The details you have just filed will be displayed on the Reference Page. You may want to print a copy ofthe Reference Page for your own reference by clicking on the “Print” icon on your Web Browser.Note: Continue Figure 9.76 on the next page.- I86 -
User Guide(eTrademarks Service)Figure 9.76 (Continued)Click on Attached Mark Image URL Go to Figure 9.58Click on [Continue with Current eService] button. Figure 9.5 will be displayed for you to continue tofile another TM 27A or TM27B from there.Click on [Logout and Return to eTrademarks Return to eTrademarks Service webpage. v1.15Service] link.- I87 -
User Guide(eTrademarks Service)Figure 9.77The details you have just saved will be displayed on the Reference Page. You may want to print a copy ofthe Reference Page for your own reference by clicking on the “Print” icon on your Web Browser.Note: Continue Figure 9.77 on the next page.- I88 -
User Guide(eTrademarks Service)Figure 9.77 (Continued)Click on Attached Mark Image URL Go to Figure 9.58Click on [Continue with Current eService] button. Figure 9.5 will be displayed for you to continue tofile another TM 27A or TM27B from there.Click on [Logout and Return to eTrademarks Return to eTrademarks Service webpage. v1.15Service] link.- I89 -