PB50 and PB51 Mobile Printer User Guide - Intermec
PB50 and PB51 Mobile Printer User Guide - Intermec
PB50 and PB51 Mobile Printer User Guide - Intermec

You also want an ePaper? Increase the reach of your titles
YUMPU automatically turns print PDFs into web optimized ePapers that Google loves.
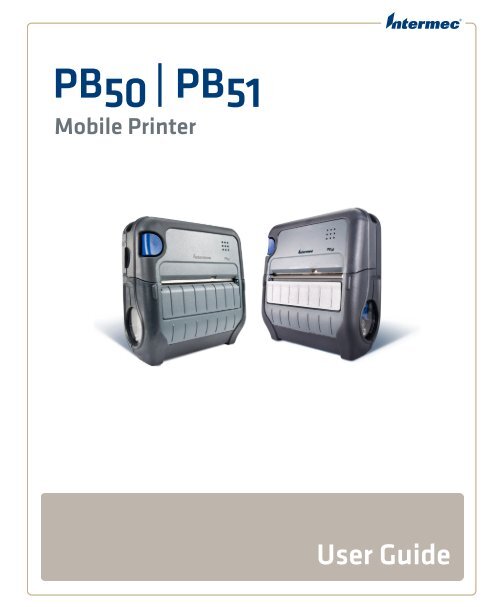
<strong>PB50</strong> | <strong>PB51</strong><strong>Mobile</strong> <strong>Printer</strong><strong>User</strong> <strong>Guide</strong>
Document Change RecordThis page records changes to this document. The document wasoriginally released as Revision 001.VersionNumber Date Description of Change008 5/2012 • Updated the manual to include information onhow to load fanfold media.007 4/2012 These changes were made for the 11.5.0 firmwarerelease:• Updated the “Underst<strong>and</strong>ing the <strong>Printer</strong>Language” section to “Selecting the <strong>Printer</strong>Language.”• Updated “Upgrading the Firmware”information.006 9/2011 • Removed information on floodcoated media.• Added procedure for configuring wirelessnetwork with PrintSet.005 4/2011 • Added an index.• Updated black mark sensor information.004 1/2010 • Updated procedures for upgrading printerfirmware <strong>and</strong> cleaning the printer.003 5/2009 • Added information describing the <strong>PB51</strong> printer.• Added changes to the media adjust in the <strong>PB50</strong>printer.002 11/2008 These changes were made for the current release:• Support for the ESC/P programming language.• Added the radioless <strong>PB50</strong> printer.• Change to the Ready-to-Work indicatorbehavior.• Added linerless media support.• New icons for Bluetooth radio <strong>and</strong> addition ofprinthead lifted error message.• Added of power management options SleepTimer <strong>and</strong> St<strong>and</strong>by Timer.<strong>PB50</strong> <strong>and</strong> <strong>PB51</strong> <strong>Mobile</strong> <strong>Printer</strong> <strong>User</strong> <strong>Guide</strong>iii
iv<strong>PB50</strong> <strong>and</strong> <strong>PB51</strong> <strong>Mobile</strong> <strong>Printer</strong> <strong>User</strong> <strong>Guide</strong>
ContentsContents1Before You Begin. . . . . . . . . . . . . . . . . . . . . . . . . . . . . . . . . . . . . . . . . . . . . . . . . . . . . . . . . . . . . . . . . ixSafety Information . . . . . . . . . . . . . . . . . . . . . . . . . . . . . . . . . . . . . . . . . . . . . . . . . . . . . . . ixGlobal Services <strong>and</strong> Support . . . . . . . . . . . . . . . . . . . . . . . . . . . . . . . . . . . . . . . . . . . . . . ixWarranty Information. . . . . . . . . . . . . . . . . . . . . . . . . . . . . . . . . . . . . . . . . . . . ixWeb Support . . . . . . . . . . . . . . . . . . . . . . . . . . . . . . . . . . . . . . . . . . . . . . . . . . . . ixSend Feedback. . . . . . . . . . . . . . . . . . . . . . . . . . . . . . . . . . . . . . . . . . . . . . . . . . . . xTelephone Support . . . . . . . . . . . . . . . . . . . . . . . . . . . . . . . . . . . . . . . . . . . . . . . xWho Should Read This Manual . . . . . . . . . . . . . . . . . . . . . . . . . . . . . . . . . . . . . . . . . . . . xRelated Documents . . . . . . . . . . . . . . . . . . . . . . . . . . . . . . . . . . . . . . . . . . . . . . . . . . . . . . . xUsing the <strong>Mobile</strong> <strong>Printer</strong> . . . . . . . . . . . . . . . . . . . . . . . . . . . . . . . . . . . . . . . . . . . . . . . . 1Introducing the <strong>Mobile</strong> <strong>Printer</strong>. . . . . . . . . . . . . . . . . . . . . . . . . . . . . . . . . . . . . . . . . . . . . . . . . . . . . 2What’s New?. . . . . . . . . . . . . . . . . . . . . . . . . . . . . . . . . . . . . . . . . . . . . . . . . . . . . . . . . . . . . . 2Features of the <strong>Printer</strong>. . . . . . . . . . . . . . . . . . . . . . . . . . . . . . . . . . . . . . . . . . . . . . . . . . . . . . . . . . . . . 2Identifying the Parts of the <strong>Printer</strong> . . . . . . . . . . . . . . . . . . . . . . . . . . . . . . . . . . . . . . . . . 3Underst<strong>and</strong>ing the Control Panel . . . . . . . . . . . . . . . . . . . . . . . . . . . . . . . . . . . . . . . . . . 3Selecting the <strong>Printer</strong> Language . . . . . . . . . . . . . . . . . . . . . . . . . . . . . . . . . . . . . . . . . . . . . 6Underst<strong>and</strong>ing the <strong>Printer</strong> Sounds . . . . . . . . . . . . . . . . . . . . . . . . . . . . . . . . . . . . . . . . . 9Using the Batteries . . . . . . . . . . . . . . . . . . . . . . . . . . . . . . . . . . . . . . . . . . . . . . . . . . . . . . . . . . . . . . . . 9Installing the Battery . . . . . . . . . . . . . . . . . . . . . . . . . . . . . . . . . . . . . . . . . . . . . . . . . . . . . 10Charging the Batteries. . . . . . . . . . . . . . . . . . . . . . . . . . . . . . . . . . . . . . . . . . . . . . . . . . . . 11Underst<strong>and</strong>ing the Battery Icon . . . . . . . . . . . . . . . . . . . . . . . . . . . . . . . . . . . . . . . . . . . 11Managing Power on the <strong>Mobile</strong> <strong>Printer</strong> . . . . . . . . . . . . . . . . . . . . . . . . . . . . . . . . . . . . 12Underst<strong>and</strong>ing the Sleep Timer . . . . . . . . . . . . . . . . . . . . . . . . . . . . . . . . . . . 12Underst<strong>and</strong>ing the St<strong>and</strong>by Timer . . . . . . . . . . . . . . . . . . . . . . . . . . . . . . . . 12Extending Battery Life. . . . . . . . . . . . . . . . . . . . . . . . . . . . . . . . . . . . . . . . . . . . . . . . . . . . 13Loading Media. . . . . . . . . . . . . . . . . . . . . . . . . . . . . . . . . . . . . . . . . . . . . . . . . . . . . . . . . . . . . . . . . . . 14Underst<strong>and</strong>ing the <strong>Printer</strong> Modes . . . . . . . . . . . . . . . . . . . . . . . . . . . . . . . . . . . . . . . . . . . . . . . . .21Underst<strong>and</strong>ing Ready Mode . . . . . . . . . . . . . . . . . . . . . . . . . . . . . . . . . . . . . . . . . . . . . . 21Underst<strong>and</strong>ing Information Mode . . . . . . . . . . . . . . . . . . . . . . . . . . . . . . . . . . . . . . . . 21Underst<strong>and</strong>ing Pause Mode. . . . . . . . . . . . . . . . . . . . . . . . . . . . . . . . . . . . . . . . . . . . . . . 22Underst<strong>and</strong>ing Setup Mode. . . . . . . . . . . . . . . . . . . . . . . . . . . . . . . . . . . . . . . . . . . . . . . 23Underst<strong>and</strong>ing Error Mode . . . . . . . . . . . . . . . . . . . . . . . . . . . . . . . . . . . . . . . . . . . . . . . 24Underst<strong>and</strong>ing Dump Mode . . . . . . . . . . . . . . . . . . . . . . . . . . . . . . . . . . . . . . . . . . . . . . 24Underst<strong>and</strong>ing Extended Test Mode . . . . . . . . . . . . . . . . . . . . . . . . . . . . . . . . . . . . . . . 25Printing a Test Page . . . . . . . . . . . . . . . . . . . . . . . . . . . . . . . . . . . . . . . . . . . . . . . . . . . . . . . . . . . . . . 26<strong>PB50</strong> <strong>and</strong> <strong>PB51</strong> <strong>Mobile</strong> <strong>Printer</strong> <strong>User</strong> <strong>Guide</strong>v
Contents2Configuring the <strong>Mobile</strong> <strong>Printer</strong> . . . . . . . . . . . . . . . . . . . . . . . . . . . . . . . . . . . . . . . 29Connecting the <strong>Printer</strong> to Your PC . . . . . . . . . . . . . . . . . . . . . . . . . . . . . . . . . . . . . . . . . . . . . . . .30Connecting the <strong>Printer</strong> Through the USB Interface . . . . . . . . . . . . . . . . . . . . . . . . . 30Connecting the <strong>Printer</strong> Through the Serial Port . . . . . . . . . . . . . . . . . . . . . . . . . . . . 31Connecting the <strong>Printer</strong> to Your Network . . . . . . . . . . . . . . . . . . . . . . . . . . . . . . . . . . . . . . . . . . . 32Setting Up Bluetooth Communications. . . . . . . . . . . . . . . . . . . . . . . . . . . . . . . . . . . . 32Setting Up 802.11 Radio Communications . . . . . . . . . . . . . . . . . . . . . . . . . . . . . . . . . 34Configuring Wireless Printing Using IPL. . . . . . . . . . . . . . . . . . . . . . . . . . .37Configuring Wireless Printing Using Fingerprint . . . . . . . . . . . . . . . . . . . 40Configuring the <strong>Printer</strong> Settings . . . . . . . . . . . . . . . . . . . . . . . . . . . . . . . . . . . . . . . . . . . . . . . . . . 42Changing Configuration Settings from the Control Panel . . . . . . . . . . . . . . . . . . . 42Changing Configuration Settings From PrintSet . . . . . . . . . . . . . . . . . . . . . . . . . . . 44Changing Configuration Settings Using the Comm<strong>and</strong> Line . . . . . . . . . . . . . . . . 44Changing Configuration Settings From the <strong>Printer</strong> Home Page . . . . . . . . . . . . . .45Changing Configuration Settings From the SmartSystems Console . . 46Upgrading the Firmware. . . . . . . . . . . . . . . . . . . . . . . . . . . . . . . . . . . . . . . . . . . . . . . . . . . . . . . . . . 47Upgrading the <strong>Printer</strong> Firmware Using PrintSet . . . . . . . . . . . . . . . . . . . . . . . . . . . . 47Upgrading the <strong>Printer</strong> Firmware Using the <strong>Printer</strong> Home Page . . . . . . . . . . . . . . . 49Upgrading <strong>Printer</strong> Firmware Using SmartSystems Foundation. . . . . . . . . . . . . . . 51Upgrading the <strong>Printer</strong> Firmware Using a Communications Program . . . . . . . . . 513Downloading Fonts <strong>and</strong> Graphics . . . . . . . . . . . . . . . . . . . . . . . . . . . . . . . . . . . . . . . . . . . . . . . . . 55Troubleshooting <strong>and</strong> Maintaining the <strong>Mobile</strong> <strong>Printer</strong>. . . . . . . . . . . . . . 57Troubleshooting the <strong>Mobile</strong> <strong>Printer</strong> . . . . . . . . . . . . . . . . . . . . . . . . . . . . . . . . . . . . . . . . . . . . . . .58Contacting Product Support. . . . . . . . . . . . . . . . . . . . . . . . . . . . . . . . . . . . . . . . . . . . . . 58Underst<strong>and</strong>ing Error Messages . . . . . . . . . . . . . . . . . . . . . . . . . . . . . . . . . . . . . . . . . . . . 58Troubleshooting <strong>Printer</strong> Problems <strong>and</strong> Finding Solutions . . . . . . . . . . . . . . . . . . . 60Troubleshooting Communication Problems . . . . . . . . . . . . . . . . . . . . . . . . . . . . . . . 62Using the Line Analyzer in Fingerprint. . . . . . . . . . . . . . . . . . . . . . . . . . . . . 62Using Dump Mode in IPL . . . . . . . . . . . . . . . . . . . . . . . . . . . . . . . . . . . . . . . . 63Restarting the <strong>Mobile</strong> <strong>Printer</strong> . . . . . . . . . . . . . . . . . . . . . . . . . . . . . . . . . . . . . . . . . . . . . . . . . . . . . 64Cleaning the <strong>Printer</strong>. . . . . . . . . . . . . . . . . . . . . . . . . . . . . . . . . . . . . . . . . . . . . . . . . . . . . . . . . . . . . . 65Cleaning the Printhead . . . . . . . . . . . . . . . . . . . . . . . . . . . . . . . . . . . . . . . . . . . . . . . . . . . 66Cleaning the Platen Roller . . . . . . . . . . . . . . . . . . . . . . . . . . . . . . . . . . . . . . . . . . . . . . . . 67Cleaning the <strong>Printer</strong> Exterior. . . . . . . . . . . . . . . . . . . . . . . . . . . . . . . . . . . . . . . . . . . . . . 67vi<strong>PB50</strong> <strong>and</strong> <strong>PB51</strong> <strong>Mobile</strong> <strong>Printer</strong> <strong>User</strong> <strong>Guide</strong>
ContentsACleaning the <strong>Printer</strong> Media Compartment . . . . . . . . . . . . . . . . . . . . . . . . . . . . . . . . . 68Specifications . . . . . . . . . . . . . . . . . . . . . . . . . . . . . . . . . . . . . . . . . . . . . . . . . . . . . . . . . 69Specifications. . . . . . . . . . . . . . . . . . . . . . . . . . . . . . . . . . . . . . . . . . . . . . . . . . . . . . . . . . . . . . . . . . . . 70Interfaces. . . . . . . . . . . . . . . . . . . . . . . . . . . . . . . . . . . . . . . . . . . . . . . . . . . . . . . . . . . . . . . . . . . . . . . . 74RS-232 Serial Interface . . . . . . . . . . . . . . . . . . . . . . . . . . . . . . . . . . . . . . . . . . . . . . . . . . . 74USB Interface. . . . . . . . . . . . . . . . . . . . . . . . . . . . . . . . . . . . . . . . . . . . . . . . . . . . . . . . . . . . 75BAccessories for the <strong>Mobile</strong> <strong>Printer</strong> . . . . . . . . . . . . . . . . . . . . . . . . . . . . . . . . . . . . . . . . . . . . . . . . . 76IPL <strong>and</strong> Fingerprint Setup Menus. . . . . . . . . . . . . . . . . . . . . . . . . . . . . . . . . . . . 79IPL Setup Menu . . . . . . . . . . . . . . . . . . . . . . . . . . . . . . . . . . . . . . . . . . . . . . . . . . . . . . . . . . . . . . . . . 80IFingerprint Setup Menu . . . . . . . . . . . . . . . . . . . . . . . . . . . . . . . . . . . . . . . . . . . . . . . . . . . . . . . . . . 81Index . . . . . . . . . . . . . . . . . . . . . . . . . . . . . . . . . . . . . . . . . . . . . . . . . . . . . . . . . . . . . . . . . . . . . 83<strong>PB50</strong> <strong>and</strong> <strong>PB51</strong> <strong>Mobile</strong> <strong>Printer</strong> <strong>User</strong> <strong>Guide</strong>vii
Contentsviii<strong>PB50</strong> <strong>and</strong> <strong>PB51</strong> <strong>Mobile</strong> <strong>Printer</strong> <strong>User</strong> <strong>Guide</strong>
Before You BeginBefore You BeginSafety InformationThis section provides you with safety information, technical supportinformation, <strong>and</strong> sources for additional product information.Your safety is extremely important. Read <strong>and</strong> follow all warnings <strong>and</strong>cautions in this document before h<strong>and</strong>ling <strong>and</strong> operating <strong>Intermec</strong>equipment. You can be seriously injured, <strong>and</strong> equipment <strong>and</strong> data canbe damaged if you do not follow the safety warnings <strong>and</strong> cautions.This section explains how to identify <strong>and</strong> underst<strong>and</strong> warnings,cautions, <strong>and</strong> notes that are in this document.A warning alerts you of an operating procedure, practice,condition, or statement that must be strictly observed to avoiddeath or serious injury to the persons working on the equipment.A caution alerts you to an operating procedure, practice,condition, or statement that must be strictly observed to preventequipment damage or destruction, or corruption or loss of data.Note: Notes either provide extra information about a topic or containspecial instructions for h<strong>and</strong>ling a particular condition or set ofcircumstances.Global Services <strong>and</strong> SupportWarranty InformationTo underst<strong>and</strong> the warranty for your <strong>Intermec</strong> product, visit the<strong>Intermec</strong> website at www.intermec.com <strong>and</strong> click Support >Returns <strong>and</strong> Repairs > Warranty.Web SupportVisit the <strong>Intermec</strong> website at www.intermec.com to download ourcurrent manuals (in PDF). To order printed versions of the <strong>Intermec</strong>manuals, contact your local <strong>Intermec</strong> representative or distributor.<strong>PB50</strong> <strong>and</strong> <strong>PB51</strong> <strong>Mobile</strong> <strong>Printer</strong> <strong>User</strong> <strong>Guide</strong>ix
Before You BeginVisit the <strong>Intermec</strong> technical knowledge base (Knowledge Central) atwww.intermec.com <strong>and</strong> click Support > Knowledge Central toreview technical information or to request technical support for your<strong>Intermec</strong> product.Send FeedbackYour feedback is crucial to the continual improvement of ourdocumentation. To provide feedback about this manual, pleasecontact the <strong>Intermec</strong> Technical Communications department directlyat TechnicalCommunications@intermec.com.Telephone SupportIn the U.S.A. <strong>and</strong> Canada, call 1-800-755-5505.Outside the U.S.A. <strong>and</strong> Canada, contact your local <strong>Intermec</strong>representative. To search for your local representative, from the<strong>Intermec</strong> website, click About Us > Contact Us.Who Should Read This ManualRelated DocumentsThis document is for the person who is responsible for installing,configuring, <strong>and</strong> maintaining the <strong>PB50</strong> or <strong>PB51</strong> mobile printer.This document provides you with information about the features ofthe mobile printer, <strong>and</strong> how to install, configure, operate, maintain,<strong>and</strong> troubleshoot it.Before you work with the mobile printer, you should be familiar withyour network <strong>and</strong> general networking terms, such as IP address.This is a list of related <strong>Intermec</strong> documents:• <strong>Intermec</strong> Fingerprint Comm<strong>and</strong> Reference Manual• <strong>Intermec</strong> Fingerprint Developer’s <strong>Guide</strong>• <strong>Intermec</strong> <strong>Printer</strong> Language (IPL) Comm<strong>and</strong> Reference Manual• ESC/P Programmer’s Reference Manual• ZSim Programmer’s <strong>Guide</strong>• CSim Programmer’s <strong>Guide</strong>• DSim Programmer’s <strong>Guide</strong>x<strong>PB50</strong> <strong>and</strong> <strong>PB51</strong> <strong>Mobile</strong> <strong>Printer</strong> <strong>User</strong> <strong>Guide</strong>
Before You BeginThe <strong>Intermec</strong> website at www.intermec.com contains our documents(as PDF files) that you can download for free.To download documents1 Visit the <strong>Intermec</strong> website at www.intermec.com.2 Click the Products tab.3 Use the Products menu, navigate to your product page. Forexample, to find the <strong>PB50</strong> mobile printer page, click <strong>Printer</strong>s <strong>and</strong>Media > <strong>Mobile</strong> <strong>Printer</strong>s > <strong>PB50</strong>.4 Click the Manuals tab.<strong>PB50</strong> <strong>and</strong> <strong>PB51</strong> <strong>Mobile</strong> <strong>Printer</strong> <strong>User</strong> <strong>Guide</strong>xi
Before You Beginxii<strong>PB50</strong> <strong>and</strong> <strong>PB51</strong> <strong>Mobile</strong> <strong>Printer</strong> <strong>User</strong> <strong>Guide</strong>
1Using the <strong>Mobile</strong> <strong>Printer</strong>Use this chapter to familiarize yourself with your mobileprinter. This chapter contains these sections:• Introducing the <strong>Mobile</strong> <strong>Printer</strong>• Features of the <strong>Printer</strong>• Using the Batteries• Loading Media• Underst<strong>and</strong>ing the <strong>Printer</strong> Modes• Printing a Test Page1
Chapter 1 — Using the <strong>Mobile</strong> <strong>Printer</strong>Introducing the <strong>Mobile</strong> <strong>Printer</strong>The <strong>PB50</strong>, <strong>PB50</strong>C, <strong>and</strong> <strong>PB51</strong> are rugged direct thermal label <strong>and</strong>receipt printers designed for use with <strong>Intermec</strong> mobile computers <strong>and</strong>SF51 <strong>and</strong> SR61 scanners. Use the <strong>PB50</strong> for label printing, <strong>and</strong> the<strong>PB51</strong> for receipt printing.Note: Unless otherwise noted, this manual uses the term “printer” torefer to both the <strong>PB50</strong> <strong>and</strong> <strong>PB51</strong> printers.What’s New?The printer provides:• print resolution of 203 dpi.• print speeds of up to 100 mm per second (4 ips).• 802.11 radio, Bluetooth radio, or no radio options.This version of the printer manual contains these changes:• Updated the user guide to include information on how to loadfanfold media. For more information, see “Loading Media” onpage 14.Features of the <strong>Printer</strong>This section explains how to use the printer <strong>and</strong> contains informationabout the:• parts of the printer.• Control Panel.• printer languages.• printer sounds.2 <strong>PB50</strong> <strong>and</strong> <strong>PB51</strong> <strong>Mobile</strong> <strong>Printer</strong> <strong>User</strong> <strong>Guide</strong>
Identifying the Parts of the <strong>Printer</strong>Chapter 1 — Using the <strong>Mobile</strong> <strong>Printer</strong>Use the illustration to underst<strong>and</strong> some of the features of the printer.Self-stripdoorMedia coverrelease buttonControl panelReady-to-WorkindicatorCommunications port<strong>PB50</strong> <strong>and</strong> <strong>PB51</strong> <strong>Mobile</strong> <strong>Printer</strong>: This illustration shows the important featuresof the printer. A weather-resistant flap protects the communications port <strong>and</strong>the external power connector.Note: Only the <strong>PB50</strong> has a self-strip door.Underst<strong>and</strong>ing the Control PanelThe printer control panel contains four buttons, a liquid crystaldisplay (LCD), <strong>and</strong> one LED indicator. Use the four buttons tonavigate the menu system <strong>and</strong> perform functions on the printer. Usethe following tables to underst<strong>and</strong> the buttons, menu system, <strong>and</strong>status LED.<strong>PB50</strong> <strong>and</strong> <strong>PB51</strong> <strong>Mobile</strong> <strong>Printer</strong> <strong>User</strong> <strong>Guide</strong> 3
Chapter 1 — Using the <strong>Mobile</strong> <strong>Printer</strong>Feed buttonSetup buttonSETUP:SER-COMSt<strong>and</strong>by button<strong>Printer</strong> Control Panel: Use this illustration to familiarize yourself with thebuttons <strong>and</strong> lights on the printer.Underst<strong>and</strong>ing How to Use the <strong>Printer</strong> ButtonsButtonName Button FunctionFeedPress to advance label or receipt paper withoutprinting. The amount of media advanced depends onthe type of media loaded in the printer. The printer willadvance 5 mm (0.2 inch), an entire label, or aconfigured length of media based on your media <strong>and</strong>settings.If you press <strong>and</strong> hold the button for longer than twoseconds while in Ready mode, the printer performs atestfeed to calibrate the media (Fingerprint or ESC/P).If the printer is printing, press this button to start <strong>and</strong>stop Pause mode.SetupPress to start <strong>and</strong> stop Setup mode (IPL <strong>and</strong>Fingerprint only).Press <strong>and</strong> hold to cancel printing (ESC/P only).St<strong>and</strong>by(Power)InfoReady-to-WorkindicatorInfo buttonPress to start St<strong>and</strong>by mode. In St<strong>and</strong>by mode, theradio, display, <strong>and</strong> backlight are turned off.Press to turn the printer on <strong>and</strong> start Ready mode.Press to show a summary of network connectionsettings <strong>and</strong> error conditions (Fingerprint <strong>and</strong> IPLonly). Each information message appears on the screenfor five seconds.Press in Pause mode to cancel the print job(Fingerprint <strong>and</strong> IPL only).The button does not have a unique function whenusing the ESC/P language.4 <strong>PB50</strong> <strong>and</strong> <strong>PB51</strong> <strong>Mobile</strong> <strong>Printer</strong> <strong>User</strong> <strong>Guide</strong>
Chapter 1 — Using the <strong>Mobile</strong> <strong>Printer</strong>The buttons can act as “soft keys,” which means that the function ofeach button depends on the state of the printer. A small icon appearsin the screen next to the button to indicate the function it performs.Underst<strong>and</strong>ing the Soft KeysButton Soft Keys DescriptionMoves through the settings at the same level in themenu system.Stops Setup mode <strong>and</strong> returns to Ready mode.• Moves up one level in the menu system. This softkey appears in Setup mode.• Increases the value of a number when editingsettings, such as an IP address. This soft keyappears in Setup mode.• Pauses the printing job. This icon appears onlywhen you are printing.• Moves down one level in the menu system <strong>and</strong>saves changes to a setting.• Cancels the print job (Fingerprint or IPL), orstops Information mode.The only LED on the printer is the blue Ready-to-Work indicator.Underst<strong>and</strong>ing the Ready-to-Work IndicatorIndicator StateOffOnDescriptionWhen the light is off, it means one of the following:• The printer is in St<strong>and</strong>by mode.• The printer is in Info mode.• The printer is in Setup mode.The printer is powered on <strong>and</strong> operating.<strong>PB50</strong> <strong>and</strong> <strong>PB51</strong> <strong>Mobile</strong> <strong>Printer</strong> <strong>User</strong> <strong>Guide</strong> 5
Chapter 1 — Using the <strong>Mobile</strong> <strong>Printer</strong>Underst<strong>and</strong>ing the Ready-to-Work Indicator (continued)Indicator StateBlinkingDescriptionWhen the light is blinking, it means one of the following:• The printer is out of paper.• The media cover is open.• There is a printer error that requires you to perform anaction. For a list of possible problems, see“Troubleshooting the <strong>Mobile</strong> <strong>Printer</strong>” on page 58.Selecting the <strong>Printer</strong> LanguageThe language you choose affects the functionality of the printer <strong>and</strong>how you use it. This manual contains information for using eachprinter language.If your printer has firmware version 11.4.0 or earlier, your printercomes with one of the following printer languages:• Fingerprint• <strong>Intermec</strong> <strong>Printer</strong> Language (IPL)• ESC/PNote: If your printer has version 11.4.0 or earlier <strong>and</strong> you want to runa simulator language , you can download ZSim, CSim, <strong>and</strong> DSim fromthe <strong>Intermec</strong> website at www.intermec.com.If you upgrade your printer firmware to version 11.5.0 or later, yourprinter is loaded with all of the following printer languages:• Fingerprint• <strong>Intermec</strong> <strong>Printer</strong> Language (IPL)• ESC/P• ZSim• CSim• DSimThe first time you start your printer after you upgrade your firmware,you are prompted to select a printer language. The language you selectautomatically runs each time you turn on your printer.6 <strong>PB50</strong> <strong>and</strong> <strong>PB51</strong> <strong>Mobile</strong> <strong>Printer</strong> <strong>User</strong> <strong>Guide</strong>
Chapter 1 — Using the <strong>Mobile</strong> <strong>Printer</strong><strong>Printer</strong> Language Descriptions<strong>Printer</strong>Language<strong>Intermec</strong> <strong>Printer</strong>Language (IPL)FingerprintESC/PZSimCSimDSimDescriptionIPL is an easy-to-use programming language that lets youdesign, download, <strong>and</strong> modify formats. To setup,configure, <strong>and</strong> use IPL, see the <strong>Intermec</strong> <strong>Printer</strong> Language(IPL) Comm<strong>and</strong> Reference Manual.<strong>Intermec</strong> Fingerprint is a BASIC-inspired, printer-residentprogramming language you use to design label formats<strong>and</strong> write custom printer application software. To setup,configure, <strong>and</strong> use Fingerprint, see the <strong>Intermec</strong>Fingerprint Comm<strong>and</strong> Reference Manual or the <strong>Intermec</strong>Fingerprint Developer’s <strong>Guide</strong>.ESC/P is Epson interpreter program that interprets theEpson St<strong>and</strong>ard Code for <strong>Printer</strong>s comm<strong>and</strong> language. Tosetup, configure, <strong>and</strong> use ESC/P, see the ESC/PProgrammer’s Reference Manual.ZSim is a Zebra interpreter program that interprets ZPLII or later programs. To setup, configure, <strong>and</strong> use ZSim,see the ZSim Programmer’s <strong>Guide</strong>.CSim is Zebra interpreter program that interprets CPCLcomm<strong>and</strong> language. To setup, configure, <strong>and</strong> use ZSim,see the CSim Programmer’s <strong>Guide</strong>.DSim is a Datamax simulation program that runsDatamax programs. To setup, configure, <strong>and</strong> use DSim,see the DSim Programmer’s <strong>Guide</strong>.The current printer language <strong>and</strong> firmware version appear on thescreen when the printer is in Ready mode.IPL 12.0.0The Screen of a <strong>Printer</strong> Running IPL FirmwareTo select your printer language1 Turn on your printer.<strong>PB50</strong> <strong>and</strong> <strong>PB51</strong> <strong>Mobile</strong> <strong>Printer</strong> <strong>User</strong> <strong>Guide</strong> 7
Chapter 1 — Using the <strong>Mobile</strong> <strong>Printer</strong>2 If the printer language you want to run appears, press the key thatcorresponds to the printer language.If the printer language you want to run does not appear, press thekey that corresponds to the next button.< FP< IPLESCP >NEXT >3 Press the key that corresponds to the printer language you want torun on your printer.< ZSIM< CSIMDSIM >PREV >4 Restart your printer.Once your printer is running a particular printer language, you canchange the printer language from the Setup menu. The way that youaccess the comm<strong>and</strong> language menu depends on which language youare currently running.Changing the <strong>Printer</strong> Language From the Setup MenuLanguage How to Access the Comm<strong>and</strong> Language MenuIPL • Go to SETUP > TEST/SERVICE > CMDLANGUAGE.Fingerprint or • Go to SETUP > PRINT DEFS > CMD LANGUAGE.Direct ProtocolZSim, DSim, or 1 Press Setup button.CSim2 Enter the Fingerprint password: 8311.3 Press Setup button.4 Go to SETUP > PRINT DEFS > CMD LANGUAGE.8 <strong>PB50</strong> <strong>and</strong> <strong>PB51</strong> <strong>Mobile</strong> <strong>Printer</strong> <strong>User</strong> <strong>Guide</strong>
Underst<strong>and</strong>ing the <strong>Printer</strong> SoundsUsing the BatteriesChapter 1 — Using the <strong>Mobile</strong> <strong>Printer</strong>Note: You cannot configure ESC/P from the Setup menu. If yourprinter is originally in ESC/P <strong>and</strong> you want to change to Fingerprintor IPL, you need to enter Exteded Test Mode <strong>and</strong> select the printerlanguage. For more information, see “Underst<strong>and</strong>ing Extended TestMode” on page 25.The printer plays sounds in response to several actions that you canperform. Use the following table to underst<strong>and</strong> when the soundsoccur <strong>and</strong> what they mean.Underst<strong>and</strong>ing the <strong>Printer</strong> SoundsSoundOccurs When:Power • You connect the AC power cable or insert a battery.• The printer starts charging the battery.Hardware You open the media door, close the media door, or insert acable.ButtonYou press any of the printer buttons.Error • The printer cannot feed paper or print a job because ofa hardware issue such as the media door open, a paperjam, or there is no media.• An error occurs such as a paper jam or a print error.The printer uses a rechargeable 2200 mAh lithium-ion battery (ModelAB13) for power. You must fully charge the battery before you can usethe printer. When in St<strong>and</strong>by mode, a fully charged battery can last upto one week without recharging.Use <strong>Intermec</strong> Model AB13 battery only. Use of another batterymay present a risk of fire or explosion.The Model AB13 battery may present a fire or chemical burnhazard if mistreated. Do not disassemble, heat above 100 °C(212 °F), or incinerate.<strong>PB50</strong> <strong>and</strong> <strong>PB51</strong> <strong>Mobile</strong> <strong>Printer</strong> <strong>User</strong> <strong>Guide</strong> 9
Chapter 1 — Using the <strong>Mobile</strong> <strong>Printer</strong>Installing the BatteryDispose of used batteries promptly. Keep away from children.Make sure you fully charge the battery before you use your printer.You can charge the battery when it is installed in the printer, or usingthe AC18 4-bay battery charger.To install the battery1 Lay the printer upside-down on a flat surface.2 Insert the battery with the tab facing away from the front controlpanel.3 Insert the edge of the battery under the lip of the printer <strong>and</strong> thenpush down until you hear the battery latch click.10 <strong>PB50</strong> <strong>and</strong> <strong>PB51</strong> <strong>Mobile</strong> <strong>Printer</strong> <strong>User</strong> <strong>Guide</strong>
Charging the BatteriesChapter 1 — Using the <strong>Mobile</strong> <strong>Printer</strong>There are two ways to charge the battery:• Connect AC power to the printer <strong>and</strong> charge the battery while it isin the printer.• Charge the battery in the AC18 4-bay battery charger. For moreinformation, see AC18 4-Bay Battery Charger Instructions.It takes approximately six hours to charge the battery while it isinstalled in the printer. To charge the battery inside the printer, youneed:• an <strong>Intermec</strong> 12 VDC power supply (Model AE19).• an AC power cord.To charge the battery inside the printer1 Install the battery in the printer. For help, see the previous section,“Installing the Battery” on page 10.2 Connect the power supply to the DC power connector on theprinter.3 Connect one end of the power cord to the power supply, <strong>and</strong> thenplug the other end into an AC outlet.Underst<strong>and</strong>ing the Battery IconThe easiest way to tell the status of your battery is to look at thebattery icon on the control panel of the printer.Battery Icon StatusIconStatusBattery is fully charged.Battery has a medium charge. You should be able to work forseveral more hours before charging or replacing the battery.Battery is low. You need to replace the battery soon.Battery is critically low. You need to replace the battery now.Battery charging error. You may need to replace the battery.<strong>PB50</strong> <strong>and</strong> <strong>PB51</strong> <strong>Mobile</strong> <strong>Printer</strong> <strong>User</strong> <strong>Guide</strong> 11
Chapter 1 — Using the <strong>Mobile</strong> <strong>Printer</strong>Battery Icon Status (continued)IconStatusExternal power connected <strong>and</strong> there is no battery in theprinter.Managing Power on the <strong>Mobile</strong> <strong>Printer</strong>Use the power options on the printer to manage <strong>and</strong> conserve batterypower. From the Power option in Setup mode, you can set LowBattery, Sleep Timer, <strong>and</strong> St<strong>and</strong>by Timer.Use the Low Battery option to set the battery voltage at which the lowbattery warning appears. The values for Low Battery range from 12.1V to 16.8 V in 0.1 V increments. The default setting is 13.5 V.Underst<strong>and</strong>ing the Sleep TimerUse the Sleep Timer option to set the amount of time it takes for theprinter to go to “sleep” if it is not printing <strong>and</strong> you do not have anyinteraction with it. When the printer goes to “sleep,” it turns off thebacklight <strong>and</strong> dims the Ready-to-Work indicator. By default, theprinter backlight turns off after 20 seconds of no user interaction.You can set Sleep Timer to always off, always on, 5 seconds, 10seconds, 20 seconds, 30 seconds, or 60 seconds. The backlight turnson when:• the printer begins printing.• you press a button.• you connect the printer to external power.• you are communicating with or sending data to the printer.Note: If you have the Sleep Timer set to always on, the St<strong>and</strong>by timersetting have no effect.Underst<strong>and</strong>ing the St<strong>and</strong>by TimerUse the St<strong>and</strong>by Timer option to turn off power to the radio, thedisplay, <strong>and</strong> the backlight. The St<strong>and</strong>by Timer option has the sameeffect on the printer as pressing the St<strong>and</strong>by button.12 <strong>PB50</strong> <strong>and</strong> <strong>PB51</strong> <strong>Mobile</strong> <strong>Printer</strong> <strong>User</strong> <strong>Guide</strong>
Extending Battery LifeChapter 1 — Using the <strong>Mobile</strong> <strong>Printer</strong>When the printer is in St<strong>and</strong>by mode, both the LCD <strong>and</strong> the Readyto-Workindicator turn off. You can set St<strong>and</strong>by Timer to 5 mins, 10mins, 20 mins, 30 mins, 60 mins, or disabled. Press the St<strong>and</strong>bybutton to turn the printer back on.Here are some tips for extending the overall life of your battery:• Never expose the battery to direct sunlight or temperatures over50 °C (122 °F).• Only charge the battery inside the printer using a power supply, orin the 4-bay battery charger (Model AC18).• Do not set the backlight to always on. This setting disables theautomatic power saving modes.Here are some tips for extending the life of your battery betweencharges:• When you are not using the printer, press the St<strong>and</strong>by button tostart St<strong>and</strong>by mode. Press <strong>and</strong> hold the St<strong>and</strong>by button for aboutone second to stop St<strong>and</strong>by mode <strong>and</strong> start Ready mode.• Remove the battery from the printer if you will not be using it forthree days or more.• Do not operate the printer in extremely cold temperatures. Usingthe printer in temperatures below 0 °C (32 °F) reduces the overallbattery life.Over time, rechargeable batteries lose the ability to maintain a charge.You can only recharge a battery a finite number of times before youmust replace it.<strong>PB50</strong> <strong>and</strong> <strong>PB51</strong> <strong>Mobile</strong> <strong>Printer</strong> <strong>User</strong> <strong>Guide</strong> 13
Chapter 1 — Using the <strong>Mobile</strong> <strong>Printer</strong>Loading MediaYou can use roll or fanfold receipt media with both the <strong>PB50</strong> <strong>and</strong><strong>PB51</strong> printers. Your printer ships with a small amount of medialoaded, <strong>and</strong> a test page printed to make sure that the printer works.The <strong>PB50</strong> printer supports self-strip printing applications. Forinformation on how to correctly load self-strip media, see “To loadmedia for self-strip printing (<strong>PB50</strong> only)” on page 19. Forinformation on media specifications, see “Specifications” onpage 70.To load roll media1 Make sure the printer is in Ready mode.• If the printer is off or in St<strong>and</strong>by mode, press the St<strong>and</strong>bybutton.• If the printer is on, press the soft key (usually the Setupbutton) to return to Ready mode.2 Press the blue media cover release button until the cover releases.14 <strong>PB50</strong> <strong>and</strong> <strong>PB51</strong> <strong>Mobile</strong> <strong>Printer</strong> <strong>User</strong> <strong>Guide</strong>
Chapter 1 — Using the <strong>Mobile</strong> <strong>Printer</strong>3 Slide the two media supports apart.4 Insert the roll of media <strong>and</strong> press the media adjust guide until theroll is held firmly in place. Make sure you load the media clockwiseso that it pulls off the core from the bottom of the printer.5 Pull out approximately 8 cm (3 inches) of the media.6 Close the media cover. The printer emits the hardware sound totell you that the media door closed correctly.<strong>PB50</strong> <strong>and</strong> <strong>PB51</strong> <strong>Mobile</strong> <strong>Printer</strong> <strong>User</strong> <strong>Guide</strong> 15
Chapter 1 — Using the <strong>Mobile</strong> <strong>Printer</strong>7 Press down on the self-strip door to make sure the media cover iscompletely latched.Note: The <strong>PB51</strong> does not have a self-strip door. Instead,the self-strip door is molded plastic <strong>and</strong> part of the media cover.8 Press <strong>and</strong> hold the Feed button for more than two seconds tocalibrate the media.16 <strong>PB50</strong> <strong>and</strong> <strong>PB51</strong> <strong>Mobile</strong> <strong>Printer</strong> <strong>User</strong> <strong>Guide</strong>
Chapter 1 — Using the <strong>Mobile</strong> <strong>Printer</strong>To load fanfold media1 Make sure the printer is in Ready mode.• If the printer is off or in St<strong>and</strong>by mode, press the St<strong>and</strong>bybutton.• If the printer is on, press the soft key (usually the Setupbutton) to return to Ready mode.2 Press the blue media cover release button until the cover releases.3 Slide the two media supports apart.<strong>PB50</strong> <strong>and</strong> <strong>PB51</strong> <strong>Mobile</strong> <strong>Printer</strong> <strong>User</strong> <strong>Guide</strong> 17
Chapter 1 — Using the <strong>Mobile</strong> <strong>Printer</strong>4 Insert a dummy core <strong>and</strong> press the media adjust guide until thedummy core is held firmly in place.5 Load the fanfold media from the bottom of the printer.6 Pull out approximately 8 cm (3 inches) of the media.18 <strong>PB50</strong> <strong>and</strong> <strong>PB51</strong> <strong>Mobile</strong> <strong>Printer</strong> <strong>User</strong> <strong>Guide</strong>
Chapter 1 — Using the <strong>Mobile</strong> <strong>Printer</strong>7 Close the media cover. The printer emits the hardware sound totell you that the media door closed correctly.To load media for self-strip printing (<strong>PB50</strong> only)1 Complete Steps 1 through 5 in the previous procedure.2 Open the self-strip door in the media cover.3 Remove a label from the roll of media so that you have severalinches of label liner.<strong>PB50</strong> <strong>and</strong> <strong>PB51</strong> <strong>Mobile</strong> <strong>Printer</strong> <strong>User</strong> <strong>Guide</strong> 19
Chapter 1 — Using the <strong>Mobile</strong> <strong>Printer</strong>4 Feed the label liner over the self-strip bar <strong>and</strong> out the back of theself-strip door.5 Close the media cover until it latches <strong>and</strong> press down on the selfstripdoor to make sure it locks.6 Pull on the liner to tighten it.7 Press <strong>and</strong> hold the Feed button for more than two seconds tocalibrate the media.20 <strong>PB50</strong> <strong>and</strong> <strong>PB51</strong> <strong>Mobile</strong> <strong>Printer</strong> <strong>User</strong> <strong>Guide</strong>
Underst<strong>and</strong>ing the <strong>Printer</strong> ModesChapter 1 — Using the <strong>Mobile</strong> <strong>Printer</strong>The printer has seven modes: Ready, Information, Pause, Setup, Error,Dump, <strong>and</strong> Extended Test. The following sections explain each mode.Underst<strong>and</strong>ing Ready ModeThe printer is in Ready mode when the printer is on <strong>and</strong> ready toprint. The main screen shows the power status, the radio status,printer language, <strong>and</strong> firmware version number.To start Ready mode• If the printer is off or in St<strong>and</strong>by mode, press the St<strong>and</strong>by button.• If the printer is on, press the soft key.SETUP:IPL 11.2.0SER-COMThe <strong>Printer</strong> in Ready ModeUnderst<strong>and</strong>ing Information ModeWhen the printer is in Information mode, it shows a subset ofnetwork information about the printer. If there is an error, the errormessage appears first, followed by the printer information. Eachmessage appears for five seconds.Note: You must use IPL or Fingerprint to start Information mode.<strong>PB50</strong> <strong>and</strong> <strong>PB51</strong> <strong>Mobile</strong> <strong>Printer</strong> <strong>User</strong> <strong>Guide</strong> 21
Chapter 1 — Using the <strong>Mobile</strong> <strong>Printer</strong>The printer stops Information mode <strong>and</strong> returns to Ready modeautomatically. You can also press the Information button again (orthe soft key) to stop Information mode manually.SETUP:I/O serial 5SER-COM X8N1 9600The <strong>Printer</strong> in Information ModeTo start or stop Information mode• Press the Information button on the control panel.Underst<strong>and</strong>ing Pause ModeUse Pause mode to temporarily suspend printing, or to cancel thecurrent print job. Once you pause the printer, the Pause mode screenappears.PAUSEXThe <strong>Printer</strong> in Pause ModeTo start Pause mode• Press the Feed button while the printer is printing.To stop Pause mode <strong>and</strong> resume printing• Press the Feed button (or soft key).To cancel the current print job with Fingerprint or IPL1 Press the Feed button to pause printing.2 Press the Information button (or soft key) to cancel thecurrent print job.To cancel the current print job with ESC/P• Press <strong>and</strong> hold the Setup button.22 <strong>PB50</strong> <strong>and</strong> <strong>PB51</strong> <strong>Mobile</strong> <strong>Printer</strong> <strong>User</strong> <strong>Guide</strong>
Underst<strong>and</strong>ing Setup ModeChapter 1 — Using the <strong>Mobile</strong> <strong>Printer</strong>Use Setup mode to change settings on the printer.Note: You must use IPL or Fingerprint to start Setup mode. For moreinformation on how to change printer settings, see “Configuring the<strong>Printer</strong> Settings” on page 42.Sample Setup Mode ScreenTo start or stop Setup mode• Press the Setup button.Some settings use normal editing mode, <strong>and</strong> other settings useenhanced editing mode. You must press the soft key to confirmyour changes before the setting is saved.Editing Settings in Setup ModeEditing Mode To Navigate To ConfirmNormal • Press to move to the next choice. Press .• Press to select the previous menu.Enhanced • Press to move the cursor. When the Press .cursor blinks, you can change the setting.• Press to increase the value of thecurrently selected setting.BAUDRATE:9600Normal Editing Mode: In normal editing mode, you see an up arrow <strong>and</strong> a rightarrow for making selections.<strong>PB50</strong> <strong>and</strong> <strong>PB51</strong> <strong>Mobile</strong> <strong>Printer</strong> <strong>User</strong> <strong>Guide</strong> 23
Chapter 1 — Using the <strong>Mobile</strong> <strong>Printer</strong>+ IP ADDRESS:130.42.240.102Enhanced Editing Mode: In enhanced editing mode, you see a plus sign (+) <strong>and</strong>a right arrow to change the value of numeric settings.Underst<strong>and</strong>ing Error ModeThe printer starts Error mode when it detects an error condition, suchas a low battery or a paper jam. Some error messages appear on thescreen immediately when they occur, such as DOOR OPEN. Othererror messages do not appear until you press the Info button. If thereis more than one error, the errors appear in the order that theyoccurred.PAPER FAULTSample Error Mode ScreenIf an error message appears, see “Underst<strong>and</strong>ing Error Messages”on page 58 for more information on how to fix the problem.Underst<strong>and</strong>ing Dump ModeDump mode can be used to identify simple problems, such as labelalignment. Extended Test mode requires more user interaction <strong>and</strong>lets you choose which tests you want the printer to perform.To start <strong>and</strong> stop Dump mode1 Make sure the printer is in Ready mode <strong>and</strong> is loaded with media.2 Press <strong>and</strong> hold the Feed <strong>and</strong> St<strong>and</strong>by buttons for about fiveseconds, or until the SELECT MEDIA message appears on thescreen.24 <strong>PB50</strong> <strong>and</strong> <strong>PB51</strong> <strong>Mobile</strong> <strong>Printer</strong> <strong>User</strong> <strong>Guide</strong>
Chapter 1 — Using the <strong>Mobile</strong> <strong>Printer</strong>3 Release the buttons. The printer performs a test feed (sensorcalibration), prints a series of test labels, <strong>and</strong> then starts Dumpmode.While in Dump mode, information received by the printer isprinted immediately.4 Press Feed to stop Dump mode.After you stop Dump mode, the printer returns to Ready mode. Formore information on additional options available in Dump modewith IPL, see “Troubleshooting Communication Problems” onpage 62.Underst<strong>and</strong>ing Extended Test ModeUse Extended Test mode to run additional diagnostic tests or resolvemore difficult problems, including printing specific test labels,starting Dump mode, <strong>and</strong> resetting the printer to factory defaultsettings.TEST LABELSCHESSSample Extended Test Mode ScreenTo start Extended Test mode1 Make sure that the printer is loaded with media.2 Press the media cover release button to open the media cover.3 Press the St<strong>and</strong>by button to turn the printer off.4 Press the Feed <strong>and</strong> St<strong>and</strong>by buttons at the same time untilCLOSE PRINTER DOOR appears on the screen.5 Close the media cover. You are now in Extended Test mode.• Press to select the next function or option.• Press to start the current function.• Press to stop Extended Test mode.<strong>PB50</strong> <strong>and</strong> <strong>PB51</strong> <strong>Mobile</strong> <strong>Printer</strong> <strong>User</strong> <strong>Guide</strong> 25
Chapter 1 — Using the <strong>Mobile</strong> <strong>Printer</strong>Options in Extended Test ModeFunctionSelect MediaTest LabelsDump ModeFactory DefaultSetup <strong>and</strong> ExitExitDescriptionThis option is almost the same as theprocess in Dump mode, except that theprinter performs a slow testfeed inExtended Test mode. The slow testfeed canhelp resolve gap or mark detectionproblems.This option allows you to print test labelsone at a time. Press to print the nextlabel.This option starts Dump mode. For moreinformation on Dump mode, see“Troubleshooting CommunicationProblems” on page 62.This option restores the factory defaultsettings. Press to select this option,then follow the instructions on the screen.This option stops Extended Test mode <strong>and</strong>puts the printer in Setup mode.This option stops Extended Test mode.Printing a Test PageAfter you have loaded media in the printer, you are ready to print atest page, or testprint. Each printer language has several differenttestprint options. If you cannot get the information to print, see“Troubleshooting the <strong>Mobile</strong> <strong>Printer</strong>” on page 58.To print a test page with a printer loaded with IPL1 Press the Setup button.2 Press until Test/Service appears on the screen.3 Press to select the Test/Service menu.4 Press to select the Testprint Config menu.5 Press to select the Config menu.6 Press to choose a test page.7 Press to print the selected test page.26 <strong>PB50</strong> <strong>and</strong> <strong>PB51</strong> <strong>Mobile</strong> <strong>Printer</strong> <strong>User</strong> <strong>Guide</strong>
Chapter 1 — Using the <strong>Mobile</strong> <strong>Printer</strong>To print a test page with a printer loaded with Fingerprint1 Press the Setup button.2 Press until Print Defs appears on the screen.3 Press to select the Print Defs menu.4 Press until you reach Testprint.5 Press to select the Testprint menu.6 Press to choose a test page.7 Press to print the selected test page.To print a test page with a printer loaded with ESC/P1 Press <strong>and</strong> hold the Feed <strong>and</strong> Power buttons for approximately fiveseconds.2 Release the buttons when the printer shows the SELECT MEDIAmessage, or a message stating the type of media loaded in theprinter.3 Press the Feed button to stop Dump Mode.<strong>PB50</strong> <strong>and</strong> <strong>PB51</strong> <strong>Mobile</strong> <strong>Printer</strong> <strong>User</strong> <strong>Guide</strong> 27
Chapter 1 — Using the <strong>Mobile</strong> <strong>Printer</strong>28 <strong>PB50</strong> <strong>and</strong> <strong>PB51</strong> <strong>Mobile</strong> <strong>Printer</strong> <strong>User</strong> <strong>Guide</strong>
2Configuring the <strong>Mobile</strong> <strong>Printer</strong>This chapter contains these sections:• Connecting the <strong>Printer</strong> to Your PC• Connecting the <strong>Printer</strong> to Your Network• Configuring the <strong>Printer</strong> Settings• Upgrading the Firmware• Downloading Fonts <strong>and</strong> Graphics29
Chapter 2 — Configuring the <strong>Mobile</strong> <strong>Printer</strong>Connecting the <strong>Printer</strong> to Your PCYou can easily connect the printer to your PC using one of these ports:• USB port• RS-232 serial interface portConnecting the <strong>Printer</strong> Through the USB InterfaceTo connect the printer to your PC through the USB port, you need toinstall <strong>Intermec</strong> InterDriver® software. To make sure you have thelatest version of InterDriver, go to the Downloads page for the printerat http://www.intermec.com/support/downloads/index.aspx.You also need a separately purchased USB cable (P/N 321-611-xxx).To connect the printer through the USB port1 Run the InterDriver installation program.2 If a Security Warning window appears, click Run. The <strong>Intermec</strong>End <strong>User</strong> License Agreement appears.3 Read <strong>and</strong> accept the agreement, <strong>and</strong> then click Next. TheInstallation Directory screen appears.4 The default installation directory is C:\<strong>Intermec</strong>\InterDriver7.Click Next to use the default directory, or specify a differentlocation to install the files, <strong>and</strong> then click Next. The InstallationInformation screen appears.5 Clear the Run Add Print Wizard after unpacking drivers checkbox <strong>and</strong> click Finish.6 On the New Hardware Wizard screen, select Install from a list orspecific location, <strong>and</strong> then click Next to continue.Note: For LPT connections, you must restart your computer forWindows to detect the new hardware. For USB connections, theNew Hardware Wizard starts automatically when the printer isconnected <strong>and</strong> turned on.7 On the Search <strong>and</strong> Installation Options screen, click Next.8 On the Hardware Installation warning screen, click ContinueAnyway.30 <strong>PB50</strong> <strong>and</strong> <strong>PB51</strong> <strong>Mobile</strong> <strong>Printer</strong> <strong>User</strong> <strong>Guide</strong>
Chapter 2 — Configuring the <strong>Mobile</strong> <strong>Printer</strong>9 Click Finish to close the New Hardware Wizard. InterDriver filesare now installed on your computer.10 Connect the USB cable to the connector on the back of the printer<strong>and</strong> connect the other end to your PC.Connecting the <strong>Printer</strong> Through the Serial PortYou can use a serial connection to communicate with your PC <strong>and</strong>run PrintSet, LabelShop, or InterDriver. You can also use the serialport to send comm<strong>and</strong>s directly to the printer through a serialcommunications program like HyperTerminal.The serial communication parameters control the communicationbetween the printer <strong>and</strong> the PC, referred to as “uart1:” on the printer.Make sure the serial port settings on the printer match the settings onthe connected device. The default serial communication settings onthe printer are: 115200 baud rate, 8 data bits, no parity, 1 stop bit, <strong>and</strong>no flow control.To connect the printer to your PC using the serial port, you need aseparately purchased serial cable (P/N 075497).To connect the printer through the serial port1 Connect the serial cable to the connector on the back of theprinter <strong>and</strong> connect the other end to your PC.2 On your PC, start the communications program.3 If necessary, configure the PC port settings as follows:ParameterDefault SettingBaud rate 115200Data bits 8ParityNoneStop bits 14 If you are using HyperTerminala Click the Settings tab.b Click ASCII Setup. The ASCII Setup window appears.<strong>PB50</strong> <strong>and</strong> <strong>PB51</strong> <strong>Mobile</strong> <strong>Printer</strong> <strong>User</strong> <strong>Guide</strong> 31
Chapter 2 — Configuring the <strong>Mobile</strong> <strong>Printer</strong>c Select the following check boxes:• Send line ends with line feed• Echo typed characters locally• Append line feeds to incoming line endsd Click OK to save <strong>and</strong> close ASCII Setup.5 Test your connection by typing one of the following comm<strong>and</strong>s inyour communications program window:• For IPL, hold down Ctrl <strong>and</strong> type:b,w,c• For FingerPrint, type:FF<strong>and</strong> press Enter.• For ESC/P, press ESC <strong>and</strong> type:EZ {AHEAD:10}The printer feeds a small strip of media.Connecting the <strong>Printer</strong> to Your NetworkThe printer must establish communications with a host that sendsthe data to print. The printer has two ways to communicate with anetwork:• Bluetooth radio communications• 802.11 b/g wireless radio communicationsSetting Up Bluetooth CommunicationsYour mobile printer contains a Bluetooth radio that allows wirelesscommunications with a remote device from distances up to 100meters (328 feet) depending on the Bluetooth range capabilities of theremote device, environmental conditions, <strong>and</strong> obstructions. For theBluetooth-enabled devices to exchange data, both devices mustestablish a connection. Bluetooth software is always running in thebackground.32 <strong>PB50</strong> <strong>and</strong> <strong>PB51</strong> <strong>Mobile</strong> <strong>Printer</strong> <strong>User</strong> <strong>Guide</strong>
Chapter 2 — Configuring the <strong>Mobile</strong> <strong>Printer</strong>A printer cannot initiate a Bluetooth connection. The other device,such as a mobile computer, must request a connection with theprinter. The printer then accepts or rejects the connection. Use<strong>Intermec</strong> Settings on the mobile computer to enable the Bluetoothsettings on the printer.If the printer has a Bluetooth connection, it can also connect toBluetooth scanners, such as the SF51 <strong>and</strong> the SR61 Cordless scanners.You can create the bar code labels you need to connect the printer to aBluetooth scanner using EasySet software. To create these bar codes,you need to know the Bluetooth Device Address (BDA)<strong>and</strong> the PIN ofthe printer. You can download a free version of EasySet from the<strong>Intermec</strong> website at www.intermec.com.Each printer equipped with a Bluetooth radio has a unique BDA. Youcan find the BDA on the certification label located on the bottom ofthe printer.For information on how to set up Bluetooth communications withyour mobile computer, see your mobile computer user manual.Note: For maximum security, <strong>Intermec</strong> recommends that you seta Bluetooth passcode. The default passcode is 1234.To set up Bluetooth communications with a scanner1 Download <strong>and</strong> install EasySet.2 Create the following bar code labels using EasySet:• Administrator reset factory defaults• Bluetooth parameters - security - not active• Bluetooth parameters - connect/disconnect - compose BTaddress• Bluetooth parameters - security - compose PIN:<strong>PB50</strong> <strong>and</strong> <strong>PB51</strong> <strong>Mobile</strong> <strong>Printer</strong> <strong>User</strong> <strong>Guide</strong> 33
Chapter 2 — Configuring the <strong>Mobile</strong> <strong>Printer</strong>3 Scan the bar code labels with the Bluetooth scanner.IconDescriptionThe Bluetooth radio is on <strong>and</strong> the printer is not connected to aserial cable.The Bluetooth radio is off. The Bluetooth radio turns off whenyou connect a serial cable.Setting Up 802.11 Radio CommunicationsThe printer can have an internal 802.11 b/g radio to transfer <strong>and</strong>receive data using wireless communications. This manual assumesthat you have already set up your wireless communications network,including at least one access point. The following procedures includeinformation on setting up wireless security for IPL <strong>and</strong> Fingerprint.The printer supports these authentication modes: none, WEP, WPAPersonal <strong>and</strong> Enterprise mode (802.1x authentication), WPA2Personal <strong>and</strong> Enterprise mode (802.1x authentication).Note: WPA <strong>and</strong> WPA2 Enterprise mode currently support PEAP,TTLS, <strong>and</strong> LEAP. For LEAP authentication, the printer supports OpenEAP, but does not support Network EAP.To connect the printer to your wireless network, you need these items:• Serial cable (P/N 075497-001)• Host PC running Windows or Linux• A communications application, such as Printset or HyperTerminalTo set up the printer for wireless communications using PrintSet1 Connect the 8-pin circular DIN connector to the serial port on theprinter. Connect the other end of the serial cable to a serial port onyour PC.2 On your PC, start PrintSet.3 Select your printer from the My <strong>Printer</strong>s list.4 In the <strong>Printer</strong> Tasks list, click Wireless Setup Wizard. If you areprompted for the administrator username <strong>and</strong> password, typethem <strong>and</strong> click Next.34 <strong>PB50</strong> <strong>and</strong> <strong>PB51</strong> <strong>Mobile</strong> <strong>Printer</strong> <strong>User</strong> <strong>Guide</strong>
Chapter 2 — Configuring the <strong>Mobile</strong> <strong>Printer</strong>5 If your wireless access point uses DHCP, select Get TCP/IPparameters automatically. If the access point does not useDHCP, select Use the following TCP/IP parameters <strong>and</strong> typethe device IP Address, Network Mask, Default Router (defaultgateway), <strong>and</strong> Name Server (primary DNS server). Click Next.6 Type the SSID (Network Name). For peer-to-peer access points,select This is an ad hoc network <strong>and</strong> select the Channel youwant to use. The channel setting must be the same on all wirelessdevices on the ad-hoc network. Click Next.7 Select the security options required to connect to your wirelessnetwork. Click Next.8 If you selected Static WEP, Dynamic WEP (802.1x), or Wi-FiProtected Access in Step 7, type the WEP keys or networkcredentials required for authentication. Click Next.9 Wait for PrintSet to apply your settings. Click Next, then clickFinish to complete the wizard.To set up the printer for wireless communications using acommunications program1 Connect the 8-pin circular DIN connector to the serial port on theprinter.2 Connect the other end of the serial cable to a serial port on theback of your PC or to a serial adapter on your mobile computer.3 Open a communications program such as HyperTerminal on yourPC <strong>and</strong> configure the following parameters for the serial port:ParameterDefault SettingBaud rate 115200Data bits 8ParityNoneStop bits 1<strong>PB50</strong> <strong>and</strong> <strong>PB51</strong> <strong>Mobile</strong> <strong>Printer</strong> <strong>User</strong> <strong>Guide</strong> 35
Chapter 2 — Configuring the <strong>Mobile</strong> <strong>Printer</strong>4 From the host PC, check the wireless settings.If you have an IPL version of the printer, send these comm<strong>and</strong>s tothe printer:wt,SSIDwt,WEP1wt,WEP2wt,WEP3wt,WEP4wt,AUTHwt,WPAwt,WPA2wt,WPA_PSKwt,ROAMwt,PWR_MODEwt,CHANNELwt,AP_MACwt,SIGNALwt,SPEEDwt,ACTIVEIf you have a Fingerprint version of the printer, send thiscomm<strong>and</strong> to the printer:setup write "wlan","uart1:"5 Configure the printer to use the correct SSID <strong>and</strong> authenticationmode.6 If you use a certificate for wireless authentication <strong>and</strong> encryption,transfer the certificate to the printer. The printer can accept .pfx,.pem, <strong>and</strong> .der certificates.7 Verify that the printer is connected to the access point <strong>and</strong> makesure it can get an IP address.Underst<strong>and</strong>ing the 802.11 Radio IconsIconDescriptionExcellent signalStrong signalGood signal36 <strong>PB50</strong> <strong>and</strong> <strong>PB51</strong> <strong>Mobile</strong> <strong>Printer</strong> <strong>User</strong> <strong>Guide</strong>
Chapter 2 — Configuring the <strong>Mobile</strong> <strong>Printer</strong>Underst<strong>and</strong>ing the 802.11 Radio Icons (continued)IconDescriptionWeak signalPoor signalNo signalUse the following sections to set most of your wirelesscommunication settings. For help with additional comm<strong>and</strong>s <strong>and</strong>information, see either the Fingerprint Comm<strong>and</strong> Reference Manual orthe IPL Comm<strong>and</strong> Reference Manual. You can download bothdocuments from the <strong>Intermec</strong> website at www.intermec.com.Configuring Wireless Printing Using IPLUse the following procedures to configure your printer with IPL forwireless printing.To configure the printer to use WEP authentication1 Send the following comm<strong>and</strong>s to login as an admin <strong>and</strong> set theSSID:.x,su -p pass adminws,SSID,xxxxxwhere xxxxx can be from 0 to 32 ASCII characters, not includingthe double quote.Note: The default administrator password is “pass.” If you havechanged the password, use your password instead of “pass.”2 Send the following comm<strong>and</strong>s to configure the WEP keys. Thefollowing example sets WEP key 1 to 1234 <strong>and</strong> enables WEP key 1.ws,WEP1, 0x0001020304ws,.WEP_KEY,13 Send the following comm<strong>and</strong> to activate the settings:ws,ACTIVE,1<strong>PB50</strong> <strong>and</strong> <strong>PB51</strong> <strong>Mobile</strong> <strong>Printer</strong> <strong>User</strong> <strong>Guide</strong> 37
Chapter 2 — Configuring the <strong>Mobile</strong> <strong>Printer</strong>To configure the printer to use WPA-PSK or WPA2-PSK mode1 Send the following comm<strong>and</strong>s to log in as an administrator <strong>and</strong>set the SSID:.x,su -p pass adminws,SSID,xxxxxwhere xxxxx can be from 0 to 32 alphanumeric characters.2 Send one of the following comm<strong>and</strong>s to turn on WPA or WPA2authentication. Send the WPA-PSK or WPA2-PSK comm<strong>and</strong> to seta pre-shared key:ws,WPA,ONws,WPA2,ONws,WPA_PSK, xxxxxxxxxxwhere xxxxxxxxxx is a value between 8 <strong>and</strong> 64 characters.3 Send the following comm<strong>and</strong> to activate the settings:ws,ACTIVE,1To configure the printer to use WPA or WPA2 Enterprise mode1 Send the following comm<strong>and</strong>s to login as an administrator <strong>and</strong> setthe SSID:.x,su -p pass adminws,SSID,xxxxxwhere xxxxx can be from 0 to 32 alphanumeric characters.Note: The default administrator password is “pass.” If you havechanged the password, use your password instead of “pass.”2 Send one of the following comm<strong>and</strong>s to enable WPA-802.1x orWPA2-802.1x authentication. You should also send the WPA_PSKcomm<strong>and</strong> that does not contain a value:ws,WPA,ONws,WPA2,ONws,WPA_PSK, 3 Send these comm<strong>and</strong>s to configure the EAP_TYPE:ws,EAP_TYPE,xxxxwhere xxxx can be OFF, LEAP, PEAP, or TTLS.ws,.EAP_USER,xxxxws,.EAP_PASS,xxxx38 <strong>PB50</strong> <strong>and</strong> <strong>PB51</strong> <strong>Mobile</strong> <strong>Printer</strong> <strong>User</strong> <strong>Guide</strong>
Chapter 2 — Configuring the <strong>Mobile</strong> <strong>Printer</strong>where xxxx is the unique username <strong>and</strong> the unique password forthis protocol.4 If you are using TTLS, you may need to send this comm<strong>and</strong> to setthe TTLS outer name:ws,TTLS_USER, xxxx where xxxx is the outer name.5 If you are using certificates for authentication, you may need thefollowing comm<strong>and</strong>s.• Send the following comm<strong>and</strong>s to set a certificate <strong>and</strong> enablevalidation:ws,CA_CERT,c:/testCA.pfx@exportws,VALIDATE,ONwhere c:/testCA.pfx is the location <strong>and</strong> name of thecertificate <strong>and</strong> export is the passphrase.• Send the following comm<strong>and</strong>s to set a common name forserver 1 <strong>and</strong> server 2:ws, .SERVER_CN1,xxxxxxxxxx ws, .SERVER_CN2,xxxxxxxxxx where xxxxxxxxxx can be a value from 0 to 64 characters.• Send the following comm<strong>and</strong> to make sure your values matchthose used by the access point:wt,[variable name]All variables are returned with the exception of EAP_PASS,which always returns “****” if configured, <strong>and</strong> CA_CERT,which transmits the name of the last certificate authoritysuccessfully installed. An additional read-only variable for thesupplicant state, called STATE, is also returned.• You may need to send the following comm<strong>and</strong> several times forthe wireless station to connect:ws,ACTIVE,1<strong>PB50</strong> <strong>and</strong> <strong>PB51</strong> <strong>Mobile</strong> <strong>Printer</strong> <strong>User</strong> <strong>Guide</strong> 39
Chapter 2 — Configuring the <strong>Mobile</strong> <strong>Printer</strong>Configuring Wireless Printing Using FingerprintUse the following procedures to configure your printer withFingerprint for wireless printing.To configure the printer to use WEP authentication1 Send the following comm<strong>and</strong>s to login as an administrator <strong>and</strong> setthe SSID:run"su -p pass admin"setup write "wlan","uart1:"setup "wlan","SSID","xxxxx"where xxxxx can be from 0 to 32 ASCII characters, not includingthe double quote.Note: The default password for logging in as an admin is “pass.”If you have changed the password, you will need to use yourpassword instead of “pass.”2 Send the following comm<strong>and</strong>s to configure the WEP keys. Thefollowing example sets WEP key 1 to 1234 <strong>and</strong> enables WEP key 1.setup "wlan","WEP1","0x0001020304"setup "wlan",".WEP_KEY","1"setup "wlan","ACTIVE","1"setup write "wlan","uart1:"To configure the printer to use WPA-PSK or WPA2-PSK mode1 Send the following comm<strong>and</strong>s to login as an administrator <strong>and</strong> setthe SSID:run"su-p pass admin"setup write "wlan","uart1:"setup "wlan","SSID","xxxxx"where xxxxx can be from 0 to 32 alphanumeric characters.2 Send one of the following WPA/WPA2 ON comm<strong>and</strong>s to turn onWPA or WPA2 authentication. Send the WPA-PSK or WPA2-PSKcomm<strong>and</strong> to set a pre-shared key:setup "wlan","WPA","ON"setup "wlan","WPA2","ON"setup "wlan","WPA_PSK","xxxxxxxxxx"setup "wlan","ACTIVE","1"setup write "wlan","uart1:"where xxxxxxxxxx is a value between 8 <strong>and</strong> 64 characters.40 <strong>PB50</strong> <strong>and</strong> <strong>PB51</strong> <strong>Mobile</strong> <strong>Printer</strong> <strong>User</strong> <strong>Guide</strong>
Chapter 2 — Configuring the <strong>Mobile</strong> <strong>Printer</strong>To configure the <strong>Printer</strong> to use WPA or WPA2 Enterprise mode1 Send the following comm<strong>and</strong>s to login as an administrator <strong>and</strong> setthe SSID:run"su-p pass admin"setup write "wlan","uart1:"setup "wlan","SSID","xxxxx"where xxxxx can be from 0 to 32 alphanumeric characters.2 Send one of the following WPA/WPA2 ON comm<strong>and</strong>s to set upWPA-802.1x or WPA2-802.1x authentication. You should alsosend the WPA_PSK comm<strong>and</strong> that does not contain a value:setup "wlan","WPA","ON"setup "wlan","WPA2","ON"setup "wlan","WPA_PSK",""setup write "wlan","uart1:"• To view the 802.1x values, send this comm<strong>and</strong>:setup write "8021x","uart1:"3 Send these comm<strong>and</strong>s to configure the EAP_TYPE:setup "8021x","EAP_TYPE","xxxx"where xxxx can be OFF, LEAP, PEAP, or TTLS.setup "8021x",".EAP_USER","xxxx"setup "8021x","EAP_PASS","xxxx"where xxxx is the unique username <strong>and</strong> the unique password forthis protocol.4 If you are using TTLS, you may need to send this comm<strong>and</strong> to setthe TTLS outer name:setup "8021x","TTLS_USER","xxxx"where xxxx is the outer name.5 If you are using certificates for authentication, here are somecomm<strong>and</strong>s you may need to use.• Send the following comm<strong>and</strong>s to set a certificate <strong>and</strong> enablevalidation:setup "8021x","CA_CERT","c:/test.pfx@export"setup "8021x","VALIDATE","ON"where c:/test.pfx is the location <strong>and</strong> name of the certificate <strong>and</strong>export is the passphrase.<strong>PB50</strong> <strong>and</strong> <strong>PB51</strong> <strong>Mobile</strong> <strong>Printer</strong> <strong>User</strong> <strong>Guide</strong> 41
Chapter 2 — Configuring the <strong>Mobile</strong> <strong>Printer</strong>• Send the following comm<strong>and</strong>s to set a common name forserver 1 <strong>and</strong> server 2:setup "8021x",".SERVER_CN1","xxxxxxxxxx"setup "8021x",".SERVER_CN2","xxxxxxxxxx"where xxxxxxxxxx can be a value from 0 to 64 characters.• Send the following comm<strong>and</strong> to make sure your values matchthose used by the access point:setup write "8021x","uart1:"• You may need to send the following comm<strong>and</strong> several times forthe wireless station to connect:setup "wlan","ACTIVE","1"Configuring the <strong>Printer</strong> SettingsYou can change the configuration settings of the printer from:• the Control Panel, or display.• the host PC using PrintSet.• the host PC using the comm<strong>and</strong> line.• the printer home page.• the SmartSystems Console.For more information on the IPL <strong>and</strong> Fingerprint menu systems, see“IPL Setup Menu” on page 80.Changing Configuration Settings from the Control PanelYou need to start Setup mode before you can change configurationsettings from the Control Panel or display. For more information onstarting Setup mode <strong>and</strong> navigating through the settings, see“Underst<strong>and</strong>ing Setup Mode” on page 23.The top levels of the Setup menu are organized in a one-way loop.Each level has several sub-levels.Note: The Setup menu is not available when using ESC/P.42 <strong>PB50</strong> <strong>and</strong> <strong>PB51</strong> <strong>Mobile</strong> <strong>Printer</strong> <strong>User</strong> <strong>Guide</strong>
Chapter 2 — Configuring the <strong>Mobile</strong> <strong>Printer</strong>Note: If you have a Bluetooth or radioless printer, you do not see theNETWORK setup menu when using Fingerprint or IPL.Starting pointSETUP:DISPLAYSETUP:SER-COM,UART1SETUP:NET-COM, NET1SETUP:POWERSETUP:NETWORKSETUP:PRINT DEFSSETUP:MEDIASETUP:FEEDADJThe Main Levels of the Setup Menu in FingerprintStarting pointSETUP:DISPLAYSETUP:SER-COMSETUP:NETWORKSETUP:POWERSETUP:TEST/SERVICESETUP:CONFIGURATIONSETUP:MEDIAThe Main Levels of the Setup Menu in IPL<strong>PB50</strong> <strong>and</strong> <strong>PB51</strong> <strong>Mobile</strong> <strong>Printer</strong> <strong>User</strong> <strong>Guide</strong> 43
Chapter 2 — Configuring the <strong>Mobile</strong> <strong>Printer</strong>Changing Configuration Settings From PrintSetPrintSet Version 4.2 (or later) is a printer configuration tool that youcan download from the <strong>Intermec</strong> website <strong>and</strong> install on a host PC.PrintSet communicates with your printer through a serial cable or anetwork connection on any PC with Windows 98 (or later). PrintSetallows you to easily change all of the setup parameters. It also includessetup wizards to guide you through some common configurationtasks. For more help using PrintSet, see the online help.Changing Configuration Settings Using the Comm<strong>and</strong> LineYou can change configuration parameters by sending comm<strong>and</strong>sdirectly to the printer using a communications program likeHyperTerminal <strong>and</strong> a serial or network connection.If your printer uses the Fingerprint language, use the SETUPcomm<strong>and</strong>, followed by the node, subnode, <strong>and</strong> parameters setting.Here is a Fingerprint example that sets your media setting to labelswith gaps:SETUP "MEDIA,MEDIA TYPE,LABEL (w GAPS)"If your printer uses the IPL language, send the following comm<strong>and</strong>:T1Fingerprint automatically sends feedback to the communicationsprogram as you type. If you want to see what you are typing with IPL,you need to complete the following procedure.To see IPL comm<strong>and</strong>s as you type1 From the HyperTerminal menu, select File > Properties > theSettings tab.2 Click the ASCII Setup button.3 Select Echo typed characters locally.4 Click OK twice.For more information on changing configuration settings, see eitherthe Fingerprint Comm<strong>and</strong> Reference Manual or the IPL Comm<strong>and</strong>Reference Manual. You can download these documents from the<strong>Intermec</strong> website at www.intermec.com.44 <strong>PB50</strong> <strong>and</strong> <strong>PB51</strong> <strong>Mobile</strong> <strong>Printer</strong> <strong>User</strong> <strong>Guide</strong>
Chapter 2 — Configuring the <strong>Mobile</strong> <strong>Printer</strong>Changing Configuration Settings From the <strong>Printer</strong> HomePageIf you are have a printer with an 802.11 wireless radio, you can changeconfiguration settings from the home page of the printer.To make changes to the configuration1 Establish a connection between your printer <strong>and</strong> the network. Forhelp see “Setting Up 802.11 Radio Communications” onpage 34.2 Connect your PC to the same network that the printer is on.3 If you are using Fingerprint or IPL, find the IP address:a Press the Setup button.b Press the until you reach Network.c Press to select the Network menu.d Press until you reach IP address.e Press to view the IP address.4 If you are using ESC/P, use a communications program to find theIP address.a Start a communications program.b In the communications program window, type:ESC{QST:NW}<strong>and</strong> press Enter. The IP address of the printer appears in thecommunications program window.5 Start a web browser.<strong>PB50</strong> <strong>and</strong> <strong>PB51</strong> <strong>Mobile</strong> <strong>Printer</strong> <strong>User</strong> <strong>Guide</strong> 45
Chapter 2 — Configuring the <strong>Mobile</strong> <strong>Printer</strong>6 In the address field, type your printer IP address <strong>and</strong> press Enter.The printer home page appears.7 Click Login <strong>and</strong> type your administrator name <strong>and</strong> password.8 On the printer home page, click Configuration.For help with Fingerprint, IPL, ESC/P, or SmartSystems comm<strong>and</strong>s<strong>and</strong> information, see either the <strong>Intermec</strong> Fingerprint Comm<strong>and</strong>Reference Manual, the <strong>Intermec</strong> <strong>Printer</strong> Language (IPL) Comm<strong>and</strong>Reference Manual, the ESC/P Programmer’s Reference Manual, orSmartSystems online help. You can download these documents fromthe <strong>Intermec</strong> website at www.intermec.com.Changing Configuration Settings From theSmartSystems ConsoleYou can use the SmartSystems Console to change configurationsettings on your printer. The printer ships with the SmartSystemsclient preloaded. The console is part of SmartSystems Foundation,<strong>and</strong> is available from the <strong>Intermec</strong> website. To downloadSmartSystems Foundation, go towww.intermec.com/products/smrtsysfoundation/index.aspx.46 <strong>PB50</strong> <strong>and</strong> <strong>PB51</strong> <strong>Mobile</strong> <strong>Printer</strong> <strong>User</strong> <strong>Guide</strong>
Chapter 2 — Configuring the <strong>Mobile</strong> <strong>Printer</strong>Upgrading the FirmwareThe latest firmware <strong>and</strong> software is available for download from the<strong>Intermec</strong> website at www.intermec.com. You can upgrade thefirmware on your printer using:• PrintSet. You can download PrintSet from the downloads page forthe printer on the <strong>Intermec</strong> website at www.intermec.com.• the printer home page.• SmartSystems TM .• a communications program like HyperTerminal.When upgrading your firmware, make sure the battery in theprinter is fully charged. If the printer loses power during theupgrade, the printer can be permanently damaged.Note: If you upgrade your printer firmware to version 11.5.0 or later,your printer is loaded with <strong>Intermec</strong> <strong>Printer</strong> Language (IPL),Fingerprint, ESC/P, ZSim, CSim, <strong>and</strong> DSim. The first time you startyour printer after you upgrade your firmware, you are prompted toselect a printer language. For more information, see “Selecting the<strong>Printer</strong> Language” on page 6.Upgrading the <strong>Printer</strong> Firmware Using PrintSetYou can only upgrade your printer using PrintSet when the printer isrunning IPL, Fingerprint, or ESC/P printer languages. To upgrade theprinter using PrintSet, you need to install PrintSet on your PC <strong>and</strong> usea serial cable (P/N 075497).To upgrade the printer firmware using PrintSet1 Connect your PC to your printer using a serial cable. For help, see“Connecting the <strong>Printer</strong> Through the Serial Port” on page 31.2 Download <strong>and</strong> save the firmware (.bin) file you want to use.a Go to www.intermec.com.b Select Products > <strong>Printer</strong>s <strong>and</strong> Media > <strong>Printer</strong> Family ><strong>Printer</strong> Model.c Click the Downloads tab.<strong>PB50</strong> <strong>and</strong> <strong>PB51</strong> <strong>Mobile</strong> <strong>Printer</strong> <strong>User</strong> <strong>Guide</strong> 47
Chapter 2 — Configuring the <strong>Mobile</strong> <strong>Printer</strong>d In the OS/Firmware/Drivers section, click the link to thelatest version of firmware <strong>and</strong> download the files to your PC.3 Open PrintSet. The <strong>Intermec</strong> PrintSet dialog box appears.4 From the printer tree, select the printer you want to upgrade.5 From the toolbar, click . The Firmware Upgrade Wizardappears. Click Next.6 If your printer only supports firmware upgrades, the SelectFirmware File window appears.If your printer supports both firmware <strong>and</strong> bootloader upgrades,select Firmware Upgrade.You should only select Bootloader Upgrade if you are told todo so by <strong>Intermec</strong> Product Support. Upgrading thebootloader unnecessarily may damage your printer.7 Follow the onscreen instructions to upgrade your firmware.48 <strong>PB50</strong> <strong>and</strong> <strong>PB51</strong> <strong>Mobile</strong> <strong>Printer</strong> <strong>User</strong> <strong>Guide</strong>
Chapter 2 — Configuring the <strong>Mobile</strong> <strong>Printer</strong>If your printer is connected to your PC through a serialconnection, the wizard displays the estimated download time.When the upgrade is complete, your printer restarts.Upgrading the <strong>Printer</strong> Firmware Using the <strong>Printer</strong> Home PageYou can upgrade your printer using the printer home page if you havea printer with an 802.11 radio, <strong>and</strong> are using IPL or Fingerprint.To upgrade using the printer home page1 Establish a connection between your printer <strong>and</strong> the network. Forhelp, see “Setting Up 802.11 Radio Communications” onpage 34.2 Establish a connection between your PC <strong>and</strong> the network.3 Download the firmware (.bin) file you want to upgrade to your PC.a Go to www.intermec.com.b Click Support > Downloads.c Use the Product Category, Product Family, <strong>and</strong> Productfields, to select the printer model.d Click Submit. The latest available software appears.e Download the latest firmware version to your PC.f Extract the .zip file to your PC.4 If you are using Fingerprint or IPL, use the Control Panel to findthe IP address of the printer.a Press the Setup button.b Press until Network appears.c Press to select the Network menu.d Press until you reach IP Address.e Press to select <strong>and</strong> view the IP Address.f Press the Setup button to return to Ready mode.5 Start a web browser.<strong>PB50</strong> <strong>and</strong> <strong>PB51</strong> <strong>Mobile</strong> <strong>Printer</strong> <strong>User</strong> <strong>Guide</strong> 49
Chapter 2 — Configuring the <strong>Mobile</strong> <strong>Printer</strong>6 In the Address text box, type the IP address of your printer <strong>and</strong>press Enter.=7 Click Maintenance. The Maintenance page appears.50 <strong>PB50</strong> <strong>and</strong> <strong>PB51</strong> <strong>Mobile</strong> <strong>Printer</strong> <strong>User</strong> <strong>Guide</strong>
Chapter 2 — Configuring the <strong>Mobile</strong> <strong>Printer</strong>8 When prompted, type your user name <strong>and</strong> password. The defaultuser name is “admin” <strong>and</strong> the default password is “pass.”9 Browse to the (.bin) file you want to upgrade to <strong>and</strong> select it.10 Click Upgrade.Wait approximately five minutes for the firmware upgrade tocomplete. The printer automatically restarts.Upgrading <strong>Printer</strong> Firmware Using SmartSystemsFoundationYou can use the SmartSystems console to upgrade the printerfirmware. Your printer ships with the SmartSystems client preloaded.The console is part of SmartSystems Foundation, <strong>and</strong> is availablefrom the <strong>Intermec</strong> website. To download SmartSystems Foundation,go to www.intermec.com/products/smrtsysfoundation/index.aspx.Upgrading the <strong>Printer</strong> Firmware Using a CommunicationsProgramYou can upgrade your printer firmware using a communicationsprogram, such as HyperTerminal, <strong>and</strong> a printer running either theIPL, Fingerprint, or ESC/P printer language.Note: <strong>Intermec</strong> recommends that you upgrade your printer firmwareusing PrintSet or the home page of the printer.To upgrade the printer firmware using a communications program<strong>and</strong> IPL1 Connect your printer to your PC using a serial cable. For help, see“Connecting the <strong>Printer</strong> Through the Serial Port” on page 31.Or, establish a connection between your printer <strong>and</strong> your network.For help, see “Connecting the <strong>Printer</strong> to Your Network” onpage 32.2 If you connected your printer to the network, establish aconnection between your PC <strong>and</strong> the network.<strong>PB50</strong> <strong>and</strong> <strong>PB51</strong> <strong>Mobile</strong> <strong>Printer</strong> <strong>User</strong> <strong>Guide</strong> 51
Chapter 2 — Configuring the <strong>Mobile</strong> <strong>Printer</strong>3 Download the firmware (.bin) file you want to upgrade to your PC.a Go to www.intermec.com.b Click Support > Downloads.c Use the Product Category, Product Family, <strong>and</strong> Productfields, to select the printer model.d Click Submit. The latest available software appears.e Download the latest firmware .zip file to your PC.f Extract the .bin file to your PC.4 Open a communications program.5 In the window, type:.y,ush<strong>and</strong> press Enter. You will be prompted for more data.6 In the window, type:su -p pass admin.<strong>and</strong> press Enter.7 In the window, type:dlk -z<strong>and</strong> press Enter.The printer shows the “Upgrading” message.8 In the communications program window, click Transfer > SendFile. A dialog box appears.9 From the protocol drop-down list, select Zmodem.10 Browse to the firmware (.bin) file you want to upgrade to <strong>and</strong>select it.Wait approximately five minutes for the firmware upgrade tocomplete. When the upgrade is complete, the communicationsprogram shows the “Kernel flashing OK” message <strong>and</strong> the printerautomatically restarts.52 <strong>PB50</strong> <strong>and</strong> <strong>PB51</strong> <strong>Mobile</strong> <strong>Printer</strong> <strong>User</strong> <strong>Guide</strong>
Chapter 2 — Configuring the <strong>Mobile</strong> <strong>Printer</strong>To upgrade the printer firmware using a communications program<strong>and</strong> Fingerprint1 Connect your printer to your PC using a serial cable. For help, see“Connecting the <strong>Printer</strong> Through the Serial Port” on page 31.2 Download the firmware (.bin) file you want to upgrade to your PC.a Go to www.intermec.com.b Click Support > Downloads.c Use the Product Category, Product Family, <strong>and</strong> Productfields, to select the printer model.d Click Submit. The latest available software appears.e Download the latest firmware version to your PC.f Extract the .zip file to your PC.3 Open a communications program.4 In the window, type:run “su -p pass admin”<strong>and</strong> press Enter.5 In the window, type:run “dlk -z”<strong>and</strong> press Enter.The printer screen shows the “Upgrading” message.6 In the communications program window, click Transfer > SendFile. A dialog box appears.7 From the protocol drop-down list, choose Zmodem.8 Browse to the firmware (.bin) file you want to upgrade to <strong>and</strong>select it.Wait approximately five minutes for the firmware upgrade tocomplete. When the upgrade is complete, the communicationsprogram shows the “Kernel flashing OK” message <strong>and</strong> the printerautomatically restarts.<strong>PB50</strong> <strong>and</strong> <strong>PB51</strong> <strong>Mobile</strong> <strong>Printer</strong> <strong>User</strong> <strong>Guide</strong> 53
Chapter 2 — Configuring the <strong>Mobile</strong> <strong>Printer</strong>To upgrade the printer firmware using a communications program<strong>and</strong> ESC/P1 Connect your printer to your PC using a serial cable. For help, see“Connecting the <strong>Printer</strong> Through the Serial Port” on page 31.2 Download the firmware (.bin) file you want to upgrade to your PC.a Go to www.intermec.com.b Click Support > Downloads.c Use the Product Category, Product Family, <strong>and</strong> Productfields, to select the printer model.d Click Submit. The latest available software appears.e Download the latest firmware version to your PC.f Extract the .zip file to a folder on your PC.3 Open a communications program.4 Restart the printer.5 Press Esc <strong>and</strong> in the communications program window type:{SYS:USH}<strong>and</strong> press Enter.6 In the window, type:su -pass admin<strong>and</strong> press Enter.7 In the window, type:dlk -z.<strong>and</strong> press Enter.The printer shows the “Upgrading” message.8 In the communications program window, click Transfer > SendFile. A dialog box will appear.9 In the protocol drop-down box, select Zmodem.10 Browse to the firmware (.bin) file you want to upgrade to <strong>and</strong>select it.Wait approximately five minutes for the firmware upgrade tocomplete. When the upgrade is complete, the communications54 <strong>PB50</strong> <strong>and</strong> <strong>PB51</strong> <strong>Mobile</strong> <strong>Printer</strong> <strong>User</strong> <strong>Guide</strong>
Chapter 2 — Configuring the <strong>Mobile</strong> <strong>Printer</strong>program shows the “Kernel flashing OK” message, <strong>and</strong> the printerautomatically restarts.Downloading Fonts <strong>and</strong> GraphicsThe easiest way to download fonts <strong>and</strong> graphics is to use PrintSet, thefree <strong>Intermec</strong> printer application. You can download PrintSet fromthe downloads page for the your printer on the <strong>Intermec</strong> website atwww.intermec.com. Follow the procedures in the PrintSet onlinehelp to download fonts <strong>and</strong> graphics.You can also use Fingerprint, IPL, or ESC/P comm<strong>and</strong>s to send fonts<strong>and</strong> graphics to the printer. For help with comm<strong>and</strong>s <strong>and</strong>information, see the Fingerprint Comm<strong>and</strong> Reference Manual, the IPLComm<strong>and</strong> Reference Manual, or the ESC/P Programmer’s ReferenceManual. You can download these documents from the <strong>Intermec</strong>website at www.intermec.com.<strong>PB50</strong> <strong>and</strong> <strong>PB51</strong> <strong>Mobile</strong> <strong>Printer</strong> <strong>User</strong> <strong>Guide</strong> 55
Chapter 2 — Configuring the <strong>Mobile</strong> <strong>Printer</strong>56 <strong>PB50</strong> <strong>and</strong> <strong>PB51</strong> <strong>Mobile</strong> <strong>Printer</strong> <strong>User</strong> <strong>Guide</strong>
3Troubleshooting <strong>and</strong> Maintaining the<strong>Mobile</strong> <strong>Printer</strong>Use this chapter to solve problems you may encounter whileusing the printer. You will also find information on booting theprinter <strong>and</strong> routine maintenance. This chapter contains thesesections:• Troubleshooting the <strong>Mobile</strong> <strong>Printer</strong>• Restarting the <strong>Mobile</strong> <strong>Printer</strong>• Cleaning the <strong>Printer</strong>57
Chapter 3 — Troubleshooting <strong>and</strong> Maintaining the <strong>Mobile</strong> <strong>Printer</strong>Troubleshooting the <strong>Mobile</strong> <strong>Printer</strong>You may have printer operation, print quality, or printercommunication problems at some time during the life of the printer.Most of the problems you encounter are easy to fix. For help, see“Troubleshooting <strong>Printer</strong> Problems <strong>and</strong> Finding Solutions” onpage 60. If you cannot find the answer to your problem, you may needto contact Product Support.Contacting Product SupportBefore you call <strong>Intermec</strong> Product Support, you may want to visit the<strong>Intermec</strong> technical knowledge base (Knowledge Central). To do so, goto www.intermec.com <strong>and</strong> click Support > Knowledge Central. Ifyou still need help after visiting Knowledge Central, you may need tocall Product Support.To talk to an <strong>Intermec</strong> Product Support representative in the U.S.A.or Canada, call:1-800-755-5505Outside the U.S.A. <strong>and</strong> Canada, go to www.intermec.com <strong>and</strong> clickContact Us to find your local <strong>Intermec</strong> representative.Before you call <strong>Intermec</strong> Product Support, make sure you have thefollowing information ready:• <strong>Printer</strong> serial number• Firmware type <strong>and</strong> version• Bluetooth, wireless, or serial port settingsYou can find all of the information listed above in the printer menusystem or on a testprint page.Underst<strong>and</strong>ing Error MessagesUse the following tables to troubleshoot some common errormessages. Some error messages appear only when you use a specifiedprinter language.58 <strong>PB50</strong> <strong>and</strong> <strong>PB51</strong> <strong>Mobile</strong> <strong>Printer</strong> <strong>User</strong> <strong>Guide</strong>
Chapter 3 — Troubleshooting <strong>and</strong> Maintaining the <strong>Mobile</strong> <strong>Printer</strong>Possible <strong>Printer</strong> Error Icons <strong>and</strong> MessagesError Icon Error Message DescriptionPauseThe print job is paused.‘Paper out (IPL)Out of Paper(Fingerprint)Testfeed notdonePrinthead hotUpgradingThe printer is out of paper. Load a new roll ofmedia. For help, see “Loading Media” onpage 14.The printer did not perform a testfeed beforeit printed out test labels. It is important toperform a testfeed because it calibrates theprinter sensors.To perform a testfeed:• Press the Feed button for more than 2seconds (Fingerprint or ESC/P)• Open <strong>and</strong> close the media door, then pressthe Feed button (IPL)The printhead is overheated <strong>and</strong> needs tocool down. In IPL, wait for printing to resumeautomatically. In Fingerprint <strong>and</strong> ESC/P,your print job is lost.The printer is loading new firmware.LSS too highLSS too lowIP configurationerrorIP link errorThese errors can occur when you run a testfeed without any media installed, or if youhave incorrect media settings.Load the printer with media (see “LoadingMedia” on page 14), run Test mode (see“Underst<strong>and</strong>ing Extended Test Mode” onpage 25), <strong>and</strong> select the appropriate mediatype.The printer does not have a network IPaddress. Wait for the printer to acquire an IPaddress before continuing.The printer does not have a networkconnection.<strong>PB50</strong> <strong>and</strong> <strong>PB51</strong> <strong>Mobile</strong> <strong>Printer</strong> <strong>User</strong> <strong>Guide</strong> 59
Chapter 3 — Troubleshooting <strong>and</strong> Maintaining the <strong>Mobile</strong> <strong>Printer</strong>Possible <strong>Printer</strong> Error Icons <strong>and</strong> Messages (continued)Error Icon Error Message DescriptionField out of label You are attempting to print in an area thatextends beyond the print window. See thecomm<strong>and</strong> reference manual for your type offirmware (IPL, Fingerprint, or ESC/P) forinformation on how to set the mediaparameters.Printhead lifted The printer is not closed. Press down on themedia cover to make sure it is latched.Troubleshooting <strong>Printer</strong> Problems <strong>and</strong> Finding SolutionsUse the following tables to troubleshoot some common problems youmay encounter with the printer.<strong>Printer</strong> Problems <strong>and</strong> SolutionsProblemThe printer does notturn on when you pressSt<strong>and</strong>by.The blue light (Readyto-Workindicator) isblinking.The printer keepsprinting or feedingwhen it should stop.The printout is not inthe desired position.Possible Solution• Replace the battery with a charged battery.• Connect external power to make sure theprinter works correctly <strong>and</strong> to charge thebattery.• Make sure media is loaded <strong>and</strong> the media coveris closed. For help, see “Loading Media” onpage 14.• There is a printing error. The screen shows anerror message containing information on theerror.• The printer is paused. The printer is cancellinga print job.• Check media settings.• Make sure the label gap sensor is clean. Forhelp, see “Cleaning the <strong>Printer</strong>” on page 65.• Check for errors in the software application.• Make sure the label gap sensor <strong>and</strong> platen rollerare clean.60 <strong>PB50</strong> <strong>and</strong> <strong>PB51</strong> <strong>Mobile</strong> <strong>Printer</strong> <strong>User</strong> <strong>Guide</strong>
Chapter 3 — Troubleshooting <strong>and</strong> Maintaining the <strong>Mobile</strong> <strong>Printer</strong><strong>Printer</strong> Problems <strong>and</strong> Solutions (continued)ProblemThe printer is notprinting with an 802.11wireless connection.The printer is notprinting with aBluetooth connection.When printing, theprinter is skippinglabels.The printout is faded orweak.The battery charge isnot lasting as long as itshould.Possible Solution• Verify that the wireless settings are correct. Forhelp, see “Setting Up 802.11 RadioCommunications” on page 34.• Make sure the printer has an IP address.• Make sure the printer is connected to thenetwork.• Make sure the printer is in Ready mode.• Re-establish a Bluetooth connection with themobile computer or scanner. For help, see yourmobile computer user manual or “Setting UpBluetooth Communications” on page 32.• Make sure the mobile computer can print to aknown good printer.• Print a Bluetooth testprint page to make surethat the mobile printer discovered your printer.For help, see “Printing a Test Page” onpage 26.• Make sure the printer is in Ready mode.Perform a testfeed:• In Fingerprint or ESC/P, press the Feed buttonfor more than 2 seconds.• In IPL, open <strong>and</strong> close the media door <strong>and</strong> thenpress the Feed button.• Make sure the label gap sensor is clean. Forhelp, see “Cleaning the <strong>Printer</strong>” on page 65.• In Fingerprint, adjust the mediaconstant/factor <strong>and</strong> contrast (-10% to +10%).• In IPL, adjust the media sensitivity setting(-10 to +10).• In ESC/P, adjust the darkness.• Check to see if the printhead needs cleaning.For help, see “Cleaning the <strong>Printer</strong>” onpage 65.• Check the battery date. If the battery is a fewyears old, the shortened life may be due tonormal aging.• Replace the battery.<strong>PB50</strong> <strong>and</strong> <strong>PB51</strong> <strong>Mobile</strong> <strong>Printer</strong> <strong>User</strong> <strong>Guide</strong> 61
Chapter 3 — Troubleshooting <strong>and</strong> Maintaining the <strong>Mobile</strong> <strong>Printer</strong><strong>Printer</strong> Problems <strong>and</strong> Solutions (continued)ProblemThe test pages do notprint.The print quality ispoor.Your printer cannotconnect to PrintSet orHyperTerminalPossible Solution• Make sure that the Ready-to-Work indicator isnot blinking. If it is, make sure your printer hasmedia <strong>and</strong> that the media cover is closed.• Make sure that you can advance media bypressing the Feed button.• Clean the printhead. For help, see “Cleaningthe <strong>Printer</strong>” on page 65.• Check the battery <strong>and</strong> recharge or replace asnecessary. For help, see “Charging theBatteries” on page 11.• Check the quality of the media. Use only<strong>Intermec</strong> media to ensure superior print quality<strong>and</strong> product performance.• Check that the printer is set to the appropriateConstant/Factory or sensitivity number for themedia you are using.• Make sure that the serial or USB cable isplugged in correctly.• Check to make sure that all pins on the serialcable are straight <strong>and</strong> not bent.Troubleshooting Communication ProblemsUse Dump mode to verify that the printer is receiving data from thehost correctly.Using the Line Analyzer in FingerprintIn Dump mode, the printer runs a Fingerprint program called LineAnalyzer. The Line Analyzer captures incoming characters on thecommunication ports <strong>and</strong> prints them on one or more labels.After the printer starts Dump mode, it tells you it has started Dumpmode by printing it on a label. The Dump mode icon appears <strong>and</strong>printer is ready to receive data. For more information on how to startDump mode, see “Underst<strong>and</strong>ing Dump Mode” on page 24.62 <strong>PB50</strong> <strong>and</strong> <strong>PB51</strong> <strong>Mobile</strong> <strong>Printer</strong> <strong>User</strong> <strong>Guide</strong>
Chapter 3 — Troubleshooting <strong>and</strong> Maintaining the <strong>Mobile</strong> <strong>Printer</strong>While the printer is receiving data, the Ready-to-Work indicatorblinks. After a half of a second, if no more characters have beenreceived, the printer times out. The program considers thetransmission terminated <strong>and</strong> prints out a label.In Dump mode, by default, printable characters print inblack-on-white. Control characters <strong>and</strong> space characters (ASCII 000 to032 dec) print in white-on-black.As long as a continuous string of characters are being received, theprogram wraps the lines until the label is full <strong>and</strong> then starts to printanother label. After each character transmission, the followinginformation prints:• Page number• Number of characters printed on the label• Total number of characters received so farWhen you stop Dump mode, a final label prints to inform you thatthe printer is exiting from Dump mode.Using Dump Mode in IPLWhen you start Dump mode, the printer captures incomingcharacters on the communication ports <strong>and</strong> prints them on one ormore labels.If you are using IPL, you can start Dump mode in two ways. Each wayproduces slightly different results. You can start Dump more:• from Ready mode or Extended Test mode. Printouts are exactlylike those produced with the Line Analyzer program inFingerprint. For more information, see the previous procedure,“Using the Line Analyzer in Fingerprint” on page 62.• using the Control Panel buttons. Characters are printed on acontinuous line along with their corresponding hexadecimalnumbers.For information on how to start Dump mode from Extended Testmode, see “Underst<strong>and</strong>ing Extended Test Mode” on page 25.<strong>PB50</strong> <strong>and</strong> <strong>PB51</strong> <strong>Mobile</strong> <strong>Printer</strong> <strong>User</strong> <strong>Guide</strong> 63
Chapter 3 — Troubleshooting <strong>and</strong> Maintaining the <strong>Mobile</strong> <strong>Printer</strong>To start Dump mode from Ready mode with IPL• Press <strong>and</strong> hold the Feed <strong>and</strong> St<strong>and</strong>by buttons until the printerstarts feeding out media.The printer feeds several labels (or inches of media), prints the testlabels, <strong>and</strong> then starts Dump mode.To stop Dump mode• Press the Feed button.Restarting the <strong>Mobile</strong> <strong>Printer</strong>You rarely need to cold boot the printer unless you are upgrading thefirmware. If your printer occasionally locks up, you will want to coldboot it. A cold boot restarts the 802.11 wireless radio <strong>and</strong> clears theworking memory.Note: The Setup menu is not affected by a cold boot. Your printerretains all of your configuration settings after the printer powers backup.To restart the printer1 Disconnect the printer from power if externally powered.2 Remove the battery from the printer for at least one second.3 Insert the battery back into the printer.4 Reconnect external power if your printer is externally powered.64 <strong>PB50</strong> <strong>and</strong> <strong>PB51</strong> <strong>Mobile</strong> <strong>Printer</strong> <strong>User</strong> <strong>Guide</strong>
Cleaning the <strong>Printer</strong>Chapter 3 — Troubleshooting <strong>and</strong> Maintaining the <strong>Mobile</strong> <strong>Printer</strong>To properly maintain your printer, you must clean it at therecommended interval. Make sure to clean the following parts:• Printhead• Platen roller• Paper sensors• Tear bar• <strong>Printer</strong> exterior• Media compartmentTo avoid possible personal injury or damage to the printer, neverinsert any pointed or sharp objects into the printer.Use only the cleaning agents specified in this section. <strong>Intermec</strong> isnot responsible for damage caused by any other cleaningmaterials used on this printer. Clean most of the printer with acotton swab saturated with alcohol.Do not clean the linerless platen roller with isopropyl alcohol. Itcould damage the surface of the platen roller.<strong>PB50</strong> <strong>and</strong> <strong>PB51</strong> <strong>Mobile</strong> <strong>Printer</strong> <strong>User</strong> <strong>Guide</strong> 65
Chapter 3 — Troubleshooting <strong>and</strong> Maintaining the <strong>Mobile</strong> <strong>Printer</strong>Use the following illustration to locate the parts of your printer toclean.Tear barPaper sensorLabel takensensorPrintheadCleaning the PrintheadLabel gapsensorPlaten roller<strong>PB50</strong> <strong>and</strong> <strong>PB51</strong> <strong>Mobile</strong> Label <strong>and</strong> Receipt <strong>Printer</strong>: Identifying the parts of theprinter to clean regularlyClean the printhead after printing five rolls of media to prolong thelife of the printhead <strong>and</strong> ensure high print quality.Clean the printhead with the cleaning swab or cleaning pen. Thecleaning swab is shipped with the printer <strong>and</strong> can also be purchasedseparately from www.intermec.com.Note: <strong>Intermec</strong> recommends that you use only the cleaning swab orcleaning pen for this task. Using other methods or tools to clean theprinthead <strong>and</strong> platen roller can damage the printer.To clean the printhead1 Open the media cover.2 Remove the media <strong>and</strong> ribbon.3 Use the cleaning swab or cleaning pen to dissolve anycontamination on the line of heat-emitting objects at the front orbottom of the printhead.66 <strong>PB50</strong> <strong>and</strong> <strong>PB51</strong> <strong>Mobile</strong> <strong>Printer</strong> <strong>User</strong> <strong>Guide</strong>
Cleaning the Platen RollerChapter 3 — Troubleshooting <strong>and</strong> Maintaining the <strong>Mobile</strong> <strong>Printer</strong>4 Wait 30 seconds <strong>and</strong> carefully rub off any contamination.5 Repeat Steps 3 <strong>and</strong> 4 if necessary.6 Allow the printhead to dry completely before loading new media<strong>and</strong> ribbon.Clean the platen roller after printing five rolls of media to prolong thelife of the printhead <strong>and</strong> ensure high print quality.Clean the printhead with the cleaning swab. One cleaning swab isshipped with the printer, <strong>and</strong> you can purchased additional cleaningswabs from www.intermec.com.Note: <strong>Intermec</strong> recommends that you use only the cleaning swab forthis task. Using other methods or tools to clean the printhead <strong>and</strong>platen roller can damage the printer.To clean the platen roller• Rotate the platen roller <strong>and</strong> clean it thoroughly with the cleaningswab.When you clean the platen roller, also clean the paper sensors <strong>and</strong> tearbar using the cleaning swab.Cleaning the <strong>Printer</strong> ExteriorMake sure that the exterior of the printer is clean to reduce the risk ofdust <strong>and</strong> other particles reaching the inside of the printer. Dustparticles can reduce print quality <strong>and</strong> cause other problems.To clean the printer exterior1 Close the media cover.2 Using a soft cloth, wipe the printer exterior. You can also use asmall amount of water or mild detergent.<strong>Intermec</strong> recommends that you keep the surface surrounding theprinter clean.<strong>PB50</strong> <strong>and</strong> <strong>PB51</strong> <strong>Mobile</strong> <strong>Printer</strong> <strong>User</strong> <strong>Guide</strong> 67
Chapter 3 — Troubleshooting <strong>and</strong> Maintaining the <strong>Mobile</strong> <strong>Printer</strong>Cleaning the <strong>Printer</strong> Media Compartment1 Open the media cover.2 Remove the media <strong>and</strong> ribbon.3 Use a brush or air blow the compartment.4 Make sure the paper sensors are free of dust.68 <strong>PB50</strong> <strong>and</strong> <strong>PB51</strong> <strong>Mobile</strong> <strong>Printer</strong> <strong>User</strong> <strong>Guide</strong>
ASpecifications69
Appendix A — SpecificationsSpecificationsPhysical DimensionsDepth:Height:Width:Weight:78.7 mm (3.1 in)174.5 mm (6.9 in)159.5 mm (6.3 in)1190 g (2 lb) with batteryPower SpecificationsAC power adapter voltage:<strong>Printer</strong> voltage:Operating power:100 V to 240 V100 V to 240 V <strong>and</strong> 50 Hz to 60 HzRechargeable 16.8 V 2200 mAh lithium-ionbatteryTemperature <strong>and</strong> Humidity SpecificationsOperating temperature:Storage temperature:Charging temperature:Relative humidity:Sealing:-15 °C to 50 °C (5 °F to 122 °F)-22 °C to 70 °C (-30 °F to 158 °F)0 °C to 45 °C (32 °F to 113 °F)0% to 95% non-condensingIP54. The paper path <strong>and</strong> slots are excludedfrom IP54.MemoryRAM:Flash:16 MB64 MBPrint Speed <strong>and</strong> ResolutionPrint speed:Resolution:up to 4 ips (100 mm/s)203 dpi (8 dots/mm)70 <strong>PB50</strong> <strong>and</strong> <strong>PB51</strong> <strong>Mobile</strong> <strong>Printer</strong> <strong>User</strong> <strong>Guide</strong>
Appendix A — SpecificationsPrint TechnologyPrinthead:Maximum print width:Direct thermal108 mm (4.25 in)Media SpecificationsCore inside diameter, st<strong>and</strong>ard:Core inside diameter, with adapter:Maximum roll outside diameter:Media width, label with liner/receipt:Media length, label:Media length, receipt:Media caliber, label with liner/receipt:Media caliber, tag (maximum):Gap length (centered on perforation):19 mm (0.75in)10.2 mm (0.4 in)67.3 mm (2.65 in)49mm (1.9 in) to 111.5 mm (4.4 in)25.4 mm (1.0 in) to 609.6 mm(24 in)Continuous0.05 mm (0.002 in) to 0.165 mm(0.0065 in)0.15 mm (0.006 in)3.17 mm (0.125 in) to 12.7 mm(0.50 in)Notch length (centered on6.35 mm (0.25 in)perforation):Notch width (centered on perforation): 12.7 mm (0.50 in)Black mark length (centered onperforation):Black mark width (centered on mediawidth):3.17 mm (0.125 in) to 12.7 mm(0.50 in)Full width of mediaReceipt roll stock media is supplied as a continuous roll. Label, tag,<strong>and</strong> fanfold media use repeat indicators for non-continuous media.Gap, notch, <strong>and</strong> black marks are used as repeat indicators:• Gap: Label <strong>and</strong> fanfold media• Notch: Tag media• Black mark: Label, tag, <strong>and</strong> fanfold media<strong>PB50</strong> <strong>and</strong> <strong>PB51</strong> <strong>Mobile</strong> <strong>Printer</strong> <strong>User</strong> <strong>Guide</strong> 71
Appendix A — SpecificationsKeep these tips in mind when ordering media for the printer:• The <strong>PB51</strong> printer can detect black marks only on the front side ofthe media. The <strong>PB50</strong> can detect black marks on both sides.• You can use higher-caliber media in the printer, but print qualitywill be reduced.• Receipt roll stock media has an end of roll indicator. The end ofroll indicator is a red marking (on last 3 feet of roll) on thethermally sensitive side of the paper.External Fanfold Media SpecificationsStack height:Page length:70 mm (2.75 in)152 mm (6 in) to 305 mm (12 in)Note: A 6-inch page length is supplied in 12-inch long stacks (two6-inch stacks of equal height with the bottom page linked).Specialty media is required for unique customer environments,including printing in extreme temperatures. Media performance isdependant on format <strong>and</strong> environment. Not all media will work in allcustomer applications. <strong>Intermec</strong> recommends that you test the mediain your application.Supported Media TypesAll models of the mobile printer support direct thermal label, tag, <strong>and</strong>receipt media. Both North American <strong>and</strong> European label media aresupported in multiple label lengths. Receipt media is supported inboth top coated <strong>and</strong> uncoated paper in continuous roll stock only.The default media sensitivity is 180.The default media sensitivity for linerless media is 103.Use the following table as a guide when setting sensitivity.72 <strong>PB50</strong> <strong>and</strong> <strong>PB51</strong> <strong>Mobile</strong> <strong>Printer</strong> <strong>User</strong> <strong>Guide</strong>
.Recommended Media Sensitivity, Constant, Factor, <strong>and</strong> Print SpeedAppendix A — SpecificationsSensitivity Constant Factor Description Max Print SpeedNorth American Label Media720 60 40 Duratherm Lightning Plus 4 ips470 52 40 Duratherm Lightning 4 ips450 48 40 Duratherm Lightning 2 ips430 100 40 Duratherm Synthetic 4 ips180 80 40 Duratherm II Label 4 ips180 80 40 Duratherm III Label 4 ips180 80 40 Duratherm Near IR 4 ips150 50 40 Duratherm 5 mil Tag 2 ipsNorth American Label Media (continued)103 110 45 Direct Thermal Linerless Dependent on format<strong>and</strong> environmentNorth America Receipt Media401 45 40 Duratherm TC 2 ips102 32 40 Duratherm NTC - 2 2 ips101 30 40 Duratherm NTC 2 ipsEuropean Label Media440 47 30 Thermal Eco 2 ips140 70 40 Thermal Top 4 ips<strong>PB50</strong> <strong>and</strong> <strong>PB51</strong> <strong>Mobile</strong> <strong>Printer</strong> <strong>User</strong> <strong>Guide</strong> 73
Appendix A — SpecificationsInterfacesRS-232 Serial InterfaceThis section describes the st<strong>and</strong>ard interfaces available on the <strong>PB50</strong><strong>and</strong> <strong>PB51</strong> printers.Use the following tables <strong>and</strong> graphics to underst<strong>and</strong> serial portdefault settingsSerial Port Default SettingsParameterDefault SettingBaud rate 115200Character Length or Data Bits 8ParityNoneStop Bits 1H<strong>and</strong>shakingnone (Fingerprint XON/XOFF (IPL)The following illustration shows the printer end of the serial cable.8631Serial Cable (<strong>Printer</strong> End)5Serial Cable Pins <strong>and</strong> Descriptions (<strong>Printer</strong> End)PIns Signal Description1 HHC RXD Receive data from host (input)3 HHC CTS Clear to send from printer (output)5 HHC RTS Request to send from host (input)6 HHC TXD Transmit data to printer (output)8 GND Ground74 <strong>PB50</strong> <strong>and</strong> <strong>PB51</strong> <strong>Mobile</strong> <strong>Printer</strong> <strong>User</strong> <strong>Guide</strong>
Appendix A — SpecificationsThe following illustration shows the PC end of the serial cable.5 4 3 21USB Interface9 8 7 6RS-232 Serial Cable DB9 PinsSerial Cable Pins <strong>and</strong> Description (PC End)Pin Signal Description1 DCD Data carrier detect2 RXD Receive data from host (input)3 TXD Transmit data to printer (output)4 DTR Data terminal ready5 GND Ground6 DSR Data set ready7 RTS Request to send from host (input)8 CTS Clear to send from printer (output)9 RI Ring indicatorTo use the USB interface to print from a PC, you need to install the<strong>Intermec</strong> InterDriver printer driver on your PC. For help setting upUSB communications, see “Connecting the <strong>Printer</strong> Through theUSB Interface” on page 30.The USB cable that ships with the printer has a USB Type A connectoron one end to connect to the PC, <strong>and</strong> a USB Type B connector on theother end to connect to the printer. You do not need to configurecommunications for the USB port.<strong>PB50</strong> <strong>and</strong> <strong>PB51</strong> <strong>Mobile</strong> <strong>Printer</strong> <strong>User</strong> <strong>Guide</strong> 75
Appendix A — SpecificationsThe following illustrations show the USB connector types.USB Type A ConnectorUSB Type B ConnectorAccessories for the <strong>Mobile</strong> <strong>Printer</strong>You can use these accessories (sold <strong>and</strong> ordered separately) with theprinter. To order accessories, contact your local <strong>Intermec</strong> salesrepresentative.4-Bay Battery Charger (Model AC18)Use the AC18 to charge up to four batteries at a time. The batterycharger is designed to sense when a battery is fully charged <strong>and</strong> notovercharge it, ensuring long <strong>and</strong> consistent battery life.Battery (Model AB13)Use the AB13 lithium-ion 2200 mAh battery to provide power to theprinter.Belt ClipUse the printer belt clip to attach the printer to your belt.Cart DockUse the cart dock to easily attach the printer to a movable cart or a flatsurface.Cleaning PenUse the cleaning pen to clean the printhead.Cleaning SwabUse cleaning swabs to clean the platen roller, paper sensor, tear bar,<strong>and</strong> printhead.76 <strong>PB50</strong> <strong>and</strong> <strong>PB51</strong> <strong>Mobile</strong> <strong>Printer</strong> <strong>User</strong> <strong>Guide</strong>
Appendix A — SpecificationsForklift Power Supply KitUse the forklift power supply kit to connect the printer <strong>and</strong> vehiclecradle to a truck or forklift.H<strong>and</strong>strapUse the printer h<strong>and</strong>strap to conveniently carry your printer. With theh<strong>and</strong>strap attached, you can also attach the printer shoulder strap.<strong>Intermec</strong> Cleaning SwabUse the <strong>Intermec</strong> cleaning swab to clean the printhead <strong>and</strong> platenroller. One cleaning swab is included with the printer. You canpurchase additional cleaning swabs from www.intermec.com.Power Supply (Model AE19)Provides power to the mobile printer <strong>and</strong> the 4-bay battery charger(Model AC18).Printhead Cleaning PenUse the cleaning pen to clean the printhead.Protective CaseUse the protective case to transport <strong>and</strong> store your printer. Theprotective case keeps the printer free of dust, dirt, <strong>and</strong> moisture <strong>and</strong>still provides easy access to the printer for printing.Serial CableThe serial adapter is an 8-pin DIN to DB9 connector that connectsyour printer to your desktop PC.Shoulder StrapUse the shoulder strap, with the h<strong>and</strong>strap, to carry the printer. Thewide padded strap makes it comfortable to wear the printer for longperiods of time.Vehicle Cradle (Model AV8)Use the vehicle cradle to attach the printer to a truck or forklift. Youwill need the forklift power supply kit to connect your vehicle powerto the printer.<strong>PB50</strong> <strong>and</strong> <strong>PB51</strong> <strong>Mobile</strong> <strong>Printer</strong> <strong>User</strong> <strong>Guide</strong> 77
Appendix A — Specifications78 <strong>PB50</strong> <strong>and</strong> <strong>PB51</strong> <strong>Mobile</strong> <strong>Printer</strong> <strong>User</strong> <strong>Guide</strong>
BIPL <strong>and</strong> Fingerprint Setup Menus79
Appendix B — IPL <strong>and</strong> Fingerprint Setup MenusIPL Setup MenuSETUPSER-COMBAUDRATE DATA BITS PARITY STOPBITS PROTOCOLNETWORKIP SELECTION IP ADDRESS NETMASKDEFAULTROUTERNAMESERVERMAC ADDRESSTEST/SERVICETESTPRINT DATA DUMP MEMORY RESET LSS TESTCMD LANGUAGECONFIGTEST LABELSFORMATPAGEUDCFONTMEDIAMEDIA TYPETESTFEEDMODELBL LENGTHDOTSLBL WIDTHDOTSSENSITIVITY DARKNESS LBL REST POINT FORM ADJ DOTSXFORM ADJ DOTSYCONFIGURATIONPWRUPEMULATIONPRINT SPEEDLTSCALIBRATIONPOWERLOW BATTERY SLEEP TIMER STANDBY TIMERDISPLAYORIENTATIONCONTRAST80 <strong>PB50</strong> <strong>and</strong> <strong>PB51</strong> <strong>Mobile</strong> <strong>Printer</strong> <strong>User</strong> <strong>Guide</strong>
Fingerprint Setup MenuAppendix B — IPL <strong>and</strong> Fingerprint Setup MenusSETUPSER-COM,UART1BAUDRATE CHAR LENGTH PARITY STOPBITS FLOWCONTROL NEW LINE REC BUF TRANS BUFNET-COM NET 1NEW LINERTS/CTSENQ/ACKXON/XOFFDATA TO HOSTNETWORKDATA FROMHOSTIP SELECTION IP ADDRESS NETMASKDEFAULTROUTERNAMESERVERMAC ADDRESSFEEDADJSTARTADJSTOPADJMEDIAMEDIA SIZEMEDIA TYPEPAPER TYPECONTRASTTESTFEEDTESTFEEDMODELEN (SLOWMODE)XSTARTLABELS(w GAPS)DIRECTTHERMALWIDTHTICKET(w MARK)LABELCONTRASTLENGTHTICKET(w GAPS)LABELFACTORFIX LENGTHSTRIPVAR LENGTHSTRIPPRINT DEFSHEAD RESIST TESTPRINT PRINT SPEEDLSS TEST CLIP DEFAULT LTSCMD LANGUAGEPOWERLESS AUTOLTS VALUELOW BATTERY SLEEP TIMER STANDBY TIMERDISPLAYLSS MANUALLTS ADJUSTLTS TESTORIENTATIONCONTRAST<strong>PB50</strong> <strong>and</strong> <strong>PB51</strong> <strong>Mobile</strong> <strong>Printer</strong> <strong>User</strong> <strong>Guide</strong> 81
Appendix B — IPL <strong>and</strong> Fingerprint Setup Menus82 <strong>PB50</strong> <strong>and</strong> <strong>PB51</strong> <strong>Mobile</strong> <strong>Printer</strong> <strong>User</strong> <strong>Guide</strong>
IIndex83
IndexNumerics802.11 wirelessauthentication modes 34configuring using Fingerprint40–42configuring using IPL 37–39configuring using PrintSet 34finding current settings 58restarting 64setting the pre-shared key 38, 40setting the SSID 38, 40, 41setting up communications 34–42signal strength 36status icons 36troubleshooting 61using certificates 36, 39, 41WEP 37, 40WPA or WPA2 Enterprise 38–39,41–42WPA-PSK or WPA2-PSK 38, 40AAC18 4-bay battery charger 11, 13,76accessories 76–77See also AC18 4-bay batterycharger; AE19 powersupply; AV8 vehicle cradle;batteryadministrator password 37, 38, 40AE19 power supply 11, 77AV8 vehicle cradle 77Bbatterycapacity 9, 61charging error 11charging guidelines 11, 13, 70conserving power 12–13expected life 9icons 11–12installing 10Low Battery option 12model number 9, 76power specifications 70, 76safety 9temperature 13when to replace 11bin file. See firmware, upgradeinformation.black mark. See mark detection.Bluetoothconnecting to a scanner 33–34device address (BDA) 33finding current settings 58maximum range 32setting up communications 32–34status icons 34troubleshooting 61buttons. See Control Panel.Ccalibrating the printer sensors 59cancel printing, withESC/P 4, 22Fingerprint 4, 5, 22IPL 4, 5, 22certificates. See 802.11 wireless,using certificates.cleaningabout 65–66cleaning swab 66, 67, 77exterior 67identifying parts 66label gap sensor 60media compartment 68platen roller 67printhead 62, 66–67cold boot. See restarting the printer.communications ports. See connectprinter to PC.connect printer to networkusing 802.11 wireless 34–42using Bluetooth 32–34connect printer to PCusing a serial connection 31–32using USB 30–31Control Panelbacklight 12, 13buttons 4illustrated 3layout 3–4soft keys 5Ddefault password 37, 38, 40default settings. See factory defaultsettings.differences between <strong>PB50</strong> <strong>and</strong> <strong>PB51</strong>3, 72display. See Control Panel.84 <strong>PB50</strong> <strong>and</strong> <strong>PB51</strong> <strong>Mobile</strong> <strong>Printer</strong> <strong>User</strong> <strong>Guide</strong>
Indexdownloads 55Dump modeabout 24–25, 62–63starting 24, 64stopping 25, 64white-on-black characters 63EEasySet 33–34errorfield out of label 60icons 59–60IP configuration 59IP link 59LSS too high 59LSS too low 59messages 58–60network configuration 59network connection 59out of paper (Fingerprint) 59paper out (IPL) 59pause 59printhead hot 59printhead lifted 60testfeed not done 59upgrading 59See also troubleshooting.error messages 9Error mode 24Extended Test modeabout 25functions 26starting 25stopping 25, 26Ffactory default settings 25, 26fanfold media, load 17Feed buttonfunctions 4location 3use as a soft key 5field out of label error 60Fingerprint setup menu 81firmwarecurrent version 7, 58upgrade information 47–55upgrade warning 47upgrading, withHyperTerminal 51–55PrintSet 47–49SmartSystems Foundation51the printer home page 49–51fonts, downloading 55Ggap detection 71graphics, downloading 55HHyperTerminalabout 31settings 31, 44troubleshooting 62using to change settings 44using to upgrade firmware 51–55Iidentifying printer language 6images 55Info buttonfunctions 4location 3use as a soft key 5, 22Information modeabout 21–22starting 22stopping 5, 22InterDriver software 30interfacesabout 74RS-232 serial 74–75USB 75–76IP address 45, 49IP configuration error 59IP link error 59IPL setup menu 80KKnowledge Central 58Llabel gap sensor 60languageschanging 8described 7LED. See Ready-to-Work indicator,about.Line Analyzer 62–63See also troubleshooting.LSS too high error 59<strong>PB50</strong> <strong>and</strong> <strong>PB51</strong> <strong>Mobile</strong> <strong>Printer</strong> <strong>User</strong> <strong>Guide</strong> 85
IndexLSS too low error 59Mmark detection 71–72mediaend of roll indicator 72fanfold 14–16, 71, 72jammed paper 9label 71label gap 60loading 14–20roll 14–16, 71self-strip 19–20sensitivity defaults 72specifications 71–72supported types 72–73tag 71media cover release button 3, 25menu, menu system. See ControlPanel.Nnetwork configuration error 59network connection error 59Oout of paper error 59Ppaper jam 9paper out error 59password 37, 38, 40Pause modeabout 22starting 4, 22stopping 4, 22platen rollercleaning information 67location 66Power button. See St<strong>and</strong>by button.power. See battery.printercalibrating the sensors 59differences between <strong>PB50</strong> <strong>and</strong><strong>PB51</strong> 3, 72find IP address 45, 49intended uses 2language 6memory 70operating temperatures 13, 70password 37, 38, 40platen roller 66power specifications 70print resolution 2, 70printhead 66printing speed 2, 70quality 62, 72sensor locations 66serial number 58size <strong>and</strong> weight 70sounds 9specifications 70–71tear bar 66printheadcleaning information 66–67location 66printhead hot error 59printhead lifted error 60PrintSet 44, 47–49, 55, 62product support. See support.RReady mode 21Ready-to-Work indicatorabout 5–6blinking 6, 60, 62light off 5light on 5location 3reference documentsESC/P Programmer’s Reference xFingerprint Comm<strong>and</strong> Reference xFingerprint Developer’s <strong>Guide</strong> x, 7IPL Comm<strong>and</strong> Reference x, 7resetting the printer. See factorydefault settings.restarting the printer 64resume printing 22Ssafety information ixSelect Media function 26self-strip. See media, self-strip.serial connectioncable part number 31, 34, 47connecting to a PC 31–32finding current settings 58illustrated 74–75pins <strong>and</strong> descriptions 74–75port communication settings31, 31–32, 35troubleshooting 62See also connect printer to PC.serial number 5886 <strong>PB50</strong> <strong>and</strong> <strong>PB51</strong> <strong>Mobile</strong> <strong>Printer</strong> <strong>User</strong> <strong>Guide</strong>
Indexsettingsabout 42–46changing, withthe Control Panel 42–43HyperTerminal 44PrintSet 44the printer home page 45–46the SmartSystems console 46Setup buttonfunctions 4location 3use as a soft key 5, 14, 17Setup modeabout 23–24starting 4stopping 4, 5Sleep Timerabout 12effect on St<strong>and</strong>by Timer 12SmartSystems Foundationdownload location 46, 51using to change settings 46using to upgrade firmware 51soft keys 5sounds 9St<strong>and</strong>by buttonfunctions 4location 3use as a soft key 5St<strong>and</strong>by modeabout 13starting 4, 13stopping 13St<strong>and</strong>by Timer 12–13stop printing, withESC/P 4, 22Fingerprint 4, 5, 22IPL 4, 5, 22supportinformation 58Knowledge Central 58phone number 58website 58Ttechnical support. See support.Test Labels function 26Test mode. See Dump mode.test pageabout 26–27information 58printing, withESC/P 27Fingerprint 27IPL 26troubleshooting 62testfeed 4, 59testfeed not done error 59testprint. See test page.troubleshooting802.11 wireless 61about 60–63battery 60, 61Bluetooth 61connection to PC 62contrast 61, 62label gap 60power 60print quality 61, 62, 72serial connection 62skipping labels 61stop printing 60test page 62USB connection 62using Dump mode 62–64See also error.typefaces, downloading 55Uupgrade firmware. See firmware,upgrade information.USB. See connecting printer to PC.Wwarranty ixwireless. See 802.11 wireless.<strong>PB50</strong> <strong>and</strong> <strong>PB51</strong> <strong>Mobile</strong> <strong>Printer</strong> <strong>User</strong> <strong>Guide</strong> 87
Index88 <strong>PB50</strong> <strong>and</strong> <strong>PB51</strong> <strong>Mobile</strong> <strong>Printer</strong> <strong>User</strong> <strong>Guide</strong>
Worldwide Headquarters6001 36th Avenue WestEverett, Washington 98203U.S.A.tel 425.348.2600fax 425.355.9551www.intermec.com© 2012 <strong>Intermec</strong> TechnologiesCorporation. All rights reserved.<strong>PB50</strong> <strong>and</strong> <strong>PB51</strong> <strong>Mobile</strong> <strong>Printer</strong> <strong>User</strong> <strong>Guide</strong>*934-012-008*P/N 934-012-008