iWAY™ 600c automotive GPS Quick Start Guide - Lowrance
iWAY™ 600c automotive GPS Quick Start Guide - Lowrance
iWAY™ 600c automotive GPS Quick Start Guide - Lowrance
You also want an ePaper? Increase the reach of your titles
YUMPU automatically turns print PDFs into web optimized ePapers that Google loves.
Pub. 988-0160-331<br />
Turn-by-Turn Mapping <strong>GPS</strong> and MP3 Player<br />
<strong>Quick</strong> <strong>Start</strong> <strong>Guide</strong>
iWAY 600C <strong>Quick</strong> <strong>Start</strong> <strong>Guide</strong><br />
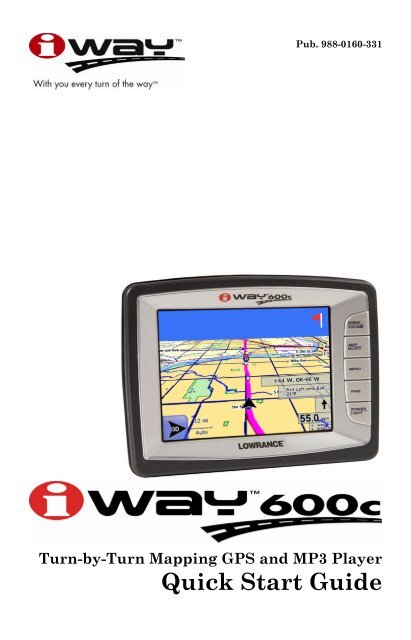
The iWAY 600C was designed to be easy to use. The buttons along the<br />
right side of the unit's screen open various menus, including turning<br />
the unit on and off. However, the unit's touch screen will be used to<br />
enter most commands.<br />
The iWAY 600C can display aerial images.<br />
1. SPEAK/VOLUME – Push this button to have the unit repeat the<br />
current navigation instruction. Press and hold this key to adjust the<br />
volume.<br />
2. MAP/MUSIC – Press this key to switch between map and music<br />
mode.<br />
3. MENU – Press this key to access the Main Menu. From the Main<br />
Menu you can select a command or adjust the unit's different features.<br />
4. FIND – The Find key is used to search for different destinations.<br />
Use this button to access the unit's three Find menus. Use this key to<br />
access the address book to search for contacts you have created.<br />
5. POWER/LIGHT – The Power key turns the unit on and off. It also<br />
controls the backlight. Press POWER to turn the unit on. To activate the<br />
backlight press POWER again.<br />
The unit has three preset backlight levels. Repeatedly pressing POWER<br />
will cycle through the backlight settings. To turn the unit off, press and<br />
hold the POWER key for 3 seconds.<br />
1<br />
1<br />
2<br />
3<br />
4<br />
5
The flexible arm mount allows you to make non-mar installations without<br />
drilling, screws or permanent adhesives. Since the mount is portable,<br />
it's easy to transfer the <strong>GPS</strong> unit to another vehicle.<br />
WARNING:<br />
When mounting a <strong>GPS</strong> unit in an automobile you must<br />
avoid any installation that obscures important instruments<br />
and controls or restricts the driver's view through<br />
the vehicle's windows. Avoid placing the <strong>GPS</strong> where it<br />
could be propelled by an activated airbag. Some states<br />
restrict mounting any electronic device in any location<br />
on an automobile dash or windshield.<br />
Be sure to check your local laws before using these<br />
mounts. Be sure to check the suction mount for adequate<br />
adhesion each time you use the unit and reinstall<br />
it if necessary. This is a portable mounting device and<br />
the normal heating and cooling cycle of a car's interior<br />
will eventually loosen the seal. A loose suction cup could<br />
allow the unit to fall or come loose during vehicle operations.<br />
Installing the flexible suction cup mount<br />
The suction cup base and arm can be adjusted to a position that best<br />
suits your vehicle. The mounting surface should be free of dirt and oil.<br />
While you can attach the flexible suction cup mount to the windshield<br />
before attaching the unit to the suction cup mount, it may be easier if<br />
the suction cup mount is connected to the unit first. You can then attach<br />
the entire assembly to the car's windshield.<br />
Suction<br />
release<br />
tab<br />
Suction<br />
cup<br />
base<br />
<strong>GPS</strong> unit<br />
resting on<br />
dash<br />
Locking<br />
lever<br />
Unit resting on dash with flexible suction cup mount.<br />
3
To attach the flexible suction cup mount to the back of the <strong>GPS</strong> unit<br />
align the mount with the back of the unit. Place the base of the flexible<br />
suction cup mount against the back of the unit by matching the male<br />
and female connector ends together.<br />
Then snap the mount into place by sliding the flexible suction cup<br />
mount up. Pull down on the flexible suction cup mount to disengage it<br />
from the back of the unit.<br />
The mounting surface should be free of dirt and oil. Press the suction<br />
cup against the mounting surface and, while maintaining pressure,<br />
push the locking lever down until the arm is secure.<br />
NOTE:<br />
Some areas restrict mounting any electronic device to a dash or<br />
windshield. Be sure to check your local laws before using any electronic<br />
mounting device.<br />
Align the suction cup mount with the<br />
back of the unit and snap it into place<br />
by sliding the mounting arm up.<br />
Attaching the unit to mounting arm.<br />
If the suction cup has problems staying secured to the mounting surface,<br />
clean the mounting surface and the suction cup with alcohol then<br />
reinstall. Moistening the suction cup may help it stick in some cases.<br />
To remove the suction cup base, disengage the locking lever and pull on<br />
the suction release tab to break the vacuum seal.<br />
Adhesive Mounting Plate<br />
In some automobiles a typical windshield mount may be difficult or undesirable.<br />
The flat self-adhesive mounting plate allows you to mount<br />
the unit somewhere else, such as on the dashboard or center console.<br />
4
Top view of adhesive mounting plate, at left. Bottom view (right)<br />
shows adhesive pad with paper backing.<br />
The adhesive plate is important in these cases because the suction cup<br />
base will not hold to textured materials covering most dashboards and<br />
center consoles. The plate's smooth, flat surface provides a secure attachment<br />
for the mount's suction cup, while the plate's adhesive pad<br />
holds the entire assembly in place.<br />
WARNING:<br />
If you use the adhesive mounting plate it may be extremely<br />
difficult to remove. If you remove the plate it<br />
could leave remnants of the adhesive pad or you could<br />
damage the surface it was attached to.<br />
Determine Plate Location<br />
Once attached, the plate's adhesive pad is difficult or impossible to remove.<br />
It's important to select the proper location before removing the<br />
adhesive backing. To select a mounting location for the adhesive pad,<br />
connect the <strong>GPS</strong> unit and mounting arm together. Then attach the<br />
mounting arm's suction cup to the adhesive plate. Hold the entire assembly<br />
at the desired location to check how it fits. Make sure the flex<br />
arm can be positioned for easy use.<br />
Attach the mounting arm's suction cup (left) to the adhesive plate. The<br />
flexible suction cup mount (right) locked to the adhesive plate.<br />
5
Next, power the unit up and make sure the unit can lock on to satellites<br />
through the automobile's window. If the unit can not lock on, try<br />
another mounting location. When you have found a suitable mounting<br />
location, make sure the mounting surface is free of dirt and oil. Release<br />
the plate from the suction cup by flipping the locking lever and pulling<br />
the suction release tab. Peel off the adhesive pad's paper backing. Position<br />
the plate over the spot and press down firmly, maintaining pressure<br />
for 20 seconds to ensure the adhesive bonds securely. You can now<br />
attach the suction cup mount and <strong>GPS</strong> to the plate.<br />
Caution:<br />
Do not leave this unit unattended on an automobile dashboard.<br />
When your car is parked and the <strong>GPS</strong> is not in use, protect it<br />
from theft and heat by storing it in an unobtrusive location<br />
away from direct sunlight. In warm seasons the temperature on<br />
a car's unventilated or non air-conditioned dash can become hot<br />
enough to prevent the <strong>GPS</strong> unit from operating.<br />
Long Term Storage<br />
When the <strong>GPS</strong> is not in use for an extended period of time we recommend<br />
bringing it indoors and storing it at room temperature or in some<br />
location with a temperature range of 60º to 90º F.<br />
<strong>GPS</strong> unit centered on dashboard. This photo was taken at passenger<br />
eye level. Notice how the unit was placed so that it does not obstruct<br />
the view of the road ahead through the windshield.<br />
Map Mode Operation<br />
The unit’s map screen is the main display mode. It shows your location<br />
and surroundings. A black arrow icon represents your position onscreen.<br />
The arrow always points in the direction you are traveling.<br />
6
While the unit is tracking your position, the black arrow icon remains<br />
in the center of the map screen. The map screen scrolls and the map<br />
changes. If you pass under a highway you will see the highway on the<br />
map screen approach the arrow icon then scroll behind even as the<br />
highway overpass dwindles in your rear-view mirror.<br />
Location Information<br />
button<br />
Black<br />
arrow<br />
icon<br />
A black arrow icon (left) indicates your position on the map screen.<br />
The map screen with map toolbar buttons is shown at right. Press the<br />
Map Orientation button to select between three different map views.<br />
Map Display Toolbar<br />
The Map Display Toolbar is used to control the map screen. To bring up<br />
the Map Display Toolbar touch the map screen and the cursor and toolbar<br />
will appear. The Map Display Toolbar buttons are:<br />
X clears the cursor and map display toolbar from map screen.<br />
Zoom In.<br />
Zoom Out.<br />
The Map View button toggles between<br />
three different map screen views.<br />
Clear Cursor clears the toolbar from the screen and centers the map<br />
on your current position.<br />
Map View toggles between three different map screen views. You can<br />
view the regular map screen, aerial view with overlay data or aerial<br />
view without overlay data. The aerial view screens are for selected areas<br />
only.<br />
7<br />
Map display<br />
toolbar<br />
Cursor<br />
Map Orientation<br />
button<br />
Range scale<br />
(Auto Zoom)
Zoom In and Zoom Out increases or decreases the map view. Control<br />
the zoom to get the most detail possible while still showing all of the<br />
necessary area. You can use this feature in combination with the Move<br />
Map function to focus on an area other than your current location.<br />
The Map Orientation button can be found in the bottom left corner of<br />
the map screen. Touch this button to select between three different<br />
map views:<br />
North Up Track Up 3D View<br />
Overlay Data boxes, like the ones in the bottom right corner of the<br />
next figure, provide textual information about the route you are following.<br />
Use the overlay boxes to display useful information as you navigate<br />
a route.<br />
Map screen with overlay data boxes shown.<br />
Map instructions can be displayed using the overlay data boxes. Use<br />
OVERLAY DATA SETUP from Menu 1 in the Main Menu to select which information<br />
to display on-screen. Overlay data appears in semi-transparent<br />
boxes on the map screen.<br />
The Overlay Data Setup feature (far left) can be found in Menu1 in the<br />
Main Menu. If you select (Press here to add …) in the Overlay Data<br />
Shown screen (center) the Data Viewer screen will appear. The Data<br />
Viewer screen is shown at right.<br />
8<br />
Map overlay<br />
data boxes.
In the Data Viewer screen you can select the overlay data you want<br />
the unit to display on-screen.<br />
Overlay data can be used to show information such as the distance to<br />
your next turn, the direction and angle of a turn, your speed, estimated<br />
time to destination, text directions and the current road you are traveling<br />
on.<br />
The Data Viewer screen is arranged in an expanding tree format. Press<br />
the + sign to view the sub-categories listed under each main category.<br />
When you select Audio Data (left figure above) its subcategories will<br />
appear.<br />
Press in the box to the left of each category to activate it. When a feature<br />
is activated (center figure above) a check mark will appear in the<br />
box next to it. The size of overlay data boxes can be changed using the<br />
slider in the Data Information screen (right figure above).<br />
Each Data Viewer category will have its own Data Information screen.<br />
Bring up the Data Information screen by highlighting and pressing on<br />
the category in the Overlay Data Shown screen.<br />
Location Information button<br />
The Location Information button, shown at left, is located in<br />
the top right corner of the map screen. Pressing this button<br />
will bring up the Location Information or POI Information<br />
screen, depending on whether the cursor is on-screen.<br />
Create Contacts<br />
You can use the Location Information button to save a contact at your<br />
current position and add it to the Address Book. Press the button to<br />
bring up the Location Information screen for your current position, now<br />
select ADD TO ADDRESSBOOK to save your position as a contact.<br />
9
Get Location Information<br />
You can use the Location Information button to get information for onscreen<br />
items. Touch the map screen to bring up the cursor. Now "highlight"<br />
a street, a landmark or POI (Point Of Interest) symbol on the map<br />
screen by placing the cursor on the item.<br />
If the location is a symbol it will be highlighted by a red halo and a yellow<br />
pop-up text box will appear, identifying the item. Now press the Location<br />
Information button. A screen will appear with detailed information<br />
about that particular location. The following figures show a POI symbol<br />
on the map screen highlighted with the cursor and the POI Information<br />
screen for that selected item.<br />
Cursor<br />
Highlighted<br />
location<br />
A business location (right) highlighted with the cursor. The cursor can<br />
highlight other symbols on the map and provide information on those<br />
locations, as well.<br />
Find Menus<br />
The unit's most important function is generating routes to help you get<br />
from where you are to where you want to go. There are several ways to<br />
do this. The easiest is the GO TO command in the POI Information<br />
screen. Use the map cursor to select any location on the map and press<br />
the Location Information button located in the top right corner of the<br />
map screen.<br />
10
In the POI Information screen select GO TO. The unit will generate a<br />
route. The route will be highlighted by a magenta line on the map<br />
screen. While the Go To command is an easy way to generate a route,<br />
several other options are available. To access these options press the<br />
FIND button on the right side of the unit. This will bring up the first of<br />
four Find screens.<br />
The Find 1 menu, left, and the Find 2 menu, at right.<br />
The Find 3 menu, left, and the Find 4 menu, at right.<br />
All the options in the Find menus point to a database of POIs stored in<br />
the unit. All the Find menus give you the option of searching through a<br />
number of different categories. Gas, ATMs, Lodging and even Restaurants<br />
have been divided into their own categories. No matter which<br />
Find category you choose, you will be able to search for places nearest<br />
your current position or cursor – if the cursor is active on-screen – or to<br />
search for specific locations by name.<br />
While the Address feature allows you to enter a street address and<br />
navigate directly to it, the Address Book feature allows you to save and<br />
then search through a list of address entries saved in the unit. Almost<br />
any location can be saved in the Address Book as long as the unit recognizes<br />
the location’s address. When you find an address you want to<br />
save, choose ADD TO ADDRESSBOOK and it will be stored in the Address<br />
Book.<br />
11
Navigation Instructions<br />
Once you decide to navigate to a location – whether it's a POI stored in<br />
the unit’s database, an address you have searched for or a cursor position<br />
on the map – the unit will try to generate a route from your current<br />
location to the destination. If you are moving, the unit will take<br />
your current direction into account.<br />
If you miss a turn the unit will automatically begin generating a new<br />
route based on your new position. The on-screen map displays the route<br />
with a magenta line, with colored dots at each turn. You can zoom in to<br />
see greater detail or let the unit show you the optimum level of detail<br />
throughout the trip with the Auto Zoom feature.<br />
The unit also provides textual instruction for every turn. Please see the<br />
main manual for more information about the Auto Zoom feature. You<br />
can view the list of instructions by selecting DIRECTIONS LIST from Menu 1<br />
in the Main Menu. From the directions list you can select any turn<br />
from the list and another screen will appear showing a close-up of the<br />
map area around the turn.<br />
The Directions list screen (left) shows every turn you will make while<br />
navigating to a destination. Select and highlight a turn from the list<br />
and it will bring up the Turn Preview screen. The Turn Preview screen<br />
(right) will show you a map view with details of the turn.<br />
You will hear "Take next left" or "Exit right in four-point-one miles."<br />
Spoken instructions are set to repeat occasionally. You can customize<br />
how often you hear voice instructions by pressing the SOUND AND VOICE<br />
SETUP button from Menu 2 in the Main Menu.<br />
12
Menu 2 of the Main Menu (left) with the Sound and Voice Setup feature.<br />
The Sounds menu is shown at right.<br />
When you select the SOUND AND VOICE SETUP feature it will bring up the<br />
Sounds menu. In the Sounds menu you can adjust all sound and volume<br />
options or turn off spoken instructions.<br />
USB Connection<br />
This section describes the proper methods for connecting and disconnecting<br />
the <strong>GPS</strong> unit to a computer using the USB-to-PC cable. Using<br />
the cable you can copy music files from a computer to the unit's hard<br />
drive.<br />
Caution:<br />
Connecting the unit to your computer incorrectly will prevent<br />
you from successfully transferring music files to the unit. In<br />
some cases, connecting incorrectly may corrupt the hard drive<br />
partition used for music storage. This would result in loss of any<br />
music files already loaded in the unit, and would require you to<br />
reformat the music partition on the unit's hard drive.<br />
The unit acts like an additional removable disk drive when connected<br />
to a computer running the Microsoft ® Windows ® 2000 or Windows ® XP<br />
operating systems. The unit is not compatible with earlier Windows<br />
versions.<br />
Connecting<br />
1. Turn the unit on.<br />
2. Plug in the cable's USB connector to the USB port on your computer<br />
and connect the cable's other end to the unit. The computer will recognize<br />
the unit and assign it a drive letter.<br />
3. Transfer music files to the unit as you would normally move or copy<br />
files, following your computer's operating system instructions.<br />
13
Disconnecting<br />
Windows XP<br />
Wait until any file operation (such as transferring files) is finished.<br />
Copying files to the unit is complete when the copy dialog box goes<br />
away. Disconnect the cable from the computer and the unit. The computer<br />
and <strong>GPS</strong> unit are ready for other tasks.<br />
Windows 2000<br />
Wait until any file operation (such as transferring files) is finished.<br />
Confirm that your file operation is complete by using the Eject command:<br />
1. Right-click the unit's drive letter. This can be found by first doubleclicking<br />
the "My Computer" icon on the Windows desktop.<br />
2. If the file is still copying, or another file operation is under way, you<br />
will see the standard Windows hourglass symbol. This indicates the<br />
unit's hard drive is still active. When the hourglass disappears, the file<br />
has finished copying. Unplug the USB cable and resume other tasks.<br />
3. If you right-click the reader's drive letter and instead of the hourglass<br />
symbol a pop-up menu appears, click EJECT.<br />
A. If no "wait" or warning message appears, unplug the USB cable<br />
and resume other tasks.<br />
B. If a "wait" message appears, follow the directions and give the unit<br />
a few moments to finish the file operation, now repeat the Eject command.<br />
If no other message appears, unplug the USB cable.<br />
C. If you click EJECT and a "Cannot Unmount Volume" message appears,<br />
click CONTINUE. You can now safely unplug the USB cable.<br />
Caution:<br />
No matter what computer operating system you are using, always<br />
wait until any file operation is finished before disconnecting<br />
the USB cable. If you have questions, refer to your computer<br />
operating system instructions to determine the completion indicators<br />
for various file operations.<br />
Music Mode Operation<br />
The Music Mode display contains an area for visualization effects with<br />
a set of play control buttons.<br />
WARNING:<br />
Listening to music or even the verbal turn-by-turn instructions<br />
with headphones can seriously impede your<br />
ability to drive. Be sure to check your local laws before<br />
using headphones while driving.<br />
14
Now Playing<br />
box<br />
Visualization<br />
effects screen<br />
Output Mode<br />
button<br />
The Music screen. When a song is playing the name of the song will<br />
appear in the Now Playing box, as well as the song's length and quality<br />
in kbps (kilobits per second).<br />
Song position slider<br />
Previous Play / Pause Next<br />
Volume slider<br />
The Music screen's play control buttons.<br />
The play control buttons are:<br />
Previous skips to the previous song.<br />
Play/Pause starts a song or play list. If no play list or song has been<br />
selected, the unit will automatically generate a play list from all the<br />
songs on your music drive. If a song is playing, pressing this button will<br />
pause the song. Press the button to begin playing the song again.<br />
Next skips to the next song.<br />
Stop stops the song playing.<br />
Volume Slider adjusts the volume.<br />
Song Position slider indicates the playback position for the song that<br />
is playing. Whenever a song begins to play the song position slider<br />
starts at the far left and moves right. You can skip to any point in a<br />
song by pressing and dragging the blue button on the song position<br />
slider.<br />
15<br />
Stop<br />
Find Music<br />
Repeat<br />
Shuffle<br />
Equalizer
Now Playing box displays the name, position and quality of the song<br />
that is playing. You can touch the screen anywhere inside the Now<br />
Playing box to open the music browser, which lets you choose the next<br />
song or play list.<br />
Find Music opens the Audio Search menu. To find a particular song or<br />
play list by its filename press the FIND MUSIC symbol and then touch anywhere<br />
inside the Name Filter box to open a virtual keyboard. Enter all<br />
or part of a song's filename and press DONE.<br />
Visualization effects screen provides either a waveform or spectrum<br />
analyzer effect in time with the music that's playing. To switch between<br />
the available visualization effects press the screen inside the<br />
Visualization area.<br />
Output Mode button<br />
To hear MP3 music and turn-by-turn instructions through<br />
your car's FM radio, press the OUTPUT MODE button, shown at<br />
left. The volume slider is replaced by two up and down<br />
arrow buttons. Tune the radio to a vacant FM radio<br />
frequency; one not used by a commercial radio station in your area. Use<br />
the up and down arrow buttons to tune the iWAY to the same frequency<br />
as the radio.<br />
You can choose any odd numbered frequency between 88.1 and 107.9<br />
MHz. Once the unit is tuned to the same frequency as the car radio you<br />
should be able to hear the unit's sound through your car's audio system.<br />
Audio Search/Browse Music Files<br />
If you have trouble finding a particular song stored in the unit use the<br />
Audio Search feature. To access the Audio Search feature press the FIND<br />
MUSIC button in the top right corner of the Music screen.<br />
Now press NAME FILTER and a virtual keyboard will appear. Use the keyboard<br />
to enter all or part of the song file name you are searching for.<br />
Now press DONE. The Audio Search menu will provide a list of all music<br />
files stored in the unit that match the text you entered in the Name<br />
Filter box.<br />
Choose the music file you want and select PLAY to begin playing the<br />
song or select BROWSE to open the Browse Music Files screen containing<br />
all your music files. If you make a mistake while entering a song name<br />
in the Name Filter box press the CLEAR button to start over.<br />
16
Press the Find Music button in the top right corner of the Music<br />
screen to bring up the Audio Search screen, shown at left. The Audio<br />
Search screen virtual keyboard is shown at right.<br />
The Browse Music Files screen shows all songs and play lists stored on<br />
the unit's hard drive. If you have sorted the music by album or artist<br />
you can select a folder and play only the songs in that folder or you can<br />
choose a specific song.<br />
You also can select PLAY ALL in the Browse Music Files screen to play all<br />
the music contained in that screen. The Browse Music Files screen also<br />
has a virtual keyboard to search for music files. Press NAME FILTER to<br />
bring up the Browse Music Files virtual keyboard. This keyboard works<br />
exactly the same as the Audio Search keyboard.<br />
The Browse Music Files screen, at left. The Browse Music Files virtual<br />
keyboard is shown at right.<br />
17
Notes<br />
18
<strong>Lowrance</strong> Pub. 988-0160-331 © Copyright 2007<br />
All Rights Reserved<br />
Printed in USA 012307 <strong>Lowrance</strong> Electronics, Inc.<br />
19


