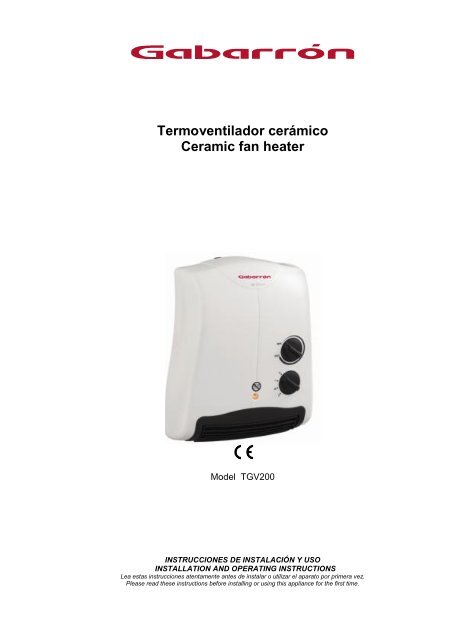
Termoventilador cerámico Ceramic fan heater
Termoventilador cerámico Ceramic fan heater
Termoventilador cerámico Ceramic fan heater

You also want an ePaper? Increase the reach of your titles
YUMPU automatically turns print PDFs into web optimized ePapers that Google loves.
RésuméLa reconnaissance automatique des instruments de musique s’appuiesur le calcul de paramètres bas-niveau sur les signaux audio à analyser.Choisir des paramètres adaptés consiste à prendre ceux permettantde discriminer efficacement les instruments. Ainsi, l’étude présentéea pour but d’ajouter des paramètres pertinents au corpus de paramètresutilisé pour la reconnaissance automatique d’instruments demusique sur des performances solo. L’idée conductrice est d’opérer unesegmentation de ces solos en notes, puis en partie transitoire (transient)/ parties tenues (release), dans le but de définir un jeu de paramètresadapté pour chaque type de segment. En effet, les transitoires sontcensés contenir une grande partie de l’information lors de l’identificationd’instruments de musique par l’homme.Tout d’abord, des méthodes de détection de débuts de note (onsets)ont été développées, puis évaluées sur une base de donnée d’onsets deréférence selon une méthodologie précisément définie. La méthode laplus adaptée aux besoins de l’algorithme de reconnaissance des instrumentsa ainsi été choisie, présentant de meilleurs résultats que lesméthodes classiques. Puis des paramètres a priori adaptés aux transitoiresont été définis, ensuite testés pour la reconnaissance des instruments.Enfin, afin de confirmer sa validité, la méthode de détectiond’onsets a été appliquée à l’extraction automatique de tempo.2
1.- IMPORTANT INFORMATIONRead these instructions carefully before installing or using this <strong>heater</strong> for the first time. The guarantee will not cover damage caused bynot following these instructions.The instructions should be retained for future reference. This guide must be kept and given to any new owner.This appliance is designed for domestic use only.The use of this <strong>heater</strong> is forbidden in areas where gases, explosive or inflammable substances are present.DO NOT USE THIS HEATER TO DRY CLOTHES.Ensure the power supply to the socket into which the <strong>heater</strong> is plugged is in accordance with the rating label on the <strong>heater</strong>.Keep the power cable away from the hot body of the <strong>heater</strong>.Do not let the cable hang over the edge of a table or counter or let it come into contact with any hot surfaces.Do not use the <strong>heater</strong> while sleeping. Never leave the <strong>heater</strong> unattended while it is operated.The improper handling can cause injuries.Always unplug the <strong>heater</strong> when moving it from one location to another.Do not pull on the connection cord, but rather on the plug, to separate the appliance from the mains.Do not use extension cable. This could overheat and cause fires.Never touch the <strong>heater</strong> with wet or humid hands or barefoot.Do not leave any object above the <strong>heater</strong>, covering the grill, or restricting the air flow.The <strong>heater</strong> must be disconnected during installation and cleaning.The <strong>heater</strong> should not be located in front of, or under an electrical socket.The <strong>heater</strong> should be positioned so the controls cannot be used when using the shower or bath.The location of the <strong>heater</strong> should not be close to curtains or other inflammable articles, and the <strong>heater</strong> must not be located immediatelybelow dripping clothes.It is important to maintain a minimum distance of 80 cm between the <strong>heater</strong> and curtains, or any other combustible materials.Never rotate the heating part of the appliance during operation. To change the tilt angle of the heating part, we advise you to wait for 15minutes after the appliance has been switched off.Avoid using the <strong>heater</strong> where there are children or disabled persons without being adequately supervised by a responsible person.Never dismantle the components of the <strong>heater</strong> or replace the components with the ones that do not meet the safety requirements. If thesupply cord is damaged, it must be replaced by the manufacturer or its service agents or a similarly qualified person in order to avoid ahazard.The appliance is not intended for use by persons (including children) with reduced physical, sensory or mental capabilities, or lack ofexperience and knowledge, unless they have been given supervision or instruction concerning use of the appliance by a personresponsible for their safety.Children should be supervised to ensure that they do not play with the applianceThe <strong>heater</strong> should be switched off and be disconnected from electric supply to avoid accidents when it is not being watched or not inuse for a long time.Ensure the voltage is suitable for the <strong>heater</strong>. Refer to technical label.The presence in the atmosphere of tobacco smoke or atmospheric pollution can with time discolour the <strong>heater</strong> surface.Stand the appliance on a table or flat surface.Do not use outdoor.WARNING: In order to avoid overheating, do not cover the <strong>heater</strong>2.- INSTALLATIONOpen the box to take out the <strong>heater</strong> and all the accessories.When you install the <strong>heater</strong>, please refer to the picture.≥20cm≥20cm≥100cmSelect a suitable place to install the <strong>heater</strong>, <strong>heater</strong> should be hung on the wall at least 100cm above the floor, the distance away fromtwo side wall should be more than 20cm.Drill two holes on the wall, with the distance between as 15cm and then locate the anchors in the holes. Part of the screws should leftoutside the wall in order to hang the <strong>heater</strong>.
Holes used to hang theproduct on the wallNote: Please make sure the screw fixed in the hole tightly and the <strong>heater</strong> hanged on the wall firmly.WARNING: When you install your appliance in fixed position, you may cut the plug and connect thethree conductors of the supply cord to a connection box in respecting the polarities as following:- Live: Brown- Neutral: Blue- Earth: Yellow/GreenIf you are not sure, it’s recommended to ask a qualified electrician for any help and to be sure thatyour installation is in accordance with the local regulations.3.- OPERATIONWARNING : Always choose a safe location for the <strong>heater</strong>, keeping in mind the safety instructions outlined in point 1.11. Power indicator light2. Thermostat knob3. Power selector4. Air outlet234Before using the <strong>heater</strong> make sure that it is on a flat and stable surface. Damage may occur if it is placed on an incline or decline.Turn off all the controls of the <strong>heater</strong>, and then plug the <strong>heater</strong> power plug directly into a standard AC outlet. Be sure plug fits tightly intooutlet.Rotate the thermostat regulator (2) clockwise to the position MAX, then rotate the power selector (3) from 0 (OFF) to (FAN) to activatethe wind-motor, and check if it acts normally.Rotate the power selector (3) from (FAN) to (LOW) or (HIGH) to choose the desired power:(LOW) for 1000W(HIGH) for 2000W.When the desired temperature is reached, rotate the thermostat regulator (2) counter clockwise until the pilot light (1) goes off. The desiredtemperature will be kept constant by the thermostat.4.- MAINTENANCEClean and dust with a dry, soft cloth only when the unit is disconnected and cold.Do not use solvents or abrasive products for cleaning.Do not immerse the <strong>heater</strong> in water.Do not allow the interior to get wet as this could create a hazard.In case of malfunction or doubt, do not try to repair the <strong>heater</strong> yourself; it may result in a fire hazard or electric shock.This thermal radiator has been manufactured under an assured quality system using environment friendly processes.Please take the <strong>heater</strong>s to a clean point once their useful life is finished, in order to recycle their materials in the right way.5.- SPECIFICATIONSModel: TGV200Voltage: 230V~Input: 2000WClass II IP23Net weight: 2kg
EEl símbolo en el producto o en su embalaje indica que este producto no se puede tratar como desperdicio normales del hogar.Este producto se debe entregar al punto de recolección de equipos eléctricos y electrónicos para reciclaje. Al asegurarse de que esteproducto se deseche correctamente usted ayudará a evitar posibles consecuencias negativas para el ambiente y la salud pública, lo cualpodría ocurrir si este producto no se manipula de forma adecuada. Para obtener información más detallada sobre el reciclaje de esteproducto, póngase en contacto con la administración de su ciudad, con su servicio de desechos del hogar o con la tienda donde compró elproducto.Estas disposiciones solamente son válidas en los países miembros de la UE.ENThe symbol on the product or in its packaging indicates that this product may not be treated as household waste. Instead itshall be handed over to the applicable collection point for the recycling of electrical and electronic equipment. By ensuring this product isdisposed of correctly, you will help prevent potential negative consequences for the environment and human health, which could otherwisebe caused by inappropriate waste handling of this product. For more detailed information about recycling of this product, please contact yourlocal city office, your household waste disposal service or the shop where you purchased the product. These instructions are only valid inthe EU member states.www.elnur.esTf. de atención al cliente:+34 902 19 57 14Como parte de la política de mejora continua Elnur s.a. se reserva el derecho a realizar modificaciones técnicas sin previo aviso.As a part of the policy of continuous product improvement Elnur s.a reserves the right to alter specifications without notice.@2011 Cod. 90210200 rev.1