ScanX Duo - Air Techniques, Inc.
ScanX Duo - Air Techniques, Inc.
ScanX Duo - Air Techniques, Inc.

Create successful ePaper yourself
Turn your PDF publications into a flip-book with our unique Google optimized e-Paper software.
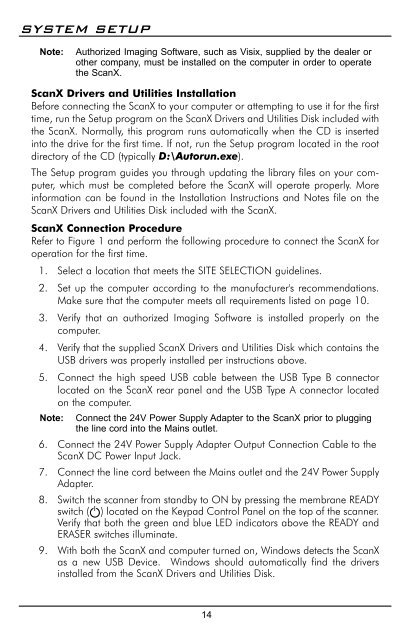
SYSTEM SETUPNote:Authorized Imaging Software, such as Visix, supplied by the dealer orother company, must be installed on the computer in order to operatethe <strong>ScanX</strong>.<strong>ScanX</strong> Drivers and Utilities InstallationBefore connecting the <strong>ScanX</strong> to your computer or attempting to use it for the firsttime, run the Setup program on the <strong>ScanX</strong> Drivers and Utilities Disk included withthe <strong>ScanX</strong>. Normally, this program runs automatically when the CD is insertedinto the drive for the first time. If not, run the Setup program located in the rootdirectory of the CD (typically D:\Autorun.exe).The Setup program guides you through updating the library files on your computer,which must be completed before the <strong>ScanX</strong> will operate properly. Moreinformation can be found in the Installation Instructions and Notes file on the<strong>ScanX</strong> Drivers and Utilities Disk included with the <strong>ScanX</strong>.<strong>ScanX</strong> Connection ProcedureRefer to Figure 1 and perform the following procedure to connect the <strong>ScanX</strong> foroperation for the first time.1. Select a location that meets the SITE SELECTION guidelines.2. Set up the computer according to the manufacturer's recommendations.Make sure that the computer meets all requirements listed on page 10.3. Verify that an authorized Imaging Software is installed properly on thecomputer.4. Verify that the supplied <strong>ScanX</strong> Drivers and Utilities Disk which contains theUSB drivers was properly installed per instructions above.5. Connect the high speed USB cable between the USB Type B connectorlocated on the <strong>ScanX</strong> rear panel and the USB Type A connector locatedon the computer.Note: Connect the 24V Power Supply Adapter to the <strong>ScanX</strong> prior to pluggingthe line cord into the Mains outlet.6. Connect the 24V Power Supply Adapter Output Connection Cable to the<strong>ScanX</strong> DC Power Input Jack.7. Connect the line cord between the Mains outlet and the 24V Power SupplyAdapter.8. Switch the scanner from standby to ON by pressing the membrane READYswitch ( ) located on the Keypad Control Panel on the top of the scanner.Verify that both the green and blue LED indicators above the READY andERASER switches illuminate.9. With both the <strong>ScanX</strong> and computer turned on, Windows detects the <strong>ScanX</strong>as a new USB Device. Windows should automatically find the driversinstalled from the <strong>ScanX</strong> Drivers and Utilities Disk.14