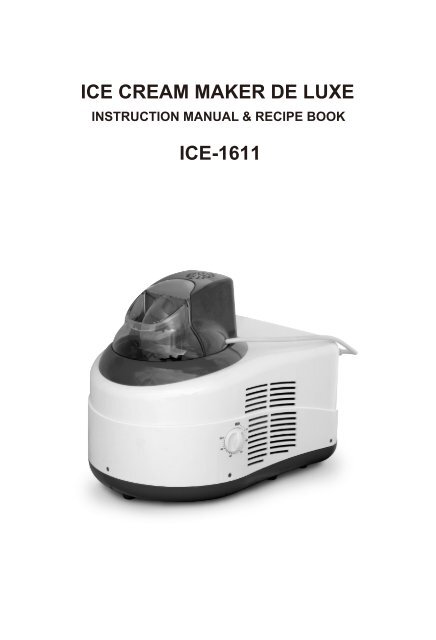
ICE CREAM MAKER DE LUXE ICE-1611 - Komplett.se
ICE CREAM MAKER DE LUXE ICE-1611 - Komplett.se
ICE CREAM MAKER DE LUXE ICE-1611 - Komplett.se

You also want an ePaper? Increase the reach of your titles
YUMPU automatically turns print PDFs into web optimized ePapers that Google loves.
<strong>ICE</strong> <strong>CREAM</strong> <strong>MAKER</strong> <strong>DE</strong> <strong>LUXE</strong>INSTRUCTION MANUAL & RECIPE BOOK<strong>ICE</strong>-<strong>1611</strong>
TABLE OF CONTENTSIMPORTANT SAFEGUARDSGENERAL <strong>DE</strong>SCRIPTIONINSTRUCTIONS FOR USEBefore the first u<strong>se</strong>Preparation of the mixtureTo u<strong>se</strong> your ice cream makerCare and cleaningACCESSORIESCOOKBOOKQuick vanilla ice creamRed cherry ice creamRum and raisin ice creamChocolate and orange ice creamBlackberry ice creamRich & creamy chocolate ice creamEasy coffee ice creamBanana and honey ice cream
IMPORTANT SAFEGUARDSWhen using electrical appliance, basic safety precautions should always be followed,including the followings:1. Read all instructions carefully, and keep them for future reference.2. To protect against electric shock, do not immer<strong>se</strong> cord, plugs or unit in water orany other liquid.3. Do not immer<strong>se</strong> electric motor as<strong>se</strong>mbly and main body in water or any other liquid.4. Clo<strong>se</strong> supervision is required when any appliance is u<strong>se</strong>d by or near children.5. Avoid contact with moving parts.6. In order to reduce the risk of injury to person or damage to the appliance, keephands and utensils out of cylinder bowl . Do not u<strong>se</strong> sharp objects or utensils insidethe cylinder bowl.7. Do not clean the inner pot with clean<strong>se</strong>r, steel wool pads or other abrasive materials.8. Remove plug from wall outlet when not in u<strong>se</strong> and before cleaning.Always allow Spindle, Paddle, Removable container and Fixed bowl to roomtemperature before removing parts and before cleaning.9. Do not operate any appliance with a damaged cord or plug or after the appliancemalfunctions or has been damaged in any manner.10. The u<strong>se</strong> of accessories not recommended by the manufacturer may cau<strong>se</strong> injury.11. Do not u<strong>se</strong> any electric appliance outdoors, hou<strong>se</strong>hold u<strong>se</strong> only.12. Do not let cords hang over the edge of table or counter or touch hot surfaces.13. Do not place any appliance on or near hot gas or electric burner or in a heatedoven.14. To disconnect, remove plug from wall outlet - DO NOT PULL LEAD.15. Do not u<strong>se</strong> the appliance for other than intended u<strong>se</strong>, as per this booklet.16. If the supply cord is damaged, it must be replaced by a special cord or availablefrom the manufacturer or its <strong>se</strong>rvice agent.SAVE THESE INSTRUCTIONS1
GENERAL <strong>DE</strong>SCRIPTIONTransparent CoverMotor UnitSpindlePaddleSafety Interlock SwitchRemovable ContainerFixed BowlLocking RingMain Body, withcompressor andstainless steelfixed bowlMotor TimerSocket for Motor UnitPower Switch
INSTRUCTIONS FOR USEIMPORTANT:This Ice Cream Maker must be allowed to <strong>se</strong>ttle on a horizontal surface for atleast 5 hours after purcha<strong>se</strong> or after every transit.Place the Ice Cream Maker on a firm and flat surface and allow for proper aircirculation through Ventilation Grilles on both sides of machine body.Before the first u<strong>se</strong>:Hygiene is extremely important when making ice cream. Clean the Cover (notthe Motor Unit!), Paddle and Spindle, Removable Container and Fixed Bowlthoroughly before you u<strong>se</strong> it at the first time. See “Care and Cleaning”.Preparation of the Mixture:Select your recipe and follow it to prepare the mixture.When u<strong>se</strong> the ice cream powder to make ice cream, plea<strong>se</strong> operate accordingto the instruction on the package of the ice cream powder.REMEMBER:U<strong>se</strong> pitted , peeled fruit and ingredients free of any waste matter.Always chill the ingredients in your fridge before pouring into the machine.This will reduce the time required to make the ice cream.Do not make up more than Ca.800-1000g mixture. This will allow the volume toincrea<strong>se</strong> during churning to maximum bowl capacity.To u<strong>se</strong> your Ice Cream Maker:1. Pour ingredients into the removable container. Connect the plug to an electricaloutlet. Turn on the Power Switch and let the Ice Cream Maker run at least 10minutes to “pre-cool” the Fixed Bowl.2. Place Removable Container inside the Fixed Bowl. Notch on fixed bowl. Bosson removable container.NOTE: The bos<strong>se</strong>s on Removable Container must be in<strong>se</strong>rted into the notcheson Fixed Bowl.(<strong>se</strong>e figure 1)3. Fit the Paddle on Spindle and in<strong>se</strong>rt the Spindle into the hole of the Motor Unit.(<strong>se</strong>e figure 2)3
REMEMBER:Safety Interlock Switch will switch off the motor power automatically when theMotor Unit departs from Locking Ring.4. Place the Motor Unit on the Locking Ring.(<strong>se</strong>e figure 3)5. Connect the Cord of Motor Unit to the Socket on the Body. (<strong>se</strong>e figure 4)6. Set the Motor Timer. (See figure 5)REMEMBER:The motor unit can only start working when the Motor Timer are on.Turn off the Motor Unit when the paddle does not rotate due to the hardnessice cream , and take out the paddle or it might be froze in the ice cream.Figure 1Figure 2Figure 3Figure 4Figure 5Figure 67. After about 30~50 minutes (depends on the recipe), the ice-cream shouldbe ready when the Paddle do not rotate anymore. Turn off the PowerSwitch. (See figure 6)4
REMEMBER:Do not turn off the Motor Unit unless the ice-cream is ready. If the Motor Unitis turned off too early, the ingredients may freeze on the Removable Container.The time for making ice-cream will be a bit shorter or longer than the timestated above becau<strong>se</strong> the room temperature may vary.When shorter, plea<strong>se</strong> turn off the motor timer and take out the paddle.When longer, plea<strong>se</strong> re<strong>se</strong>t the motor timer to prolong the process accordingto the rigidity of ice-cream. (The time listed in the cookbook are estimates)8. Unplug the Cord of Motor Unit and unplug the main plug from wall socket.9. Remove the Motor Unit and take out the Removable Container.10. U<strong>se</strong> plastic spoREMEMBER:The condensation water between Removable Container and Fixed Bowl mayfreeze and cau<strong>se</strong> the Removable Container difficult to remove.NOTE: Moisture might be found under the Ice-cream Maker becau<strong>se</strong> of thehumidity.IMPORTANT:Carefully wiped out the water in Fixed bowl by a cloth. Do not turn theappliance upside.Do not u<strong>se</strong> metal utensils to stir or scoop your ice cream in the.Care and Cleaning1. Before starting to clean make sure that the machine is switched off andunplugged.2. The Transparent Cover can be removed from the Motor Unit by pushing it asindicated in figure 7. Before this operation, you have to take out the paddle.3. Wash the paddle, the Transparent Cover and, if necessary the RemovableContainer in warm, soapy water.4. Wash out the steel bowl with a sponge and dry it with a cloth. 5. U<strong>se</strong> a dampcloth to clean the motor drive and main body.5
Figure 7 Figure 8IMPORTANT:NEVER IMMERSE THE MOTOR AND THE MAIN BODY OF <strong>ICE</strong> <strong>CREAM</strong><strong>MAKER</strong> IN WATER.(<strong>se</strong>e figure 8)ACCESSORIES25ml cupce cream scoop6
COOKBOOKQuick Vanilla Ice CreamRed Cherry Ice CreamRum and Raisin Ice CreamChocolate and Orange Ice CreamBlackberry Ice CreamRich & Creamy Chocolate Ice CreamEasy Coffee Ice CreamBanana and Honey Ice CreamRecipe Tips:1. Ingredients: The amount of ingredients can be adjusted according to yourpersonal taste.2. Timer Setting: The Timer <strong>se</strong>tting in the recipes in this book should be u<strong>se</strong>d asa guide. You need to judge whether the ice cream you are making weighs moreor less than that which is u<strong>se</strong>d in the recipes and slightly adjust your timer<strong>se</strong>tting. Also, you have to adjust the <strong>se</strong>tting according to the initial temperatureof the ingredients. When working with the ice cream maker, we suggestwatching the progress through the transparent window.3. Pre-cooling : It is recommended to put ingredients into the removable containerand to pre-cooling the unit for 15 minutes before starting the process. It helpsthe units running more quickly and smoothly.Conversion table :1 teaspoon 1 tablespoon 1/3 cup 1/2 cup 1 cup5 ml 15 ml 80 ml 120 ml 240 ml7
Quick Vanilla Ice Cream* 2/3 cup (160ml) unsweetened evaporated milk, well chilled* 2 teaspoons (10ml) vanilla es<strong>se</strong>nce* 2/3 cup (160ml) sweetened conden<strong>se</strong>d milk* 1 cup (240ml) double cream-whippedMethod: Beat the evaporated milk until thick and creamy. Add the sweetenedconden<strong>se</strong>d milk and beat well.Add vanilla es<strong>se</strong>nce. Beat the cream until thick and fold into the first mixture.Pour into Removable Container. Switch on the Ice Cream Maker.SETPPower SwitchONTIMER45 MIN.It takes 45 minutes to thicken the mix. If desired, takes out the paddle and keeps thePower Switch ON for around 10 minutes freezing the ice cream until firm.8
Red Cherry Ice Cream* 2/3 tin (270g) red cherry fruit pie filling* 2/3 cup (160ml) double cream-stiffly beaten* 2 egg whites-stiffly beaten* 2 teaspoons (10ml) cherry liquorNote: If the red cherry fruit is un-sweetened. Add 2/3 cup (160ml) sugar.Method: Mix the cherry liquor into the cherry fruit pie filling.Fold the cream and then the egg whites into the fruit mixture .Pour into Removable Container. Switch on theIce Cream Maker.SETPower SwitchONTIMER35MIN .It takes 35 minutes to thicken the mix. If desired, takes out the paddle and keeps thePower Switch ON for around 10 minutes freezing the ice cream until firm.Strawberry ice cream option- picture not shown* 300g strawberries* 7ml lemon juice* 2/3 cup (160ml) sugar* 2/3 cup (160ml) double cream-stiffly beatenMethod: boil strawberries, lemon juice and sugar together until the fruit has reducedto a pulp. Cool and then proceed as for cherry ice cream.9
Rum and Raisin Ice Cream* 2 teaspoons (10ml) vanilla es<strong>se</strong>nce* 1/6 cup (40ml) rum* 1/3 cup (80ml) raisins* 1/3 cup (80ml) evaporated milk-well chilled* 1/3 cup (80ml) sweetened conden<strong>se</strong>d milk* 2/3 cup (160ml) double creamMethod: Soak the raisins in the rum and vanilla es<strong>se</strong>nce overnight.Beat the well chilled evaporated milk until thick and creamy.Add the sweetened conden<strong>se</strong>d milk and beat well.Beat the cream until thick, fold into first mixture, then fold in the raisins.Pour into Removable Container. Switch on the Ice Cream Maker.SETPower SwitchONTIMER30MIN .It takes 30 minutes to thicken the mix. If desired, takes out the paddle and keeps thePower Switch ON for around 10 minutes freezing the ice cream until firm.10
Chocolate and Orange Ice Cream* 135ml evaporated milk-well chilled* 100ml double cream* 50g plain chocolate-finely gated* 1 orange* 2 teaspoons (10ml) orange flavoured liquor* 2 tablespoons (30ml) icing sugar (sifted)* wafer biscuit to <strong>se</strong>rveMethod: Whip the well chilled evaporated milk as thickly as possible, whip thecream to the same consistency. Fold together gently and then add thegated chocolate, icing sugar, orange rind, strained orange juice andliquor.Pour into Removable Container. Switch on the Ice Cream Maker.SETPower SwitchONTIMER30MIN .It takes 35 minutes to thicken the mix. If desired, takes out the paddle and keeps thePower Switch ON for around 10 minutes freezing the ice cream until firm.11
Blackberry Ice Cream* 160g blackberries (fresh or frozen)* 2 teaspoons (10ml) honey* 4 teaspoons (20ml) caster sugar* 2/3 cup (160ml) evaporate milk-well chilled* 100ml double cream* 2 teaspoons orange (10ml) flavoured liquor (optional)* 2 teaspoons (10ml) lemon juice* single cream and wafer biscuit to <strong>se</strong>rveMethod: Wash fresh blackberries and drain well, cook blackberries with thehoney and sugar gently for 4 to 8 minutes until soft.Pass through a fine sieve to remove pips. Leave till cold.Whip the well chilled evaporated milk until it thickens, whip the creamto the same consistency and fold together gently.Fold in the fruit puree with the liquor and lemon juice.Pour into Removable Container. Switch on the Ice Cream Maker.SETPower SwitchONTIMER30MIN .It takes 30 minutes to thicken the mix. If desired, takes out the paddle and keeps thePower Switch ON for around 10 minutes freezing the ice cream until firm.12
Rich & Creamy Chocolate Ice Cream* 140g milk or dark chocolate* 1/4 cup (60ml) sweetened conden<strong>se</strong>d milk* 2 eggs-<strong>se</strong>parated* 2/3 cup (160ml) double cream-whipped* 1 tablespoon orange liquor or rumMethod: Break chocolate into piece and melt over hot water (or microwave at 70%power for 2-3 minutes). Beat egg yolks and conden<strong>se</strong>d milk well, add themelted chocolate and liquor, beat well.Add whipped cream and stiffly beaten egg whites and fold in.Pour into Removable Container. Switch on the Ice Cream Maker.SETPower SwitchONTIMER30MIN .It takes 30 minutes to thicken the mix. If desired, takes out the paddle and keeps thePower Switch ON for around 10 minutes freezing the ice cream until firm.13
Easy Coffee Ice Cream* 2 Eggs-<strong>se</strong>parated* 2/3 cup (160ml) sweetened conden<strong>se</strong>d milk* 1 cup (240ml) double cream-whipped* 1 heaped tablespoon (16ml) instant coffee powder* 2 teaspoons (10ml) brandy* 1 teaspoon (5ml) vanilla es<strong>se</strong>nceMethod: Beat the egg yolks well with the conden<strong>se</strong>d milk.Fold in the whipped cream and the stiffly beaten egg whites.Dissolve the coffee in a little boiling water, add to the mixture with the brandyand vanilla es<strong>se</strong>nce.Pour into Removable Container. Switch on the Ice Cream Maker.SETPower SwitchONTIMER30MIN .It takes 30 minutes to thicken the mix. If desired, keeps the Power Switch ON foraround 5 minutes freezing the ice cream until firm.14
Banana and Honey Ice Cream* 2 to 3 bananas (depending on size)* juice of 1 large lemon* 1/2 cup (120ml) double cream* 1/4 cup (60ml) honey* 100ml unsweetened natural yoghurt* 2 egg whitesMethod: Mash the bananas in a large bowl using a fork , add the lemon juice,un-whipped cream, yoghurt and honey.Beat well to combine. Whisk the eggs whites until stiff and fold into thebanana mixture.Ajoutez le tout dans le bol amovible. Allumez la sorbetière.SETPower SwitchONTIMER40MIN .It takes 40 minutes to thicken the mix. If desired, takes out the paddle and keeps thePower Switch ON for around 15 minutes freezing the ice cream until firm.15
Waste Disposal / Environmental ProtectionOur appliances are produced on a high quality level for a long lifetime. If an applianceis defective and repair is not possible we ask you to follow the following instructionsfor disposal.Do not dispo<strong>se</strong> this appliance together with your standard hou<strong>se</strong>hold waste. Plea<strong>se</strong>bring this product to an approved collection point for recycling of electric and electronicproducts. Dispo<strong>se</strong> the electrical element/heating element via electrical waste, all othercomponents according to the material and the respective local regulations (e.g. glass,metal, plastic).By <strong>se</strong>parate collection and disposal of waste products you help to protect naturalresources and ensure, that the product is dispo<strong>se</strong>d in an adequate way to protecthealth and environment.16