

Xerox WorkCentre 7120/7125 Multifunction Printer User Guide
Xerox WorkCentre 7120/7125 Multifunction Printer User Guide
Xerox WorkCentre 7120/7125 Multifunction Printer User Guide

You also want an ePaper? Increase the reach of your titles
YUMPU automatically turns print PDFs into web optimized ePapers that Google loves.
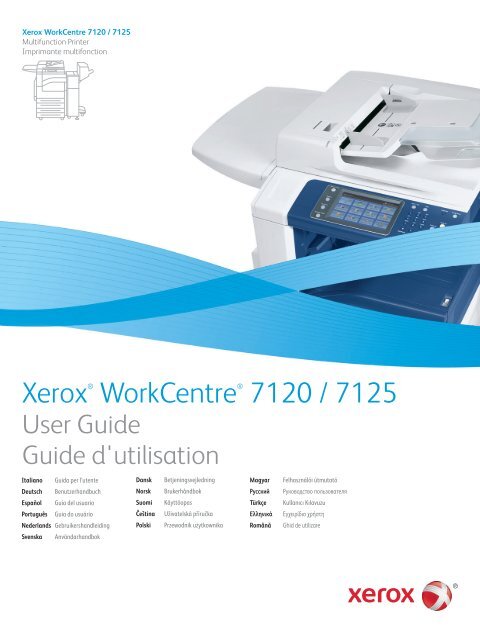
<strong>Xerox</strong> <strong>WorkCentre</strong> <strong>7120</strong> / <strong>7125</strong><br />
<strong>Multifunction</strong> <strong>Printer</strong><br />
Imprimante multifonction<br />
<strong>Xerox</strong>®<br />
<strong>WorkCentre</strong>®<br />
<strong>User</strong> <strong>Guide</strong><br />
<strong>Guide</strong> d'utilisation<br />
Italiano Guida per l’utente<br />
Deutsch Benutzerhandbuch<br />
Español Guía del usuario<br />
Português Guia do usuário<br />
Nederlands Gebruikershandleiding<br />
Svenska Användarhandbok<br />
Dansk Betjeningsvejledning<br />
Norsk Brukerhåndbok<br />
Suomi Käyttöopas<br />
Čeština Uživatelská příručka<br />
Polski Przewodnik użytkownika<br />
<strong>7120</strong> / <strong>7125</strong><br />
Magyar Felhasználói útmutató<br />
Русский Руководство пользователя<br />
Türkçe Kullanıcı Kılavuzu<br />
Ελληνικά Εγχειρίδιο χρήστη<br />
Română Ghid de utilizare
© 2011 <strong>Xerox</strong> Corporation. All Rights Reserved. Unpublished rights reserved under the copyright laws of the United States. Contents<br />
of this publication may not be reproduced in any form without permission of <strong>Xerox</strong> Corporation.<br />
Copyright protection claimed includes all forms of matters of copyrightable materials and information now allowed by statutory or<br />
judicial law or hereinafter granted, including without limitation, material generated from the software programs which are displayed<br />
on the screen such as styles, templates, icons, screen displays, looks, and so on.<br />
XEROX ® and XEROX and Design ® , Phaser ® , PhaserSMART ® , CentreWare ® , PrintingScout ® , Walk-Up ® , <strong>WorkCentre</strong> ® , FreeFlow ® ,<br />
SMARTsend ® , Scan to PC Desktop ® , MeterAssistant ® , SuppliesAssistant ® , <strong>Xerox</strong> Secure Access Unified ID System ® , <strong>Xerox</strong> Extensible<br />
Interface Platform ® , ColorQube ® , Global Print Driver ® , and Mobile Express Driver ® are trademarks of <strong>Xerox</strong> Corporation in the<br />
United States and/or other countries.<br />
Adobe ® Reader ® , Adobe ® Type Manager ® , ATM, Flash ® , Macromedia ® , Photoshop ® , and PostScript ® are trademarks of<br />
Adobe Systems Incorporated in the United States and/or other countries.<br />
Apple ® , AppleTalk ® , Bonjour ® , EtherTalk ® , Macintosh ® , Mac OS ® , and TrueType ® are trademarks of Apple Inc., registered in the U.S.<br />
and other countries.<br />
HP-GL ® , HP-UX ® , and PCL ® are trademarks of Hewlett-Packard Corporation in the United States and/or other countries.<br />
IBM ® and AIX ® are trademarks of International Business Machines Corporation in the United States and/or other countries.<br />
Microsoft ® , Windows Vista ® , Windows ® , and Windows Server ® are trademarks of Microsoft Corporation in the United States and<br />
other countries.<br />
Novell ® , NetWare ® , NDPS ® , NDS ® , IPX, and Novell Distributed Print Services are trademarks of Novell, Inc. in the United States<br />
and other countries.<br />
SGI ® and IRIX ® are trademarks of Silicon Graphics International Corp. or its subsidiaries in the United States and/or other countries.<br />
SunSM, Sun Microsystems, and Solaris are trademarks of Sun Microsystems, Inc. in the United States and other countries.<br />
UNIX ® is a trademark in the United States and other countries, licensed exclusively through X/ Open Company Limited.<br />
As an ENERGY STAR ® partner, <strong>Xerox</strong> Corporation has determined that this product meets the ENERGY STAR guidelines for energy<br />
efficiency. The ENERGY STAR name and logo are registered U.S. marks.<br />
Document version 1.1: July 2011
Contents<br />
1 Safety<br />
Electrical Safety . . . . . . . . . . . . . . . . . . . . . . . . . . . . . . . . . . . . . . . . . . . . . . . . . . . . . . . . . . . . . . . . . . . . . . . . . 12<br />
Electrical Supply . . . . . . . . . . . . . . . . . . . . . . . . . . . . . . . . . . . . . . . . . . . . . . . . . . . . . . . . . . . . . . . . . . . . . 12<br />
Power Cord. . . . . . . . . . . . . . . . . . . . . . . . . . . . . . . . . . . . . . . . . . . . . . . . . . . . . . . . . . . . . . . . . . . . . . . . . . 12<br />
Emergency Power Off. . . . . . . . . . . . . . . . . . . . . . . . . . . . . . . . . . . . . . . . . . . . . . . . . . . . . . . . . . . . . . . . 13<br />
Telephone Line Cord . . . . . . . . . . . . . . . . . . . . . . . . . . . . . . . . . . . . . . . . . . . . . . . . . . . . . . . . . . . . . . . . . 13<br />
Maintenance Safety. . . . . . . . . . . . . . . . . . . . . . . . . . . . . . . . . . . . . . . . . . . . . . . . . . . . . . . . . . . . . . . . . . . . . 15<br />
<strong>Printer</strong> Symbols . . . . . . . . . . . . . . . . . . . . . . . . . . . . . . . . . . . . . . . . . . . . . . . . . . . . . . . . . . . . . . . . . . . . . . . . . 16<br />
Product Safety Certification. . . . . . . . . . . . . . . . . . . . . . . . . . . . . . . . . . . . . . . . . . . . . . . . . . . . . . . . . . . . . . 17<br />
Environmental Health and Safety Contacts . . . . . . . . . . . . . . . . . . . . . . . . . . . . . . . . . . . . . . . . . . . . . . . 18<br />
2 Features<br />
Before Using the <strong>Printer</strong> . . . . . . . . . . . . . . . . . . . . . . . . . . . . . . . . . . . . . . . . . . . . . . . . . . . . . . . . . . . . . . . . . 20<br />
<strong>Xerox</strong> Welcome Center. . . . . . . . . . . . . . . . . . . . . . . . . . . . . . . . . . . . . . . . . . . . . . . . . . . . . . . . . . . . . . . 20<br />
Parts of the <strong>Printer</strong> . . . . . . . . . . . . . . . . . . . . . . . . . . . . . . . . . . . . . . . . . . . . . . . . . . . . . . . . . . . . . . . . . . . . . . 21<br />
Front-Left View. . . . . . . . . . . . . . . . . . . . . . . . . . . . . . . . . . . . . . . . . . . . . . . . . . . . . . . . . . . . . . . . . . . . . . 22<br />
Right-Rear View . . . . . . . . . . . . . . . . . . . . . . . . . . . . . . . . . . . . . . . . . . . . . . . . . . . . . . . . . . . . . . . . . . . . . 23<br />
Telephone and Fax Connection Option . . . . . . . . . . . . . . . . . . . . . . . . . . . . . . . . . . . . . . . . . . . . . . . 24<br />
Document Feeder . . . . . . . . . . . . . . . . . . . . . . . . . . . . . . . . . . . . . . . . . . . . . . . . . . . . . . . . . . . . . . . . . . . 25<br />
Internal Components . . . . . . . . . . . . . . . . . . . . . . . . . . . . . . . . . . . . . . . . . . . . . . . . . . . . . . . . . . . . . . . . 26<br />
Integrated Office Finisher Option. . . . . . . . . . . . . . . . . . . . . . . . . . . . . . . . . . . . . . . . . . . . . . . . . . . . . 27<br />
Office LX Finisher Option. . . . . . . . . . . . . . . . . . . . . . . . . . . . . . . . . . . . . . . . . . . . . . . . . . . . . . . . . . . . . 28<br />
Standard Features . . . . . . . . . . . . . . . . . . . . . . . . . . . . . . . . . . . . . . . . . . . . . . . . . . . . . . . . . . . . . . . . . . . 29<br />
Configurations . . . . . . . . . . . . . . . . . . . . . . . . . . . . . . . . . . . . . . . . . . . . . . . . . . . . . . . . . . . . . . . . . . . . . . 29<br />
<strong>Printer</strong> Options . . . . . . . . . . . . . . . . . . . . . . . . . . . . . . . . . . . . . . . . . . . . . . . . . . . . . . . . . . . . . . . . . . . . . . 30<br />
Energy Saver Mode . . . . . . . . . . . . . . . . . . . . . . . . . . . . . . . . . . . . . . . . . . . . . . . . . . . . . . . . . . . . . . . . . . 31<br />
Control Panel . . . . . . . . . . . . . . . . . . . . . . . . . . . . . . . . . . . . . . . . . . . . . . . . . . . . . . . . . . . . . . . . . . . . . . . . . . . 32<br />
Control Panel Layout . . . . . . . . . . . . . . . . . . . . . . . . . . . . . . . . . . . . . . . . . . . . . . . . . . . . . . . . . . . . . . . . 32<br />
<strong>Printer</strong> Information . . . . . . . . . . . . . . . . . . . . . . . . . . . . . . . . . . . . . . . . . . . . . . . . . . . . . . . . . . . . . . . . . . 33<br />
Accounting. . . . . . . . . . . . . . . . . . . . . . . . . . . . . . . . . . . . . . . . . . . . . . . . . . . . . . . . . . . . . . . . . . . . . . . . . . 34<br />
3 Installation and Setup<br />
Installation and Setup Overview. . . . . . . . . . . . . . . . . . . . . . . . . . . . . . . . . . . . . . . . . . . . . . . . . . . . . . . . . . 38<br />
Physical Connection . . . . . . . . . . . . . . . . . . . . . . . . . . . . . . . . . . . . . . . . . . . . . . . . . . . . . . . . . . . . . . . . . 38<br />
Turning the <strong>Printer</strong> On . . . . . . . . . . . . . . . . . . . . . . . . . . . . . . . . . . . . . . . . . . . . . . . . . . . . . . . . . . . . . . . 38<br />
Turning the <strong>Printer</strong> Off. . . . . . . . . . . . . . . . . . . . . . . . . . . . . . . . . . . . . . . . . . . . . . . . . . . . . . . . . . . . . . . 40<br />
Assigning a Network Address . . . . . . . . . . . . . . . . . . . . . . . . . . . . . . . . . . . . . . . . . . . . . . . . . . . . . . . . . 41<br />
<strong>WorkCentre</strong> <strong>7120</strong>/<strong>7125</strong> <strong>Multifunction</strong> <strong>Printer</strong><br />
<strong>User</strong> <strong>Guide</strong><br />
3
Contents<br />
4<br />
Installing the Software . . . . . . . . . . . . . . . . . . . . . . . . . . . . . . . . . . . . . . . . . . . . . . . . . . . . . . . . . . . . . . . . . . 42<br />
Operating System Requirements . . . . . . . . . . . . . . . . . . . . . . . . . . . . . . . . . . . . . . . . . . . . . . . . . . . . . 42<br />
Installing Drivers and Utilities for Windows. . . . . . . . . . . . . . . . . . . . . . . . . . . . . . . . . . . . . . . . . . . . 42<br />
Installing the Drivers and Utilities for Macintosh. . . . . . . . . . . . . . . . . . . . . . . . . . . . . . . . . . . . . . . 43<br />
Adding the <strong>Printer</strong> for OS X Version 10.5 . . . . . . . . . . . . . . . . . . . . . . . . . . . . . . . . . . . . . . . . . . . . . . 45<br />
UNIX and Linux Drivers . . . . . . . . . . . . . . . . . . . . . . . . . . . . . . . . . . . . . . . . . . . . . . . . . . . . . . . . . . . . . . 46<br />
Using CentreWare Internet Services . . . . . . . . . . . . . . . . . . . . . . . . . . . . . . . . . . . . . . . . . . . . . . . . . . . . . . 47<br />
Finding The <strong>Printer</strong>’s IP Address . . . . . . . . . . . . . . . . . . . . . . . . . . . . . . . . . . . . . . . . . . . . . . . . . . . . . . 47<br />
Accessing CentreWare IS. . . . . . . . . . . . . . . . . . . . . . . . . . . . . . . . . . . . . . . . . . . . . . . . . . . . . . . . . . . . . 47<br />
4 Printing<br />
Printing Overview . . . . . . . . . . . . . . . . . . . . . . . . . . . . . . . . . . . . . . . . . . . . . . . . . . . . . . . . . . . . . . . . . . . . . . . 50<br />
Supported Media. . . . . . . . . . . . . . . . . . . . . . . . . . . . . . . . . . . . . . . . . . . . . . . . . . . . . . . . . . . . . . . . . . . . . . . . 51<br />
Recommended Media . . . . . . . . . . . . . . . . . . . . . . . . . . . . . . . . . . . . . . . . . . . . . . . . . . . . . . . . . . . . . . . 51<br />
General Media Loading <strong>Guide</strong>lines. . . . . . . . . . . . . . . . . . . . . . . . . . . . . . . . . . . . . . . . . . . . . . . . . . . . 51<br />
Media That Can Damage Your <strong>Printer</strong> . . . . . . . . . . . . . . . . . . . . . . . . . . . . . . . . . . . . . . . . . . . . . . . . 52<br />
Paper Storage <strong>Guide</strong>lines . . . . . . . . . . . . . . . . . . . . . . . . . . . . . . . . . . . . . . . . . . . . . . . . . . . . . . . . . . . . 52<br />
Loading Media . . . . . . . . . . . . . . . . . . . . . . . . . . . . . . . . . . . . . . . . . . . . . . . . . . . . . . . . . . . . . . . . . . . . . . . . . . 53<br />
Loading Paper in Trays 1 through 4 . . . . . . . . . . . . . . . . . . . . . . . . . . . . . . . . . . . . . . . . . . . . . . . . . . . 53<br />
Loading Paper in Tray 5 (Bypass Tray) . . . . . . . . . . . . . . . . . . . . . . . . . . . . . . . . . . . . . . . . . . . . . . . . 55<br />
Loading Envelopes in Tray 5 (Bypass Tray) . . . . . . . . . . . . . . . . . . . . . . . . . . . . . . . . . . . . . . . . . . . . 57<br />
Configuring the Envelope Tray . . . . . . . . . . . . . . . . . . . . . . . . . . . . . . . . . . . . . . . . . . . . . . . . . . . . . . . 57<br />
Loading Envelopes in the Envelope Tray . . . . . . . . . . . . . . . . . . . . . . . . . . . . . . . . . . . . . . . . . . . . . . 58<br />
Printing on Special Media . . . . . . . . . . . . . . . . . . . . . . . . . . . . . . . . . . . . . . . . . . . . . . . . . . . . . . . . . . . . . . . . 60<br />
Printing on Envelopes . . . . . . . . . . . . . . . . . . . . . . . . . . . . . . . . . . . . . . . . . . . . . . . . . . . . . . . . . . . . . . . . 60<br />
Printing on Labels . . . . . . . . . . . . . . . . . . . . . . . . . . . . . . . . . . . . . . . . . . . . . . . . . . . . . . . . . . . . . . . . . . . 61<br />
Printing on Glossy Paper . . . . . . . . . . . . . . . . . . . . . . . . . . . . . . . . . . . . . . . . . . . . . . . . . . . . . . . . . . . . . 62<br />
Selecting Printing Options . . . . . . . . . . . . . . . . . . . . . . . . . . . . . . . . . . . . . . . . . . . . . . . . . . . . . . . . . . . . . . . 63<br />
Printing Options for Windows . . . . . . . . . . . . . . . . . . . . . . . . . . . . . . . . . . . . . . . . . . . . . . . . . . . . . . . . 63<br />
Printing Options for Macintosh . . . . . . . . . . . . . . . . . . . . . . . . . . . . . . . . . . . . . . . . . . . . . . . . . . . . . . . 66<br />
Printing on Both Sides of the Paper . . . . . . . . . . . . . . . . . . . . . . . . . . . . . . . . . . . . . . . . . . . . . . . . . . . . . . . 68<br />
Media Types for Automatic 2-Sided Printing . . . . . . . . . . . . . . . . . . . . . . . . . . . . . . . . . . . . . . . . . . 68<br />
Printing a 2-Sided Document . . . . . . . . . . . . . . . . . . . . . . . . . . . . . . . . . . . . . . . . . . . . . . . . . . . . . . . . . 69<br />
2-Sided Page Layout Options. . . . . . . . . . . . . . . . . . . . . . . . . . . . . . . . . . . . . . . . . . . . . . . . . . . . . . . . . 69<br />
Selecting Paper . . . . . . . . . . . . . . . . . . . . . . . . . . . . . . . . . . . . . . . . . . . . . . . . . . . . . . . . . . . . . . . . . . . . . . . . . 70<br />
Windows. . . . . . . . . . . . . . . . . . . . . . . . . . . . . . . . . . . . . . . . . . . . . . . . . . . . . . . . . . . . . . . . . . . . . . . . . . . . 70<br />
Macintosh . . . . . . . . . . . . . . . . . . . . . . . . . . . . . . . . . . . . . . . . . . . . . . . . . . . . . . . . . . . . . . . . . . . . . . . . . . 70<br />
Printing Multiple Pages to a Single Sheet (N-Up) . . . . . . . . . . . . . . . . . . . . . . . . . . . . . . . . . . . . . . . . . . 71<br />
Windows. . . . . . . . . . . . . . . . . . . . . . . . . . . . . . . . . . . . . . . . . . . . . . . . . . . . . . . . . . . . . . . . . . . . . . . . . . . . 71<br />
Macintosh . . . . . . . . . . . . . . . . . . . . . . . . . . . . . . . . . . . . . . . . . . . . . . . . . . . . . . . . . . . . . . . . . . . . . . . . . . 71<br />
Printing Booklets . . . . . . . . . . . . . . . . . . . . . . . . . . . . . . . . . . . . . . . . . . . . . . . . . . . . . . . . . . . . . . . . . . . . . . . . 72<br />
Selecting Booklet Printing Using a Booklet Maker . . . . . . . . . . . . . . . . . . . . . . . . . . . . . . . . . . . . . . 73<br />
Selecting Booklet Printing Without Using a Booklet Maker . . . . . . . . . . . . . . . . . . . . . . . . . . . . . 74<br />
<strong>WorkCentre</strong> <strong>7120</strong>/<strong>7125</strong> <strong>Multifunction</strong> <strong>Printer</strong><br />
<strong>User</strong> <strong>Guide</strong>
<strong>WorkCentre</strong> <strong>7120</strong>/<strong>7125</strong> <strong>Multifunction</strong> <strong>Printer</strong><br />
<strong>User</strong> <strong>Guide</strong><br />
Contents<br />
Using Color Corrections . . . . . . . . . . . . . . . . . . . . . . . . . . . . . . . . . . . . . . . . . . . . . . . . . . . . . . . . . . . . . . . . . . 75<br />
Color Corrections for Windows. . . . . . . . . . . . . . . . . . . . . . . . . . . . . . . . . . . . . . . . . . . . . . . . . . . . . . . . 75<br />
Color Corrections for Macintosh . . . . . . . . . . . . . . . . . . . . . . . . . . . . . . . . . . . . . . . . . . . . . . . . . . . . . . 76<br />
Selecting Color Correction. . . . . . . . . . . . . . . . . . . . . . . . . . . . . . . . . . . . . . . . . . . . . . . . . . . . . . . . . . . . 76<br />
Printing in Black and White . . . . . . . . . . . . . . . . . . . . . . . . . . . . . . . . . . . . . . . . . . . . . . . . . . . . . . . . . . . . . . 77<br />
Windows. . . . . . . . . . . . . . . . . . . . . . . . . . . . . . . . . . . . . . . . . . . . . . . . . . . . . . . . . . . . . . . . . . . . . . . . . . . . 77<br />
Macintosh . . . . . . . . . . . . . . . . . . . . . . . . . . . . . . . . . . . . . . . . . . . . . . . . . . . . . . . . . . . . . . . . . . . . . . . . . . 77<br />
Printing Cover Pages. . . . . . . . . . . . . . . . . . . . . . . . . . . . . . . . . . . . . . . . . . . . . . . . . . . . . . . . . . . . . . . . . . . . . 78<br />
Windows. . . . . . . . . . . . . . . . . . . . . . . . . . . . . . . . . . . . . . . . . . . . . . . . . . . . . . . . . . . . . . . . . . . . . . . . . . . . 79<br />
Macintosh . . . . . . . . . . . . . . . . . . . . . . . . . . . . . . . . . . . . . . . . . . . . . . . . . . . . . . . . . . . . . . . . . . . . . . . . . . 79<br />
Printing Insert Pages . . . . . . . . . . . . . . . . . . . . . . . . . . . . . . . . . . . . . . . . . . . . . . . . . . . . . . . . . . . . . . . . . . . . 80<br />
Windows. . . . . . . . . . . . . . . . . . . . . . . . . . . . . . . . . . . . . . . . . . . . . . . . . . . . . . . . . . . . . . . . . . . . . . . . . . . . 80<br />
Macintosh . . . . . . . . . . . . . . . . . . . . . . . . . . . . . . . . . . . . . . . . . . . . . . . . . . . . . . . . . . . . . . . . . . . . . . . . . . 80<br />
Printing Exception Pages. . . . . . . . . . . . . . . . . . . . . . . . . . . . . . . . . . . . . . . . . . . . . . . . . . . . . . . . . . . . . . . . . 81<br />
Windows. . . . . . . . . . . . . . . . . . . . . . . . . . . . . . . . . . . . . . . . . . . . . . . . . . . . . . . . . . . . . . . . . . . . . . . . . . . . 81<br />
Macintosh . . . . . . . . . . . . . . . . . . . . . . . . . . . . . . . . . . . . . . . . . . . . . . . . . . . . . . . . . . . . . . . . . . . . . . . . . . 81<br />
Scaling . . . . . . . . . . . . . . . . . . . . . . . . . . . . . . . . . . . . . . . . . . . . . . . . . . . . . . . . . . . . . . . . . . . . . . . . . . . . . . . . . 82<br />
Windows. . . . . . . . . . . . . . . . . . . . . . . . . . . . . . . . . . . . . . . . . . . . . . . . . . . . . . . . . . . . . . . . . . . . . . . . . . . . 82<br />
Macintosh . . . . . . . . . . . . . . . . . . . . . . . . . . . . . . . . . . . . . . . . . . . . . . . . . . . . . . . . . . . . . . . . . . . . . . . . . . 82<br />
Printing Watermarks. . . . . . . . . . . . . . . . . . . . . . . . . . . . . . . . . . . . . . . . . . . . . . . . . . . . . . . . . . . . . . . . . . . . . 83<br />
Windows. . . . . . . . . . . . . . . . . . . . . . . . . . . . . . . . . . . . . . . . . . . . . . . . . . . . . . . . . . . . . . . . . . . . . . . . . . . . 83<br />
Macintosh . . . . . . . . . . . . . . . . . . . . . . . . . . . . . . . . . . . . . . . . . . . . . . . . . . . . . . . . . . . . . . . . . . . . . . . . . . 84<br />
Printing Mirror Images for Windows . . . . . . . . . . . . . . . . . . . . . . . . . . . . . . . . . . . . . . . . . . . . . . . . . . . . . . 85<br />
Creating and Saving Custom Sizes. . . . . . . . . . . . . . . . . . . . . . . . . . . . . . . . . . . . . . . . . . . . . . . . . . . . . . . . 86<br />
Windows. . . . . . . . . . . . . . . . . . . . . . . . . . . . . . . . . . . . . . . . . . . . . . . . . . . . . . . . . . . . . . . . . . . . . . . . . . . . 86<br />
Macintosh . . . . . . . . . . . . . . . . . . . . . . . . . . . . . . . . . . . . . . . . . . . . . . . . . . . . . . . . . . . . . . . . . . . . . . . . . . 86<br />
Job Completion Notification for Windows. . . . . . . . . . . . . . . . . . . . . . . . . . . . . . . . . . . . . . . . . . . . . . . . . 87<br />
Printing from USB Flash Drive . . . . . . . . . . . . . . . . . . . . . . . . . . . . . . . . . . . . . . . . . . . . . . . . . . . . . . . . . . . . 88<br />
Printing from Media Card Reader. . . . . . . . . . . . . . . . . . . . . . . . . . . . . . . . . . . . . . . . . . . . . . . . . . . . . . . . . 89<br />
Printing Special Job Types . . . . . . . . . . . . . . . . . . . . . . . . . . . . . . . . . . . . . . . . . . . . . . . . . . . . . . . . . . . . . . . 90<br />
Printing and Deleting Secure Print Jobs . . . . . . . . . . . . . . . . . . . . . . . . . . . . . . . . . . . . . . . . . . . . . . . 90<br />
Printing a Sample Set . . . . . . . . . . . . . . . . . . . . . . . . . . . . . . . . . . . . . . . . . . . . . . . . . . . . . . . . . . . . . . . . 91<br />
Delayed Printing. . . . . . . . . . . . . . . . . . . . . . . . . . . . . . . . . . . . . . . . . . . . . . . . . . . . . . . . . . . . . . . . . . . . . 91<br />
Charge Print. . . . . . . . . . . . . . . . . . . . . . . . . . . . . . . . . . . . . . . . . . . . . . . . . . . . . . . . . . . . . . . . . . . . . . . . . 92<br />
Saving a Print Job to the <strong>Printer</strong> . . . . . . . . . . . . . . . . . . . . . . . . . . . . . . . . . . . . . . . . . . . . . . . . . . . . . . 92<br />
Sending a Print Job to a Fax Machine . . . . . . . . . . . . . . . . . . . . . . . . . . . . . . . . . . . . . . . . . . . . . . . . . 93<br />
5 Copying<br />
Basic Copying . . . . . . . . . . . . . . . . . . . . . . . . . . . . . . . . . . . . . . . . . . . . . . . . . . . . . . . . . . . . . . . . . . . . . . . . . . . 96<br />
Document Glass . . . . . . . . . . . . . . . . . . . . . . . . . . . . . . . . . . . . . . . . . . . . . . . . . . . . . . . . . . . . . . . . . . . . . 96<br />
Document Feeder . . . . . . . . . . . . . . . . . . . . . . . . . . . . . . . . . . . . . . . . . . . . . . . . . . . . . . . . . . . . . . . . . . . 96<br />
5
Contents<br />
6<br />
Adjusting Copy Options. . . . . . . . . . . . . . . . . . . . . . . . . . . . . . . . . . . . . . . . . . . . . . . . . . . . . . . . . . . . . . . . . . 98<br />
Basic Settings . . . . . . . . . . . . . . . . . . . . . . . . . . . . . . . . . . . . . . . . . . . . . . . . . . . . . . . . . . . . . . . . . . . . . . . 98<br />
Image Quality Adjustments . . . . . . . . . . . . . . . . . . . . . . . . . . . . . . . . . . . . . . . . . . . . . . . . . . . . . . . . . 102<br />
Layout Adjustments . . . . . . . . . . . . . . . . . . . . . . . . . . . . . . . . . . . . . . . . . . . . . . . . . . . . . . . . . . . . . . . . 104<br />
Output Format Adjustments . . . . . . . . . . . . . . . . . . . . . . . . . . . . . . . . . . . . . . . . . . . . . . . . . . . . . . . . 108<br />
Advanced Copying . . . . . . . . . . . . . . . . . . . . . . . . . . . . . . . . . . . . . . . . . . . . . . . . . . . . . . . . . . . . . . . . . . . . . 114<br />
Building a Job . . . . . . . . . . . . . . . . . . . . . . . . . . . . . . . . . . . . . . . . . . . . . . . . . . . . . . . . . . . . . . . . . . . . . . 114<br />
Printing a Sample Copy . . . . . . . . . . . . . . . . . . . . . . . . . . . . . . . . . . . . . . . . . . . . . . . . . . . . . . . . . . . . . 116<br />
Combining Original Sets . . . . . . . . . . . . . . . . . . . . . . . . . . . . . . . . . . . . . . . . . . . . . . . . . . . . . . . . . . . . 116<br />
Delete Outside/Delete Inside . . . . . . . . . . . . . . . . . . . . . . . . . . . . . . . . . . . . . . . . . . . . . . . . . . . . . . . . 117<br />
Saving Copy Settings . . . . . . . . . . . . . . . . . . . . . . . . . . . . . . . . . . . . . . . . . . . . . . . . . . . . . . . . . . . . . . . 117<br />
Retrieving Saved Copy Settings. . . . . . . . . . . . . . . . . . . . . . . . . . . . . . . . . . . . . . . . . . . . . . . . . . . . . . 118<br />
6 Scanning<br />
Scanning Overview . . . . . . . . . . . . . . . . . . . . . . . . . . . . . . . . . . . . . . . . . . . . . . . . . . . . . . . . . . . . . . . . . . . . . 120<br />
Loading Original Documents . . . . . . . . . . . . . . . . . . . . . . . . . . . . . . . . . . . . . . . . . . . . . . . . . . . . . . . . . . . . 121<br />
Using the Document Glass . . . . . . . . . . . . . . . . . . . . . . . . . . . . . . . . . . . . . . . . . . . . . . . . . . . . . . . . . . 121<br />
Using the Document Feeder. . . . . . . . . . . . . . . . . . . . . . . . . . . . . . . . . . . . . . . . . . . . . . . . . . . . . . . . . 121<br />
Storing a Scan to a Folder. . . . . . . . . . . . . . . . . . . . . . . . . . . . . . . . . . . . . . . . . . . . . . . . . . . . . . . . . . . . . . . 122<br />
Scanning to a Folder . . . . . . . . . . . . . . . . . . . . . . . . . . . . . . . . . . . . . . . . . . . . . . . . . . . . . . . . . . . . . . . . 122<br />
Printing Stored Files at the <strong>Printer</strong> . . . . . . . . . . . . . . . . . . . . . . . . . . . . . . . . . . . . . . . . . . . . . . . . . . . 122<br />
Using Job Flow Sheets . . . . . . . . . . . . . . . . . . . . . . . . . . . . . . . . . . . . . . . . . . . . . . . . . . . . . . . . . . . . . . 124<br />
Printing Stored Files using CentreWare IS . . . . . . . . . . . . . . . . . . . . . . . . . . . . . . . . . . . . . . . . . . . . 124<br />
Retrieving Scanned Files to Your Computer Using CentreWare Internet Services . . . . . . . . 124<br />
Creating a Folder . . . . . . . . . . . . . . . . . . . . . . . . . . . . . . . . . . . . . . . . . . . . . . . . . . . . . . . . . . . . . . . . . . . 125<br />
Deleting a Folder . . . . . . . . . . . . . . . . . . . . . . . . . . . . . . . . . . . . . . . . . . . . . . . . . . . . . . . . . . . . . . . . . . . 126<br />
Scanning to a Network File Repository . . . . . . . . . . . . . . . . . . . . . . . . . . . . . . . . . . . . . . . . . . . . . . . . . . . 127<br />
Scanning to an Email Address . . . . . . . . . . . . . . . . . . . . . . . . . . . . . . . . . . . . . . . . . . . . . . . . . . . . . . . . . . . 128<br />
Setting Email Options. . . . . . . . . . . . . . . . . . . . . . . . . . . . . . . . . . . . . . . . . . . . . . . . . . . . . . . . . . . . . . . 128<br />
Scanning to a Computer . . . . . . . . . . . . . . . . . . . . . . . . . . . . . . . . . . . . . . . . . . . . . . . . . . . . . . . . . . . . . . . . 130<br />
Scanning to a Home Directory . . . . . . . . . . . . . . . . . . . . . . . . . . . . . . . . . . . . . . . . . . . . . . . . . . . . . . . . . . 131<br />
Storing to a USB Flash Drive . . . . . . . . . . . . . . . . . . . . . . . . . . . . . . . . . . . . . . . . . . . . . . . . . . . . . . . . . . . . 132<br />
Setting Scan Options . . . . . . . . . . . . . . . . . . . . . . . . . . . . . . . . . . . . . . . . . . . . . . . . . . . . . . . . . . . . . . . . . . . 133<br />
Scan Settings. . . . . . . . . . . . . . . . . . . . . . . . . . . . . . . . . . . . . . . . . . . . . . . . . . . . . . . . . . . . . . . . . . . . . . . 133<br />
Additional Scanning Options . . . . . . . . . . . . . . . . . . . . . . . . . . . . . . . . . . . . . . . . . . . . . . . . . . . . . . . . 134<br />
Advanced Settings. . . . . . . . . . . . . . . . . . . . . . . . . . . . . . . . . . . . . . . . . . . . . . . . . . . . . . . . . . . . . . . . . . 134<br />
Using the <strong>Xerox</strong> Scan Utility . . . . . . . . . . . . . . . . . . . . . . . . . . . . . . . . . . . . . . . . . . . . . . . . . . . . . . . . . . . . 137<br />
Overview. . . . . . . . . . . . . . . . . . . . . . . . . . . . . . . . . . . . . . . . . . . . . . . . . . . . . . . . . . . . . . . . . . . . . . . . . . . 137<br />
Creating a Scan Template. . . . . . . . . . . . . . . . . . . . . . . . . . . . . . . . . . . . . . . . . . . . . . . . . . . . . . . . . . . 138<br />
Scanning to a Template. . . . . . . . . . . . . . . . . . . . . . . . . . . . . . . . . . . . . . . . . . . . . . . . . . . . . . . . . . . . . 139<br />
Accessing <strong>Xerox</strong> Scan Utility. . . . . . . . . . . . . . . . . . . . . . . . . . . . . . . . . . . . . . . . . . . . . . . . . . . . . . . . . 139<br />
Importing Scanned Files into an Application . . . . . . . . . . . . . . . . . . . . . . . . . . . . . . . . . . . . . . . . . 140<br />
7 Faxing<br />
Fax Overview. . . . . . . . . . . . . . . . . . . . . . . . . . . . . . . . . . . . . . . . . . . . . . . . . . . . . . . . . . . . . . . . . . . . . . . . . . . 144<br />
<strong>WorkCentre</strong> <strong>7120</strong>/<strong>7125</strong> <strong>Multifunction</strong> <strong>Printer</strong><br />
<strong>User</strong> <strong>Guide</strong>
<strong>WorkCentre</strong> <strong>7120</strong>/<strong>7125</strong> <strong>Multifunction</strong> <strong>Printer</strong><br />
<strong>User</strong> <strong>Guide</strong><br />
Contents<br />
Loading Original Documents . . . . . . . . . . . . . . . . . . . . . . . . . . . . . . . . . . . . . . . . . . . . . . . . . . . . . . . . . . . . 145<br />
Document Glass . . . . . . . . . . . . . . . . . . . . . . . . . . . . . . . . . . . . . . . . . . . . . . . . . . . . . . . . . . . . . . . . . . . . 145<br />
Document Feeder . . . . . . . . . . . . . . . . . . . . . . . . . . . . . . . . . . . . . . . . . . . . . . . . . . . . . . . . . . . . . . . . . . 145<br />
Sending a Fax. . . . . . . . . . . . . . . . . . . . . . . . . . . . . . . . . . . . . . . . . . . . . . . . . . . . . . . . . . . . . . . . . . . . . . . . . . 146<br />
Inserting Pauses in Fax Numbers . . . . . . . . . . . . . . . . . . . . . . . . . . . . . . . . . . . . . . . . . . . . . . . . . . . . 146<br />
Server Fax . . . . . . . . . . . . . . . . . . . . . . . . . . . . . . . . . . . . . . . . . . . . . . . . . . . . . . . . . . . . . . . . . . . . . . . . . . . . . 147<br />
Sending a Server Fax . . . . . . . . . . . . . . . . . . . . . . . . . . . . . . . . . . . . . . . . . . . . . . . . . . . . . . . . . . . . . . . 147<br />
Sending an Internet Fax . . . . . . . . . . . . . . . . . . . . . . . . . . . . . . . . . . . . . . . . . . . . . . . . . . . . . . . . . . . . . . . . 148<br />
Faxing from Your Computer. . . . . . . . . . . . . . . . . . . . . . . . . . . . . . . . . . . . . . . . . . . . . . . . . . . . . . . . . . . . . 149<br />
Receiving Faxes . . . . . . . . . . . . . . . . . . . . . . . . . . . . . . . . . . . . . . . . . . . . . . . . . . . . . . . . . . . . . . . . . . . . . . . . 150<br />
Selecting Fax Options . . . . . . . . . . . . . . . . . . . . . . . . . . . . . . . . . . . . . . . . . . . . . . . . . . . . . . . . . . . . . . . . . . 151<br />
Setting 2-Sided Faxing . . . . . . . . . . . . . . . . . . . . . . . . . . . . . . . . . . . . . . . . . . . . . . . . . . . . . . . . . . . . . . 151<br />
Selecting the Original Type. . . . . . . . . . . . . . . . . . . . . . . . . . . . . . . . . . . . . . . . . . . . . . . . . . . . . . . . . . 151<br />
Setting the Fax Resolution . . . . . . . . . . . . . . . . . . . . . . . . . . . . . . . . . . . . . . . . . . . . . . . . . . . . . . . . . . 151<br />
Adjusting Image Quality . . . . . . . . . . . . . . . . . . . . . . . . . . . . . . . . . . . . . . . . . . . . . . . . . . . . . . . . . . . . 151<br />
Adjusting Layout . . . . . . . . . . . . . . . . . . . . . . . . . . . . . . . . . . . . . . . . . . . . . . . . . . . . . . . . . . . . . . . . . . . 152<br />
Additional Fax Options. . . . . . . . . . . . . . . . . . . . . . . . . . . . . . . . . . . . . . . . . . . . . . . . . . . . . . . . . . . . . . 153<br />
More Fax Options . . . . . . . . . . . . . . . . . . . . . . . . . . . . . . . . . . . . . . . . . . . . . . . . . . . . . . . . . . . . . . . . . . 154<br />
Internet Fax Options. . . . . . . . . . . . . . . . . . . . . . . . . . . . . . . . . . . . . . . . . . . . . . . . . . . . . . . . . . . . . . . . 154<br />
Adding Address Book Entries . . . . . . . . . . . . . . . . . . . . . . . . . . . . . . . . . . . . . . . . . . . . . . . . . . . . . . . . . . . . 155<br />
Adding an Individual Address . . . . . . . . . . . . . . . . . . . . . . . . . . . . . . . . . . . . . . . . . . . . . . . . . . . . . . . 155<br />
Deleting an Individual Address . . . . . . . . . . . . . . . . . . . . . . . . . . . . . . . . . . . . . . . . . . . . . . . . . . . . . . 155<br />
Adding a Group . . . . . . . . . . . . . . . . . . . . . . . . . . . . . . . . . . . . . . . . . . . . . . . . . . . . . . . . . . . . . . . . . . . . 155<br />
Deleting a Group . . . . . . . . . . . . . . . . . . . . . . . . . . . . . . . . . . . . . . . . . . . . . . . . . . . . . . . . . . . . . . . . . . . 156<br />
Using Chain Dial. . . . . . . . . . . . . . . . . . . . . . . . . . . . . . . . . . . . . . . . . . . . . . . . . . . . . . . . . . . . . . . . . . . . 156<br />
Creating Fax Comments . . . . . . . . . . . . . . . . . . . . . . . . . . . . . . . . . . . . . . . . . . . . . . . . . . . . . . . . . . . . . . . . 157<br />
8 Maintenance<br />
Maintenance and Cleaning . . . . . . . . . . . . . . . . . . . . . . . . . . . . . . . . . . . . . . . . . . . . . . . . . . . . . . . . . . . . . 160<br />
General Precautions . . . . . . . . . . . . . . . . . . . . . . . . . . . . . . . . . . . . . . . . . . . . . . . . . . . . . . . . . . . . . . . . 160<br />
Locating the Serial Number . . . . . . . . . . . . . . . . . . . . . . . . . . . . . . . . . . . . . . . . . . . . . . . . . . . . . . . . . 161<br />
Billing and Usage Information . . . . . . . . . . . . . . . . . . . . . . . . . . . . . . . . . . . . . . . . . . . . . . . . . . . . . . 161<br />
Cleaning the <strong>Printer</strong> . . . . . . . . . . . . . . . . . . . . . . . . . . . . . . . . . . . . . . . . . . . . . . . . . . . . . . . . . . . . . . . . . . . . 162<br />
Cleaning the Document Glass and Document Cover . . . . . . . . . . . . . . . . . . . . . . . . . . . . . . . . . . 162<br />
Cleaning the Exterior . . . . . . . . . . . . . . . . . . . . . . . . . . . . . . . . . . . . . . . . . . . . . . . . . . . . . . . . . . . . . . . 163<br />
Cleaning the Document Feeder Rollers . . . . . . . . . . . . . . . . . . . . . . . . . . . . . . . . . . . . . . . . . . . . . . . 163<br />
Cleaning the Printhead Lenses. . . . . . . . . . . . . . . . . . . . . . . . . . . . . . . . . . . . . . . . . . . . . . . . . . . . . . . 164<br />
Ordering Supplies . . . . . . . . . . . . . . . . . . . . . . . . . . . . . . . . . . . . . . . . . . . . . . . . . . . . . . . . . . . . . . . . . . . . . . 167<br />
Consumables. . . . . . . . . . . . . . . . . . . . . . . . . . . . . . . . . . . . . . . . . . . . . . . . . . . . . . . . . . . . . . . . . . . . . . . 167<br />
Routine Maintenance Items. . . . . . . . . . . . . . . . . . . . . . . . . . . . . . . . . . . . . . . . . . . . . . . . . . . . . . . . . 167<br />
When to Order Supplies . . . . . . . . . . . . . . . . . . . . . . . . . . . . . . . . . . . . . . . . . . . . . . . . . . . . . . . . . . . . . 168<br />
Recycling Supplies . . . . . . . . . . . . . . . . . . . . . . . . . . . . . . . . . . . . . . . . . . . . . . . . . . . . . . . . . . . . . . . . . . 168<br />
Installing Staples. . . . . . . . . . . . . . . . . . . . . . . . . . . . . . . . . . . . . . . . . . . . . . . . . . . . . . . . . . . . . . . . . . . . . . . 169<br />
Staple Replacement for Integrated Office Finisher. . . . . . . . . . . . . . . . . . . . . . . . . . . . . . . . . . . . 169<br />
Main Staple Replacement for Office Finisher LX . . . . . . . . . . . . . . . . . . . . . . . . . . . . . . . . . . . . . . 171<br />
Booklet Maker Staple Replacement for Office LX Finisher . . . . . . . . . . . . . . . . . . . . . . . . . . . . . 173<br />
7
Contents<br />
9 Troubleshooting<br />
8<br />
Control Panel Messages . . . . . . . . . . . . . . . . . . . . . . . . . . . . . . . . . . . . . . . . . . . . . . . . . . . . . . . . . . . . . . . . 176<br />
General Troubleshooting. . . . . . . . . . . . . . . . . . . . . . . . . . . . . . . . . . . . . . . . . . . . . . . . . . . . . . . . . . . . . . . . 177<br />
<strong>Printer</strong> Does Not Turn On . . . . . . . . . . . . . . . . . . . . . . . . . . . . . . . . . . . . . . . . . . . . . . . . . . . . . . . . . . . 177<br />
Printing Takes Too Long . . . . . . . . . . . . . . . . . . . . . . . . . . . . . . . . . . . . . . . . . . . . . . . . . . . . . . . . . . . . 178<br />
<strong>Printer</strong> Resets or Turns Off Frequently. . . . . . . . . . . . . . . . . . . . . . . . . . . . . . . . . . . . . . . . . . . . . . . . 178<br />
<strong>Printer</strong> Is Making Unusual Noises . . . . . . . . . . . . . . . . . . . . . . . . . . . . . . . . . . . . . . . . . . . . . . . . . . . . 178<br />
2-Sided Printing Problems . . . . . . . . . . . . . . . . . . . . . . . . . . . . . . . . . . . . . . . . . . . . . . . . . . . . . . . . . . . 178<br />
Scanner Error. . . . . . . . . . . . . . . . . . . . . . . . . . . . . . . . . . . . . . . . . . . . . . . . . . . . . . . . . . . . . . . . . . . . . . . 179<br />
Clearing Paper Jams . . . . . . . . . . . . . . . . . . . . . . . . . . . . . . . . . . . . . . . . . . . . . . . . . . . . . . . . . . . . . . . . . . . . 180<br />
Clearing Paper Jams from Tray 1, Tray 2, Tray 3 or Tray 4 . . . . . . . . . . . . . . . . . . . . . . . . . . . . . 180<br />
Clearing Paper Jams from Tray 5 (Bypass Tray). . . . . . . . . . . . . . . . . . . . . . . . . . . . . . . . . . . . . . . 181<br />
Clearing Paper Jams in Document Feeder . . . . . . . . . . . . . . . . . . . . . . . . . . . . . . . . . . . . . . . . . . . . 182<br />
Clearing Paper Jams in Cover A . . . . . . . . . . . . . . . . . . . . . . . . . . . . . . . . . . . . . . . . . . . . . . . . . . . . . . 184<br />
Clearing Paper Jams in Cover B . . . . . . . . . . . . . . . . . . . . . . . . . . . . . . . . . . . . . . . . . . . . . . . . . . . . . . 185<br />
Clearing Paper Jams in Cover C . . . . . . . . . . . . . . . . . . . . . . . . . . . . . . . . . . . . . . . . . . . . . . . . . . . . . . 186<br />
Clearing Paper Jams in Duplex Module D. . . . . . . . . . . . . . . . . . . . . . . . . . . . . . . . . . . . . . . . . . . . . 187<br />
Clearing Paper Jams in Cover E . . . . . . . . . . . . . . . . . . . . . . . . . . . . . . . . . . . . . . . . . . . . . . . . . . . . . . 188<br />
Clearing Paper Jams in Integrated Office Finisher . . . . . . . . . . . . . . . . . . . . . . . . . . . . . . . . . . . . 189<br />
Clearing Paper Jams in Office Finisher LX . . . . . . . . . . . . . . . . . . . . . . . . . . . . . . . . . . . . . . . . . . . . 190<br />
Clearing Hole Punch Jams in Office Finisher LX . . . . . . . . . . . . . . . . . . . . . . . . . . . . . . . . . . . . . . . 191<br />
Troubleshooting Paper Jams . . . . . . . . . . . . . . . . . . . . . . . . . . . . . . . . . . . . . . . . . . . . . . . . . . . . . . . . 193<br />
Clearing Staple Jams . . . . . . . . . . . . . . . . . . . . . . . . . . . . . . . . . . . . . . . . . . . . . . . . . . . . . . . . . . . . . . . . . . . 196<br />
Clearing Staple Jams in Integrated Office Finisher . . . . . . . . . . . . . . . . . . . . . . . . . . . . . . . . . . . . 196<br />
Clearing Main Staple Jams in Office Finisher LX . . . . . . . . . . . . . . . . . . . . . . . . . . . . . . . . . . . . . . 198<br />
Clearing Booklet Maker Staple Jams in Office Finisher LX. . . . . . . . . . . . . . . . . . . . . . . . . . . . . . 200<br />
Print Quality Problems . . . . . . . . . . . . . . . . . . . . . . . . . . . . . . . . . . . . . . . . . . . . . . . . . . . . . . . . . . . . . . . . . . 202<br />
Copy and Scan Problems. . . . . . . . . . . . . . . . . . . . . . . . . . . . . . . . . . . . . . . . . . . . . . . . . . . . . . . . . . . . . . . . 203<br />
Fax Problems . . . . . . . . . . . . . . . . . . . . . . . . . . . . . . . . . . . . . . . . . . . . . . . . . . . . . . . . . . . . . . . . . . . . . . . . . . 204<br />
Problems Sending Faxes . . . . . . . . . . . . . . . . . . . . . . . . . . . . . . . . . . . . . . . . . . . . . . . . . . . . . . . . . . . . 204<br />
Problems Receiving Faxes . . . . . . . . . . . . . . . . . . . . . . . . . . . . . . . . . . . . . . . . . . . . . . . . . . . . . . . . . . . 205<br />
Getting Help . . . . . . . . . . . . . . . . . . . . . . . . . . . . . . . . . . . . . . . . . . . . . . . . . . . . . . . . . . . . . . . . . . . . . . . . . . . 206<br />
Control Panel Messages. . . . . . . . . . . . . . . . . . . . . . . . . . . . . . . . . . . . . . . . . . . . . . . . . . . . . . . . . . . . . 206<br />
Alerts . . . . . . . . . . . . . . . . . . . . . . . . . . . . . . . . . . . . . . . . . . . . . . . . . . . . . . . . . . . . . . . . . . . . . . . . . . . . . . 206<br />
Online Support Assistant . . . . . . . . . . . . . . . . . . . . . . . . . . . . . . . . . . . . . . . . . . . . . . . . . . . . . . . . . . . . 206<br />
Web Resources . . . . . . . . . . . . . . . . . . . . . . . . . . . . . . . . . . . . . . . . . . . . . . . . . . . . . . . . . . . . . . . . . . . . . 207<br />
10 <strong>Printer</strong> Specifications<br />
Physical Specifications. . . . . . . . . . . . . . . . . . . . . . . . . . . . . . . . . . . . . . . . . . . . . . . . . . . . . . . . . . . . . . . . . . 210<br />
Base Unit . . . . . . . . . . . . . . . . . . . . . . . . . . . . . . . . . . . . . . . . . . . . . . . . . . . . . . . . . . . . . . . . . . . . . . . . . . 210<br />
Base Unit with Integrated Office Finisher . . . . . . . . . . . . . . . . . . . . . . . . . . . . . . . . . . . . . . . . . . . . 210<br />
Base Unit with Office Finisher LX and Booklet Maker. . . . . . . . . . . . . . . . . . . . . . . . . . . . . . . . . . 210<br />
Environmental Specifications . . . . . . . . . . . . . . . . . . . . . . . . . . . . . . . . . . . . . . . . . . . . . . . . . . . . . . . . . . . 211<br />
Temperature . . . . . . . . . . . . . . . . . . . . . . . . . . . . . . . . . . . . . . . . . . . . . . . . . . . . . . . . . . . . . . . . . . . . . . . 211<br />
Relative Humidity . . . . . . . . . . . . . . . . . . . . . . . . . . . . . . . . . . . . . . . . . . . . . . . . . . . . . . . . . . . . . . . . . . 211<br />
Electrical Specifications . . . . . . . . . . . . . . . . . . . . . . . . . . . . . . . . . . . . . . . . . . . . . . . . . . . . . . . . . . . . . . . . . 212<br />
<strong>WorkCentre</strong> <strong>7120</strong>/<strong>7125</strong> <strong>Multifunction</strong> <strong>Printer</strong><br />
<strong>User</strong> <strong>Guide</strong>
<strong>WorkCentre</strong> <strong>7120</strong>/<strong>7125</strong> <strong>Multifunction</strong> <strong>Printer</strong><br />
<strong>User</strong> <strong>Guide</strong><br />
Contents<br />
Performance Specifications . . . . . . . . . . . . . . . . . . . . . . . . . . . . . . . . . . . . . . . . . . . . . . . . . . . . . . . . . . . . . 213<br />
Resolution . . . . . . . . . . . . . . . . . . . . . . . . . . . . . . . . . . . . . . . . . . . . . . . . . . . . . . . . . . . . . . . . . . . . . . . . . 213<br />
Print Speed. . . . . . . . . . . . . . . . . . . . . . . . . . . . . . . . . . . . . . . . . . . . . . . . . . . . . . . . . . . . . . . . . . . . . . . . . 213<br />
Controller Specifications . . . . . . . . . . . . . . . . . . . . . . . . . . . . . . . . . . . . . . . . . . . . . . . . . . . . . . . . . . . . . . . . 214<br />
Processor . . . . . . . . . . . . . . . . . . . . . . . . . . . . . . . . . . . . . . . . . . . . . . . . . . . . . . . . . . . . . . . . . . . . . . . . . . 214<br />
Memory . . . . . . . . . . . . . . . . . . . . . . . . . . . . . . . . . . . . . . . . . . . . . . . . . . . . . . . . . . . . . . . . . . . . . . . . . . . 214<br />
Interface. . . . . . . . . . . . . . . . . . . . . . . . . . . . . . . . . . . . . . . . . . . . . . . . . . . . . . . . . . . . . . . . . . . . . . . . . . . 214<br />
A Regulatory Information<br />
Basic Regulations . . . . . . . . . . . . . . . . . . . . . . . . . . . . . . . . . . . . . . . . . . . . . . . . . . . . . . . . . . . . . . . . . . . . . . 216<br />
United States (FCC Regulations). . . . . . . . . . . . . . . . . . . . . . . . . . . . . . . . . . . . . . . . . . . . . . . . . . . . . 216<br />
Canada (Regulations). . . . . . . . . . . . . . . . . . . . . . . . . . . . . . . . . . . . . . . . . . . . . . . . . . . . . . . . . . . . . . . 216<br />
European Union . . . . . . . . . . . . . . . . . . . . . . . . . . . . . . . . . . . . . . . . . . . . . . . . . . . . . . . . . . . . . . . . . . . . 217<br />
Ozone Release. . . . . . . . . . . . . . . . . . . . . . . . . . . . . . . . . . . . . . . . . . . . . . . . . . . . . . . . . . . . . . . . . . . . . . 217<br />
Other Regulations . . . . . . . . . . . . . . . . . . . . . . . . . . . . . . . . . . . . . . . . . . . . . . . . . . . . . . . . . . . . . . . . . . 217<br />
Copy Regulations . . . . . . . . . . . . . . . . . . . . . . . . . . . . . . . . . . . . . . . . . . . . . . . . . . . . . . . . . . . . . . . . . . . . . . 218<br />
United States . . . . . . . . . . . . . . . . . . . . . . . . . . . . . . . . . . . . . . . . . . . . . . . . . . . . . . . . . . . . . . . . . . . . . . 218<br />
Canada . . . . . . . . . . . . . . . . . . . . . . . . . . . . . . . . . . . . . . . . . . . . . . . . . . . . . . . . . . . . . . . . . . . . . . . . . . . . 219<br />
Other Countries . . . . . . . . . . . . . . . . . . . . . . . . . . . . . . . . . . . . . . . . . . . . . . . . . . . . . . . . . . . . . . . . . . . . 220<br />
Fax Regulations . . . . . . . . . . . . . . . . . . . . . . . . . . . . . . . . . . . . . . . . . . . . . . . . . . . . . . . . . . . . . . . . . . . . . . . . 221<br />
United States . . . . . . . . . . . . . . . . . . . . . . . . . . . . . . . . . . . . . . . . . . . . . . . . . . . . . . . . . . . . . . . . . . . . . . 221<br />
Canada . . . . . . . . . . . . . . . . . . . . . . . . . . . . . . . . . . . . . . . . . . . . . . . . . . . . . . . . . . . . . . . . . . . . . . . . . . . . 222<br />
Europe . . . . . . . . . . . . . . . . . . . . . . . . . . . . . . . . . . . . . . . . . . . . . . . . . . . . . . . . . . . . . . . . . . . . . . . . . . . . . 223<br />
South Africa. . . . . . . . . . . . . . . . . . . . . . . . . . . . . . . . . . . . . . . . . . . . . . . . . . . . . . . . . . . . . . . . . . . . . . . . 223<br />
Material Safety Data Sheets . . . . . . . . . . . . . . . . . . . . . . . . . . . . . . . . . . . . . . . . . . . . . . . . . . . . . . . . . . . . 224<br />
Energy Saver Mode. . . . . . . . . . . . . . . . . . . . . . . . . . . . . . . . . . . . . . . . . . . . . . . . . . . . . . . . . . . . . . . . . . . . . 225<br />
B Recycling and Disposal<br />
Index<br />
<strong>Guide</strong>lines and Information. . . . . . . . . . . . . . . . . . . . . . . . . . . . . . . . . . . . . . . . . . . . . . . . . . . . . . . . . . . . . 228<br />
All Countries . . . . . . . . . . . . . . . . . . . . . . . . . . . . . . . . . . . . . . . . . . . . . . . . . . . . . . . . . . . . . . . . . . . . . . . 228<br />
North America . . . . . . . . . . . . . . . . . . . . . . . . . . . . . . . . . . . . . . . . . . . . . . . . . . . . . . . . . . . . . . . . . . . . . 228<br />
European Union . . . . . . . . . . . . . . . . . . . . . . . . . . . . . . . . . . . . . . . . . . . . . . . . . . . . . . . . . . . . . . . . . . . . 228<br />
Other Countries . . . . . . . . . . . . . . . . . . . . . . . . . . . . . . . . . . . . . . . . . . . . . . . . . . . . . . . . . . . . . . . . . . . . 230<br />
9
Contents<br />
10<br />
<strong>WorkCentre</strong> <strong>7120</strong>/<strong>7125</strong> <strong>Multifunction</strong> <strong>Printer</strong><br />
<strong>User</strong> <strong>Guide</strong>
Safety<br />
This chapter includes:<br />
• Electrical Safety on page 12<br />
• Operational Safety on page 14<br />
• Maintenance Safety on page 15<br />
• <strong>Printer</strong> Symbols on page 16<br />
• Product Safety Certification on page 17<br />
• Environmental Health and Safety Contacts on page 18<br />
<strong>WorkCentre</strong> <strong>7120</strong>/<strong>7125</strong> <strong>Multifunction</strong> <strong>Printer</strong><br />
<strong>User</strong> <strong>Guide</strong><br />
1<br />
Your printer and the recommended supplies have been designed and tested to meet strict safety<br />
requirements. Attention to the following information ensures the continued safe operation of your printer.<br />
11
Safety<br />
Electrical Safety<br />
12<br />
WARNINGS:<br />
• Do not push objects, including paper clips or staples, into slots or openings on the printer.<br />
Making contact with a voltage point or shorting out a part could result in fire or electrical shock.<br />
• Do not remove the covers or guards that are fastened with screws unless you are installing<br />
optional equipment and are specifically instructed to do so. Power should be OFF when<br />
performing these installations. Disconnect the power cord when removing covers and guards<br />
for installing optional equipment. Except for user-installable options, there are no parts that<br />
you can maintain or service behind these covers.<br />
The printer must be turned off before removing the power cord. For instructions on turning the printer<br />
off, see Turning the <strong>Printer</strong> Off on page 40.<br />
The following are hazards to your safety:<br />
• The power cord is damaged or frayed.<br />
• Liquid is spilled into the printer.<br />
• The printer is exposed to water.<br />
If any of these conditions occur, do the following:<br />
1. Turn off the printer immediately.<br />
2. Disconnect the power cord from the electrical outlet.<br />
3. Call an authorized service representative.<br />
Electrical Supply<br />
The printer must be operated from the type of electrical supply indicated on the printer’s data plate<br />
label. If you are not sure if your electrical supply meets the requirements, please consult a licensed<br />
electrician for advice.<br />
WARNING: This printer must be connected to a protective earth circuit. This printer is supplied<br />
with a plug that has a protective earth pin. This plug will only fit into an earthed electrical outlet.<br />
This is a safety feature. If you are unable to insert the plug into the outlet, contact a licensed<br />
electrician to replace the outlet.<br />
Power Cord<br />
• Always connect equipment to a correctly grounded power outlet. If in doubt, have the outlet<br />
checked by a qualified electrician.<br />
• Use the power cord supplied with your printer.<br />
• Do not use a ground adapter plug to connect the printer to an electrical outlet that does not have<br />
a ground connection terminal.<br />
• Do not use an extension cord or power strip.<br />
<strong>WorkCentre</strong> <strong>7120</strong>/<strong>7125</strong> <strong>Multifunction</strong> <strong>Printer</strong><br />
<strong>User</strong> <strong>Guide</strong>
• Do not place the printer in an area where people might step on the power cord.<br />
• Do not place objects on the power cord.<br />
<strong>WorkCentre</strong> <strong>7120</strong>/<strong>7125</strong> <strong>Multifunction</strong> <strong>Printer</strong><br />
<strong>User</strong> <strong>Guide</strong><br />
Safety<br />
The power cord is attached to the printer as a plug-in device on the back of the printer. If it is necessary<br />
to disconnect all electrical power from the printer, disconnect the power cord from the electrical outlet.<br />
The printer must be turned off before removing the power cord. For instructions on turning the printer<br />
off, see Turning the <strong>Printer</strong> Off on page 40.<br />
Emergency Power Off<br />
If any of the following conditions occur, turn off the printer immediately and disconnect the power cable<br />
from the electrical outlet. Contact an authorized <strong>Xerox</strong> Service Representative to correct the problem:<br />
• The printer emits unusual odors or makes unusual noises.<br />
• The power cable is damaged or frayed.<br />
• A wall panel circuit breaker, fuse, or other safety device has been tripped.<br />
• Liquid is spilled into the printer.<br />
• The printer is exposed to water.<br />
• Any part of the printer is damaged<br />
Telephone Line Cord<br />
CAUTION: To reduce the risk of fire, use only No. 26 American Wire Gauge (AWG) or larger<br />
telecommunication line cord.<br />
Laser Safety<br />
This printer complies with laser printer performance standards set by governmental,<br />
national, and international agencies and is certified as a Class 1 Laser Product. The<br />
printer does not emit hazardous light because the beam is totally enclosed during all<br />
modes of customer operation and maintenance.<br />
WARNING: Use of controls, adjustments, or performance of procedures other than those<br />
specified in this manual can result in hazardous radiation exposure.<br />
13
Safety<br />
Operational Safety<br />
Your printer and supplies were designed and tested to meet strict safety requirements. These include<br />
safety agency examination, approval, and compliance with established environmental standards.<br />
Your attention to the following safety guidelines helps to ensure the continued, safe operation of<br />
your printer.<br />
<strong>Printer</strong> Location<br />
• Do not block or cover the slots or openings on the printer. These openings are provided for<br />
ventilation and to prevent overheating of the printer.<br />
• Place the printer in an area where there is adequate space for operation and servicing.<br />
• Place the printer in a dust-free area.<br />
• Do not store or operate the printer in an extremely hot, cold, or humid environment For optimum<br />
performance environmental specifications, see Environmental Specifications on page 211.<br />
• Place the printer on a level, solid non-vibrating surface with adequate strength to hold the weight<br />
of the printer. The base printer weight without any packaging materials is approximately<br />
115 kg (253.5 lb.).<br />
• Do not place the printer near a heat source.<br />
• Do not place the printer in direct sunlight to avoid exposure to light-sensitive components.<br />
• Do not place the printer where it is directly exposed to the cold air flow from an air<br />
conditioning unit.<br />
Operational <strong>Guide</strong>lines<br />
When the printer is printing:<br />
• Do not remove the paper source tray that you selected using either the printer driver or<br />
control panel.<br />
• Do not open the doors.<br />
• Do not move the printer.<br />
• Keep hands, hair, neckties, and so on, away from the exit and feed roller.<br />
<strong>Printer</strong> Supplies<br />
• Use the supplies specifically designed for your printer. The use of unsuitable materials may cause<br />
poor performance and a possible safety hazard.<br />
• Follow all warnings and instructions marked on, or supplied with, the printer, options, and supplies.<br />
14<br />
CAUTION: Use of non-<strong>Xerox</strong> supplies is not recommended. The <strong>Xerox</strong> Warranty, Service<br />
Agreements, and Total Satisfaction Guarantee do not cover damage, malfunction, or degradation<br />
of performance caused by use of non-<strong>Xerox</strong> supplies, or the use of <strong>Xerox</strong> supplies not specified for<br />
this printer. The Total Satisfaction Guarantee is available in the United States and Canada.<br />
Coverage may vary outside these areas. Please contact your local representative for details.<br />
<strong>WorkCentre</strong> <strong>7120</strong>/<strong>7125</strong> <strong>Multifunction</strong> <strong>Printer</strong><br />
<strong>User</strong> <strong>Guide</strong>
Maintenance Safety<br />
• Do not attempt any maintenance procedure that is not specifically described in the<br />
documentation supplied with your printer.<br />
• Do not use aerosol cleaners. Clean with a dry lint-free cloth only.<br />
• Do not burn any consumables or routine maintenance items. For information on <strong>Xerox</strong> supplies<br />
recycling programs, go to www.xerox.com/gwa.<br />
<strong>WorkCentre</strong> <strong>7120</strong>/<strong>7125</strong> <strong>Multifunction</strong> <strong>Printer</strong><br />
<strong>User</strong> <strong>Guide</strong><br />
Safety<br />
15
Safety<br />
<strong>Printer</strong> Symbols<br />
16<br />
Symbol Description<br />
Warning or Caution:<br />
Ignoring this warning could cause serious injury or even death.<br />
Ignoring this caution could cause injury or damage to the property.<br />
Hot surface on or in the printer. Use caution to avoid personal injury.<br />
Do not touch components with this symbol as personal injury could result.<br />
Do not burn the item.<br />
Hot Surface. Wait the indicated time before handling.<br />
<strong>WorkCentre</strong> <strong>7120</strong>/<strong>7125</strong> <strong>Multifunction</strong> <strong>Printer</strong><br />
<strong>User</strong> <strong>Guide</strong>
Product Safety Certification<br />
This product is certified by the following agency using the safety standards listed:<br />
Agency Standard<br />
CSA UL60950<br />
CSA IEC60950<br />
<strong>WorkCentre</strong> <strong>7120</strong>/<strong>7125</strong> <strong>Multifunction</strong> <strong>Printer</strong><br />
<strong>User</strong> <strong>Guide</strong><br />
Safety<br />
17
Safety<br />
Environmental Health and Safety Contacts<br />
For more information on Environment, Health, and Safety in relation to this <strong>Xerox</strong> product and<br />
supplies, contact:<br />
USA: 1-800-828-6571<br />
Canada: 1-800-828-6571<br />
www.xerox.com/environment<br />
Europe: +44 1707 353 434<br />
www.xerox.com/environment_europe<br />
18<br />
<strong>WorkCentre</strong> <strong>7120</strong>/<strong>7125</strong> <strong>Multifunction</strong> <strong>Printer</strong><br />
<strong>User</strong> <strong>Guide</strong>
Features<br />
This chapter includes:<br />
• Before Using the <strong>Printer</strong> on page 20<br />
• Parts of the <strong>Printer</strong> on page 21<br />
• <strong>Printer</strong> Configuration on page 29<br />
• Control Panel on page 32<br />
• More Information on page 35<br />
<strong>WorkCentre</strong> <strong>7120</strong>/<strong>7125</strong> <strong>Multifunction</strong> <strong>Printer</strong><br />
<strong>User</strong> <strong>Guide</strong><br />
2<br />
19
Features<br />
Before Using the <strong>Printer</strong><br />
<strong>Xerox</strong> Welcome Center<br />
If you need assistance during or after product installation, visit the <strong>Xerox</strong> website for online solutions<br />
and support.<br />
www.xerox.com/office/worldcontacts<br />
If you require further assistance, contact our experts at the <strong>Xerox</strong> Welcome Center. A local<br />
representative telephone number may have been provided when the product was installed. For<br />
convenience and future reference, please record the telephone number in the space below.<br />
Welcome Center or local representative telephone number:<br />
#______________________________________<br />
<strong>Xerox</strong> US Welcome Center: 1-800-821-2797<br />
<strong>Xerox</strong> Canada Welcome Center: 1-800-93-XEROX (1-800-939-3769)<br />
If you need any additional help using your printer:<br />
1. Refer to this <strong>User</strong> <strong>Guide</strong>.<br />
2. Contact the Key Operator.<br />
3. Visit our Customer Website at www.xerox.com/office/WC<strong>7120</strong>/<strong>7125</strong>support or contact the<br />
<strong>Xerox</strong> Welcome Center.<br />
Please have your printer’s serial number when contacting <strong>Xerox</strong>.<br />
The Welcome Center will want to know the following information: The nature of the problem, the serial<br />
number of the printer, the fault code (if any), as well as the name and location of your company. Follow<br />
the steps below to look up the serial number of the printer.<br />
1. On the control panel, press Machine Status.<br />
2. The Machine Information tab appears. The serial number is displayed on the left side of the<br />
touch screen.<br />
If the serial number cannot be read from the printer touch screen, it can also be found inside the<br />
printer. Open Cover A on the left side of the printer. The serial number is located on the left hand side.<br />
20<br />
<strong>WorkCentre</strong> <strong>7120</strong>/<strong>7125</strong> <strong>Multifunction</strong> <strong>Printer</strong><br />
<strong>User</strong> <strong>Guide</strong>
Parts of the <strong>Printer</strong><br />
This section includes:<br />
• Front-Left View on page 22<br />
• Right-Rear View on page 23<br />
• Telephone and Fax Connection Option on page 24<br />
• Document Feeder on page 25<br />
• Internal Components on page 26<br />
• Integrated Office Finisher Option on page 27<br />
• Office LX Finisher Option on page 28<br />
<strong>WorkCentre</strong> <strong>7120</strong>/<strong>7125</strong> <strong>Multifunction</strong> <strong>Printer</strong><br />
<strong>User</strong> <strong>Guide</strong><br />
Features<br />
21
Features<br />
Front-Left View<br />
22<br />
12<br />
11<br />
10<br />
1. Document cover 7. Front cover<br />
2. Document glass 8. Tray 1, 2, 3, 4<br />
3. Control panel 9. Locking Casters<br />
4. Center Tray Upper 10. Tray 5 (Bypass)<br />
5. Center Tray Lower 11. Stylus pen holder<br />
6. Power Switch 12. Stylus pen<br />
<strong>WorkCentre</strong> <strong>7120</strong>/<strong>7125</strong> <strong>Multifunction</strong> <strong>Printer</strong><br />
<strong>User</strong> <strong>Guide</strong><br />
1<br />
2<br />
3<br />
4<br />
5<br />
6<br />
7<br />
8<br />
9<br />
wc<strong>7120</strong>-001
Right-Rear View<br />
7<br />
8<br />
6<br />
1. Cover E 5. Adjusting foot<br />
2. Cover A 6. Reset button<br />
3. Cover B 7. USB interface connector<br />
4. Cover C 8. Network connector<br />
<strong>WorkCentre</strong> <strong>7120</strong>/<strong>7125</strong> <strong>Multifunction</strong> <strong>Printer</strong><br />
<strong>User</strong> <strong>Guide</strong><br />
1<br />
2<br />
3<br />
4<br />
5<br />
wc<strong>7120</strong>-002<br />
Features<br />
23
Features<br />
Telephone and Fax Connection Option<br />
24<br />
1. Telephone 3. Line 2<br />
2. Line 1 4. Line 3<br />
<strong>WorkCentre</strong> <strong>7120</strong>/<strong>7125</strong> <strong>Multifunction</strong> <strong>Printer</strong><br />
<strong>User</strong> <strong>Guide</strong><br />
TEL LINE1<br />
LINE3<br />
LINE2<br />
4<br />
1 2<br />
3<br />
wc<strong>7120</strong>-005
Document Feeder<br />
1 2 3 4 5 6 7 8<br />
wc<strong>7120</strong>-004<br />
1. Confirmation indicator 6. Document feeder tray<br />
2. Lever 7. Document stopper<br />
3. Left cover 8. Document output tray<br />
4. Inner cover 9. CVT glass<br />
5. Document guides 10. Document glass<br />
9 10<br />
wc<strong>7120</strong>-104<br />
<strong>WorkCentre</strong> <strong>7120</strong>/<strong>7125</strong> <strong>Multifunction</strong> <strong>Printer</strong><br />
<strong>User</strong> <strong>Guide</strong><br />
Features<br />
25
Features<br />
Internal Components<br />
26<br />
8<br />
1. Toner cartridges 5. Drum cartridge cover<br />
2. Main power switch 6. Drum cartridge cover release lever<br />
3. Drum cartridges 7. Waste toner container<br />
4. Cleaning bar 8. Fuser unit<br />
<strong>WorkCentre</strong> <strong>7120</strong>/<strong>7125</strong> <strong>Multifunction</strong> <strong>Printer</strong><br />
<strong>User</strong> <strong>Guide</strong><br />
1<br />
2<br />
3<br />
4<br />
5<br />
6<br />
7<br />
wc<strong>7120</strong>-003
Integrated Office Finisher Option<br />
1. Center tray 4. Front cover<br />
2. Integrated Office Finisher 5. Top cover<br />
3. Staple cartridge<br />
5<br />
4<br />
3<br />
1<br />
2<br />
wc<strong>7120</strong>-007<br />
<strong>WorkCentre</strong> <strong>7120</strong>/<strong>7125</strong> <strong>Multifunction</strong> <strong>Printer</strong><br />
<strong>User</strong> <strong>Guide</strong><br />
Features<br />
27
Features<br />
Office LX Finisher Option<br />
28<br />
14<br />
13<br />
12<br />
11<br />
1. Tray attachment 8. Main staple cartridge<br />
2. Booklet unit (option) 9. Front cover<br />
3. Booklet unit side cover 10. Office Finisher LX<br />
4. Booklet staple cartridge 11. Front transport cover<br />
5. Top cover 12. Hole punch waste container<br />
6. Finisher tray 13. Hole punch (option)<br />
7. Creaser unit (option) 14. Finisher transport cover/Center tray<br />
<strong>WorkCentre</strong> <strong>7120</strong>/<strong>7125</strong> <strong>Multifunction</strong> <strong>Printer</strong><br />
<strong>User</strong> <strong>Guide</strong><br />
1<br />
2<br />
3<br />
4<br />
5<br />
6<br />
7<br />
8<br />
9<br />
10<br />
wc<strong>7120</strong>-006
<strong>Printer</strong> Configuration<br />
• Standard Features on page 29<br />
• Configurations on page 29<br />
• <strong>Printer</strong> Options on page 30<br />
Standard Features<br />
<strong>WorkCentre</strong> <strong>7120</strong>/<strong>7125</strong> <strong>Multifunction</strong> <strong>Printer</strong><br />
<strong>User</strong> <strong>Guide</strong><br />
Features<br />
Your printer has many features to meet your print and copy needs:<br />
• Copy, print, and scan to email capabilities<br />
• Maximum print speed of 20 pages per minute for black and white and color printing (on letter-size<br />
plain paper)<br />
• 600 x 600 dpi<br />
• Automatic 2-sided printing<br />
• Color touch screen on control panel<br />
• Duplex Automatic Document Feeder that holds up to 110 sheets<br />
• 2 GB RAM memory<br />
• Foreign Device Interface<br />
• <strong>Xerox</strong> Extensible Interface Platform<br />
• Hard drive that provides feature support for special job types, additional forms, and macros<br />
• PCL 6, PCL 5<br />
• Ethernet 10/100Base-TX connection<br />
Configurations<br />
The printer is available in two configurations.<br />
Configuration Description<br />
Two paper trays and stand Tray 1 and Tray 2 that each hold up to 500 sheets, supporting<br />
standard selectable sizes up to A3, 11 x 17 in.<br />
Tray 5 (Bypass Tray) that holds up to 50 sheets, supporting custom<br />
sizes up to A3, 11 x 17 in.<br />
Four paper trays Tray 1, Tray 2, Tray 3 and Tray 4 that each hold up to 500 sheets,<br />
supporting standard selectable sizes up to A3, 11 x 17 in.<br />
Tray 5 (Bypass Tray) that holds up to 50 sheets, supporting custom<br />
sizes up to A3, 11 x 17 in.<br />
29
Features<br />
<strong>Printer</strong> Options<br />
Fax<br />
• Single Line Fax with Internet Fax<br />
• Three Line Fax with Internet Fax<br />
• Server Fax<br />
• VoIP Fax<br />
Scan<br />
• Scan Kit (Searchable PDF, High Compression PDF/XPS, Thumbnail preview)<br />
• Scan To/Print From USB<br />
Finishing<br />
• Integrated Office Finisher<br />
• Office Finisher LX with Hole Punch and Booklet Maker options<br />
• Convenience Stapler<br />
Security<br />
• Data Security Kit<br />
• <strong>Xerox</strong> Secure Access Unified ID System<br />
• Job Based Network Accounting<br />
• Common Access Card Authentication (CAC)<br />
Other<br />
• PostScript<br />
• Work Surface<br />
• Envelope Feeder Tray<br />
• Media Card Reader<br />
For more information on options, go to www.xerox.com/office/WC<strong>7120</strong>/<strong>7125</strong>supplies.<br />
30<br />
<strong>WorkCentre</strong> <strong>7120</strong>/<strong>7125</strong> <strong>Multifunction</strong> <strong>Printer</strong><br />
<strong>User</strong> <strong>Guide</strong>
Energy Saver Mode<br />
<strong>WorkCentre</strong> <strong>7120</strong>/<strong>7125</strong> <strong>Multifunction</strong> <strong>Printer</strong><br />
<strong>User</strong> <strong>Guide</strong><br />
Features<br />
Energy Saver mode reduces the printer’s power consumption when the printer is inactive for a preset time.<br />
The printer enters Low Power mode after a preset time has elapsed. If no jobs are sent to the printer for<br />
an additional preset time, it then enters Sleep Mode. The touch screen is dark and the Energy Saver<br />
button is lit in both modes.<br />
Press the Energy Saver button to return the printer to normal operation. Receipt of a job or accessing<br />
the printer using CentreWare Internet Services also cancels Energy Saver mode.<br />
For details, see the System Administrator <strong>Guide</strong> at www.xerox.com/office/WC<strong>7120</strong>/<strong>7125</strong>docs.<br />
31
Features<br />
Control Panel<br />
This section includes:<br />
• Control Panel Layout on page 32<br />
• <strong>Printer</strong> Information on page 33<br />
Control Panel Layout<br />
32<br />
16<br />
Item Description<br />
1 Services Home Press to access features such as copy, scan, and fax, on the<br />
touch screen.<br />
2 Touch Screen Displays information and provides access to printer functions.<br />
3 Log In/Out To access password protected features, press Log In/Out, then enter the<br />
user name and password using the touch screen keyboard. Press again<br />
to log out.<br />
4 Language Press to change the touch screen language and keyboard settings.<br />
5 Energy Saver Button When printer is in low power mode, press to enter normal mode.<br />
6 Interrupt Printing Temporarily stops the current copy job to allow a priority job to process.<br />
7 Clear All Press twice to clear current job settings. Touch Confirm on the touch<br />
screen to reset all job settings to default.<br />
8 Stop Press to pause a print, copy, scan, or fax job. On the touch screen, touch<br />
Resume to continue or Delete to cancel the job.<br />
<strong>WorkCentre</strong> <strong>7120</strong>/<strong>7125</strong> <strong>Multifunction</strong> <strong>Printer</strong><br />
<strong>User</strong> <strong>Guide</strong><br />
1 2<br />
3<br />
15<br />
1<br />
GHI<br />
4<br />
PQRS<br />
7<br />
ABC<br />
2<br />
JKL<br />
5<br />
TUV<br />
8<br />
14<br />
13 1211<br />
10<br />
0<br />
C<br />
DEF<br />
3<br />
MNO<br />
6<br />
WXYZ<br />
9<br />
#<br />
4 5<br />
6<br />
7<br />
8<br />
9<br />
wc<strong>7120</strong>-103
Item Description<br />
9 Start Press to start a copy, scan, or fax job.<br />
10 C Deletes numeric values or the last digit entered using the<br />
alphanumeric keys.<br />
11 Dial Pause Inserts a pause in a fax number.<br />
12 Alphanumeric Keys Enter alphanumeric information.<br />
<strong>Printer</strong> Information<br />
<strong>WorkCentre</strong> <strong>7120</strong>/<strong>7125</strong> <strong>Multifunction</strong> <strong>Printer</strong><br />
<strong>User</strong> <strong>Guide</strong><br />
Features<br />
13 Services Press to access the options for the selected feature, such as copy, scan,<br />
and fax, on the touch screen.<br />
14 Job Status Press to view the list of active and completed jobs on the touch screen.<br />
15 Machine Status Press to view supplies status, printer information, and so on, on the<br />
touch screen.<br />
16 USB Memory Port USB memory port option<br />
Your printer provides status information from the touch screen on the control panel and in printed<br />
reports. Usage and billing information are also available from the touch screen. For details, see Billing<br />
and Usage Information on page 161.<br />
Job Status<br />
View job status to check and manage jobs:<br />
1. Press the Job Status button on the control panel.<br />
2. Touch the Active Jobs or Completed Jobs tab.<br />
3. Select the desired category from the All Jobs drop-down list.<br />
4. Touch the desired job in the list to view details. A job report can be printed by touching either the<br />
Print this Job History Report button or the Print this Job Report button.<br />
5. For additional job types, touch the Secure Print Jobs & More tab, then choose from the following:<br />
• Secure Print<br />
• Sample Set<br />
• Delayed Print<br />
• Charge Print<br />
• Public Folder<br />
33
Features<br />
Reports<br />
Reports can be printed using the control panel.<br />
To print a report:<br />
1. On the control panel, press the Machine Status button.<br />
2. Touch Print Reports, then touch the desired category.<br />
34<br />
Note: The Configuration Report lists information about the current configuration of your printer,<br />
and is useful for network analysis and general troubleshooting.<br />
3. On the next screen, touch the desired report, then press the green Start button.<br />
Accounting<br />
Accounting tracks billing and controls access to copying, scanning, faxing, and printing for each user.<br />
When Accounting is enabled, each user is required to enter their <strong>User</strong> ID information to use a<br />
controlled feature. Controlled features are identified by a lock and key symbol.<br />
The system administrator must create user accounts, and then configure Accounting.<br />
1. On the touch screen, touch the desired feature button.<br />
2. The touch screen keyboard appears. Enter the <strong>User</strong> ID information provided by the System<br />
Administrator, then touch Enter.<br />
The <strong>User</strong> ID appears in the upper right corner of the touch screen.<br />
3. To log out, press Log In/Out, touch the <strong>User</strong> ID, then touch Log Out.<br />
For details, see the System Administrator <strong>Guide</strong> at www.xerox.com/office/WC<strong>7120</strong>/<strong>7125</strong>docs.<br />
<strong>WorkCentre</strong> <strong>7120</strong>/<strong>7125</strong> <strong>Multifunction</strong> <strong>Printer</strong><br />
<strong>User</strong> <strong>Guide</strong>
More Information<br />
Refer to the following sources for more information about your printer and its capabilities.<br />
Information Source<br />
Quick Use <strong>Guide</strong> Packaged with printer<br />
<strong>User</strong> <strong>Guide</strong> (PDF) Software and Documentation disc<br />
www.xerox.com/office/WC<strong>7120</strong>/<strong>7125</strong>docs<br />
System Administrator <strong>Guide</strong> www.xerox.com/office/WC<strong>7120</strong>/<strong>7125</strong>docs<br />
Recommended Media List www.xerox.com/paper (United States)<br />
www.xerox.com/europaper (Europe)<br />
<strong>Printer</strong> Management Tools www.xerox.com/office/WC<strong>7120</strong>/<strong>7125</strong>drivers<br />
Online Support Assistant www.xerox.com/office/WC<strong>7120</strong>/<strong>7125</strong>support<br />
Technical Support www.xerox.com/office/WC<strong>7120</strong>/<strong>7125</strong>support<br />
<strong>WorkCentre</strong> <strong>7120</strong>/<strong>7125</strong> <strong>Multifunction</strong> <strong>Printer</strong><br />
<strong>User</strong> <strong>Guide</strong><br />
Features<br />
35
Features<br />
36<br />
<strong>WorkCentre</strong> <strong>7120</strong>/<strong>7125</strong> <strong>Multifunction</strong> <strong>Printer</strong><br />
<strong>User</strong> <strong>Guide</strong>
Installation and Setup<br />
This chapter includes:<br />
• Installation and Setup Overview on page 38<br />
• Physical Connection on page 38<br />
• Turning the <strong>Printer</strong> On on page 38<br />
• Turning the <strong>Printer</strong> Off on page 40<br />
• Installing the Software on page 42<br />
• Using CentreWare Internet Services on page 47<br />
See also:<br />
Online Support Assistant at www.xerox.com/office/WC<strong>7120</strong>/<strong>7125</strong>support.<br />
System Administrator <strong>Guide</strong> at www.xerox.com/office/WC<strong>7120</strong>/<strong>7125</strong>docs.<br />
<strong>WorkCentre</strong> <strong>7120</strong>/<strong>7125</strong> <strong>Multifunction</strong> <strong>Printer</strong><br />
<strong>User</strong> <strong>Guide</strong><br />
3<br />
37
Installation and Setup<br />
Installation and Setup Overview<br />
Before you can use the printer, you must:<br />
1. Make sure the printer is connected correctly and turned on.<br />
2. Install software drivers and utilities.<br />
3. Configure the software.<br />
Physical Connection<br />
You can connect to the printer over a network. Connect to a functioning and dedicated fax telephone<br />
line for the optional fax. Communication cables are not included with the printer and must be<br />
purchased separately.<br />
To physically connect the printer:<br />
1. Connect the power cable to the printer, and plug it into an electrical outlet.<br />
2. Connect one end of a Category 5, or better, Ethernet cable to the Ethernet port in the back of the<br />
printer. Connect the other end of the cable to your network port.<br />
3. If the fax option is installed, connect to a functioning telephone line using a standard RJ11 cable.<br />
Turning the <strong>Printer</strong> On<br />
The printer has two power switches, the main power switch located behind the front cover, and the<br />
power switch visible on the lower center tray.<br />
Turning Main Power On<br />
Main printer power is controlled by the main power switch. Main power should be left on for normal<br />
printer operation and should only be turned off when connecting a cable to the printer or when<br />
cleaning the printer.<br />
38<br />
CAUTIONS:<br />
• Switch main power on first using the main power switch to avoid damaging the printer’s<br />
internal hard drive or causing a printer malfunction.<br />
• Do not switch main power off immediately after switching it on. Doing so may damage the<br />
printer’s internal hard drive or cause a printer malfunction.<br />
<strong>WorkCentre</strong> <strong>7120</strong>/<strong>7125</strong> <strong>Multifunction</strong> <strong>Printer</strong><br />
<strong>User</strong> <strong>Guide</strong>
1. Open the front cover.<br />
2. Press the main power switch to the on position.<br />
wc<strong>7120</strong>-015<br />
wc<strong>7120</strong>-011<br />
Installation and Setup<br />
3. Close the front cover.<br />
4. Press the power switch, visible on the lower center tray, to the on position to turn the printer on.<br />
The printer takes approximately 35 seconds to warm up before use.<br />
Note: When the optional Office Finisher LX is attached, the power switch is located behind a clear<br />
plastic door in the finisher transport cover/center tray.<br />
wc<strong>7120</strong>-008 wc<strong>7120</strong>-009<br />
Power switch Power switch with optional Office Finisher LX<br />
<strong>WorkCentre</strong> <strong>7120</strong>/<strong>7125</strong> <strong>Multifunction</strong> <strong>Printer</strong><br />
<strong>User</strong> <strong>Guide</strong><br />
39
Installation and Setup<br />
Turning the <strong>Printer</strong> Off<br />
Press the power switch, visible on the lower center tray, to the off position to turn the printer off.<br />
Internal processing takes place before the printer shuts off.<br />
40<br />
Notes:<br />
• Wait five seconds after any active job completes before turning the printer off.<br />
• When the optional Office Finisher LX is attached, the power switch is located behind a<br />
clear plastic door in the finisher transport cover/center tray.<br />
Turning Main Power Off<br />
wc<strong>7120</strong>-013<br />
Power switch Power switch with optional Office Finisher LX<br />
Main printer power is controlled by the main power switch. Main power should be left on for normal<br />
printer operation and should only be turned off when connecting a cable to the printer or when<br />
cleaning the printer.<br />
CAUTIONS:<br />
• Do not switch the main power off while a job is being processed or while the Energy Saver<br />
button is blinking. This may cause damage to the printer's internal hard drive or cause a<br />
printer malfunction.<br />
• Switch the main power off before unplugging the power cord. Unplugging the power cord<br />
with the main power on may damage the printer's internal hard drive or cause a<br />
printer malfunction.<br />
• Do not switch main power off immediately after switching it on. Doing so may damage the<br />
printer’s internal hard drive or cause a printer malfunction.<br />
• Do not switch main power off immediately after switching the power switch off. Doing so<br />
may damage the printer’s internal hard drive or cause a printer malfunction. Wait 10 seconds<br />
after the touch screen goes dark before turning off main power.<br />
1. Make sure the power switch, visible on the lower center tray, is in the off position.<br />
<strong>WorkCentre</strong> <strong>7120</strong>/<strong>7125</strong> <strong>Multifunction</strong> <strong>Printer</strong><br />
<strong>User</strong> <strong>Guide</strong><br />
wc<strong>7120</strong>-012
2. Open the front cover.<br />
3. Press the main power switch to the off position.<br />
4. Close the front cover.<br />
Assigning a Network Address<br />
wc<strong>7120</strong>-015<br />
wc<strong>7120</strong>-014<br />
Installation and Setup<br />
If the network uses a DHCP server, the printer automatically acquires a network address. To assign a<br />
static IP address, configure DNS server settings, or configure other TCP/IP settings, see the System<br />
Administrator <strong>Guide</strong> at www.xerox.com/office/WC<strong>7120</strong>/<strong>7125</strong>docs.<br />
<strong>WorkCentre</strong> <strong>7120</strong>/<strong>7125</strong> <strong>Multifunction</strong> <strong>Printer</strong><br />
<strong>User</strong> <strong>Guide</strong><br />
41
Installation and Setup<br />
Installing the Software<br />
This section includes:<br />
• Operating System Requirements on page 42<br />
• Installing Drivers and Utilities for Windows on page 42<br />
• Installing the Drivers and Utilities for Macintosh on page 43<br />
• UNIX and Linux Drivers on page 46<br />
Operating System Requirements<br />
• Windows XP, Vista, Windows Server 2003 or later.<br />
• Macintosh: OS X version 10.3 or later.<br />
• UNIX and Linux: see www.xerox.com/office/WC<strong>7120</strong>/<strong>7125</strong>drivers.<br />
Installing Drivers and Utilities for Windows<br />
To access all features of the printer, you must:<br />
• Install the <strong>Xerox</strong> printer driver<br />
• If scanning is installed, install the <strong>Xerox</strong> scan driver<br />
Installing a Network <strong>Printer</strong><br />
Before installing drivers, ensure that the printer is plugged in, turned on, connected to an active<br />
network and has a valid IP address.<br />
To install the driver:<br />
1. Insert the Software and Documentation disc into your computer’s CD or DVD drive.<br />
2. The installer starts automatically unless you have autorun disabled on your computer.<br />
42<br />
Note: If the installer does not start, navigate to the drive and double-click Setup.exe. If the<br />
Software and Documentation disc is not available, download the latest driver from<br />
www.xerox.com/office/WC<strong>7120</strong>/<strong>7125</strong>drivers.<br />
3. To change the language, click Language, select your language from the list, then click OK.<br />
4. Click Install Drivers, then click Install Print and Scan Drivers.<br />
5. Click Agree to accept the License Agreement.<br />
6. Select the printer from the list of discovered printers, then click Install.<br />
7. If the printer does not appear in the list of discovered printers:<br />
a. Click IP Address or DNS Name near the top of the window.<br />
b. Type the address or name of the printer, then click Search. If the IP address does not appear,<br />
see Finding The <strong>Printer</strong>’s IP Address on page 47.<br />
c. When the printer appears in the window, click Next.<br />
<strong>WorkCentre</strong> <strong>7120</strong>/<strong>7125</strong> <strong>Multifunction</strong> <strong>Printer</strong><br />
<strong>User</strong> <strong>Guide</strong>
8. Select the desired printer driver:<br />
• PostScript<br />
• PCL 5<br />
• PCL 6<br />
9. If scanning is installed, click the desired scan driver:<br />
• TWAIN<br />
• WIA<br />
10. If scanning is installed, select <strong>Xerox</strong> Scan Utility.<br />
11. Click Install.<br />
12. When the installation completes, click Finish.<br />
Installing the Drivers and Utilities for Macintosh<br />
To access all features of the printer, you must:<br />
• Install the printer and scan drivers<br />
• If required, add the printer<br />
Installation and Setup<br />
Before installing drivers, verify that the printer is plugged in, turned on, connected to an active network<br />
and has a valid IP address.<br />
Installing <strong>Printer</strong> and Scan Drivers<br />
Note: The printer and scan drivers both install at the same time.<br />
To install the printer and scan driver:<br />
1. Insert the Software and Documentation disc into your computer’s CD or DVD drive.<br />
Note: If the Software and Documentation disc is not available, download the latest driver from<br />
www.xerox.com/office/WC<strong>7120</strong>/<strong>7125</strong>drivers.<br />
2. Open the Mac folder, then open Mac OS 10.3+Universal PS folder.<br />
3. Open <strong>WorkCentre</strong> <strong>7120</strong>.dmg.<br />
4. Open <strong>WorkCentre</strong> <strong>7120</strong> CD.<br />
5. Click Continue three times.<br />
6. Click Agree to accept the License Agreement.<br />
7. Click Install.<br />
8. Type your password, then click OK.<br />
9. If the printer does not appear in the list of discovered printers:<br />
a. Click Manually enter the printer’s name or address at the top of the window.<br />
b. Type the address or name of the desired printer, then wait for the computer to find the<br />
printer. If the IP address of the printer is not known, see Finding The <strong>Printer</strong>’s IP Address on<br />
page 47.<br />
c. Click Continue.<br />
10. Click OK to accept the print queue message.<br />
11. If desired, select the check boxes to Set <strong>Printer</strong> as Default and Print a Test Page.<br />
<strong>WorkCentre</strong> <strong>7120</strong>/<strong>7125</strong> <strong>Multifunction</strong> <strong>Printer</strong><br />
<strong>User</strong> <strong>Guide</strong><br />
43
Installation and Setup<br />
12. Click Continue, then click Close.<br />
13. From the Apple menu, open System Preferences, then open Print & Fax.<br />
14. Click the Printing tab, click the printer in the list, then click <strong>Printer</strong> Setup.<br />
15. Click Installable Options, then confirm the options installed on the printer appear.<br />
16. If changes are made, click Apply Changes, close the window, then quit System Preferences.<br />
The printer is now ready to use.<br />
Adding the <strong>Printer</strong> for Macintosh OS X Version 10.3<br />
1. Open the Applications folder, then open the Utilities folder.<br />
2. Open the <strong>Printer</strong> Setup Utility.<br />
3. Click Add.<br />
4. Confirm that the first drop-down list is set to Rendezvous for a network connection.<br />
5. Click the printer.<br />
6. Click <strong>Xerox</strong> in the <strong>Printer</strong> Model drop-down list.<br />
7. Click the printer model, then click Add.<br />
1.<br />
Note: If the printer was not detected by the network, check to make sure that the printer is on, and<br />
the Ethernet cable is connected properly.<br />
If you want to connect by specifying the printer’s IP address:<br />
Open the Applications folder, then open the Utilities folder.<br />
2. Open the <strong>Printer</strong> Setup Utility.<br />
3. Click Add.<br />
4. Confirm that the first drop-down list is set to IP Printing.<br />
5. Click LPD/LPR, IPP, or Socket/HP Jet Direct in the <strong>Printer</strong> Type drop-down list.<br />
6. Type the printer’s IP address in the <strong>Printer</strong> Address field.<br />
7. Click <strong>Xerox</strong> in the <strong>Printer</strong> Model drop-down list.<br />
8. Click the printer model, then click Add.<br />
Adding the <strong>Printer</strong> for Macintosh OS X Version 10.4<br />
1. Open a Finder window, click the Applications folder, then click System Preferences.<br />
Note: If the System Preferences application is displayed in your dock, click the icon to open<br />
System Preferences.<br />
2. Click Print & Fax, then click Printing.<br />
3. Click the plus button under the list of detected printers.<br />
4. Click Default Browser in the <strong>Printer</strong> Browser window.<br />
5. Click the printer, then click Add.<br />
44<br />
Note: If the printer was not detected by the network, check to make sure that the printer is on and<br />
the Ethernet cable is connected properly.<br />
<strong>WorkCentre</strong> <strong>7120</strong>/<strong>7125</strong> <strong>Multifunction</strong> <strong>Printer</strong><br />
<strong>User</strong> <strong>Guide</strong>
To connect by specifying the printer’s IP address:<br />
1. Open System Preferences from the Applications folder.<br />
2. Open Print & Fax, then click the Printing tab.<br />
3. Click the plus button under the list of detected printers.<br />
4. Click IP <strong>Printer</strong> in the <strong>Printer</strong> Browser window.<br />
5. Click IPP, Line <strong>Printer</strong> Daemon – LPD, or HP Jet Direct – Socket.<br />
6. Type the printer’s IP address in the Address field.<br />
7. Type a name for the printer.<br />
8. Type a location for the printer.<br />
9. Click <strong>Xerox</strong> in the Print Using drop-down list.<br />
10. Click the printer model, then click Add.<br />
Adding the <strong>Printer</strong> for OS X Version 10.5<br />
1. Open the Applications folder, then double-click System Preferences.<br />
2. Click Print & Fax.<br />
3. Click the plus button under the list of installed printers.<br />
4. Type the IP address or host name of the printer.<br />
5. Type a Queue name for the printer, or leave it blank to use the default queue.<br />
6. Click the printer, then click Add.<br />
Installation and Setup<br />
1.<br />
Note: If the printer was not detected by the network, check to make sure that the printer is on, and<br />
the Ethernet cable is connected properly.<br />
If you want to connect by specifying the printer’s IP address:<br />
From the Applications folder on the dock, click the System Preferences icon.<br />
2. Click Print & Fax.<br />
3. Click the plus button under the list of installed printers.<br />
4. Click IP <strong>Printer</strong>.<br />
5. Click IPP, Line <strong>Printer</strong> Daemon – LPD, or HP Jet Direct – Socket.<br />
6. Type the printer’s IP address in the Address field.<br />
7. Type a name for the printer.<br />
8. Type a location for the printer.<br />
9. Click the desired driver in the Print Using drop-down list.<br />
10. Click the printer model, then click Add.<br />
<strong>WorkCentre</strong> <strong>7120</strong>/<strong>7125</strong> <strong>Multifunction</strong> <strong>Printer</strong><br />
<strong>User</strong> <strong>Guide</strong><br />
45
Installation and Setup<br />
UNIX and Linux Drivers<br />
Supported UNIX and Linux drivers are available at www.xerox.com/office/WC<strong>7120</strong>/<strong>7125</strong>drivers.<br />
For details, see the System Administrator <strong>Guide</strong> at www.xerox.com/office/WC<strong>7120</strong>/<strong>7125</strong>docs.<br />
Other Drivers<br />
The following drivers are also available for Windows only at:<br />
www.xerox.com/office/WC<strong>7120</strong>/<strong>7125</strong>drivers.<br />
• <strong>Xerox</strong> Global Print Driver: Use to print to any PCL or PostScript-enabled printer on your network,<br />
including those made by other manufacturers. The driver configures itself for the printer you select.<br />
• <strong>Xerox</strong> Mobile Express Driver: Use to print to any PostScript-enabled printer on your network,<br />
including those made by other manufacturers. The driver configures itself for the printer you select<br />
every time you print. If you travel frequently to the same sites, you can save your favorite printers<br />
in that location and the driver will remember your settings.<br />
46<br />
<strong>WorkCentre</strong> <strong>7120</strong>/<strong>7125</strong> <strong>Multifunction</strong> <strong>Printer</strong><br />
<strong>User</strong> <strong>Guide</strong>
Using CentreWare Internet Services<br />
Installation and Setup<br />
CentreWare Internet Services (CentreWare IS) provides access to the printer’s embedded Web server.<br />
It enables you to easily manage, configure, and monitor the printer using a Web browser on a<br />
network computer.<br />
CentreWare IS enables you to:<br />
• Access printer status, configuration, and security settings.<br />
• Check supplies status from your computer.<br />
• Access job accounting records to allocate printing costs and plan supplies purchases.<br />
• Retrieve scanned document files stored in the printer.<br />
Note: Some printer capabilities must be enabled using CentreWare IS. Unless your system<br />
administrator has unlocked the printer, you will need to log in as an administrator to access<br />
these settings.<br />
CentreWare IS requires:<br />
• A Web browser and a TCP/IP connection between the printer and the network (in Windows,<br />
Macintosh, or UNIX environments).<br />
• JavaScript must be enabled in the Web browser. If JavaScript is disabled, a warning message<br />
appears and CentreWare IS may not function properly.<br />
• TCP/IP and HTTP must be enabled in the printer.<br />
For details see the System Administrator <strong>Guide</strong> at www.xerox.com/office/WC<strong>7120</strong>/<strong>7125</strong>docs.<br />
Finding The <strong>Printer</strong>’s IP Address<br />
The printer’s IP address is required to use CentreWare IS. If you do not know the IP Address, print the<br />
Configuration Report. The printer’s IP address appears in the Communication Settings section.<br />
To print the Configuration Report:<br />
1. At the control panel, press the Machine Status button.<br />
2. Touch the Machine Information tab, then touch Print Reports.<br />
3. Touch <strong>Printer</strong> Reports, touch Configuration Report, then press the green Start button on the<br />
control panel.<br />
4. After the report prints, touch Close.<br />
Accessing CentreWare IS<br />
1. Make sure your printer is turned on.<br />
2. At your computer, open a Web browser.<br />
3. Type the IP address of the printer in the Web browser’s address field.<br />
The CentreWare IS Welcome page appears.<br />
<strong>WorkCentre</strong> <strong>7120</strong>/<strong>7125</strong> <strong>Multifunction</strong> <strong>Printer</strong><br />
<strong>User</strong> <strong>Guide</strong><br />
47
Installation and Setup<br />
48<br />
<strong>WorkCentre</strong> <strong>7120</strong>/<strong>7125</strong> <strong>Multifunction</strong> <strong>Printer</strong><br />
<strong>User</strong> <strong>Guide</strong>
Printing<br />
This chapter includes:<br />
• Printing Overview on page 50<br />
• Supported Media on page 51<br />
• Loading Media on page 53<br />
• Printing on Special Media on page 60<br />
• Selecting Printing Options on page 63<br />
• Printing on Both Sides of the Paper on page 68<br />
• Selecting Paper on page 70<br />
• Printing Multiple Pages to a Single Sheet (N-Up) on page 71<br />
• Printing Booklets on page 72<br />
• Using Color Corrections on page 75<br />
• Printing in Black and White on page 77<br />
• Printing Insert Pages on page 80<br />
• Printing Cover Pages on page 78<br />
• Printing Exception Pages on page 81<br />
• Scaling on page 82<br />
• Printing Watermarks on page 83<br />
• Printing Mirror Images for Windows on page 85<br />
• Creating and Saving Custom Sizes on page 86<br />
• Job Completion Notification for Windows on page 87<br />
• Printing from USB Flash Drive on page 88<br />
• Printing from Media Card Reader on page 89<br />
• Printing Special Job Types on page 90<br />
<strong>WorkCentre</strong> <strong>7120</strong>/<strong>7125</strong> <strong>Multifunction</strong> <strong>Printer</strong><br />
<strong>User</strong> <strong>Guide</strong><br />
4<br />
49
Printing<br />
Printing Overview<br />
1. Select appropriate media.<br />
2. Load media in the tray. On the printer touch screen, specify the size, color, and type.<br />
3. Access the print settings in your software application. For most software applications, press<br />
CTRL+P for Windows, or CMD+P for Macintosh.<br />
4. Select your printer from the list.<br />
5. Access the printer driver settings by selecting Properties or Preferences (Windows), or <strong>Xerox</strong><br />
Features for Macintosh. The title of the button may vary depending on your application.<br />
6. Modify the printer driver settings as necessary, then click OK.<br />
7. To send the job to the printer, click Print.<br />
See also:<br />
Loading Media on page 53<br />
Selecting Printing Options on page 63<br />
Printing on Both Sides of the Paper on page 68<br />
Printing on Special Media on page 60<br />
50<br />
<strong>WorkCentre</strong> <strong>7120</strong>/<strong>7125</strong> <strong>Multifunction</strong> <strong>Printer</strong><br />
<strong>User</strong> <strong>Guide</strong>
Supported Media<br />
This section includes:<br />
• Recommended Media on page 51<br />
• General Media Loading <strong>Guide</strong>lines on page 51<br />
• Media That Can Damage Your <strong>Printer</strong> on page 52<br />
• Paper Storage <strong>Guide</strong>lines on page 52<br />
<strong>WorkCentre</strong> <strong>7120</strong>/<strong>7125</strong> <strong>Multifunction</strong> <strong>Printer</strong><br />
<strong>User</strong> <strong>Guide</strong><br />
Printing<br />
Your printer is designed to be used with a variety of media types. Follow the guidelines in this section to<br />
ensure the best print quality, and to avoid jams.<br />
For best results, use <strong>Xerox</strong> printing media specified for your printer.<br />
Recommended Media<br />
A complete list of recommended media types is available:<br />
• www.xerox.com/paper Recommended Media List (United States)<br />
• www.xerox.com/europaper Recommended Media List (Europe)<br />
Ordering Media<br />
To order paper or specialty media, contact your local reseller or go to:<br />
www.xerox.com/office/WC<strong>7120</strong>/<strong>7125</strong>supplies.<br />
CAUTION: Damage caused by using unsupported paper and specialty media is not covered by<br />
the <strong>Xerox</strong> Warranty, Service Agreement, or Total Satisfaction Guarantee. The Total Satisfaction<br />
Guarantee is available in the United States and Canada. Coverage may vary outside these areas.<br />
Please contact your local representative for details.<br />
General Media Loading <strong>Guide</strong>lines<br />
Follow these guidelines when loading paper and media in the appropriate trays:<br />
• Do not print on label sheets that have labels removed.<br />
• Use only paper envelopes. Print envelopes 1-sided only.<br />
• Do not overload the paper trays.<br />
• Adjust the paper guides to fit the paper size.<br />
• Make sure the correct paper type is selected on the printer touch screen after loading paper in a tray.<br />
51
Printing<br />
Media That Can Damage Your <strong>Printer</strong><br />
Your printer is designed to use a variety of paper and media types for print jobs. However, some media<br />
can cause poor output quality, increased paper jams, or damage to your printer.<br />
Do not use the following:<br />
• Rough or porous media<br />
• Inkjet paper<br />
• Non-laser glossy or coated paper<br />
• Paper that has been photocopied<br />
• Paper that has been folded or wrinkled<br />
• Paper with cutouts or perforations<br />
• Stapled paper<br />
• Envelopes with windows, metal clasps, side seams, or adhesives with release strips<br />
• Padded envelopes<br />
• Plastic media<br />
Paper Storage <strong>Guide</strong>lines<br />
Providing good storage conditions for your paper and other media contributes to optimum print quality.<br />
• Store paper in dark, cool, relatively dry locations. Most paper is susceptible to damage from<br />
ultraviolet and visible light. Ultraviolet light, which is emitted by the sun and fluorescent bulbs, is<br />
particularly damaging to paper.<br />
• The intensity and length of exposure to visible light on paper should be reduced as much as possible.<br />
• Maintain constant temperatures and relative humidity.<br />
• Avoid storing paper in attics, kitchens, garages, or basements. These spaces are more likely to<br />
collect moisture.<br />
• Store paper flat, either on pallets, cartons, shelves, or in cabinets.<br />
• Avoid having food or drinks in the area where paper is stored or handled.<br />
• Do not open sealed packages of paper until you are ready to load them into the printer. Leave<br />
stored paper in the original packaging. The paper wrapper usually contains an inner lining that<br />
protects the paper from moisture loss or gain.<br />
• Some specialty media is packaged inside resealable plastic bags. Store the media inside the bag<br />
until you are ready to use it. Keep unused media in the bag and reseal it for protection.<br />
52<br />
<strong>WorkCentre</strong> <strong>7120</strong>/<strong>7125</strong> <strong>Multifunction</strong> <strong>Printer</strong><br />
<strong>User</strong> <strong>Guide</strong>
Loading Media<br />
This section includes:<br />
• Loading Paper in Trays 1 through 4 on page 53<br />
• Loading Paper in Tray 5 (Bypass Tray) on page 55<br />
• Loading Envelopes in Tray 5 (Bypass Tray) on page 57<br />
• Loading Envelopes in the Envelope Tray on page 58<br />
• Printing on Special Media on page 60<br />
Select the appropriate tray depending on the media you plan to use. For details, see Recommended<br />
Media on page 51.<br />
Loading Paper in Trays 1 through 4<br />
Tray 1, Tray 2, Tray 3, and Tray 4 accept the following media types:<br />
• Plain<br />
• Plain Reload (paper that has had one side printed)<br />
• Bond<br />
• Punched<br />
• Letterhead<br />
• Heavyweight<br />
• Heavyweight Reload<br />
• Extra Heavyweight<br />
• Extra Heavyweight Reload<br />
• Extra Heavyweight Plus<br />
• Extra Heavyweight Plus Reload<br />
• Recycled<br />
• Labels<br />
• Heavyweight Labels<br />
• Extra Heavyweight Labels<br />
• Pre-Printed<br />
• Gloss<br />
• Gloss Reload<br />
• Heavyweight Gloss<br />
• Heavyweight Gloss Reload<br />
• Extra Heavyweight Gloss<br />
• Extra Heavyweight Gloss Reload<br />
Tray 1, Tray 2, Tray 3, and Tray 4 accept a maximum of approximately 560 sheets of 80 g/m² paper<br />
from A5, 148 x 210 mm (5.5 x 8.3 in.) to A3, 297 x 420 mm (11 x 17 in.).<br />
<strong>WorkCentre</strong> <strong>7120</strong>/<strong>7125</strong> <strong>Multifunction</strong> <strong>Printer</strong><br />
<strong>User</strong> <strong>Guide</strong><br />
Printing<br />
53
Printing<br />
The following custom paper sizes are also supported: X width between 182 and 432 mm (7.2 x 17 in.),<br />
and Y length between 140 and 297 mm (5.5 x 11.6 in.). Custom paper sizes can be specified in<br />
1-mm increments.<br />
Tray 1, Tray 2, Tray 3, and Tray 4 accept paper weights from 60 g/m² to 256 g/m².<br />
To load paper in Tray 1, Tray 2, Tray 3, or Tray 4:<br />
1. Pull the paper tray out toward you.<br />
54<br />
WARNING: Do not open all trays at once. The printer could topple forward, possibly<br />
causing injury.<br />
2. Before loading paper into the paper trays, fan the edges to separate any sheets of paper that are<br />
stuck together. This reduces the possibility of paper jams.<br />
3. If required, move the paper tray guides further out to load the new paper. To adjust the side and<br />
front guides, pinch the guide lever on each guide and slide the guides to their new position. To<br />
secure the guides in position, release the levers.<br />
<strong>WorkCentre</strong> <strong>7120</strong>/<strong>7125</strong> <strong>Multifunction</strong> <strong>Printer</strong><br />
<strong>User</strong> <strong>Guide</strong><br />
wc<strong>7120</strong>-021<br />
wc<strong>7120</strong>-031<br />
wc<strong>7120</strong>-027
4. Load the paper against the left-hand side of the tray.<br />
Note: Do not load paper above the maximum fill line. Doing so may cause paper jams.<br />
5. Adjust the guides so they touch the edges of the stack.<br />
6. Push the tray completely into the printer.<br />
7. If required, choose paper size, type, or color on the printer touch screen, then touch Confirm.<br />
8. If you have not changed the media type, touch Confirm on the touch screen.<br />
Loading Paper in Tray 5 (Bypass Tray)<br />
<strong>WorkCentre</strong> <strong>7120</strong>/<strong>7125</strong> <strong>Multifunction</strong> <strong>Printer</strong><br />
<strong>User</strong> <strong>Guide</strong><br />
Printing<br />
Use the bypass tray for a variety of media types and custom sizes. It is primarily intended for small<br />
quantity jobs using special media. The bypass tray is located on the left-hand side of the printer. A tray<br />
extension is provided to accommodate larger paper. After loading paper in the bypass tray, make sure<br />
that the tray settings on the touch screen match the paper size and type loaded.<br />
Tray 5 (Bypass Tray) accepts the following paper types:<br />
• Plain<br />
• Plain Reload<br />
• Bond<br />
• Punched<br />
• Letterhead<br />
• Heavyweight<br />
• Extra heavyweight<br />
• Extra heavyweight reload<br />
• Recycled<br />
wc<strong>7120</strong>-028<br />
wc<strong>7120</strong>-029<br />
55
Printing<br />
• Labels<br />
• Heavyweight labels<br />
• Pre-printed<br />
• Envelope<br />
• Gloss<br />
• Gloss Reload<br />
• Heavyweight gloss<br />
• Heavyweight gloss reload<br />
Tray 5 (Bypass Tray) accepts a maximum of approximately 50 sheets of 80 g/m² paper.<br />
Tray 5 (Bypass Tray) accepts the following range of paper sizes: from A6, 100 x 148 mm (3.9 x 5.8 in.)<br />
to A3, 297 x 420 mm (11 x 17 in.).<br />
The following custom paper sizes are also supported: X width between 98 and 432 mm (3.8 x 17 in.), and Y<br />
length between 89 and 297 mm (3.5 x 11.6 in.). Custom paper sizes can be specified in 1-mm increments.<br />
Tray 5 (Bypass Tray) accepts paper weights from 60 g/m² to 216 g/m².<br />
To load paper in Tray 5 (Bypass Tray):<br />
1. Open Tray 5 by rotating it outward. For larger paper, pull the extension straight out until it stops.<br />
wc<strong>7120</strong>-102<br />
2. Insert the paper either long edge or short edge first. Larger paper sizes can only be fed short edge first.<br />
56<br />
<strong>WorkCentre</strong> <strong>7120</strong>/<strong>7125</strong> <strong>Multifunction</strong> <strong>Printer</strong><br />
<strong>User</strong> <strong>Guide</strong><br />
wc<strong>7120</strong>-024
3. Slide the guides so they just touch the edges of the stack.<br />
Note: Do not load paper above the maximum fill line. Doing so may cause paper jams.<br />
4. If required, choose paper size, type, or color on the printer touch screen, then touch Confirm.<br />
5. If you have not changed the media type, touch Confirm on the touch screen.<br />
Loading Envelopes in Tray 5 (Bypass Tray)<br />
Tray 5 (Bypass Tray) accepts Monarch and Commercial #10 envelopes.<br />
Tray 5 (Bypass Tray) accepts envelope paper weights from 75 g/m² to 90 g/m².<br />
To load envelopes in Tray 5 (Bypass Tray):<br />
1. Insert envelopes in Tray 5 (Bypass Tray).<br />
2. Slide the guides so they just touch the edges of the stack.<br />
Note: To help avoid jams, do not load envelopes above the maximum fill line.<br />
3. On the printer touch screen, choose the envelope size, then touch Confirm.<br />
Configuring the Envelope Tray<br />
wc<strong>7120</strong>-025<br />
<strong>WorkCentre</strong> <strong>7120</strong>/<strong>7125</strong> <strong>Multifunction</strong> <strong>Printer</strong><br />
<strong>User</strong> <strong>Guide</strong><br />
Printing<br />
Note: The optional envelope tray provides higher volume envelope capacity than the bypass tray.<br />
The envelope tray replaces Tray 1 in the printer, and must be configured before use. When the<br />
envelope tray is installed, the standard Tray 1 cannot be used.<br />
To configure the envelope tray:<br />
1. Remove Tray 1 from the printer.<br />
2. Insert the envelope tray in the Tray 1 position in the printer.<br />
3. On the control panel, press Log in/Out.<br />
4. Using the touch screen keyboard, enter admin, touch Next, enter 1111, then touch Enter.<br />
5. Press the Machine Status button.<br />
6. Touch the Tools tab, then touch System Settings.<br />
7. Touch Common Service Settings.<br />
8. Under Features, scroll down, then touch Other Settings.<br />
9. Under Page, touch the down arrow to display page 2 of 3.<br />
10. Touch Tray 1 Configuration, then touch Change Settings.<br />
57
Printing<br />
11. Touch Coupled as Envelope Feeder, touch Save, then touch Close.<br />
12. Under Features, scroll up, then touch Paper Tray Settings.<br />
13. Touch Paper Tray Attributes, then touch Tray 1.<br />
14. Touch the check box for Envelope Feeder, then touch Change Settings.<br />
15. Ensure that Paper Type is set to Envelope.<br />
16. Under Paper Size, touch the desired envelope size.<br />
17. Touch Save, touch Confirm, then touch Close twice.<br />
The envelope tray is now ready for use.<br />
Loading Envelopes in the Envelope Tray<br />
The envelope tray accepts Monarch, Commercial #10, ISO C-5, DL envelopes, and custom-size<br />
envelopes from 148 x 241 mm (5.8 x 9.5 in.) to 98 x 162 mm (3.9 x 6.4 in.). Envelope size must be set<br />
using the touch screen.<br />
The optional envelope tray accepts envelope paper weights from 75 g/m² to 90 g/m².<br />
To load envelopes in the envelope tray:<br />
1. Pull the envelope tray out toward you.<br />
wc<strong>7120</strong>-030<br />
2. If required, move the paper tray guides further out to load the new envelopes. To adjust the side<br />
and front guides, pinch the guide lever on each guide and slide the guides to their new position. To<br />
secure the guides in position, release the levers.<br />
58<br />
<strong>WorkCentre</strong> <strong>7120</strong>/<strong>7125</strong> <strong>Multifunction</strong> <strong>Printer</strong><br />
<strong>User</strong> <strong>Guide</strong><br />
wc<strong>7120</strong>-033
<strong>WorkCentre</strong> <strong>7120</strong>/<strong>7125</strong> <strong>Multifunction</strong> <strong>Printer</strong><br />
<strong>User</strong> <strong>Guide</strong><br />
Printing<br />
3. Load the envelopes in the envelope tray flap side down. Flaps should be closed and on the leading<br />
edge, toward the left side of the tray.<br />
Notes:<br />
• Printing will appear on the side facing up.<br />
• Do not load envelopes above the maximum fill line. Doing so may cause jams.<br />
wc<strong>7120</strong>-032<br />
4. Adjust the guides in the envelope tray so they touch the edges of the stack.<br />
wc<strong>7120</strong>-035<br />
5. Push the tray completely into the printer.<br />
6. If you have changed the envelope size: on the printer touch screen, touch Change Settings,<br />
choose the envelope size on the touch screen, touch Save, then touch Confirm.<br />
7. If you are loading more envelopes of the same size, touch Confirm on the touch screen.<br />
59
Printing<br />
Printing on Special Media<br />
This section includes:<br />
• Printing on Envelopes on page 60<br />
• Printing on Labels on page 61<br />
• Printing on Glossy Paper on page 62<br />
• Creating and Saving Custom Sizes on page 86<br />
Printing on Envelopes<br />
Envelopes can be printed from Tray 5 (Bypass Tray) or from the optional envelope tray in the Tray 1 position.<br />
<strong>Guide</strong>lines<br />
• Successful envelope printing is dependent on the quality and construction of the envelopes. Try<br />
another envelope brand if the desired results are not achieved.<br />
• Maintain constant temperatures and relative humidity.<br />
• Store unused envelopes in their original packaging to avoid the excess moisture or dryness which<br />
can affect print quality and cause wrinkling. Excessive moisture can cause the envelopes to seal<br />
before or during printing.<br />
• Do not use padded envelopes.<br />
To print envelopes:<br />
1. Load envelopes in the desired tray.<br />
2. In the printer driver, do one of the following:<br />
• Select Envelope as the paper type.<br />
• Select Tray 5 (Bypass Tray) as the paper source.<br />
• With the optional Envelope Tray in the Tray 1 position, select Tray 1 as the paper source.<br />
60<br />
Note: Some wrinkling or embossing may occur when printing on envelopes.<br />
CAUTION: Never use envelopes with windows or metal clasps: they can damage the printer.<br />
Damage caused by using unsupported envelopes is not covered under the <strong>Xerox</strong> warranty, service<br />
agreement, or Total Satisfaction Guarantee. The Total Satisfaction Guarantee is available in the<br />
United States and Canada. Coverage may vary outside these areas. Please contact your local<br />
representative for details.<br />
<strong>WorkCentre</strong> <strong>7120</strong>/<strong>7125</strong> <strong>Multifunction</strong> <strong>Printer</strong><br />
<strong>User</strong> <strong>Guide</strong>
Printing on Labels<br />
Labels can be printed from Trays 1, 2, 3, 4, and 5 (Bypass Tray).<br />
<strong>Guide</strong>lines<br />
<strong>WorkCentre</strong> <strong>7120</strong>/<strong>7125</strong> <strong>Multifunction</strong> <strong>Printer</strong><br />
<strong>User</strong> <strong>Guide</strong><br />
Printing<br />
• Use labels designed for laser printing.<br />
• Do not use vinyl labels.<br />
• Do not use dry gum labels.<br />
• Print only on one side of the sheet of labels.<br />
• Do not use any sheet where labels are missing: it may damage the printer.<br />
• Store unused labels flat in their original packaging. Leave the sheets of labels inside the original<br />
packaging until ready to use. Return any unused sheets of labels to the original packaging and<br />
reseal it.<br />
• Do not store labels in extremely dry or humid conditions or extremely hot or cold conditions. Storing<br />
them in extreme conditions may cause print quality problems or cause them to jam in the printer.<br />
• Rotate stock frequently. Long periods of storage in extreme conditions can cause labels to curl and<br />
jam in the printer.<br />
To print on glossy paper:<br />
1. Load labels in the desired tray.<br />
2. In the printer driver, do one of the following:<br />
• Select Labels as the paper type.<br />
• Select the tray containing the labels as the paper source.<br />
61
Printing<br />
Printing on Glossy Paper<br />
Glossy paper can be printed from Tray 1, 2, 3, 4, and 5 (Bypass Tray).<br />
To order paper or specialty media, contact your local reseller or go to the <strong>Xerox</strong> Supplies website for<br />
your printer: www.xerox.com/office/WC<strong>7120</strong>/<strong>7125</strong>supplies.<br />
<strong>Guide</strong>lines<br />
• Do not open sealed packages of glossy paper until you are ready to load them into the printer.<br />
• Store glossy paper flat in the original packaging.<br />
• Remove all other paper from the tray before loading glossy paper.<br />
• Load only the amount of glossy paper you plan to use and remove the unused portion from the<br />
tray when you are finished printing. Replace the unused portion in the original wrapper and seal<br />
for later use.<br />
• Rotate stock frequently. Long periods of storage in extreme conditions can cause glossy paper to<br />
curl and jam in the printer.<br />
Procedure<br />
1. Load glossy paper in the desired tray.<br />
2. In the printer driver, do one of the following:<br />
• Select Gloss Coating as the paper type.<br />
• Select the tray containing the glossy paper as the paper source.<br />
62<br />
<strong>WorkCentre</strong> <strong>7120</strong>/<strong>7125</strong> <strong>Multifunction</strong> <strong>Printer</strong><br />
<strong>User</strong> <strong>Guide</strong>
Selecting Printing Options<br />
<strong>WorkCentre</strong> <strong>7120</strong>/<strong>7125</strong> <strong>Multifunction</strong> <strong>Printer</strong><br />
<strong>User</strong> <strong>Guide</strong><br />
Printing<br />
Printing options are specified as Printing Preferences in Windows, and <strong>Xerox</strong> Features in Macintosh.<br />
Printing Options include settings for 2-sided printing, page layout, and print quality.<br />
• Printing Options for Windows on page 63<br />
• Setting Default Printing Options for Windows on page 64<br />
• Selecting Printing Options for an Individual Job in Windows on page 65<br />
• Saving a Set of Commonly Used Printing Options in Windows on page 65<br />
• Selecting Finishing Options for Windows on page 65<br />
• Printing Options for Macintosh on page 66<br />
• Selecting Options for an Individual Job for Macintosh on page 67<br />
• Saving a Set of Commonly Used Printing Options for Macintosh on page 67<br />
• Selecting Finishing Options for Macintosh on page 67<br />
Printing Options for Windows<br />
The following table lists printing options organized in tabs within the Printing Preferences window.<br />
.<br />
Tab PCL 6 Printing Options PostScript Printing Options<br />
Paper/Output Job Type<br />
Paper Size, Paper Color, Paper Type,<br />
Tray Selection<br />
2-sided Printing<br />
Finishing (if a finisher is installed)<br />
Print Quality<br />
Output Destination<br />
Special Pages Covers<br />
Inserts<br />
Exception Pages<br />
Color Options<br />
(Color Correction)<br />
Automatic Color<br />
Black and White conversion<br />
Color Adjustments<br />
Layout/Watermark Pages Per Sheet (N-Up)<br />
Booklet Layout<br />
Booklet Paper Size, Margins<br />
Orientation<br />
2-Sided Printing<br />
Booklet Page Borders<br />
Watermark<br />
Job Type<br />
Paper Size, Paper Color, Paper Type, and<br />
Tray Selection<br />
2-sided Printing<br />
Finishing (if a finisher is installed)<br />
Print Quality<br />
Output Destination<br />
Covers<br />
Inserts<br />
Exception Pages<br />
Automatic Color<br />
Black and White conversion<br />
Color Adjustments<br />
Pages Per Sheet (N-Up)<br />
Booklet Layout<br />
Booklet Paper Size, Margins, Gutter,<br />
and Creep<br />
Orientation<br />
2-Sided Printing<br />
Booklet Page Borders<br />
Watermark<br />
63
Printing<br />
Tab PCL 6 Printing Options PostScript Printing Options<br />
Setting Default Printing Options for Windows<br />
When you print from any software application, the printer uses the print job settings specified in the<br />
Printing Preferences window. You can specify your most commonly used printing options and save<br />
them so that you do not have to change them every time you print.<br />
To change Printing Preferences:<br />
1. Click the Windows Start button, select Settings, then click <strong>Printer</strong>s and Faxes.<br />
2. In the <strong>Printer</strong>s and Faxes window, right-click the icon for your printer, then click Printing Preferences.<br />
3. Click the tabs in the Printing Preferences window, click the desired settings, then click OK.<br />
64<br />
Advanced Paper/Output<br />
• Copies<br />
• Collate<br />
• Banner Sheet<br />
• Offset Sets<br />
• Bypass Tray Feed Edge<br />
Image options<br />
• Reduce/Enlarge<br />
• Draft Mode<br />
• Gloss Level<br />
Advanced Printing Features<br />
Print Optimization<br />
TrueType Font Substitution<br />
TrueType Font Download<br />
Note: For more information about Windows printing options, click Help in the lower left-hand<br />
corner of any tab in the Printing Preferences window.<br />
<strong>WorkCentre</strong> <strong>7120</strong>/<strong>7125</strong> <strong>Multifunction</strong> <strong>Printer</strong><br />
<strong>User</strong> <strong>Guide</strong><br />
Paper/Output<br />
• Copies<br />
• Collate<br />
• Banner Sheet<br />
• Offset Sets<br />
• Bypass Tray Feed Edge<br />
Image options<br />
• Reduce/Enlarge<br />
• Draft Mode<br />
• Gloss Level<br />
• Mirrored Output<br />
• PostScript Pass-through<br />
Booklet Layout<br />
• Image Order<br />
Advanced Printing Features<br />
TrueType Font Substitution<br />
TrueType Font Download<br />
PostScript Output<br />
PostScript Language Level<br />
PostScript Error Handler<br />
Help is available in all tabs. For more information about Windows printer driver options, click Help in the lower<br />
left-hand corner of any tab in the Properties or Printing Preferences window.
Selecting Printing Options for an Individual Job in Windows<br />
<strong>WorkCentre</strong> <strong>7120</strong>/<strong>7125</strong> <strong>Multifunction</strong> <strong>Printer</strong><br />
<strong>User</strong> <strong>Guide</strong><br />
Printing<br />
To use specific printing options for a single job, change the printing properties before sending the job<br />
to the printer. These settings override default printing options for the current job only.<br />
1. With the document open in your application, click File, then click Print.<br />
2. Select the printer. To open the Properties window, click Properties. Click the tabs in the Properties<br />
window, then click the desired settings.<br />
3. Click OK to save and close the Properties window.<br />
4. Print the job.<br />
Saving a Set of Commonly Used Printing Options in Windows<br />
You can define and save a set of printing options, so that you can quickly apply them to future print jobs.<br />
To save a set of printing options:<br />
1. With the document open in your application, click File, then click Print.<br />
2. Select the printer, then click Properties. Click the tabs in the Properties window, then click the<br />
desired settings.<br />
3. Click Saved Settings at the bottom of the Properties window, then click Save As.<br />
4. Type a name for the set of printing options, then click OK.<br />
The set of options is saved and will appear in the list. To print using these options, select the name<br />
from the list.<br />
Selecting Finishing Options for Windows<br />
If your printer has the optional Integrated Office Finisher or the optional Office Finisher LX installed,<br />
finishing options are selected in the printer driver.<br />
To select finishing features in the printer driver:<br />
1. Click the Paper/Output tab.<br />
2. Click the arrow to the right of the Finishing section, then click the desired finishing options.<br />
65
Printing<br />
Printing Options for Macintosh<br />
The following table lists printing options organized in drop-down lists within the <strong>Xerox</strong> Features print<br />
dialog box.<br />
66<br />
Menu Printing Options<br />
Paper/Output Special Pages<br />
• Add Covers<br />
• Add Inserts<br />
• Add Exceptions<br />
Layout/Watermark<br />
• Booklet Layout<br />
• Page Borders<br />
• Booklet Options<br />
• Watermark<br />
Color Options<br />
• Automatic<br />
• Black and White<br />
Advanced<br />
• Booklet Image Order<br />
• Banner Sheet<br />
• Request Offset<br />
• Mirrored Output<br />
• Printing Optimization<br />
Job Type Normal<br />
Secure Print<br />
Sample Set<br />
Delayed Print<br />
Saved Job<br />
Fax<br />
Paper Other Color<br />
Other Type<br />
2-Sided Printing 1-Sided Print<br />
2-Sided Print<br />
2-Sided Print, Flip on Short Edge<br />
Print Quality High Resolution<br />
High Quality<br />
High Speed<br />
Help is available in all menus. For more information about Macintosh printer driver options, click Help in the<br />
lower left-hand corner of any print dialog box.<br />
<strong>WorkCentre</strong> <strong>7120</strong>/<strong>7125</strong> <strong>Multifunction</strong> <strong>Printer</strong><br />
<strong>User</strong> <strong>Guide</strong>
Selecting Options for an Individual Job for Macintosh<br />
<strong>WorkCentre</strong> <strong>7120</strong>/<strong>7125</strong> <strong>Multifunction</strong> <strong>Printer</strong><br />
<strong>User</strong> <strong>Guide</strong><br />
Printing<br />
To use specific printing options for a single job, change the settings before sending the job to the printer.<br />
1. With the document open in your application, click File, then click Print.<br />
2. From the <strong>Printer</strong> list, select your printer.<br />
3. From the Copies & Pages menu, select <strong>Xerox</strong> Features.<br />
4. From the drop-down lists, select the desired printing options.<br />
5. To print the job, click Print.<br />
Saving a Set of Commonly Used Printing Options for Macintosh<br />
You can define and save a set of options, so that you can quickly apply them to future print jobs.<br />
To save a set of printing options:<br />
1. With the document open in your application, click File, then click Print.<br />
2. From the <strong>Printer</strong> list, select your printer.<br />
3. From the drop-down lists in the Print dialog box, select the desired printing options.<br />
4. Click the Presets menu, then click Save As.<br />
5. Type a name for the printing options, then click OK.<br />
The set of options is saved and appears in the Presets list. To print using these options, select the<br />
name from the list.<br />
Selecting Finishing Options for Macintosh<br />
If your printer has the optional Integrated Office Finisher or the optional Office Finisher LX installed,<br />
finishing options, such as stapling and creasing, are selected in the printer driver.<br />
To select finishing features in the Macintosh printer driver:<br />
1. In the printer driver, click the Copies & Pages menu, then select <strong>Xerox</strong> Features.<br />
2. In the Paper/Output dialog box, click the arrow to the right of the Finishing section, then select<br />
the desired finishing options.<br />
67
Printing<br />
Printing on Both Sides of the Paper<br />
• Media Types for Automatic 2-Sided Printing on page 68<br />
• Printing a 2-Sided Document on page 69<br />
• 2-Sided Page Layout Options on page 69<br />
Media Types for Automatic 2-Sided Printing<br />
The printer can automatically print a 2-sided document on supported paper. Before printing a 2-sided<br />
document, verify that the paper type and weight are supported.<br />
Paper weights in the range of 60 g/m²to 169 g/m² can be used for automatic 2-sided printing.<br />
The following paper types can be used for automatic 2-sided printing:<br />
• Plain<br />
• Letterhead<br />
• Heavyweight<br />
• Recycled<br />
• Bond<br />
• Pre-printed<br />
• Gloss<br />
• Punched<br />
The following paper and media cannot be used for 2-sided printing:<br />
• Reload (paper previously laser printed or copied)<br />
• Envelopes<br />
• Labels<br />
• Any die-cut specialty media, such as business cards<br />
• Extra Heavyweight<br />
• Heavyweight Gloss<br />
For details, see Recommended Media on page 51.<br />
68<br />
<strong>WorkCentre</strong> <strong>7120</strong>/<strong>7125</strong> <strong>Multifunction</strong> <strong>Printer</strong><br />
<strong>User</strong> <strong>Guide</strong>
Printing a 2-Sided Document<br />
Options for automatic 2-Sided Printing are specified in the printer driver. Application settings for<br />
portrait or landscape orientation are used.<br />
Windows<br />
1. Click the Paper/Output tab.<br />
2. Under 2-Sided Printing, click 2-Sided Print or 2-Sided Print, Flip on Short Edge.<br />
Macintosh<br />
1. In the Print dialog box, click <strong>Xerox</strong> Features.<br />
2. Under 2-Sided Printing, click 2-Sided Print or 2-Sided Print, Flip on Short Edge.<br />
2-Sided Page Layout Options<br />
You can specify the page layout for 2-Sided Printing, which determines how the printed pages turn.<br />
These settings override the application page orientation settings.<br />
Portrait<br />
2-Sided Print<br />
Windows<br />
1. In the printer driver, click the Layout/Watermark tab.<br />
2. Under Page Layout Options, click Portrait, Landscape, or Rotated Landscape.<br />
3. Under Page Layout Options, click 2-Sided Print, or 2-Sided Print, Flip on Short Edge.<br />
4. Click OK.<br />
Macintosh<br />
Portrait Landscape<br />
Portrait<br />
2-Sided Print, Flip on<br />
Short Edge<br />
Landscape<br />
2-Sided Print<br />
1. In the application, click Portrait, Landscape or Rotated Landscape page orientation.<br />
2. In the Print dialog box, select <strong>Xerox</strong> Features from the Copies & Pages menu.<br />
3. Click 2-Sided Print, or 2-Sided Print, Flip on Short Edge.<br />
Landscape<br />
2-Sided Print, Flip on<br />
Short Edge<br />
<strong>WorkCentre</strong> <strong>7120</strong>/<strong>7125</strong> <strong>Multifunction</strong> <strong>Printer</strong><br />
<strong>User</strong> <strong>Guide</strong><br />
Printing<br />
69
Printing<br />
Selecting Paper<br />
When you send your print job to the printer, you can choose to let the printer automatically select<br />
which paper to use based on the document size, paper type and paper color you select, or you can<br />
select a specific tray loaded with the desired paper.<br />
Windows<br />
1. In the printer driver, click the Paper/Output tab.<br />
2. To specify a paper size, click the arrow next to the Paper field, then select Other Size. In the Paper<br />
Size window, select the size from the Output Paper Size menu, then click OK.<br />
3. To change the paper color, click the arrow next to the Paper field. From the Other Color menu,<br />
select the paper color.<br />
4. To change the paper type, click the arrow next to the Paper field. From the Other Type menu,<br />
select the paper type.<br />
5. To specify a tray, click the arrow next to the Paper field. From the Select by Tray menu, select the tray.<br />
Macintosh<br />
1. In the Print dialog box, click Copies & Pages menu, then click Paper Feed.<br />
2. From the All pages from drop-down list, click Auto Select to select the paper based on your<br />
application settings, or select a specific paper tray.<br />
70<br />
<strong>WorkCentre</strong> <strong>7120</strong>/<strong>7125</strong> <strong>Multifunction</strong> <strong>Printer</strong><br />
<strong>User</strong> <strong>Guide</strong>
<strong>WorkCentre</strong> <strong>7120</strong>/<strong>7125</strong> <strong>Multifunction</strong> <strong>Printer</strong><br />
<strong>User</strong> <strong>Guide</strong><br />
Printing<br />
Printing Multiple Pages to a Single Sheet (N-Up)<br />
When printing a multiple-page document, you can print more than one page on a single sheet of<br />
paper. Print one, two, four, six, nine, or 16 pages per side.<br />
Windows<br />
1. In the printer driver, click the Layout/Watermark tab.<br />
2. Click Pages Per Sheet (N-Up).<br />
3. Click the button for the number of pages you want to appear on each side of the sheet.<br />
4. Click OK.<br />
Macintosh<br />
1 2<br />
1. In the Print dialog box, click Copies & Pages menu, then click Layout.<br />
2. Select the number of Pages per Sheet and Layout Direction.<br />
3<br />
4<br />
71
Printing<br />
Printing Booklets<br />
With 2-sided printing, you can print a document in the form of a small booklet. Create booklets for any<br />
paper size that is supported for 2-sided printing. The driver automatically reduces each page image<br />
and prints four page images per sheet of paper (two on each side). The pages are printed in the correct<br />
order so that you can fold and staple the pages to create the booklet.<br />
72<br />
Note: Booklets can be created using A4/210 mm x 297 mm (8.5 x 11 in.) paper, and<br />
A3/297 mm x 420 mm (11 x 17 in.) paper.<br />
When you print booklets using the Windows PostScript or Macintosh driver, you can specify the gutter<br />
and creep.<br />
• Gutter: Specifies the horizontal distance (in points) between the page images. A point is 0.35 mm<br />
(1/72 in.).<br />
• Creep: Specifies how much the page images are shifted outward (in 10ths of a point). This<br />
compensates for the thickness of the folded paper, which otherwise would cause the page images<br />
to shift slightly outward when folded. You can select a value from zero to 1 point.<br />
Gutter Creep<br />
<strong>WorkCentre</strong> <strong>7120</strong>/<strong>7125</strong> <strong>Multifunction</strong> <strong>Printer</strong><br />
<strong>User</strong> <strong>Guide</strong>
Selecting Booklet Printing Using a Booklet Maker<br />
Windows<br />
<strong>WorkCentre</strong> <strong>7120</strong>/<strong>7125</strong> <strong>Multifunction</strong> <strong>Printer</strong><br />
<strong>User</strong> <strong>Guide</strong><br />
Printing<br />
1. In the printer driver, click the Paper/Output tab, click the arrow to the right of Finishing, then click<br />
Booklet Creation.<br />
2. In the Booklet Creation window, under Booklet Finishing, do one of the following:<br />
• Click None: no folding or stapling.<br />
• Click Booklet Crease: bi-fold, 5 sheets maximum.<br />
• Click Booklet Crease and Staple: bi-fold and saddle staple, 15 sheets maximum.<br />
3. Under Booklet Layout, do one of the following:<br />
• If your document is preformatted as a booklet, click None.<br />
• To order the pages into a booklet, click Booklet Layout. If desired, click Print Page Borders.<br />
4. The paper size is automatically selected. To manually specify the paper size, under Booklet Paper<br />
Size, clear the Automatically Select check box, click the down arrow, then click the paper size.<br />
5. In the PostScript driver, gutter and creep values are set automatically. To manually specify the<br />
values, click the Gutter and Creep arrows.<br />
6. Click OK.<br />
Macintosh<br />
1. In the Print dialog box, click Copies & Pages, click <strong>Xerox</strong> Features, then click the Paper/Output.<br />
2. Click the arrow to the right of Finishing, then select Booklet Creation.<br />
3. In the Booklet Creation dialog box, under Booklet Finishing, do one of the following:<br />
• Click None: no folding or stapling.<br />
• Click Booklet Crease: bi-fold, 5 sheets maximum.<br />
• Click Booklet Crease and Staple: bi-fold and saddle staple, 15 sheets maximum.<br />
4. Under Booklet Layout, do one of the following:<br />
• If your document is preformatted as a booklet, click None.<br />
• To order the pages into a booklet, click Booklet Layout. If desired, click Print Page Borders.<br />
5. The paper size is automatically selected. To manually specify the paper size, under Booklet Paper<br />
Size, click the down arrow, then select the paper size.<br />
6. The gutter and creep values are set automatically. To manually specify the values, click the Gutter<br />
and Creep arrows.<br />
7. Click OK.<br />
73
Printing<br />
Selecting Booklet Printing Without Using a Booklet Maker<br />
Windows<br />
1. In the printer driver, click the Layout/Watermark tab.<br />
2. Click the Booklet Layout option, then click Booklet Options.<br />
3. The paper size is automatically selected. To manually specify the paper size, under Booklet Paper<br />
Size, clear the check box, click the down arrow, then click the desired paper size.<br />
4. To turn off Booklet Margins, click the down arrow, then click None.<br />
5. In the PostScript driver, the gutter and creep values are set automatically. To manually specify the<br />
values, click the Gutter and Creep arrows to specify the values.<br />
6. Click OK.<br />
7. If desired, select Print Page Borders from the drop-down list.<br />
8. Click OK.<br />
Macintosh<br />
1. In the Print dialog box, click Copies & Pages, click <strong>Xerox</strong> Features, then click Layout/Watermark.<br />
2. Under Booklet Layout, click Enabled.<br />
3. Click Booklet Options.<br />
4. The paper size is automatically selected. To manually specify the paper size, under Booklet Paper<br />
Size, clear the Automatically Select check box, click the down arrow, then select the paper size.<br />
5. The gutter and creep values are set automatically. To manually specify the values, click the Gutter<br />
and Creep arrows.<br />
6. Click OK.<br />
7. If desired, click Print Page Borders.<br />
8. Click OK.<br />
74<br />
<strong>WorkCentre</strong> <strong>7120</strong>/<strong>7125</strong> <strong>Multifunction</strong> <strong>Printer</strong><br />
<strong>User</strong> <strong>Guide</strong>
Using Color Corrections<br />
This section includes:<br />
• Color Corrections for Windows on page 75<br />
• Color Corrections for Macintosh on page 76<br />
• Selecting Color Correction on page 76<br />
<strong>WorkCentre</strong> <strong>7120</strong>/<strong>7125</strong> <strong>Multifunction</strong> <strong>Printer</strong><br />
<strong>User</strong> <strong>Guide</strong><br />
Printing<br />
The Color Correction options provide simulations of different color devices. Automatic is the<br />
recommended correction for general image processing. See the following tables to determine which<br />
option to use.<br />
Color Corrections for Windows<br />
PCL 6 <strong>Printer</strong> Driver<br />
Color Correction Description<br />
Automatic Color<br />
(Recommended)<br />
PostScript <strong>Printer</strong> Driver<br />
Applies the best color correction to text, graphics, and images.<br />
Black and White Converts all colors to black and white or shades of gray.<br />
Color Adjustments Select from Automatic, sRGB, Black & White, or None.<br />
Color Correction Description<br />
Automatic Color<br />
(Recommended)<br />
Applies the best color correction to text, graphics, and images.<br />
Black and White Converts all colors to black and white or shades of gray.<br />
Color Adjustments Select from Lighten/Darken, Automatic, sRGB, Black & White, None, CMYK<br />
Commercial, SNAP, SWOP, EuroScale, and Japan Color.<br />
75
Printing<br />
Color Corrections for Macintosh<br />
76<br />
Color Correction Description<br />
Automatic<br />
(Recommended)<br />
Selecting Color Correction<br />
Windows<br />
1. In the printer driver, click the Color Options tab.<br />
2. Click the desired color correction: Automatic, or Black and White.<br />
3. To select additional color adjustments:<br />
• Click the Color Adjustments button then click the Color Adjustments bar.<br />
• In the Color Adjustments window, click the arrow, then click Automatic, sRGB, Black and<br />
White or None.<br />
• In the PostScript printer driver, move Lighten/Darken slider to the right to lighten colors or to<br />
the left to darken colors in your print job.<br />
• In the PostScript printer driver, select the desired printing press simulation by clicking the<br />
CMYK Color arrow, then click Commercial, SNAP, SWOP, EuroScale, or Japan Color.<br />
Macintosh<br />
Applies the best color correction to text, graphics, and images.<br />
Black and White Converts all colors to black and white or shades of gray.<br />
CMYK Source Control Select from Commercial, SNAP, SWOP, EuroScale, and Japan Color.<br />
1. In the Print dialog box, from the Copies & Pages menu, click <strong>Xerox</strong> Features, click Image Options,<br />
then click Output Color Correction.<br />
2. Select the desired color correction: Automatic, sRGB, Black & White or Press Match.<br />
3. To select a printing press simulation, click the CMYK Source Color arrow, then click Commercial,<br />
SNAP, SWOP, EuroScale or Japan Color.<br />
<strong>WorkCentre</strong> <strong>7120</strong>/<strong>7125</strong> <strong>Multifunction</strong> <strong>Printer</strong><br />
<strong>User</strong> <strong>Guide</strong>
Printing in Black and White<br />
Windows<br />
1. In the printer driver, click Properties, then click the Color Options tab.<br />
2. Under Color Corrections, click Black and White, then click OK.<br />
Macintosh<br />
1. In the Print dialog box, click Copies & Pages, click <strong>Xerox</strong> Features, then click Color Options.<br />
2. Under Color Corrections, click Black and White.<br />
<strong>WorkCentre</strong> <strong>7120</strong>/<strong>7125</strong> <strong>Multifunction</strong> <strong>Printer</strong><br />
<strong>User</strong> <strong>Guide</strong><br />
Printing<br />
77
Printing<br />
Printing Cover Pages<br />
A cover page is the first or last page of a document. You can choose a different paper source for the<br />
cover page than for the body of a document. For instance, use your company letterhead for the first<br />
page of a document, or use heavyweight paper for the first and last pages of a report.<br />
• Use the applicable paper tray as the source for printing cover pages.<br />
• Verify that the cover page is the same size as the paper used for the rest of your document.<br />
If you specify a different size in the printer driver than the tray you select as a cover page source,<br />
your cover prints on the same paper as the rest of your document.<br />
You have the following options for cover pages:<br />
• No Covers: Prints the first and last pages of your document from the same tray as the rest of<br />
your document.<br />
• Front Only: Prints the first page on paper from the specified tray.<br />
• Back Only: Prints the back page on paper from the specified tray.<br />
• Front and Back: Same: Front and back cover pages print from the same tray.<br />
• Front and Back: Different: Front and back cover pages print from different trays.<br />
78<br />
Cover Page Print Option Pages Printed on Cover<br />
Front 1-sided printing Page 1<br />
2-sided printing Pages 1 and 2<br />
Back 1-sided printing Last page<br />
2-sided printing (odd-numbered pages) Last page<br />
2-sided printing (even-numbered pages) Last two pages<br />
For the back of your front cover to remain blank when using 2-sided printing, page two of your<br />
document must be blank. For the back cover of your document to remain blank, see the following table<br />
for inserting blank pages.<br />
Print Option Last Page of Text Blank Pages<br />
1-sided printing Add one blank page at the end of the document.<br />
2-sided printing Odd-numbered Add two blank pages at the end of the document.<br />
Even-numbered Add one blank page at the end of the document.<br />
<strong>WorkCentre</strong> <strong>7120</strong>/<strong>7125</strong> <strong>Multifunction</strong> <strong>Printer</strong><br />
<strong>User</strong> <strong>Guide</strong>
Windows<br />
1. In the printer driver, click the Special Pages tab.<br />
2. Click Add Covers.<br />
3. In the Add Covers window, click the desired options, then click OK.<br />
Macintosh<br />
1. In the Print dialog box, click Copies & Pages, click <strong>Xerox</strong> Features, then click Add Covers.<br />
2. Click Before document or After document.<br />
3. Click the desired options, then click OK.<br />
<strong>WorkCentre</strong> <strong>7120</strong>/<strong>7125</strong> <strong>Multifunction</strong> <strong>Printer</strong><br />
<strong>User</strong> <strong>Guide</strong><br />
Printing<br />
79
Printing<br />
Printing Insert Pages<br />
An insert is a divider page or slipsheet that can be inserted after a print job, between copies of a print<br />
job, or between individual pages of a print job. You must specify the tray to use as the source for the<br />
insert pages.<br />
• Insert Options: place insert After Page(s) or Before Page(s).<br />
• Insert Quantity: Specifies the number of pages to be inserted at each location.<br />
• Page(s): Specifies the location, either a page or a range of pages, to place the inserts. Separate<br />
individual pages or page ranges with commas. Specify page ranges with a dash. For example, to<br />
add inserts after pages 1, 6, 9, 10, and 11, type: 1, 6, 9–11.<br />
• Paper: The Paper field displays the Use Job Settings default size, color, and type of paper to use<br />
for the insert pages. To change the paper to use for the insert pages, click the down arrow to the<br />
right of the Paper field, then select from the following menu items:<br />
• Other Size: Click this menu item, then click the paper size desired for the insert pages.<br />
• Other Color: Click this menu item, then click a color for the paper to use for the insert pages.<br />
• Other Type: Click this menu item, then click the type of paper to use for the insert pages.<br />
• Job Settings: Displays the attributes of the paper for the majority of the document.<br />
Windows<br />
1. In the printer driver, click the Special Pages tab, then click Add Inserts.<br />
2. In the Add Inserts window, select the desired options, then click OK.<br />
Macintosh<br />
1. In the Print dialog box, click Copies & Pages, click <strong>Xerox</strong> Features, then click Special Pages.<br />
2. Click Add Inserts.<br />
3. Select the desired options, then click OK.<br />
80<br />
<strong>WorkCentre</strong> <strong>7120</strong>/<strong>7125</strong> <strong>Multifunction</strong> <strong>Printer</strong><br />
<strong>User</strong> <strong>Guide</strong>
Printing Exception Pages<br />
<strong>WorkCentre</strong> <strong>7120</strong>/<strong>7125</strong> <strong>Multifunction</strong> <strong>Printer</strong><br />
<strong>User</strong> <strong>Guide</strong><br />
Printing<br />
You can specify the characteristics of any pages in the print job that differ from the settings used for<br />
the majority of the print job.<br />
For example, your print job contains 30 pages that print on standard-sized paper, and two pages that<br />
must print on a different size of paper. In the Add Exceptions window, set the characteristics of these<br />
two exception pages and select the alternate paper size to use.<br />
• Page(s): Specify the location (page or range of pages) to place the inserts. Separate individual<br />
pages or page ranges with commas. Specify ranges with a dash. For example, to add inserts after<br />
pages 1, 6, 9, 10, and 11, type: 1, 6, 9-11.<br />
• Paper: The Paper field displays the Use Job Settings default size, color, and type of paper to use<br />
for the exception pages. To change the paper to use for the exception pages, click the down arrow<br />
to the right of the Paper field, then select from the following menu items:<br />
• Other Size: Click this menu item, then click the paper size desired for the exception pages.<br />
• Other Color: Click this menu item, then click a color for the paper to use for the exception pages.<br />
• Other Type: Click this menu item, then click the type of paper or media to use for the<br />
exception pages.<br />
• 2-Sided Printing: Click the down arrow, then click the desired 2-sided printing option:<br />
• 1-Sided Print: Prints the exception pages on one side only.<br />
• 2-Sided Print: Prints the exception pages on both sides of the sheet of paper with the images<br />
printed so the job can be bound on the long edge of the sheet.<br />
• 2-Sided Print, Flip on Short Edge: Prints the exception pages on both sides of the sheet of<br />
paper with the images printed so the job can be bound on the short edge of the sheet.<br />
• Job Settings: Displays the attributes of the paper for the majority of the document.<br />
Windows<br />
1. In the printer driver, click the Special Pages tab.<br />
2. Click Add Exceptions.<br />
3. Click the desired settings, then click OK.<br />
Macintosh<br />
1. In the Print dialog box, click Copies & Pages, then click <strong>Xerox</strong> Features.<br />
2. Click Special Pages, then click Add Exceptions.<br />
3. Click the desired settings, then click OK.<br />
81
Printing<br />
Scaling<br />
To reduce or enlarge your printed page images select a scaling value between 25 and 400 percent. The<br />
default value is 100 percent.<br />
Windows<br />
1. In the printer driver, click the Paper/Output tab.<br />
2. Click the down arrow to the right of the Paper field, then click Other Size.<br />
3. In the Paper Size window, click the arrow to the right of Scale Options, then click one of the<br />
following options:<br />
• Automatically Scale to scale from one standard paper size to another.<br />
• Manually Scale to scale by a percentage entered in the percentage field.<br />
Macintosh<br />
1. In the application, click File, then click Page Setup.<br />
2. In the Scale field, type the desired scale percentage value.<br />
3. Click OK.<br />
82<br />
<strong>WorkCentre</strong> <strong>7120</strong>/<strong>7125</strong> <strong>Multifunction</strong> <strong>Printer</strong><br />
<strong>User</strong> <strong>Guide</strong>
Printing Watermarks<br />
<strong>WorkCentre</strong> <strong>7120</strong>/<strong>7125</strong> <strong>Multifunction</strong> <strong>Printer</strong><br />
<strong>User</strong> <strong>Guide</strong><br />
Printing<br />
A watermark is additional text that can be printed across one or more pages. For example, terms like Draft<br />
and Confidential, which you might stamp on a page before distribution, can be inserted as a watermark.<br />
Using the watermark feature, you can do any of the following:<br />
• Create a watermark.<br />
• Edit an existing watermark’s text, color, density, location, and angle.<br />
• Place a watermark on either the first page or every page in a document.<br />
• Print a watermark in the foreground or background or blend with the print job.<br />
• Use a picture for the watermark.<br />
• Use a time stamp for the watermark.<br />
Note: Not all applications support watermark printing.<br />
Windows<br />
1. In the printer driver, click the Layout/Watermark tab.<br />
• Click the Watermark down arrow, then click the desired existing watermark.<br />
• To modify an existing watermark, click the Watermark down arrow, click Edit, make the<br />
desired settings in the Watermark Editor window, then click OK.<br />
• To create a new watermark, click the Watermark down arrow, click New, make the desired<br />
settings in the Watermark Editor window, then click OK.<br />
2. To select watermark printing options, click the Watermark down arrow, click Options, then click<br />
the desired printing options.<br />
83
Printing<br />
Macintosh<br />
1. In the Print dialog box, click Copies & Pages, then click <strong>Xerox</strong> Features.<br />
• Click the Watermark down arrow, then click the desired existing watermark.<br />
• To modify a watermark, click the Watermark down arrow, click Edit, make the desired<br />
settings in the Watermark Editor dialog box, then click OK.<br />
• To create a new watermark, click the Watermark down arrow, click New, make the desired<br />
settings in the Watermark Editor dialog box, then click OK.<br />
2. To select watermark printing options, click the Watermark down arrow, click Options, then click<br />
the desired printing options.<br />
84<br />
<strong>WorkCentre</strong> <strong>7120</strong>/<strong>7125</strong> <strong>Multifunction</strong> <strong>Printer</strong><br />
<strong>User</strong> <strong>Guide</strong>
Printing Mirror Images for Windows<br />
<strong>WorkCentre</strong> <strong>7120</strong>/<strong>7125</strong> <strong>Multifunction</strong> <strong>Printer</strong><br />
<strong>User</strong> <strong>Guide</strong><br />
Printing<br />
If the PostScript option is installed, you can print pages as a mirror image. Images mirror left to right<br />
when printed.<br />
1. In the printer driver, click the Advanced tab.<br />
2. Click the Image Options plus sign (+), click Mirrored Output, then click Yes.<br />
85
Printing<br />
Creating and Saving Custom Sizes<br />
You can print custom-size paper from Trays 1, 2, 3, 4, and 5 (Bypass Tray). Custom size paper settings<br />
are saved in the printer driver, and are available for you to select in all your applications.<br />
86<br />
Note: For details, see Loading Media on page 53.<br />
Windows<br />
1. Click the Paper/Output tab.<br />
2. Click the arrow to the right of the Paper field, then click Other Size.<br />
3. In the Paper Size window, click the arrow to the right of Output Paper Size, then click New.<br />
4. In the New Custom Size window, type a name in the Name field, then type dimensions in the<br />
Height and Width fields.<br />
5. Click OK twice.<br />
Macintosh<br />
1. In the application, click File, then click Page Setup.<br />
2. In the Paper Size drop-down list, click Manage Custom Sizes.<br />
3. Click the + button to add a new custom page size.<br />
4. Double-click the name Untitled, then type a name for the custom size.<br />
5. Type dimensions in the Height and Width fields.<br />
6. Click <strong>Printer</strong> Margins, then do one of the following:<br />
• Select <strong>User</strong> Defined, then type custom margin values.<br />
• To use default margins, select your printer from the list.<br />
7. Click OK.<br />
<strong>WorkCentre</strong> <strong>7120</strong>/<strong>7125</strong> <strong>Multifunction</strong> <strong>Printer</strong><br />
<strong>User</strong> <strong>Guide</strong>
Job Completion Notification for Windows<br />
<strong>WorkCentre</strong> <strong>7120</strong>/<strong>7125</strong> <strong>Multifunction</strong> <strong>Printer</strong><br />
<strong>User</strong> <strong>Guide</strong><br />
Printing<br />
You can choose to be notified when your job is finished printing. A message appears in the lower right corner<br />
of your computer screen with the name of the job and the name of the printer where it was printed.<br />
Note: This feature is only available when your printer is connected to your Windows computer over<br />
a network.<br />
1. In the printer driver, click More Status at the bottom of any tab.<br />
2. In the Status window, click Notification, then click the desired option.<br />
3. Click the X in the upper right corner of the window.<br />
87
Printing<br />
Printing from USB Flash Drive<br />
PDF, TIFF, and XPS files can be printed directly from a USB Flash Drive.<br />
88<br />
Notes:<br />
• Printing from the USB option must be enabled by the System Administrator.<br />
• The USB port and the optional Media Card Reader cannot be used at the same time. If<br />
present, remove the cable for the Media Card Reader before using the USB port on the<br />
control panel.<br />
To print from a USB Flash Drive:<br />
1. Insert a USB Flash Drive into the USB port on the control panel.<br />
2. Press the Services Home button.<br />
3. Touch Media Print-Text.<br />
4. To print one file, touch Select from List.<br />
5. To select multiple files, do one of the following:<br />
• To print all files, touch Select All.<br />
• To select a range of files to print, touch Select from Range, then enter the file numbers using<br />
the plus or minus (+/–) buttons.<br />
6. Touch the desired folder. To move down one directory level, touch Next. To move up one directory<br />
level, touch Previous.<br />
7. Touch the desired file.<br />
8. If desired, make selections from the Output Color, Paper Supply, 2-Sided Printing and Pages per<br />
Side drop-down lists.<br />
Note: The default color setting is Black and White. To select color output, touch Output Color,<br />
then touch Color.<br />
9. To print the file, press the green Start button.<br />
<strong>WorkCentre</strong> <strong>7120</strong>/<strong>7125</strong> <strong>Multifunction</strong> <strong>Printer</strong><br />
<strong>User</strong> <strong>Guide</strong>
Printing from Media Card Reader<br />
JPEG, TIFF, DCF 1.0, and TIFF files can be printed directly from a Compact Flash card inserted in the<br />
optional Media Card Reader.<br />
<strong>WorkCentre</strong> <strong>7120</strong>/<strong>7125</strong> <strong>Multifunction</strong> <strong>Printer</strong><br />
<strong>User</strong> <strong>Guide</strong><br />
Printing<br />
Notes:<br />
• The print from USB option must be enabled by the System Administrator.<br />
• The Media Card Reader and the USB port on the control panel cannot be used at the<br />
same time. If present, remove the USB flash drive from the port before connecting the<br />
cable for the Media Card Reader.<br />
1. Insert a Compact Flash card into the Media Card Reader.<br />
2. Press the Services Home button.<br />
3. Touch Media Print-Photos.<br />
4. Touch Select from List to print one file.<br />
5. To select multiple files, do one of the following:<br />
• Touch Select All to print all files.<br />
• To select a range of files to print, touch Select from Range, then enter the file numbers using<br />
the plus or minus (+/–) buttons.<br />
6. Touch the desired file.<br />
7. To print the file, press the green Start button.<br />
89
Printing<br />
Printing Special Job Types<br />
You can assign the following special job types from either the Windows or Macintosh printer drivers.<br />
• Printing and Deleting Secure Print Jobs on page 90<br />
• Printing a Sample Set on page 91<br />
• Delayed Printing on page 91<br />
• Charge Print on page 92<br />
• Saving a Print Job to the <strong>Printer</strong> on page 92<br />
• Sending a Print Job to a Fax Machine on page 93<br />
Printing and Deleting Secure Print Jobs<br />
The Secure Print job type allows you to print a job after you select your user identification and enter<br />
your passcode at the printer control panel.<br />
Windows<br />
1. In the printer driver, click Paper/Output, click the Job Type menu, then click Secure Print.<br />
2. In the Secure Print window, type and confirm a 1- to 12-digit passcode.<br />
3. Click OK.<br />
Macintosh<br />
1. In the print dialog box, click Copies & Pages, then click <strong>Xerox</strong> Features.<br />
2. Click the Job Type menu, then click Secure Print.<br />
3. Type and confirm a 1- to 12-digit passcode.<br />
4. Click OK.<br />
Printing or Deleting Secure Print Jobs at the <strong>Printer</strong><br />
90<br />
CAUTION: Once deleted, a job cannot be restored.<br />
1. On the control panel, press the Job Status button.<br />
2. Touch the Secure Print Jobs & More tab, then touch Secure Print.<br />
3. Touch your user identification in the list, then touch Job List.<br />
4. Enter the passcode using the alphanumeric keypad, then touch Confirm.<br />
5. Touch the document in the job list. If desired, enter the print quantity using the alphanumeric keypad.<br />
6. Touch Print.<br />
7. To delete the job, touch Delete.<br />
<strong>WorkCentre</strong> <strong>7120</strong>/<strong>7125</strong> <strong>Multifunction</strong> <strong>Printer</strong><br />
<strong>User</strong> <strong>Guide</strong>
Printing a Sample Set<br />
<strong>WorkCentre</strong> <strong>7120</strong>/<strong>7125</strong> <strong>Multifunction</strong> <strong>Printer</strong><br />
<strong>User</strong> <strong>Guide</strong><br />
Printing<br />
The Sample Set job type allows you to send a multiple-copy job, print a sample copy of the job, and<br />
hold the remaining copies of the job at the printer. After you review the sample copy, you can release<br />
or delete the remaining copies.<br />
Windows<br />
1. In the Print window, under Number of Copies, type the number of copies, or click the arrows.<br />
2. Click Properties, click Paper/Output, click the Job Type menu, then click Sample Set.<br />
3. Click OK.<br />
Macintosh<br />
1. In the print dialog box, click Copies & Pages, then <strong>Xerox</strong> Features.<br />
2. Click the Job Type menu, then click Sample Set.<br />
Printing or Deleting the Job at the <strong>Printer</strong><br />
CAUTION: Once deleted, a job cannot be restored.<br />
1. On the control panel, press the Job Status button.<br />
2. Touch the Secure Print Jobs & More tab, then touch Sample Set.<br />
3. Touch your user identification in the list, then touch Job List.<br />
4. Touch the document in the job list. If desired, enter the print quantity using the alphanumeric keypad.<br />
5. Touch Release.<br />
6. To delete the job, touch Delete.<br />
Delayed Printing<br />
A print job can be delayed for up to 24 hours from the original job submission time. Enter the time at<br />
which you would like the job to print. Use either a 12-hour format or a 24-hour format.<br />
Windows<br />
1. In the printer driver, click Paper/Output, click the Job Type menu, then click Delay Print.<br />
2. Under Time to Print, type the desired print time, or click the arrows, then click OK.<br />
3. Click OK.<br />
Macintosh<br />
1. In the print dialog box, click Copies & Pages, then <strong>Xerox</strong> Features.<br />
2. Click the Job Type menu, then click Delay Print.<br />
3. Click the arrows to set the desired print time, then click OK.<br />
91
Printing<br />
Charge Print<br />
When this feature is enabled, only the print jobs of authenticated users can be printed.<br />
This feature must be configured by the System Administrator. For details, see the<br />
System Administrator <strong>Guide</strong> at www.xerox.com/office/WC<strong>7120</strong>/<strong>7125</strong>docs.<br />
To print using this feature:<br />
1. Print the job from your application.<br />
2. On the printer control panel, press the Log In/Out button.<br />
3. Using the touch screen keyboard, enter the user identification, then touch Enter.<br />
4. If required, enter the passcode, then touch Enter.<br />
5. Press the Job Status button, touch the Secure Print Jobs & More tab, then touch Charge Print.<br />
6. Touch the desired user, then touch Job List.<br />
7. If required, enter the passcode, then touch Confirm.<br />
8. Touch the job to be printed or deleted.<br />
9. If desired, specify the number of print sets using the alphanumeric keypad, then touch Print.<br />
After printing, the job is deleted.<br />
10. To delete the job without printing, touch Delete.<br />
92<br />
CAUTION: Once deleted, a job cannot be restored.<br />
11. When finished, press the Log In/Out button, then touch Logout.<br />
Saving a Print Job to the <strong>Printer</strong><br />
The Store File in Folder job type stores a print job in a folder in the printer. You can print the job from<br />
the printer control panel. The job is not automatically deleted after printing, but it can be manually<br />
deleted at the printer control panel.<br />
Windows<br />
1. In the printer driver, click Paper/Output, click the Job Type menu, then click Store File in Folder.<br />
2. In the Store File in Folder window, do one of the following:<br />
• Click the arrow to the right of Job Name, then click Use Document Name.<br />
• Delete the text in the Job Name field, then type a job name.<br />
3. To select a Folder Number, do one of the following:<br />
• Click the arrow to the right of Folder Number, then click a folder number in the list.<br />
• Delete the text in the Folder Number field, then type a folder number.<br />
4. To create a Secure Saved Job:<br />
a. Select the Secure Saved Job check box.<br />
b. Type and confirm a 1- to 20-digit passcode.<br />
5. Click OK three times.<br />
The job is stored in the printer.<br />
<strong>WorkCentre</strong> <strong>7120</strong>/<strong>7125</strong> <strong>Multifunction</strong> <strong>Printer</strong><br />
<strong>User</strong> <strong>Guide</strong>
Macintosh<br />
1. In the print dialog box, click Copies & Pages, then <strong>Xerox</strong> Features.<br />
2. Click the Job Type menu, click Store File in Folder.<br />
3. In the Store File in Folder dialog box, type a job name.<br />
4. Select a folder on the printer.<br />
5. If desired, enter the Secure Job data.<br />
6. Click OK.<br />
7. Click Print.<br />
The job is stored in the printer<br />
Printing or Deleting a Job at the <strong>Printer</strong><br />
1. On the control panel, press the Job Status button.<br />
2. Touch the Secure Print Jobs & More tab, then touch Public Folder.<br />
3. Touch the job to be printed or deleted.<br />
4. If required, enter the passcode, then touch Confirm.<br />
5. If desired, specify the number of print sets using the alphanumeric keypad, then touch Print.<br />
6. To delete the job without printing, touch Delete.<br />
Sending a Print Job to a Fax Machine<br />
See Faxing from Your Computer on page 149.<br />
<strong>WorkCentre</strong> <strong>7120</strong>/<strong>7125</strong> <strong>Multifunction</strong> <strong>Printer</strong><br />
<strong>User</strong> <strong>Guide</strong><br />
Printing<br />
93
Printing<br />
94<br />
<strong>WorkCentre</strong> <strong>7120</strong>/<strong>7125</strong> <strong>Multifunction</strong> <strong>Printer</strong><br />
<strong>User</strong> <strong>Guide</strong>
Copying<br />
This chapter includes:<br />
• Basic Copying on page 96<br />
• Adjusting Copy Options on page 98<br />
See also:<br />
System Administrator <strong>Guide</strong> at www.xerox.com/office/WC<strong>7120</strong>/<strong>7125</strong>docs for details on<br />
managing copy functions.<br />
<strong>WorkCentre</strong> <strong>7120</strong>/<strong>7125</strong> <strong>Multifunction</strong> <strong>Printer</strong><br />
<strong>User</strong> <strong>Guide</strong><br />
5<br />
95
Copying<br />
Basic Copying<br />
To make copies:<br />
1. On the control panel, press the yellow Clear All button to remove previous copy settings.<br />
2. Load the original document. Use the document glass for single copies or paper that cannot be fed<br />
using the document feeder. Use the document feeder for multiple or single pages.<br />
Document Glass<br />
.<br />
Document Feeder<br />
96<br />
wc<strong>7120</strong>-020<br />
wc<strong>7120</strong>-018<br />
wc<strong>7120</strong>-019<br />
3. On the control panel touch screen, touch Copy.<br />
<strong>WorkCentre</strong> <strong>7120</strong>/<strong>7125</strong> <strong>Multifunction</strong> <strong>Printer</strong><br />
<strong>User</strong> <strong>Guide</strong><br />
• Lift the document feeder cover and place the<br />
original facedown, toward the back-left<br />
corner of the document glass.<br />
• The original must be aligned to the matching<br />
paper size printed on the edge of the glass.<br />
• The document glass accepts paper sizes from<br />
15 x 15 mm (0.59 x 0.59 in.) to<br />
A3/297 x 432 mm (11.6 x 17 in.).<br />
• The document glass automatically detects<br />
standard paper sizes.<br />
• Insert originals faceup, with page 1 on top.<br />
• The confirmation indicator illuminates when<br />
the originals are correctly loaded.<br />
• Adjust the paper guides so they fit against<br />
the originals.<br />
• The document feeder accepts paper weights<br />
from 38 g/m² to 128 g/m² for 1-sided<br />
copying, and 60 g/m² to 128 g/m² for<br />
2-sided copying.<br />
• The document feeder accepts paper sizes<br />
from 125 x 85 mm (4.9 x 3.3 in.) to<br />
A3/297 x 432 mm (11.6 x 17 in.).<br />
• The maximum feeder capacity is<br />
approximately 110 sheets of 80 g/m² paper.<br />
• The document feeder automatically detects<br />
standard paper sizes.
<strong>WorkCentre</strong> <strong>7120</strong>/<strong>7125</strong> <strong>Multifunction</strong> <strong>Printer</strong><br />
<strong>User</strong> <strong>Guide</strong><br />
Copying<br />
4. Use the alphanumeric keypad on the control panel to enter the number of copies. The number of<br />
copies appears in the upper-right corner of the touch screen.<br />
• To correct the number of copies entered using the alphanumeric keypad, press the C button,<br />
then reenter the number.<br />
• To stop a copy job, press the red Stop button on the control panel. On the touch screen, touch<br />
Resume to continue the job, or Cancel to cancel the job completely.<br />
5. If desired, change the copy settings. For details, see Adjusting Copy Options on page 98.<br />
6. Press the green Start button on the control panel.<br />
97
Copying<br />
Adjusting Copy Options<br />
This section includes:<br />
• Basic Settings on page 98<br />
• Image Quality Adjustments on page 102<br />
• Layout Adjustments on page 104<br />
• Output Format Adjustments on page 108<br />
• Advanced Copying on page 114<br />
Basic Settings<br />
The Copy tab appears when the touch screen Copy button is touched. Use the Copy tab to change the<br />
following basic settings:<br />
• Selecting Color or Black and White Copies on page 98<br />
• Reducing or Enlarging the Image on page 99<br />
• Selecting the Tray to Use for Copies on page 99<br />
• Specifying 2-Sided Originals or Copies on page 99<br />
• Collated Copies on page 100<br />
• Uncollated Copies on page 100<br />
• Stapling Copies on page 101<br />
• Creasing Copies on page 101<br />
• Hole Punching Copies on page 101<br />
• Creating Booklets on page 102<br />
Selecting Color or Black and White Copies<br />
If the original document contains color, you can create copies in full color, a single color<br />
(monochrome), or in black and white.<br />
To select the output color:<br />
1. Touch Copy on the touch screen.<br />
2. Touch the desired output color:<br />
• Auto Detect: this option detects the color content in the original document, and makes<br />
copies in full color if the original is a color document, or in black only if the original is a black<br />
and white document.<br />
• Color: this option copies in full color output using all four printing colors (cyan, magenta,<br />
yellow, and black).<br />
• Black & White: this option copies in black and white only. Colors in the original are converted<br />
to shades of gray.<br />
98<br />
<strong>WorkCentre</strong> <strong>7120</strong>/<strong>7125</strong> <strong>Multifunction</strong> <strong>Printer</strong><br />
<strong>User</strong> <strong>Guide</strong>
Reducing or Enlarging the Image<br />
<strong>WorkCentre</strong> <strong>7120</strong>/<strong>7125</strong> <strong>Multifunction</strong> <strong>Printer</strong><br />
<strong>User</strong> <strong>Guide</strong><br />
Copying<br />
To reduce or enlarge the image:<br />
1. Touch Copy on the touch screen.<br />
2. To reduce or enlarge the image proportionally, do one of the following:<br />
• Touch the plus or minus (+/–) buttons.<br />
• Touch Reduce/Enlarge, then touch the plus or minus (+/–) buttons.<br />
3. To reduce or enlarge the image proportionally by a preset amount, such as to fit a particular paper size:<br />
a. Touch Reduce/Enlarge.<br />
b. Touch Proportional %, then touch one of the Preset % buttons.<br />
Note: You can also use the arrow buttons to change the percentage.<br />
c. To center the image on the page, touch Auto Center.<br />
d. Touch Save.<br />
4. To reduce or enlarge the width and length of the image by different percentages:<br />
a. Touch Reduce/Enlarge, then touch Independent X–Y%.<br />
b. To scale the width (X axis) of the image, touch the Width percentage arrow buttons.<br />
c. To scale the length (Y axis) of the image, touch the Length percentage arrow buttons.<br />
Note: You can also reduce or enlarge an image by touching one of the Presets.<br />
d. To center the image on the page, touch Auto Center.<br />
e. Touch Save.<br />
Selecting the Tray to Use for Copies<br />
The printer automatically selects the paper tray to use for copying based on settings made by the<br />
System Administrator. To use a different paper type for copying on letterhead, colored paper or<br />
different paper sizes, select the paper tray loaded with the desired paper.<br />
To select the tray to use:<br />
1. Touch Copy on the touch screen.<br />
2. Touch the desired tray under Paper Supply.<br />
3. To use another tray:<br />
a. Touch More.<br />
b. Touch the desired tray in the list.<br />
c. Touch Save.<br />
Specifying 2-Sided Originals or Copies<br />
The document feeder and the document glass can be used to copy one or both sides of a 2-sided original.<br />
To copy both sides of a 2-sided original:<br />
1. Touch Copy on the touch screen.<br />
2. Under 2-Sided Copying, touch 2 –> 2 Sided.<br />
99
Copying<br />
3. Press the green Start button.<br />
The document feeder automatically copies both sides of a 2-sided original.<br />
100<br />
Note: When using the document glass for 2-sided copying, a message appears at the top of the<br />
touch screen when it is time to place the next original on the glass.<br />
Other options are available under 2-Sided Copying:<br />
• 1 –> 1 Sided: Scans only one side of the originals and produces 1-sided copies.<br />
• 1 –> 2 Sided: Scans only one side of the originals and produces 2-sided copies.<br />
• 2 –> 1 Sided: Scans both sides of the originals and produces 1-sided copies.<br />
• Rotate Side 2: Rotates the side two image of 2-sided copies 180 degrees.<br />
Collated Copies<br />
You can automatically collate multi-page copy jobs. For example, when making three 1-sided copies of<br />
a six-page document, the copies are printed in this order:<br />
1, 2, 3, 4, 5, 6; 1, 2, 3, 4, 5, 6; 1, 2, 3, 4, 5, 6<br />
To choose collated copies:<br />
1. Touch Copy on the touch screen.<br />
2. Under Copy Output, touch Collated.<br />
Uncollated Copies<br />
Uncollated copies are printed in this order:<br />
1, 1, 1, 2, 2, 2, 3, 3, 3, 4, 4, 4, 5, 5, 5, 6, 6, 6<br />
To choose uncollated copies:<br />
1. Touch Copy on the touch screen.<br />
2. Under Copy Output, touch Uncollated.<br />
Note: If a finisher is installed, touch More, then touch Uncollated.<br />
To choose uncollated copies with separators:<br />
1. Under Copy Output, touch Uncollated with Separators.<br />
2. To choose the tray loaded with separator sheets, touch Paper Supply, then touch Save.<br />
To choose Offset Stacking options without a finisher:<br />
1. Under Copy Output, touch More, then touch Output/Offset.<br />
2. Touch Offset Stacking, touch the desired setting, then touch Save.<br />
3. Touch Save.<br />
To choose Offset Stacking options with a finisher:<br />
1. Under Copy Output, touch More, then touch Offset Stacking<br />
2. Touch the desired setting, then touch Save.<br />
<strong>WorkCentre</strong> <strong>7120</strong>/<strong>7125</strong> <strong>Multifunction</strong> <strong>Printer</strong><br />
<strong>User</strong> <strong>Guide</strong>
Stapling Copies<br />
<strong>WorkCentre</strong> <strong>7120</strong>/<strong>7125</strong> <strong>Multifunction</strong> <strong>Printer</strong><br />
<strong>User</strong> <strong>Guide</strong><br />
Copying<br />
If the printer has the optional Integrated Office Finisher, copies can be automatically stapled with one<br />
staple. The Office Finisher LX can automatically staple with two staples.<br />
To select stapling:<br />
1. Touch Copy on the touch screen.<br />
2. Under Copy Output, touch Collated 1 Staple.<br />
3. For additional stapling options, touch More.<br />
Note: Stapling options are dependent upon paper feed orientation (short edge or long edge). If<br />
the desired stapling option is unavailable, touch Paper Supply, then choose the appropriate tray.<br />
a. Under Staple, touch 1 Staple, 2 Staples or 2 Staples Top. The screen shows the location of<br />
the staple on the page.<br />
b. If necessary, touch Paper Supply to select the tray loaded with the required paper.<br />
c. Touch Save.<br />
Creasing Copies<br />
If the printer has the Office Finisher LX with Booklet Maker option, copies can be automatically<br />
creased. You can then fold the copies to make a booklet.<br />
Note: Creasing options are dependent upon paper size and feed orientation. The paper must be<br />
fed from a tray with the paper loaded for short edge feed. If the creasing button or the desired<br />
creasing option is unavailable, touch Paper Supply, then choose the appropriate tray.<br />
1. Touch Copy on the touch screen.<br />
2. Under Copy Output, touch Creasing, then touch Single Crease.<br />
3. To crease and stack each page separately, under Pages to Crease, touch Crease a page at a time,<br />
or touch Crease as a Set. If desired, when Crease as a Set is selected, touch Staple to staple the<br />
pages at the crease.<br />
4. Touch Save.<br />
Hole Punching Copies<br />
If the printer has the Office Finisher LX with the Hole Punch option, copies can be automatically<br />
hole punched.<br />
Note: Hole punch options are dependent on paper size and feed orientation. The paper can be fed<br />
from a tray with the paper loaded for short edge feed.or long edge feed. If the desired hole punch<br />
option is unavailable, touch Paper Supply, then choose the tray containing the paper in the<br />
correct orientation.<br />
1. Touch Copy on the touch screen.<br />
2. Under Copy Output, touch More.<br />
3. Under Hole Punch, touch 2 Hole Punch, 3 Hole Punch, or 4 Hole Punch. Select Top if desired.<br />
Note: Hole punch settings vary based on printer configuration.<br />
4. Touch Save.<br />
101
Copying<br />
Creating Booklets<br />
Copies can be printed in the form of a booklet. The page images are reduced to print two images per side<br />
of each printed page. The pages can then be folded and stapled manually. With the Office Finisher LX,<br />
pages can be creased and stapled automatically. For details, see Creating Booklets on page 108.<br />
Image Quality Adjustments<br />
Use the Image Quality tab to change the following image quality settings:<br />
• Specifying the Original Type on page 102<br />
• Adjusting the Darkness, Sharpness, and Saturation on page 102<br />
• Automatically Suppressing Background Variations on page 103<br />
• Adjusting the Contrast on page 103<br />
• Selecting Color Effects on page 103<br />
• Adjusting the Color Balance on page 104<br />
• Adjusting the Color Shift on page 104<br />
Specifying the Original Type<br />
The printer optimizes the image quality of the copies based on the type of images in the original<br />
document and how the original was created.<br />
To specify the original type:<br />
1. Touch Copy on the touch screen, then touch the Image Quality tab.<br />
2. Touch Original Type.<br />
3. In the Original Type window:<br />
a. On the left side of the window, touch the content type of the original document.<br />
b. If known, select how the original was produced.<br />
c. Touch Save.<br />
Adjusting the Darkness, Sharpness, and Saturation<br />
You can lighten or darken copies and adjust the sharpness and saturation.<br />
To adjust these image options:<br />
1. On the touch screen, touch Copy, then touch the Image Quality tab.<br />
2. Touch Image Options.<br />
102<br />
<strong>WorkCentre</strong> <strong>7120</strong>/<strong>7125</strong> <strong>Multifunction</strong> <strong>Printer</strong><br />
<strong>User</strong> <strong>Guide</strong>
3. In the Image Options window:<br />
a. To lighten or darken the image, touch the Lighten/Darken pointer, then move it toward<br />
Lighten or Darken.<br />
<strong>WorkCentre</strong> <strong>7120</strong>/<strong>7125</strong> <strong>Multifunction</strong> <strong>Printer</strong><br />
<strong>User</strong> <strong>Guide</strong><br />
Copying<br />
b. To sharpen or soften the image, touch the Sharpness pointer, then move it toward Sharpen<br />
or Soften.<br />
c. To make the image colors more or less vivid, touch the Saturation pointer, then move it<br />
toward Vivid or Pastel.<br />
d. Touch Save.<br />
Automatically Suppressing Background Variations<br />
When you are using originals printed on thin paper, text or images printed on one side of the paper can<br />
sometimes be seen on the other side of the paper. Use Auto Suppression to minimize the visibility of<br />
background colors in your copies.<br />
To change this setting:<br />
1. Touch Copy on the touch screen, then touch the Image Quality tab.<br />
2. Touch Image Enhancement.<br />
3. Under Background Suppression, touch Auto Suppression.<br />
4. Touch Save.<br />
Adjusting the Contrast<br />
Contrast is the difference between light and dark areas in an image. To reduce or increase the contrast<br />
of the copies:<br />
1. Touch Copy on the touch screen, then touch the Image Quality tab.<br />
2. Touch Image Enhancement.<br />
3. Do one of the following:<br />
• To automatically adjust the contrast, touch Auto Contrast.<br />
• Touch Manual Contrast, touch the Contrast pointer, then move it toward More or Less.<br />
4. Touch Save.<br />
Selecting Color Effects<br />
If you have a color original, you can adjust the color using presets called Color Effects. For example,<br />
the copy colors can be adjusted to be warmer or cooler.<br />
To select a color preset:<br />
1. On the touch screen, touch Copy, then touch the Image Quality tab.<br />
2. Touch the Color Effects button.<br />
3. Touch the desired color preset. The sample images show how the colors are adjusted.<br />
4. Touch Save.<br />
103
Copying<br />
Adjusting the Color Balance<br />
If you have a color original, you can adjust the balance of the printing colors between cyan, magenta,<br />
yellow, and black before you print your copy.<br />
To adjust the color balance:<br />
1. Touch Copy on the touch screen, then touch the Image Quality tab.<br />
2. Touch Color Balance.<br />
3. To adjust the density levels of all four colors:<br />
a. Select Basic Color on the Color Balance window.<br />
b. To adjust the level for each color, touch its pointer, then move it toward + or –.<br />
4. To adjust the highlight, midtone, and shadow density levels by color:<br />
a. Touch Advanced Color.<br />
b. Touch the desired color.<br />
c. To adjust the levels for highlights, midtones, and shadows, touch the pointer, then move it<br />
toward + or –.<br />
d. For additional color adjustments, repeat steps 4b and 4c.<br />
5. Touch Save.<br />
Adjusting the Color Shift<br />
If you have a color original, you can adjust the hue of the copy colors.<br />
104<br />
Note: This feature is only available when the output color is set to Auto Detect or Color.<br />
To adjust the color shift:<br />
1. Touch Copy on the touch screen, then touch the Image Quality tab.<br />
2. Touch Color Shift. The Original Color bar represents the colors of the original document. The Copy<br />
Color bar represents the copy colors.<br />
3. Touch one of the five buttons from Minus to Plus to select the desired color shift.<br />
4. Touch Save.<br />
Layout Adjustments<br />
Use the Layout Adjustment tab to change the following settings:<br />
• Book Copying on page 105<br />
• 2-Sided Book Copying on page 105<br />
• Specifying the Original Size on page 106<br />
• Erasing the Edges of a Copy on page 106<br />
• Shifting the Image on page 107<br />
• Rotating the Image on page 107<br />
• Inverting the Image on page 108<br />
• Specifying the Orientation of the Original on page 108<br />
<strong>WorkCentre</strong> <strong>7120</strong>/<strong>7125</strong> <strong>Multifunction</strong> <strong>Printer</strong><br />
<strong>User</strong> <strong>Guide</strong>
Book Copying<br />
<strong>WorkCentre</strong> <strong>7120</strong>/<strong>7125</strong> <strong>Multifunction</strong> <strong>Printer</strong><br />
<strong>User</strong> <strong>Guide</strong><br />
Copying<br />
When copying a book, magazine, or other bound document, you can copy either the left or right page,<br />
or both pages onto a single sheet of paper.<br />
You must use the document glass to make copies from books, magazines, or other bound documents.<br />
Do not place bound originals in the document feeder.<br />
Notes:<br />
• This feature and 2-Sided Book Copying on page 105 cannot be activated simultaneously.<br />
• Non-standard size documents will not be separated into two pages accurately.<br />
To copy pages from a book or other bound document:<br />
1. Touch Copy on the touch screen, then touch the Layout Adjustment tab.<br />
2. Touch Book Copying. In the next screen, touch On.<br />
a. To copy both pages of an open book in page order, touch Both Pages. To specify the Binding<br />
Edge Erase amount, the space between the image area and the binding, touch the plus or<br />
minus (+/–) buttons.<br />
b. To copy only the left page of an open book touch Left Page Only. To specify the Binding<br />
Edge Erase amount, the space between the image area and the binding, touch the plus or<br />
minus (+/–) buttons.<br />
c. To copy only the right page of an open book, touch Right Page Only. To specify the Binding<br />
Edge Erase amount, the space between the image area and the binding, touch the plus or<br />
minus (+/–) buttons.<br />
3. Touch Save.<br />
Note: The facing pages of a bound document must be placed in a horizontal orientation on the<br />
document glass as shown on the touch screen.<br />
2-Sided Book Copying<br />
This feature allows you to make 2-Sided copies of facing pages of the original bound document.<br />
Notes:<br />
• This feature and Book Copying on page 105 cannot be activated simultaneously.<br />
• You must use the document glass to make copies from books, magazines, or pamphlets.<br />
Do not place bound originals in the document feeder.<br />
• Non-standard size documents will not be separated into two pages accurately.<br />
To copy pages from a book or other bound document:<br />
1. Touch Copy on the touch screen, then touch the Layout Adjustment tab.<br />
2. Touch 2-Sided Book Copying. In the next screen, touch On.<br />
105
Copying<br />
3. To specify the copy start page and copy end page, touch Starting & Ending Page.<br />
• For Starting Page: touch Left Page or Right Page.<br />
• For Ending Page: touch Left Page or Right Page.<br />
4. To specify the Binding Edge Erase amount, the space between the image area and the binding,<br />
touch the plus or minus (+/–) buttons.<br />
5. Touch Save.<br />
Specifying the Original Size<br />
To specify the original size so that the correct area is copied:<br />
1. On the touch screen, touch Copy, then touch the Layout Adjustment tab.<br />
2. Touch Original Size.<br />
a. The printer can pre-scan the first page of the originals to determine the area to copy. Touch<br />
Auto Detect.<br />
b. If the area to be copied matches a particular paper size, touch Manual Size Input. then<br />
touch the desired paper size. To view the entire list, touch the scroll arrows.<br />
c. If the original contains pages of different sizes, touch Mixed Size Originals.<br />
3. Touch Save.<br />
Erasing the Edges of a Copy<br />
You can erase content from the edges of your copies by specifying the amount to erase on the right,<br />
left, top, and bottom edge.<br />
To erase edges on copies:<br />
1. Touch Copy on the touch screen, then touch the Layout Adjustment tab.<br />
2. Touch Edge Erase.<br />
3. To erase all the edges by the same amount:<br />
a. Touch All Edges.<br />
b. Touch the plus or minus (+/–) buttons.<br />
4. To specify different amounts for the edges:<br />
a. Touch Individual Edges.<br />
b. For each edge, touch the plus or minus (+/–) buttons.<br />
c. If you selected 2-sided copies: to specify the amount to erase from each edge on Side 2,<br />
touch the plus or minus (+/–) buttons, or touch Mirror Side 1.<br />
5. To cancel edge erase, touch Print to Edge.<br />
6. To specify the original’s orientation as you place it in the document feeder or on the document<br />
glass, touch Original Orientation, then touch either Upright Image or Sideways Image (top to<br />
left), then touch Save.<br />
106<br />
Note: If preset values such as Hole Punch Erase or Header/Footer Erase were previously saved,<br />
you can touch the preset in the lower-left corner of the window.<br />
7. Touch Save.<br />
<strong>WorkCentre</strong> <strong>7120</strong>/<strong>7125</strong> <strong>Multifunction</strong> <strong>Printer</strong><br />
<strong>User</strong> <strong>Guide</strong>
Shifting the Image<br />
<strong>WorkCentre</strong> <strong>7120</strong>/<strong>7125</strong> <strong>Multifunction</strong> <strong>Printer</strong><br />
<strong>User</strong> <strong>Guide</strong><br />
Copying<br />
You can change the placement of the image on the copy page. This is useful if the image size is smaller<br />
than the page size.<br />
Originals must be positioned correctly for image shift to work correctly. For details, see Basic Copying<br />
on page 96.<br />
• Document feeder: position originals faceup, left (long) edge entering the feeder first.<br />
• Document glass: position originals facedown, in the back-left corner of the document glass, long<br />
edge to the left.<br />
To change image placement:<br />
1. Touch Copy on the touch screen, then touch the Layout Adjustment tab.<br />
2. Touch Image Shift.<br />
3. To center the image on the page, touch Auto Center.<br />
4. To specify the position of the image:<br />
a. Touch Margin Shift.<br />
b. To specify the amount of Up/Down and Left/Right shift for Side 1, touch the plus or minus<br />
(+/–) buttons.<br />
c. If you selected 2-sided copies: to specify the amount to erase from each edge on Side 2,<br />
touch the plus or minus (+/–) buttons, or touch Mirror Side 1.<br />
5. To specify the original’s orientation as you place it in the document feeder or on the document<br />
glass, touch Original Orientation, then touch either Upright Image or Sideways Image (top to<br />
left), then touch Save.<br />
Note: If preset values were previously saved, select the preset in the lower-left corner of the window.<br />
6. Touch Save.<br />
Rotating the Image<br />
If the orientation of the paper currently loaded in the selected tray differs from that of your original,<br />
the printer automatically rotates the copy to fit on the paper.<br />
1. Touch Copy on the touch screen, then touch the Layout Adjustment tab.<br />
2. Touch Image Rotation, then select from the following:<br />
• To cancel rotation, touch Off.<br />
• For automatic rotation of the copy of your original to fit correctly on your selected paper,<br />
touch Always On.<br />
• For automatic rotation of the copy of your original when Auto Paper Select or Auto % is<br />
selected, touch On during Auto.<br />
3. Touch Save.<br />
107
Copying<br />
Inverting the Image<br />
Originals can be printed as mirror images. This reflects each image left to right on the page.<br />
Originals can be printed as negative images: the positive image is printed as a negative.<br />
To invert images:<br />
1. Touch Copy on the touch screen, then touch the Layout Adjustment tab.<br />
2. To mirror images, touch Invert Image, then touch Mirror Image. The default is Normal Image,<br />
which does not mirror the images.<br />
3. To create negative images, touch Negative Image. The default is Positive Image, which does not<br />
print the image as a negative.<br />
4. Touch Save.<br />
Specifying the Orientation of the Original<br />
Adjust these settings to allow the printer to correctly orient the image when using other layout adjustments:<br />
1. Touch Copy on the touch screen, then touch the Layout Adjustment tab.<br />
2. Touch Original Orientation.<br />
3. Touch Upright Images or Sideways Images (top to left).<br />
4. Touch Save.<br />
Output Format Adjustments<br />
Use the Output Format tab to make the following changes:<br />
• Creating Booklets on page 102<br />
• Including Covers on page 109<br />
• Page Layout on page 110<br />
• Creating Posters on page 110<br />
• Adding Annotations on page 111<br />
• Adding Watermarks on page 112<br />
• Identification Card Copying on page 113<br />
Creating Booklets<br />
Copies can be printed in the form of a booklet. The page images are reduced to print two images per<br />
side of each printed page. The pages can then be folded and stapled manually, or with the appropriate<br />
finisher, they can be creased and stapled automatically.<br />
108<br />
Note: In this mode, the printer does not print the copies until it has scanned all the originals.<br />
To create a booklet:<br />
1. Touch Copy on the touch screen, then touch the Output Format tab.<br />
2. Touch Booklet Creation, then touch Booklet Options On.<br />
3. Under Original Input, touch 1-Sided Originals, 2-Sided Originals or 2-Sided Rotated Originals.<br />
<strong>WorkCentre</strong> <strong>7120</strong>/<strong>7125</strong> <strong>Multifunction</strong> <strong>Printer</strong><br />
<strong>User</strong> <strong>Guide</strong>
<strong>WorkCentre</strong> <strong>7120</strong>/<strong>7125</strong> <strong>Multifunction</strong> <strong>Printer</strong><br />
<strong>User</strong> <strong>Guide</strong><br />
Copying<br />
4. If the Office Finisher LX with Booklet Maker option is installed, touch No Crease & Staple, Crease<br />
& Staple or Crease Only.<br />
5. You can add margins in the center binding area to compensate for the thickness of the booklet:<br />
a. Touch Binding Shift, then touch the plus or minus (+/–) buttons to set the shift.<br />
b. Touch Save.<br />
6. To add covers, touch Covers, then touch Blank Cover, Print on Both or<br />
1-Sided Covers Print Outside.<br />
• Touch the tray loaded with cover paper and the tray loaded with main body paper. Touch Save.<br />
• To print the copy of the last original page on the back cover for Blank Cover and Print on<br />
Both, touch Last Page on Back Cover, then touch Save.<br />
7. To sub-divide a large booklet into subsets, touch Divide Output, then touch On.<br />
8. To enter the number of sheets for each subset, touch the plus or minus (+/–) buttons, then<br />
touch Save.<br />
9. Offset Stacking places each stack of printed pages slightly to the left or right of the previous stack<br />
for easier separation.<br />
a. Touch Output /Offset.<br />
b. Touch Center Tray Upper or Center Tray Lower. For automatic creasing, touch<br />
Right Middle Tray.<br />
c. Touch Offset Stacking, then touch System Default, No Offset, Offset Per Set or Offset Per<br />
Job, then touch Save.<br />
10. Touch Save.<br />
Including Covers<br />
To add covers to a copy job, select different trays for the first and last page. Those trays can be loaded<br />
with heavier stock, color or pre-printed paper. The covers can be blank or printed.<br />
Note: The paper used for the covers must be the same size as the paper used for the rest of<br />
the document.<br />
To select the type of covers and the tray to use for the cover paper:<br />
1. Touch Copy on the touch screen, then touch the Output Format tab.<br />
2. Touch Covers.<br />
3. To include both a front and back cover that use the same tray and printing options:<br />
a. Touch Front & Back Covers.<br />
b. Touch a printing option for the cover: Blank Cover, 1-Sided Covers or Print on Both.<br />
c. Touch the tray to use for the covers, then touch the tray to use for the main body.<br />
4. To include only a front cover or only a back cover:<br />
a. Touch Front Cover Only or Back Cover Only.<br />
b. Touch a printing option for the cover: Blank Cover, 1-Sided Covers or Print on Both.<br />
c. Touch the tray to use for the covers, then touch the tray to use for the main body of the document.<br />
5. Touch Save.<br />
109
Copying<br />
Page Layout<br />
You can copy multiple original pages onto one side of a sheet of paper. The size of the page images is<br />
reduced proportionally to fit on the selected paper.<br />
To copy multiple pages on a sheet:<br />
1. Touch Copy on the touch screen, then touch the Output Format tab.<br />
2. Touch Page Layout.<br />
3. Touch Multiple Pages per Side.<br />
4. To select the number of original pages for each sheet of paper, touch 2Pages, 4 Pages or 8 Pages.<br />
For 4 Pages Up or 8 Pages Up, touch the desired Reading Order.<br />
5. To change the orientation of the copies, touch Original Orientation, then touch Upright Images<br />
or Sideways Images, then touch Save.<br />
6. To repeat the same image on a page, touch Repeat Image.<br />
a. Touch 2 Times, 4 Times, or 8 Times.<br />
b. To automatically calculate the number of times to repeat vertically or horizontally (based on<br />
document size, paper size, and the enlarge/reduction ratio), touch Auto Repeat.<br />
c. To specify the number of times to repeat the image vertically or horizontally, touch Variable<br />
Repeat, then touch the plus or minus (+/–) buttons. You can repeat an image between 1 to 23<br />
times vertically (columns), and between 1 to 33 times horizontally (rows).<br />
• To arrange the images evenly on the page, touch Evenly Spaced.<br />
• To arrange the images with no space between them, touch Side by Side.<br />
d. To change the orientation of the copies, touch Original Orientation, then touch Upright<br />
Images or Sideways Images, then touch Save.<br />
Creating Posters<br />
You can create a large size copy of an original, fitting it to more than one sheet of paper. You then<br />
reassemble the pages into a poster and tape them together.<br />
To create a poster:<br />
1. Touch Copy on the touch screen, then touch the Output Format tab.<br />
2. Touch Page Layout.<br />
3. Touch Poster.<br />
4. Touch Output Size, then touch the desired size of the poster.<br />
5. To select the width and length enlargement percentages independently, touch Enlargement %,<br />
then touch the plus or minus (+/–) buttons. To set the width and length proportionally, touch<br />
Lock X–Y%.<br />
6. To select the paper tray, touch Paper Supply, touch the desired tray, then touch Save.<br />
110<br />
<strong>WorkCentre</strong> <strong>7120</strong>/<strong>7125</strong> <strong>Multifunction</strong> <strong>Printer</strong><br />
<strong>User</strong> <strong>Guide</strong>
Adding Annotations<br />
Annotations, such as page numbers and the date, can be automatically added to copies.<br />
<strong>WorkCentre</strong> <strong>7120</strong>/<strong>7125</strong> <strong>Multifunction</strong> <strong>Printer</strong><br />
<strong>User</strong> <strong>Guide</strong><br />
Copying<br />
To add annotations:<br />
1. Touch Copy on the touch screen, then touch the Output Format tab.<br />
2. Touch Annotations.<br />
3. To insert a comment:<br />
a. Touch Comment, then touch On.<br />
b. On the next screen, touch the desired comment in the list of stored comments.<br />
c. To create a comment, touch an comment, then touch Edit. Using the touch<br />
screen keyboard, enter the new comment, then touch Save.<br />
d. Touch Apply To, then touch First Page Only, All Pages or All Pages Except First, then<br />
touch Save.<br />
e. To select the location of the comment on the page, touch Position, then touch the<br />
desired location.<br />
f. Touch Save twice.<br />
4. To insert the current date:<br />
a. Touch Date, then touch On.<br />
b. Touch the format to use for the date.<br />
c. To select which pages the date appears on, touch Apply To, then touch First Page Only, All<br />
Pages or All Pages Except First, then touch Save.<br />
d. To select the position of the date stamp on the page, touch Position, then select the<br />
desired position.<br />
e. Touch Save twice.<br />
5. To insert page numbers:<br />
a. Touch Page Numbers, then touch On.<br />
b. To enter the starting page number, touch the plus or minus (+/–) buttons.<br />
c. To select which pages the page number appears on, touch Apply To, then touch All Pages or<br />
All Pages Except First, then touch Save.<br />
d. To select the position of the date stamp on the page, touch Position, then select the<br />
desired position.<br />
e. Touch Save twice.<br />
6. To insert a Bates Stamp:<br />
a. Touch Bates Stamp, then touch On.<br />
b. Touch an existing stored prefix to use for the Bates Stamp. To create a new prefix, touch an<br />
prefix, then touch Edit. Using the touch screen keyboard, enter the new prefix,<br />
then touch Save.<br />
c. To enter the starting page number, touch the plus or minus (+/–) buttons.<br />
d. To select which pages the Bates Stamp appears on, touch Apply To, then touch All Pages or<br />
All Pages Except First, then touch Save.<br />
e. To select the position of the Bates Stamp on the page, touch Position, then touch the desired<br />
position, then touch Save.<br />
111
Copying<br />
f. To specify the number of digits, touch Number of Digits. To select the minimum number of<br />
digits necessary, touch Auto Assign, then touch Save. To select a specific number of digits,<br />
touch Manual Assign, then touch the plus or minus (+/–) buttons to insert up to 9 leading<br />
zeros, then touch Save.<br />
g. Touch Save.<br />
7. To specify the original’s orientation as you place it in the document feeder or on the document<br />
glass, under Original Orientation, touch either Upright Images or Sideways Images.<br />
8. To change the format used for annotations:<br />
a. Touch Format & Style.<br />
b. To select the font point size, touch the plus or minus (+/–) buttons.<br />
c. Touch the desired font color.<br />
d. To select the placement of the annotations on the second side when printing 2-sided copies,<br />
touch Same as Side 1 or Mirror Side 1.<br />
e. Touch Save.<br />
9. Touch Save.<br />
Adding Watermarks<br />
You can add a watermark beneath the original image on your copies. Information such as<br />
predetermined text, date and time, and the printer serial number can be added.<br />
1. Touch Copy on the touch screen, then touch the Output Format tab.<br />
2. Touch Watermark.<br />
3. To add a control number, touch Control Number, touch Add. To select the starting number, touch<br />
the plus or minus (+/–) buttons.<br />
4. Touch Save.<br />
5. To add a stored watermark, touch Stored Watermarks, then touch On. Touch a stored watermark<br />
in the list, then touch Save.<br />
6. To print the current date and time on the copies, touch Date & Time, touch Add, then touch Save.<br />
7. To print the printer’s serial number on the copies, touch Serial Number, touch Add, then touch Save.<br />
8. The watermark image is faint so the content of the page can be seen. To make the watermark<br />
visible on copies used as originals, touch Watermark Effect, then touch Embossed or Outline,<br />
then touch Save.<br />
9. Touch Save.<br />
112<br />
<strong>WorkCentre</strong> <strong>7120</strong>/<strong>7125</strong> <strong>Multifunction</strong> <strong>Printer</strong><br />
<strong>User</strong> <strong>Guide</strong>
Identification Card Copying<br />
<strong>WorkCentre</strong> <strong>7120</strong>/<strong>7125</strong> <strong>Multifunction</strong> <strong>Printer</strong><br />
<strong>User</strong> <strong>Guide</strong><br />
Copying<br />
This feature allows you to copy both sides of a small original, such as an identification card, onto the<br />
same side of a page.<br />
1. Open the document feeder and place the card in the upper left hand corner of the document glass.<br />
Note: Place the card slightly away from the top left corner of the document glass to capture the<br />
whole image of the card.<br />
2. Close the document feeder, touch Copy on the touch screen, then touch the Output Format tab.<br />
3. Touch ID Card Copy, touch On, then touch Save.<br />
4. To scan side one, press the green Start button.<br />
5. To scan side two, turn the card over without changing its location on the document glass, then<br />
touch Start on the touch screen.<br />
Both sides of the card will then print onto the same side of a sheet of paper.<br />
113
Copying<br />
Advanced Copying<br />
Use the Job Assembly tab to change the following settings:<br />
• Building a Job on page 114<br />
• Printing a Sample Copy on page 116<br />
• Combining Original Sets on page 116<br />
• Delete Outside/Delete Inside on page 117<br />
• Saving Copy Settings on page 117<br />
• Retrieving Saved Copy Settings on page 118<br />
Building a Job<br />
Complex copy jobs that include a variety of originals requiring different copy settings can be produced using<br />
this feature. Each “segment” can have different copy settings. After all segments are programmed and<br />
scanned, the page images are stored temporarily in the printer. The complete copy job is then printed.<br />
To build a copy job with multiple segments:<br />
1. Touch Copy on the touch screen.<br />
2. Program and scan the first segment:<br />
a. Place the originals in the document feeder or on the document glass for the first segment.<br />
b. Touch the desired copy settings for the first segment.<br />
c. Touch the Job Assembly tab.<br />
d. Touch the Build Job button, touch On, then touch Save.<br />
e. To scan the first set of originals, press the green Start button on the control panel.<br />
The Copy screen appears on the touch screen.<br />
3. Program and scan additional segments:<br />
a. Place the originals in the document feeder or on the document glass for the next segment,<br />
then touch Next Original.<br />
b. When printing 2-sided jobs, the start page of the next segment is set using Chapter Start. To set<br />
the start page of the next 2-sided segment, touch Chapter Start, then choose from the following:<br />
• Off: the first page of the next segment prints on the next available side.<br />
• On: the first page of the next segment prints on Side 1 of a new sheet of paper.<br />
• Pages per Side-New Page: if the first segment has an odd number of pages the second<br />
segment will start on side 1. If the first segment has an even number of pages the<br />
second segment will start on side 2.<br />
c. Touch Change Settings. Touch the settings for the segment.<br />
d. To scan the next set of originals, press the green Start button on the control panel.<br />
114<br />
<strong>WorkCentre</strong> <strong>7120</strong>/<strong>7125</strong> <strong>Multifunction</strong> <strong>Printer</strong><br />
<strong>User</strong> <strong>Guide</strong>
<strong>WorkCentre</strong> <strong>7120</strong>/<strong>7125</strong> <strong>Multifunction</strong> <strong>Printer</strong><br />
<strong>User</strong> <strong>Guide</strong><br />
Copying<br />
4. For each additional segment you wish to copy, repeat Step 3.<br />
5. When all segments have been scanned, in the Copy screen, touch Last Original.<br />
The entire copy job prints.<br />
Note: Because all the segments print as one job, you can select options such as covers or booklet<br />
creation that will apply to the entire job.<br />
To select Build Job options:<br />
1. Touch Copy on the touch screen, then touch the Job Assembly tab.<br />
2. Touch Build Job, then touch On.<br />
3. Select from:<br />
a. Copy Output: touch Paper Supply, Stapling, Collation and Output/Offset options, then<br />
touch Save.<br />
b. Booklet Creation: see Creating Booklets on page 102. Select the desired settings, then<br />
touch Save.<br />
c. Covers: see Including Covers on page 109. Select the desired settings, then touch Save.<br />
d. Annotations: see Adding Annotations on page 111. Select the desired settings, then<br />
touch Save.<br />
e. Segment Separators: to insert separator pages between segments, touch Segment<br />
Separators, then choose from the following:<br />
• No Separators: separators are not inserted. Touch Save.<br />
• Blank Separators: blank separators are inserted. To specify the quantity of separators,<br />
touch the plus or minus (+/–) buttons, then touch Save.<br />
• 1-Sided Separators Side 1 Only: the first page of the loaded documents is copied on the<br />
front side of a separator. Touch Save.<br />
• 1-Sided Separators Side 2 Only: the first page of the loaded documents is copied on the<br />
back side of a separator. Touch Save.<br />
• 2-Sided Separators: the first two pages of the loaded documents are copied onto each<br />
side of a separator. Touch Save.<br />
f. Watermarks: See Adding Watermarks on page 112. Select settings, then touch Save.<br />
4. Touch Save.<br />
115
Copying<br />
Printing a Sample Copy<br />
With a complicated copy job, it can be helpful to print a test copy before printing multiple copies. This<br />
feature prints a single copy and holds the remaining copies. After inspection of the sample, the<br />
remaining copies can be printed using the same settings, or cancelled.<br />
116<br />
Note: The sample copy is counted as part of the total quantity selected. For example, when<br />
copying a book, if 3 is entered as the number of desired copies, one copy of the book will be<br />
printed, and two other copies will be held until they are released for printing.<br />
To print the sample copy:<br />
1. Touch Copy on the touch screen, then touch the desired copy settings.<br />
2. Touch the Job Assembly tab.<br />
3. Touch Sample Job, then touch On.<br />
4. Touch Save.<br />
5. Press the green Start button on the control panel. The sample set is printed.<br />
To print the remaining copies or delete the job:<br />
1. To print the remaining copies of the job, touch Start, or press the green Start button on the<br />
control panel.<br />
2. If the sample copy is unsatisfactory, touch Delete.<br />
Combining Original Sets<br />
If the number of originals exceeds the capacity of the document feeder, you can combine the sets into<br />
one job.<br />
To select Combine Original Sets:<br />
1. Touch Copy on the touch screen. Touch the desired copy settings, then enter the number of copies<br />
using the alphanumeric keypad on the control panel.<br />
2. Touch the Job Assembly tab, then touch Combine Original Sets.<br />
3. Touch On, then touch Save.<br />
4. Place the first set of originals in the document feeder.<br />
5. Press the green Start button on the control panel. Copying begins.<br />
The Copy screen appears on the touch screen.<br />
6. Scan additional sets:<br />
a. Place the originals for the next set in the document feeder.<br />
b. In the Copy screen, touch Next Original.<br />
c. Touch Start on the touch screen, or press the green Start button on the control panel.<br />
7.<br />
Copying continues.<br />
For each additional set, repeat Step 6.<br />
8. When the final set has been copied, in the Combine Original Sets screen, touch Last Original.<br />
The final copies print.<br />
9. To cancel the job, touch Delete.<br />
<strong>WorkCentre</strong> <strong>7120</strong>/<strong>7125</strong> <strong>Multifunction</strong> <strong>Printer</strong><br />
<strong>User</strong> <strong>Guide</strong>
Delete Outside/Delete Inside<br />
<strong>WorkCentre</strong> <strong>7120</strong>/<strong>7125</strong> <strong>Multifunction</strong> <strong>Printer</strong><br />
<strong>User</strong> <strong>Guide</strong><br />
Copying<br />
This feature allows you to delete everything inside or outside a specified rectangular area. Up to three<br />
areas can be defined for deletion.<br />
To select areas to delete:<br />
1. Touch Copy on the touch screen, then touch the Job Assembly tab.<br />
2. Touch Delete Outside/Delete Inside.<br />
3. To delete everything outside the specified area when copying:<br />
a. Touch Delete Outside.<br />
b. The area is defined by the rectangle formed between the points as shown on the touch<br />
screen. Touch Area 1, then touch each coordinate on the touch screen. Use the alphanumeric<br />
keypad on the control panel to enter the coordinate values for X1, X2, Y1 and Y2. When all<br />
values have been entered, touch Save.<br />
c. To apply the deleted area for 2-Sided copying, under Originals touch Both Sides, Side 1 Only<br />
or Side 2 Only.<br />
d. Touch Save.<br />
e. Additional areas can be defined by selecting Area 2 and Area 3.<br />
4. To delete everything inside the specified area when copying:<br />
a. Touch Delete Inside.<br />
b. The area is defined by the rectangle formed between the points as shown on the touch<br />
screen. Touch Area 1, then touch each coordinate on the touch screen. Use the alphanumeric<br />
keypad on the control panel to enter the coordinate values for X1, X2, Y1 and Y2. When all<br />
values have been entered, touch Save.<br />
c. To apply the deleted area for 2-Sided copying, under Originals, touch Both Sides, Side 1 Only<br />
or Side 2 Only.<br />
d. Touch Save.<br />
e. Additional areas can be defined by selecting Area 2 and Area 3.<br />
Saving Copy Settings<br />
To use a particular combination of copy settings for future copy jobs, you can save the settings with a<br />
name and retrieve the settings for later use with other copy jobs.<br />
To save the current copy settings:<br />
1. On the touch screen, touch Copy.<br />
2. Touch the Job Assembly tab, then touch Save Current Settings.<br />
3. Using the touch screen keyboard, enter a name for the saved settings.<br />
4. Touch Save.<br />
117
Copying<br />
Retrieving Saved Copy Settings<br />
You can retrieve and use previously saved copy settings for current jobs.<br />
118<br />
Note: To save the copy settings with a name, see Saving Copy Settings on page 117.<br />
To retrieve saved settings:<br />
1. On the touch screen, touch Copy.<br />
2. Touch the Job Assembly tab, then touch Retrieve Saved Settings.<br />
3. Touch the desired saved setting.<br />
Note: To delete a saved setting, touch it, then touch the Delete Settings button.<br />
4. Touch Retrieve. The saved settings are loaded for the current copy job.<br />
<strong>WorkCentre</strong> <strong>7120</strong>/<strong>7125</strong> <strong>Multifunction</strong> <strong>Printer</strong><br />
<strong>User</strong> <strong>Guide</strong>
Scanning<br />
This chapter includes:<br />
• Scanning Overview on page 120<br />
• Loading Original Documents on page 121<br />
• Storing a Scan to a Folder on page 122<br />
• Printing Stored Files at the <strong>Printer</strong> on page 122<br />
• Printing Stored Files using CentreWare IS on page 124<br />
• Scanning to a Network File Repository on page 127<br />
• Scanning to an Email Address on page 128<br />
• Scanning to a Computer on page 130<br />
• Scanning to a Home Directory on page 131<br />
• Storing to a USB Flash Drive on page 132<br />
• Setting Scan Options on page 133<br />
• Using the <strong>Xerox</strong> Scan Utility on page 137<br />
See also:<br />
System Administrator <strong>Guide</strong> at www.xerox.com/office/WC<strong>7120</strong>/<strong>7125</strong>docs for details on<br />
setting up scanning.<br />
<strong>WorkCentre</strong> <strong>7120</strong>/<strong>7125</strong> <strong>Multifunction</strong> <strong>Printer</strong><br />
<strong>User</strong> <strong>Guide</strong><br />
6<br />
119
Scanning<br />
Scanning Overview<br />
Scanning is an optional printer feature providing several methods for scanning and storing an original<br />
document. The scanning procedure used with the printer differs from that of desktop scanners. Because<br />
the printer is normally connected to a network rather than directly to a single computer, you select a<br />
destination for the scanned image at the printer.<br />
The scanning feature allows you to scan a document and store the image to any of the<br />
following destinations:<br />
• Folder on the printer’s hard drive<br />
• Document repository on a network server<br />
• Email address<br />
• Windows computer<br />
• Home directory<br />
• USB Flash Drive<br />
• Computer using <strong>Xerox</strong> Scan Utility<br />
• Application using TWAIN or WIA<br />
120<br />
Notes:<br />
• The printer must be connected to a network to retrieve a scan file.<br />
• Scanning functions require installation of the Scan Drivers. For more information, see<br />
Installing the Software on page 42.<br />
• Scanning must be enabled before use. For details, see the System Administrator <strong>Guide</strong> at<br />
www.xerox.com/office/WC<strong>7120</strong>/<strong>7125</strong>docs.<br />
• Print, copy, and fax jobs can print while you are scanning original documents or<br />
downloading files from the printer’s hard drive.<br />
<strong>WorkCentre</strong> <strong>7120</strong>/<strong>7125</strong> <strong>Multifunction</strong> <strong>Printer</strong><br />
<strong>User</strong> <strong>Guide</strong>
Loading Original Documents<br />
<strong>WorkCentre</strong> <strong>7120</strong>/<strong>7125</strong> <strong>Multifunction</strong> <strong>Printer</strong><br />
<strong>User</strong> <strong>Guide</strong><br />
Scanning<br />
All scanning tasks begin with loading the original document in the printer. Use the document glass for<br />
single-page jobs, or originals that will not feed through the document feeder. Use the document feeder<br />
for multiple- or single-page jobs.<br />
Using the Document Glass<br />
Lift the document feeder cover and place the original facedown, toward the back left corner of the<br />
document glass as shown.<br />
CAUTION: When scanning a bound document, do not attempt to force the document feeder<br />
cover closed. Doing so may damage the document feeder cover.<br />
Using the Document Feeder<br />
Insert originals faceup. Adjust the paper guides so they fit against the originals.<br />
wc<strong>7120</strong>-018<br />
wc<strong>7120</strong>-020<br />
wc<strong>7120</strong>-019<br />
121
Scanning<br />
Storing a Scan to a Folder<br />
This section includes:<br />
• Scanning to a Folder on page 122<br />
• Printing Stored Files at the <strong>Printer</strong> on page 122<br />
• Using Job Flow Sheets on page 124<br />
• Printing Stored Files using CentreWare IS on page 124<br />
• Retrieving Scanned Files to Your Computer Using CentreWare Internet Services on page 124<br />
• Creating a Folder on page 125<br />
• Deleting a Folder on page 126<br />
Storing a scanned file to a folder is the simplest scanning method. A document scanned at the printer<br />
is stored as a file to a folder on the printer’s hard drive. You can then print the file, or you can copy the<br />
stored file to your computer using a Web browser and CentreWare IS.<br />
Folders are accessible to all users unless protected with a password. For details, see Creating a Folder on<br />
page 125.<br />
Note: Scanning to a folder must be enabled by the system administrator.<br />
Scanning to a Folder<br />
To store a scanned file to a folder:<br />
1. Load the original on the document glass or in the document feeder.<br />
2. Press the Services Home button.<br />
3. On the touch screen, touch Store to Folder.<br />
4. Touch the desired folder. If a password is required, enter the password using the alphanumeric<br />
keypad, then touch Confirm on the touch screen.<br />
5. To change any of the scan settings, use the four menus at the bottom of the touch screen: Color<br />
Scanning, 2-Sided Scanning, Original Type and Scan Presets. For details, see Setting Scan<br />
Options on page 133.<br />
6. Press the green Start button. The Store to Folder progress screen appears on the touch screen.<br />
When the scan is complete, the touch screen will redisplay the Store to Folder tab. The file is stored<br />
to the folder on the printer’s hard drive. You can then print the file or retrieve it to your computer<br />
using CentreWare IS.<br />
Printing Stored Files at the <strong>Printer</strong><br />
To print a file stored to a folder at the printer:<br />
1. Press the Services Home button.<br />
2. On the touch screen, touch Send from Folder.<br />
3. Touch the desired folder. If a password is required, enter the password using the alphanumeric<br />
keypad, then touch Confirm on the touch screen.<br />
122<br />
<strong>WorkCentre</strong> <strong>7120</strong>/<strong>7125</strong> <strong>Multifunction</strong> <strong>Printer</strong><br />
<strong>User</strong> <strong>Guide</strong>
4. In the file list, touch the desired file. To print multiple files, touch them in succession.<br />
Note: To view a thumbnail preview of the file, from the List drop-down list, select Thumbnail.<br />
5. Touch Print.<br />
<strong>WorkCentre</strong> <strong>7120</strong>/<strong>7125</strong> <strong>Multifunction</strong> <strong>Printer</strong><br />
<strong>User</strong> <strong>Guide</strong><br />
Scanning<br />
6. If desired, select from the following options: Paper Supply, 2-Sided Printing or Output Destination.<br />
7. To set the number of copies, touch Print Quantity, then enter the desired quantity using the<br />
alphanumeric keypad.<br />
8. Touch Print.<br />
Additional Send from Folder Options<br />
1. To view an enlarged file preview:<br />
a. In the touch screen file list, touch the desired file.<br />
b. Touch File Details. From the Whole Page drop-down list, touch Enlarged View. Touch the<br />
scroll buttons to examine the enlarged preview.<br />
c. To rotate the preview, select the desired rotation from the No Rotation drop-down list.<br />
Note: Rotating the preview does not rotate the printed output.<br />
d. When finished, touch Close.<br />
2. To view a summary of file information:<br />
a. In the touch screen file list, touch the desired file.<br />
b. Touch Review.<br />
c. When finished, touch Close.<br />
3. To delete a file:<br />
a. In the touch screen file list, touch the file to be deleted.<br />
b. Touch Delete twice.<br />
4. To change a file name:<br />
a. In the touch screen file list, touch the desired file.<br />
b. Touch File Details.<br />
c. Touch Change File Name.<br />
d. Using the touch screen keyboard, enter the new name.<br />
e. Touch Save, then touch Close.<br />
5. To access Job Flow Settings:<br />
a. If Job Flow Sheets have been created, touch Job Flow Settings. The Job Flow Sheet currently<br />
linked to the folder is displayed.<br />
b. To make changes to the Job Flow settings, touch Create/Change Link or Select Job Flow Sheet.<br />
123
Scanning<br />
Using Job Flow Sheets<br />
Job Flow Sheets allow you to execute a series of registered actions, such as Send as Fax or Print, for a<br />
file stored in a folder. Job Flow Sheets are created by the system administrator and are stored in the<br />
printer where they can linked by the user to a stored file.<br />
For details, see the System Administrator <strong>Guide</strong> at www.xerox.com/office/WC<strong>7120</strong>/<strong>7125</strong>docs.<br />
Printing Stored Files using CentreWare IS<br />
1. At your computer, launch your Web browser.<br />
2. Type the printer’s IP address into the Web browser’s address bar, then press Enter to open<br />
CentreWare Internet Services.<br />
Note: If you don’t know the printer’s IP address, see Finding The <strong>Printer</strong>’s IP Address on page 47.<br />
3. Click the Scan tab.<br />
4. In the Scan navigation pane at the left of the page, click Folder.<br />
5. In the Folder list, click the desired folder. If required, enter the folder password, then click Apply.<br />
The Folder: List of Files page appears.<br />
6. Select the desired file.<br />
7. Scroll the page to see the Print File section.<br />
8. If desired, make selections from the following printing options: Paper Supply, Output<br />
Destination, Quantity, 2-Sided Printing, or Batch Print.<br />
9. Click Print File.<br />
Retrieving Scanned Files to Your Computer Using<br />
CentreWare Internet Services<br />
Stored files are retrieved by copying them from the printer folder to your computer’s hard drive.<br />
1. At your computer, launch your Web browser.<br />
2. Type the printer’s IP address into the Web browser’s address bar, then press Enter to open<br />
CentreWare IS.<br />
Note: If you don’t know the printer’s IP address, see Finding The <strong>Printer</strong>’s IP Address on page 47.<br />
3. Click the Scan tab.<br />
4. In the Scan navigation pane at the left of the page, click Folder.<br />
5. In the Folder list, click the desired folder. If required, enter the folder password, then click Apply.<br />
The Folder: List of Files page appears.<br />
Note: If necessary, scroll down to see all files.<br />
6. Select the desired file.<br />
7. Scroll down to reveal Retrieving Format. From the Retrieving Format drop-down list, click the<br />
desired file format. If desired, select options for the file format using the check boxes and<br />
drop-down lists. Options vary by file format.<br />
8. Click Retrieve.<br />
124<br />
<strong>WorkCentre</strong> <strong>7120</strong>/<strong>7125</strong> <strong>Multifunction</strong> <strong>Printer</strong><br />
<strong>User</strong> <strong>Guide</strong>
9. On the Retrieve Files from Folder page, click the link to the selected file.<br />
10. Click Save, select the desired storage location, then click Save.<br />
11. If a stored file is no longer needed:<br />
a. Select the desired file.<br />
b. In the upper right corner of the page, click Delete.<br />
c. When prompted, click OK.<br />
Additional File Retrieve Options<br />
<strong>WorkCentre</strong> <strong>7120</strong>/<strong>7125</strong> <strong>Multifunction</strong> <strong>Printer</strong><br />
<strong>User</strong> <strong>Guide</strong><br />
Scanning<br />
The following options are available when retrieving a stored file:<br />
1. To retrieve a single page of a multiple-page document, select Retrieve Page Enabled. In the Page<br />
Number field, type the page number.<br />
2. To add a thumbnail view when using XPS format, select the Add Thumbnail Enabled check box.<br />
3. To apply MRC High Compression to PDF and XPS format files, select the MRC High Compression<br />
Enabled check box. Select the desired quality from the Quality drop-down list.<br />
4. To create a searchable-text PDF or XPS file:<br />
a. Select Searchable Text Enabled.<br />
b. From the Language of the Original drop-down list, select the language.<br />
c. To apply Text Compression, from the Text Compression drop-down list, select Enabled.<br />
Creating a Folder<br />
To create a folder using the printer touch screen:<br />
1. On the control panel, press the Machine Status button.<br />
2. Touch the Tools tab, then under Features, touch Create Folder.<br />
3. Touch an folder.<br />
4. To assign a password to the folder:<br />
a. Under Check Folder Passcode, touch On.<br />
b. Using the alphanumeric keypad, enter the password.<br />
c. Touch Save.<br />
5. Assign folder attributes:<br />
• Touch Folder Name. Using the touch screen keyboard, enter the name, then touch Save.<br />
• Touch Delete Files After Retrieval, touch Yes or No, then touch Save.<br />
• Touch Delete Expired Files, touch Yes or No, then touch Save.<br />
• Touch Link Job Flow Sheets to folder, then touch Cut Link or Create Change Link.<br />
To create a folder using CentreWare IS:<br />
1. At your computer, launch your Web browser.<br />
2. Type the printer’s IP address into the Web browser’s address bar, then press Enter to open<br />
CentreWare Internet Services.<br />
Note: If you don’t know the printer’s IP address, see Finding The <strong>Printer</strong>’s IP Address on page 47.<br />
3. Click the Scan tab.<br />
125
Scanning<br />
4. In the Scan navigation pane at the left of the page, click Folder.<br />
5. In the Folder list, click Create for an folder.<br />
126<br />
Note: If necessary, scroll the page to see available folders.<br />
6. Assign folder attributes:<br />
• Folder Name: type the name.<br />
• Delete Files After Retrieval: set or clear.<br />
• Delete Expired Files: set or clear.<br />
7. To assign a password to the folder:<br />
a. In the Folder Passcode field, type the password.<br />
b. In the Retype Passcode field, retype the password.<br />
c. In the Check Folder Passcode drop-down list, select Always, Save or Print/Delete.<br />
Your folder is now available for use. Its contents will be stored on the printer’s hard drive. The folder will<br />
appear on the printer touch screen, and in the folder list in CentreWare IS.<br />
Deleting a Folder<br />
CAUTION: Files in the folder will be deleted.<br />
To delete a folder using the printer touch screen:<br />
1. On the control panel, press the Machine Status button.<br />
2. Touch the Tools tab, then under Features, touch Create Folder.<br />
3. Touch the desired folder.<br />
4. If a password is required, enter the password using the alphanumeric keypad, then touch Confirm.<br />
5. Touch Delete Folder, then touch Delete.<br />
To delete a folder using CentreWare IS:<br />
1. At your computer, launch your Web browser.<br />
2. Type the printer’s IP address into the Web browser’s address bar, then press Enter to open<br />
CentreWare Internet Services.<br />
Note: If you don’t know the printer’s IP address, see Finding The <strong>Printer</strong>’s IP Address on page 47.<br />
3. Click the Scan tab.<br />
4. In the Scan navigation pane at the left of the page, click Folder.<br />
Note: If necessary, scroll down to see all folders.<br />
5. In the Folder list, click Delete for the folder to be deleted.<br />
Note: If the folder contains files, they must be deleted before the folder can be deleted.<br />
6. Click OK. If required, enter the folder password, then click Apply.<br />
<strong>WorkCentre</strong> <strong>7120</strong>/<strong>7125</strong> <strong>Multifunction</strong> <strong>Printer</strong><br />
<strong>User</strong> <strong>Guide</strong>
Scanning to a Network File Repository<br />
<strong>WorkCentre</strong> <strong>7120</strong>/<strong>7125</strong> <strong>Multifunction</strong> <strong>Printer</strong><br />
<strong>User</strong> <strong>Guide</strong><br />
Scanning<br />
Scanning to a network file repository is a feature of Network Scanning. Documents you scan are sent to a<br />
document repository on a network server configured by your system administrator. A template, also<br />
created by the system administrator, defines the scan settings and the destination of the scanned image.<br />
Notes:<br />
• Scanning to a network file repository must be configured by your system administrator.<br />
• Templates must be created using CentreWare IS. For details, see the<br />
System Administrator <strong>Guide</strong> at www.xerox.com/office/WC<strong>7120</strong>/<strong>7125</strong>docs.<br />
To use the scan to a network file repository feature:<br />
1. Load the original on the document glass or in the document feeder.<br />
2. On the control panel, press the Services Home button.<br />
3. Touch Network Scanning.<br />
4. Touch the desired template.<br />
5. To override the template scan settings:<br />
• For scanning options, use the four menus at the bottom of the touch screen: Color Scanning,<br />
2-Sided Scanning, Original Type and Scan Presets. For details, see Setting Scan Options on<br />
page 133.<br />
• For additional scanning options, use the three tabs at the top of the touch screen. For details,<br />
see Additional Scanning Options on page 134.<br />
6. Press the green Start button.<br />
127
Scanning<br />
Scanning to an Email Address<br />
Scanning to an email address sends scanned documents as attachments to email.<br />
128<br />
Note: This feature must be enabled by your system administrator.<br />
To send a scanned image to an email address:<br />
1. Load the original on the document glass or in the document feeder.<br />
2. On the control panel, press the Services Home button.<br />
3. Touch E-Mail.<br />
4. Specify the recipient using one of these methods:<br />
• Touch New Recipient: using the touch screen keyboard, enter the complete email address,<br />
touch Add, then touch Close.<br />
• Touch Address Book: touch the desired recipient, then touch To.<br />
5. Repeat Step 4 to add additional recipients to the list. When all recipients have been added to the<br />
list, touch Close.<br />
6. A default subject is provided for the email. To change the subject, touch Subject. Using the touch<br />
screen keyboard, enter the new subject, then touch Save.<br />
7. To change any of the scan settings, touch the four menus at the bottom of the control panel:<br />
Color Scanning, 2-Sided Scanning, Original Type and Scan Presets. For details, see Setting Scan<br />
Options on page 133.<br />
8. Press the green Start button.<br />
Setting Email Options<br />
You can override the template settings created by your system administrator, and change the following<br />
email settings:<br />
• File Name<br />
• File Format<br />
• Reply To<br />
• Read Receipts<br />
To change the File Name, Message or Reply to email options:<br />
1. On the printer control panel, press the Services Home button.<br />
2. Touch E-Mail, then touch the E-mail Options tab.<br />
3. Touch File Name, Message, or Reply to. Using the touch screen keyboard, delete or modify the text.<br />
4. Touch Save.<br />
To change the file format:<br />
1. On the printer control panel, press the Services Home button.<br />
2. Touch E-Mail, then touch the E-mail Options tab.<br />
3. Touch File Format, then select the desired file type. Each file format is described when selected.<br />
4. To accept the file format, touch Save.<br />
<strong>WorkCentre</strong> <strong>7120</strong>/<strong>7125</strong> <strong>Multifunction</strong> <strong>Printer</strong><br />
<strong>User</strong> <strong>Guide</strong>
To request a read receipt:<br />
1. On the printer control panel, press the Services Home button.<br />
2. Touch E-Mail, then touch the E-mail Options tab.<br />
3. Touch Read Receipts, then touch On.<br />
4. Touch Save.<br />
<strong>WorkCentre</strong> <strong>7120</strong>/<strong>7125</strong> <strong>Multifunction</strong> <strong>Printer</strong><br />
<strong>User</strong> <strong>Guide</strong><br />
Scanning<br />
129
Scanning<br />
Scanning to a Computer<br />
The Scan to PC feature allows you to scan a document to your computer.<br />
130<br />
Note: This feature must be enabled by your system administrator.<br />
To use the Scan to PC feature:<br />
1. Load the original on the document glass or in the document feeder.<br />
2. On the control panel, press the Services Home button.<br />
3. Touch Scan to PC.<br />
4. Touch Transfer Protocol, then touch FTP, SMB or SMB (UNC Format), then touch Save.<br />
5. Touch Server, Save in, <strong>User</strong> Name and Password. For each setting, using the touch screen<br />
keyboard, enter the data. Touch Save.<br />
Note: If the server name was previously stored, touch Address Book, touch the desired server,<br />
touch Add, then touch Close.<br />
6. To change any of the scan settings, touch the four menus at the bottom of the touch screen: Color<br />
Scanning, 2-Sided Scanning, Original Type and Scan Presets. For details, see Setting Scan<br />
Options on page 133.<br />
7. Press the green Start button.<br />
8. Access the scanned image at your computer.<br />
<strong>WorkCentre</strong> <strong>7120</strong>/<strong>7125</strong> <strong>Multifunction</strong> <strong>Printer</strong><br />
<strong>User</strong> <strong>Guide</strong>
Scanning to a Home Directory<br />
The Scan to Home feature allows you to scan a document to your home directory. The network<br />
location of your home directory is defined by the system administrator.<br />
Note: This feature must be configured by the system administrator.<br />
<strong>WorkCentre</strong> <strong>7120</strong>/<strong>7125</strong> <strong>Multifunction</strong> <strong>Printer</strong><br />
<strong>User</strong> <strong>Guide</strong><br />
Scanning<br />
To use the Scan to Home feature:<br />
1. Load the original on the document glass or in the document feeder.<br />
2. On the control panel, press the Services Home button.<br />
3. Touch Network Scanning.<br />
4. Touch the template created by your system administrator.<br />
5. The template defines the scan settings as well as the destination of the image. To change any of<br />
the scan settings, touch the four menus at the bottom of the touch screen: Color Scanning,<br />
2-Sided Scanning, Original Type and Scan Presets. For details, see Setting Scan Options on<br />
page 133.<br />
6. Press the green Start button.<br />
For details, see the System Administrator <strong>Guide</strong> at www.xerox.com/office/WC<strong>7120</strong>/<strong>7125</strong>docs.<br />
131
Scanning<br />
Storing to a USB Flash Drive<br />
The Store to USB feature allows you to scan a document to a USB Flash Drive using the USB port on<br />
the printer control panel.<br />
132<br />
Notes:<br />
• This feature must be enabled by your system administrator.<br />
• This feature cannot be used when the Media Card Reader option is connected.<br />
To use the Store to USB feature:<br />
1. Load the original on the document glass or in the document feeder.<br />
2. Insert a USB Flash Drive in the USB port on the control panel.<br />
3. Press the Services Home button.<br />
4. Touch Store to USB.<br />
5. Touch Save in.<br />
6. Touch the desired folder.<br />
• To move down one directory level, touch Next.<br />
• To move up one directory level, touch Previous.<br />
7. To select the storage location, touch Save.<br />
8. To change any of the scan settings, touch the four menus at the bottom of the touch screen: Color<br />
Scanning, 2-Sided Scanning, Original Type and Scan Presets. For details, see Setting Scan<br />
Options on page 133.<br />
9. To change any of the additional scanning options, use the three tabs at the top of the touch<br />
screen. For details, see Additional Scanning Options on page 134.<br />
10. To scan the original and store the file, press the green Start button.<br />
CAUTIONS:<br />
• Do not remove the USB Flash Drive while a file is being stored. Damage to stored files may occur.<br />
• Remove the USB Flash Drive before turning the printer off.<br />
11. Touch the Services Home button, then remove the USB Flash Drive.<br />
To print files stored on a USB Flash Drive, see Printing from USB Flash Drive on page 88.<br />
<strong>WorkCentre</strong> <strong>7120</strong>/<strong>7125</strong> <strong>Multifunction</strong> <strong>Printer</strong><br />
<strong>User</strong> <strong>Guide</strong>
Setting Scan Options<br />
This section includes:<br />
• Scan Settings on page 133<br />
• Additional Scanning Options on page 134<br />
Scan Settings<br />
<strong>WorkCentre</strong> <strong>7120</strong>/<strong>7125</strong> <strong>Multifunction</strong> <strong>Printer</strong><br />
<strong>User</strong> <strong>Guide</strong><br />
Scanning<br />
Scanning can be adjusted using optional settings. After selecting the desired scanning method, use the<br />
four menus at the bottom of the control panel touch screen to change the following scan settings:<br />
• Color Scanning<br />
• 2-Sided Scanning<br />
• Original Type<br />
• Scan Presets<br />
To change the scan settings:<br />
1. On the printer control panel, press Services Home.<br />
2. Touch the desired scan method.<br />
3. Touch the desired settings in the four menus at the bottom of the touch screen.<br />
Setting Use<br />
Setting Color Scanning Overrides automatic detection. Set to Color, Black & White,<br />
or Grayscale.<br />
Setting 1-sided or 2-sided originals Use the document feeder to scan 2-sided originals. Select<br />
2-sided scanning to scan both sides of the paper to produce a<br />
multi-page image.<br />
If your original document cannot be fed through the document<br />
feeder, use the document glass to manually perform<br />
2-sided scanning.<br />
Setting the Original Type Choose from Photo & Text, Text, or Photo.<br />
Setting the Scan Presets Choose from Sharing & Printing, Archival-Record, OCR, High<br />
Quality Printing, or Simple Scan.<br />
133
Scanning<br />
Additional Scanning Options<br />
Additional scanning options allow precise control of the scanning process. Many of these optional settings<br />
override the automatic settings. Instructions on the touch screen describe the use of these options.<br />
After selecting the desired scanning method, use the tabs along the top of the touch screen to change<br />
the following scanning options:<br />
• Advanced Settings<br />
• Layout Adjustment<br />
• Filing Options<br />
Advanced Settings<br />
Advanced settings allow you to control image options, image enhancements, scan resolution, file size,<br />
photographs, and shadow suppression.<br />
To use Advanced Settings:<br />
1. On the printer control panel, press Services Home.<br />
2. Touch the desired scan method.<br />
3. Touch the Advanced Settings tab.<br />
4. Touch the desired setting.<br />
Setting Use<br />
Image Options Choose from Lighten/Darken, or Sharpness/Soften.<br />
Image Enhancement Choose from Auto Suppression, or Contrast.<br />
Resolution Choose from 200 to 600 dpi.<br />
Quality/File Size Choose from: good image quality with small file size, higher image<br />
quality with larger file size, or highest image quality with largest<br />
file size.<br />
Photographs Enhances the appearance of scans of photographic originals. Color<br />
Scanning must be set to Color.<br />
Shadow Suppression Choose Auto Suppression to hide background color and image bleed<br />
through for color scanning.<br />
134<br />
<strong>WorkCentre</strong> <strong>7120</strong>/<strong>7125</strong> <strong>Multifunction</strong> <strong>Printer</strong><br />
<strong>User</strong> <strong>Guide</strong>
Layout Adjustment<br />
<strong>WorkCentre</strong> <strong>7120</strong>/<strong>7125</strong> <strong>Multifunction</strong> <strong>Printer</strong><br />
<strong>User</strong> <strong>Guide</strong><br />
Scanning<br />
Layout adjustment provides additional settings for original orientation, original size, edge erase, Book<br />
Scanning and Reduce/Enlarge.<br />
To use Layout Adjustment:<br />
1. On the printer control panel, press Services Home.<br />
2. Touch the desired scan method.<br />
3. Touch the Layout Adjustment tab.<br />
4. Touch the desired setting.<br />
Setting Use<br />
Original Orientation Choose from Upright Images or Sideways Images.<br />
Original Size Choose from Auto Detect, Manual Size Input or Mixed Size Originals.<br />
Edge Erase Choose from All Edges, Print to Edge, Individual Edges or from a<br />
previously created Preset. Using the plus or minus buttons (+/–),<br />
enter the value.<br />
Book Scanning Choose from Left Page then Right, Right Page then Left or Top Page<br />
then Bottom. Using the plus or minus buttons (+/–), enter the<br />
Binding Edge Erase.<br />
Reduce/Enlarge Choose from Proportional%, a Preset, or Enter Output Size. Using<br />
the plus or minus buttons (+/–), enter the value.<br />
135
Scanning<br />
Filing Options<br />
Filing Options provide additional settings for naming images, choosing image formats, adding meta<br />
data, and behavior if a file name already exists.<br />
To use Filing Options:<br />
1. On the printer control panel, press Services Home.<br />
2. Touch the desired scan method.<br />
3. Touch the Filing Options tab.<br />
4. Touch the desired setting.<br />
Setting Use<br />
File Name Enter a filename prefix.<br />
File Format Choose from: PDF (Image Only or Searchable), PDF/A (Image Only<br />
or Searchable), Multi-page TIFF, TIFF (1 file per page), JPEG (1 file<br />
per page) or XPS (Image Only or Searchable).<br />
Choose Compression Method, MRC High Compression or Optimize<br />
for Fast Web View.<br />
Meta Data Assign descriptive metadata to a scanned image.<br />
If File Already Exists Choose from Do Not Save, Rename New File, Overwrite Existing<br />
File, Append to Existing Folder, or AddDateStamp to File.<br />
Login Name Enter login name if required.<br />
Password Enter password if required.<br />
136<br />
<strong>WorkCentre</strong> <strong>7120</strong>/<strong>7125</strong> <strong>Multifunction</strong> <strong>Printer</strong><br />
<strong>User</strong> <strong>Guide</strong>
Using the <strong>Xerox</strong> Scan Utility<br />
This section includes:<br />
• Overview on page 137<br />
• Creating a Scan Template on page 138<br />
• Scanning to a Template on page 139<br />
• Accessing <strong>Xerox</strong> Scan Utility on page 139<br />
• Importing Scanned Files into an Application on page 140<br />
The <strong>Xerox</strong> Scan Utility allows you to scan images from the printer directly to your computer. These<br />
scanned images are not stored in the printer.<br />
Notes:<br />
• You must install the scan drivers to use the <strong>Xerox</strong> Scan Utility. For details, see the<br />
System Administrator <strong>Guide</strong> at www.xerox.com/office/WC<strong>7120</strong>/<strong>7125</strong>docs.<br />
• You must create a scan template before using the <strong>Xerox</strong> Scan Utility.<br />
Overview<br />
<strong>WorkCentre</strong> <strong>7120</strong>/<strong>7125</strong> <strong>Multifunction</strong> <strong>Printer</strong><br />
<strong>User</strong> <strong>Guide</strong><br />
Scanning<br />
The following steps summarize the use of the <strong>Xerox</strong> Scan Utility:<br />
1. Create a <strong>Xerox</strong> Scan Utility scan template using your computer.<br />
• The template contains scanning instructions, such as color settings, file format and resolution.<br />
• Once created, the template data is sent to the printer and stored there for later use.<br />
2. Scan an original document at the printer.<br />
• Using the printer touch screen, select the desired template.<br />
• Scan the original document.<br />
• When scanning is complete, the image is sent from the printer to the computer.<br />
3. Use the <strong>Xerox</strong> Scan Utility to manage the scanned image at your computer:<br />
• View image thumbnails.<br />
• Copy images into file folders on your computer.<br />
• Include images as attachments to emails.<br />
137
Scanning<br />
Creating a Scan Template<br />
Scan templates contain scanning instructions, such as color settings, file format and resolution. You can<br />
specify additional settings to retain thumbnail images, or you can select a folder destination so that<br />
when images are scanned, they are automatically copied into a designated folder on your computer.<br />
You must create a scan template before you can download images to your computer or import images<br />
to applications using TWAIN or WIA.<br />
To create a new <strong>Xerox</strong> Scan Utility scan template or edit an existing template:<br />
1. Access the <strong>Xerox</strong> Scan Utility on your computer:<br />
• Windows: In the taskbar, right-click the <strong>Xerox</strong> Scan Utility icon. Select Open <strong>Xerox</strong> Scan<br />
Utility. If the icon is not visible in the taskbar, click Start, select All Programs, or Programs if<br />
you are using Windows Classic View, select <strong>Xerox</strong> Office Printing > Scanning ><br />
<strong>Xerox</strong> Scan Utility.<br />
• Macintosh: Navigate to Applications > <strong>Xerox</strong> > <strong>Xerox</strong> Scan Utility, then double-click the<br />
<strong>Xerox</strong> Scan Utility.<br />
2. Click Scan Settings, then select one of the following options:<br />
• To view the scanned image in both the Scan to Email and Copy to Folder tabs, click Preview<br />
image in <strong>Xerox</strong> Scan Utility.<br />
• To automatically save the scanned images in a particular folder without opening the <strong>Xerox</strong><br />
Scan Utility, click Send Image Directly to Folder. For details, see <strong>Xerox</strong> Scan Utility Help.<br />
3. Select the desired settings for the template: Color, Black and White, Original Size, Resolution,<br />
Original Type, File Format, and Sides to Scan.<br />
4. Select one of the following options:<br />
• To create a new template for the settings you selected: in the Saved Template Settings<br />
drop-down list, type the name for the new template. Click Save.<br />
• To edit an existing template with the settings you selected: in the Saved Template Settings<br />
drop-down list, select a template from the list displayed. Click Save.<br />
Note: Spaces are not permitted in template names.<br />
The template will now appear in the list of templates on the Network Scanning tab on the printer touch<br />
screen and in Folder: List of Files in CentreWare Internet Services.<br />
138<br />
<strong>WorkCentre</strong> <strong>7120</strong>/<strong>7125</strong> <strong>Multifunction</strong> <strong>Printer</strong><br />
<strong>User</strong> <strong>Guide</strong>
Scanning to a Template<br />
<strong>WorkCentre</strong> <strong>7120</strong>/<strong>7125</strong> <strong>Multifunction</strong> <strong>Printer</strong><br />
<strong>User</strong> <strong>Guide</strong><br />
Scanning<br />
At the printer, place your original document in the document feeder or on the document glass.<br />
1. On the control panel, press Services Home.<br />
2. Touch Network Scanning.<br />
3. Touch the desired template. To create a template, see Creating a Scan Template on page 138.<br />
Note: Settings chosen using CentreWare Internet Services can be overridden using the printer<br />
touch screen.<br />
4. To change any of the scan settings, touch the four menus at the bottom of the touch screen: Color<br />
Scanning, 2-Sided Scanning, Original Type and Scan Presets. For details, see Setting Scan<br />
Options on page 133.<br />
5. Press the green Start button. The progress screen appears on the printer touch screen. When the<br />
scan is complete, the touch screen will redisplay the Network Scanning tab. Your file is stored in<br />
the selected folder on your computer.<br />
Note: A password may be required when scanning to a template. Contact your system<br />
administrator for the password. For details, see the System Administrator <strong>Guide</strong> at<br />
www.xerox.com/office/WC<strong>7120</strong>/<strong>7125</strong>docs.<br />
Accessing <strong>Xerox</strong> Scan Utility<br />
To access the <strong>Xerox</strong> Scan Utility on your computer:<br />
• Windows: In the taskbar, right-click the <strong>Xerox</strong> Scan Utility icon. Select Open <strong>Xerox</strong> Scan Utility. If<br />
the icon is not visible in the taskbar, click Start, select All Programs, or Programs if you are using<br />
Windows Classic View, select <strong>Xerox</strong> Office Printing > Scanning > <strong>Xerox</strong> Scan Utility.<br />
• Macintosh: Navigate to Applications > <strong>Xerox</strong> > <strong>Xerox</strong> Scan Utility, then double-click the<br />
<strong>Xerox</strong> Scan Utility.<br />
139
Scanning<br />
Importing Scanned Files into an Application<br />
You can import images scanned at the printer into Windows or Macintosh applications on your<br />
computer. You must create a scan template before you can download images to your computer or<br />
import images to applications using TWAIN or WIA. For details, see <strong>Xerox</strong> Scan Utility Help.<br />
This section includes:<br />
• Importing Scanned Images into a Windows Application (TWAIN) on page 140<br />
• Using the WIA Image Manager in a Windows Application on page 141<br />
• Using the <strong>Xerox</strong> Scan Utility in a Macintosh OS X Application (TWAIN) on page 141<br />
Importing Scanned Images into a Windows Application (TWAIN)<br />
To import scanned images into an application for Windows 2000, Windows XP, Windows Vista and<br />
Windows Server 2003:<br />
1. Open the file in which you want to place the image.<br />
2. Click the application’s menu item to acquire the scanned image. For example, if you are placing<br />
an image in a Microsoft Word 2003 document:<br />
a. Click Insert.<br />
b. Click Picture.<br />
c. Click From Scanner or Camera.<br />
d. Click the scanner, then click Custom Insert.<br />
The <strong>Xerox</strong> Scan Utility window displays thumbnails of the scanned images. The date and time the<br />
image was scanned appears below each thumbnail. If you move your mouse over the thumbnail, a<br />
pop-up message displays information including the resolution and size of the image file. If a<br />
recently scanned image is not displayed, click Refresh.<br />
3. Select the image you want to import.<br />
4. Click Retrieve. A copy of the image is transferred to the location in your application. If you want to<br />
delete the images you selected, click Delete.<br />
140<br />
<strong>WorkCentre</strong> <strong>7120</strong>/<strong>7125</strong> <strong>Multifunction</strong> <strong>Printer</strong><br />
<strong>User</strong> <strong>Guide</strong>
Using the WIA Image Manager in a Windows Application<br />
<strong>WorkCentre</strong> <strong>7120</strong>/<strong>7125</strong> <strong>Multifunction</strong> <strong>Printer</strong><br />
<strong>User</strong> <strong>Guide</strong><br />
Scanning<br />
To import scanned images into an application using the WIA Image Manager on Windows XP,<br />
Windows Vista and Windows Server 2003:<br />
1. Open the file in which you want to place the image.<br />
2. To acquire the scanned image, select the application’s menu item. For example, if you are placing<br />
an image in a Microsoft Word 2003 document:<br />
a. Click Insert.<br />
b. Select Picture.<br />
c. Select From Scanner or Camera.<br />
d. Select the scanner, then click OK.<br />
3. Open the folder to view thumbnails of the scanned images.<br />
4. To see details of an image file:<br />
a. Select the image.<br />
b. Click View picture information. The Properties dialog box displays the file size, and the date<br />
and time that the image was scanned.<br />
c. Click OK.<br />
d. Select the image you want to import.<br />
5. Click Get Pictures.<br />
A copy of the image is transferred to the location selected in your application.<br />
Note: If you want to delete the images you selected, click Delete.<br />
Using the <strong>Xerox</strong> Scan Utility in a Macintosh OS X Application (TWAIN)<br />
To import scanned images into an application:<br />
1. Open the file in which you want to place the image.<br />
2. Select the application’s menu item to acquire the image. For example, if you are placing an image<br />
in a Microsoft Word for Macintosh document:<br />
a. Click Insert.<br />
b. Select Picture.<br />
c. Select From Scanner or Camera.<br />
d. Select the scanner, then click Acquire.<br />
The Scan to Email and Copy to Folder tabs on the <strong>Xerox</strong> Scan Utility display thumbnails of the<br />
images. Information about each image, including the template used, resolution, size of the image<br />
file, and the profile name and settings appears to the right of the thumbnail.<br />
3. Select the image you want to import.<br />
4. Click Import. A copy of the image is transferred to the location selected in your application. If you<br />
want to delete the images you selected, click Delete.<br />
Note: For details, click Help.<br />
141
Scanning<br />
142<br />
<strong>WorkCentre</strong> <strong>7120</strong>/<strong>7125</strong> <strong>Multifunction</strong> <strong>Printer</strong><br />
<strong>User</strong> <strong>Guide</strong>
Faxing<br />
This chapter includes:<br />
• Fax Overview on page 144<br />
• Sending a Fax on page 146<br />
• Server Fax on page 147<br />
• Sending an Internet Fax on page 148<br />
• Faxing from Your Computer on page 149<br />
• Receiving Faxes on page 150<br />
• Selecting Fax Options on page 151<br />
• Adding Address Book Entries on page 155<br />
• Creating Fax Comments on page 157<br />
<strong>WorkCentre</strong> <strong>7120</strong>/<strong>7125</strong> <strong>Multifunction</strong> <strong>Printer</strong><br />
<strong>User</strong> <strong>Guide</strong><br />
7<br />
143
Faxing<br />
Fax Overview<br />
Faxing is an optional printer feature providing several methods for faxing an original document.<br />
• Embedded Fax: Document is scanned and sent directly to a fax machine.<br />
• Server Fax: Document is scanned and sent over an Ethernet network to a fax server, which then<br />
sends the fax to a fax machine.<br />
• Internet Fax: Document is scanned and emailed to a recipient.<br />
• Faxing from your Computer: Using the printer driver, the current print job is sent as a fax.<br />
144<br />
Note: Fax capability must be enabled by the system administrator before use. For details, see the<br />
System Administrator <strong>Guide</strong> at www.xerox.com/office/WC<strong>7120</strong>/<strong>7125</strong>docs.<br />
<strong>WorkCentre</strong> <strong>7120</strong>/<strong>7125</strong> <strong>Multifunction</strong> <strong>Printer</strong><br />
<strong>User</strong> <strong>Guide</strong>
Loading Original Documents<br />
<strong>WorkCentre</strong> <strong>7120</strong>/<strong>7125</strong> <strong>Multifunction</strong> <strong>Printer</strong><br />
<strong>User</strong> <strong>Guide</strong><br />
Faxing<br />
With the exception of Faxing from Your Computer, faxing tasks begin with loading the original<br />
document in the printer. Use the document glass for single page jobs or for originals that will not feed<br />
through the document feeder. Use the document feeder for multiple or single page jobs.<br />
Document Glass<br />
Lift the document feeder cover and place the original facedown, toward the back-left corner of the<br />
document glass as shown.<br />
Document Feeder<br />
Insert originals faceup. Adjust the paper guides so they fit against the originals.<br />
wc<strong>7120</strong>-018<br />
wc<strong>7120</strong>-020<br />
wc<strong>7120</strong>-019<br />
145
Faxing<br />
Sending a Fax<br />
To send a fax using the printer’s Embedded Fax:<br />
1. Load the original on the document glass or in the document feeder.<br />
2. On the control panel, press Services Home.<br />
3. Touch Fax.<br />
4. To manually enter the recipient fax number do one of the following:<br />
• Enter the fax number using the alphanumeric keypad, then touch Add.<br />
• Touch New Recipients, enter the number using the touch screen keyboard, touch Add, then<br />
touch Close.<br />
5. To use a number previously stored in the Address Book:<br />
a. Touch Address Book.<br />
b. Touch List all public entries or List all group entries from the drop-down list.<br />
c. Touch the arrows to scroll through the list.<br />
d. Touch the desired address.<br />
e. Touch Add, then touch Close.<br />
Notes:<br />
• Addresses must be entered in the Address Book to use the address book. For details, see<br />
Adding Address Book Entries on page 155.<br />
• Chain Dial can be performed when viewing the list of individual addresses in the Address<br />
Book. For details, see Using Chain Dial on page 156.<br />
6. To include a cover page:<br />
• Touch Cover Page, then touch Print Cover Page.<br />
• To add a previously created comment, touch Comments, then under either Recipient’s<br />
Comment or Sender’s Comment, touch an available comment, then touch Save. For details,<br />
see Creating Fax Comments on page 157.<br />
• Touch Save.<br />
7. Adjust fax options if required. For details, see Selecting Fax Options on page 151.<br />
8. Press the green Start button. The printer scans the pages and transmits the document when all<br />
pages have been scanned.<br />
Inserting Pauses in Fax Numbers<br />
Some fax numbers require one or more pauses during the dialing sequence.<br />
To insert a pause in a fax number:<br />
1. Using the alphanumeric keypad, begin entering the fax number.<br />
2. Press the Dial Pause button on the control panel to insert a pause, represented by a hyphen, in the<br />
desired location.<br />
3. Continue entering the fax number.<br />
146<br />
<strong>WorkCentre</strong> <strong>7120</strong>/<strong>7125</strong> <strong>Multifunction</strong> <strong>Printer</strong><br />
<strong>User</strong> <strong>Guide</strong>
Server Fax<br />
When using the Server Fax, a document is scanned and sent to a fax server on the network. The fax<br />
server then sends the fax over a telephone line to a fax machine.<br />
Notes:<br />
<strong>WorkCentre</strong> <strong>7120</strong>/<strong>7125</strong> <strong>Multifunction</strong> <strong>Printer</strong><br />
<strong>User</strong> <strong>Guide</strong><br />
Faxing<br />
• The Server Fax service must be enabled before use, and a fax server must be configured.<br />
• Server Fax cannot be used together with the Fax feature. When Server Fax is in use, the<br />
touch screen Fax button activates Server Fax.<br />
• Server Fax cannot be used together with the Internet Fax feature. When Server Fax is in<br />
use, the touch screen Internet Fax button does not appear.<br />
Sending a Server Fax<br />
1. Load the original on the document glass or in the document feeder.<br />
2. On the control panel, touch Services Home.<br />
3. Touch Fax.<br />
4. Enter the number using the alphanumeric keypad, then touch Add.<br />
5. Touch New Recipients, enter the number using the touch screen keyboard, touch Add, then<br />
touch Close.<br />
6. To use a number previously stored in the Address Book:<br />
a. Touch Address Book.<br />
b. Touch the arrows to scroll through the list.<br />
c. Touch the desired address.<br />
d. Touch Add, then touch Close.<br />
7. Adjust fax options if necessary. For details, see Selecting Fax Options on page 151.<br />
8. Press the green Start button. The printer scans the pages and transmits the fax document when<br />
all pages have been scanned.<br />
147
Faxing<br />
Sending an Internet Fax<br />
If an SMTP email server is connected to the network, a document can be sent to an email address.<br />
This feature eliminates the need for a dedicated telephone line. When sending an Internet Fax, the<br />
document is scanned and sent to an email address.<br />
148<br />
Note: The Internet Fax service must be enabled before use, and an SMTP server must be configured.<br />
For details, see the System Administrator <strong>Guide</strong> at www.xerox.com/office/WC<strong>7120</strong>/<strong>7125</strong>docs.<br />
To send an Internet Fax:<br />
1. Place the original on the document glass or in the document feeder.<br />
2. On the printer touch screen, touch Services Home, then touch Internet Fax.<br />
3. Touch New Recipient.<br />
4. To enter the recipient’s email address do one of the following:<br />
• Enter the address using the touch screen keyboard, then touch Add. Repeat for each<br />
recipient, then touch Close.<br />
• Touch Address Book, touch the desired address in the scrolling list, then touch Add. When all<br />
recipients have been added, touch Close.<br />
5. Adjust fax options if necessary. For details, see Selecting Fax Options on page 151.<br />
6. Press the green Start button. The printer scans the pages and sends the document as an email<br />
attachment when all pages have been scanned.<br />
<strong>WorkCentre</strong> <strong>7120</strong>/<strong>7125</strong> <strong>Multifunction</strong> <strong>Printer</strong><br />
<strong>User</strong> <strong>Guide</strong>
Faxing from Your Computer<br />
A document stored on your computer can be sent as a fax using the printer driver.<br />
Note: To fax from your computer, fax must be installed in the printer and enabled by the<br />
system administrator.<br />
1. In your software application, click File, then Print.<br />
2. Select your printer from the list.<br />
3. Access the printer driver settings by selecting Properties or Preferences (Windows), or <strong>Xerox</strong><br />
Features for Macintosh. The title of the button may vary depending on your application.<br />
4. Select printer features.<br />
• Windows: Click the Paper/Output tab.<br />
• Macintosh: Click Copies & Pages, then click <strong>Xerox</strong> Features.<br />
5. Click the Job Type menu, then click Fax.<br />
6. Click Add Recipients.<br />
7. Enter the recipient’s name and fax number. If desired, complete the additional information.<br />
8. If desired, click the Cover Sheet tab, choose an option, then click OK.<br />
9. If desired, click the Options tab, choose options, then click OK.<br />
10. Click OK.<br />
11. Send the fax:<br />
• Windows: Click OK.<br />
• Macintosh: Click Print.<br />
For details, click the Help button in the Fax window.<br />
<strong>WorkCentre</strong> <strong>7120</strong>/<strong>7125</strong> <strong>Multifunction</strong> <strong>Printer</strong><br />
<strong>User</strong> <strong>Guide</strong><br />
Faxing<br />
149
Faxing<br />
Receiving Faxes<br />
The printer must be configured by the system administrator to receive and print a fax using the<br />
Embedded Fax, Server Fax, and Internet Fax. For more information, see the System Administrator <strong>Guide</strong><br />
at www.xerox.com/office/WC<strong>7120</strong>/<strong>7125</strong>docs.<br />
150<br />
<strong>WorkCentre</strong> <strong>7120</strong>/<strong>7125</strong> <strong>Multifunction</strong> <strong>Printer</strong><br />
<strong>User</strong> <strong>Guide</strong>
Selecting Fax Options<br />
This section includes:<br />
• Setting 2-Sided Faxing on page 151<br />
• Selecting the Original Type on page 151<br />
• Setting the Fax Resolution on page 151<br />
• Adjusting Image Quality on page 151<br />
• Adjusting Layout on page 152<br />
• Additional Fax Options on page 153<br />
• Creating Fax Comments on page 157<br />
Setting 2-Sided Faxing<br />
<strong>WorkCentre</strong> <strong>7120</strong>/<strong>7125</strong> <strong>Multifunction</strong> <strong>Printer</strong><br />
<strong>User</strong> <strong>Guide</strong><br />
Faxing<br />
1. Touch Fax on the touch screen.<br />
2. Touch 2 Sided Scanning, then touch the desired option: 1 Sided, 2 Sided, 2 Sided, Rotate Side 2.<br />
3. For more options, touch 2 Sided Scanning, then touch More:<br />
• Touch 2 Sided or 2 Sided, Rotate Side 2.<br />
• Touch First Page 1 Sided.<br />
Selecting the Original Type<br />
1. Touch Fax on the touch screen.<br />
2. Touch Original Type, then touch the desired option (Text, Photo & Text, Photo).<br />
Setting the Fax Resolution<br />
1. Touch Fax on the touch screen.<br />
2. Touch Resolution, then touch the desired option:<br />
• Standard 200x100 dpi<br />
• Fine 200 dpi<br />
• Super Fine 400 dpi<br />
• Super Fine 600 dpi<br />
Note: For Server Fax, touch Standard or Fine.<br />
Adjusting Image Quality<br />
Lighten/Darken<br />
1. Touch Fax on the touch screen.<br />
2. Touch Lighten/Darken, then touch the left arrow to darken or the right arrow to lighten image.<br />
151
Faxing<br />
Image Enhancement: Auto Suppression<br />
When faxing originals printed on thin paper, images printed on one side of the paper can sometimes<br />
be seen on the other side of the paper. Use Auto Suppression to reduce this problem.<br />
1. Touch Fax on the touch screen.<br />
2. Touch the Image Quality tab, then touch Image Enhancement.<br />
3. Touch Auto Suppression.<br />
4. To manually adjust the image contrast (the difference between light and dark areas in an image),<br />
touch Manual Contrast, then touch the pointer to adjust the contrast level. The default setting is<br />
Auto Contrast.<br />
5. Touch Save.<br />
Adjusting Layout<br />
Layout settings allow you to adjust the original size, set page scanning for book faxing, and reduce or<br />
enlarge the fax image.<br />
Adjusting the Original Size<br />
1. Touch Fax on the touch screen.<br />
2. Touch the Layout Adjustment tab, then touch Original Size.<br />
3. Touch one of the following:<br />
• Auto Detect, to automatically identify standard size originals.<br />
• Manual Size Input, for manual definition of the scan area using standard paper dimensions.<br />
• Mixed Size Originals, for scanning originals of different standard sizes.<br />
4. Touch Save.<br />
Book Faxing<br />
1. Touch Fax on the touch screen.<br />
2. Touch the Layout Adjustment tab, then touch Book Faxing.<br />
3. Touch one of the following options:<br />
• Off (Default).<br />
• Left Page then Right, then touch Both Pages, Left Page Only or Right Page Only.<br />
• Right Page then Left, then touch Both Pages, Left Page Only or Right Page Only.<br />
• Top Page then Bottom, then touch Both Pages, Top Page Only or Bottom Page Only.<br />
4. Touch Save.<br />
Reduce/Enlarge<br />
1. Touch Fax on the touch screen.<br />
2. Touch the Layout Adjustment tab, then touch Reduce/Enlarge.<br />
3. Touch a preset percentage, or touch the plus or minus buttons (+/–) to specify a variable percentage.<br />
4. Touch Save.<br />
152<br />
<strong>WorkCentre</strong> <strong>7120</strong>/<strong>7125</strong> <strong>Multifunction</strong> <strong>Printer</strong><br />
<strong>User</strong> <strong>Guide</strong>
Additional Fax Options<br />
Additional fax options allow you to specify how the fax is transmitted.<br />
Note: With the exception of Delay Start, these settings are not available for Server Fax.<br />
To adjust these settings:<br />
1. On the touch screen, touch Fax, then touch the Fax Options tab.<br />
2. Touch the desired option, touch the desired settings, then touch Save.<br />
Option Values<br />
Confirmation Options Off, print report after each fax transmission<br />
Starting Rate G3 Auto, Forced 4800 bps<br />
Priority Send/Delay Start Priority Send: Off, On.<br />
Delay Start: Off, Specific Time (touch Specific Time, then touch<br />
desired settings)<br />
Transmission Header Text Off, Display Header<br />
Recipient Print Sets 1 Set, Multiple Sets (touch Multiple Sets, then touch plus or minus buttons<br />
(+/–) to set quantity)<br />
Pages per Side Off, On (touch plus or minus buttons (+/–) to set quantity)<br />
Remote Folder Send to Folder: Off, On, Folder Number, Folder Passcode (enables sending a<br />
file directly to a folder on a remote fax machine by setting the Folder<br />
Number and Folder Passcode using the alphanumeric keypad)<br />
F Code Off, On, (F Code is a file transmission method enabled by setting the F Code<br />
and Folder Password using the alphanumeric keypad or the touch<br />
screen keyboard)<br />
<strong>WorkCentre</strong> <strong>7120</strong>/<strong>7125</strong> <strong>Multifunction</strong> <strong>Printer</strong><br />
<strong>User</strong> <strong>Guide</strong><br />
Faxing<br />
153
Faxing<br />
More Fax Options<br />
Further optional fax settings are provided. To adjust these settings:<br />
1. On the touch screen, touch Fax, then touch the More Fax Options tab.<br />
2. Touch the desired option, touch the desired settings, then touch Save.<br />
154<br />
Note: These settings are not available for Server Fax.<br />
Option Values<br />
Remote Polling Off, Poll a Remote Device (retrieve files stored on a remote fax machine by<br />
using the Remote Folder feature)<br />
Store for Polling Off, Store for Free Polling and Store for Secure Polling (fax documents stored<br />
in the printer are made available for remote polling by enabling Free Polling<br />
or Secure Local Polling, then touching the folder and file)<br />
On-Hook (Manual<br />
Send/Receive)<br />
Internet Fax Options<br />
Additional Internet Fax options are provided. To make these settings:<br />
1. On the touch screen, touch Internet Fax, then touch the Internet Fax Options tab.<br />
2. Touch the desired option, touch the desired settings, then touch Save.<br />
Option Values<br />
Note: For details, see the System Administrator <strong>Guide</strong> at<br />
www.xerox.com/office/WC<strong>7120</strong>/<strong>7125</strong>docs.<br />
<strong>WorkCentre</strong> <strong>7120</strong>/<strong>7125</strong> <strong>Multifunction</strong> <strong>Printer</strong><br />
<strong>User</strong> <strong>Guide</strong><br />
Manual Send: touch On-Hook, touch Manual Send, then use the touch<br />
screen keyboard to enter destination and passcode<br />
Manual Receive: touch On-Hook, touch Manual Receive, then press green<br />
Start button<br />
Acknowledgement Report Confirmation Options: Off, print report after each fax transmission<br />
Read Receipts: Off, request read receipt from recipient’s fax server<br />
Internet Fax Profile TIFF-S: use for A4, 210 x 297 mm (8.5 x 11 in.) originals with Standard or<br />
Fine Resolution<br />
TIFF-F or TIFF-J: use for A3, 297 x 420 mm (11 x 17 in.) originals with<br />
Superfine Resolution<br />
Pages per Side Off, On (touch plus or minus buttons (+/–) to set quantity)<br />
Starting Rate G3 Auto, Forced 4800 bps, G4 Auto<br />
Transmission Header Text Off, Display Header
Adding Address Book Entries<br />
This section includes:<br />
• Adding an Individual Address on page 155<br />
• Deleting an Individual Address on page 155<br />
• Adding a Group on page 155<br />
• Deleting a Group on page 156<br />
• Using Chain Dial on page 156<br />
The address book can store email, server, fax, and Internet fax addresses. Addresses can be stored for<br />
individuals, or groups containing multiple individuals.<br />
Adding an Individual Address<br />
<strong>WorkCentre</strong> <strong>7120</strong>/<strong>7125</strong> <strong>Multifunction</strong> <strong>Printer</strong><br />
<strong>User</strong> <strong>Guide</strong><br />
Faxing<br />
1. On the control panel, press the Machine Status button.<br />
2. On the touch screen, touch the Tools tab.<br />
3. Touch Setup & Calibration, touch Setup, then touch Add Address Book Entry.<br />
4. On the next screen, touch an address in the scrolling list.<br />
5. Touch Address Type, touch the desired address type, then touch Save.<br />
Each address book type requires different settings.<br />
6. Touch each desired item in the list, enter the information using the alphanumeric keypad or touch<br />
screen keyboard, then touch Save.<br />
7. When all desired settings have been configured, touch Save to complete the address book entry.<br />
Deleting an Individual Address<br />
1. On the control panel, press the Machine Status button.<br />
2. On the touch screen, touch the Tools tab.<br />
3. Touch Setup & Calibration, touch Setup, then touch Add Address Book Entry.<br />
4. On the next screen, touch the desired address in the scrolling list.<br />
5. Touch Delete Entry, then touch Delete to confirm.<br />
Adding a Group<br />
Create a group to send a fax to multiple individuals. Groups can include both previously stored<br />
individuals and group entries.<br />
Note: Individual entries must be configured before groups can be defined.<br />
1. On the control panel, press the Machine Status button.<br />
2. On the touch screen, touch the Tools tab.<br />
3. Touch Setup & Calibration, touch Setup, then touch Create Fax Group Recipients.<br />
4. On the next screen, touch an group in the scrolling list.<br />
155
Faxing<br />
5. On the next screen, touch the Group Name field, enter a name for the group using the touch<br />
screen keyboard, then touch Save.<br />
6. Touch the Speed Dial field, then enter the Speed Dial number for the desired individual using the<br />
alphanumeric keypad.<br />
7. Touch Add to this Group.<br />
8. Repeat steps 6 and 7 until all individuals have been added to the group.<br />
9. When all entries have been added, touch Save, then touch Close.<br />
Deleting a Group<br />
1. On the control panel, press the Machine Status button.<br />
2. On the touch screen, touch the Tools tab.<br />
3. Touch Setup & Calibration, touch Setup, then touch Create Fax Group Recipients.<br />
4. On the next screen, touch the desired group in the scrolling list.<br />
5. Touch Delete, then touch Delete to confirm.<br />
Using Chain Dial<br />
Chain Dial creates a single fax recipient telephone number by adding two or more fax numbers<br />
together into a single number. For example, an area code or extension number could be stored<br />
separately from the rest of the telephone number. Access Chain Dial from the Address Book.<br />
1. On the touch screen, touch Fax.<br />
2. Touch Address Book.<br />
3. Touch List all public entries from the drop-down list.<br />
4. Touch Chain Dial.<br />
5. To add numbers do one of the following:<br />
a. Touch the desired speed dial entry from the scrolling list. Touch the scroll arrows if necessary.<br />
b. Enter a number using the alphanumeric keypad.<br />
c. Touch the keyboard button, enter a number using the touch screen keyboard, then touch Save.<br />
6. Touch Add. The numbers are added together in the Recipient List.<br />
7. Touch Save. The combined number appears as a single recipient in the Recipient(s) list.<br />
8. Touch Close.<br />
The fax can now be sent.<br />
156<br />
<strong>WorkCentre</strong> <strong>7120</strong>/<strong>7125</strong> <strong>Multifunction</strong> <strong>Printer</strong><br />
<strong>User</strong> <strong>Guide</strong>
Creating Fax Comments<br />
1. On the control panel, press the Machine Status button.<br />
2. On the touch screen, touch the Tools tab.<br />
3. Touch Setup, then touch Add Fax Comment.<br />
4. On the next screen, touch an comment in the scrolling list.<br />
5. Enter the comment using the touch screen keyboard, then touch Save.<br />
6. Touch Close.<br />
The comment is ready to use.<br />
<strong>WorkCentre</strong> <strong>7120</strong>/<strong>7125</strong> <strong>Multifunction</strong> <strong>Printer</strong><br />
<strong>User</strong> <strong>Guide</strong><br />
Faxing<br />
157
Faxing<br />
158<br />
<strong>WorkCentre</strong> <strong>7120</strong>/<strong>7125</strong> <strong>Multifunction</strong> <strong>Printer</strong><br />
<strong>User</strong> <strong>Guide</strong>
Maintenance<br />
This chapter includes:<br />
• Maintenance and Cleaning on page 160<br />
• Ordering Supplies on page 167<br />
<strong>WorkCentre</strong> <strong>7120</strong>/<strong>7125</strong> <strong>Multifunction</strong> <strong>Printer</strong><br />
<strong>User</strong> <strong>Guide</strong><br />
8<br />
159
Maintenance<br />
Maintenance and Cleaning<br />
This section includes:<br />
• General Precautions on page 160<br />
• Locating the Serial Number on page 161<br />
• Billing and Usage Information on page 161<br />
• Cleaning the <strong>Printer</strong> on page 162<br />
• Installing Staples on page 169<br />
See also:<br />
Safety on page 11<br />
General Precautions<br />
160<br />
WARNINGS:<br />
• When cleaning your printer do NOT use organic or strong chemical solvents or aerosol<br />
cleaners. Do NOT pour fluids directly into any area. Use supplies and cleaning materials only<br />
as directed in this documentation. Keep all cleaning materials out of the reach of children.<br />
• Internal parts of the printer may be hot. Use caution when doors and covers are open.<br />
• Do NOT use pressurized air spray cleaning aids on or in the printer. Some pressurized air spray<br />
containers contain explosive mixtures and are not suitable for use in electrical applications.<br />
Use of such cleaners can result in a risk of explosion and fire.<br />
• Do NOT remove the covers or guards that are fastened with screws. You cannot maintain or<br />
service any parts that are behind these covers and guards. Do NOT attempt any maintenance<br />
procedure that is NOT specifically described in the documentation supplied with your printer.<br />
To avoid damaging the printer, keep the following guidelines in mind:<br />
• Do not place anything on top of the printer.<br />
• Do not leave the covers and doors open for any length of time, especially in well-lit places. Light<br />
exposure can damage the drum cartridges.<br />
• Do not open covers and doors during printing.<br />
• Do not tilt the printer while in use.<br />
• Do not touch the electrical contacts, gears, or laser devices. Doing so may damage the printer and<br />
cause the print quality to deteriorate.<br />
• Make sure any parts removed during cleaning are replaced before you plug in the printer.<br />
<strong>WorkCentre</strong> <strong>7120</strong>/<strong>7125</strong> <strong>Multifunction</strong> <strong>Printer</strong><br />
<strong>User</strong> <strong>Guide</strong>
Locating the Serial Number<br />
<strong>WorkCentre</strong> <strong>7120</strong>/<strong>7125</strong> <strong>Multifunction</strong> <strong>Printer</strong><br />
<strong>User</strong> <strong>Guide</strong><br />
Maintenance<br />
When ordering supplies or contacting <strong>Xerox</strong> for assistance, you will be asked to provide the printer’s<br />
serial number.<br />
View the printer serial number from the printer touch screen:<br />
1. Press the Machine Status button.<br />
2. The Machine Information tab appears. The serial number appears at the left of the Machine<br />
Information screen.<br />
If the serial number cannot be read from the printer touch screen, it can also be found inside the<br />
printer. Open Cover A on the left side of the printer. The serial number is located on the left-hand side.<br />
Billing and Usage Information<br />
The Billing Information screen displays billing and printer usage information.<br />
1. Press the Machine Status button.<br />
2. Touch the Billing Information tab.<br />
The total impressions counters appear on the left of the screen.<br />
For more detail:<br />
1. Touch Usage Counters, then touch the down arrow to choose the desired counter. Touch the scroll<br />
arrows to view the entire list.<br />
2. Touch Close.<br />
161
Maintenance<br />
Cleaning the <strong>Printer</strong><br />
• Cleaning the Document Glass and Document Cover on page 162<br />
• Cleaning the Exterior on page 163<br />
• Cleaning the Document Feeder Rollers on page 163<br />
• Cleaning the Printhead Lenses on page 164<br />
• Ordering Supplies on page 167<br />
Cleaning the Document Glass and Document Cover<br />
To ensure optimum print quality, regularly clean the glass areas of the printer. This helps avoid output<br />
with streaks, smears, and other marks that transfer from the glass area while scanning documents.<br />
Use a lint-free cloth lightly dampened with <strong>Xerox</strong> Anti-Static or another suitable non-abrasive glass<br />
cleaner to clean the document glass and the CVT glass to its left.<br />
Use a lint-free cloth, <strong>Xerox</strong> Cleaning Fluid or <strong>Xerox</strong> Film Remover to clean the under side of the<br />
document cover and the document feeder.<br />
162<br />
<strong>WorkCentre</strong> <strong>7120</strong>/<strong>7125</strong> <strong>Multifunction</strong> <strong>Printer</strong><br />
<strong>User</strong> <strong>Guide</strong><br />
wc<strong>7120</strong>-065 wc<strong>7120</strong>-067<br />
wc<strong>7120</strong>-064
Cleaning the Exterior<br />
<strong>WorkCentre</strong> <strong>7120</strong>/<strong>7125</strong> <strong>Multifunction</strong> <strong>Printer</strong><br />
<strong>User</strong> <strong>Guide</strong><br />
Maintenance<br />
Regular cleaning keeps the touch screen and control panel free from dust and dirt. To remove finger<br />
prints and smudges, clean the touch screen and control panel with a soft, lint-free cloth.<br />
Use a cloth to clean the document feeder, output trays, paper trays and outside areas of the printer.<br />
Cleaning the Document Feeder Rollers<br />
wc<strong>7120</strong>-100<br />
wc<strong>7120</strong>-063<br />
Dirt on the document feeder rollers can cause paper jams or deteriorate print quality. For best<br />
performance, clean the document feeder rollers once a month.<br />
1. Lift the lever and open the document feeder top cover until it comes to a stop.<br />
wc<strong>7120</strong>-062<br />
163
Maintenance<br />
2. While turning the rollers, wipe them with a clean, lint free cloth moistened with water.<br />
164<br />
CAUTION: Do not use alcohol or chemical cleaners on the document feed rollers.<br />
3. Close the top cover until it clicks into place. Make sure the cover is completely closed.<br />
Cleaning the Printhead Lenses<br />
The printer is constructed with four printhead lenses. Clean all lenses as described below.<br />
WARNING: Do not perform this operation when the printer is copying or printing.<br />
1. Turn the printer off using the power switch visible on the lower center tray.<br />
2. Open the front cover.<br />
<strong>WorkCentre</strong> <strong>7120</strong>/<strong>7125</strong> <strong>Multifunction</strong> <strong>Printer</strong><br />
<strong>User</strong> <strong>Guide</strong><br />
wc<strong>7120</strong>-068<br />
wc<strong>7120</strong>-036
<strong>WorkCentre</strong> <strong>7120</strong>/<strong>7125</strong> <strong>Multifunction</strong> <strong>Printer</strong><br />
<strong>User</strong> <strong>Guide</strong><br />
Maintenance<br />
3. Grip the orange tabs on the waste toner container, then pull the container toward you. Set the<br />
container aside.<br />
4. Remove the cleaning tool from the front cover.<br />
5. Insert the cleaning tool slowly into each slot until it stops, then slowly slide the tool out. Repeat for<br />
each printhead.<br />
6. Store the cleaning tool in the front cover.<br />
wc<strong>7120</strong>-037<br />
wc<strong>7120</strong>-038<br />
wc<strong>7120</strong>-042<br />
wc<strong>7120</strong>-039<br />
165
Maintenance<br />
7. Align the bottom of the waste toner container with the tabs.<br />
8. Rotate the waste toner container toward the printer until it clicks into place.<br />
9. Close the front cover.<br />
10. Turn the printer on using the power switch visible on the lower center tray.<br />
166<br />
<strong>WorkCentre</strong> <strong>7120</strong>/<strong>7125</strong> <strong>Multifunction</strong> <strong>Printer</strong><br />
<strong>User</strong> <strong>Guide</strong><br />
wc<strong>7120</strong>-040<br />
wc<strong>7120</strong>-041
Ordering Supplies<br />
This section includes:<br />
• Consumables on page 167<br />
• Routine Maintenance Items on page 167<br />
• When to Order Supplies on page 168<br />
• Recycling Supplies on page 168<br />
<strong>WorkCentre</strong> <strong>7120</strong>/<strong>7125</strong> <strong>Multifunction</strong> <strong>Printer</strong><br />
<strong>User</strong> <strong>Guide</strong><br />
Maintenance<br />
Certain consumables and routine maintenance items need to be ordered occasionally. Each supply<br />
item includes installation instructions.<br />
Consumables<br />
Use genuine <strong>Xerox</strong> Toner Cartridges (Cyan, Magenta, Yellow, and Black).<br />
Note: Each toner cartridge includes installation instructions.<br />
CAUTION: Use of toner other than Genuine <strong>Xerox</strong> Toner may affect print quality and printer<br />
reliability. It is the only toner designed and manufactured under strict quality controls by <strong>Xerox</strong> for<br />
specific use with this printer.<br />
Routine Maintenance Items<br />
Routine maintenance items are printer parts that have a limited life and require periodic replacement.<br />
Replacements may be parts or kits. Routine maintenance items are typically customer replaceable.<br />
The following items are routine maintenance items:<br />
• Drum Cartridge<br />
• Waste Toner Container<br />
• Fuser Assembly<br />
• Transfer Belt<br />
• Second Bias Transfer Roller<br />
• Hole Punch Waste Container<br />
• Staple Cartridge<br />
• Staple Cartridge for Booklet Maker<br />
167
Maintenance<br />
When to Order Supplies<br />
The printer control panel displays a warning when a supply nears its replacement time. Verify that you<br />
have replacements on hand. It is important to order supplies when the messages first appear to avoid<br />
interruptions in printing. The touch screen displays an error message when the supply must be replaced.<br />
Order supplies from your local reseller or from the <strong>Xerox</strong> Supplies website at:<br />
www.xerox.com/office/WC<strong>7120</strong>/<strong>7125</strong>supplies.<br />
168<br />
CAUTION: Use of non-<strong>Xerox</strong> supplies is not recommended. The <strong>Xerox</strong> Warranty, Service Agreements,<br />
and Total Satisfaction Guarantee do not cover damage, malfunction, or degradation of performance<br />
caused by use of non-<strong>Xerox</strong> supplies, or the use of <strong>Xerox</strong> supplies not specified for this printer. The Total<br />
Satisfaction Guarantee is available in the United States and Canada. Coverage may vary outside these<br />
areas. Please contact your local representative for details.<br />
Recycling Supplies<br />
For information on <strong>Xerox</strong> supplies recycling programs, go to www.xerox.com/gwa.<br />
Some routine maintenance items come with a prepaid return label. Please use it to return used<br />
components in their original boxes for recycling.<br />
<strong>WorkCentre</strong> <strong>7120</strong>/<strong>7125</strong> <strong>Multifunction</strong> <strong>Printer</strong><br />
<strong>User</strong> <strong>Guide</strong>
Installing Staples<br />
<strong>WorkCentre</strong> <strong>7120</strong>/<strong>7125</strong> <strong>Multifunction</strong> <strong>Printer</strong><br />
<strong>User</strong> <strong>Guide</strong><br />
Maintenance<br />
If the printer has the optional Integrated Office Finisher or the optional Office Finisher LX with Booklet<br />
Maker installed, the control panel displays a message when a staple cartridge is empty and needs to<br />
be replaced.<br />
This section includes:<br />
• Staple Replacement for Integrated Office Finisher on page 169<br />
• Main Staple Replacement for Office Finisher LX on page 171<br />
• Booklet Maker Staple Replacement for Office LX Finisher on page 173<br />
Staple Replacement for Integrated Office Finisher<br />
WARNING: Do not perform this procedure when the printer is copying or printing.<br />
1. Open the finisher front cover.<br />
wc<strong>7120</strong>-044<br />
2. Remove the staple cartridge by gripping the orange handle at the front of the cartridge and<br />
pulling it firmly toward you.<br />
wc<strong>7120</strong>-045<br />
169
Maintenance<br />
3. Check the inside of the finisher for any loose staples and remove them.<br />
4. Pinch both sides of the staple case (1) and remove the staple case from the cartridge (2).<br />
5. Insert the front side of the new staple case into the staple cartridge (1), then push the rear side<br />
into the cartridge (2).<br />
6. Insert the staple cartridge into the finisher.<br />
7. Close the finisher front cover.<br />
170<br />
<strong>WorkCentre</strong> <strong>7120</strong>/<strong>7125</strong> <strong>Multifunction</strong> <strong>Printer</strong><br />
<strong>User</strong> <strong>Guide</strong><br />
1<br />
2<br />
2<br />
1<br />
1<br />
wc<strong>7120</strong>-047<br />
wc<strong>7120</strong> 048<br />
wc<strong>7120</strong>-046<br />
wc<strong>7120</strong>-049
Main Staple Replacement for Office Finisher LX<br />
WARNING: Do not perform this procedure when the printer is copying or printing.<br />
1. Open the finisher front cover.<br />
<strong>WorkCentre</strong> <strong>7120</strong>/<strong>7125</strong> <strong>Multifunction</strong> <strong>Printer</strong><br />
<strong>User</strong> <strong>Guide</strong><br />
Maintenance<br />
2. The staple cartridge is located inside the finisher cabinet. Pull the staple unit toward you until it stops.<br />
3. Push the staple unit to the right.<br />
wc<strong>7120</strong>-050<br />
wc<strong>7120</strong>-051<br />
4. Remove the staple cartridge by gripping the orange tab at R1 and pulling it firmly toward you.<br />
wc<strong>7120</strong>-052<br />
171
Maintenance<br />
5. Pinch both sides of the staple case (1) and remove the staple case from the cartridge (2).<br />
6. Insert the front side of the new staple case into the staple cartridge (1), then push the rear side<br />
into the cartridge (2).<br />
7. Grip the staple cartridge by the orange tab and insert it into the staple unit until it clicks.<br />
8. Close the finisher front cover.<br />
172<br />
<strong>WorkCentre</strong> <strong>7120</strong>/<strong>7125</strong> <strong>Multifunction</strong> <strong>Printer</strong><br />
<strong>User</strong> <strong>Guide</strong><br />
1<br />
2<br />
2<br />
1<br />
1<br />
wc<strong>7120</strong>-047<br />
wc<strong>7120</strong> 048<br />
wc<strong>7120</strong>-099
Booklet Maker Staple Replacement for Office LX Finisher<br />
<strong>WorkCentre</strong> <strong>7120</strong>/<strong>7125</strong> <strong>Multifunction</strong> <strong>Printer</strong><br />
<strong>User</strong> <strong>Guide</strong><br />
Maintenance<br />
Note: The booklet maker uses two staple cartridges labeled R2 and R3. Booklet stapling requires<br />
that both staple cartridges contain staples.<br />
WARNING: Do not perform this procedure when the printer is copying or printing.<br />
1. Open the booklet maker side cover.<br />
wc<strong>7120</strong>-054<br />
2. If the staple cartridges are not visible, grip the vertical panels at the left and right of the opening<br />
and gently slide them to the center until they stop.<br />
wc<strong>7120</strong>-055<br />
3. Grip the orange tabs on both sides of the staple cartridge and pull the cartridge out of the stapler.<br />
wc<strong>7120</strong>-056<br />
173
Maintenance<br />
4. Grip the orange tabs on both sides of the replacement staple cartridge and insert it into the<br />
original position in the stapler.<br />
Note: If you have trouble inserting the cartridge, make sure the cartridge is oriented with the<br />
orange tabs facing up.<br />
174<br />
Note: The booklet maker uses two staple cartridges. Booklet stapling requires that both staple<br />
cartridges contain staples.<br />
5. Repeat steps 3 and 4 for the other staple cartridge.<br />
6. Close the booklet maker side cover.<br />
<strong>WorkCentre</strong> <strong>7120</strong>/<strong>7125</strong> <strong>Multifunction</strong> <strong>Printer</strong><br />
<strong>User</strong> <strong>Guide</strong><br />
wc<strong>7120</strong>-057
Troubleshooting<br />
This chapter includes:<br />
• Control Panel Messages on page 176<br />
• General Troubleshooting on page 177<br />
• Clearing Paper Jams on page 180<br />
• Clearing Staple Jams on page 196<br />
• Print Quality Problems on page 202<br />
• Copy and Scan Problems on page 203<br />
• Fax Problems on page 204<br />
• Getting Help on page 206<br />
<strong>WorkCentre</strong> <strong>7120</strong>/<strong>7125</strong> <strong>Multifunction</strong> <strong>Printer</strong><br />
<strong>User</strong> <strong>Guide</strong><br />
9<br />
175
Troubleshooting<br />
Control Panel Messages<br />
The control panel touch screen provides information and troubleshooting help. When an error or<br />
warning condition occurs, the touch screen displays a message. The touch screen may also display an<br />
animated graphic showing the location of the problem, such as the location of a paper jam.<br />
Problems which prevent the full operation of the printer have associated fault codes. These codes will<br />
help pinpoint the specific subsystem with the problem. Current faults and fault history can be retrieved<br />
at any time.<br />
To see a list of the fault messages that have been displayed on the printer:<br />
1. Press the Machine Status button.<br />
2. On the touch screen, touch the Faults tab.<br />
3. Touch Current Faults, Current Messages, or Fault History.<br />
4. Touch Close.<br />
176<br />
<strong>WorkCentre</strong> <strong>7120</strong>/<strong>7125</strong> <strong>Multifunction</strong> <strong>Printer</strong><br />
<strong>User</strong> <strong>Guide</strong>
General Troubleshooting<br />
<strong>WorkCentre</strong> <strong>7120</strong>/<strong>7125</strong> <strong>Multifunction</strong> <strong>Printer</strong><br />
<strong>User</strong> <strong>Guide</strong><br />
Troubleshooting<br />
This section contains procedures to help you locate and resolve problems. Some problems can be<br />
resolved by simply restarting the printer.<br />
To restart the printer, see Turning the <strong>Printer</strong> Off on page 40.<br />
If the problem is not resolved by restarting the printer, see the table in this chapter that best describes<br />
the problem.<br />
• <strong>Printer</strong> Does Not Turn On on page 177<br />
• Printing Takes Too Long on page 178<br />
• <strong>Printer</strong> Resets or Turns Off Frequently on page 178<br />
• <strong>Printer</strong> Is Making Unusual Noises on page 178<br />
• 2-Sided Printing Problems on page 178<br />
• Scanner Error on page 179<br />
<strong>Printer</strong> Does Not Turn On<br />
Probable Causes Solutions<br />
The power switch is not correctly turned on. Turn off the printer using the power switch visible on the lower<br />
center tray. Wait two minutes, then turn the printer on.<br />
Ensure that the main power switch behind the front cover of<br />
the printer is in the on position.<br />
The power cord is not correctly plugged into<br />
the outlet.<br />
Something is wrong with the outlet connected<br />
to the printer.<br />
The printer is connected to an outlet with a<br />
voltage or frequency that does not match the<br />
printer specifications.<br />
Turn off the printer, and plug the power cord securely into<br />
the outlet.<br />
Plug another electrical appliance into the outlet and see<br />
whether it operates properly.<br />
Try a different outlet.<br />
Use a power source with the specifications listed in Electrical<br />
Specifications on page 212.<br />
CAUTION: Plug the three-wire power cord (with grounding prong) directly into a grounded AC<br />
outlet only. Do not use a power strip. If necessary, contact a licensed electrician to install a<br />
properly grounded outlet.<br />
177
Troubleshooting<br />
Printing Takes Too Long<br />
Probable Causes Solutions<br />
The printer is set to a slower printing mode (for<br />
example, heavyweight stock).<br />
<strong>Printer</strong> Resets or Turns Off Frequently<br />
<strong>Printer</strong> Is Making Unusual Noises<br />
2-Sided Printing Problems<br />
178<br />
<strong>WorkCentre</strong> <strong>7120</strong>/<strong>7125</strong> <strong>Multifunction</strong> <strong>Printer</strong><br />
<strong>User</strong> <strong>Guide</strong><br />
It takes more time to print with special media. Make sure<br />
that the media type is set properly in the printer driver and<br />
at the printer control panel.<br />
The printer is in power saving mode. It takes time for printing to start in power saving mode.<br />
The job is very complex. Wait. No action needed.<br />
Probable Causes Solutions<br />
The power cord is not correctly plugged into the<br />
outlet.<br />
Turn off the printer, confirm that the power cord is correctly<br />
plugged into the printer and the outlet, then turn on<br />
the printer.<br />
A system error occurred. Contact your local <strong>Xerox</strong> service representative with the<br />
fault information. Check the fault history. For details, see<br />
Control Panel Messages on page 206.<br />
Probable Causes Solutions<br />
The tray is not installed correctly. Open and close the tray you are printing from.<br />
There is an obstruction or debris inside<br />
the printer.<br />
Probable Causes Solutions<br />
Turn off the printer and remove the obstruction or debris. If<br />
you cannot remove it, contact your <strong>Xerox</strong><br />
service representative.<br />
Media or settings are not correct. Make sure that you are using correct media. For details, see<br />
Supported Media on page 51. Envelopes, labels, gloss, and<br />
extra heavyweight stock cannot be used for<br />
2-Sided Printing.<br />
In the printer driver, choose 2-Sided Printing.
Scanner Error<br />
Probable Causes Solutions<br />
<strong>WorkCentre</strong> <strong>7120</strong>/<strong>7125</strong> <strong>Multifunction</strong> <strong>Printer</strong><br />
<strong>User</strong> <strong>Guide</strong><br />
Troubleshooting<br />
Scanner is not communicating. Turn off the printer using the power switch visible on the<br />
lower center tray. Wait two minutes, then turn the printer on.<br />
If the problem is not resolved, contact your local <strong>Xerox</strong><br />
service representative.<br />
179
Troubleshooting<br />
Clearing Paper Jams<br />
When a jam occurs, the control panel touch screen displays an animated graphic showing the location<br />
of the jam.<br />
This section includes:<br />
• Clearing Paper Jams from Tray 1, Tray 2, Tray 3 or Tray 4 on page 180<br />
• Clearing Paper Jams from Tray 5 (Bypass Tray) on page 181<br />
• Clearing Paper Jams in Document Feeder on page 182<br />
• Clearing Paper Jams in Cover A on page 184<br />
• Clearing Paper Jams in Cover B on page 185<br />
• Clearing Paper Jams in Cover C on page 186<br />
• Clearing Paper Jams in Duplex Module D on page 187<br />
• Clearing Paper Jams in Cover E on page 188<br />
• Clearing Paper Jams in Integrated Office Finisher on page 189<br />
• Clearing Paper Jams in Office Finisher LX on page 190<br />
• Clearing Hole Punch Jams in Office Finisher LX on page 191<br />
• Troubleshooting Paper Jams on page 193<br />
To avoid damage, always remove misfed media gently, without tearing it. Try to remove the paper in the<br />
direction that the paper would normally feed. Any piece of media left in the printer, whether large or<br />
small, can obstruct the media path and cause further misfeeds. Do not reload media that has misfed.<br />
180<br />
Note: The printed side of jammed pages may smudge, and the toner may stick to your hands. Do<br />
not touch the printed side of the media when removing it. Make sure not to spill any toner inside<br />
the printer.<br />
WARNING: If you accidentally get toner on your clothes, lightly dust them off as best as you can.<br />
If some toner remains on your clothes, use cool, not hot water, to rinse the toner off. If toner gets<br />
on your skin, wash it off with cool water and a mild soap. If you get toner in your eyes, wash it out<br />
immediately with cool water and consult a doctor.<br />
Clearing Paper Jams from Tray 1, Tray 2, Tray 3 or Tray 4<br />
1. Pull the tray out toward you until it stops.<br />
<strong>WorkCentre</strong> <strong>7120</strong>/<strong>7125</strong> <strong>Multifunction</strong> <strong>Printer</strong><br />
<strong>User</strong> <strong>Guide</strong><br />
wc<strong>7120</strong>-079
2. Remove the paper from the tray.<br />
<strong>WorkCentre</strong> <strong>7120</strong>/<strong>7125</strong> <strong>Multifunction</strong> <strong>Printer</strong><br />
<strong>User</strong> <strong>Guide</strong><br />
Troubleshooting<br />
3. If the paper is torn, remove the tray completely and check inside the printer for torn pieces of paper.<br />
4. Reload the tray with undamaged paper, then push the tray in until it stops.<br />
5. On the printer touch screen, touch Confirm.<br />
Clearing Paper Jams from Tray 5 (Bypass Tray)<br />
1. Remove the jammed paper from the tray. Make sure there are no sheets of paper in the paper<br />
feed entrance area where the tray connects to the printer.<br />
2. If the paper is torn, check inside the printer for torn pieces of paper.<br />
3. Reload the tray with undamaged paper. The leading edge of the paper should lightly touch the<br />
paper feed entrance.<br />
4. Touch Confirm on the printer touch screen.<br />
wc<strong>7120</strong>-080<br />
wc<strong>7120</strong>-081<br />
wc<strong>7120</strong>-082<br />
181
Troubleshooting<br />
Clearing Paper Jams in Document Feeder<br />
1. Lift the lever, then open the document feeder top cover until it comes to a stop.<br />
2. If the paper is not jammed in the document feeder, pull it out in the direction shown.<br />
3. If the message on the touch screen instructs you to turn the knob, turn it to eject the paper. Pull<br />
gently on the paper to remove it from the document feeder.<br />
4. If the message on the touch screen instructs you to open the inner cover, lift the green handle up,<br />
then open the inner cover.<br />
182<br />
<strong>WorkCentre</strong> <strong>7120</strong>/<strong>7125</strong> <strong>Multifunction</strong> <strong>Printer</strong><br />
<strong>User</strong> <strong>Guide</strong><br />
wc<strong>7120</strong>-062<br />
wc<strong>7120</strong>-092<br />
wc<strong>7120</strong>-093<br />
wc<strong>7120</strong>-094
5. Turn the knob to eject the paper upward. Pull gently on the paper to remove it from the<br />
document feeder.<br />
wc<strong>7120</strong>-095<br />
<strong>WorkCentre</strong> <strong>7120</strong>/<strong>7125</strong> <strong>Multifunction</strong> <strong>Printer</strong><br />
<strong>User</strong> <strong>Guide</strong><br />
Troubleshooting<br />
6. Close the inner cover, then close the document feeder top cover until it clicks into place. Confirm<br />
that the cover is fully closed on both the near and far sides.<br />
7. If the jammed paper is not visible, raise the document feeder. Remove any jammed paper from<br />
under the document feeder or from the document glass.<br />
8. Close the document feeder.<br />
9. If the jammed paper is not visible, lift the document feeder tray and remove the jammed paper.<br />
wc<strong>7120</strong>-096<br />
10. Return the document feeder tray to its original position.<br />
11. To resume document scanning, make sure the paper is not torn, wrinkled or folded, then reload the<br />
entire document, including the pages already scanned. The printer will automatically skip the<br />
previously scanned pages and resume scanning with the unscanned pages.<br />
CAUTION: Torn, wrinkled or folded originals may cause jams and damage the printer. To scan<br />
them, use the document glass.<br />
183
Troubleshooting<br />
Clearing Paper Jams in Cover A<br />
WARNINGS:<br />
• Do not perform this operation when the printer is copying or printing.<br />
• The area around the fuser may be hot. Use caution to avoid injury.<br />
• Do not touch the shiny black transfer belt inside the cover. Touching the belt may deteriorate<br />
image quality or damage the belt.<br />
1. If necessary, open Tray 5 (1). While lifting up the release lever (2), open cover A (3).<br />
.<br />
2. If you can see the edge of the jammed paper in the output tray, remove the paper by pulling in<br />
the direction shown.<br />
Note: If the paper is torn, remove all torn pieces from the printer.<br />
3. Remove the jammed paper.<br />
Note: If the paper is torn, remove all torn pieces from the printer.<br />
184<br />
<strong>WorkCentre</strong> <strong>7120</strong>/<strong>7125</strong> <strong>Multifunction</strong> <strong>Printer</strong><br />
<strong>User</strong> <strong>Guide</strong><br />
wc<strong>7120</strong>-069<br />
wc<strong>7120</strong>-070<br />
wc<strong>7120</strong>-071
4. If paper is jammed in the fuser unit, remove paper in the direction shown.<br />
WARNING: The area around the fuser may be hot. Use caution to avoid injury.<br />
5. Close cover A.<br />
Clearing Paper Jams in Cover B<br />
1. If necessary, close Tray 5 (Bypass Tray).<br />
2. Lift the lever up, then open cover B.<br />
3. Remove the jammed paper.<br />
Notes:<br />
4. Close cover B.<br />
wc<strong>7120</strong>-074<br />
wc<strong>7120</strong>-072<br />
<strong>WorkCentre</strong> <strong>7120</strong>/<strong>7125</strong> <strong>Multifunction</strong> <strong>Printer</strong><br />
<strong>User</strong> <strong>Guide</strong><br />
Troubleshooting<br />
• Paper may be jammed inside the printer. Inspect thoroughly and remove any jammed paper.<br />
• If the paper is torn, remove all torn pieces from the printer.<br />
wc<strong>7120</strong>-075<br />
185
Troubleshooting<br />
Clearing Paper Jams in Cover C<br />
1. If necessary, close Tray 5 (Bypass Tray).<br />
2. Lift the lever up, then open cover C.<br />
3. Remove the jammed paper.<br />
186<br />
Notes:<br />
4. Close cover C.<br />
• Paper may be jammed inside the printer. Inspect thoroughly and remove any jammed paper.<br />
• If the paper is torn, remove all torn pieces from the printer.<br />
<strong>WorkCentre</strong> <strong>7120</strong>/<strong>7125</strong> <strong>Multifunction</strong> <strong>Printer</strong><br />
<strong>User</strong> <strong>Guide</strong><br />
wc<strong>7120</strong>-073<br />
wc<strong>7120</strong>-076
Clearing Paper Jams in Duplex Module D<br />
<strong>WorkCentre</strong> <strong>7120</strong>/<strong>7125</strong> <strong>Multifunction</strong> <strong>Printer</strong><br />
<strong>User</strong> <strong>Guide</strong><br />
Troubleshooting<br />
1. If necessary, open Tray 5 (1). While lifting up the release lever (2) open duplex module cover D (3).<br />
.<br />
2. Remove the jammed paper.<br />
Note: If the paper is torn, remove all torn pieces from the printer.<br />
3. Close duplex module cover D (1), then close Tray 5 (2).<br />
wc<strong>7120</strong>-083<br />
wc<strong>7120</strong>-084<br />
wc<strong>7120</strong>-085<br />
187
Troubleshooting<br />
Clearing Paper Jams in Cover E<br />
188<br />
WARNINGS:<br />
• Do not perform this operation when the printer is copying or printing.<br />
• The area around the fuser may be hot. Use caution to avoid injury.<br />
CAUTION: Do not touch the shiny black transfer belt inside the cover. Touching the belt may<br />
deteriorate image quality or damage the belt.<br />
1. If necessary, open Tray 5 (1). While lifting up the release lever (2) open cover A (3).<br />
.<br />
2. Lift the lever up, then open cover E.<br />
<strong>WorkCentre</strong> <strong>7120</strong>/<strong>7125</strong> <strong>Multifunction</strong> <strong>Printer</strong><br />
<strong>User</strong> <strong>Guide</strong><br />
wc<strong>7120</strong>-069<br />
wc<strong>7120</strong>-077
3. Remove the jammed paper.<br />
Note: If the paper is torn, remove all torn pieces from the printer.<br />
4. Close cover E.<br />
5. Close cover A.<br />
Clearing Paper Jams in Integrated Office Finisher<br />
<strong>WorkCentre</strong> <strong>7120</strong>/<strong>7125</strong> <strong>Multifunction</strong> <strong>Printer</strong><br />
<strong>User</strong> <strong>Guide</strong><br />
Troubleshooting<br />
1. Open the finisher top cover (1). Turn the knob (2), then remove the paper by pulling it in the<br />
direction shown (3).<br />
Note: If the paper is torn, remove all torn pieces from the printer.<br />
2. Close the finisher top cover.<br />
2<br />
1<br />
3<br />
wc<strong>7120</strong>-078<br />
wc<strong>7120</strong>-086<br />
189
Troubleshooting<br />
Clearing Paper Jams in Office Finisher LX<br />
This section includes:<br />
• Paper Jams under the Top Cover on page 190<br />
• Paper Jams in the Finisher Transport on page 191<br />
Paper Jams under the Top Cover<br />
1. To open the finisher top cover, pull the lever up.<br />
2. Remove the jammed paper.<br />
190<br />
Note: If the paper is torn, remove all torn pieces from the printer.<br />
3. Close the finisher top cover.<br />
<strong>WorkCentre</strong> <strong>7120</strong>/<strong>7125</strong> <strong>Multifunction</strong> <strong>Printer</strong><br />
<strong>User</strong> <strong>Guide</strong><br />
wc<strong>7120</strong>-087<br />
wc<strong>7120</strong>-088<br />
wc<strong>7120</strong>-089
Paper Jams in the Finisher Transport<br />
1. Lift to open the finisher transport cover.<br />
Note: The cover is hinged and cannot be removed from the printer.<br />
2. Remove the jammed paper.<br />
Note: If the paper is torn, remove all torn pieces from the printer.<br />
3. Close the finisher transport cover.<br />
Clearing Hole Punch Jams in Office Finisher LX<br />
wc<strong>7120</strong>-090<br />
wc<strong>7120</strong>-091<br />
1. Lift to open the finisher transport cover, then open the front transport cover.<br />
Note: The covers are hinged and cannot be removed from the printer.<br />
wc<strong>7120</strong>-058<br />
<strong>WorkCentre</strong> <strong>7120</strong>/<strong>7125</strong> <strong>Multifunction</strong> <strong>Printer</strong><br />
<strong>User</strong> <strong>Guide</strong><br />
Troubleshooting<br />
191
Troubleshooting<br />
2. Remove the Hole Punch Waste Container at R4.<br />
3. Empty the waste container.<br />
192<br />
Note: Whenever the waste container is removed, it must be emptied before re-inserting it in the printer.<br />
4. Insert the container all the way into the finisher.<br />
5. Locate and remove any paper jams.<br />
6. Close the front transport cover, then close the finisher transport cover.<br />
<strong>WorkCentre</strong> <strong>7120</strong>/<strong>7125</strong> <strong>Multifunction</strong> <strong>Printer</strong><br />
<strong>User</strong> <strong>Guide</strong><br />
wc<strong>7120</strong>-059<br />
wc<strong>7120</strong>-060<br />
wc<strong>7120</strong>-061
Troubleshooting Paper Jams<br />
<strong>WorkCentre</strong> <strong>7120</strong>/<strong>7125</strong> <strong>Multifunction</strong> <strong>Printer</strong><br />
<strong>User</strong> <strong>Guide</strong><br />
Troubleshooting<br />
The printer is designed to function with minimal paper jams using <strong>Xerox</strong> supported media types only.<br />
Other media types may cause more frequent paper jams. If supported media is jamming frequently in<br />
one area, that area may need to be cleaned or repaired.<br />
This section contains help for the following problems:<br />
• The <strong>Printer</strong> Pulls Multiple Sheets Together on page 193<br />
• Paper Jam Message Stays On on page 193<br />
• Duplex Unit Jams on page 194<br />
• Document Feeder Jams on page 194<br />
The <strong>Printer</strong> Pulls Multiple Sheets Together<br />
Probable Causes Solutions<br />
The paper tray is too full. Remove some of the paper. Do not load paper past fill line.<br />
The front edges of the paper are not even. Remove the media, align the front edges, then reload it.<br />
The media is moist from humidity. Remove the media from the tray, and replace it with new<br />
dry media.<br />
Too much static electricity is present. Try a new ream of paper.<br />
Unsupported media. Use only <strong>Xerox</strong>-approved media. See Supported Media on<br />
page 51.<br />
Humidity is too high for coated paper. Feed paper one sheet at a time.<br />
Paper Jam Message Stays On<br />
Probable Causes Solutions<br />
Some paper remains jammed in the printer. Recheck the media path and make sure that you have<br />
removed all of the jammed paper.<br />
193
Troubleshooting<br />
Duplex Unit Jams<br />
Probable Causes Solutions<br />
Unsupported media of the wrong size,<br />
thickness, or type is being used.<br />
Document Feeder Jams<br />
Probable Causes Solutions<br />
Unsupported media of the wrong size,<br />
thickness, or type is in use.<br />
The documents loaded in the document feeder<br />
exceed the maximum capacity allowed.<br />
The document feeder guides are<br />
improperly adjusted.<br />
Media Misfeeds<br />
Probable Causes Solutions<br />
194<br />
<strong>WorkCentre</strong> <strong>7120</strong>/<strong>7125</strong> <strong>Multifunction</strong> <strong>Printer</strong><br />
<strong>User</strong> <strong>Guide</strong><br />
Use only <strong>Xerox</strong>-approved media. For details, see Supported<br />
Media on page 51.<br />
Recheck the media path inside the duplex module and<br />
make sure that you have removed all of the jammed paper.<br />
Make sure that you have not mixed media types in the tray.<br />
Do not print envelopes, labels, extra heavyweight, or gloss<br />
paper 2-sided.<br />
Do not use unsupported media.<br />
Use only <strong>Xerox</strong>-approved media. See Supported Media on<br />
page 51.<br />
Place fewer documents in the document feeder.<br />
Ensure the media guides fit snugly against the media<br />
loaded in the document feeder.<br />
The media is not correctly positioned in the tray. Remove the misfed media and reposition the media<br />
properly in the tray. Ensure that the media guides in the<br />
tray are set correctly.<br />
The number of sheets in the tray exceeds the<br />
maximum capacity allowed.<br />
The media guides are not correctly adjusted to<br />
the media size.<br />
Remove the excess paper and load paper below the fill line.<br />
Adjust the media guides in the tray to match the size of<br />
the media.<br />
Warped or wrinkled media is loaded in the tray. Remove the media, smooth it out, and reload it. If it still<br />
misfeeds, do not use that media.<br />
The media is moist from humidity. Remove the moist media and replace it with new, dry media.<br />
Unsupported media of the wrong size,<br />
thickness, or type is in use.<br />
Do not use unsupported media.<br />
Use <strong>Xerox</strong>-approved media. See Supported Media on<br />
page 51.
Probable Causes Solutions<br />
The label sheet is facing the wrong way in the tray. Load the label sheets according to the<br />
manufacturer’s instructions.<br />
Envelopes are facing the wrong way in Tray 5<br />
(Bypass Tray).<br />
<strong>WorkCentre</strong> <strong>7120</strong>/<strong>7125</strong> <strong>Multifunction</strong> <strong>Printer</strong><br />
<strong>User</strong> <strong>Guide</strong><br />
Troubleshooting<br />
Load the envelopes facedown in Tray 5 (Bypass Tray) with<br />
the flaps closed, on the leading edge.<br />
195
Troubleshooting<br />
Clearing Staple Jams<br />
This section includes:<br />
• Clearing Staple Jams in Integrated Office Finisher on page 196<br />
• Clearing Main Staple Jams in Office Finisher LX on page 198<br />
• Clearing Booklet Maker Staple Jams in Office Finisher LX on page 200<br />
Clearing Staple Jams in Integrated Office Finisher<br />
196<br />
WARNING: Do not perform this procedure while the printer is copying or printing.<br />
1. Open the finisher door.<br />
2. Grip the staple cartridge by the orange handle and remove it by pulling it firmly toward you.<br />
3. Check inside the finisher for any loose staples and remove them.<br />
<strong>WorkCentre</strong> <strong>7120</strong>/<strong>7125</strong> <strong>Multifunction</strong> <strong>Printer</strong><br />
<strong>User</strong> <strong>Guide</strong><br />
wc<strong>7120</strong>-044<br />
wc<strong>7120</strong>-045<br />
wc<strong>7120</strong>-046
4. Open the staple cartridge clamp by pulling firmly in the direction shown.<br />
<strong>WorkCentre</strong> <strong>7120</strong>/<strong>7125</strong> <strong>Multifunction</strong> <strong>Printer</strong><br />
<strong>User</strong> <strong>Guide</strong><br />
Troubleshooting<br />
5. Remove the jammed staples (1), then push the clamp in the direction shown until it snaps into the<br />
locked position (2).<br />
WARNING: The points of the jammed staples are sharp. Remove the jammed staples carefully.<br />
6. Grip the staple cartridge by the orange handle and insert it into the staple cartridge unit until it clicks.<br />
7. Close the finisher front door.<br />
1<br />
wc<strong>7120</strong>-097<br />
2<br />
wc<strong>7120</strong>-098<br />
wc<strong>7120</strong>-049<br />
197
Troubleshooting<br />
Clearing Main Staple Jams in Office Finisher LX<br />
198<br />
WARNING: Do not perform this procedure when the printer is copying or printing.<br />
1. Open the finisher front door.<br />
2. The stapler is located inside the finisher cabinet. Pull the stapler toward you until it stops.<br />
3. Push the stapler to the right.<br />
4. Grip the staple cartridge by the orange handle and remove it by pulling it firmly toward you.<br />
<strong>WorkCentre</strong> <strong>7120</strong>/<strong>7125</strong> <strong>Multifunction</strong> <strong>Printer</strong><br />
<strong>User</strong> <strong>Guide</strong><br />
wc<strong>7120</strong>-050<br />
wc<strong>7120</strong>-051<br />
wc<strong>7120</strong>-052
5. Check inside the finisher for any loose staples and remove them.<br />
6. Open the staple cartridge clamp by pulling firmly in the direction shown.<br />
<strong>WorkCentre</strong> <strong>7120</strong>/<strong>7125</strong> <strong>Multifunction</strong> <strong>Printer</strong><br />
<strong>User</strong> <strong>Guide</strong><br />
Troubleshooting<br />
WARNING: The points of the jammed staples are sharp. Remove the jammed staples carefully.<br />
7. Remove the jammed staples (1), then push the clamp in the direction shown until it snaps into the<br />
locked position (2).<br />
8. Grip the staple cartridge by the orange handle and insert it into the stapler until it clicks into place.<br />
9. Close the finisher front door.<br />
1<br />
wc<strong>7120</strong>-097<br />
wc<strong>7120</strong>-053<br />
2<br />
wc<strong>7120</strong>-098<br />
wc<strong>7120</strong>-099<br />
199
Troubleshooting<br />
Clearing Booklet Maker Staple Jams in Office Finisher LX<br />
The booklet maker stapler uses two staple cartridges labeled R2 and R3. Booklet stapling requires that<br />
both staple cartridges be free of jammed staples.<br />
200<br />
WARNING: Do not perform this procedure when the printer is copying or printing.<br />
1. Open the booklet maker side cover.<br />
2. If the staple cartridges are not visible, grip the vertical panels at the left and right of the opening<br />
and gently slide them to the center until they stop.<br />
3. Grip the orange tabs on both sides of the staple cartridge and pull the cartridge out of the stapler<br />
WARNING: The points of the jammed staples are sharp. Remove the jammed staples carefully.<br />
<strong>WorkCentre</strong> <strong>7120</strong>/<strong>7125</strong> <strong>Multifunction</strong> <strong>Printer</strong><br />
<strong>User</strong> <strong>Guide</strong><br />
wc<strong>7120</strong>-054<br />
wc<strong>7120</strong>-055<br />
wc<strong>7120</strong>-056
4. Remove the jammed staples by pulling them in the direction shown.<br />
wc<strong>7120</strong>-101<br />
<strong>WorkCentre</strong> <strong>7120</strong>/<strong>7125</strong> <strong>Multifunction</strong> <strong>Printer</strong><br />
<strong>User</strong> <strong>Guide</strong><br />
Troubleshooting<br />
5. Grip the orange tabs on both sides of the staple cartridge and insert it into the original position in<br />
the stapler.<br />
Note: If you have trouble inserting the cartridge, make sure the cartridge is oriented with the<br />
orange tabs facing up.<br />
wc<strong>7120</strong>-057<br />
6. If no jammed staples were found, repeat steps 3 to 5 for the other staple cartridge.<br />
7. Close the booklet maker side cover.<br />
201
Troubleshooting<br />
Print Quality Problems<br />
202<br />
CAUTION: The <strong>Xerox</strong> Warranty, Service Agreement, or Total Satisfaction Guarantee does not<br />
cover damage caused by using unsupported paper or specialty media. The Total Satisfaction<br />
Guarantee is available in the United States and Canada. Coverage may vary outside these areas.<br />
Please contact your local representative for details.<br />
Notes:<br />
• To enhance print quality, toner/print cartridges for many models of equipment are<br />
designed to cease functioning at a predetermined point.<br />
• Grayscale images printed with the composite black setting count as color pages, because<br />
color consumables are used. This is the default setting on most printers.<br />
<strong>WorkCentre</strong> <strong>7120</strong>/<strong>7125</strong> <strong>Multifunction</strong> <strong>Printer</strong><br />
<strong>User</strong> <strong>Guide</strong>
Copy and Scan Problems<br />
<strong>WorkCentre</strong> <strong>7120</strong>/<strong>7125</strong> <strong>Multifunction</strong> <strong>Printer</strong><br />
<strong>User</strong> <strong>Guide</strong><br />
Troubleshooting<br />
When the copy or scan quality is poor, select the closest symptom from the following table to correct<br />
the problem.<br />
If the copy quality does not improve after carrying out the appropriate action, contact <strong>Xerox</strong> Customer<br />
Support or your reseller.<br />
Symptom Solution<br />
Lines or streaks only present in copies made<br />
from the document feeder.<br />
Spots present in copies taken from the<br />
document glass.<br />
The reverse side of the original is showing on<br />
the copy or scan.<br />
There is debris on the document glass. When scanning, the<br />
paper from the document feeder passes over the debris<br />
creating lines or streaks. Clean all glass surfaces with a lint<br />
free cloth.<br />
There is debris on the document glass. When scanning, the<br />
debris creates a spot on the image. Clean all glass surfaces<br />
with a lint free cloth.<br />
Copy: Turn on Background Suppression.<br />
Scan: Turn on Background Suppression.<br />
Image is too light or dark. Copy: Use the Image Quality settings to lighten, darken or<br />
adjust contrast.<br />
Scan: Use the Advanced Settings Tab to lighten, darken or<br />
adjust contrast.<br />
Colors are off. Copy: Use the Image Quality settings to adjust color balance.<br />
Scan: Confirm the correct Original Type is set.<br />
203
Troubleshooting<br />
Fax Problems<br />
If a fax cannot be sent or received correctly, refer to the following table, then perform the indicated<br />
operation. If a fax still cannot be sent or received correctly, even after performing the described<br />
operations, contact your service representative.<br />
This section includes:<br />
• Problems Sending Faxes on page 204<br />
• Problems Receiving Faxes on page 205<br />
Problems Sending Faxes<br />
Symptom Cause Solution<br />
The document is not scanned<br />
using the document feeder.<br />
The document is scanned at<br />
an angle.<br />
The fax received by the<br />
recipient is blurry.<br />
The fax received by the<br />
recipient is blank.<br />
204<br />
The document is too thick, too thin,<br />
or too small.<br />
The document feeder guides are not<br />
adjusted to the width of<br />
the document.<br />
The document is<br />
incorrectly positioned.<br />
<strong>WorkCentre</strong> <strong>7120</strong>/<strong>7125</strong> <strong>Multifunction</strong> <strong>Printer</strong><br />
<strong>User</strong> <strong>Guide</strong><br />
Use the document glass to send<br />
the fax.<br />
Adjust the document feeder guides<br />
to fit the width of the document.<br />
Position the document correctly.<br />
The document glass is dirty. Clean the document glass.<br />
The text in the document is too faint. Adjust the resolution. Adjust<br />
the contrast.<br />
There may be a problem with the<br />
telephone connection.<br />
There may be a problem with the<br />
caller’s fax machine.<br />
Check the telephone line, then send<br />
the fax again.<br />
Make a copy to check that your<br />
printer is operating correctly, and<br />
then, if the copy was printed<br />
correctly, have the recipient check<br />
the condition of their fax machine.<br />
The document was loaded incorrectly. Document feeder: place the<br />
document to be faxed faceup.<br />
Document glass: place the document<br />
to be faxed facedown.<br />
Fax was not transmitted. The fax number may be wrong. Check the fax number.<br />
The telephone line may be<br />
incorrectly connected.<br />
There may be a problem with the<br />
recipient’s fax machine.<br />
Check the telephone line connection.<br />
If it is disconnected, connect it.<br />
Contact the recipient.
Problems Receiving Faxes<br />
Symptom Cause Solution<br />
The received fax is blank. There may be a problem with the<br />
telephone connection or with the<br />
caller’s fax machine.<br />
The printer answers the<br />
call, but will not accept<br />
incoming data.<br />
The sender may have loaded the<br />
pages incorrectly.<br />
<strong>WorkCentre</strong> <strong>7120</strong>/<strong>7125</strong> <strong>Multifunction</strong> <strong>Printer</strong><br />
<strong>User</strong> <strong>Guide</strong><br />
Troubleshooting<br />
Check that the printer can make<br />
clean copies. If it can, have the caller<br />
send the fax again.<br />
Contact the sender.<br />
Not enough memory. If the job contains several graphics,<br />
the printer might not have enough<br />
memory. The printer will not answer<br />
if memory is low. Delete stored<br />
documents and jobs and wait for the<br />
existing job to complete. This will<br />
increase available memory.<br />
The received fax size is reduced. The paper supply in the printer may<br />
not match the document size sent.<br />
Faxes cannot be<br />
received automatically.<br />
The printer is set to receive<br />
faxes manually.<br />
Confirm the original size of the<br />
documents. Documents might be<br />
reduced based on the available<br />
paper supply in the printer.<br />
Set the printer to automatic reception.<br />
The memory is full. Load paper if it is empty, and then<br />
print the faxes stored in the memory.<br />
The telephone line is<br />
incorrectly connected.<br />
There may be a problem with the<br />
sender’s fax machine.<br />
Check the telephone line connection.<br />
If it is disconnected, connect it.<br />
Make a copy to check that your<br />
printer is operating correctly. If the<br />
copy prints correctly, have the<br />
recipient check their fax machine.<br />
205
Troubleshooting<br />
Getting Help<br />
This section includes:<br />
• Control Panel Messages on page 206<br />
• Alerts on page 206<br />
• Online Support Assistant on page 206<br />
• Web Resources on page 207<br />
Control Panel Messages<br />
<strong>Xerox</strong> provides several automatic diagnostic tools to help you produce and maintain print quality.<br />
The control panel provides you with information and troubleshooting help. When an error or warning<br />
condition occurs, the control panel touch screen displays a message informing you of the problem. In<br />
many cases, the touch screen also displays an animated graphic showing the location of the problem,<br />
such as the location of a paper jam.<br />
Alerts<br />
Alerts provide messages and instructions to help solve problems. Alerts can be viewed on:<br />
• The Status page in CentreWare IS.<br />
• All tabs in the printer driver Properties window. For detailed status information, click More Status.<br />
Online Support Assistant<br />
The Online Support Assistant is a knowledge base that provides instructions and troubleshooting help<br />
to solve your printer problems. You can find solutions for problems with print quality, copy quality,<br />
media jams, software installation, and much more.<br />
To access the Online Support Assistant, go to www.xerox.com/office/WC<strong>7120</strong>/<strong>7125</strong>support.<br />
206<br />
<strong>WorkCentre</strong> <strong>7120</strong>/<strong>7125</strong> <strong>Multifunction</strong> <strong>Printer</strong><br />
<strong>User</strong> <strong>Guide</strong>
Web Resources<br />
<strong>Xerox</strong> provides several websites that offer additional help.<br />
Resource Link<br />
Technical support information for the<br />
printer, includes online Technical Support,<br />
Recommended Media List, Online Support<br />
Assistant, driver downloads, documentation,<br />
and more<br />
www.xerox.com/office/WC<strong>7120</strong>/<strong>7125</strong>support<br />
Supplies for the printer www.xerox.com/office/WC<strong>7120</strong>/<strong>7125</strong>supplies<br />
A resource for tools and information, such as<br />
printing templates, helpful tips, and<br />
customized features to meet your<br />
individual needs<br />
www.xerox.com/office/businessresourcecenter<br />
Local sales and support center www.xerox.com/office/worldcontacts<br />
<strong>Printer</strong> registration www.xerox.com/office/register<br />
Material Safety Data Sheets identify<br />
materials, and provide information on safely<br />
handling and storing hazardous materials<br />
www.xerox.com/msds<br />
(U.S. and Canada)<br />
www.xerox.com/environment_europe<br />
(European Union)<br />
Information about recycling supplies www.xerox.com/gwa<br />
Information about recycling the printer www.xerox.com/environment<br />
(U.S. and Canada)<br />
www.xerox.com/environment_europe<br />
(European Union)<br />
<strong>WorkCentre</strong> <strong>7120</strong>/<strong>7125</strong> <strong>Multifunction</strong> <strong>Printer</strong><br />
<strong>User</strong> <strong>Guide</strong><br />
Troubleshooting<br />
207
Troubleshooting<br />
208<br />
<strong>WorkCentre</strong> <strong>7120</strong>/<strong>7125</strong> <strong>Multifunction</strong> <strong>Printer</strong><br />
<strong>User</strong> <strong>Guide</strong>
<strong>Printer</strong> Specifications<br />
This chapter includes:<br />
• Physical Specifications on page 210<br />
• Environmental Specifications on page 211<br />
• Electrical Specifications on page 212<br />
• Performance Specifications on page 213<br />
• Controller Specifications on page 214<br />
For media specifications and capacities, see Supported Media on page 51.<br />
10<br />
<strong>WorkCentre</strong> <strong>7120</strong>/<strong>7125</strong> <strong>Multifunction</strong> <strong>Printer</strong><br />
<strong>User</strong> <strong>Guide</strong><br />
209
<strong>Printer</strong> Specifications<br />
Physical Specifications<br />
Base Unit<br />
• Width: 607 mm (23.8 in.) with bypass tray closed<br />
• Depth: 640 mm (25.1 in.)<br />
• Height: 1,132 mm (44.5 in.)<br />
• Weight: 115 kg (253.5 lb.)<br />
Base Unit with Integrated Office Finisher<br />
• Width: 644 mm (25.3 in.)<br />
• Depth: 640 mm (25.1 in.)<br />
• Height: 1,132 mm (44.5 in.)<br />
• Weight: 127 kg (279.9 lb.)<br />
Base Unit with Office Finisher LX and Booklet Maker<br />
• Width: 1,164 mm (45.8 in.)<br />
• Depth: 651 mm (25.6 in.)<br />
• Height: 1,132 mm (44.5 in.)<br />
• Weight: 153 kg (337.3 lb.)<br />
210<br />
<strong>WorkCentre</strong> <strong>7120</strong>/<strong>7125</strong> <strong>Multifunction</strong> <strong>Printer</strong><br />
<strong>User</strong> <strong>Guide</strong>
Environmental Specifications<br />
Temperature<br />
Operating: 10° to 28° C/50° to 83° F<br />
When the humidity is 85%, temperature must be 28° C/83° F or below.<br />
Relative Humidity<br />
Operating: 15% to 85%<br />
When the temperature is 32°C /90° F, humidity must be 62.5% or below.<br />
<strong>Printer</strong> Specifications<br />
<strong>WorkCentre</strong> <strong>7120</strong>/<strong>7125</strong> <strong>Multifunction</strong> <strong>Printer</strong><br />
<strong>User</strong> <strong>Guide</strong><br />
211
<strong>Printer</strong> Specifications<br />
Electrical Specifications<br />
• 120 V AC, +/- 10%, 60 Hz. Power Consumption: 1.58 kW maximum<br />
• 220-240 V AC, +/- 10%, 50 Hz. Power Consumption: 1.76 kW maximum for 220 VAC, 1.92 kW<br />
maximum for 240 V AC<br />
• ENERGY STAR qualified product<br />
212<br />
<strong>WorkCentre</strong> <strong>7120</strong>/<strong>7125</strong> <strong>Multifunction</strong> <strong>Printer</strong><br />
<strong>User</strong> <strong>Guide</strong>
Performance Specifications<br />
Resolution<br />
Maximum Resolution: 600 x 600 dpi<br />
Print Speed<br />
Color: 20 ppm<br />
Black and White: 20 ppm<br />
<strong>Printer</strong> Specifications<br />
<strong>WorkCentre</strong> <strong>7120</strong>/<strong>7125</strong> <strong>Multifunction</strong> <strong>Printer</strong><br />
<strong>User</strong> <strong>Guide</strong><br />
213
<strong>Printer</strong> Specifications<br />
Controller Specifications<br />
Processor<br />
667 MHz<br />
Memory<br />
2 GB<br />
Interface<br />
Ethernet 10/100Base-TX<br />
214<br />
<strong>WorkCentre</strong> <strong>7120</strong>/<strong>7125</strong> <strong>Multifunction</strong> <strong>Printer</strong><br />
<strong>User</strong> <strong>Guide</strong>
Regulatory Information<br />
This chapter includes:<br />
• Basic Regulations on page 216<br />
• Copy Regulations on page 218<br />
• Fax Regulations on page 221<br />
• Material Safety Data Sheets on page 224<br />
• Energy Saver Mode on page 225<br />
<strong>WorkCentre</strong> <strong>7120</strong>/<strong>7125</strong> <strong>Multifunction</strong> <strong>Printer</strong><br />
<strong>User</strong> <strong>Guide</strong><br />
A<br />
215
Regulatory Information<br />
Basic Regulations<br />
<strong>Xerox</strong> has tested this product to electromagnetic emission and immunity standards. These standards are<br />
designed to mitigate interference caused or received by this product in a typical office environment.<br />
United States (FCC Regulations)<br />
This equipment has been tested and found to comply with the limits for a Class B digital device,<br />
pursuant to Part 15 of the FCC Rules. These limits are designed to provide reasonable protection<br />
against harmful interference in a commercial environment. This equipment generates, uses, and can<br />
radiate radio frequency energy. If it is not installed and used in accordance with these instructions, it<br />
may cause harmful interference to radio communications. Operation of this equipment in a residential<br />
area is likely to cause harmful interference in which case the user will be required to correct the<br />
interference at his/her own expense.<br />
If this equipment does cause harmful interference to radio or television reception, which can be<br />
determined by turning the equipment off and on, the user is encouraged to try to correct the<br />
interference by one or more of the following measures:<br />
• Reorient or relocate the receiver.<br />
• Increase the separation between the equipment and receiver.<br />
• Connect the equipment into an outlet on a circuit different from that to which the receiver<br />
is connected.<br />
• Consult the dealer or an experienced radio/television technician for help.<br />
Any changes or modifications not expressly approved by <strong>Xerox</strong> could void the user's authority to operate<br />
the equipment. To ensure compliance with Part 15 of the FCC rules, use shielded interface cables.<br />
Canada (Regulations)<br />
This Class B digital apparatus complies with Canadian ICES-003.<br />
Cet appareil numérique de la classe B est conforme à la norme NMB-003 du Canada.<br />
216<br />
<strong>WorkCentre</strong> <strong>7120</strong>/<strong>7125</strong> <strong>Multifunction</strong> <strong>Printer</strong><br />
<strong>User</strong> <strong>Guide</strong>
European Union<br />
Regulatory Information<br />
CAUTION: This is a Class B product. In a domestic environment this product may cause radio<br />
interference in which case the user may be required to take adequate measures.<br />
This product, if used properly in accordance with the user's instructions, is neither dangerous for the<br />
consumer nor for the environment.<br />
To ensure compliance with European Union regulations, use shielded interface cables.<br />
A signed copy of the Declaration of Conformity for this product can be obtained from <strong>Xerox</strong>.<br />
Ozone Release<br />
During print operation, a small quantity of ozone is released. This amount is not large enough to<br />
harm anyone adversely. However, be sure the room where the product is being used has adequate<br />
ventilation, especially if you are printing a high volume of materials, or if the product is being used<br />
continuously over a long period.<br />
Other Regulations<br />
The CE mark applied to this product symbolizes <strong>Xerox</strong>’s declaration of conformity with<br />
the following applicable Directives of the European Union as of the dates indicated:<br />
• December 12, 2006: Low Voltage Directive 2006/95/EC<br />
• December 15, 2004: Electromagnetic Compatibility Directive 2004/108/EC<br />
• March 9, 1999: Radio & Telecommunications Terminal Equipment Directive<br />
1999/5/EC<br />
Turkey (RoHS Regulation)<br />
In compliance with Article 7 (d), we hereby certify “It is in compliance with the EEE Regulation.”<br />
"EEE yönetmeliğine uygundur."<br />
<strong>WorkCentre</strong> <strong>7120</strong>/<strong>7125</strong> <strong>Multifunction</strong> <strong>Printer</strong><br />
<strong>User</strong> <strong>Guide</strong><br />
217
Regulatory Information<br />
Copy Regulations<br />
United States<br />
Congress, by statute, has forbidden the reproduction of the following subjects under certain circumstances.<br />
Penalties of fine or imprisonment may be imposed on those guilty of making such reproductions.<br />
1. Obligations or Securities of the United States Government, such as:<br />
• Certificates of Indebtedness<br />
• National Bank Currency<br />
• Coupons from Bonds<br />
• Federal Reserve Bank Notes<br />
• Silver Certificates<br />
• Gold Certificates<br />
• United States Bonds<br />
• Treasury Notes<br />
• Federal Reserve Notes<br />
• Fractional Notes<br />
• Certificates of Deposit<br />
• Paper Money<br />
• Bonds and Obligations of certain agencies of the government, such as FHA, and so on.<br />
• Bonds (U.S. Savings Bonds may be photographed only for publicity purposes in connection<br />
with the campaign for the sale of such bonds.)<br />
• Internal Revenue Stamps. If it is necessary to reproduce a legal document on which there is a<br />
canceled revenue stamp, this may be done provided the reproduction of the document is<br />
performed for lawful purposes.<br />
• Postage Stamps, canceled or uncanceled. For philatelic purposes, Postage Stamps may be<br />
photographed, provided the reproduction is in black and white and is less than 75% or more<br />
than 150% of the linear dimensions of the original.<br />
• Postal Money Orders<br />
• Bills, Checks, or Draft of money drawn by or upon authorized officers of the United States.<br />
• Stamps and other representatives of value, of whatever denomination, which have been or<br />
may be issued under any Act of Congress.<br />
• Adjusted Compensation Certificates for Veterans of the World Wars.<br />
2. Obligations or Securities of any Foreign Government, Bank, or Corporation.<br />
3. Copyrighted materials, unless permission of the copyright owner has been obtained or the<br />
reproduction falls within the “fair use” or library reproduction rights provisions of the copyright<br />
law. Further information of these provisions may be obtained from the Copyright Office, Library of<br />
Congress, Washington, D.C. 20559. Ask for Circular R21.<br />
4. Certificate of Citizenship or Naturalization. Foreign Naturalization Certificates may be photographed.<br />
5. Passports. Foreign Passports may be photographed.<br />
6. Immigration papers.<br />
218<br />
<strong>WorkCentre</strong> <strong>7120</strong>/<strong>7125</strong> <strong>Multifunction</strong> <strong>Printer</strong><br />
<strong>User</strong> <strong>Guide</strong>
Regulatory Information<br />
7. Draft Registration Cards.<br />
8. Selective Service Induction papers that bear any of the following Registrant’s information:<br />
• Earnings or Income<br />
• Court Record<br />
• Physical or mental condition<br />
• Dependency Status<br />
• Previous military service<br />
Exception: United States military discharge certificates may be photographed.<br />
9. Badges, Identification Cards, Passes, or Insignia carried by military personnel, or by members of<br />
the various Federal Departments, such as FBI, Treasure, and so on. (Unless photograph is ordered<br />
by the head of such department or bureau.)<br />
Reproducing the following is also prohibited in certain states:<br />
• Automobile Licenses<br />
• Drivers’ Licenses<br />
• Automobile Certificates of Title<br />
The above list is not all inclusive, and no liability is assumed for its completeness or accuracy. In case of<br />
doubt, consult your attorney.<br />
Canada<br />
Parliament, by stature, has forbidden the reproduction of the following subjects under certain<br />
circumstances. Penalties of fine or imprisonment may be imposed on those guilty of making<br />
such reproductions.<br />
1. Current bank notes or current paper money.<br />
2. Obligations or securities of a government or bank.<br />
3. Exchequer bill paper or revenue paper.<br />
4. The public seal of Canada or of a province, or the seal of a public body or authority in Canada, or<br />
of a court of law.<br />
5. Proclamations, orders, regulations or appointments, or notices thereof (with intent to falsely cause<br />
same to purport to have been printed by the Queens <strong>Printer</strong> for Canada, or the equivalent printer<br />
for a province).<br />
6. Marks, brands, seals, wrappers or designs used by or on behalf of the Government of Canada or of<br />
a province, the government of a state other than Canada or a department, board, Commission or<br />
agency established by the Government of Canada or of a province or of a government of a state<br />
other than Canada.<br />
7. Impressed or adhesive stamps used for the purpose of revenue by the Government of Canada or<br />
of a province or by the government of a state other than Canada.<br />
8. Documents, registers or records kept by public officials charged with the duty of making or issuing<br />
certified copies thereof, where the copy falsely purports to be a certified copy thereof.<br />
9. Copyrighted material or trademarks of any manner or kind without the consent of the copyright<br />
or trademark owner.<br />
The above list is provided for your convenience and assistance, but it is not all-inclusive, and no liability<br />
is assumed for its completeness or accuracy. In case of doubt, consult your solicitor.<br />
<strong>WorkCentre</strong> <strong>7120</strong>/<strong>7125</strong> <strong>Multifunction</strong> <strong>Printer</strong><br />
<strong>User</strong> <strong>Guide</strong><br />
219
Regulatory Information<br />
Other Countries<br />
• Copying certain documents may be illegal in your country. Penalties of fine or imprisonment may<br />
be imposed on those found guilty of making such reproductions.<br />
• Currency notes<br />
• Bank notes and checks<br />
• Bank and government bonds and securities<br />
• Passports and identification cards<br />
• Copyright material or trademarks without the consent of the owner<br />
• Postage stamps and other negotiable instruments<br />
This list is not inclusive and no liability is assumed for either its completeness or accuracy. In case of<br />
doubt, contact your legal counsel.<br />
220<br />
<strong>WorkCentre</strong> <strong>7120</strong>/<strong>7125</strong> <strong>Multifunction</strong> <strong>Printer</strong><br />
<strong>User</strong> <strong>Guide</strong>
Fax Regulations<br />
United States<br />
Fax Send Header Requirements<br />
Regulatory Information<br />
The Telephone Consumer Protection Act of 1991 makes it unlawful for any person to use a computer or<br />
other electronic device, including a fax machine, to send any message unless such message clearly<br />
contains in a margin at the top or bottom of each transmitted page or on the first page of the<br />
transmission, the date and time it is sent and an identification of the business or other entity, or other<br />
individual sending the message and the telephone number of the sending machine or such business,<br />
other entity or individual. The telephone number provided may not be a 900 number or any other<br />
number for which charges exceed local or long distance transmission charges.<br />
In order to program this information into your machine, refer to customer documentation and follow<br />
the steps provided.<br />
Data Coupler Information<br />
This equipment complies with Part 68 of the FCC rules and the requirements adopted by the<br />
Administrative Council for Terminal Attachments (ACTA). On the cover of this equipment is a label<br />
that contains, among other information, a product identifier in the format US:AAAEQ##TXXXX. If<br />
requested, this number must be provided to the Telephone Company.<br />
A plug and jack used to connect this equipment to the premises wiring and telephone network must<br />
comply with the applicable FCC Part 68 rules and requirements adopted by the ACTA. A compliant<br />
telephone cord and modular plug is provided with this product. It is designed to be connected to a<br />
compatible modular jack that is also compliant. See installation instructions for details.<br />
You may safely connect the machine to the following standard modular jack: USOC RJ-11C using the<br />
compliant telephone line cord (with modular plugs) provided with the installation kit. See installation<br />
instructions for details.<br />
The Ringer Equivalence Number (REN) is used to determine the number of devices that may be<br />
connected to a telephone line. Excessive RENs on a telephone line may result in the devices not ringing<br />
in response to an incoming call. In most but not all areas, the sum of RENs should not exceed five (5.0).<br />
To be certain of the number of devices that may be connected to a line, as determined by the total<br />
RENs, contact the local Telephone Company. For products approved after July 23, 2001, the REN for<br />
this product is part of the product identifier that has the format US:AAAEQ##TXXXX. The digits<br />
represented by ## are the REN without a decimal point (for example, 03 is a REN of 0.3). For earlier<br />
products, the REN is separately shown on the label.<br />
<strong>WorkCentre</strong> <strong>7120</strong>/<strong>7125</strong> <strong>Multifunction</strong> <strong>Printer</strong><br />
<strong>User</strong> <strong>Guide</strong><br />
221
Regulatory Information<br />
To order the correct service from the local telephone company, you may also have to quote the<br />
following codes:<br />
• Facility Interface Code (FIC) = 02LS2<br />
• Service Order Code (SOC) = 9.0Y<br />
222<br />
WARNING: Ask your local telephone company for the modular jack type installed on your line.<br />
Connecting this machine to an unauthorized jack can damage telephone company equipment.<br />
You, not <strong>Xerox</strong>, assume all responsibility and/or liability for any damage caused by the connection<br />
of this machine to an unauthorized jack.<br />
If this <strong>Xerox</strong> equipment causes harm to the telephone network, the Telephone Company will notify you<br />
in advance that temporary discontinuance of service may be required. But if advance notice is not<br />
practical, the Telephone Company will notify the customer as soon as possible. Also, you will be advised<br />
of your right to file a complaint with the FCC if you believe it is necessary.<br />
The Telephone Company may make changes in its facilities, equipment, operations or procedures that<br />
could affect the operation of the equipment. If this happens, the Telephone Company will provide<br />
advance notice in order for you to make necessary modifications to maintain uninterrupted service.<br />
If trouble is experienced with this <strong>Xerox</strong> equipment, for repair or warranty information, please contact<br />
the appropriate service center, details of which are displayed either on the machine or contained<br />
within the <strong>User</strong> <strong>Guide</strong>. If the equipment is causing harm to the telephone network, the Telephone<br />
Company may request that you disconnect the equipment until the problem is resolved.<br />
Repairs to the machine should be made only by a <strong>Xerox</strong> Service Representative or an authorized <strong>Xerox</strong><br />
Service provider. This applies at any time during or after the service warranty period. If unauthorized<br />
repair is performed, the remainder of the warranty period is null and void.<br />
This equipment must not be used on party lines. Connection to party line service is subject to state<br />
tariffs. Contact the state public utility commission, public service commission or corporation<br />
commission for information.<br />
If your office has specially wired alarm equipment connected to the telephone line, make sure that the<br />
installation of this <strong>Xerox</strong> equipment does not disable your alarm equipment.<br />
If you have questions about what will disable alarm equipment, consult your Telephone Company or a<br />
qualified installer.<br />
Canada<br />
Note: The Industry Canada label identifies certified equipment. This certification means that the<br />
equipment meets certain telecommunications network protective, operational and safety<br />
requirements as prescribed in the appropriate Terminal Equipment Technical Requirements<br />
document(s). The Department does not guarantee the equipment will operate to the<br />
user’s satisfaction.<br />
Before installing this equipment, users must make sure that it is permissible to be connected to the<br />
facilities of the local telecommunications company. The equipment must also be installed using an<br />
acceptable method of connection. The customer should be aware that compliance with the above<br />
conditions may not prevent degradation of service in some situations.<br />
<strong>WorkCentre</strong> <strong>7120</strong>/<strong>7125</strong> <strong>Multifunction</strong> <strong>Printer</strong><br />
<strong>User</strong> <strong>Guide</strong>
Regulatory Information<br />
Repairs to certified equipment should be coordinated by a representative designated by the supplier.<br />
Any repairs or alterations made by the user to this equipment, or equipment malfunctions, may give<br />
the telecommunications company cause to request the user to disconnect the equipment.<br />
<strong>User</strong>s should make sure for their own protection that the electrical ground connections of the power<br />
utility, telephone lines and internal metallic water pipe systems, if present, are connected together.<br />
This precaution may be particularly important in rural areas.<br />
WARNING: <strong>User</strong>s should not attempt to make such connections themselves, but should contact<br />
the appropriate electric inspection authority, or electrician, as appropriate.<br />
The Ringer Equivalence Number (REN) assigned to each terminal device provides an indication of the<br />
maximum number of terminals allowed to be connected to a telephone interface. The termination on<br />
an interface may consist of any combination of devices subject only to the requirement that the sum<br />
of the Ringer Equivalent Numbers of all of the devices does not exceed 5. For the Canadian REN value,<br />
please see the label on the equipment.<br />
Europe<br />
Radio Equipment & Telecommunications Terminal Equipment Directive<br />
The Facsimile has been approved in accordance with the Council Decision 1999/5/EC for pan-European<br />
single terminal connection to the public switched telephone network (PSTN). However, due to<br />
differences between the individual PSTNs provided in different countries, the approval does not, of<br />
itself, give an unconditional assurance of successful operation on every PSTN network terminal point.<br />
In the event of a problem you should contact your authorized local dealer in the first instance.<br />
This product has been tested to and is compliant with ES 203 021-1, -2, -3, a specification for terminal<br />
equipment for use on analogue-switched telephone networks in the European Economic Area. This<br />
product provides an user-adjustable setting of the country code. Refer to the customer documentation<br />
for this procedure. Country codes should be set prior to connecting this product to the network.<br />
Note: Although this product can use either loop disconnect (pulse) or DTMF (tone) signaling, it is<br />
recommended that it is set to use DTMF signaling. DTMF signaling provides reliable and faster call<br />
setup. Modification of this product, connection to external control software or to external control<br />
apparatus not authorized by <strong>Xerox</strong>, will invalidate its certification.<br />
South Africa<br />
This modem must be used in conjunction with an approved surge protection device.<br />
<strong>WorkCentre</strong> <strong>7120</strong>/<strong>7125</strong> <strong>Multifunction</strong> <strong>Printer</strong><br />
<strong>User</strong> <strong>Guide</strong><br />
223
Regulatory Information<br />
Material Safety Data Sheets<br />
For Material Safety Data information regarding your printer, go to:<br />
North America: www.xerox.com/msds<br />
European Union: www.xerox.com/environment_europe<br />
For the Customer Support Center phone numbers, go to www.xerox.com/office/worldcontacts.<br />
224<br />
<strong>WorkCentre</strong> <strong>7120</strong>/<strong>7125</strong> <strong>Multifunction</strong> <strong>Printer</strong><br />
<strong>User</strong> <strong>Guide</strong>
Energy Saver Mode<br />
Regulatory Information<br />
As an ENERGY STAR partner, <strong>Xerox</strong> Corporation has determined that the basic configuration of this<br />
printer meets the ENERGY STAR guidelines for energy efficiency.<br />
The ENERGY STAR and ENERGY STAR mark are registered United States trademarks.<br />
The ENERGY STAR Office Equipment Program is a team effort between U.S., European Union, and<br />
Japanese governments and the office equipment industry to promote energy-efficient copiers,<br />
printers, fax, multifunction machines, personal computers, and monitors. Reducing product energy<br />
consumption helps combat smog, acid rain and long-term changes to the climate by decreasing the<br />
emissions that result from generating electricity.<br />
<strong>Xerox</strong> ENERGY STAR equipment is preset at the factory. Your printer will be delivered with the timer for<br />
switching to Power Save Mode from the last copy/print out, set at 2 minutes. For details on this<br />
feature see the System Administrator <strong>Guide</strong>.<br />
<strong>WorkCentre</strong> <strong>7120</strong>/<strong>7125</strong> <strong>Multifunction</strong> <strong>Printer</strong><br />
<strong>User</strong> <strong>Guide</strong><br />
225
Regulatory Information<br />
226<br />
<strong>WorkCentre</strong> <strong>7120</strong>/<strong>7125</strong> <strong>Multifunction</strong> <strong>Printer</strong><br />
<strong>User</strong> <strong>Guide</strong>
Recycling and Disposal<br />
This chapter includes recycling and disposal guidelines and information for:<br />
• All Countries on page 228<br />
• North America on page 228<br />
• European Union on page 228<br />
• Other Countries on page 230<br />
<strong>WorkCentre</strong> <strong>7120</strong>/<strong>7125</strong> <strong>Multifunction</strong> <strong>Printer</strong><br />
<strong>User</strong> <strong>Guide</strong><br />
B<br />
227
Recycling and Disposal<br />
<strong>Guide</strong>lines and Information<br />
All Countries<br />
If you are managing the disposal of your <strong>Xerox</strong> product, please note that the product may contain<br />
lead, perchlorate, and other materials whose disposal may be regulated due to environmental<br />
considerations. The presence of these materials is fully consistent with global regulations applicable at<br />
the time that the product was placed on the market. For recycling and disposal information, contact<br />
your local authorities. In the United States, you may also refer to the Electronic Industries Alliance<br />
website: www.eiae.org. Perchlorate Material: This product may contain one or more Perchloratecontaining<br />
devices, such as batteries. Special handling may apply, please see<br />
www.dtsc.ca.gov/hazardouswaste/perchlorate.<br />
North America<br />
<strong>Xerox</strong> operates an equipment takeback and reuse/recycle program. Contact your <strong>Xerox</strong> sales<br />
representative (1-800-ASK-XEROX) to determine whether this <strong>Xerox</strong> product is part of the program. For<br />
more information about <strong>Xerox</strong> environmental programs, visit www.xerox.com/environment or for<br />
recycling and disposal information, contact your local authorities.<br />
European Union<br />
WEEE Directive 2002/96/EC<br />
Some equipment may be used in both a domestic/household and a professional/business application.<br />
Domestic/Household Environment<br />
228<br />
Application of this symbol on your equipment is confirmation that you<br />
should not dispose of the equipment in the normal household waste stream.<br />
In accordance with European legislation, end of life electrical and electronic equipment subject to<br />
disposal must be segregated from household waste.<br />
Private households within EU member states may return used electrical and electronic equipment to<br />
designated collection facilities free of charge. Please contact your local disposal authority for information.<br />
In some member states, when you purchase new equipment, your local retailer may be required to take<br />
back your old equipment free of charge. Please ask you retailer for information.<br />
<strong>WorkCentre</strong> <strong>7120</strong>/<strong>7125</strong> <strong>Multifunction</strong> <strong>Printer</strong><br />
<strong>User</strong> <strong>Guide</strong>
Professional/Business Environment<br />
Recycling and Disposal<br />
Application of this symbol on your equipment is confirmation that you must<br />
dispose of this equipment in compliance with agreed national procedures.<br />
In accordance with European legislation, end of life electrical and electronic equipment subject to<br />
disposal must be managed within agreed procedures.<br />
Prior to disposal, please contact your local reseller or <strong>Xerox</strong> representative for end of life<br />
takeback information.<br />
Information for <strong>User</strong>s on Collection and Disposal of Old Equipment and<br />
Used Batteries<br />
These symbols on the products and/or accompanying documents mean<br />
that used electrical and electronic products and batteries should not be<br />
mixed with general household waste.<br />
For proper treatment, recovery and recycling of old products and used<br />
batteries, please take them to applicable collection points, in accordance<br />
with your national legislation and the Directive 2002/96/EC and<br />
2006/66/EC.<br />
By disposing of these products and batteries correctly, you will help to save<br />
valuable resources and prevent any potential negative effects on human<br />
health and the environment which could otherwise arise from inappropriate<br />
waste handling.<br />
For more information about collection and recycling of old products and<br />
batteries, please contact your local municipality, your waste disposal service<br />
or the point of sale where you purchased the items.<br />
Penalties may be applicable for incorrect disposal of this waste, in<br />
accordance with national legislation.<br />
For Business <strong>User</strong>s in the European Union<br />
If you wish to discard electrical and electronic equipment, please contact your dealer or supplier for<br />
further information.<br />
<strong>WorkCentre</strong> <strong>7120</strong>/<strong>7125</strong> <strong>Multifunction</strong> <strong>Printer</strong><br />
<strong>User</strong> <strong>Guide</strong><br />
229
Recycling and Disposal<br />
Information on disposal in other countries outside the European Union<br />
These symbols are only valid in the European Union If you wish to discard these items, please contact<br />
your local authorities or dealer and ask for the correct method of disposal.<br />
Note for the Battery Symbol<br />
Removal<br />
230<br />
Hg<br />
Batteries should only be replaced by a MANUFACTURER approved service facility.<br />
Other Countries<br />
This wheeled bin symbol may be used in combination with a chemical symbol.<br />
This establishes compliance with the requirements set out by the Directive.<br />
Please contact your local waste authorities and request disposal guidance.<br />
<strong>WorkCentre</strong> <strong>7120</strong>/<strong>7125</strong> <strong>Multifunction</strong> <strong>Printer</strong><br />
<strong>User</strong> <strong>Guide</strong>
